CinematicFanatic (by MyWay) is a browser extension for Google Chrome that may come bundled with other free software that you download off of the Internet. When installed CinematicFanatic will set the homepage and search engine for your web browser to http://search.myway.com
While browsing the internet with this extension installed, you will see additional ads, sponsored content, and even pop-up ads throughout your browsing sessions.
While CinematicFanatic is active, it will log user information, visited websites, product categories. This information is later used/sold to better display targeted ads through your web pages as sponsored content and banner ads.
CinematicFanatic has been marked as a Browser Extension by several popular anti-malware scanners, and due to its information-gathering behavior, it is recommended to remove it from your computer.
About Browser Hijackers
Browser hijack is a very common type of internet fraud where your web browser configurations are modified to allow it to do things you never intend. Browser hijacker malware is developed for many different reasons. These are typically used to force visitors to predetermined sites, manipulating web traffic to generate ad revenue. Even though it may seem naive, all browser hijackers are dangerous and thus always regarded as security risks. They not only screw up your web browsers, but browser hijackers can even modify the computer registry to make your PC susceptible to other forms of hacking.
How to know if your internet browser is hijacked
There are several symptoms of browser hijacking. Here are a few of them:
1. home-page is modified
2. bookmark and the new tab are likewise changed
3. The default search page of your browser is altered
4. you’ll see multiple toolbars in your internet browser
5. you will find random pop-ups start showing regularly
6. websites load slowly and often incomplete
7. You simply can’t access particular sites, particularly anti-malware websites.
How they get into your computer or laptop
Browser hijackers could use drive-by downloads or file-sharing websites or perhaps an e-mail attachment in order to reach a targeted computer. Many web browser hijackings originate from add-on programs, i.e., browser helper objects (BHO), toolbars, or plug-ins added to browsers to provide them additional functionality. A browser hijacker could also come bundled up with some freeware which you unintentionally download to your PC, compromising your internet security. Some of the well-known hijackers are CinematicFanatic, Babylon Toolbar, Conduit Search, Sweet Page, OneWebSearch, and CoolWebSearch.
Browser hijackers could disrupt the user’s web surfing experience greatly, keep track of the websites visited by users and steal financial information, cause difficulty in connecting to the net, and ultimately create stability issues, making applications and systems crash.
Browser hijacker removal
Certain browser hijacking could be easily reversed by discovering and removing the corresponding malware software through your control panel. Having said that, many hijackers are really tenacious and need specialized tools to eliminate them. Additionally, manual removals demand deep system understanding and thus can be a very difficult job for inexperienced computer users.
You might opt for automatic browser hijacker removal by simply installing and running an efficient anti-malware program. One of the top tools for fixing browser hijacker infections is SafeBytes Anti-Malware. It assists you to get rid of any pre-existing malware on your system and gives you real-time monitoring and protection from new threats. Together with the antivirus tool, a system optimizer, such as SafeBytes’s Total System Care, will help you in removing all related files and modifications in the computer registry automatically.
What To Do When You Cannot Download Safebytes Anti-Malware?
Viruses could cause a lot of damage to your PC. Some malware is designed to interfere with or block things that you’d like to do on your personal computer. It may not allow you to download anything from the net or it will stop you from accessing a few or all of the sites, especially the antivirus sites. If you’re reading this, chances are you’re stuck with a malware infection that is preventing you to download and/or install the Safebytes Anti-Malware program on your PC. Refer to the instructions below to remove malware in alternate ways.
Install in Safe Mode
In Safe Mode, you can change Windows settings, uninstall or install some applications, and get rid of hard-to-delete viruses and malware. In case the malicious software is set to load automatically when the PC starts, shifting into this particular mode may prevent it from doing so. In order to get into Safe Mode or Safe Mode with Networking, press the F8 key while the computer is starting up or run MSCONFIG and look for the “Safe Boot” options under the “Boot” tab. Once you’re in safe mode, you can try to install your anti-malware software program without the hindrance of the virus. Now, you can run the anti-malware scan to remove viruses and malware without hindrance from another application.
Switch to an alternate browser
Web-based malware could be environment-specific, targeting a particular browser or attacking specific versions of the browser. If you appear to have a virus attached to Internet Explorer, then switch to a different browser with built-in safety features, such as Firefox or Chrome, to download your preferred antivirus program – Safebytes.
Install and run anti-virus from the USB drive
Another solution is to store and operate an antivirus software program entirely from a Thumb drive. Adopt these measures to use a USB drive to clean your corrupted PC.
1) Download the anti-malware on a virus-free PC.
2) Plug the Flash drive into the uninfected computer.
3) Double-click the Setup icon of the anti-malware software to run the Installation Wizard.
4) When asked, select the location of the pen drive as the place where you would like to put the software files. Follow the instructions on the computer screen to finish off the installation process.
5) Transfer the USB drive from the uninfected computer to the infected computer.
6) Double-click the EXE file to run the Safebytes program right from the pen drive.
7) Hit the “Scan Now” button to start the malware scan.
SafeBytes Anti-Malware - More Protection For You
If you’re looking to purchase anti-malware for your computer, there are various brands and utilities for you to consider. A few of them are excellent, some are ok types, and some will damage your computer themselves! While looking for antivirus software, choose one that provides reliable, efficient, and complete protection against all known viruses and malware. Amongst few good applications, SafeBytes Anti-Malware is the highly recommended software for the security-conscious user.
SafeBytes can be described as a highly effective, real-time antivirus application that is created to assist the regular computer end user in protecting their computer from malicious threats. This tool can easily identify, remove, and protect your PC from the most advanced malware intrusions including spyware, adware, trojan horses, ransomware, worms, PUPs, parasites along other potentially harmful software applications.
SafeBytes carries a variety of features that can help you protect your PC from malware attacks and damage. A few of them are given as below:
Best AntiMalware Protection: By using a critically acclaimed malware engine, SafeBytes offers multilayered protection that is designed to catch and remove viruses and malware that are concealed deep inside your computer system.
Real-Time Protection: SafeBytes gives round-the-clock protection for your computer limiting malware attacks instantly. This utility will always monitor your PC for suspicious activity and updates itself regularly to keep abreast of the latest threats.
Safe Browsing: Safebytes allots all websites a unique safety score that helps you to get an idea of whether the website you’re about to visit is safe to view or known to be a phishing site.
Fast Multi-threaded Scanning: SafeBytes’s virus scan engine is one of the fastest and most efficient within the industry. It's targeted scanning tremendously increases the catch rate for viruses that are embedded in various computer files.
Light-weight Tool: SafeBytes is a lightweight and easy-of-use antivirus and anti-malware solution. As it uses minimal computer resources, this application leaves the computer’s power exactly where it belongs to: with you.
Premium Support: You will get 24/7 technical support to quickly resolve any issue with your security tool.
SafeBytes will keep your computer safe from most advanced malware threats automatically with hardly any input needed from you again. Now you may understand that this software does more than just scan and remove threats on your PC. If you’re trying to find a comprehensive anti-malware program that’s still simple enough to use, SafeBytes Anti-Malware is exactly what you will need!
Technical Details and Manual Removal (Advanced Users)
If you don’t want to use a malware removal software and prefer to get rid of CinematicFanatic manually, you may do so by going to the Windows Add/Remove Programs menu in the Control Panel and delete the offending program; in cases of web browser plug-ins, you could remove it by going to the browser’s Add-on/Extension manager. It is also recommended to factory reset your web browser settings to their default state.
Lastly, check your hard drive for all of the following and clean your registry manually to get rid of leftover application entries after uninstallation. Please note that only professional users should try to manually edit the registry because removing any single critical system file leads to a serious problem or even a system crash. In addition, some malware is capable of replicating itself or preventing its deletion. It is advised that you do the removal process in Windows Safe Mode.
Files:
%UserProfile%\Local Settings\Application Data\Google\Chrome\User Data\Default\Sync Extension Settings\bpkmogbhibhnpebcaipnknfkgibdheoc
%LOCALAPPDATA%\Google\Chrome\User Data\Default\Local Extension Settings\bpkmogbhibhnpebcaipnknfkgibdheoc
%UserProfile%\Local Settings\Application Data\Google\Chrome\User Data\Default\Local Extension Settings\bpkmogbhibhnpebcaipnknfkgibdheoc
%LOCALAPPDATA%\Google\Chrome\User Data\Default\Extensions\bpkmogbhibhnpebcaipnknfkgibdheoc
%UserProfile%\Local Settings\Application Data\Google\Chrome\User Data\Default\Extensions\bpkmogbhibhnpebcaipnknfkgibdheoc
%LOCALAPPDATA%\CinematicFanaticTooltab
%UserProfile%\Local Settings\Application Data\CinematicFanaticTooltab
Registry:
HKEY_LOCAL_MACHINE\Software\CinematicFanatic
HKEY_LOCAL_MACHINE\Software\Wow6432Node\CinematicFanatic
HKEY_LOCAL_MACHINE\Software\[APPLICATION]\Microsoft\Windows\CurrentVersion\Uninstall..Uninstaller
CinematicFanaticTooltab Uninstall Internet Explorer

 Error Causes

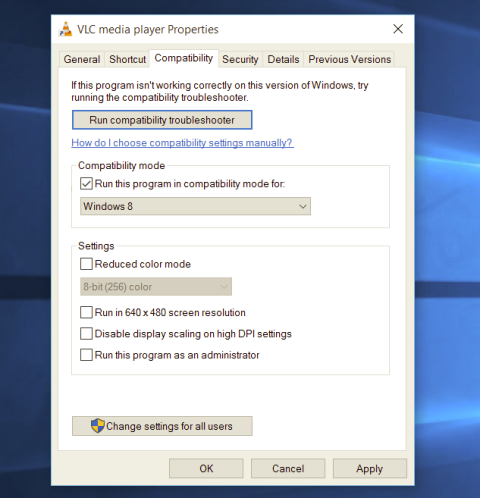 Most of the time running applications with typical settings is fine but from time to time we might have some applications that will require running with administrator privilege in order to work properly. In this case, it is very easy to do it, you just right-click and choose run as administrator.
Although a very easy solution, it can be quite annoying if running the app is on a daily basis or even more times per day. If this is the case then right-clicking and choosing to run as administrator can be a daunting task, sometimes you can even forget to run it like this in heat of work and some unforeseen consequences might occur.
Luckily there is an easy hack so you can open the chosen application each time as an administrator with a simple double click each time.
Most of the time running applications with typical settings is fine but from time to time we might have some applications that will require running with administrator privilege in order to work properly. In this case, it is very easy to do it, you just right-click and choose run as administrator.
Although a very easy solution, it can be quite annoying if running the app is on a daily basis or even more times per day. If this is the case then right-clicking and choosing to run as administrator can be a daunting task, sometimes you can even forget to run it like this in heat of work and some unforeseen consequences might occur.
Luckily there is an easy hack so you can open the chosen application each time as an administrator with a simple double click each time.