One of the smoother things that Microsoft did with the Windows 10 operating system is to separate Cortana from Search. This means that Cortana is strictly now a voice assistant and many users have seen it coming since not everyone uses Cortana. In addition, it also paved the way for other virtual assistants like Alexa to get on board with Windows 10. And now in the newly released Windows 10 v1903, Windows has brought the Voice Activation under Privacy. In this post, you will be guided on how to perform the Voice Activation troubleshooting on your Windows 10 computer.
To use Voice Activation in Windows 10, follow, in the Start Search, type “voice activation” and click on “Voice activation privacy settings” listed in the search results. And from there, you can choose to allow apps to use Microphone, like listen in the background as well as select which app can access it. Each time enabled voice assistants continue to listen via microphone for the voice keyword, the app will activate itself for the keyword and will react depending on what you ask it. So if you are using a voice assistant and it didn’t respond when you speak the keyword, just go to Settings > Privacy > Voice Activation and follow these steps:
Option 1: Check the App permission to use the voice activation feature.
You have to make sure that the toggle button for the Voice activation feature is turned on globally. It can be found under the “Allow apps to use voice activation” section. You also have to ensure that the microphone is available for apps that use this feature.
Option 2: Voice activation is not working under the lock screen.
If you tend to use the voice assistant even when your computer is locked, Microsoft has a specific setting that you have to turn on. You need to make sure that the toggle button for the “Allow apps to use voice activation when this device is locked” option is turned on. However, keep in mind that the voice assistants are not locked to only recognize your voice as they also answer to anyone who will use the voice keyword.
Option 3: Check the individual permissions of apps.
If the voice assistant is not working, you have to check each one of the apps’ permissions for voice keyword, and the option to work under locked condition works.
Option 4: Run the Microphone troubleshooter.
If you’ve verified that the settings are in place, then you have to run the Microphone troubleshooter by simply going to Settings > Privacy > Microphone. From there, make sure that the toggle button for the following options is turned on:
Allow apps to access your microphone
Enable microphone access for the voice assistant
And if it’s a desktop app, you have to enable the toggle on at the end.
Msvcr100.dll is a dynamic link library file. This file is loaded into the memory at runtime for successful program execution.
This process is also referred to as runtime dynamic linking. The Msvcr100.dll belongs to the Microsoft Visual C++ Runtime Library.
It is a core Windows component used by numerous Windows-based applications to load and run smoothly on Windows PC.
Msvcr100.dll error occurs when the process of runtime dynamic linking fails. Due to this error, you are unable to access the desired application. The error code is displayed in either of the following formats:
“Msvcr100.dll Not Found"
"This application failed to start because msvcr100.dll was not found. Re-installing the application may fix this problem."
"Cannot find [PATH]msvcr100.dll"
"msvcr100.dll is missing from your computer"
"XXX.exe - System Error - MSVCR100.dll is missing from your computer."
Solution
Error Causes
Narrowing down the cause of the Msvcr100.dll error is not possible as this error can occur on your PC due to multiple reasons. However, here are some of the most common causes of Msvcr100.dll error code on Windows PC:
Msvcr100.dll file corrupt and damaged
Missing Msvcr100.dll file
Corrupt runtime code library
Registry issues
Malware attack and viral infection
Further Information and Manual Repair
Here are some of the best ways to resolve this error on your system:
Reinstall the application causing the error
As dll are shared files used by multiple programs to load and run, there is the possibility of it getting deleted when uninstalling a certain program.
If so, then the best way to fix it is to reinstall the application that is causing the error to pop up on your screen. This way you’ll be able to set up the program again and install the Msvcr100.dll file back on your system.
Download Microsoft Visual C++ 2010 Redistributable Package
Another way to resolve this error is to download Microsoft Visual C++ 2010 Redistributable Package. To do this, first, see if you are running a 32 bit or 64-bit copy of Windows. XP users go to the start menu and click run then type winver and press enter.
In Vista and Windows 7, go to the start menu and type computer and click properties. The information you require is under Windows Edition.
Once you find out whether you are using a 32 bit or a 64-bit version, accordingly, download the correct version of Microsoft Visual C++ 2010 Redistributable Package directly from Microsoft’s official website. Simply download and install the software.
Then follow the prompts to add the toolbox to your PC. After that, restart your computer; most likely the error message will be gone. If it still persists, then this means the error is either related to the registry or malware.
Download and Run Restoro
Restoro can be used to resolve both malware infection and registry issues on your PC that could be triggering Msvcr100.dll errors.
Restoro is a next-generation and multi-functional PC repair tool embedded with powerful utilities like an antivirus, a registry cleaner, and a system optimizer. The registry cleaning feature detects all registry issues and Msvcr100.dll errors.
It removes unnecessary and obsolete files on the disk, like junk files, cookies, internet history, and temporary files cluttering the disk and damaging dll files. It repairs the damaged and corrupt dll files and restores the registry.
Simultaneously the antivirus feature scans and removes all malicious software on your system. These include spyware, viruses, Trojans, adware, and malware that can damage dll files.
This software is efficient and resolves the Msvcr100.dll error in seconds. It is easy to use and has a simple navigation. It is compatible with all Windows versions.
Click here to download Restoro on your PC and resolve the Msvcr100.dll error today!
What is Active History? A new feature has been introduced in Windows 10 that allows users to stay connected to their tasks across their devices. This new feature is called “Windows Timeline” and using this feature, users could continue their tasks all over their Windows 10 computers as well as on devices that run Android and iOS as well.
This new feature was included in Microsoft Launcher and Microsoft Edge on Android devices as well as in Microsoft Edge for iOS devices. In order for the feature to work, you have to send either Basic or Full data and diagnostics of your computer to Microsoft which would sync it all over your devices with the help of the cloud. And now since all your data is stored on your Windows 10 computer and with Microsoft under your account, it is easier for you to access the back and start where you left off. This kind of option is called Active History. In this post, you will be guided on how you can permanently disable Active History using either the Windows Registry or Group Policy.
Before you go on further, it is recommended that you create a System Restore Point first in case anything goes wrong. This is a precautionary measure you must take so that you can easily undo the changes you’ve made. After creating a System Restore Point, proceed to the given instructions below.
Option 1 – Disable Active History via Registry Editor
Tap the Win + R keys to open the Run dialog box and type in “Regedit” in the field and hit Enter to open the Registry Editor.
Next, navigate to this registry key: ComputerHKEY_LOCAL_MACHINESOFTWAREPoliciesMicrosoftWindowsSystem
From there, check if you can find a DWORD named “PublishUserActivities”. If you can’t find this DWORD, just create one with the same name and make sure that the base is selected to Hexadecimal.
After that, double-click on the DWORD and change its value from 1 to 0 to disable Active History.
Restart your computer to apply the changes you’ve made successfully.
Option 2 – Disable Active History via Group Policy Editor
Note that this second option won’t work if you are using the Home edition of Windows 10. This is because the Group Policy Editor does not come with Windows 10 Home. So if you are not using Windows 10 Home, follow the given steps below.
Tap the Win + R keys to open the Run box.
Then type in “gpedit.msc” in the field and hit Enter to open the Group Policy Editor.
Next, navigate to this path: Computer ConfigurationAdministrative TemplatesSystemOS Policies
After that, double click on the configuration listing named “Allow publishing of User Activities” to open the configuration page which has the following description:
“This policy setting determines whether User Activities can be published. If you enable this policy setting, activities of type User Activity are allowed to be published. If you disable this policy setting, activities of type User Activity are not allowed to be published. Policy change takes effect immediately.”
Now you have to select Disabled or Not Configured if you want to disable Publishing of User Activities or Enabled to Enable Publishing of User Activities depending on your preferences.
Next, click OK and exit the Group Policy Editor and then restart your computer to successfully apply the changes made.
Afraid of the growing threats online? As you should be. But we’re here to show you what kinds of malware are out there and what you can do to keep them at bay.
Malware definition
Malware comes from the term malicious software. It’s software designed to attack and exploit devices and networks to the advantage of the hacker who made it.
Malware can be transmitted in different ways. Most commonly this happens via infected USB drives, downloadable files or malicious websites. Depending on the type and ultimate goal, the consequences of a malware attack can range from negligible to catastrophic.
Credit: Ed Hardie on Unsplash
What kinds of malware are there?
1. Virus
A virus is typically spread via infected files, websites or links. It’s one of the oldest malware types and one of the most difficult to get rid of. That’s because, once activated, it replicates itself - hence the name.
It can perform different kinds of attacks, depending on what the creator wants to achieve. The main characteristic of a virus is that it really doesn’t show itself until you activate the host. So that’s a scary thought for sure.
2. Adware
Sometimes an ad blocker isn’t enough to fight off unwanted ads. And some of them can, unfortunately, be malicious. They may redirect you to infected sites or prompt downloads of risky files. Even just opening a malicious site can lead to data theft.
So, definitely be careful when clicking around. Even if an ad seems completely legitimate, you can never be too sure.
3. Ransomware
Through ransomware, cybercriminals gain access to a user’s data and use it to extort them for money. Basically, the user is threatened with data deletion or even exposure if a ransom isn’t paid by a specific deadline.
This is a particularly nerve-wracking type of malware. If it targets an individual, it preys upon their sense of anxiety, fear, guilt and even shame. If it targets a business (which is a lot more common), it preys upon not only that business’s profit but also every single one of their customers and their data.
4. Trojans
This type of malware disguises itself very well as a legitimate-looking program. Once you download it, hackers can get full access and control of your device, data and network. They can even be hidden in games, apps and attachments. They cannot self-replicate, though, so we guess that’s… good news?
5. Worms
Worms can replicate, just like viruses, but you don’t need to actually activate the infected program for them to get going. They can be used for various purposes, ranging from data deletion to file encryption to support a ransomware attack.
Credit: Growtika on Unsplash
6. Spyware
Spyware refers to malicious software that stays hidden on your computer and monitors your activity. The best-known type is keyloggers. This can be used to steal sensitive data like passwords and banking information.
7. Rootkits
Rootkits are among the most dangerous types of malware. They allow administrative access and full control of a device, which lets hackers continue hijacking all your data and monitoring your activity without your knowledge.
8. Botnets
Botnets are networks made up of bots - computers that cybercriminals have infected with malicious software. Bots and botnets give hackers remote access to users’ devices and allow them to spy on your camera, take screenshots, memorize passwords and launch Distributed Denial of Service attacks. This one truly makes your hair stand on end.
What can you do about it?
You know the old adage - better safe than sorry. And trust us, malware attacks are such a pain in the you-know-what that you really don’t want to be sorry.
Luckily, there are simple solutions that can shield you from most digital threats these days. What you want to be looking at is a solid antivirus program. Well, technically, you need an antimalware program, but since the latter evolved from the former, we still mostly refer to them as antivirus software. The majority of antimalware programs these days don’t just shield you from potential risks online, but include additional features as well. For example, some Bitdefender antivirus packages also include parental control and a VPN. And Bitdefender is not just for PCs either - it offers protection for your beloved iPhone or Android as well. You can throw in a password manager in there too, for an additional layer of security.
Credit: Dan Nelson on Unsplash
If you aren’t too concerned about all these various threats or feel like you don’t need extra security, you can at least take a step to protect your information from being exposed to lurking cybercriminals as you’re browsing. This can be done through a good VPN like Surfshark, which hides your identity in the digital space and prevents your data from being tracked.
Choosing the right protective software is especially important if you have children with access to the Internet, since they’re unfortunately even more vulnerable to malicious attacks. If you aren’t sure what the right kind of antimalware program is right for you, you can reach out to us and we’ll be happy to help keep your entire household or office digitally secure.
The bottom line
The truth is that there’s no way to be 100% protected in the online world. Hackers are constantly coming up with new ways to infiltrate our devices. But malware-battling software evolves along with them and there’s still plenty you can do to keep risks away. Stay safe!
Every computer has to have a graphic card, it is one of the essential components in order for the computer to work. If you have a second-hand computer, got one as a gift, or similar, there is a high chance that you do not really know which components are inside. Luckily finding out which graphic card you have inside is quite easy.
Right-click the taskbar and select Task Manager
Click the Performance tab at the top of the window, if you don’t see the tabs, click “More Info.” Select “GPU 0” in the sidebar. The GPU’s manufacturer and model names are displayed at the top right corner of the window.
You’ll also see other information, such as the amount of dedicated memory on your GPU, in this window. Windows 10’s Task Manager displays your GPU usage here, and you can also view GPU usage by application.
If your system has multiple GPUs, you’ll also see “GPU 1” and so on here. Each represents a different physical GPU.
If you have a laptop that is slowing down and some usual tasks are sluggish you probably mean that it is time to change it and get a new one. Altho it is a good solution and it will guarantee that you will be able to do your tasks with more speed and comfort, straight purchasing is not always the best thing to do.
There are things you can do and some upgrades that are cheaper and will bring your laptop back into the game and extend its usage for a few more years.
1. Clean it
The most common issue for slowing down of computer is dust and dirt that accumulates over time and usage. If the laptop has not been properly cleaned in a while, cleaning it and placing new thermal paste on the CPU can do wonders. If you are not keen on doing this yourself or do not possess the required skillset take it to your local IT center for cleaning.
2. Uninstall software that you are not using
Various software can have speeding effects on computers, it can have some services running in the background and thus take precious resources slowing the whole system. If you are not using software, uninstall it.
3. Do not install the latest software
If you are using your computer for basic tasks there is no really need to install the latest and best. A lot of new software will require new hardware and things that offer are not so much better nor even required to justify the upgrade. Let us take office, for example, if you are using it to just write some text and not using any advanced options there is really no need to switch to a newer version, the old one will do just fine tasks that you are in need of.
4. Replace HD
Now this fits in the domain of upgrading your hardware but still it is much cheaper than replacing the whole laptop. Windows 10 works much better with SSD and SSD itself is faster than your standard HD, especially if it is slower model spinning in only 5400RPM. Operation of HD replacement is simple and straightforward and anyone can do it but the benefits of replacement will be visible right away. With a new SSD instead of an old mechanical one, you will have the feeling that you actually bought a new laptop.
5. Add more RAM
This is basically the last thing you can do in order to speed up your old laptop that will not break your bank account. Upgrading RAM was always the thing that can push your computer to have more power and to behave better while you are doing tasks. One important thing here is to first see how much RAM you have in your computer. If you are packing already 8GB then upgrading will not do much but if you have only 4GB, raising it to 6GB or 8GB will be beneficial. Also, check if the model of the laptop supports more RAM in the first place.
Conclusion
We have covered here a vast array of options in order to get your laptop back into the game with variability between hardware upgrades to taking care of your software. Whatever option you choose to do it will speed up your computer but among all of them, replacing the hard drive will do the most.
When we purchase a computer, usually it is meant to be used by one person. Sometimes we would like to share our computer with other people, with friends and family members but we would also like to keep some privacy for ourselves in the process. Lucky for us Windows 10 will let us create multiple user accounts which then can be used by other persons with their own settings, documents, etc. The only requirement is to already have one user account which is automatically created when Windows is installed.
This guide will lead you step by step in the creation of a new user account within Windows 10, so grab your favorite drink, and let's begin.
Creating new account
First thing is to click on the windows icon on the bottom left and open start menu, from start menu click once on settings.
When the settings window opens, choose ACCOUNTS on it.
Windows will then go to the accounts settings page. Within that page, click on the Family & other users to open the setting for the chosen section on right. On the right settings, screen navigate to the lower section and click once with the left button on add someone else to this PCWhen add someone else to this PC is clicked, pop up window will appear which will ask you to provide the persons email address and later on the password of his/her Microsoft account, after the required information is provided you are done, a new user has been added and he can use his Microsoft credentials on the login screen to use this computer.
Setting up a user without Microsoft ID
However, if you do not wish to add a new user via his Microsoft login credentials or the person does not have them, on the pop-up window click on I don't have this person's sign-in information.This will open yet another pop-up giving you the option to create a Microsoft account for this person, to use a phone number instead of a Microsoft account, or to create a new email address for the user. Any of these options will create a new user for this computer with provided credentials but there is the last option at bottom of the pop-up which will allow you to create a local user only without a Microsoft account. This user will be able to use this computer, will not be able to transfer his document through various devices like he/she would if using a valid Microsoft account but it could use the computer and personalize it fully to his/her liking.
Once the link is clicked, you will be presented with a floating window requiring you to input needed information in order for the account to be created. You will need to provide username, password, and answers to 3 security questions.Once all information has been provided, click on next and your new non-Microsoft local user has been created. Now when you click on Family & other users you will see that Windows has added a new user with the provided name to this computer. If you wish, you can add another user in the same manner, following the previous steps. Microsoft Windows does not have a limit for how many users can be on one computer so feel free to create as many as you like.
User account options
Now, clicking on the existing created user will open user options. From there you will have options to remove the user, therefore removing him/her from this computer, note that removing the local user will remove permanently his/her settings and they would not be able to be restored, or you can change the user account type.
Click on Change account type.Under account type, you will have the option to promote this user to an administrator if you wish or you can leave it as a standard user.
If you encounter an error message that says, “<Drive>: is not accessible, The File or directory is corrupted and unreadable” when you try to connect your USB or external device, then the File System could have been corrupted or the external device might be infected with malware. On the other hand, it is also possible that the device might have some physical damage.
To fix the “The file or directory is corrupted and unreadable” error, you can try to run Check Disk or scan your computer for malware or you could also format the destination drive. For more details, refer to each one of the given options below.
Option 1 – Run the Check Disk utility
You can also run the Check Disk utility to fix the error when you connect your USB or external device.
In the Windows Search box, type “command prompt” and from the search results, right click on Command Prompt and select “Run as administrator”.
After opening Command Prompt, type this command and tap Enter: chkdsk <Partition Letter>: /f /r /x /b
The command you entered will start to check for errors and fix them automatically. Else, it will throw an error message saying, “Chkdsk cannot run because the volume is in use by another process. Would you like the schedule this volume to be checked the next time the system restarts? (Y/N)”.
Tap the Y key to schedule Disk Check the next time your computer restarts.
Option 2 – Try to format the destination drive
Formatting the drive can also help you resolve the error. To format it, follow these steps:
To get started formatting your drive, tap the Win + E keys and then go the access page of the drive.
Next, right click on the drive and select Format.
After that, uncheck the “Quick Format” option and then format your drive properly.
Now once the formatting process is finished, unplug the drive and plug it back in afterwards.
Check if the error is already fixed. If the drive is not initialized, tap the Win + R keys and hit Enter.
After opening the Run dialog box, type “diskmgmt.msc” and hit Enter to open Disk Management.
From there, right click on the drive volume and select initialize Disk.
Next, select the correct partition type and proceed.
Option 3 – Try scanning your computer for malware using Windows Defender
Your computer could be infected with malware which might have triggered the “The file or directory is corrupted and unreadable” error. To fix this, you need to scan your computer using a reliable program like Windows Defender.
Tap the Win + I keys to open Update & Security.
Then click on the Windows Security option and open Windows Defender Security Center.
Next, click on Virus & threat protection > Run a new advanced scan.
Now make sure that Full Scan is selected from the menu and then click the Scan Now button to get started.
If you suddenly encounter an error message saying, “ File Record Segment is Unreadable ” on a blue screen while booting your PC, it means that your hard drive is in an error state. This particular blue screen of death error might have a lot of bad sectors or might have reached its end.
The workarounds you can try to resolve the issue is by locating the bad sectors or checking your hard drive for any discrepancies in the mapping and fix them. Follow the detailed instructions laid out below for these workarounds.
Option 1 – Try to check for any bad sectors and wrong configurations in your hard drive
The first thing you have to check is the boot files on your PC. As you know, your PC boots from these files and if there is anything wrong with any one of them or if one of them ends up getting corrupted, you will most likely see the blue screen of death error or a prompt with an error message saying, “File record segment is unreadable”. According to some users who reported this issue, new hard drives aren’t exempted from this error. That’s why it is recommended that you carry out this solution no matter what kind of scenario you are in. You will have to launch the Command Prompt in recovery mode and see if you can fix the problem by executing the check disk commands.
Upon booting, restart your PC and tap F11 to go to the recovery environment then select Troubleshoot.
Next, click Advanced from the given options and select Command Prompt.
After opening Command Prompt, execute the commands listed below, and don’t forget to hit Enter right after you type in each one of them and if you have installed Windows to some different directory, you must replace “C” with the name of the drive you’ve installed Windows with.
chkdsk C: /r /x
chkdsk C: /f
Note: The Chkdsk function might take a while before it finishes its operations so you need to be patient and wait until the entire process is completed. And depending on the situation, it might even take a day at most so patience is really the key here.
Option 2 – Try connecting the hard drive to a different computer
If option 1 didn’t work for you and you’re still seeing the error, you can try connecting the hard drive to a different computer and then copy the data first. Make it a priority to salvage the data just in case the hard drive won’t make it in the future.
After replicating your hard drive, you can then try running the chkdsk commands that are listed in option 1 above in the new computer you’re connecting your hard drive to and make sure that you key in the correct drive letter that’s assigned to the hard drive you’re using. After executing the chkdsk commands, plug your hard drive back into the previous computer and then check if you can now boot it without any issues.
Option 4 – Replace the faulty hard drive
If none of the options provided above really worked out then maybe it’s time to consider getting a replacement for your hard drive. In about 50% of the cases about this error, some unfortunate users were left with no choice but to replace the hard drive since the problem is with the hard drive itself. Hard drives have a complex running mechanism which includes a head and the disk that rotates accordingly so you can check if the cables connected to the hard drive are connected properly and if it is in a correct position or not. In addition, you also have to make sure that the SATA adapters where the hard drive is connected are working properly.
If the drive is showing problems in the I/O operation, there is little chance for you to use it as a normal hard drive. If the hard drive is in warranty, get it checked and replace it. If not, you might consider taking it to the service center for the specialists to take a look into it.
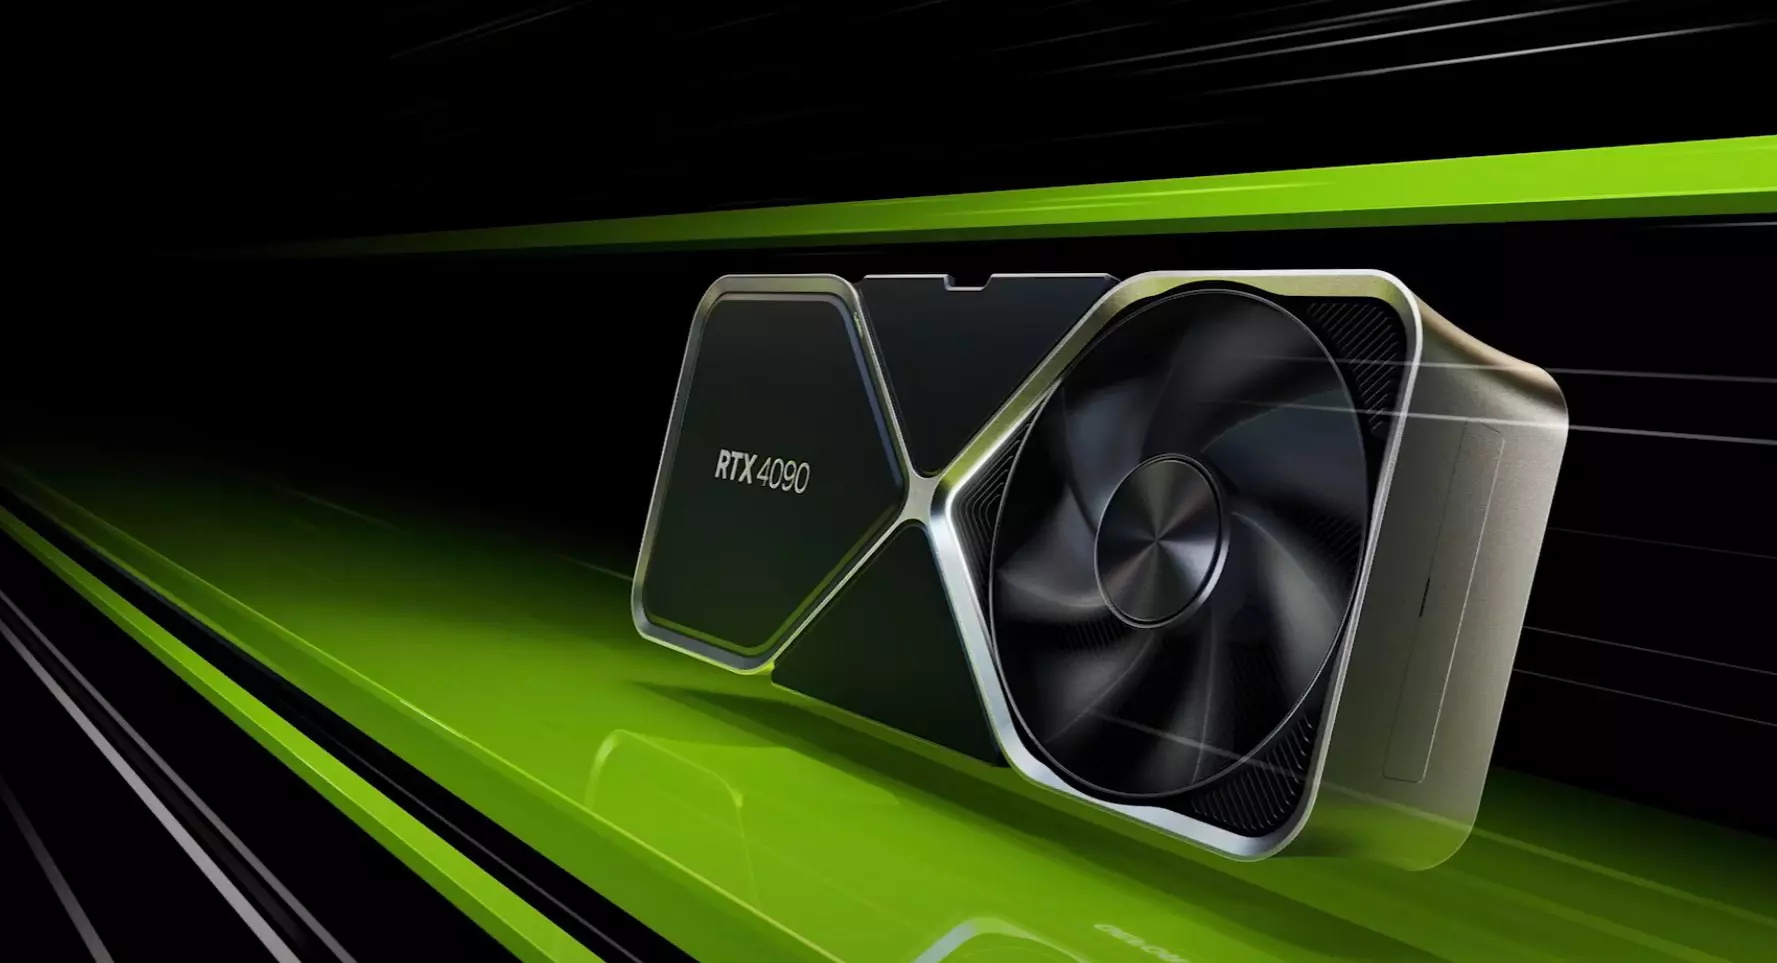
Nvidia announced the third generation of GeForce RTX GPUs called Ada Lovelace. New technology is bringing 76 billion transistors with 18,000 CUDA cores along with new gen ray tracing cores and improved Tensor cores as well. The new lineup also comes with DLSS 3 which is vastly improved from its previous version pushing a 4 times increase in frame rates over native rendering.
RTX 4090, a better model of GPU will come with 16,384 CUDA cores and a boost clock speed of 2.52 GHz. Also, it is packed with stunning 24 GB of GDDR6V VRAM. In Nvidia's words, its performance is twice faster than the 3090 Ti in games like Flight simulator, three times faster on Portal RTX, and four times faster on RacerX.
RTX 4080 comes in two modes, one with 12GB VRAM and a stronger one with 16GB VRAM but differences do not end here. The lower model is packing 7,680 CUDA cores while the stronger one is going to 9,728 CUDA cores. We will wait to see how will these cores count impact real-world performance in games.
As for prices, the flagship model RTX 4090 will be $1,600 USD and it will hit the market on October 12th. RTX 4080 12GB model will be $900 USD and the model with 16GB VRAM will go up to $1,200 USD. This, of course, is the price for Founders Edition cards, OEM cards from third parties like ASUS, MSI, Gigatech, etc will cost more.
C0000135 is a blue screen of death error code (BSoD) also referred to as the ‘Stop’ error. This error code usually pops up on the screen at startup. The system stops and displays the error code:
Stop: c0000135 {Unable to Locate DLL}The dynamic link library FILE_NAME could not be found in the specified path Default Load Path
Solution
Error Causes
There are multiple reasons behind the error code C0000135 BSoD such as:
Missing and damaged .DLL files which is linked to registry corruption
Malware attack
Viral infection
When this error code pops, the computer screen turns blue and hampers your ability to use Windows successfully. Nonetheless, if the error C0000135 is not repaired timely this error can cause a great deal of damage to your PC. It puts you at risk of:
Data Loss with possibly no chances of recovery
System Failure and crash
Cybercrime if malware is the underlying cause of the occurrence of the error code C0000135
To avoid serious PC damages and inconvenience it is advisable to repair this error immediately.
Further Information and Manual Repair
There are two ways to fix the error code C0000135:
Hire a Professional
Download Error Tools PC Repair
Hire a Technician
Hiring a professional can be costly. You may have to pay hundreds of dollars to the technician to resolve this issue.
However, the latter option is not only money-saving but also time-saving, convenient, and simple. In fact, it is so easy that even if you have no technical knowledge you can still work your way around it and repair the error in seconds.
Download Restoro
Restoro is a top-quality, efficient, and multi-functional PC fixer. It is integrated with cutting-edge technology.
It has a comprehensive suite of advanced utilities like an intuitive registry cleaner, powerful anti-virus, and a smart system stability detector. All of these exciting and highly functional features are combined together in one.
With this helper, you don’t need to search for the underlying cause of the error.
When you experience the BSoD error code C0000135 on your system all you have to do is run it for a scan and its intuitive in-built technology will detect the issues and causes in no time and display them to you in the form of a comprehensive scan report.
Once the scan is complete, you just have to hit the repair tab to resolve it. It’s that easy and fast!
Restoro is powered by a highly functional registry cleaner. This cleaner helps detect all the errors related to the registry.
It cleans the unnecessary files cluttering and damaging the hard disk including the junk files, invalid registry entries, internet history, and the files from the programs that you have uninstalled on your PC.
These files acquire a lot of disk space and damage .dll files as well.
Overloaded registry also slows down the system and the CPU and RAM then require more power to start and function.
The registry cleaner embedded in the Restoro removes and wipes out all this unnecessary clutter, clears up the disk space and repairs the damaged files, and corrupted registry, and thus resolves the error code C0000135 on your system.
Restoro also serves as a system optimizer. And when you repair issues on your PC with this helper, you’ll see a massive difference in the speed and performance of your computer. It will run smoothly and boot efficiently.
Restoro is safe to use. It is bug-free and used widely by PC users experiencing different types of PC-related issues including the error code C0000135. It has easy navigation and a user-friendly interface.
You can download and run Restoro on all Windows versions.
Click here to download Restoro today!

 Error Causes


 Windows will then go to the accounts settings page. Within that page, click on the Family & other users to open the setting for the chosen section on right. On the right settings, screen navigate to the lower section and click once with the left button on add someone else to this PC
 When add someone else to this PC is clicked, pop up window will appear which will ask you to provide the persons email address and later on the password of his/her Microsoft account, after the required information is provided you are done, a new user has been added and he can use his Microsoft credentials on the login screen to use this computer.
 This will open yet another pop-up giving you the option to create a Microsoft account for this person, to use a phone number instead of a Microsoft account, or to create a new email address for the user. Any of these options will create a new user for this computer with provided credentials but there is the last option at bottom of the pop-up which will allow you to create a local user only without a Microsoft account. This user will be able to use this computer, will not be able to transfer his document through various devices like he/she would if using a valid Microsoft account but it could use the computer and personalize it fully to his/her liking.
 Once the link is clicked, you will be presented with a floating window requiring you to input needed information in order for the account to be created. You will need to provide username, password, and answers to 3 security questions.
 Once all information has been provided, click on next and your new non-Microsoft local user has been created. Now when you click on Family & other users you will see that Windows has added a new user with the provided name to this computer. If you wish, you can add another user in the same manner, following the previous steps. Microsoft Windows does not have a limit for how many users can be on one computer so feel free to create as many as you like.
 Click on Change account type.
 Under account type, you will have the option to promote this user to an administrator if you wish or you can leave it as a standard user.