The standard icon place in the Taskbar inside Windows 11 is in the center. Some users welcomed this change, some not so much. If you are part of the user base that is not so much thrilled with this Microsoft’s idea of innovation, do not worry, there is an easy way to move all icons and start button on the left inside Taskbar.
Moving icons in Taskbar
Open Windows settings by using ⊞ WINDOWS + I key combination
Click on Personalization
Select Taskbar
Click on Taskbar Behaviors
Click on the drop-down menu beside Taskbar Alignment
Select your desired option of icon alignment
Close settings
Your options will be active right away and you will see icons switching to the position of your choosing.
The Windows Update service, just like other services in Windows 10 may sometimes experience some issues and stop behaving properly. One of the issues you might encounter as you use the Windows Update service is the Windows Update error 0x8024A10A. This kind of error code signifies that the Windows Update service is shutting down. So if you encounter this error, read on as this post will guide you on how you can fix it.
When you receive the Windows Update error 0x8024A10A, you may see this error message on your screen:
“USO_E_SERVICE_SHUTTING_DOWN indicates that the WU Service is shutting down. This may happen due to a very long period of time of inactivity, a system hang leading to the service being idle and leading to the shutdown of the service. Ensure that the system remains active and the connections remain established to complete the upgrade.”
You could try to restart your computer to resolve the problem since there are instances when a simple restart can fix errors. However, if it does not work, you might find the options provided below useful.
Option 1 – Try to restart the Windows Update Service
The first thing you can do to fix Windows Update error 0x8024A10A is to restart the Windows Update Service from the Services Manager. To do so, follow these steps:
In the Cortana search box, type “services” and click on the Services icon to open the Services Manager. Alternatively, you can also tap the Win + R keys to launch the Run prompt and then type “services.msc” in the field and hit Enter to open the Services Manager.
After opening the Services Manager, look for the Windows Update Service.
Once you found it, right-click on it and check if the Service is stopped. If it is, then select the Start option. On the other hand, if the Windows Update Service is already started, just select the Restart option.
After that, try to run the Windows Update again and see if the error 0x8024A10A is now fixed.
Option 2 – Run the Windows Update Troubleshooter
Since the Windows Update troubleshooter reviews the status of the services that support the process, it would prompt and fix it if there is anything that’s not right. Thus, you might want to run a built-in Windows Update troubleshooter to resolve the Windows Update error. It is one of the things you can check out as it is known to automatically resolve any Windows Update errors like error 0x8024A10A. To run this troubleshooter, go to Settings and then select Troubleshoot from the options. From there, click on Windows Update and then click the “Run the troubleshooter” button. After that, follow the next on-screen instructions and you should be good to go.
Option 3 – Run Microsoft’s online troubleshooter
Aside from the Windows Update troubleshooter, running Microsoft’s online troubleshooter might also help you fix the Windows Update Error 0x8024A10A. This online troubleshooter is known to help in fixing Windows Update errors, it scans your computer for issues that might be causing the problem and then fixes them automatically.
Option 4 – Try to run the Windows Update Service in a Clean Boot State
There are some instances that some conflicting programs installed in your computer might be the one that’s causing Windows Update error code 0x8024A10A. To identify which program is causing the problem, you need to put your computer in a Clean Boot State. To do so, follow the steps below.
Log onto your PC as an administrator.
Type in MSConfig in the Start Search to open the System Configuration utility.
From there, go to the General tab and click “Selective startup”.
Clear the “Load Startup items” check box and make sure that the “Load System Services” and “Use Original boot configuration” options are checked.
Next, click the Services tab and select the “Hide All Microsoft Services” check box.
Click Disable all.
Click on Apply/OK and restart your PC. (This will put your PC into a Clean Boot State. And configure Windows to use the usual startup, just simply undo the changes.)
Now try to run the Windows Update Service again and see if Windows Update error 0x8024A10A is now gone.
Error Code 1627 is a type of HP printer installation error. It usually occurs when you try to install an HP printer on your PC. The error code 1627 pop-up hampers your ability to install an HP printer successfully.
This error code is usually displayed in the following format:
Installation Error: Call to Driver Package Install returned error 1627 for package C:ProgramFilersHPHP deskjet 2510 seriesDriver storePipelinehpvplog.inf
Solution
Error Causes
Like every device installed on your PC, printers also need software called drivers to function on Windows Operating System.
Although Windows supports several computer devices since many drivers are already installed in Windows but there are some devices that do need additional software to get started and operate smoothly on Windows such as Hewlett-Packard HP printers.
Installing a Hewlett-Packard printer driver is slightly more time-consuming and complex than any other driver. Causes for HP printer installation usually include:
Driver issues
Bad Registry Keys
Though this is not a fatal error, it is still advisable to fix it right away to avoid inconvenience.
Further Information and Manual Repair
To resolve this error on your PC, you don’t necessarily have to hire a professional and spend hundreds of dollars in repair. The good news is that HP Installation error code 1627 is quite easy to fix. Here are some of the best and proven DIY methods to resolve error code 1627:
Method 1 - Uninstall and then Reinstall HP Printer Driver
HP printer installation errors can occur due to driver issues. If the driver is not installed properly or is outdated, you will never be able to install an HP printer on your PC successfully.
Therefore to solve this issue, first, make sure the driver used for printer installation is up to date. If it is outdated, then update it. On the other hand, if the printer driver is up to date but not installed properly then reinstall it. In both situations, first, you must uninstall the driver.
Uninstalling the previous installation will help you clean the system. Once the system is clean you can reinstall the HP drivers again.
To uninstall, go to the start menu and then the control panel. Now go to the Add/Remove program option and uninstall the driver. To activate changes, reboot your PC. Now install the updated version again.
Method 2 - Clean the Registry
If the printer software installation fails while updating, then this means the removal of the failed software was not successful. It may not show up in the Control Panel program list.
This means the entries of the failed software are still present in the registry of your PC. In this scenario, you need to clean the registry and remove the bad entries from there to successfully install the HP printer driver on your system.
Though this can be done manually this can be both time-consuming and slightly challenging if you are not technically sound. Therefore, to remove bad entries from the registry in seconds in just a few clicks download Restoro.
This is a user-friendly PC Repair Tool deployed with a powerful registry cleaner. The registry cleaner scans your entire PC, detects and removes all bad entries and files corrupting the registry right away.
Once the registry is cleaned, you can try installing the printer driver again. This is most likely to resolve the issue.
Click here to download Restoro.
Method 3: Locate and Install the Driver
As was pointed out, you might need to reinstall the printer driver again. Using DriverFIX, you'll be able to automatically update your computer system and install the drivers your computer needs to operate smoothly.
As you know, all computer mouse devices are designed ergonomically for users who are right-handed. Although that’s mostly the case, there are also other mouse devices that are designed specifically for left-handed users or the ones that can be used by either the right or left hand. But before you look for these kinds of mouse devices, there is actually an option you can try so that your mouse device can work with either the left or right hand. All you have to do is configure your mouse device. Aside from setting the device to work on either hand, you can also switch mouse buttons, from left to right, using only a couple of simple steps.
As mentioned earlier, most mouse devices are created for right-handed users. Meaning to say, these mouse devices are configured to be right-handed with their primary button on the left and the second one on the right. The primary button is used for certain functions such as selecting and dragging. Now you can configure your mouse to be left-handed by swapping its predefined functionality. How? Refer to each one of the given instructions below.
Option 1 – via Control Panel
First, go to the Start Menu and search for “control panel” in the Start search.
Once you see it from the search results, click on it to open it and then go to the Hardware and Sound section.
From there, click on Mouse under the Device and Printers section. This will open the window for Mouse Properties.
Now you have to check the Switch primary and secondary buttons box.
Then click on OK to save the changes made. After that, your primary select button on your mouse device is your right button while the secondary button, also known as right-click, is now the left button.
Option 2 – via Windows 10 Settings
This is the second option you can check out to change the configuration of your mouse from being right-handed to being left-handed.
First, right-click on the Windows icon and select Search.
Next, type “mouse” and from the search results that appear, click on Mouse Settings.
After that, select “Right” from the “Select your primary button” drop-down menu. This should set the mouse device from being right-handed to being left-handed.
Error code 0xc004f210 occurs when Windows 8 users fail to activate their Windows operating system. Users will be able to identify error code 0xc004f210 because of the following common symptoms which occur:
If you enter an invalid product key or do not have a digital entitlement for the edition of Windows you are attempting to activate, you may experience error code 0xc004f210. Since this error usually occurs due to these main reasons, you will most likely find success resolving this issue by ensuring you use a valid product key or activate an appropriate edition of Windows based on the edition of your digital entitlement.
Further Information and Manual Repair
Error codes can be resolved through manual repair procedures that seek to fix the underlying issues causing the error. In the case of error code 0xc004f210, you should be able to resolve this error by using the methods below. You may also consider contacting a Windows repair technician if you have difficulty resolving the error code.
Method One: Enter Valid Product Key
To successfully activate your operating system and resolve error code 0xc004f210, you will need to enter a valid product key in the Update & security section of Windows. Follow the instructions below to enter the product key.
Step one: Click the Start button then select Settings
Step two: Select Update & security then Activation
Step three: Click the Change product key
Step four: Enter a valid product key
If the issue causing error code 0xc004f210 is related to the use of an invalid product key, you should be able to successfully activate your Windows operating system. Should the problem persist, however, you will need to attempt the next manual repair method explained below? Note: Failure to fix this error code might result in other Windows 10 error messages.
Method Two: Ensure Edition of Windows Matches Your Digital Entitlement
Digital entitlement allows Windows users to access activation without using a product key. This digital entitlement only affects Windows 8 users who are attempting to activate versions of Windows 10 that include Windows 10 Pro. Once you are using a genuine copy of Windows 8.1 and your edition of Windows matches your entitlement, you may proceed with the instructions below.
Step one: Click the Start button then select Settings
Step two: After selecting Settings, click Update & Security
Step three: Select Windows Update then the Check for updates tab
Step four: Click activate Windows 10 update
You should be able to activate your Windows update once you follow the instructions above. Remember error code 0xc004f210 is an activation code related to product keys or your digital entitlement so once these issues are rectified, you should have no problem activating your operating system of choice and enjoying the benefits it offers. If, however, the problem remains unresolved after you have attempted both manual repair methods, there may be unusual issues affecting your system. Contact Microsoft to rectify the issue or get help from a Windows repair technician.
Method Three: Download an Automated Tool
If you wish to always have at your disposal a utility tool to fix these Windows 8 and other related issues when they do arise, download and install a powerful automated tool.
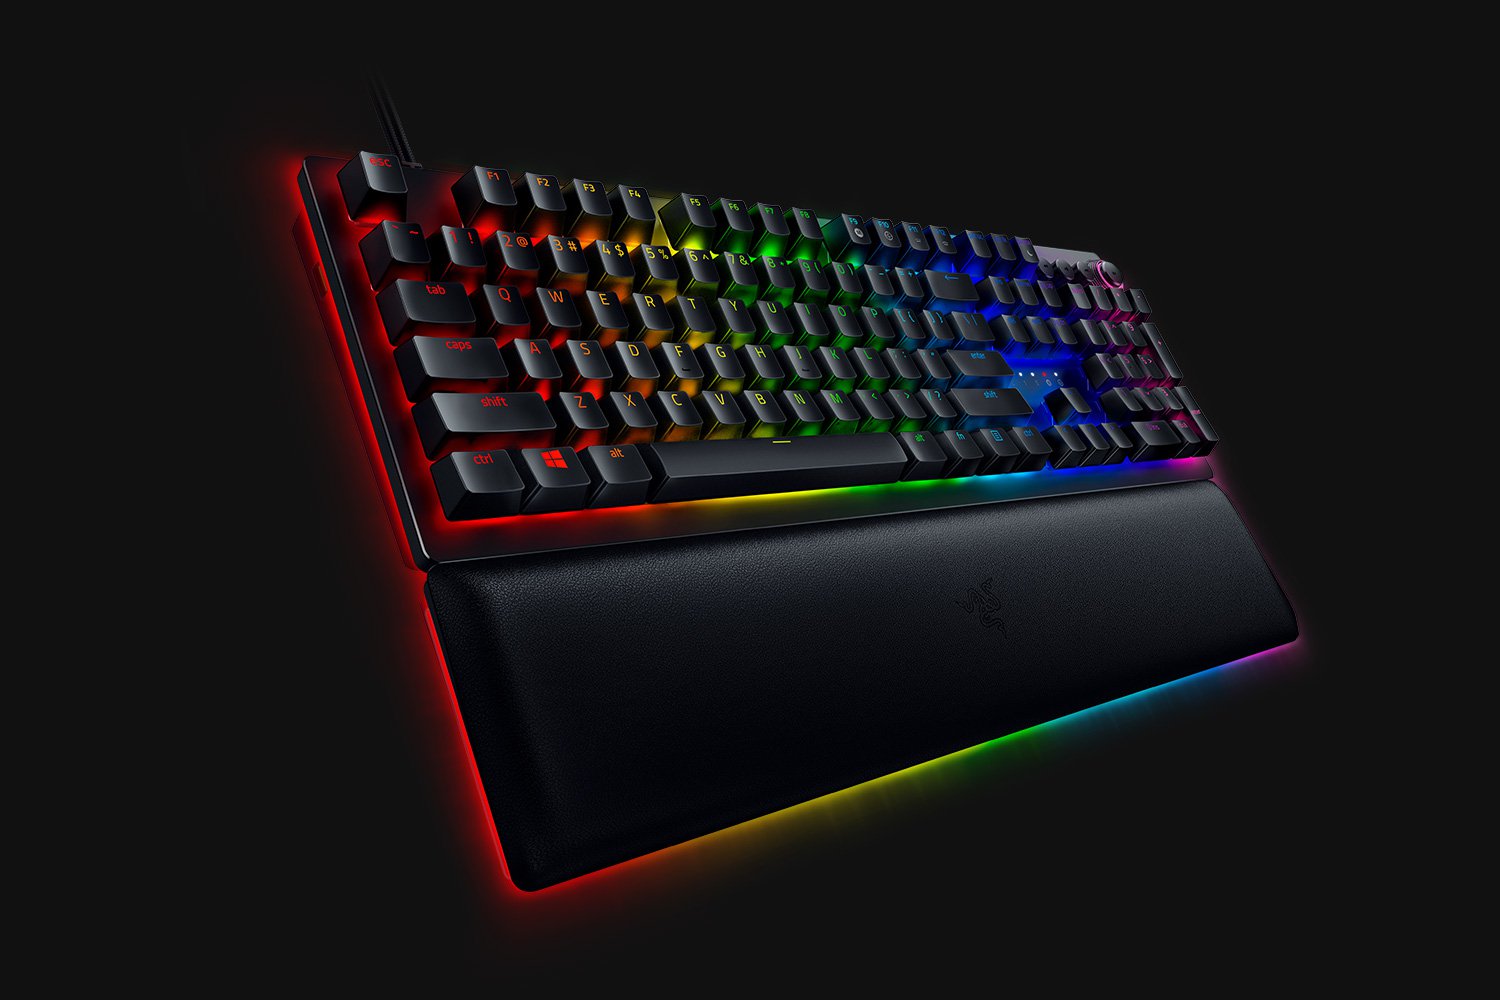
When it comes to computer peripherals first thing that comes to people's minds is probably Mouse and Keyboard. Also when discussing peripherals brands, Razer is not a stranger and over the years it has built its name and cult following.
Razer’s mechanical keyboards have been always in the upper field of quality and trust from users and Huntsman is no different.
Tech specifics of Huntsman keyboard
Mechanical optical switches
Razer has introduced their new optical technology switch with this keyboard. These switches are faster and more accurate than typical mechanical switches and if tests are to be believed this is the fastest keyboard currently on the market.
Multi-functional digital dial
A multi-function digital dial with three tactile media keys gives you instant access to everything from brightness to volume in seconds. All programmable and customizable through Synapse 3, so you can set your preferred configurations right at your fingertips.
10-key rollover
Anti-ghosting technology that enables 10-key simultaneous presses at the same time
4-side underglow with Razer chroma
Go crazy and personalize lighting effects any way you want with a full 4-side underglow and 38 customization zones. Powered by Razer Chroma
Feel and noise
In the department of noise, well it is the mechanical keyboard so naturally, it will be louder than membrane ones but in terms of comparing it to other mechanical keyboards it is within the same noise range, maybe just a tiny bit silenced.
The keyboard comes with 2 different types of switches, purple clicky ones that are louder and have that *click* sound for sound feedback, and red ones, that are not equipped with clicky sound but are linear providing slightly faster performance.
If you choose the Huntsman elite model of the keyboard it will come with a nice hand resting mat that is very comfortable and feels right. Using a keyboard feels like using a Razer keyboard, it is responsive and gives that superior mechanical feeling.
Conclusion
Razer Huntsman mechanical keyboard is not the cheapest nor the best on the market but it is the fastest one out. It is in the top tier of keyboards and worth the investment.
In your Graphics Settings, select r5apex.exe and change the Graphics performance preference to Classic App, set it to High Performance, and then launch the game as an administrator when you want to play.
Inside the Nvidia Control Panel, click “Manage 3D Settings”, and select Apex Legends and change it to “Prefer Maximum Power”
You can also change “pre-rendered frames” to 1, but it will make you lag just a tiny, tiny bit.
Turning the shader cache on can help improve FPS, but on some systems, it may cause additional negative performance changes.
If you have the ability to use G-Sync, use that as well (Only available on some monitors and graphics cards)
From the task manager, change the priority of r5apex.exe to “High” and close out of other applications.
Update your graphics drivers.
Ensure your PC complies with the games minimum system requirements:
Every now and then, the Windows Installer can also encounter some problems or glitches. One of these problems is where the Windows Update Standalone Installer, Windows Defender as well as Windows Firewall throws an error message that says, “The specified service does not exist as an installed service, 0x80070424”. This type of error can actually affect various applications on your computer so you have to fix it as soon as you can.
Although there is no clear reason for what really causes this error, there are various suggestions you can try to fix it.
Option 1 – Try to run the Windows Update troubleshooter
Windows 10 have various troubleshooters that can help you resolve many system issues. So if you’re dealing with errors “The specified service does not exist as an installed service, 0x80070424”, you can run the Windows Update troubleshooter to resolve it.
To run it, go to Settings and then select Troubleshoot from the options. From there, click on Windows Update and then click the “Run the troubleshooter” button. After that, follow the next on-screen instructions and you should be good to go.
Option 2 – Try to reconfigure the Windows Time Service
In the Start Search, type “command prompt” and right-click on Command Prompt from the search results.
Then click on the “Run as administrator” option to open Command Prompt with admin privileges.
Now execute each one of the given commands sequentially and hit Enter right after you type each one of them.
net stop W32time
exe /unregister
exe /register
net start W32time
After executing the given commands above, wait until it says, “W32Time successfully registered”.
Option 3 – Try to restart related Windows services
First, type “command prompt” in the Start Search and right-click on Command Prompt from the search results.
Then click on the “Run as administrator” option to open Command Prompt with admin privileges.
Now execute each one of the given commands sequentially and hit Enter right after you type each one of them.
SC config wuauserv start= auto
SC config bits start= auto
SC config cryptsvc start= auto
SC config trustedinstaller start= auto
Note: The commands you’ve just executed will make sure that the required Windows services are available.
Option 4 – Try to download and install the Windows Update Agent
You might also want to download and install the latest Windows Update Agent as it could also help you resolve the “The specified service does not exist as an installed service, 0x80070424” error.
Option 5 – Try to reset the Windows Update components
If by any chance that the second option didn’t work, resetting the Windows Update components could also help you resolve the problem. How? Refer to the following steps:
Open Command Prompt with admin privileges.
After that, type each one of the following commands and hit Enter after you key in one after the other.
net stop wuauserv
net stop cryptsvc
net stop bits
net stop msiserver
Note: The commands you entered will stop the Windows Update components such as Windows Update service, Cryptographic services, BITS, and MSI Installer.
After disabling WU components, you need to rename both the SoftwareDistribution and Catroot2 folders. To do that, type each one of the following commands below, and don’t forget to hit Enter after you type one command after the other.
Next, restart the services you’ve stopped by entering another series of commands. Don’t forget to hit Enter after you key in one command after the other.
net start wuauserv
net start cryptsvc
net start bits
net start msiserver
Close Command Prompt and reboot your PC and then check for updates on your computer and see if the error is resolved.
Option 6 – Try running the Windows Firewall troubleshooter
You could also try to run the Windows Firewall troubleshooter as it might also help you fix the problem. This could help in repairing and fixing Windows Firewall issues automatically. Check if it’s available for your Windows.
To make the Windows 10 operating system a lot more user-friendly, Microsoft introduced the Tablet Mode for Windows 10 devices, especially the 2-in-1 devices like Surface Pro and Surface Book. Despite the Tablet Mode’s efficiency, it also encounters some errors from time to time. One of the issues users reported about tablet mode is that they can’t turn off or exit tablet mode. If you are one of these users, read on as this post will guide you in what you can do to fix the issue.
To fix the problem with Tablet Mode, there are several suggestions you can check out. You can try to check the full-screen setting, or perform a full shutdown or perform two buttons to restart the Surface devices. You could also disable Tablet Mode via Registry Editor or perform System Restore or change the settings in the System tab or the Action Center.
Option 1 – Try to check the full-screen setting
Tap the Win + I keys to open the Windows Settings app.
Then navigate to this path, Personalization > Start.
Next, scroll down to toggle off the “Use Start Full Screen” option.
After that, restart your computer and see if the problem is fixed.
Option 2 – Perform a full shutdown
Open Command Prompt with admin privileges first.
Next, execute this command to perform a full shutdown: shutdown /s /f /t 0
The command you entered will shut down your computer and once it’s turned off, wait for a couple of minutes and then turn it back on.
Option 3 – Try to perform a two-button restart on your Surface device
Tap and hold the power button for about 30 seconds.
Then release them after 30 seconds.
After that, tap and hold the volume up + the power button for 20 seconds. This will cause the display to flash a few times but you have to keep those buttons pressed until your Surface device is turned off.
Wait for a couple of minutes and your Surface will turn back on. This should resolve the problem.
Option 4 – Try to disable the Tablet Mode via Registry Editor
In the Start Search, type “registry editor” and right-click on the Registry Editor from the results, and then select the Run as administrator option. This will open the Registry Editor with admin privileges.
Next, navigate to this registry key: ComputerHKEY_CURRENT_USERSoftwareMicrosoftWindowsCurrentVersionImmersiveShell
From there, look for the DWORD named “SignInMode” and double click on it.
Set its value to “1” and its base as hexadecimal.
After that, click on OK to save the changes made. This will make sure that you are signed in to the desktop mode when you log into your account.
Now look for the DWORD named “TabletMode” and double click on it and set its value data to “0” and it's base as hexadecimal.
Click on OK to save the changes made and then restart your computer.
Option 5 – Run System Restore
Tap the Win + R keys to open the Run dialog box.
After that, type in “sysdm.cpl” in the field and tap Enter.
Next, go to the System Protection tab then click the System Restore button. This will open a new window where you have to select your preferred System Restore point.
After that, follow the on-screen instructions to finish the process and then restart your computer and check if the problem is fixed or not.
Option 6 – Try changing the settings in the System tab or the Action Center
Go to Settings and navigate to System > Tablet Mode.
After that, scroll down to set the “Use desktop mode” from the drop-down menu under the “When I sign in” section.
Now restart your computer and see if the issue is fixed.
Blackouts are one of the most annoying things that can happen in the modern age. We have all learned to depend on electricity, maybe too much, so having a backup plan in these unpleasant situations is necessary. Here are some good gadgets for these kinds of situations.
Power Bank
The fully charged power bank is a great item that could fill up your phone or tablet. If it is a larger power bank it could fill them up all the way to the top several times and having charged phone or tablet can help greatly with some fun during dark times. The power bank can also be used to fill up other gadgets on this list so if the power outage is expected to last longer perhaps it would be wiser not to waste it on phone/tablet games.
Portable Generator
If the power bank is too short-lived for your needs, a portable generator is always a good option since it can provide power for longer time periods. The solar generator is what we recommend because it is much cheaper to produce electricity but it is limited if a power surge comes at night, one on gasoline is more stable and practical but it costs more to produce electricity.
Portable Solar Charger
One more electric-producing device on the list, this one however is aimed at charging your phone, tablet, or laptop by harvesting Sun's energy and turning it into valuable electricity for your devices. Fully silent and easy to operate this is a great tool for power outrage. It will not be able to produce electricity for smaller house appliances but for basic phone/tablet/laptop needs it will suffice.
Panic light
Self-sustained with its own battery, panic lights are great assets for lightning when power is not present. They can turn automatically when the circuit detects that power is missing but can be also manually switched on or off. There are many versions of panic lights ranging from the light they produce to how long can they work so picking the right one will depend entirely on your home size and needs.
USB Headlamp
If you lack panic lights USB headlamp is a great choice to light your way and it works even better than a flashlight, although a flashlight is also a great tool, a headlight will provide you with free arms to do various things that you would not be able to by holding a flashlight. Modern headlights come with LED lights so they provide a good amount of light with small power consumption and they can be recharged in a power bank, solar charger, or generator.
LED lantern
LED Lantern is a gadget sitting somewhere between a headlight and a panic light, it offers around the same light amount as a panic light but you can carry it around with you. Of course, it will drain its battery faster than a panic light and it will still need to carry around but it can offer some good options when you need it, like taking it with you to the toilet.
Electric Lighter
An electric lighter is also one of the things that you will need, it can ignite candles, paper, stoves, etc. Its battery is usually enough for extensive use and there are small chances that it will need to be recharged. Having matches is also smart, just in case.
Solar Oven
Great gadget when outbreaks last long or when you get hungry. Not all households have gas ovens so a Solar oven is a great tool to keep you full of food. Granted it will not be on par in speed and quality with a regular oven but when it is the only option it will suffice.
One of the preferred ways to upgrade Windows 10 is by creating a bootable USB drive. However, you might change your mind when you encounter an error during the Windows 10 Setup that says, “We can’t find a USB flash drive”. Worry not for this error can be fixed using some suggestions that will be provided in this post.
The funning thing about this error in Windows setup is that the computer says it’s not there when it’s clearly there. To fix this problem, you need to check if the USB device is accessible on your computer or you can also try a different USB device. In addition, you could check if there are any issues with both the USB 3.0 and USB 2.0 ports as it could be the reason why you’re getting the error or fix the bad sectors in the USB drive as well as see if the USB drive is set as the primary drive.
Option 1 – Try to check if the USB is accessible on your PC
The first thing you can do to resolve the problem is to check if you can access your USB device from your computer. All you have to do is open File Explorer and check if the USB device is listed there or not.
Option 2 – Try to connect a different USB device
The next thing you can do to fix the error is to try connecting a different USB device, specifically the one that has more significant storage space. You also have to make sure that it’s working on a different PC.
Option 3 – Fix any issues with the USB 3.0 and 2.0 ports
Although the USB 3.0 ports are compatible with the USB 2.0 ports, it does not necessarily mean that there wouldn’t be any problem when you use them which is why it’s best to fix any issues in them or better yet, use a compatible drive.
Option 4 – Try to fix the bad sectors in the USB drive via CHKDSK
When it comes to some issues concerning the hard drive or removable devices, there is a utility in Windows that might help which is called “chkdsk”. To use it, follow the steps below.
Tap the Win + S keys to open the Search box.
Then type “command prompt” in the field and from the search results that appear, right-click on Command Prompt and select “Run as administrator”.
After opening an elevated command prompt, copy and paste the following command and hit Enter:
Note: In the command given above, “[/F]” will try to fix the system errors while “[/R]” will be the one to fix the bad sectors.
Now if you are prompted to run CHKDSK after your reboot your PC, just tap Y and reboot your PC.
If CHKDSK is not able to find any errors, tap the Win + E keys and navigate the access window. From there, right-click on the concerned drive and click on Properties.
After opening Properties, click on the tab Tools and then click on the “Check” button under the Error-checking section.
Wait until the process is completed and then restart your computer.
Option 5 – Try checking if the USB is set as the primary drive
You might also want to check if the USB drive is set as the primary drive because if it is, then it won’t appear on the list. It could also be that the USB drive has a primary disk in it. To undo it, you need to use the DISKPART utility.
In the Start Search, type “command prompt” and right-click on Command Prompt from the search results, and then select the “Run as administrator” option.
Next, execute the “diskpart” command to initiate the DISKPART utility.
After that, type the “list disk” command and tap Enter to display the list of disks on the computer. You have to take note of the drive number or letter of the concerned USB drive.
Once done, type the “select disk <X>” command where X is the drive letter or number and tap Enter.
Then execute the “list partition” command to see the list of all the partitions in your computer. It should be listed as 0, 1, or 2. 0 is the primary partition.
Now type the “select partition 0” command and tap Enter and then type “delete partition” to delete the selected partition.
You can do the same to the other partitions as well and when you’re done, execute the format command to turn the USB drive into a standard one.


 When it comes to computer peripherals first thing that comes to people's minds is probably Mouse and Keyboard. Also when discussing peripherals brands, Razer is not a stranger and over the years it has built its name and cult following.
Razer’s mechanical keyboards have been always in the upper field of quality and trust from users and Huntsman is no different.
When it comes to computer peripherals first thing that comes to people's minds is probably Mouse and Keyboard. Also when discussing peripherals brands, Razer is not a stranger and over the years it has built its name and cult following.
Razer’s mechanical keyboards have been always in the upper field of quality and trust from users and Huntsman is no different.


