
Error Code 0x800705b4 - What is it?
Error Code 0x800705b4 is an error that will appear when the computer is not stable, and very critical system files will fail to respond or they will start going missing. This will happen when the computer is not being maintained properly. The problem should be solved immediately to avoid any further damage or loss of data. This error code may be regarded as one of the most severe computer problems that can present itself.
Common symptoms include:
- There will be a failure to install updates and a display of the error message.
- The Error Code 0x800705b4 will display itself.
- After a system update, the computer will not be able to install new drivers.
Solution
 Error Causes
Windows 10 update error 0x800705b4 can be caused when the user wants to update their windows system when important dll registries or files are missing or are corrupt. This will also happen when the user is trying to install or uninstall programs in a way that is wrong, or it may be infected with a Trojan virus. Additionally, this error code will be displayed when a PC's drivers are either outdated or installed the wrong way. There could be a registry error, a failure to update by the operating system, or even a device failure to update automatically.
Further Information and Manual Repair
There are several ways to resolve the appearance of error code 0x800705b4 on Windows devices. If you are not familiar with fixing error codes on a computer or are having trouble fixing this one, consider contacting a Windows technician to help with fixing the error. The computer must be run on administrator mode no matter which steps you are taking or which methods you are using. Depending on which version of Windows you are using, the steps for each method may differ slightly, but the basic process will remain the same.
Method One: Fixing it with updates
Start the computer in safe mode to begin troubleshooting for error code 0x800705b4. When the computer is starting up, press F8—this will enter the computer into safe mode.
You will now need to manually update your computer's outdated drivers. To do this, click on Start. Then, type in Device Manager into the search box to see if there are any outdated or corrupt issues with the drivers.
Method Two: Run an SFC scan
This will allow users to find files in Windows that are corrupt, damaged, or lost.
- Start the Command Prompt. To do this, click Start and then type in cmd inside of the search box to see the icon. Right-click and choose to Run as administrator. If asked, enter the password for the administrator.
- When viewing the command prompt, type in “sfc/scannnow” and then press enter. This will be scanning all of the protected system files and will fix the corrupt files. Do not close the command prompt before it is done.
Method Three: System Restore
This is the most efficient way to fix any problem or system status. System backup is vital when performing this.
Click on the Start button, and then type in “system restore” inside of the search box. Right click on System Restore, and then choose Run as Administrator. This could also be found in the Control Panel. Now you will choose the time point in which to restore the system. You will be able to choose the recommended or specific restore based on the situation. Now you can review the restore point and then click Finish.
Method Four: For Windows 10
- You may need to update the Windows Defender in the security center. To locate this, click Start, Settings, Update and Security, Windows Defender.
- Go to the Windows Updates and click on Advanced Options. Click on the option that will get updates for more Microsoft products.
- Restart the computer, and then check for updates again. This update process will be able to be done without a problem. When a message comes up that says “Your device is up to date” you will need to click Advanced Options once again and check for update options.
- Check for updates one more time and now the proper updates should be able to be downloaded and installed properly.
Method Five: Use An Automated Tool
If you wish to always have at your disposal a utility tool to fix these Windows 10 and other related issues when they do arise, download and install a powerful automated tool.

 Today most people have Facebook accounts where they keep in touch with friends and family. But large Facebook network of users is also very interesting to another party as well, hackers.
There are many ways hackers can steal your data via direct hacks, trickery, and social engineering in order to get your credentials, emails, and many other things using them to wreak further havoc.
Once a hacker has needed information it is very difficult to minimize impact and all of your information could be compromised from a list of friends to credit card numbers. Keep on reading to learn how can you protect yourself against these attacks and learn about common practices that hackers use in order to steal your data.
Today most people have Facebook accounts where they keep in touch with friends and family. But large Facebook network of users is also very interesting to another party as well, hackers.
There are many ways hackers can steal your data via direct hacks, trickery, and social engineering in order to get your credentials, emails, and many other things using them to wreak further havoc.
Once a hacker has needed information it is very difficult to minimize impact and all of your information could be compromised from a list of friends to credit card numbers. Keep on reading to learn how can you protect yourself against these attacks and learn about common practices that hackers use in order to steal your data.
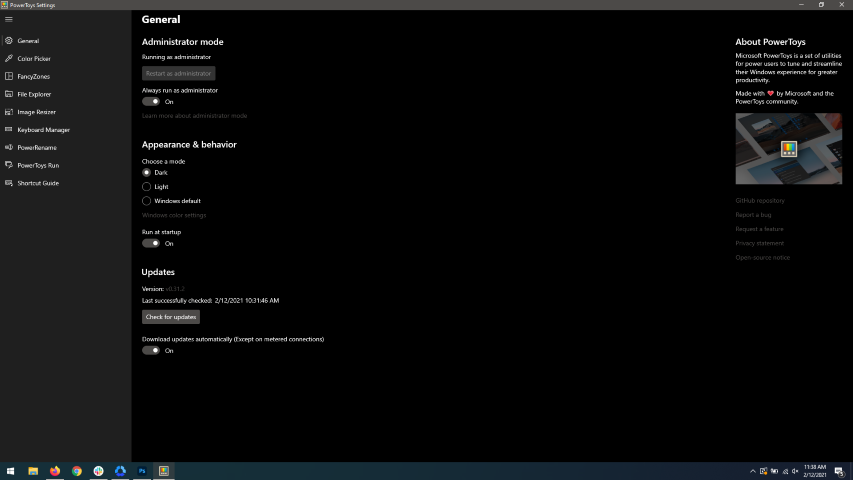 When opened you will be greeted with general settings window. These are settings for power toys themselves, Here you can check for updates, change the looks of power toys, run it on system startup and run them as administrator. Set them up so they best suit your needs.
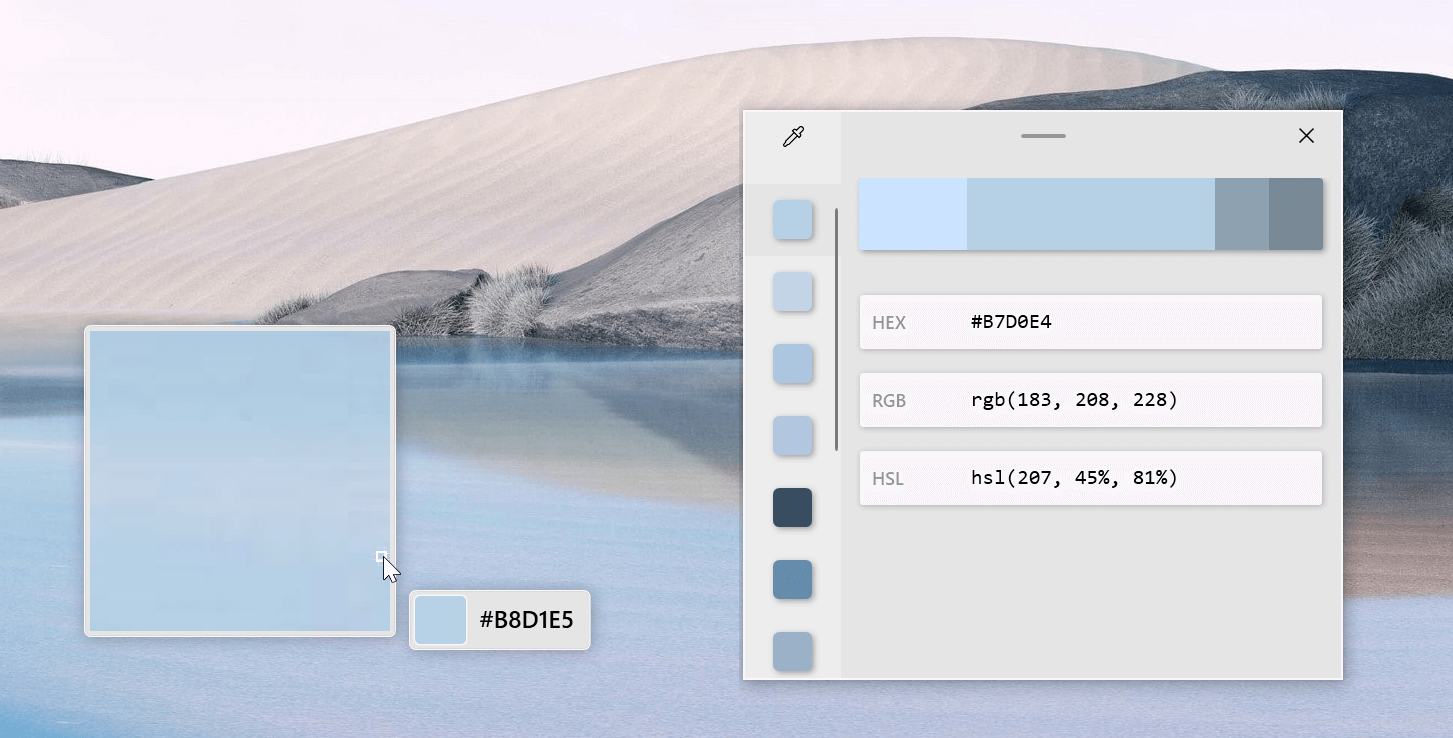 The color picker will let you as the name suggests pick colors, it will sample colors from running applications and windows, snap their values, and place them in the clipboard. A useful application if you are working as a graphic designer, want to create some cool word document, or just want to compare the difference between colors.
After the Color Picker is activated, hover your mouse cursor over the color you would like to copy and left-click the mouse button to select a color. If you want to see the area around your cursor in more detail, scroll up to zoom in. The copied color will be stored in your clipboard in the format that is configured in the settings (HEX by default). The editor lets you see the history of picked colors (up to 20) and copy their representation in any predefined string format. You can configure what color formats are visible in the editor, along with the order that they appear. This configuration can be found in PowerToys settings. The editor also allows you to fine-tune any picked color or get a new similar color. Editor previews different shades of currently selected color - 2 lighter and 2 darker ones. Clicking on any of those alternative color shades will add the selection to the history of picked colors (appears on the top of the colors history list). Color in the middle represents your currently selected color from the history of the colors. By clicking on it, the fine-tuning configuration control will appear, which will let you change the HUE or RGB values of the current color. Pressing OK will add newly configured color into the history of the colors.
The color picker will let you as the name suggests pick colors, it will sample colors from running applications and windows, snap their values, and place them in the clipboard. A useful application if you are working as a graphic designer, want to create some cool word document, or just want to compare the difference between colors.
After the Color Picker is activated, hover your mouse cursor over the color you would like to copy and left-click the mouse button to select a color. If you want to see the area around your cursor in more detail, scroll up to zoom in. The copied color will be stored in your clipboard in the format that is configured in the settings (HEX by default). The editor lets you see the history of picked colors (up to 20) and copy their representation in any predefined string format. You can configure what color formats are visible in the editor, along with the order that they appear. This configuration can be found in PowerToys settings. The editor also allows you to fine-tune any picked color or get a new similar color. Editor previews different shades of currently selected color - 2 lighter and 2 darker ones. Clicking on any of those alternative color shades will add the selection to the history of picked colors (appears on the top of the colors history list). Color in the middle represents your currently selected color from the history of the colors. By clicking on it, the fine-tuning configuration control will appear, which will let you change the HUE or RGB values of the current color. Pressing OK will add newly configured color into the history of the colors.
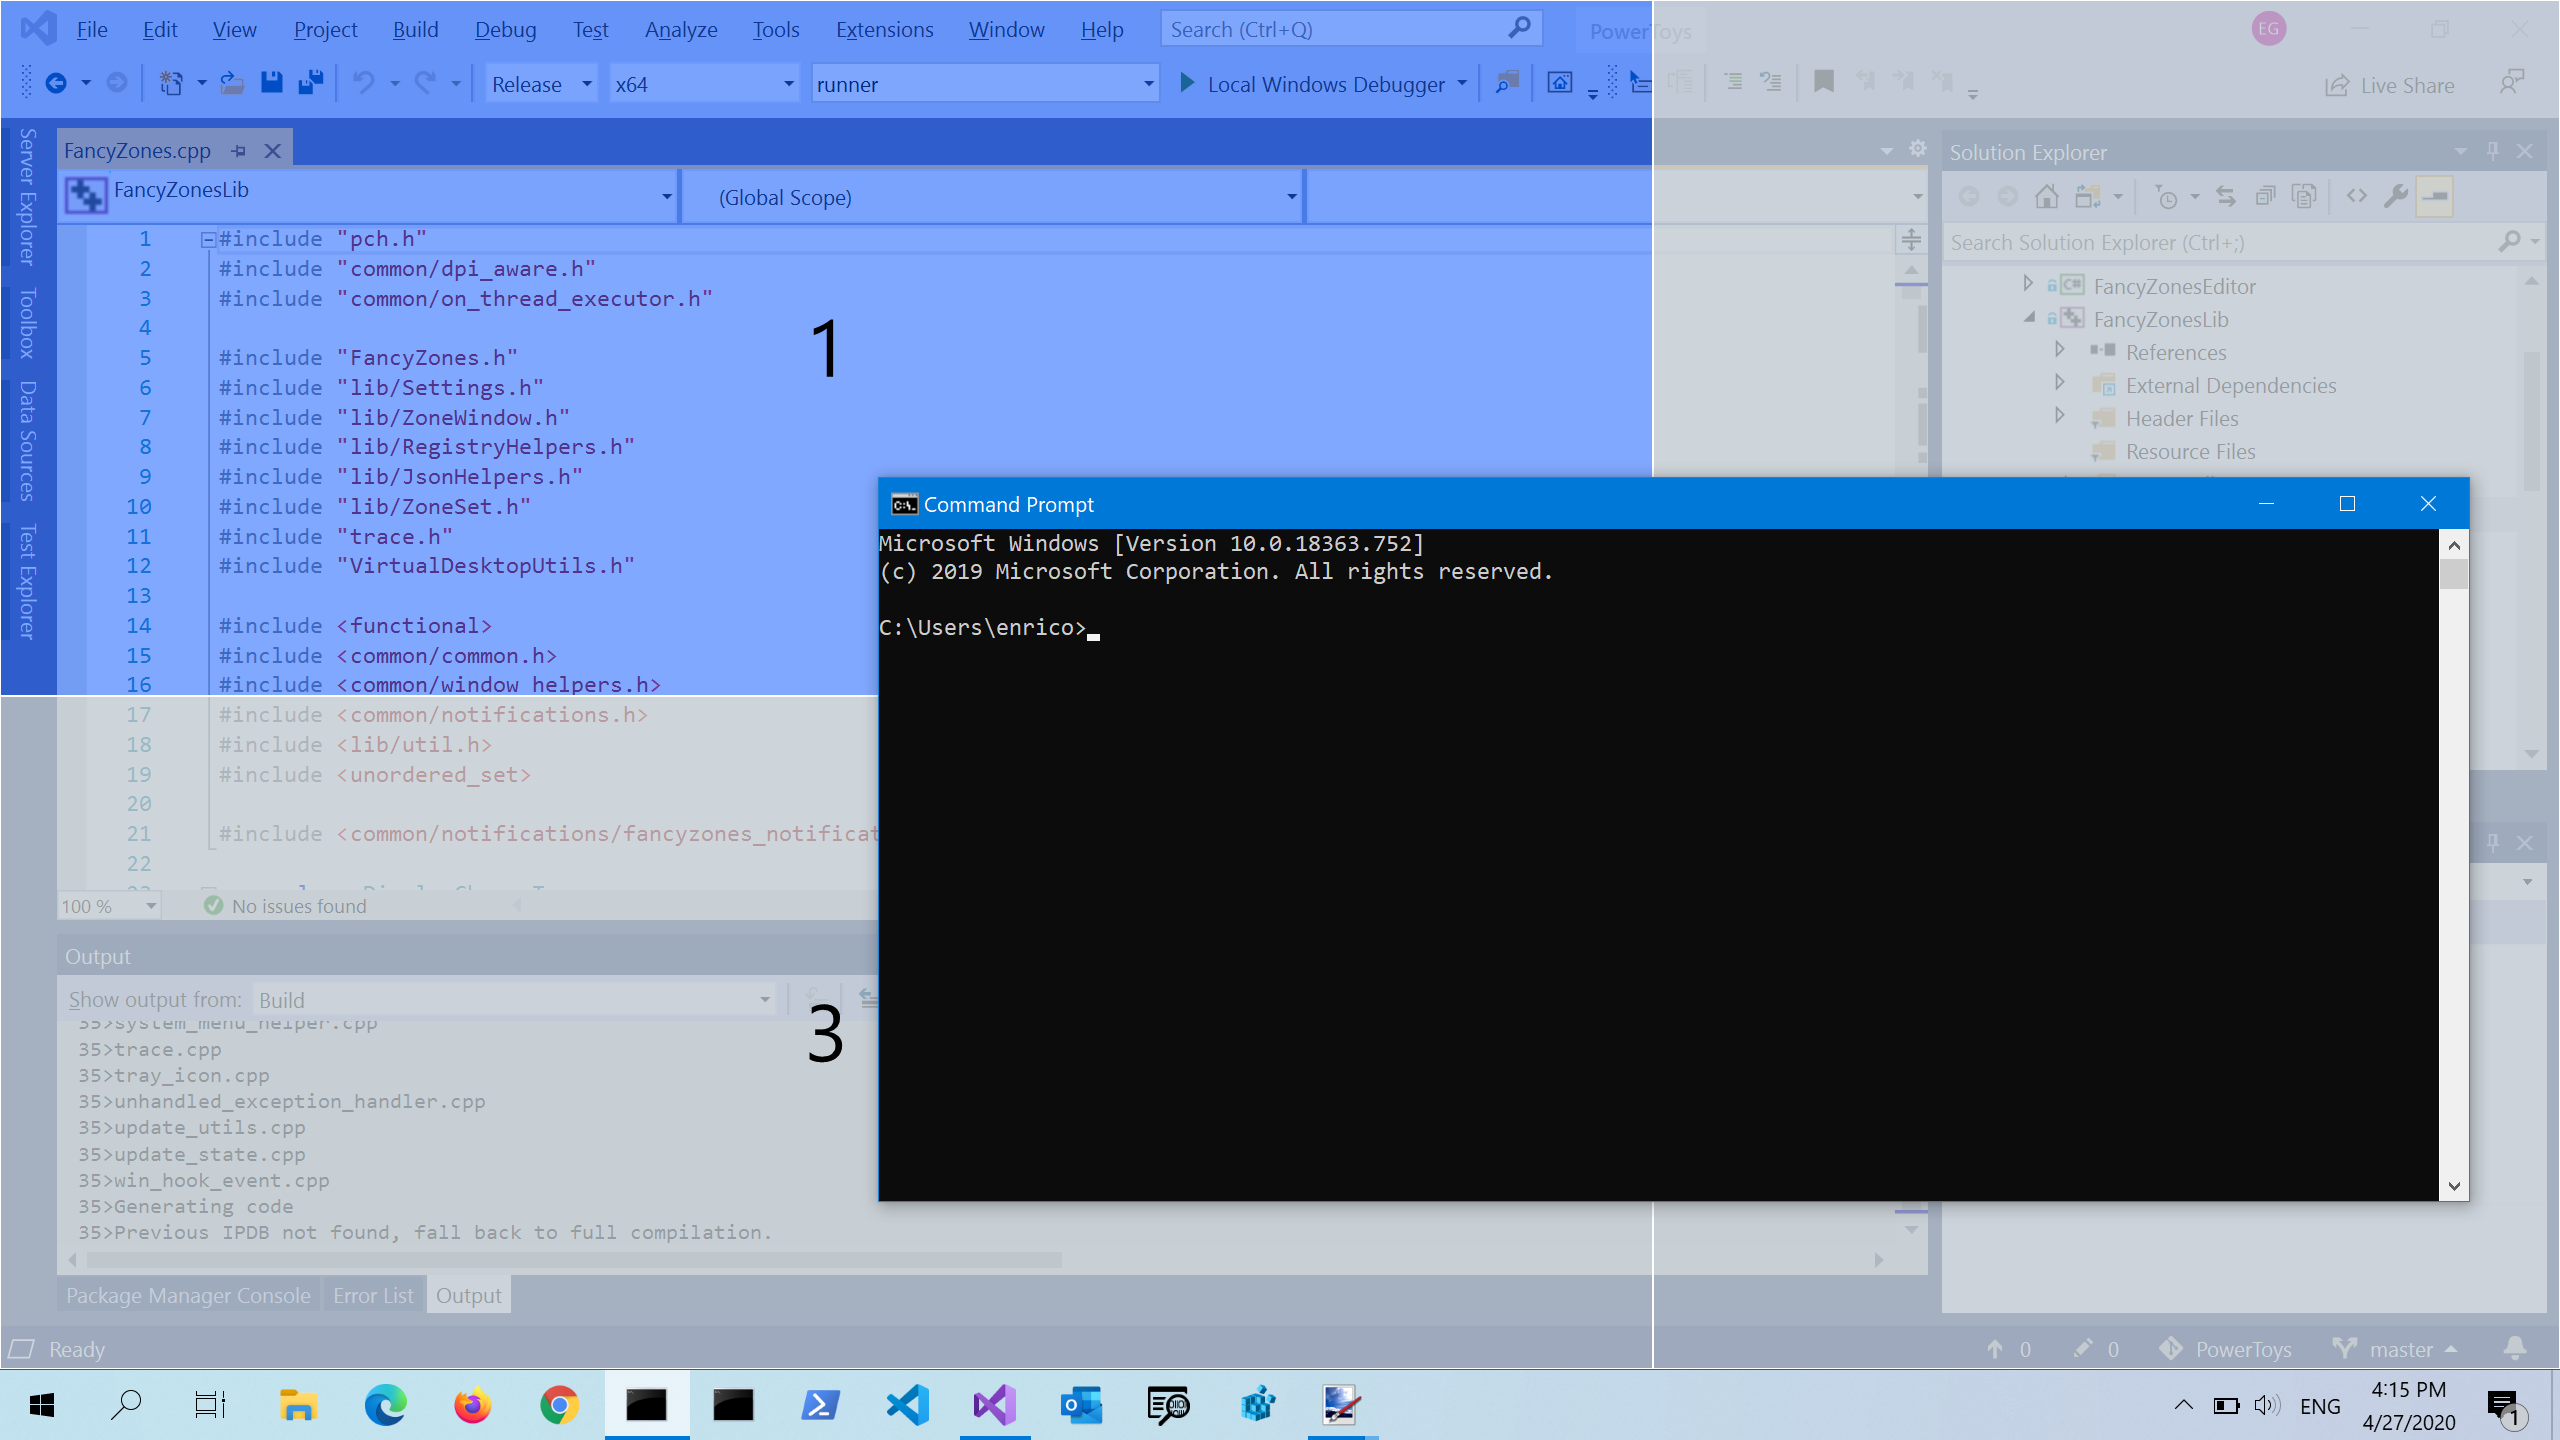 FancyZones is a window manager utility for arranging and snapping windows into efficient layouts to improve the speed of your workflow and restore layouts quickly. FancyZones allows the user to define a set of window locations for a desktop that are drag targets for windows. When the user drags a window into a zone, the window is resized and repositioned to fill that zone. When first launched, the zones editor presents a list of layouts that can be adjusted by how many windows are on the monitor. Choosing a layout shows a preview of that layout on the monitor. The selected layout is applied automatically.
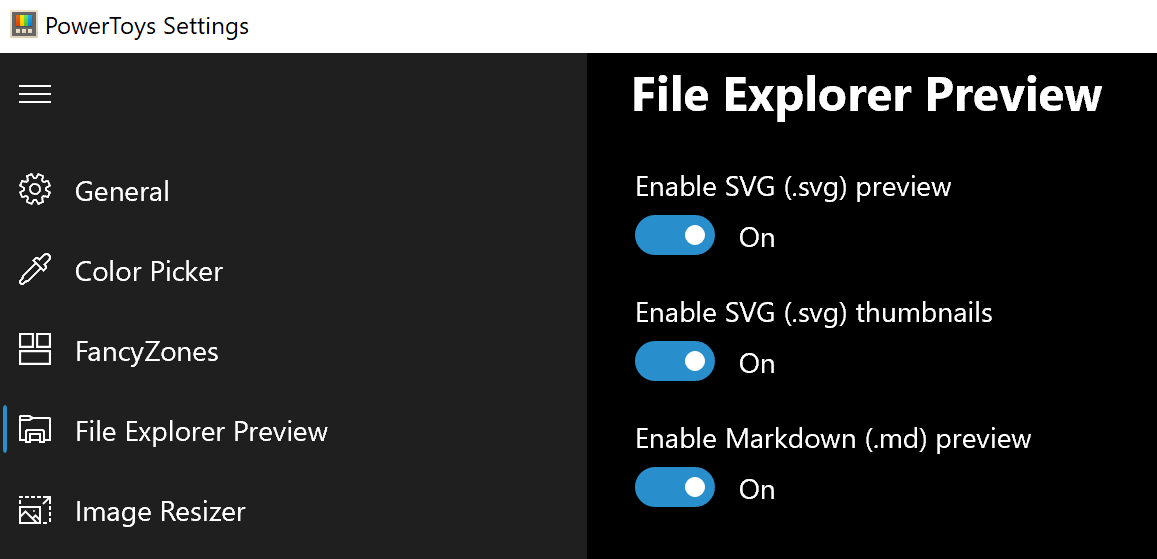 Only 3 options here but maybe some are important to you. This extension lets you enable SVG file preview in File Explorer, enable Markdown preview, and enable SVG thumbnails. Turn on each one you might need.
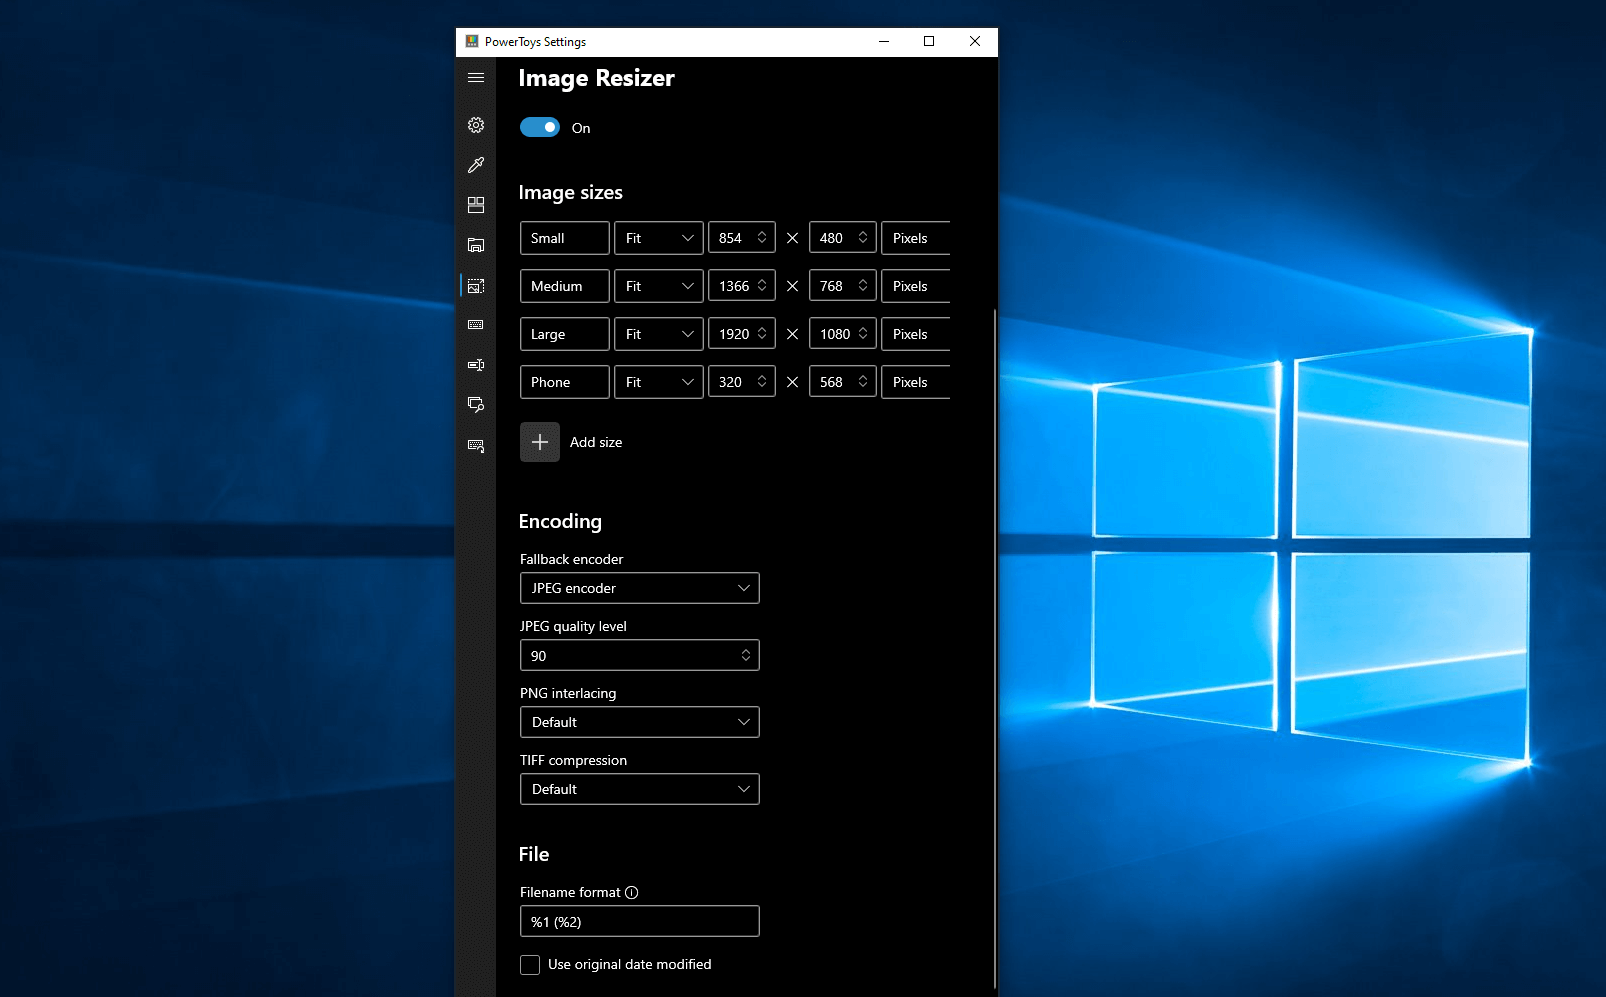 Image Resizer is a Windows shell extension for bulk image-resizing. After installing PowerToys, right-click on one or more selected image files in File Explorer, and then select Resize pictures from the menu. You can specify your own sizes if you want, you can resize when dragging files, you can overwrite files or make new copies of new sizes, and many more options. A very useful tool I am sure plenty of users can use since this eliminates the need for pictures or any other image application for common resizing tasks.
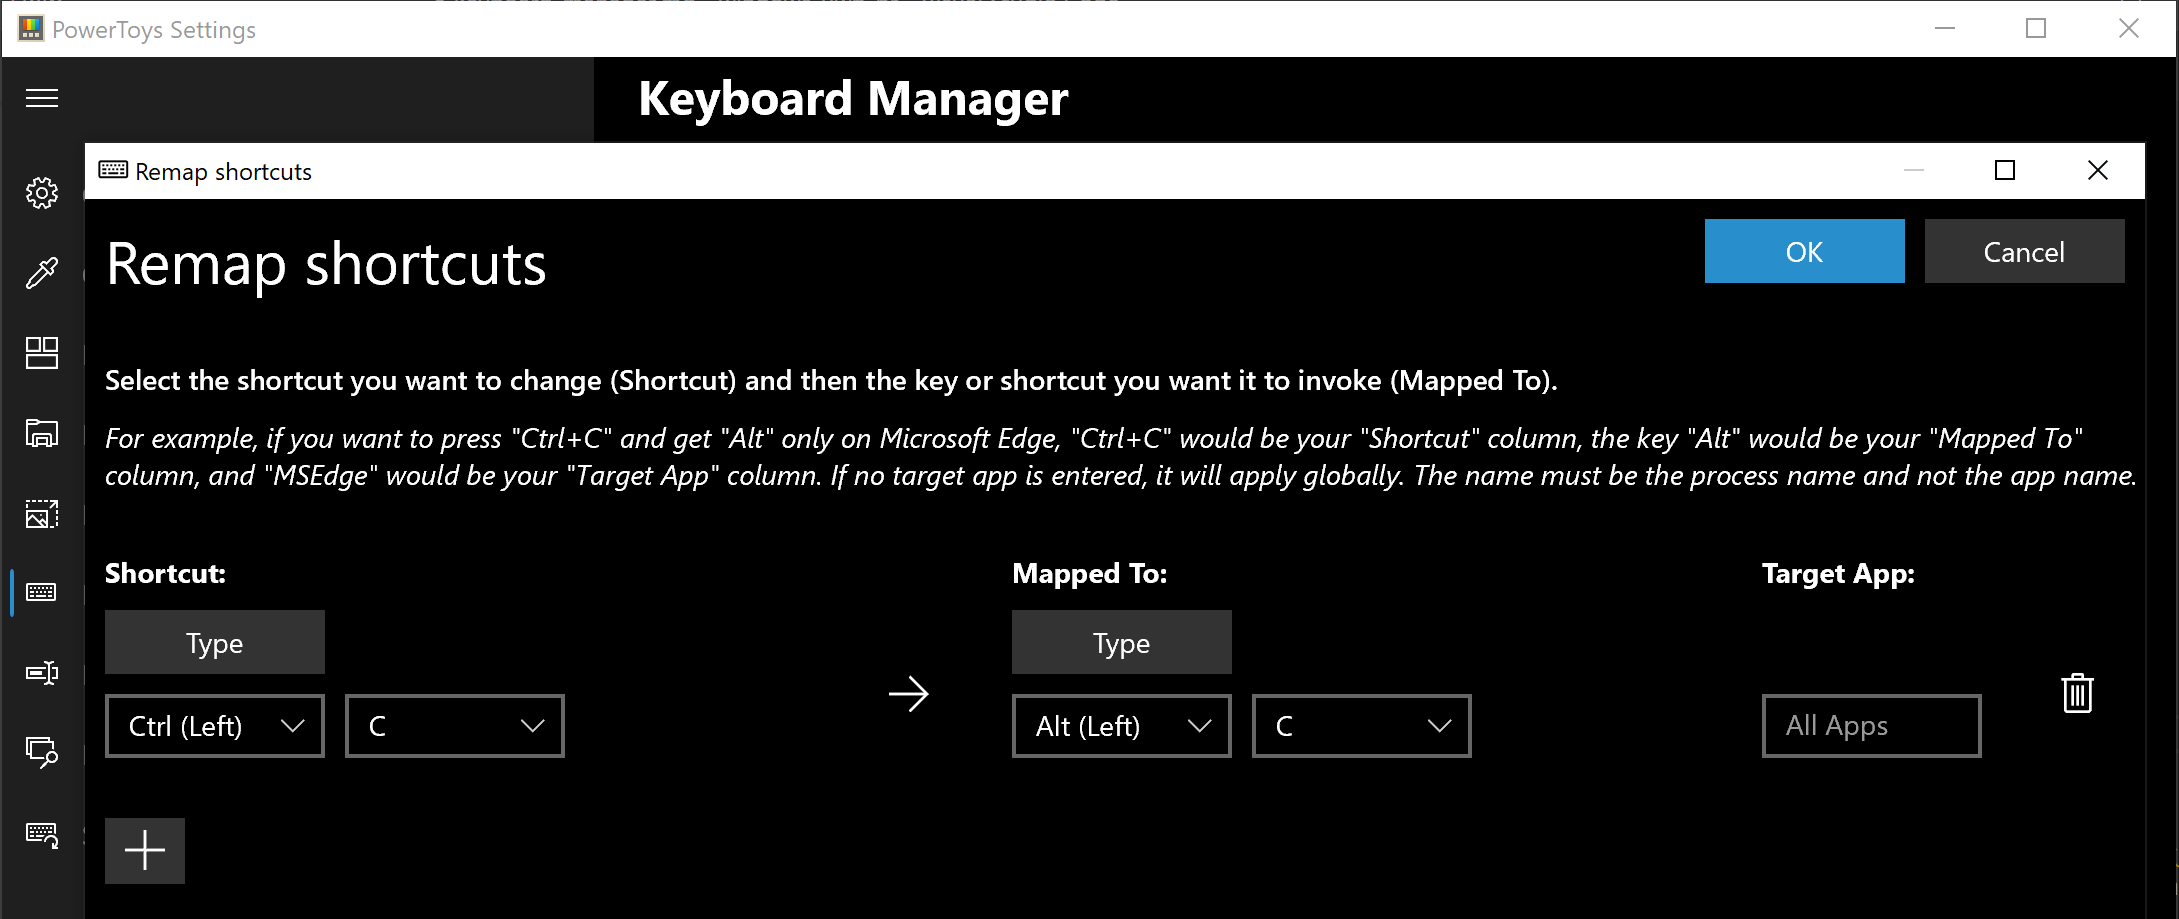 The PowerToys Keyboard Manager enables you to redefine keys on your keyboard. For example, you can exchange the letter A for the letter D on your keyboard. When you select the A key, a D will display. You can also exchange shortcut key combinations. For example, the shortcut key, Ctrl+C, will copy the text in Microsoft Word. With the PowerToys Keyboard Manager utility, you can exchange that shortcut for ⊞ Win+C). Now, ⊞ Win+C) will copy text. If you do not specify a targeted application in PowerToys Keyboard Manager, the shortcut exchange will be applied globally across Windows. PowerToys Keyboard Manager must be enabled (with PowerToys running in the background) for remapped keys and shortcuts to be applied. If PowerToys is not running, key remapping will no longer be applied.
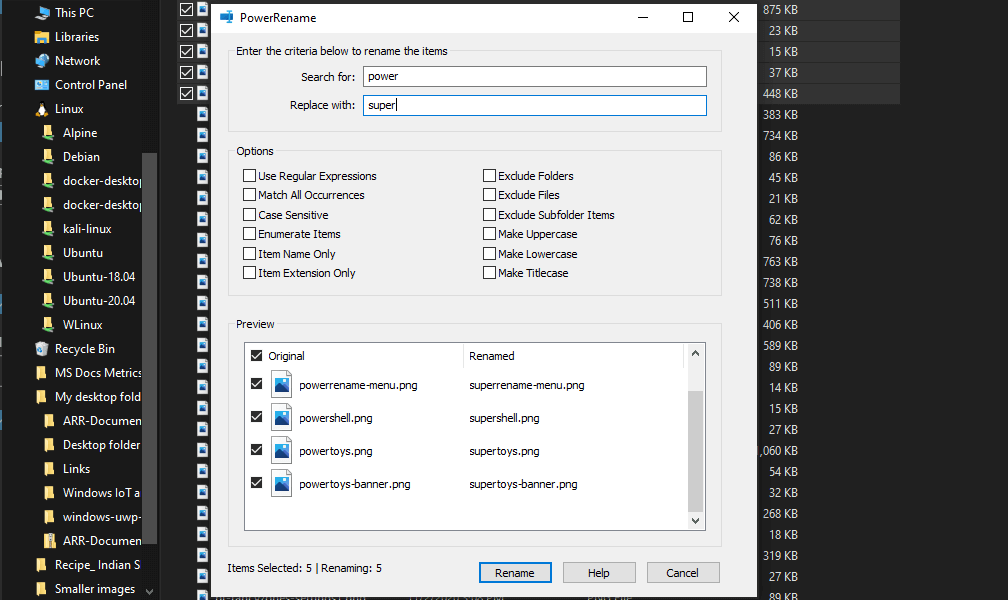 PowerRename is a bulk renaming tool that enables you to:
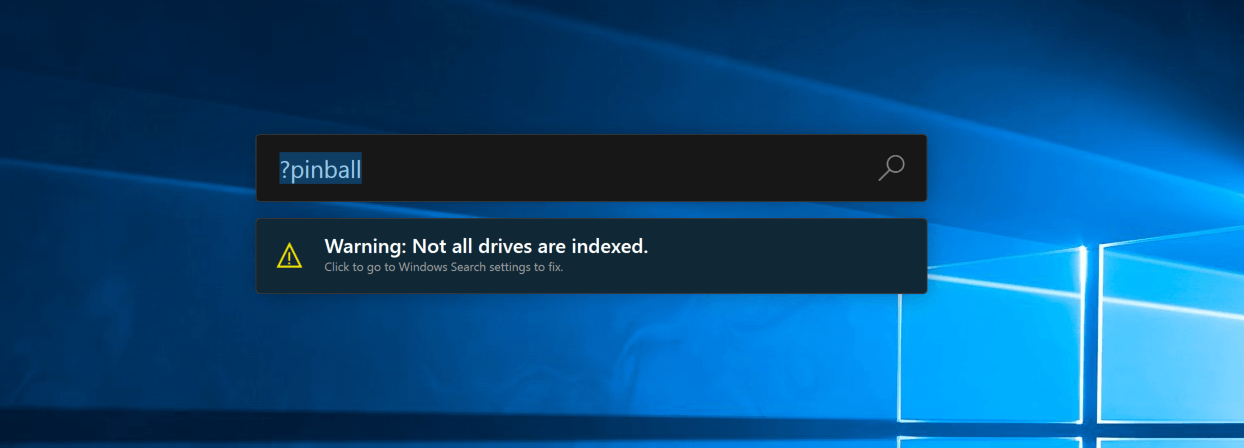 PowerToys Run is a quick launcher for power users that contains some additional features without sacrificing performance.
PowerToys Run features include:
PowerToys Run is a quick launcher for power users that contains some additional features without sacrificing performance.
PowerToys Run features include:
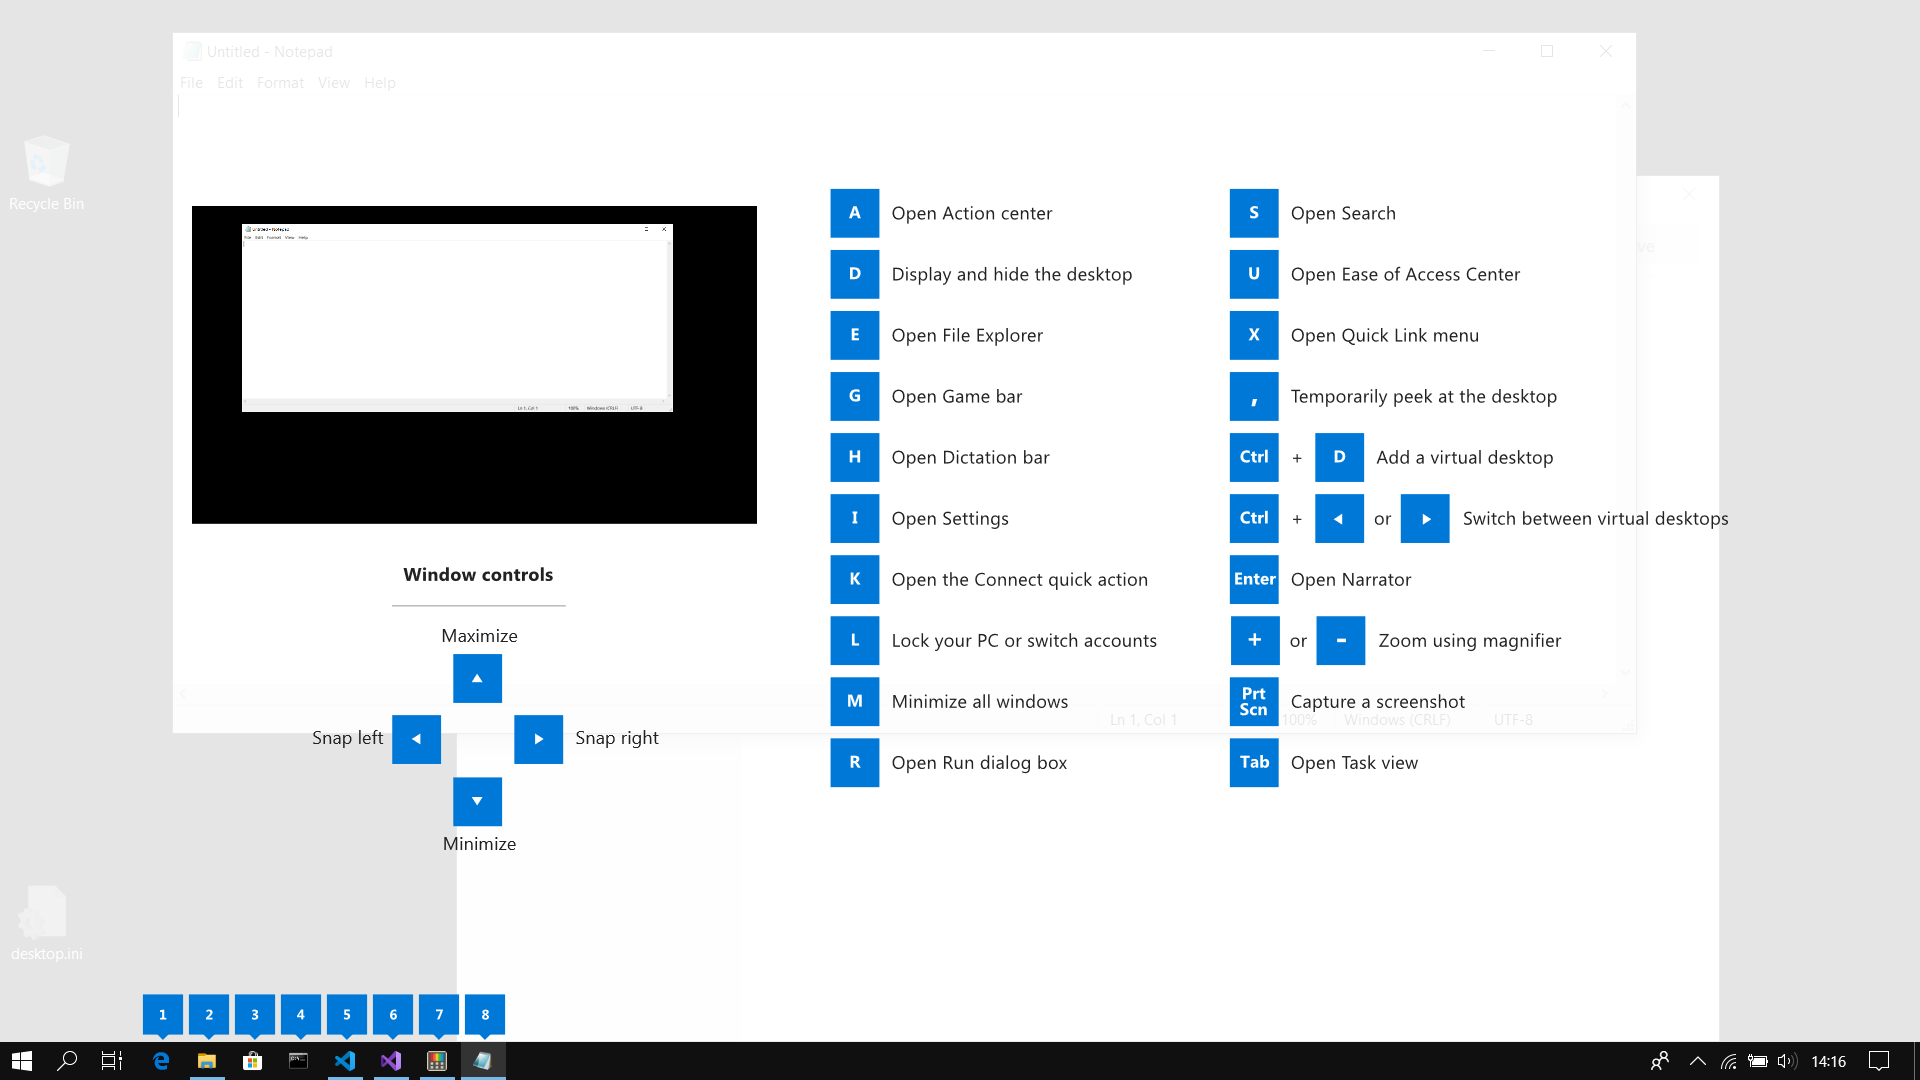 This guide uses PowerToys to display common keyboard shortcuts that use the Windows ⊞ key. Windows key keyboard shortcuts can be used while the guide is being shown and the result of those shortcuts (active window moved, arrow shortcut behavior changes, etc) will be displayed in the guide. Releasing the Windows ⊞ key will make the overlay disappear. Tapping the Windows ⊞ key will display the Windows Start menu.
Hey, you made it till the end, thank you for reading and I hope to see you soon.
This guide uses PowerToys to display common keyboard shortcuts that use the Windows ⊞ key. Windows key keyboard shortcuts can be used while the guide is being shown and the result of those shortcuts (active window moved, arrow shortcut behavior changes, etc) will be displayed in the guide. Releasing the Windows ⊞ key will make the overlay disappear. Tapping the Windows ⊞ key will display the Windows Start menu.
Hey, you made it till the end, thank you for reading and I hope to see you soon.