Getting errors while trying to update your Windows 10 computer is not an uncommon occurrence. Although some of them are easy to fix, there are others that need a lot of time and research in order to resolve. One of these tough Windows Update errors is Error 0x80244007. This kind of Windows Update error halts the process of Windows Update and a simple system restart won’t help much to fix it.
When you encounter this Windows Update error, you will see a description that says, “SOAP client failed because there was a SOAP fault for reasons of WU_E_PT_SOAP_* error codes”. One of the main causes of such an error is that Windows was not able to renew the cookies for Windows Update. To fix this error, here are some suggestions that might be useful.
Option 1 – Clear up temporary or junk files
The error could be caused by some temporary or junk files in your computer and so you need to clear them up to fix the problem. You can achieve that using the Storage Sense feature.
Open Setting > System > Storage from the WinX Menu.
From there, you will see a list of all the local and connected storage devices along with the details on the free space. Make sure that Storage Sense is on.
Next, find a link that says “Free Up Space” and click it to open.
After that, a screen which is the built-in program in Windows 10 will appear and will scan your computer for the following junk files so you can free up disk space:
Windows Upgrade Log Files
The system created Windows Error Reporting Files
Thumbnails
Temporary Internet Files
Previous Windows Installation Files
Delivery Optimisation Files
DirectX Shader Cache
Choose the files you want to get rid of and then click on the remove files option. Note that you’ll have an idea of the total size as you select any of the junk files listed above.
Now go to the “Free Up Space Now” section and click the Clear Now button. This will get rid of all the temporary or junk files in your computer and should hopefully fix the Windows Update error 0x80244007.
Option 2 – Try running the Windows Update troubleshooter
Windows 10 have various troubleshooters that can help you resolve many system issues. So if you’re dealing with Windows Update errors like Error 0x80244007, you can run the Windows Update troubleshooter to resolve it.
To run it, go to Settings and then select Troubleshoot from the options. From there, click on Windows Update and then click the “Run the troubleshooter” button. After that, follow the next on-screen instructions and you should be good to go.
Option 3 – Try to reset the Windows Update components
If by any chance that the second option didn’t work, resetting the Windows Update components could also help you resolve the problem. How? Refer to the following steps:
Open Command Prompt with admin privileges.
After that, type each one of the following commands and hit Enter after you key in one after the other.
net stop wuauserv
net stop cryptsvc
net stop bits
net stop msiserver
Note: The commands you entered will stop the Windows Update components such as Windows Update service, Cryptographic services, BITS and MSI Installer.
After disabling WU components, you need to rename both the SoftwareDistribution and Catroot2 folders. To do that, type each one of the following commands below and don’t forget to hit Enter after you type one command after the other.
Next, restart the services you’ve stopped by entering another series of commands. Don’t forget to hit Enter after you key in one command after the other.
As you know, the functioning of the Windows Sandbox feature is supported by various components in the background of the Windows operating system. And the only way for you to enable the Windows Sandbox feature in your computer is through the Turn Windows features on or off utility. This feature will work directly on the basis of Virtualization which is also supported by Hyper-V. However, there are some reports claiming that some computers have the Windows 10 Sandbox item greyed out in the Turn Windows features on or off utility. Thus, in this post, you will be guided on what you can do to resolve such a problem in your Windows 10 computer.
In this kind of problem, you should know that this has something to do with the Second Level Address Translation which is one of the important pillars of how the Windows 10 Sandbox feature functions. Thus, if the Second Level Address Translation or SLAT feature in Windows Sandbox is not supported by the CPU of your computer, there is no way for you to use Windows Sandbox on your computer. On the other hand, if SLAT is supported, then there is definitely something you can do to resolve the greyed-out Sandbox item in Windows 10.
To get started, follow the steps provided below.
Step 1: First, you have to boot into the BIOS of your PC.
Step 2: After that, make sure that the following options are set to their respective configurations:
Hyper-V – Enabled
VM Monitor Mode – Yes
Virtualization – Enabled
Second Level Address Translation (VT-d or RVI) – Enabled
Data Execution Prevention – Enabled
Step 3: Once you’re done, save the configuration and then restart your Windows 10 computer as usual.
Step 4: Once your computer has restarted, you should see the same option in the Turn Windows features on or off utility and it should no longer be greyed out. Then you can now enable the feature and follow the onscreen instructions need to use the feature as best as you can.
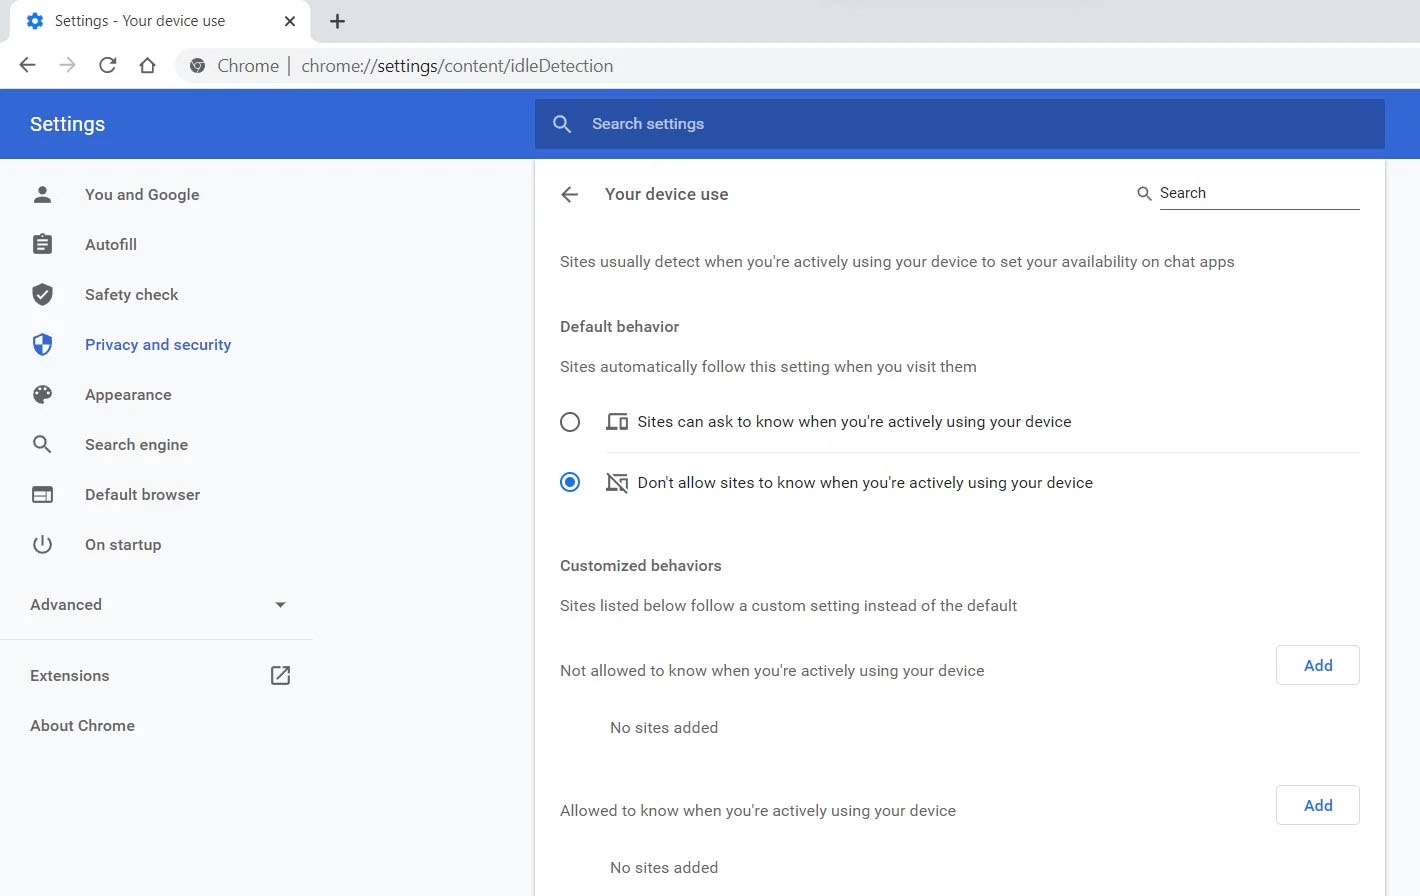
Google Chrome 94 is here and it has introduced a controversial idle detection API. For those people that do not know what idle detection API is, well basically Chrome can be asked by a website to report when a user of the site has a site open and is idle on the device. The issue that people have with this is that this particular feature can be used to report when the user is not using a computer at all.
Good thing is that website or web application will prompt you to allow it to use this feature like when a site/application wants to use your microphone or web camera. Developers are on board with this feature since it can provide them with more telemetric data on how users are interacting with their website/application but there are some that are strongly voicing against this.
Tantek Çelik, Mozilla Standards Lead, commented on GitHub, saying:
As it is currently specified, I consider the Idle Detection API too tempting of an opportunity for surveillance capitalism motivated websites to invade an aspect of the user’s physical privacy, keep long-term records of physical user behaviors, discerning daily rhythms (e.g. lunchtime), and using that for proactive psychological manipulation (e.g. hunger, emotion, choice)…Thus I propose labeling this API harmful and encourage further incubation, perhaps reconsidering simpler, less-invasive alternative approaches to solve the motivating use-cases.
Others who have spoken against this feature are people from the WebKit development team inside Apple. Ryosuke Niwa, an Apple software engineer who works on WebKit said:
That doesn’t seem like a strong enough use case for this API. For starters, there is no guarantee that the user won’t immediately come back to the device. Also, who is such a service supposed to know what another device user might be using at any given point? We’re definitely not going to let a website know all the devices a given user might be using at any given point. That’s a very serious breach of the said user’s privacy. It seems to me that such a suppression/distribution mechanism is best left for the underlying operating systems/web browsers to handle.
Of course, technology itself as always can be used for good or for bad and time will tell if this feature has brought good stuff or it has paved another brick in surveillance and privacy manipulation. As said for now option will prompt for agreement and let's hope that it will be used for good causes from this day into the future.
This post will guide you in fixing yet another annoying Blue Screen of Death error, “BUGCODE_USB_DRIVER”. This particular BSOD error occurs due to some issue with usbhub.sys, winusb.sys, or usbport.sys system driver file. When you encounter this kind of Stop error on your Windows 10 PC, it indicates that an error has occurred in the Universal Serial Bus or USB driver. The USB driver is issued by Microsoft themselves and it comes along with the Windows 10 system which is why it is difficult to download its latest version using a web browser. Thus, you need to take some basic steps to resolve the problem.
Carefully follow the given fixes below to fix the BUGCODE_USB_DRIVER Blue Screen error and before you proceed, you need to create a System Restore Point, this way you have some backup in case something goes out of hand.
Option 1 – Update the USB Controller Drivers
First, click the Start button and type “device manager”.
Then click on the “Device Manager” from the search results to open it.
From there, look for the “Universal Serial Bus controllers” option and then right-click on each one of the USB drivers and select the Update Driver from the menu.
Restart your PC and then click the “Search automatically for updated driver software” option.
You also have the option to update the motherboard and the USB driver from the manufacturer’s official website.
Option 2 – Check for any available Windows Updates
Another you can try is to check if there are any Windows Updates available to make sure that your Windows 10 PC has all the latest updates installed. All you have to do is go to Settings > Update &security. From there, just click on the Check for updates button.
Option 3 – Uninstall conflicting programs and services
There are certain programs like VMWare, Virtual Box, Hyper-V Virtualization services that might be in conflict with the USB port drivers on the parent operating system. Thus, you can try uninstalling the aforementioned programs and other similar ones to see if it fixes the BSOD error.
In the search box, type in “control” and then click on Control Panel (desktop app) among the search results.
After that, select Programs and Features from the list which will give you a list of all the programs installed on your computer.
From there, look for the concerned program and select it and then uninstall it.
Note: If you have downloaded the app from the Windows Store, you can simply right-click on it from the application list and then uninstall it.
If uninstalling the programs mentioned above didn’t help, you might want to try putting your PC in a Clean Boot State to help you find the faulty program.
Log onto your PC as an administrator.
Type in MSConfig in the Start Search to open the System Configuration utility.
From there, go to the General tab and click “Selective startup”.
Clear the “Load Startup items” check box and make sure that the “Load System Services” and “Use Original boot configuration” options are checked.
Next, click the Services tab and select the “Hide All Microsoft Services” check box.
Click Disable all.
Click on Apply/OK and restart your PC. (This will put your PC into a Clean Boot State. And configure Windows to use the usual startup, just simply undo the changes.)
Option 4 – Modify the Power Settings
In the Cortana Search box, type “power options” and then select Power Options from the search results.
After opening Power Options, click on Change plan settings for your selected power plan.
Next, click on Change advanced power settings.
Then look for USB Settings and click on it to expand it.
Now expand the USB selective suspend setting and then disable it.
After that, click on the Apply and then OK buttons to save the changes made.
Option 5 – Check for any hard disk errors
On your desktop, right-click on the “This PC” or computer icon and then select Manage to open the Disk Management. Here you get to check your drive’s health.
Next, click on Disk Management on the left side panel.
From there, check the state of your drives. If it shows that all your partitions are healthy then it means all is good and that the problem may have something to do with some physical issues with your hard drive.
You might also want to run the CHKDSK utility to help you fix any issues with your hard disk. If your hard drive has issues with integrity, the update will really fail as the system will think that it’s not healthy and that’s where the CHKDSK utility comes in. The CHKDSK utility repairs hard drive errors that might be causing the problem.
Open Command Prompt with admin privileges.
After opening Command Prompt, execute the following command and hit Enter:
chkdsk /f /r
Wait for the process to be completed and then restart your computer.
Sqlite3.dll error is a typical example of DLL errors. This error message occurs when the system fails to access Sqlite3.dLL (Dynamic Link Library) files shared by certain programs to run on the PC. The error is displayed in the following format:
"Cannot find the file sqlite3.dll (or one of its components)"
Followed by:
"Error starting program.. A required .DLL file sqlite3.dll was not found."
Solution
Error Causes
The sqlite3.dll error message may pop up on your computer screen due to the following reasons:
Missing sqlite3.dll files
DLL files affected due to viruses and malware on your system
Registry overloaded with invalid entries
Disk fragmentation
Whether the cause for the sqlite3.dll error code on your PC is malware invasion or registry issues, it is recommended to resolve it immediately before the damage sets in.
Such errors can expose your PC to serious threats like privacy errors, data breaches, identity thefts, cybercrime, system failure, crashes, and valuable data loss.
Further Information and Manual Repair
When it comes to fixing sqlite3.dll error code, you don’t always need to hire a professional and spend hundreds of dollars on the repair. Here are some simple and do it yourself solutions that you can try and resolve the error on your system for free.
1. Check inside recycle bin and restore the deleted file
If this error popped on your computer screen after installing a certain program, then you need to check your recycle bin.
This is because DLL files are shared by multiple programs, it might be possible that the program you just deleted also used the sqlite3.dll file to run on your system. And so when you uninstalled the program, the sqlite3.dll file also got removed.
To resolve this, check your recycle bin for the file. If you find it, restore it. Once the files is restored, try running the application that was generating the sqlite3.dll error message. If the error still persists, then this means the cause of the sqlite3.dll error is deeper. It could be due to malware or the registry.
2. Remove Malware
To remove malware, run an antivirus. This will help scan for such malicious software on your system affecting DLL files and remove them. However, the drawback is that it may slow down the speed of your PC significantly. And when running it, you may have to stop all other activities on your system.
3. Repair and Restore the Registry
If the cause of the sqlite3.dll error is the registry corrupted with invalid entries and disk fragmentation, then you need to repair and restore the registry. The best way to do this is to download Restoro.
Restoro is a powerful and highly functional registry cleaner.
It scans your entire PC and detects all registry issues in seconds. It wipes out all the unnecessary and obsolete files including the junk files, invalid registry entries, bad registry keys, temporary internet files, cookies, and browser history.
It clears up hard disk space and frees it of clutter. Furthermore, this registry cleaner also repairs the damaged DLL files and restores the registry.
Restoro is not only a registry cleaner but is also a system optimizer. This means you can also run it to scan and remove malware on your PC and system instability issues. It boosts your PC’s speed and performance.
It runs smoothly on all Windows versions. It is safe, efficient and user-friendly. The layout is neat and the interface is easy to use and intuitive. In just a few clicks you can resolve the sqlite3.dll error and resume using your desired programs.
Click here to download Total System Care on your PC to resolve sqlite3.dll error pop-ups.
Error Code 100?? Whenever a Setup error contains error codes in the message, this indicates what the setup was operating on, let’s say copying files.
The text in the error message will determine whether that it is fatal or not. An error code 100 is a system error that is displayed as ‘ERROR_TOO_MANY_SEMAPHORES’ or as a value 0x64.
This error means that the system ‘cannot create another system semaphore.’ A semaphore is used in controlling access to parallel programming or a multi-user platform through multiple processes.
This error can prevent certain features of your Windows to perform properly, like trying to get a print, copying files, deleting files, or any other routine computer activities.
Solution
Error Causes
Error code 100 can affect a wide range of activities that you normally perform on your PC. This error can occur for a number of reasons, of which some of the common ones include:
When the account used for starting AOS does not match the database in SQL Server
When the AOS licenses have exceeded their limit
When the SQL Server database is incorrectly case sensitive
Though these are the common causes for error code 100, there can be other ways through which this error can occur. To find out the specific cause for error code 100, follow these steps:
Go to Start and select All Programs. Go to Administrative Tools and click Even Viewer
Click Application in Even Viewer
Locate the error message in the right pane by scrolling down
Click on the error message and see if the message applies to the error code.
Further Information and Manual Repair
In order to manually repair this error, you will have to work with your Network Administrator as they will have security privileges to take the steps. However, there are more than one ways to resolve this issue, for instance:
Starting SQL Server Service
A likely cause of an error code 100 can be that your SQL Server service is not started. To activate it, follow these steps:
Got to Start and Click on All Programs, go to Administrative Tools and click on Services
Find SQL/MSSQLServer service
Right Click on it and click Start to activate the service
Network Resolve
If you are connected to a network, then you can work with your network administrator to fix error code 100. Follow these steps to resolve this error:
Got to Start and then Run. Type dcomcnfg and press Enter
Locate Default Security and click it
Find Default Access Permissions and click Edit Default
You should locate System and Interactive, listed in the Allow Access. If they’re not listing, you can add them by clicking Add
Find the local computer in the list and click on Allow Access
To understand Logon.scr application error, it is first important to understand the function of logon.scr. Logon.scr is an important file that is located in the Windows\System32 folder. It guarantees Windows systems stability.
Logon.scr application error occurs when logon.scr file gets corrupt. It is a common system error that can happen in most Windows platforms. It usually pops up during system start-ups and when trying to launch certain programs.
Some of the common systems of this error code include: system halt, freeze, no application icons are visible on the desktop, random blue screen of death and system performance decreases dramatically.
Solution
Error Causes
Two of the most common causes of logon.scr application error is:
Corrupted and damaged logon.scr file
Viral infection
It is advisable to fix this error code immediately because it leads to serious damages. It is fatal and can result in a system crash; therefore resolve it right away.
Further Information and Manual Repair
To resolve this issue on your computer you don’t have to spend hundreds of dollars to hire a professional for the job. The good news is that it can be repaired easily and does not require any technical expertise.
Here are some of the most effective and easy DIY methods to resolve the error on your screens.
Method 1 - Replace the Damaged and the Corrupted Logon.scr File
Whether the file gets corrupted or is accidentally deleted, the best way to fix the issue is to download the Logon.scr file again from a reliable website and install in the following location C:\Windows\System32.
Alternatively you can also get the file copy form another proper functioning computer by using flash drive if you don’t have an internet connection to download the logon.scr file online.
Method 2 - Restore Points by Applying System Restore of Windows
Another way to resolve this is to restore points to bring back your system to the previous state before the error occurred. To do this, simply click the start button and type ‘System Restore’.
Now click System Restore in the result and click next. Select the restore point in the list and click the next button to proceed. To activate changes reboot your PC.
Method 3 - Scan and Remove Viruses
If Logon.scr application error still persists, then it could be due to viruses. To resolve, install a powerful anti-virus. Scan your entire PC and remove viruses.
Method 4 - Repair the Registry
Corrupt and damaged Logon.scr file also triggers issues with the registry. DLL files and other important files like Logon.scr application files may get damage due to too many bad and invalid registry entries.
Registry stores all the activities performed on the PC including unnecessary files like junk files and cookies. If these are not removed timely, these files accumulate and corrupt important files. Therefore, to fix the error it is advisable to clean and repair the registry.
The best way to go about is to download Restoro. This is a user-friendly and multi-functional PC Fixer deployed with a registry cleaner. It scans for all registry errors and removes all the invalid entries. It cleans the registry and repairs the damaged files thereby resolving the issue in seconds.
Click here to download Restoro and resolve the Logon.scr application error now!
If you are trying to update your Windows 10 computer but are not able to do so since your computer is running low on storage then this obviously indicates that there is not enough disk space available on your drive where Windows 10 has been installed. As you know, when Windows 10 downloads the update packages, it extracts them in a separate folder which means that there should be enough space on that particular folder for the update to begin with. Windows do not really check systems for any adequate space requirements before it even initializes the update or upgrades and you only get to know about it right when the update process starts.
On Windows 10 thin clients or the ones with embedded systems that have limited storage space, when Windows Update runs, the update initialization may fail because as pointed out, Windows does not check systems for adequate space requirements so you may have to do the work for them by making sure that your disk has enough space available. Here are some suggestions you can follow to resolve Windows 10 update issues on computers with low storage space.
Option 1 – Delete the files from the Download folder
Since you are going to delete everything manually, you need to create a backup for all your important files which you may have placed in the Download folder. After you create backup copies of important files, delete the files from this folder or you could simply tap the Shift + Del keys to remove the files permanently after you selected them all.
Option 2 – Change the Windows Update Folder location
You might have to change the Windows Update folder location where Windows download all the files need to update the operating system if you cannot really create some space on your primary driver. So all you have to do is set the drive with enough space available for the update to be completed.
Option 3 – Uninstall apps and programs you no longer use
In some cases, apps and programs take up a lot of space on your drive. So if there are programs or apps that you no longer use, you can uninstall them to save storage space. To do so, follow these steps:
In the search box, type in “control” and then click on Control Panel (desktop app) among the search results.
After that, select Programs and Features from the list which will give you a list of all the programs installed on your computer.
From there, look for the apps and programs that you no longer use and right-click on each one of them and click on Uninstall.
Option 4 – Move files to another drive
This is another thing you can try. You can move files, especially the ones with large sizes, to another drive to make up space on your drive. After that, install the updates once again.
Option 5 – Reduce on-drive files from Cloud services
If you are using tons of cloud backup services such as OneDrive and Dropbox, you might want to consider reducing the number of files you have on those cloud backup services. You can do what you’ve done on option number three and have those files moved to another drive to free up storage space.
Option 6 – Empty the contents in Recycle Bin
As you know, the files that are deleted from your computer goes to the Recycle Bin first. So if you have not emptied Recycle Bin for a long time now, the files you delete are still actually taking up space on your drive. Thus, you need to empty the contents in the Recycle Bin to save storage space.
Option 7 – Clean up temporary files
You can use the Windows 10 Storage Sense feature which can clean all the temporary files from your computer. To use Storage Sense, follow the steps below.
Open Setting > System > Storage from the WinX Menu.
From there, you will see a list of all the local and connected storage devices along with the details on the free space.
Now make sure that the Storage Sense feature is turned On then go find a link that says “Free Up Space” and click it to open.
After that, a screen which is the built-in program in Windows 10 will appear and will scan your computer for the following junk files so you can free up disk space:
Windows Upgrade Log Files
System created Windows Error Reporting Files
Thumbnails
Temporary Internet Files
Previous Windows Installation Files
Delivery Optimisation Files
DirectX Shader Cache
Choose the files you want to get rid of and then click on the remove files option. Note that you’ll have an idea of the total size as you select any of the junk files listed above.
There are times when you may find it hard to kill a particular process in the Windows Task Manager and every time you try to do so, you will only get an error message saying, “Unable to terminate the process, The operation could not be completed, Access is denied”. If you are one of the users who is constantly getting this error, read on as this post will provide you with a couple of options you can try to resolve the problem.
Refer to the given instructions below if you are unable to terminate a process in the Task Manager but before you proceed you need to restart your PC and then try killing the process again, if you’re still not able to do it, you need to follow the options laid out below.
Option 1 – Try using Taskkill
Open the Command Prompt as admin from the WinX Menu.
After opening Command Prompt, type in the following command and tap Enter to execute it:
taskkill /IM "processname" /T /Fprocessname – it is the name of the process which you can see on the Details tab of the Windows Task Manager.
/IM – it is the one that specifies the image name of the process, which follows, that is to be terminated.
/T – it is the one that kills not just the main process but also the child process.
/F – it is the one that terminates the process forcefully.
Option 2 – Try using the WMIC
Open Command Prompt as admin from the WinX Menu.
From the Command Prompt window that opens, type in the following command and hit Enter to execute it:
wmic process where name='processname.exe' delete
Note: In the given command, you need to replace “processname.exe” with the name of the particular process you want to terminate which is found in the Details tab of the Windows Task Manager.
Option 3 – Try using PowerShell
The first thing you have to do is open an elevated PowerShell prompt.
From there, type in the following command and hit Enter to execute it:
kill -id pid
Note: In the given command above, “pid” is the Process ID number of the process you want to terminate. And for you to identify this number, you need to open the Details tab of the Windows Task Manager once again and take note of the number against the process you want to get rid of.
Alternatively, you can also run the following command in the PowerShell prompt that you’ve pulled up to get the process ID number:
Get-Process
For example, “5364” is the process ID number for the DimScreen.exe process which is the process you want to terminate. In order for you to kill this process, you need to type in this command:
If you’ve been experiencing a 0x0000007E error code pop message on your PC frequently then you need to get it fixed before it causes serious damage to your system. 0x0000007E is a Stop error or Blue Screen of Death error code.
This error message turns your computer screen blue and locks you out of the program running on your computer. It freezes your system and hampers your ability to perform any type of task on your PC.
Solution
Error Causes
Error 0x0000007E, a blue screen of death error triggers registry issues. It’s not easy to narrow down the cause of 0x0000007E as it results due to many reasons like memory overload, cluttered disk space, viral infection, malware attack, and if the hardware malfunctions.
Ignoring 0x0000007E error pop up is not wise. It is more like a warning of the serious damage that can happen to your PC if it is not fixed timely. It also leads to slowing down the system and increases boot time.
This error message exposes you to dangerous Windows PC threats like registry corruption and damage. Registry corruption can lead to system crash and failure and you may also lose all your important data saved on your PC.
Further Information and Manual Repair
Install Restoro
You don’t always have to spend hundreds of dollars to hire a technician to fix error pop-ups on your PC try using Restoro
Restoro is an advanced and multi-functional PC repair tool with a comprehensive suite of powerful features designed to resolve almost all types of PC errors in seconds including 0x0000007E error code.
It is a next-generation PC repair tool that serves as a system optimizer, anti-virus, and quality registry cleaner. Its built-in intuitive technology enables Restoro to scan, identify and repair the ultimate cause of the error code 0x0000007E in just a few seconds.
Eventually, it spares you from the hassle of finding the root cause of the 0x0000007E error message and then selecting a tool specifically designed to resolve only that particular cause with limited features. This highly functional PC error tool is the answer for all your registry issues.
By running Restoro on your PC, you can fix the 0x0000007E BSOD error code and avoid registry corruption.
Why Restoro?
The smart registry cleaner utility embedded in this tool enables it to scan for registry errors and clear up disk space accumulated by junk files, internet temporary files, invalid entries, and other types of unnecessary files taking up a good chunk of your disk space.
This clutter also slows down your PC performance as it requires more power than it has to run the system because of the excess load on the RAM.
However, by wiping out the clutter with this helper, you can optimize the speed of your PC and see a significant difference in its performance.
Restoro backup feature enables you to create backup files for safety purposes. Furthermore, it has several other built-in value-adding features like privacy error utility and system stability utility for enhanced functionality.
To resolve the error code 0x0000007E in seconds, all you need to do is download and install Restoro on your system and run it to scan for errors. In a few seconds, you will see a scanning report with comprehensive details of the types of PC damages.
To fix the issue right away, create backups and click ‘fix’ to resolve. In just a few clicks you can repair your PC.
Download Restoro Today!
So, you have finished with work, game, movie, music, email, or whatever on your PC, you look at the clock, it is late, you decide to go to sleep or outside, you click on the power button and choose shutdown. Now when a PC is shut down you feel good and go with your business but the next time you power it up you get the same error like the computer never really shut down in the first place. You wonder why and reboot it, just in case and all of the sudden error is gone.
If something similar has happened to you or you had the feeling that after shutting down your computer has not really felt like shutting it down, do not seek professional help, everything is OK with you because when you click on shut down, your computer does not really shut down!
Truth is that Microsoft has changed how to shut down works and how rebooting works in Windows with an update but has not publicly said anything about it so some users may experience this feeling of not shutdown phenomenon and might even think there is something wrong with their PC.
Why this change?
A few years ago shutdown button and option in Windows were really shutting down OS, but things changed when Microsoft wanted to increase boot-up speed. Now when that decision was made shutdown option was changed. So, what was changed? Well in order to increase Windows booting time, the shutdown will now turn off power to PC components and it will look like everything is indeed shutdown but the Windows kernel will actually be saved to a hard drive with all settings and just awaken once the PC is turned back ON. This will result in all errors and other stuff being just still present same as they were once the system was instructed to be turned off.
Rebooting your PC will now clear kernel and file from the hard drive and you will get a clean system startup without any issues tied with the kernel itself.
Workaround
Now that we know why and what change has been made to Windows logical question is can we shut down our PC at all properly? Luckily for us, the answer is yes and we will not need any external application to do it, we can still do it inside Windows itself and it is quite quick and easy.
Bringing back the old shutdown
In order to bring the old shutdown functionality of your PC please follow the instructions but be aware that by doing this your PC will boot a little bit slower since it will have to load the kernel from scratch each time computer is turned ON.
First thing is to go to settings and go to System
Then once you are inside the system, navigate to the power and sleep and click on it to select it. Once you have it selected to all the way to the right and click on additional power settings.
When you click on advanced power settings you should be led to the control panel's power options. Inside this panel click on top left link where it says Choose what the power button does.
Inside options, you will need to untick the box next to Turn on fast startup (recommended), this option has been ticked ON by the Windows update and probably without notifying you. Option means exactly what was described, it will save kernel state on the hard drive for faster boot time but sadly it can cause some issues since it will never be reloaded from 0.
If you are unable to uncheck the box click on the text beside the shield icon that says: Change settings that are currently unavailable (you will have to be logged in as administrator).
Conclusion
Altho turning off fast startup and shutting down the PC completely will for sure extend your bootup time I still believe that it is the right choice since sometimes a lot of clutter and bad things accumulate over time inside the OS and can cause a vast variety of problems in a long run. So stay safe and shut down that PC as it used to be in the past.

 Good thing is that website or web application will prompt you to allow it to use this feature like when a site/application wants to use your microphone or web camera. Developers are on board with this feature since it can provide them with more telemetric data on how users are interacting with their website/application but there are some that are strongly voicing against this.
Tantek Çelik, Mozilla Standards Lead, commented on GitHub, saying:
Good thing is that website or web application will prompt you to allow it to use this feature like when a site/application wants to use your microphone or web camera. Developers are on board with this feature since it can provide them with more telemetric data on how users are interacting with their website/application but there are some that are strongly voicing against this.
Tantek Çelik, Mozilla Standards Lead, commented on GitHub, saying:


