Fix Windows Error Code 0x80070017

If you suddenly encountered a Windows Error Code 0x80070017 during an Update, Installation or System Restore then it’s probably due to some missing or corrupted system files. This kind of error code can occur during an update, installation, or system restore and the only way out of it is to download the file once again and re-run the installation from the top.

Before you start to troubleshoot the problem, you need to create a System Restore Point first. After you create a System Restore point, you can follow the troubleshooting options laid out below to fix the Windows Error Code 0x80070017. You just have to follow the troubleshooting option that applies to your situation and whether you got the error during an update, installation, or during System Restore.

Whether you got the error 0x80070017 while updating Windows 10 or installing it or during a system restore, the first thing you must do is run the System File Checker. As pointed out early on, the Windows Error Code 0x80070017 might be caused by corrupted or missing system files so the first thing you can try is to run the System File Checker scan.

  • Tap Win + R to launch Run.
  • Type in cmd in the field and tap Enter.
  • After opening Command Prompt, type in sfc /scannow and hit Enter.

The command will start a system scan which will take a few whiles before it finishes. Once it’s done, you could get the following results:

  1. Windows Resource Protection did not find any integrity violations.
  2. Windows Resource Protection found corrupt files and successfully repaired them.
  3. Windows Resource Protection found corrupt files but was unable to fix some of them.

If you have encountered Windows Error Code 0x80070017 during an Update, then here are some options you need to try:

Option 1 – Delete the files/contents in the SoftwareDistribution Folder

The Software Distribution folder in the Windows operating system is a folder that can be found in the Windows directory and is used to store files temporarily which might be required to install the Windows Update on your PC. Thus, it is required by the Windows Update and maintained by WUAgent. A lot of users tried deleting the files in this folder to fix the problem and so far it has worked. Like them, you can try clearing the Windows Update cache by simply deleting the contents of the folder named “SoftwareDistribution” since Windows apparently can’t clear and re-download the update contents once they are corrupted. Thus, deleting the contents of this folder will make Windows download the contents again which will fix the problem. To do that, follow the steps below.

  • Open the WinX Menu.
  • From there, open Command Prompt as admin.
  • Then type in the following command – don’t forget to hit Enter right after typing each one of them.

net stop wuauserv

net stop bits

  • After entering these commands, it will stop the Windows Update Service and the Background Intelligent Transfer Service.
  • Next, go to the C:/Windows/SoftwareDistribution folder and get rid of all the folders and files thereby tapping the Ctrl + A keys to select them all and then click on Delete. Note that if the files are in use, you won’t be able to delete them.
  • Once all the contents in the Software Distribution folder are deleted, restart your PC and then go back to Command Prompt and input the following commands again.

net start wuauserv

net start bits

Since the folder has already been flushed, it will be populated afresh the instant your restart your computer and open Windows Update.

Option 2 – Run the Windows Update Troubleshooter

Running the built-in Windows Update troubleshooter could also help you resolve the Windows Update Error Code 0x80070017. To run it, go to Settings and then select Troubleshoot from the options. From there, click on Windows Update and then click the “Run the troubleshooter” button. After that, follow the next on-screen instructions and you should be good to go.

On the other hand, if you got the error code 0x80070017 during a Windows 10 installation, then it’s because of bad media or corruption in ISO. Here are some troubleshooting steps for this kind of situation:

Option a – Try to create Windows 10 ISO media again

In this option, you will have to create a Windows 10 bootable media and use it to install the latest Windows 10 version. Most users reported that this option works and the reason why it does have something to do with the Windows Update client since the Windows Updates downloaded from the regular Windows Update client seem to create issues such as the error 0x80070017. However, issues like this one don’t occur when the very same Windows Updates are downloaded and installed via an ISO file.

Take note that when using a Windows ISO file, you will be asked to choose what you want to do with the previous settings and apps. A lot of users opted for the “Not to keep the old Windows settings” option which has resolved the issue. So if you want to keep the previous settings then you must try to update Windows first while keeping the old settings. However, if it doesn’t work, you have to try installing the latest version of Windows without keeping the previous settings.

  • Click this link and then click the Download Tool Now button.
  • Next, click the “Use the tool to create installation media (USB flash drive, DVD, or ISO file)…” option and follow the next given instructions on the screen.
  • Now select the ISO file option in step 5.
  • After that, you should now have an ISO file.
  • Next, go to the location where you’ve downloaded the ISO file.
  • Then right-click on the Windows 10 ISO file and select the Open with the option and then select File Explorer.
  • Now click on “setup.exe” and follow the next instructions that appear on the screen. When asked, you have to select either Nothing (clean install) or Keep personal files only option. Take note that you must not select the “Keep personal files, apps, and Windows settings since it doesn’t really work.

Option b – Run Microsoft’s online troubleshooter

Running Microsoft’s online troubleshooter might also help you fix the Windows update error 0x80070017. This online troubleshooter is known to help in fixing Windows Update errors, it scans your computer for issues that might be causing the problem and then fixes them automatically.

If you got the error during System Restore then this means that the files that are being copied from the disk are not making it to the hard drive. To resolve it, here’s what you can do:

Option 1 – Run System Restore in Safe Mode

You might want to run System Restore in Safe Mode and see if it works. Just reboot your PC into Safe Mode and then run System Restore.

Option 2 – Reset Repository

  • Boot your PC into Safe Mode.
  • Then open Command Prompt as admin.
  • Next, type the “net stop winmgmt” command and hit Enter to stop the Windows Management Instrumentation Service.
  • After that, go to C:/Windows/System32/wbem. From there, rename the repository folder to “repository-old”.
  • Restart your computer.
  • After your computer has restarted, open Command Prompt as admin again and then type the “net stop winmgmt” command and hit Enter.
  • Next, type the “winmgmt /resetRepository” and hit Enter to reset Repository.
  • Restart PC and check if System Restore now works.

Option 3 – Try resetting Windows 10

To fix the error 0x80070017, you can try resetting Windows 10. Doing so won’t get rid of any file in your system – instead of erasing all your media files and documents, it only resets all the system settings and files. Simply go to Settings > Recovery. From there click the Get started button under the Reset This PC section.

Do You Need Help with Your Device?

Our Team of Experts May Help
Troubleshoot.Tech Experts are There for You!
Replace damaged files
Restore performance
Free disk space
Remove Malware
Protects WEB browser
Remove Viruses
Stop PC freezing
GET HELP
Troubleshoot.Tech experts work with all versions of Microsoft Windows including Windows 11, with Android, Mac, and more.

Share this article:

You might also like

Why You Need Antivirus Software & How to Select the Right One

Anxiety from all these digital threats lurking everywhere? An antivirus program can help put your mind at ease.

What can a virus do to your device?

A virus is malicious software that can affect pretty much any device and does so in a variety of ways. Be it your computer, your phone or your smart lightbulb - as long as there’s access to the internet, malware can get to it.

How exactly does this kind of attack manifest itself? Well, there’s a wide variety of effects ranging from mild to severe. Among other things, they depend on which type of malware attacks your device - a virus, spyware, ransomware, adware or something else.

These are some of the things you can expect to happen:

  • Slow performance
  • System crashes
  • Theft of data and sensitive information
  • Connectivity issues
  • Constant browser redirects
  • Strange messages sent to your contacts 
  • Interference with files

It really can be the stuff of nightmares. So, if you want to sleep peacefully knowing that your devices are completely safe, you should definitely consider getting an antivirus.

P.S. don’t let its name fool you - an antivirus does indeed protect your devices against more than just viruses.

What is antivirus software exactly?

Antivirus software is designed to help you battle and ward off malware. Basically, it scans your device to detect any suspicious activity and offers tools to get rid of the culprit. 

At first, antiviruses were developed to fight against viruses only, but nowadays they cover a lot more ground. Here are some of the biggest benefits of getting yourself a powerful defender.

Advantages of antivirus software

1. It fights those pesky ads

Look, constant ads that pop up everywhere aren’t the absolute worst thing that can happen on your computer. If anything, they are annoying, like when you’re trying to sleep but that one fly in your room just won’t stop buzzing.

Now, there’s a free, well-established solution for that - installing an ad blocker. And we’re about a hundred and ten percent sure you’ve already done that on each and every browser you use.

However, “if I can’t see it, it doesn’t exist” isn’t the most ideal approach for your online safety. Ad blockers can’t block everything and they won’t protect you from potential adware. An antivirus on the other hand offers that layer of protection against malware snuck into pop-ups and spammy websites.

2. It protects you from hackers

Hackers don’t target government institutions only. They’ll target regular people too if they have something to gain.

Antivirus can protect you from hackers
Credit: Clint Patteron (Unsplash)

There are different types of hacking, such as phishing e-mails, transmission of malicious programs, credential reuse, denial of service and more. In any case, they take control of your device and hijack your data.

The good thing is that, as threats evolve, antiviruses evolve too and there are tons of quality programs on the market that can keep you secure for an affordable price.

3. It keeps your files and data safe

When malware enters your device, it can target pretty much any file and get access to any and all data.

Installing an antivirus program will make sure that every single file, new or old, is monitored at all times, warning you against threats immediately. That way, you can make sure to react before your other files become infected and data is lost or stolen.

Another great thing for data protection is that the best antivirus software normally comes with a password manager, so no one can use malware to steal your passwords.

4. It blocks all kinds of malware

As we already stated, malicious attacks can be performed in many ways and malware comes in in different shapes an sizes, such as:

  • Trojan horse
  • Spyware
  • Ransomware
  • Adware
  • Rootkit
  • RAT (remote access Trojan)
  • Keyloggers
  • Worms
  • Botnets
Illustration of a computer worm
Credit: Growtika (Unsplash)

Nowadays, antivirus software is designed to fight against all of these types. That’s why more often than not we hear the term 'antivirus' used interchangeably with 'anti-malware,' like in this article.

5. It keeps your children protected

You can’t keep your eyes on your kid every second of the day and you can’t protect them from everything. But at least you can limit their exposure to the threats they can encounter at every corner of the digital world.

An antivirus program will block harmful or suspicious websites and ads, which is great both for you and your children. To take it a step further, though, many such programs come with special parental controls and offer monitoring as well. It’s a great solution for keeping your kids safe online without sounding like the irritating, overbearing, controlling parent who “just doesn’t get it!”

How to pick one

There are definitely lots of different antivirus programs out there, both free and paid. We recommend you look for a paid option, since free ones are unfortunately a lot more susceptible to being compromised through malicious attacks.

Now, there are a few factors to consider when choosing the right software. If you use your PC for basic things then a basic antivirus will suffice. However, the more complex your use and the more sensitive the data you deal with, the stronger it needs to be.

It’s also crucial that you take into account the features it includes. As we already mentioned, some programs have additional security options. For example, depending on the package you select, Bitdefender provides:

  • Webcam and mic monitoring
  • Parental control
  • Firewall
  • VPN
  • Password management
  • Identity theft protection

Some are included in plans and some are separate products, so make sure to check out all the offers.

And don’t worry if you have multiple PCs or you’re looking for protection for your smartphone or tablet as well; Bitdefender has suitable solutions for your needs. Of course, you can also just pick their classic antivirus software if you’re not in need of advanced protection.

Another important point is how regularly the software is updated and enhanced. The more frequent the updates the better, as bugs can make the program more vulnerable. Other things we advise you consider are user-friendliness, impact on performance, reputation (user reviews especially) and, of course, price.

The bottom line

Fact is: anyone can be a malware victim. Don’t let it be you.

You can’t put a price on peace and security, so don’t be reluctant to pay for yours - especially since a lot of options out there are extremely affordable. Is $159.00 a year really too much to pay for cross-platform protection for up to 10 devices? We don’t think so.

Explore your options and protect your files and data before it’s too late.

Read More
Configure Windows 10 to create Dump Files on Blue Screen of Death
If your Windows PC encounters an error, it will display a Blue Screen of Death or BSOD error which usually comes up for a fraction of second and creates some logs or Dumps Files as what other user prefers to call it and then boots your PC suddenly. This process usually takes place quickly that most users find it hard to get the error code and won’t probably be able to check what really went wrong with their PCs. This is where the dump files come in. They are stored internally in your computer and can only be accessed by an administrator. They are classified into 4 main types and in Windows 10 they are either:
  1. Complete Memory Dump
  2. Kernel Memory Dump
  3. Small Memory Dump (256 KB)
  4. Active Memory Dumps
Dump Files are useful as they could help you in resolving the problem and so you need to configure your Windows 10 PC to create them but first, you need to make a system restore point. This is essential as you are about to modify some system files as well as critical Windows 10 settings. There are two ways you can create Dump files – first is by modifying the settings in the Startup and Recovery and lastly is via the WMIC command line. Refer to the instructions prepared below to be guided on how you can create Dump files after any BSOD error using these options.

Option 1 – via Startup and Recovery

  • Type in “control panel” in the Cortana Search box and then click on Control Panel from the search results to open it.
  • After opening Control Panel, you need to make sure that you view the contents by their Category then click on the header link which is labeled “System and Security” or you could also right-click on the This PC icon and then click on Properties.
  • Next, select the Advanced system settings from the left panel. Once you do, a new and small window will pop up.
  • Under the newly opened window, look for the section called Startup and Recovery and then click on the Settings button.
  • And from the System Failure section, you can choose any option from the drop-down for Write debugging information such as:
    • None – this means that there is no dump file created by Windows
    • Small Memory Dump – this means that Windows will create a Minidump file on BSOD
    • Complete Memory Dump – this means that Windows will create a Complete Memory Dump file on BSOD
    • Automatic Memory Dump – this means that Windows will create an Automatic Memory Dump file on BSOD
    • Active Memory Dump – this means that Windows will create an Active Memory Dump file on BSOD
Note: The complete dump needs a page file that is allowed to be the size of the physical memory installed in your PC with a dedicated 1 MB of space for just the page header.
  • Now once you have selected the most suitable option for you, just click on OK/Apply and then exit.
  • Restart your PC to successfully apply the changes made.

Option 2 – via the WMIC command line

  • The first thing you need to do to create Dump files via the WMIC command line is to tap the Win + X keys combination or simply right-click on the Start button and then select the Command Prompt (Admin) option. You could also type in “cmd” in the Cortana search box and then right-click on Command Prompt from the results and select Run as administrator.
  • After that, type in any of the commands given below depending on your preferences so that your Windows 10 PC will be configured to create Dump Files:
    • No dump file: wmic RECOVEROS set DebugInfoType = 0
    • Small Memory Dump: wmic RECOVEROS set DebugInfoType = 3
    • Kernel Memory Dump: wmic RECOVEROS set DebugInfoType = 2
    • Complete Memory Dump: wmic RECOVEROS set DebugInfoType = 1
    • Automatic Memory Dump: wmic RECOVEROS set DebugInfoType = 7
    • Active Memory Dump: wmic RECOVEROS set DebugInfoType = 1
Note: A complete dump has to have a Page file which is allowed to be the size of the physical memory installed on your PC accompanied by a 1 MB space for just the page header.
  • Now type in “exit” in the Command Prompt to exit it.
  • Restart your PC to apply the changes made successfully.
Read More
How to Fix Windows 10 Error Code 0x80072F8F

Error Code 0x80072F8F - What is it?

Error Code 0x80072F8F manifests in one main way. It is known to appear as early as Windows 7, and mainly deals with an error that occurs in the update process, or when the computer is trying to connect to the online activation service. It can appear when the activation fails to verify the product key. The error code will present itself when the system realizes that the PC's date and time are incorrect. Error Code 0x80072F8F will also appear if the computer has determined that the time zone settings on the computer are not accurate.

When Windows is going through the installation process and is verifying all of the information associated with the computer, Error Code 0x80072F8F will arise, indicating that the information in the computer's settings is not valid. Correct times and dates are necessary when using serial validation keys to install Windows. When these settings are outside of the tolerated window, the problem will arise.

Error Causes

There is only one main symptom to look out for, and it will manifest during a Windows installation. In the midst of the installation, the computer will not be able to proceed with the installation if Error Code 0x80072F8F has popped up. Because the information cannot be verified, Windows will not be able to continue the installation process when the time settings are not accurate. This interrupts the process, causing the need to edit the settings, restart the computer, and try again. It is imperative to be sure that the date and time on the computer are inside of the tolerated window for the serial key.

  • This error code will not give any information on how to correct it.
  • Windows Error 0x80072F8F is displayed on the screen.
  • The error code appears when typing the Windows serial key and proceeding.

Further Information and Manual Repair

When experiencing Error Code 0x80072F8F, the date and time need to be corrected in the computer settings menu, and then verify the correct time zone settings.  There are a few different ways to edit the time and date settings, and one may need to even edit the time zone settings. After this, restarting the computer may be needed. When booting into Windows, the validation code should be activated within 30 days of obtaining the serial number.

  • Method One

Check the time and date settings.

  1. Open the Start menu.
  2. Select Settings, then Time and Language, then Date and Time.
  3. Check and make sure that the PC is operating at the correct time and date.
  • Method Two

Ensure that the computer is connected to the internet.

  1. Enter “network troubleshooter” into the search box located on the taskbar.
  2. Select “Identify and Repair Network Problems”.
  3. Follow the instructions that are given on-screen. This will fix any problems that the network is experiencing.
  • Method Three

Review the timezone.

  1. Open the Start menu.
  2. Select Settings, then Time and Language, then Date and Time.
  3. Check to make sure that the correct timezone is selected from the drop-down menu.
  • Method Four

Reboot the PC and check if that fixes the problem. This may help in the event that the network troubleshooter does not detect a problem.

After completing these steps to edit the time, date, and time zone settings, it may be necessary to restart the computer. This is to ensure that the computer will save and recognize the new settings. After restarting, continue the process as intended and enter the product key. The computer will now be able to verify the product key since the time and date will be recognizable. The Windows installation should proceed as normal and complete successfully when the time, date, and time zone are inside of the parameters for the Windows product key.

In short, if it is not, the computer will not be able to recognize the product key, thus will not be able to install the Windows product. Generally, the fix is quite simple and does not take much time at all, but it is very important.

Read More
Completely Remove SweetIM From Computer

SweetIM Toolbar for Internet Explorer is a browser add-on which adds various shortcuts to your browsers for easy access. This toolbar also changes your homepage to home.sweetim.com. The toolbar is typically bundled with the free Sweet Instant Messenger program and does not necessarily get uninstalled when Instant Messenger is removed from the user’s PC. Additionally, if the home page and search settings were modified by this toolbar, they need to be manually reverted back by the user.

This extension injects various ads into your browser search results and changes your default search engine. While you are browsing the internet, this software records your website surfing data, clicks, and possibly private information. Several Anti-virus programs have classified SweetIM Toolbar as a potentially unwanted application and are not recommended to keep.

About Browser Hijackers

Browser hijacking means that a malicious program code has power over and modified the settings of your web browser, without your approval. They are made to disrupt browser functions for many different reasons. Generally, the idea would be to force users to visit particular sites that are looking to increase their visitor traffic and produce higher ad revenue. Most people assume that such websites are legitimate and harmless but that is incorrect. Nearly every browser hijacker poses an actual threat to your online safety and it is vital to categorize them under privacy dangers. On top of that, hijackers can make the whole infected system vulnerable – other harmful malware and viruses would grab these opportunities to intrude into your system effortlessly.

Major signs that an internet browser has been highjacked

The common signs that indicate having this malicious software on your PC are: the home page of your respective browser is changed unexpectedly; bookmark and the new tab are also modified; the default search engine and the default web browser settings are altered; discover new toolbars that you didn’t add; you find lots of pop-up ads on your computer screen; web pages load very slowly and sometimes incomplete; Inability to navigate to particular sites, particularly antivirus and also other computer security software websites.

Exactly how they get into your computer or laptop

There are several ways your computer can get infected with a browser hijacker. They usually arrive by way of spam e-mail, via file sharing websites, or by a drive-by download. Many browser hijackings originate from add-on software, i.e., toolbars, browser helper objects (BHO), or extensions added to browsers to give them additional features. A browser hijacker may also come bundled up with some freeware that you unwittingly download to your computer system, compromising your internet security. A good example of some notorious browser hijackers includes Anyprotect, Conduit, Babylon, SweetPage, DefaultTab, RocketTab, and Delta Search, but the names are continually changing. Browser hijackers can record user keystrokes to gather potentially invaluable information that leads to privacy concerns, cause instability on systems, severely disrupt the user experience, and eventually slow down the PC to a stage where it becomes unusable.

Removal

Some browser hijacking could be quite easily corrected by identifying and removing the corresponding malware application through your control panel. But, many browser hijackers are hard to eliminate manually. Regardless of how much you attempt to remove it, it may keep returning over and over. You should consider doing manual repairs only if you are a tech-savvy person, as there are risks associated with tinkering around with the computer registry and HOSTS file. Browser hijackers could be effectively removed by installing the anti-malware application on the affected computer. One of the finest tools for repairing browser hijacker malware is Safebytes Anti-Malware. It will help you get rid of any pre-existing malware on your computer and gives you real-time monitoring and protection from new internet threats. Along with the antivirus tool, a PC optimizer will help you in getting rid of all related files and modifications in the registry automatically.

Can't Install Safebytes Anti-malware because of Malware? Do This!

Viruses could potentially cause a great deal of damage to your personal computer. Certain malware variants alter browser settings by including a proxy server or change the computer’s DNS settings. In such cases, you will be unable to visit certain or all internet sites, and thus unable to download or install the necessary security software to remove the infection. If you’re reading this, chances are you’re stuck with a virus infection that is preventing you to download or install Safebytes Anti-Malware software on your system. Although this kind of issue will be difficult to get around, there are some actions you can take.

Eliminate malware in Safe Mode

The Windows-based PC has got a special mode referred to as “Safe Mode” in which only the minimum required programs and services are loaded. If the malware is blocking access to the internet and affecting your computer, launching it in Safe Mode enables you to download anti-virus and run a diagnostic scan while limiting potential damage. To boot into Safe Mode, hit the “F8” key on the keyboard just before the Windows logo screen shows up; Or after normal Windows boot up, run MSCONFIG, check the Safe Boot under the Boot tab, and then click Apply. As soon as you restart the PC into Safe Mode with Networking, you can download, install, and update the anti-malware program from there. At this point, you can actually run the anti-virus scan to remove computer viruses and malware without any hindrance from another malicious application.

Switch over to an alternate browser

Malicious code could exploit vulnerabilities on a specific internet browser and block access to all antivirus software sites. If you appear to have malware attached to Internet Explorer, then switch over to an alternate internet browser with built-in safety features, such as Firefox or Chrome, to download your preferred antivirus program – Safebytes.

Make a bootable USB anti-virus drive

Another solution is to create a portable antivirus program onto your USB thumb drive. Follow these steps to run the anti-virus on the affected PC. 1) On a clean computer, install Safebytes Anti-Malware. 2) Mount the USB drive onto the same computer. 3) Double-click the Setup icon of the anti-malware software to run the Installation Wizard. 4) Pick a USB flash drive as the place when the wizard asks you exactly where you want to install the application. Follow activation instructions. 5) Disconnect the USB drive. You may now utilize this portable antivirus on the infected computer. 6) Double-click the EXE file to open the Safebytes program from the thumb drive. 7) Click “Scan Now” to run a complete scan on the infected computer for viruses.

Overview of SafeBytes Anti-Malware

Nowadays, an anti-malware program can protect your laptop or computer from different forms of online threats. But wait, how do choose the best one amongst plenty of malware protection applications that’s available on the market? You may be aware, there are numerous anti-malware companies and tools for you to consider. A few of them are good, some are ok types, and some will affect your computer themselves! You should go with a product that has gained a strong reputation and detects not just viruses but other kinds of malware as well. On the list of highly recommended applications by industry, analysts are SafeBytes Anti-Malware, a well-known security application for Windows computers. SafeBytes anti-malware is a trusted software that not only protects your system completely but is also very user-friendly for people of all ability levels. Once you’ve got installed this application, SafeBytes advanced protection system will ensure that absolutely no viruses or malicious software can seep through your PC. There are many great features you’ll get with this security product. Listed below are some of the great ones: Active Protection: SafeBytes offers complete and real-time security for your laptop or computer. This tool will constantly monitor your PC for suspicious activity and updates itself regularly to keep current with the latest threats. Antimalware Protection: With its advanced and sophisticated algorithm, this malware elimination tool can identify and remove the malware threats hiding within your computer system effectively. Web protection: Through its unique safety score, SafeBytes informs you whether a site is safe or not to visit it. This will make sure that you’re always certain of your safety when browsing the net. Lightweight Tool: This program is not “heavy” on the computer’s resources, so you’ll not see any overall performance difficulties when SafeBytes is operating in the background. 24/7 Live Expert Support: Support service is available 24 x 7 x 365 days via chat and email to answer your concerns.

Technical Details and Manual Removal (Advanced Users)

If you wish to manually remove SweetIM without the use of an automated tool, it may be possible to do so by removing the program from the Windows Add/Remove Programs menu, or in cases of browser extensions, going to the browsers AddOn/Extension manager and removing it. You will likely also want to reset your browser. To ensure the complete removal, manually check your hard drive and registry for all of the following and remove or reset the values accordingly. Please note that this is for advanced users only and may be difficult, with incorrect file removal causing additional PC errors. In addition, some malware is capable of replicating or preventing deletion. Doing this in Safe Mode is advised.

The following files, folders, and registry entries are created or modified by SweetIM

Files: File %COMMONAPPDATASweetIMMessengerconfusersmain_user_config.xml. File %COMMONAPPDATASweetIMMessengerdatacontentdbcache_indx.dat. File %PROGRAMFILESSweetIMMessengerdefault.xml. File %PROGRAMFILESSweetIMMessengermgYahooMessengerAdapter.dll. File %PROGRAMFILESSweetIMMessengermsvcp71.dll. File %PROGRAMFILESSweetIMMessengermsvcr71.dll. File %PROGRAMFILESSweetIMMessengerresourcesimagesAudibleButton.png. File %PROGRAMFILESSweetIMMessengerresourcesimagesDisplayPicturesButton.png. File %PROGRAMFILESSweetIMMessengerresourcesimagesEmoticonButton.png. File %PROGRAMFILESSweetIMMessengerresourcesimagesGamesButton.png. File %PROGRAMFILESSweetIMMessengerresourcesimagesKeyboardButton.png. File %PROGRAMFILESSweetIMMessengerresourcesimagesNudgeButton.png. File %PROGRAMFILESSweetIMMessengerresourcesimagesSoundFxButton.png. File %PROGRAMFILESSweetIMMessengerresourcesimagesWinksButton.png. File %PROGRAMFILESSweetIMMessengerSweetIM.exe. File %PROGRAMFILESSweetIMToolbarsInternet Explorerdefault.xml. File %PROGRAMFILESSweetIMToolbarsInternet Explorerresourcesabout.html. File %PROGRAMFILESSweetIMToolbarsInternet Explorerresourcesaffid.dat. File %PROGRAMFILESSweetIMToolbarsInternet Explorerresourcesbasis.xml. File %PROGRAMFILESSweetIMToolbarsInternet Explorerresourcesbing.png. File %PROGRAMFILESSweetIMToolbarsInternet Explorerresourcesclear-history.png. File %PROGRAMFILESSweetIMToolbarsInternet Explorerresourcescontent-notifier.js. File %PROGRAMFILESSweetIMToolbarsInternet Explorerresourcescontent-notifier-anim.gif. File %PROGRAMFILESSweetIMToolbarsInternet Explorerresourcescontent-notifier-anim-over.gif. File %PROGRAMFILESSweetIMToolbarsInternet Explorerresourcesdating.png. File %PROGRAMFILESSweetIMToolbarsInternet Explorerresourcesdictionary.png. File %PROGRAMFILESSweetIMToolbarsInternet Explorerresourcese_cards.png. File %PROGRAMFILESSweetIMToolbarsInternet Explorerresourceseye_icon.png. File %PROGRAMFILESSweetIMToolbarsInternet Explorerresourceseye_icon_over.png. File %PROGRAMFILESSweetIMToolbarsInternet Explorerresourcesfind.png. File %PROGRAMFILESSweetIMToolbarsInternet Explorerresourcesfree_stuff.png. File %PROGRAMFILESSweetIMToolbarsInternet Explorerresourcesgames.png. File %PROGRAMFILESSweetIMToolbarsInternet Explorerresourcesglitter.png. File %PROGRAMFILESSweetIMToolbarsInternet Explorerresourcesgoogle.png. File %PROGRAMFILESSweetIMToolbarsInternet Explorerresourceshelp.png. File %PROGRAMFILESSweetIMToolbarsInternet Explorerresourceshighlight.png. File %PROGRAMFILESSweetIMToolbarsInternet Explorerresourceslocales.xml. File %PROGRAMFILESSweetIMToolbarsInternet Explorerresourceslogo_16x16.png. File %PROGRAMFILESSweetIMToolbarsInternet Explorerresourceslogo_21x18.png. File %PROGRAMFILESSweetIMToolbarsInternet Explorerresourceslogo_32x32.png. File %PROGRAMFILESSweetIMToolbarsInternet Explorerresourceslogo_about.png. File %PROGRAMFILESSweetIMToolbarsInternet Explorerresourcesmore-search-providers.png. File %PROGRAMFILESSweetIMToolbarsInternet Explorerresourcesmusic.png. File %PROGRAMFILESSweetIMToolbarsInternet Explorerresourcesnews.png. File %PROGRAMFILESSweetIMToolbarsInternet Explorerresourcesoptions.html. File %PROGRAMFILESSweetIMToolbarsInternet Explorerresourcesphotos.png. File %PROGRAMFILESSweetIMToolbarsInternet Explorerresourcessearch-current-site.png. File %PROGRAMFILESSweetIMToolbarsInternet Explorerresourcesshopping.png. File %PROGRAMFILESSweetIMToolbarsInternet ExplorerresourcesSmileySmile.png. File %PROGRAMFILESSweetIMToolbarsInternet ExplorerresourcesSmileyWink.png. File %PROGRAMFILESSweetIMToolbarsInternet Explorerresourcessweetim_text.png. File %PROGRAMFILESSweetIMToolbarsInternet Explorerresourcestoolbar.xml. File %PROGRAMFILESSweetIMToolbarsInternet Explorerresourcesversion.txt. File %PROGRAMFILESSweetIMToolbarsInternet Explorerresourcesvideo.png. File %PROGRAMFILESSweetIMToolbarsInternet Explorerresourcesweb-search.png. File %PROGRAMFILESSweetIMToolbarsInternet Explorerresourcesweb-toolbar.js. File %PROGRAMFILESSweetIMToolbarsInternet Explorerresourcesyahoo.png. Registry: Directory %COMMONAPPDATASweetIMMessengerconfusers. Directory %COMMONAPPDATASweetIMMessengerconf. Directory %COMMONAPPDATASweetIMMessengerdatacontentdb. Directory %COMMONAPPDATASweetIMMessengerdata. Directory %COMMONAPPDATASweetIMMessengerlogs. Directory %COMMONAPPDATASweetIMMessengerupdate. Directory %COMMONAPPDATASweetIMMessenger. Directory %COMMONAPPDATASweetIMToolbarsInternet Explorercache. Directory %COMMONAPPDATASweetIMToolbarsInternet Explorer. Directory %COMMONAPPDATASweetIMToolbars. Directory %COMMONAPPDATASweetIM. Directory %PROGRAMFILESSweetIMMessengerresourcesimages. Directory %PROGRAMFILESSweetIMMessengerresources. Directory %PROGRAMFILESSweetIMMessenger. Directory %PROGRAMFILESSweetIMToolbarsInternet Explorerconf. Directory %PROGRAMFILESSweetIMToolbarsInternet ExplorerMicrosoft.VC90.CRT. Directory %PROGRAMFILESSweetIMToolbarsInternet Explorerresources. Directory %PROGRAMFILESSweetIMToolbarsInternet Explorer. Directory %PROGRAMFILESSweetIMToolbars. Directory %PROGRAMFILESSweetIM. Key HKEY_CLASSES_ROOT named SWEETIE.IEToolbar.1, plus associated values. Key HKEY_CLASSES_ROOT named SWEETIE.IEToolbar, plus associated values. Key HKEY_CLASSES_ROOT named SweetIM_URLSearchHook.ToolbarURLSearchHook.1, plus associated values. Key HKEY_CLASSES_ROOT named SweetIM_URLSearchHook.ToolbarURLSearchHook, plus associated values. Key HKEY_CLASSES_ROOT named Toolbar3.SWEETIE.1, plus associated values. Key HKEY_CLASSES_ROOT named Toolbar3.SWEETIE, plus associated values. Key 4D3B167E-5FD8-4276-8FD7-9DF19C1E4D19 at HKEY_CLASSES_ROOTTypeLib. Key 82AC53B4-164C-4B07-A016-437A8388B81A at HKEY_CLASSES_ROOTCLSID. Key A4A0CB15-8465-4F58-A7E5-73084EA2A064 at HKEY_CLASSES_ROOTCLSID. Key EEE6C35B-6118-11DC-9C72-001320C79847 at HKEY_CLASSES_ROOTCLSID. Key EEE6C35C-6118-11DC-9C72-001320C79847 at HKEY_CLASSES_ROOTCLSID. Key EEE6C35C-6118-11DC-9C72-001320C79847 at HKEY_LOCAL_MACHINESOFTWAREMicrosoftWindowsCurrentVersionExplorerBrowser Helper Objects. Key EEE6C35D-6118-11DC-9C72-001320C79847 at HKEY_CLASSES_ROOTCLSID. Key EEE6C35E-6118-11DC-9C72-001320C79847 at HKEY_CLASSES_ROOTTypeLib. Key EEE6C35F-6118-11DC-9C72-001320C79847 at HKEY_CLASSES_ROOTTypeLib. Key EEE6C360-6118-11DC-9C72-001320C79847 at HKEY_CURRENT_USERSoftwareMicrosoftInternet ExplorerSearchScopes. Key EEE6C360-6118-11DC-9C72-001320C79847 at HKEY_LOCAL_MACHINESOFTWAREMicrosoftInternet ExplorerSearchScopes. Key 878E59AD181B66344A3316549572708A at HKEY_CLASSES_ROOTInstallerProducts. Key E54D4DC11584D69448F0C2E257E2FC7B at HKEY_CLASSES_ROOTInstallerProducts. Key Install at HKEY_CURRENT_USERSoftwareSweetIM. Key Messenger at HKEY_LOCAL_MACHINESOFTWARESweetIM. Key SweetIM.exe at HKEY_LOCAL_MACHINESOFTWAREMicrosoftWindowsCurrentVersionApp Paths. Key SweetIM at HKEY_CURRENT_USERSoftware. Key SweetIM at HKEY_LOCAL_MACHINESOFTWARE. Key Toolbars at HKEY_CURRENT_USERSoftwareSweetIM. Key Toolbars at HKEY_LOCAL_MACHINESOFTWARESweetIM. Value (Default) at HKEY_LOCAL_MACHINESOFTWAREMicrosoftWindowsCurrentVersionApp PathsSweetIM.exe. Value EEE6C35B-6118-11DC-9C72-001320C79847 at HKEY_CURRENT_USERSoftwareMicrosoftInternet ExplorerToolbarWebBrowser. Value EEE6C35B-6118-11DC-9C72-001320C79847 at HKEY_LOCAL_MACHINESOFTWAREMicrosoftInternet ExplorerToolbar. Value EEE6C35D-6118-11DC-9C72-001320C79847 at HKEY_CURRENT_USERSoftwareMicrosoftInternet ExplorerURLSearchHooks. Value Path at HKEY_LOCAL_MACHINESOFTWAREMicrosoftWindowsCurrentVersionApp PathsSweetIM.exe. Value simapp_id at HKEY_CURRENT_USERSoftwareSweetIM. Value simapp_id at HKEY_LOCAL_MACHINESOFTWARESweetIM.
Read More
Airplane Mode turns on by itself in Windows
As you know, Airplane mode is the one that gets devices in such a state where all the wireless connections are turned off. However, recently, there are some reports from users claiming that the Airplane Mode turns on by itself in their Windows 10 computers. This kind of problem could be due to an error with the Network driver, third-party applications, and many other factors. Other users also reported that the Airplane Mode automatically flickers, while some stated that they aren’t able to toggle the option for Airplane mode. There are several options you can try to resolve this problem. You can try to configure the Power Management settings for the driver or run the Network troubleshooter. You could also roll back, reinstall or update the Network driver, as well as troubleshoot the problem in a Clean Boot State. For more details, follow each one of the given options below.

Option 1 – Try configuring the Power Management settings for the driver

The first thing you can do to fix the problem is to try configuring the Power Management settings for the driver. How? Refer to these steps:
  • Tap the Win + X keys to open the WinX menu and from there, select the Device Manager to open it.
  • Next, expand the Network adapters and select the entry for your Wi-Fi hardware.
  • After that, right-click on it and select Properties.
  • From there, go to the Power Management tab and uncheck the “Allow the computer to turn off this device to save power” option.
  • Once done, restart your computer and see if it has fixed the problem.

Option 2 – Try to run the Network troubleshooter

To run the Network Troubleshooter, refer to these steps:
  • Open the Search bar on your computer and type in “troubleshoot” to open the Troubleshoot settings.
  • Next, scroll down and select the “Network Adapter” option from the right pane.
  • Then click on the Run Troubleshooter” button.
  • After that, your computer will check for any possible errors and will pinpoint the root cause of the problem if possible.
  • Restart your computer.

Option 3 – Try to update, rollback or reinstall the Network adapter drivers

The next thing you can do to resolve the problem is to update the Network Adapter drivers by following these steps:
  • Tap the Win + R keys to launch the Run window and then type in the “devmgmt.msc” command and hit Enter to open the Device Manager window.
  • Under the Device Manager, you will see a list of drivers. From there, look for the Network Adapters and expand them.
  • Look for the Broadcom Network Adapter and right-click on it, as well as other network adapters that have an exclamation icon, and update them all.
  • Restart your PC and see if it helped in fixing the problem.
Note: If updating the network drivers didn’t help in fixing the problem, you can also try to roll back the very same drivers from their previous versions and restart your Windows 10 PC. After that, the system itself will reinstall the drivers you just uninstalled. Alternatively, you can also download and install the drivers from the manufacturer’s website directly. To reinstall the network adapter drivers, refer to these steps:
  • Open the Devices Manager from the Win X Menu.
  • Then locate the device drivers and right-click on them to open the Properties.
  • After that, switch to the Driver tab and click on the Uninstall Device button.
  • Follow the screen option to completely uninstall it.
  • Finally, restart your computer. It will just reinstall the device drivers automatically.

Option 4 – Try to reset the Network Adapter

You can also try to perform a Network Reset to resolve the problem. This will reset the entire network configuration including your IP address. To perform Network Reset, follow these steps:
  • Tap the Win + I keys to open Settings.
  • From there, go to the Network and Internet section.
  • Next, scroll down and look for “Network Reset” under the status pane.
  • After that, click on Network Reset and then on Reset now to start resetting the network configuration. Once done, check if it is able to fix the error or not.

Option 5 – Try putting your computer in a Clean Boot State

You can also troubleshoot the problem in a Clean Boot state. It could be that there are some third-party applications in your computer that are causing the Airplane Mode to behave in a strange way. So, to isolate this possibility, you need to boot your computer in a Clean Boot State be using these steps:
  • Log onto your PC as an administrator.
  • Type in MSConfig in the Start Search to open the System Configuration utility.
  • From there, go to the General tab and click “Selective startup”.
  • Clear the “Load Startup items” check box and make sure that the “Load System Services” and “Use Original boot configuration” options are checked.
  • Next, click the Services tab and select the “Hide All Microsoft Services” check box.
  • Click Disable all.
  • Click on Apply/OK and restart your PC. (This will put your PC into a Clean Boot State. And configure Windows to use the usual startup, just simply undo the changes.)
  • After you’ve set your computer into a Clean Boot State, try to observe if the Airplane mode is now back to normal or not.
Read More
Windows 11 launch date set for October 5th
windows 11 release dateIt is officially confirmed, Windows 11 release date is October 5th. Windows 11 will be released as a free upgrade to all registered Windows 10 users that have supported hardware for it. The rest of the users will be able to install it via ISO file as a clean installation if their computer supports Windows 10 hardware requirements. The official price for the license for Windows 11 has not yet been set but I assume after release it will be set. Priority for W11 will have users who are upgrading from W10 as stated by Microsoft. Also, it was officially confirmed that Android apps will not be running natively in this first release of Windows 11, that feature will come in a future update, official statement below:
"We look forward to continuing our journey to bring Android apps to Windows 11 and the Microsoft Store through our collaboration with Amazon and Intel; this will start with a preview for Windows Insiders over the coming months,"
The rest of the features will be all included inside Windows 11 on launch.
Read More
Should you buy used GPU in current market?
Things have stirred lately with Chinas ban on crypto mining and many used GPUs will flow the market probably. But should you buy a used GPU? Short answer: NO, long answer: keep on reading to find out why.

GPU 1080tiGPU shortage and its cause

As you all know by now, we live sadly in a world struck by a global Pandemic. Due to this awful disease and measures taken against it, many people are either working from home or are at home making the manufacturing of new chips problematic while demand on the market has raised. Throw into that mix crypto mining which has raised in popularity and you have, well today's market where we have GPU shortage. Now with the latest news that China has banned the mining of cryptocurrency, there is to be expected that at some point in time mining cards used there will fit the market in the whole world. Sadly even with a large quantity of GPUs that will become available, the overall price of cards will not be much lowered I am afraid since demand is still very high and many people would not want to purchase used mining cards and neither should you.

Be prepared for the worst scenario

Although this sounds very pessimistic and in most cases, it will not turn out to be true, you should always prepare yourself mentally that you might be in that lower percentage that will end up with a really bad GPU. What has come up to be absolutely true when considering GPU that were mining is that if anything at all can be done to GPU in order to increase performance, it has been done. Miners want to optimize and almost every GPU if could be overclocked, it was overclocked. Extensive mining also means that thermal paste has been dried and it is pretty useless at this point and there is a very high chance that fans and heat sinks will need much cleaning or even replacement raising the price of the card itself for mentioned paste, fans, and heat sinks. There's no way to tell what the previous owner might have done with a graphics card when you're shopping online, so our advice is to assume the worst. Don't trust the seller to give truthful information. Any listing that says it was "never used for mining" at this point is probably a lie.

Age of the GPU matters

Date when GPU itself has manufactured really matters. Newer cards even if used extensively have been used for a much shorter period of time and are not so damaged were ones produced a few years ago have seen a lot of action. Let’s say that you get RTX 3060, In the worst-case scenario it has been mining since late February of 2021 and basically, it is still under warranty so it should behave OK and put some good work in gaming even in that state. On another hand, if we take for example GTX 1080Ti which is 4 years old GPU things start to change drastically. 4 years GPU could be worn out even if it was used just for extensive gaming sessions let alone for mining.

No return policy and seller rating

Most of the time you will run into a product that cannot be returned or no refunds policy. This should bring a red flag right away and deter you from purchase. Sellers with the highest ratings are more trustworthy since many of them will not want to destroy their reputation but these will probably not even have these kinds of merchandise in their store. Buying with a poor rating seller and no return policy on a product is just asking for trouble. And although some stores do have arbitration and will stand on the customer side there is no guarantee for that and it will take too much time to process.

If you really must buy a second-hand GPU

Of course in these troubled times sometimes due to malfunction or any other reason, there would not be another choice than to buy a second-hand GPU. In this case, if there is no other option consider sellers with many positive ratings. If you can buy locally that would even be better or the best-case scenario would be if you could visually see and inspect GPU itself in order to see in what state it is. Look for warranty stickers to see if they are thorn and the card has been tampered with. Also take a good look at screws, if they have scratches card has been opened, probably to replace fan or heating sinks which means that it has worked a lot.

Conclusion

It is very difficult to give the best possible advice on this situation since of GPU shortage, but I would much prefer a new GPU with lower performance than a hi-performance one which was mining.
Read More
Where can you get computer viruses & malware
From their infant stages to modern days, computer viruses were always kind of here. From simple ones that were annoying with playing speaker sounds and throwing messages on screen to more malicious ones capable of deleting and encrypting files. In today's modern world it is very important to protect yourself, modern viruses are not a joke anymore and they are aimed to create serious damage to computer systems. Where can you get computer viruses & malwareThey can encrypt files in order to make you pay for a decrypter, they can straight up delete files or even cause some hardware damage. Like mentioned before protecting yourself is important, but protecting does not mean only having antivirus software installed, information, where are common places in which they lurk and could be picked up, is also very important. That is why we are exploring in this article the most common place where you can pick viruses or other malware.

Downloading Programs

Programs that contain the downloadable files are the commonest source of malware such as freeware, worms, and other executable files. Whether you download an image editing software, a music file, or an e-book, it is important to ensure the reliability of the source of the media. Unknown, new, or less popular sources should be avoided.

Pirated or Cracked Software

Are you aware of software cracking? Well, every time you open cracked software, your antivirus software might flag it as malware as the cracks consist of malicious scripts. Always say “No” to cracks as they can inject malicious script into your PC.

Email Attachments

Anyone can send you an email attachment whether you know them or not. Clicking on unknown links or attachments can harm your device. Think twice before clicking anything and make sure that file type is not ‘.exe’.

Internet

One of the easiest ways to get a virus on your device is through the Internet. Make sure to check the URL before accessing any website. For a secured URL always look for ‘HTTPS in it. For example, when you click videos published on social media websites, they may require you to install a particular type of plug-in to watch that video. But in reality, these plug-ins might be malicious software that can steal your sensitive information.

Booting Data from Unknown CDs

Malicious software can get into your device through an unknown CD. A good practice to be safe from malicious infection is to remove CD when your device is not working at all. Your system could reboot the CD if it is not removed before switching off the computer.

Bluetooth

Bluetooth transfers can also infect your system, so it is crucial to know what type of media file is being sent to your computer whenever a transfer takes place. An effective armor would be to allow Bluetooth connectivity with only known devices and activate it only when required.

Unpatched Software

Often overlooked, unpatched software is also a leading source of virus infection. Security holes in software are exploited by attackers and are unknown to software makers until the attackers release them in the form of zero-day attacks. It is therefore recommended to install software updates as soon as they are available on your PC.
Read More
How to choose default applications in Windows
Hello everyone and welcome to another tutorial on errortools.com, Windows itself when it is installed has a general idea about certain file types and how to open them, for example, image files would be opened with application photos, web links with the edge, etc. So when we double click on the known file type, Windows will start the default application for that type and open the file in it. But what if we do not want to open files in applications Microsoft thinks we should? What if we want to open the website in firefox or images in photoshop, or whatever. Luckily we can easily change which application Windows uses for which file type. Click on ⊞ WINDOWS to open the start menu and choose settings. Windows 10 Star menu with marked settings iconOn the settings screen, choose Apps. Windows settings apps section markedWhen the Apps screen opens on the left click on Default apps. Windows settings default apps markedOn right, you will get a list of Windows default applications for certain types of files. Click on any application you would like to change and choose from the drop-down list a new one. Click on it and you are done.
Read More
Best online learning websites for everything
Building your skill set could be a very important thing, especially in today’s world, and what’s the best way other than online learning classes. You are not exposing yourself to pandemics, staying safe in the warmth of your home and most of the courses are free. Presented here are sites that I believe will and can help you with your goal of learning desired material whatever that might be. Sites are listed in no particular order with a description of what each has to offer.

Coursera

https://www.coursera.org/ coursera
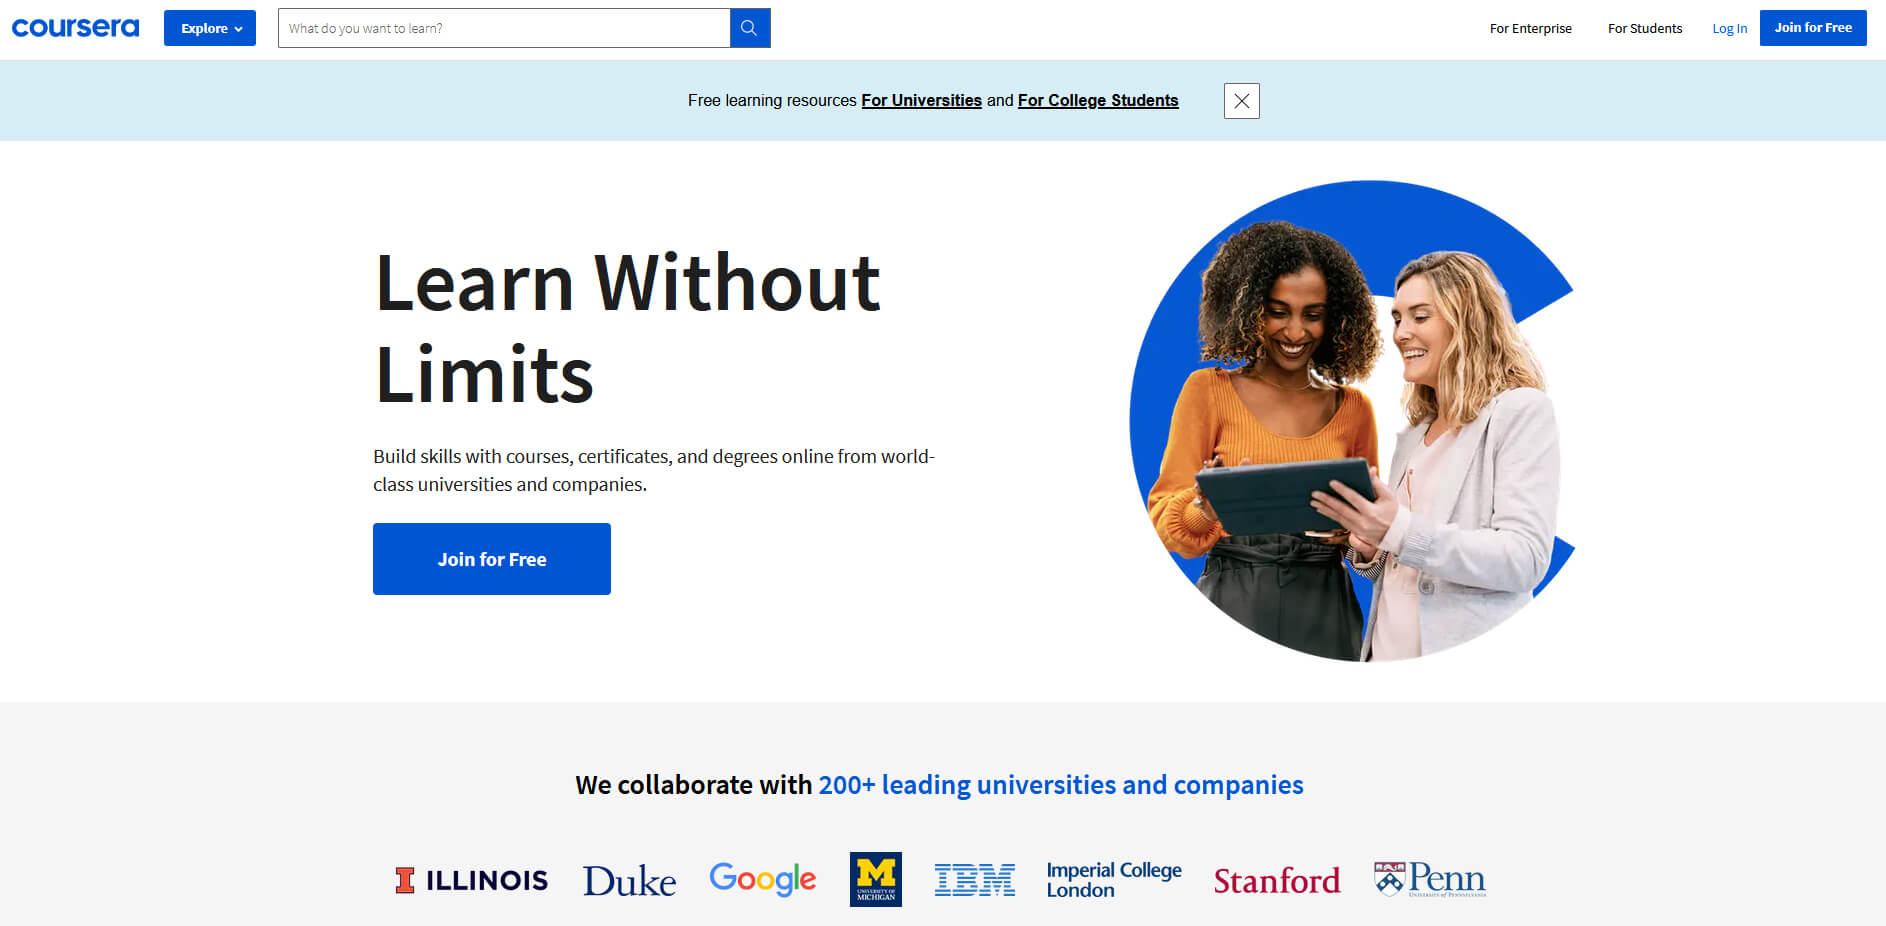
Coursera was one of the pioneers when it comes to college education online. When it started all courses were free and offered certificates if the taker has done tasks with a passing grade. Today not everything is free but still, there are tons of free courses that can help you to learn something new and to advance in your work or hobby. Google is using the Coursera platform to deliver its courses to the audience and besides google a lot of academic professors from Princeton, Stanford, John Hopkins and many more are presently offering their course material.

edX

https://www.edx.org/ edx online learning
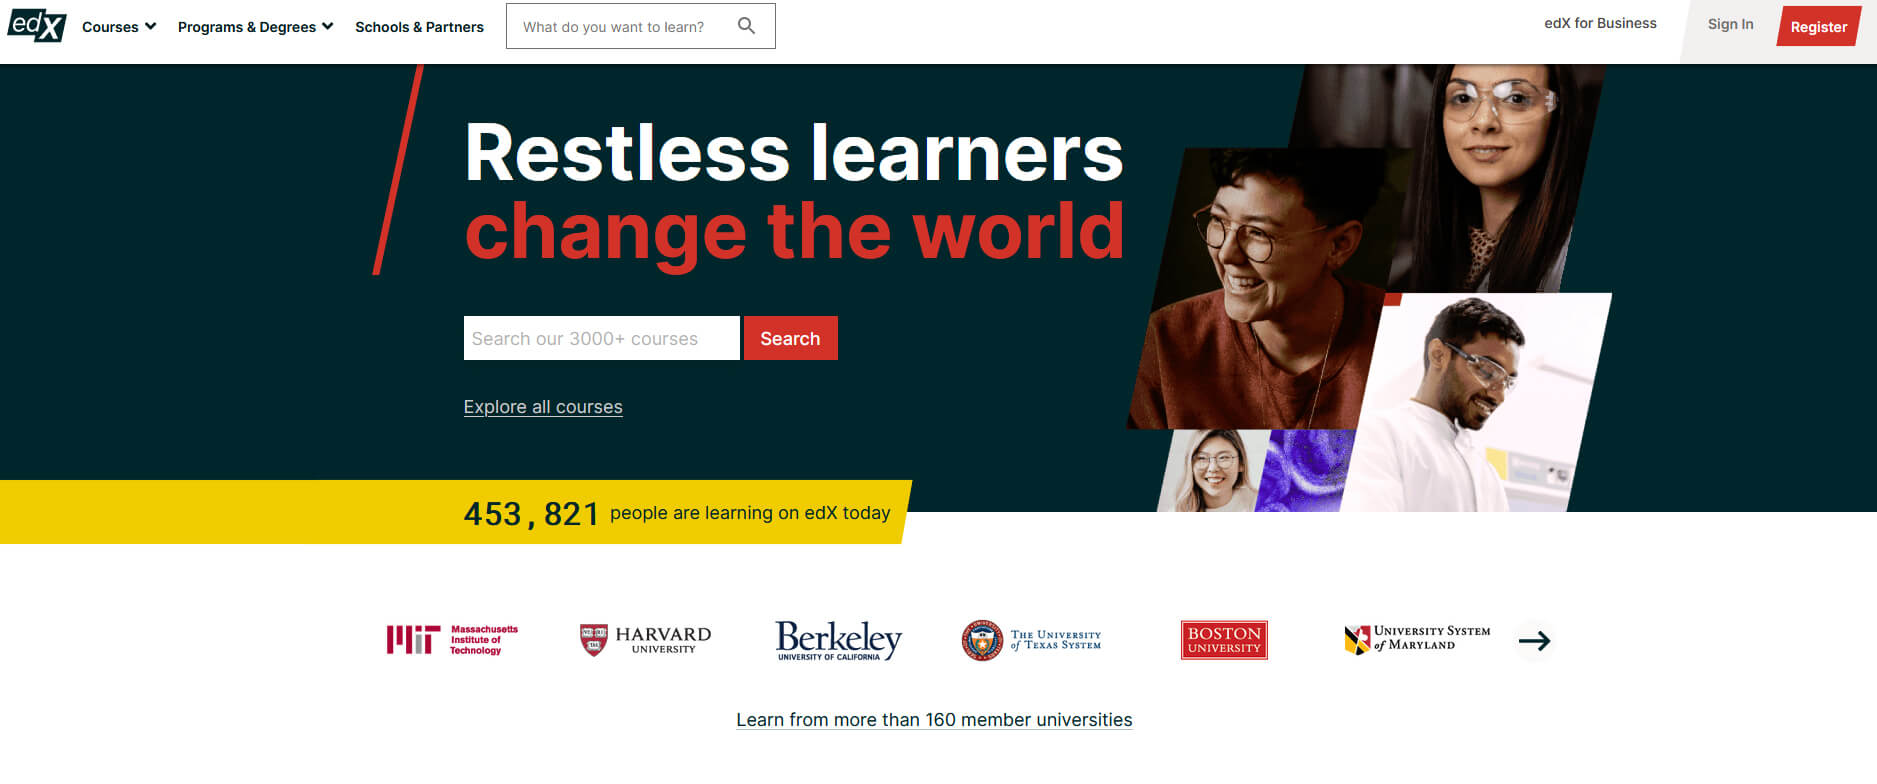
edX has evolved from MITx, MIT’s free initiative to place some free academic lectures from its classrooms free into the world. Since it was rebranded into edX it started including other big university names like Berkeley, University of Texas System, Harvard, and many more. Since its infant days, edX has expanded and included many areas that it offers coursework from arts to science. Certificated today are mostly not free but course videos are, so if you care to learn and not wave certificates around this is a great place to do it.

Udemy

https://www.udemy.com/ udemy
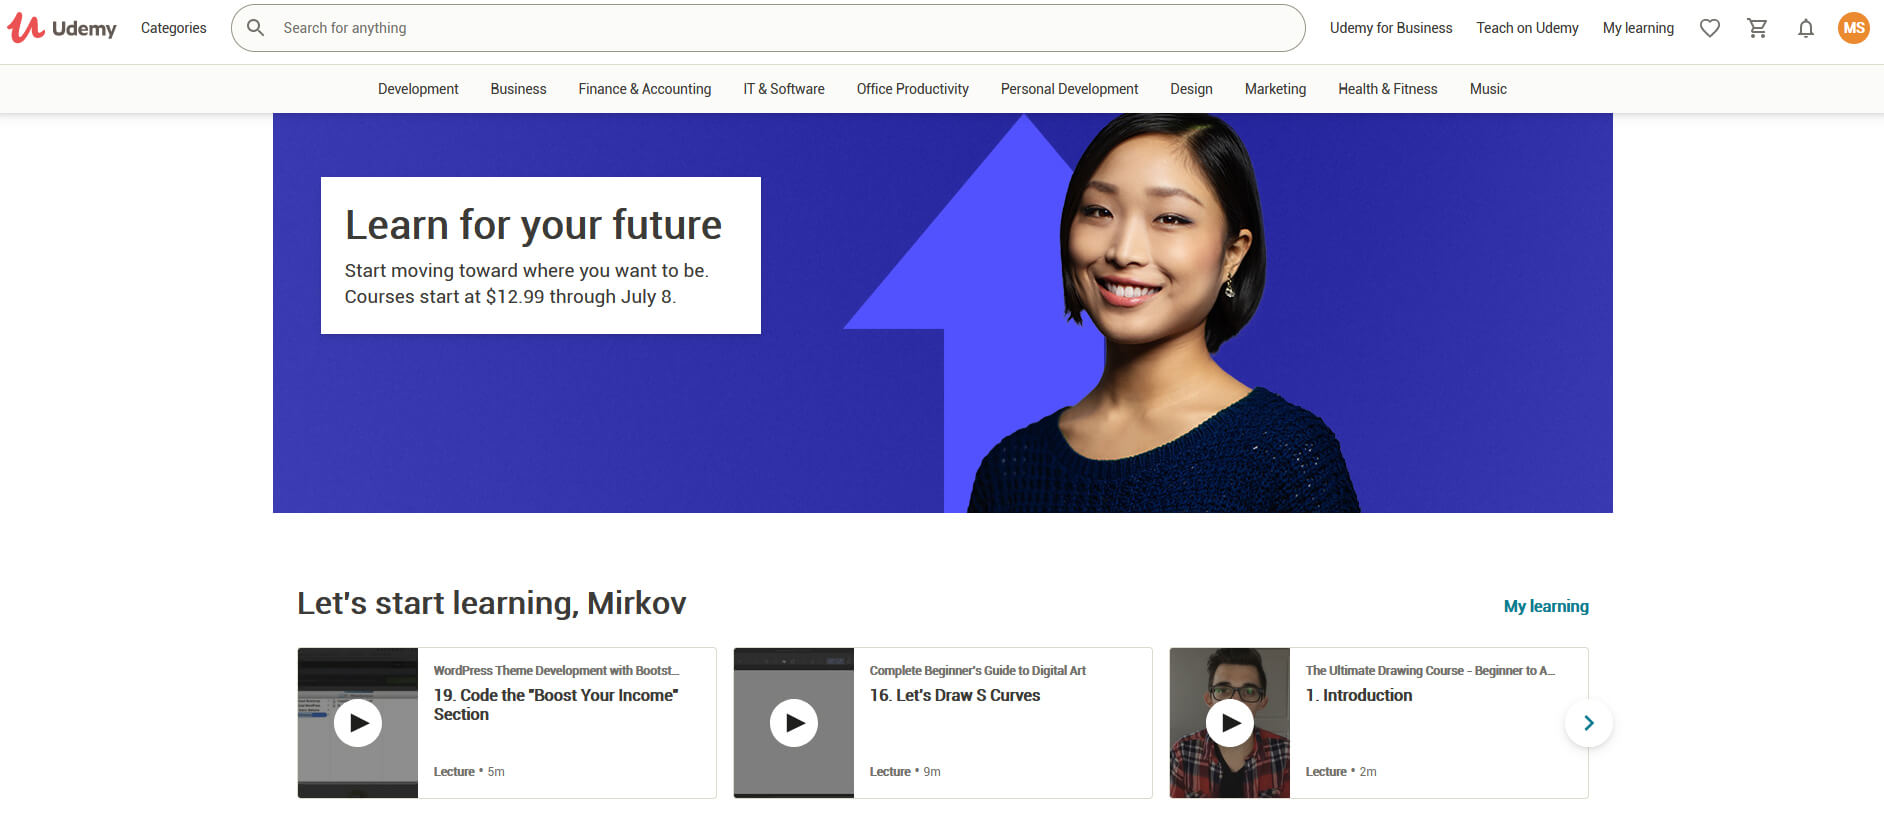
Udemy has a little different approach to course material than previously mentioned websites. Teachers on Udemy are mostly people that are working in a given field. Programmers will teach programming, fitness instructors will teach training, etc. There are vas variety of topics even on lifestyle, hobbies even gaming to more serious ones like software developing hardware, etc. There are free courses but mostly are one-time purchases with unlimited access to course material and with frequent discounts udemy might be a good place to look if you can find anything interesting.

Alison

https://alison.com/ alisonAlison is kind of Udemy if we are talking about course material and who is teaching, the difference however is that it has more free content and it is one of the rare websites on this list that has Language courses. Courses vary from beginner level to more advanced ones.

Udacity

https://www.udacity.com/ udacity online learning
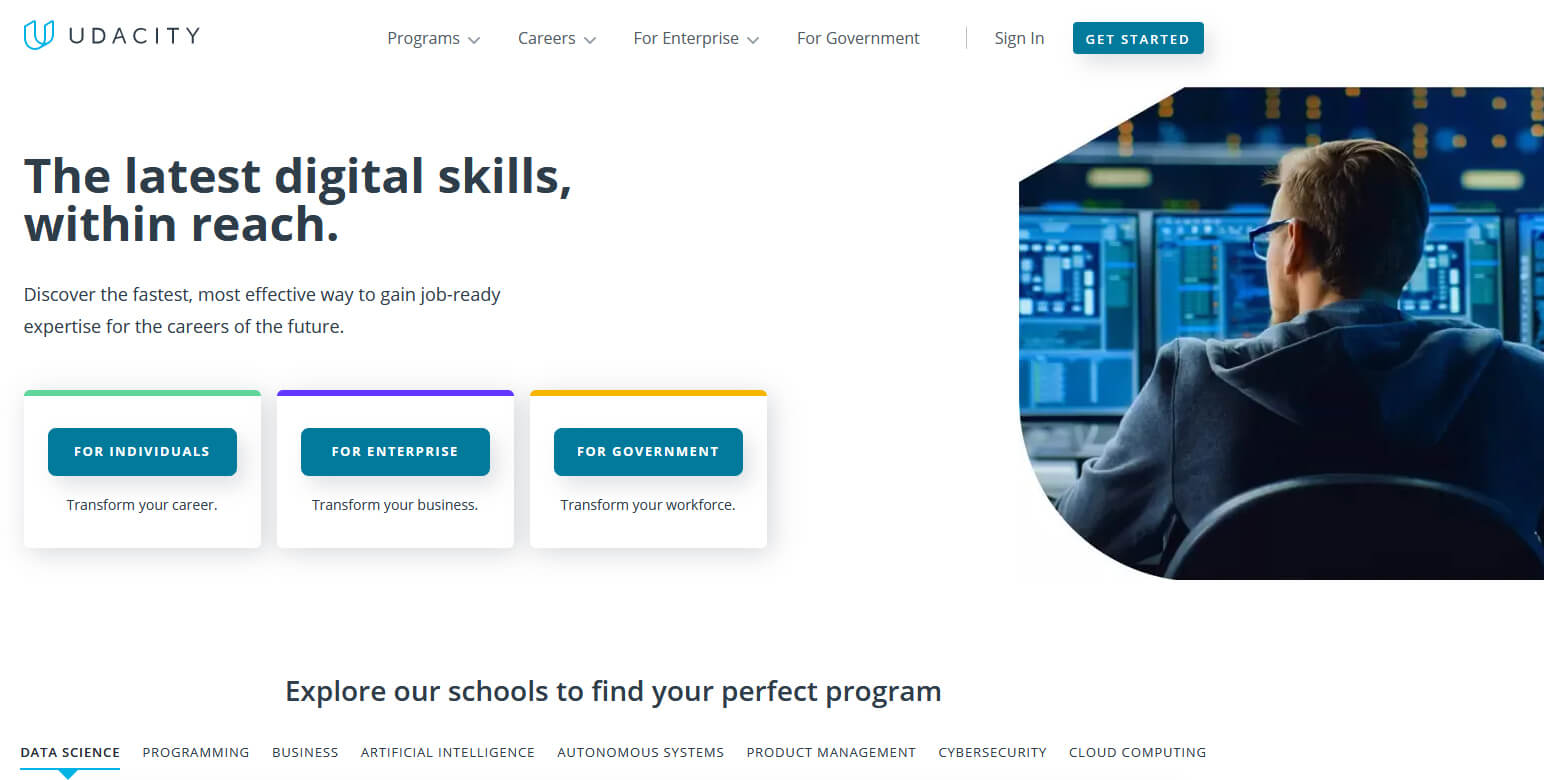
Udacity was also one of the earlier websites to offer free courses, in today’s world it still has free material but there is also paying one. The big difference from other competitors is that Udacity focuses mostly on programming, data science, and web development and it is very strong in this field. There are no courses about art. Music or similar, mostly IT stuff is covered here. If this is something that interests you, make a free account and give it a go.

Codecademy

https://www.codecademy.com/ codecademy
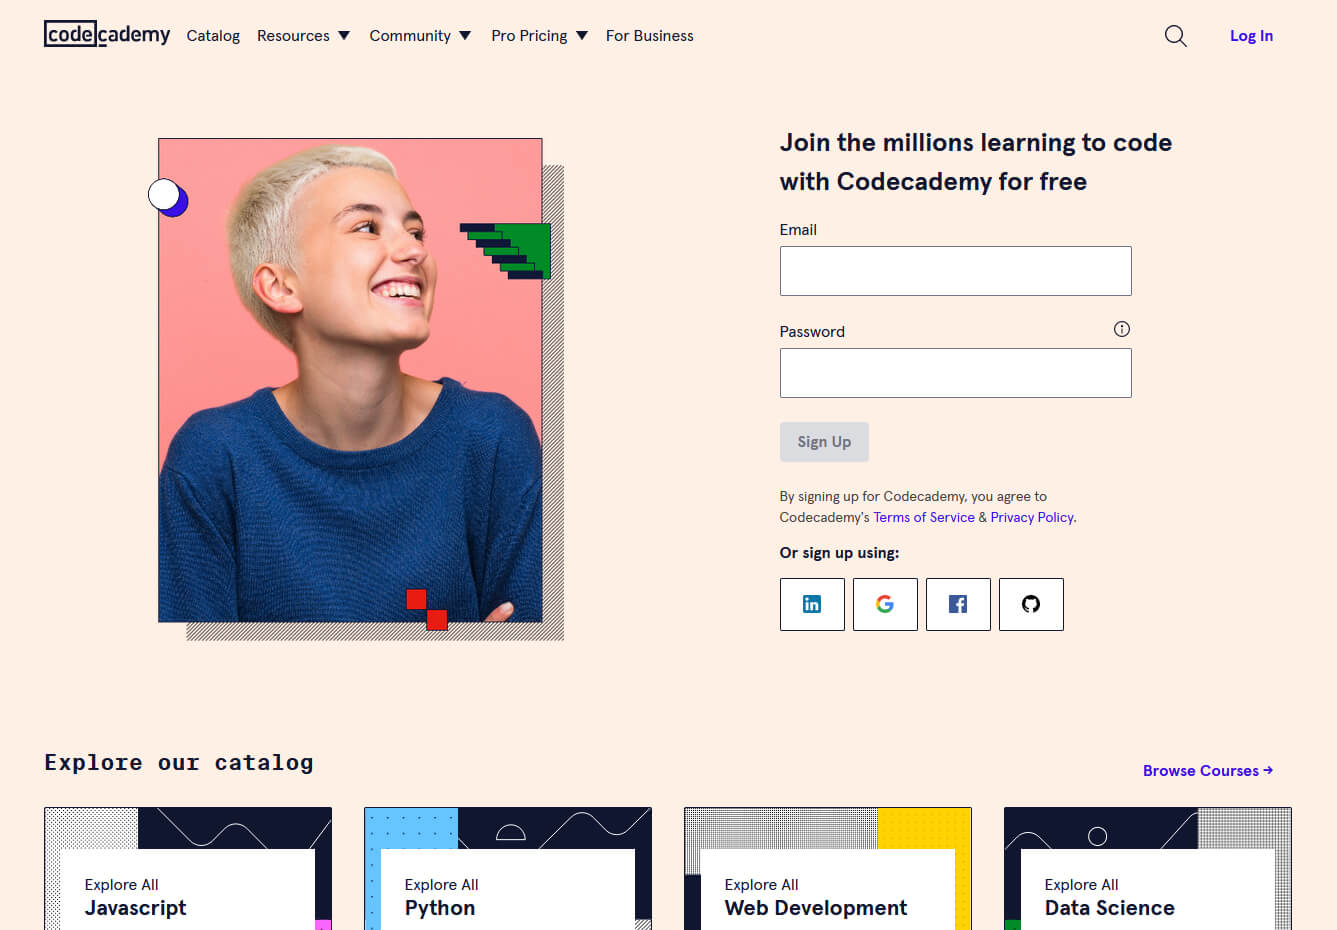
Codecademy is a website mainly focused on teaching you how to code. Pro plan is there but there are a lot of basic and free courses on the mentioned subject. The curriculum is really wide covering Python, R, Java, JavaScript, SQL, Ruby, C#, C++, Swift, PHP, HTML, CSS and more so I am sure that if you are interested in coding this would be a pretty good place to find things. Besides pure language coding courses site offers also, Cybersecurity, Web design, Data science, web development, Game Development, Mobile Development, and many more courses on provided subjects.

Academic Earth

https://academicearth.org/ academic earth
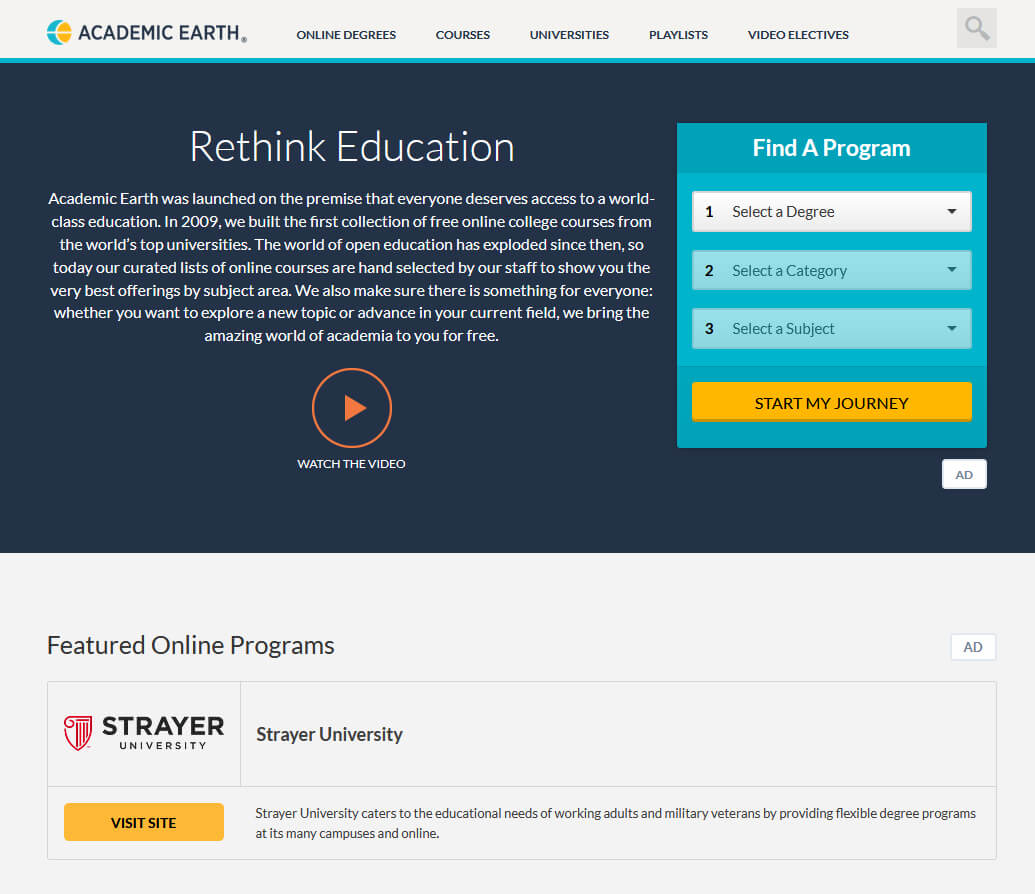
Academic Earth has been built with one simple premise: Everyone deserves access to education. Lead by this kind of mindset on Academic Earth you will find well, academic courses similar to ones found on edX and Coursera, but from mentioned sites here all courses are free and you will find only academic ones, there are no entrepreneur or expert courses here, just pure academic ones. If you wish to see and learn something the way it is taught in Harvard, Berkeley, MIT, etc this is the place for you.

Khan Academy

https://www.khanacademy.org/ khan academy
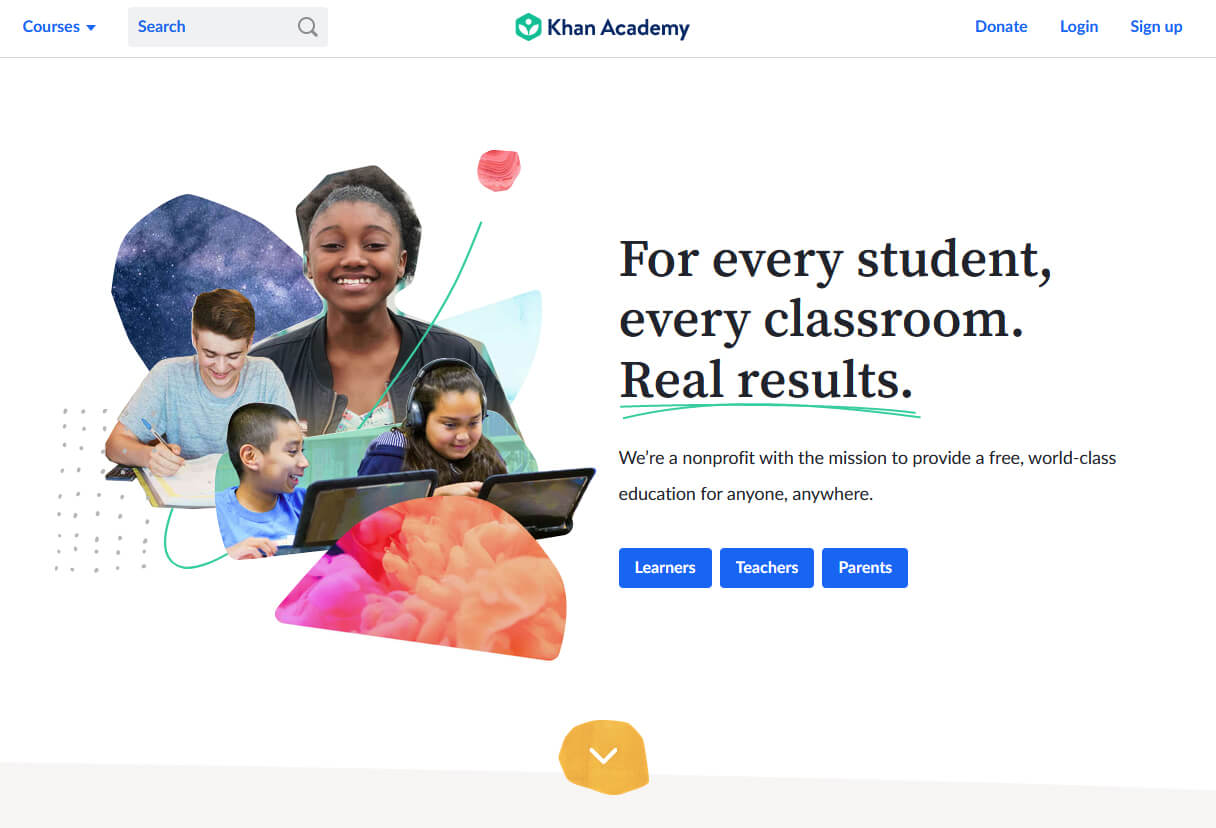
Khan academy is completely free and it is offering courses matching certain grades for children. It is offering courses for all 8 years of elementary school, math courses for high school and college with some coursework on topics like science, arts & humanities, reading, life skills, etc. Despite not being on the same level as some university courses presented on other mentioned websites Khan Academy is a good place to learn a lot of basic skills that you could build upon later.

Conclusion

I hope that I have helped you in some way to expand your skill set and learn something new with provided sources and I hope to see you again on errortools.com
Read More
1 2 3 171
Logo
Copyright © 2023, ErrorTools. All Rights Reserved
Trademark: Microsoft Windows logos are registered trademarks of Microsoft. Disclaimer: ErrorTools.com is not affiliated with Microsoft, nor claims direct affiliation.
The information on this page is provided for information purposes only.
DMCA.com Protection Status