Windows 10 setup is a bit complicated which is why it’s uncommon to encounter errors along the way. One of these errors you can encounter when running Windows Setup is the error code 0x80070006. If you are trying to fix this error, you’ve come to the right place as this post will guide you on how to do so.
When you get the error code 0x80070006, you will see the following error message:
“Windows cannot install required files. Network problems may be preventing Windows from accessing the file. Make sure the computer is connected to the network and restart the installation. Error code: 0x80070006.”
As stated in the error message, this kind of error in Windows Setup is due to an unstable or unreliable network connection. Such problems can also be triggered by network hardware which includes the network adapters and the network routers. To fix this error, you need to check your internet connection and router or run the built-in network troubleshooter. You could also try using a different USB port or recreate a bootable USB drive as well as get a new Windows image file.
Option 1 – Try checking your internet connection and router
As mentioned, this Windows 10 setup error could be due to an unstable internet connection. To fix it, the first thing you have to do is to check the status of your internet connection and see if it is stable and has enough speed to run the setup. If it’s slow, then it’s no wonder that the setup process failed. To fix that, you can try to reboot your router from its admin panel or you can just turn it off manually and then turn it back on after a couple of seconds. In addition, you also have to check if it’s plugged in properly.
Option 2 – Try to run the Network Adapter troubleshooter
The next thing you can do is to run the Network Adapter troubleshooter. This built-in troubleshooter can help resolve any network issues. It can reset the adapters, remove cached settings, and many more. To run it, follow these steps:
Go to Settings > Update & security and from there select Troubleshoot.
Next, scroll down and select the “Network Adapter” option from the right pane.
Then click on the Run Troubleshooter” button.
After that, your computer will check for any possible errors and will pinpoint the root cause of the problem if possible.
Option 3 – Try to use a different USB port
You might want to check the integrity of the USB port where connected the device if you are using a bootable USB storage device to run the setup for Windows 10. All you have to do is switch the USB port or try to use another bootable USB device and see if it fixes the problem.
Option 4 – Try recreating the Windows 10 installation USB
Recreating the Windows 10 installation USB might help in fixing the problem. You can use a USB drive to do so but make sure that it has a great read-write speed. Follow the steps below to recreate Windows 10 installation USB”
Click this link and then click the Download Tool Now button.
Next, click the “Use the tool to create installation media (USB flash drive, DVD, or ISO file)…” option and follow the next given instructions on the screen.
Now select the ISO file option in step 5.
After that, you should now have an ISO file.
Next, go to the location where you’ve downloaded the ISO file.
Then right-click on the Windows 10 ISO file and select the Open with option and then select File Explorer.
Now click on “setup.exe” and follow the next instructions that appear on the screen. When asked, you have to select either Nothing (clean install) or Keep personal files only option. Take note that you must not select the “Keep personal files, apps, and Windows settings since it doesn’t really work.
Option 5 – Try getting a new Windows image file
If none of the four given options above worked, you might want to get a newer installation image using the Windows Media Creation tool. After that, create the bootable USB drive and once completed and then try to run the Windows 10 setup again.
A general rule of thumb, which is followed by most users, is to download the specific missing DLL file and place it within the software’s installation directory. However, this can be harmful to your system as hackers often upload popular malicious DLL files to target systems. Thus, you should avoid downloading DLLs from the internet. And follow these steps to fix the DLL error:
Restart your computer
System restore to an earlier state
Run a malware/virus scan
Update all the hardware drivers
Running SFC /scannow command in command prompt
Then do as the error suggests, reinstall the program if it’s feasible. Game files can take several hours to install and therefore, reinstallation can be a cumbersome job. Also, frustrating if the error appears after reinstallation.
Update device drivers manually, such as graphics drivers, DirectX software if you see DLL missing error while running game
Default applications in previous Windows versions were a pretty straightforward process. The user went to the settings application and picked for each category which application he would like to choose from the list of installed ones.
In Windows 11 things are little changed. In this article, we will show you how to choose the default internet browser inside Windows 11, and sadly it is a more tedious task than in previous versions.
Choosing default browser in settings
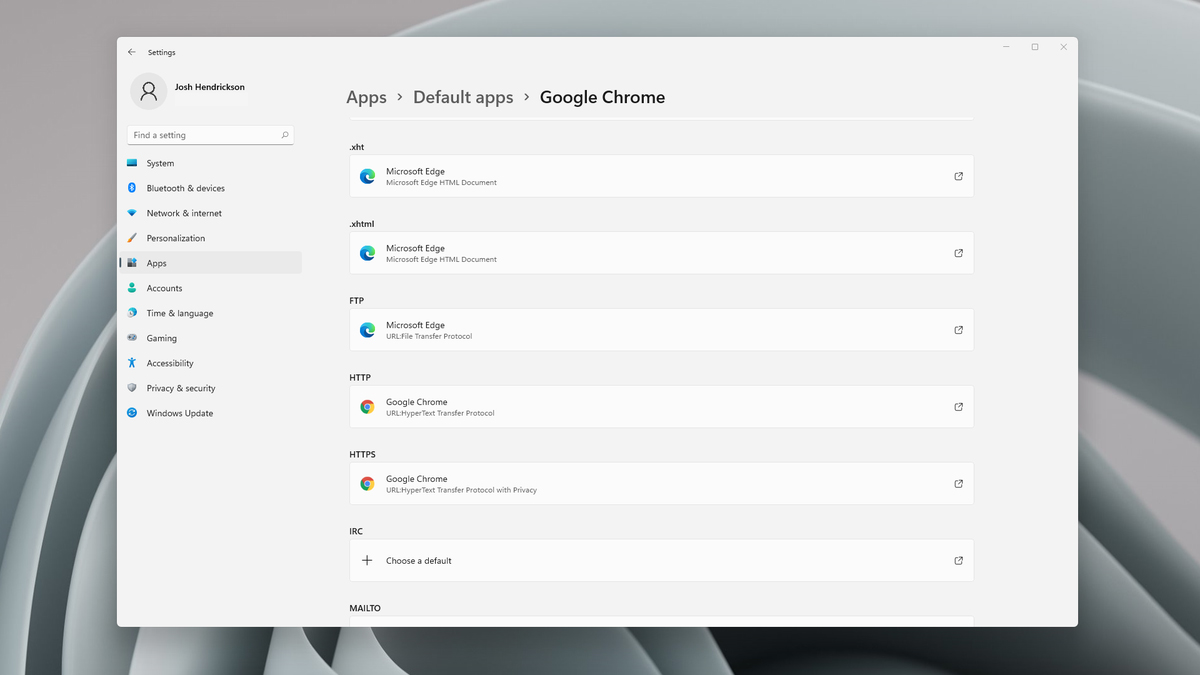
As in previous versions of the Windows operating system you will need to use the settings application in order to change your default Internet browser. Previously, in Windows 10, a variety of general categories like email, web browser, and photo viewer were all listed under the Default Apps section of the Settings panel. It was easy to click on one of those categories and click on the option you like best from the small pop-up suggestion window.
In the Windows 11 Insider Build, you’ll see a gauche list of an individual file or link types that you’ll need to specify your preferred browser for. The types include: HTM, HTML, PDF, SHTML, SVG, WEBP, SHT, FTP, HTTP, and HTTPS. There are additional optional types you can specify your preferred browser for as well.
The issue here is in order to use a single browser which most users do you will have to go through each file type and set your preferred one. I am really not sure why this was introduced or why it has to be this way, all I can do is hope that in the final release of Windows 11 this feature will be rolled back as it used to be and that you could set your default browser in just one simple click.
A newfound bug in Google docs is causing it to crush and upon reopening it will crush again making it very difficult to re-access your document. The bug is manifested when a series of the same word is typed into a document and Show grammar suggestion is turned on.
How was it found
A Google Docs user, Pat Needham brought up the issue on Google Docs Editors Help forum.
"I've only tried in Google Chrome, with documents from three separate Google accounts (personal, G Suite Basic, and work one which might be enterprise). All three experience this same issue".
"It's case-sensitive. So trying with 'and. and. And. and. And.' doesn't cause it to crash."
While Needham publicly reported the bug, it appears that the issue was discovered by Eliza Callahan who was writing a poem novel for her novel using Google Docs.
Needham's findings have also been confirmed by other users running Firefox 99.0.1
Another user, Sergii Dymchenko, said strings like "But. But. But. But. But." triggered the same response. Some also noticed putting any of the terms like "Also, Therefore, And, Anyway, But, Who, Why, Besides, However," in the same format achieved the outcome.
A YCombinator HackerNews reader suspected the cause to be the "Show grammar suggestion" option in Google Docs.
A Google spokesperson confirmed the presence of the issue adding, "we're aware of this issue and the team is working on a fix."
How to recover your document
First thing first, turn off Show grammar suggestions so you do not run into issue by accident. In order to turn it off go to Tools and then into Spelling and grammar and untick Show grammar suggestions.
Now, if you already have a document that has been crushed, fear not because there is a workaround to access it. For some strange reason this bug does not manifest on Google Docs mobile app, so you can open the crushed document in the mobile app, delete words that have caused the bug and reopen the document on your desktop.
Until Google comes up with the solution this is currently the only way to address the issue.
We’ve already covered disabling Security Questions If you want to disable Security Questions on your Windows 10 computer then you’ve come to the right place as this post will guide you in doing exactly that. In this post, you will be disabling Security Questions using a PowerShell script. This PowerShell script is called “Update-AllUsersQA”. It is designed to remove or disable the security questions and answers for local users on a Windows 10 computer. It lets administrators take control of the security questions in the environment and at the same time minimizes the risk that comes with them.
If a user has a Microsoft account that’s configured to sign in to Windows 10 then he will not probably notice the Password Recovery questions. On the other hand, if he has a chosen local account for installing Windows, he will e prompted to create three security questions that can be used to reset the password and log into the Windows 10 account in case there is any misfortune. However, if you do not have much use for these Security Questions, then you can definitely have them disabled using a simple PowerShell script which you can download from GitHub.
For more details on how to disable security questions in a Windows 10 machine, refer to the steps provided below.
Step 1: You need to first download the .ps1 file from the GitHub repository.
Step 2: Once you’ve downloaded the file, open the PowerShell window with admin privileges.
Step 3: After that, navigate to the folder where you had saved the .ps1 file. Then copy the address of the folder location.
Step 4: Next, change the directory by using the following command:
cd "folder location address"
Step 5: After that, enter the following script to disable the security questions:
Update-AllUsersQA
Once you’ve completed the steps above, the Security Questions should be disabled and you will be notified with a message stating that the feature has been disabled. On the other hand, if you have a change of heart and you want to enable the Security Questions back, here are some steps you need to take:
Step 1: First, open the PowerShell window as admin.
Step 2: Next, run the same script with one more parameter such as:
Update-AllUsersQA -answer SecretAnswer
Step 3: And that’s about it. Do not forget to replace the Secret Answer with your preferred one and once you’re done, it will be set as the answer for all the Security Questions.
Step 4: Now all that’s left to do is go to the Settings app to change the answer to the questions and you should be good to go.
Started as an internal network and has slowly expanded since 1960 internet has taken over the world. In the beginning, it was a means of information change but in the modern age you can run applications and virtual machines over the internet, you can stream video and audio, and you can communicate in real-time with someone on the other side of Earth.
With the internet growing so fast in such a small amount of time it is only logical and wise to take a step back and take a good look at what it offers now, what are great things about it and what are some of the worst.
Good sides of the internet
Information
There are a lot of advantages of the internet, first and foremost is information. Internet was made as an information exchange service and even today you can find a lot of various information about various topics that interest you. A site like Wikipedia is a completely free online encyclopedia and a lot of news companies have their own internet sites where you can find free information and news.
On the other hand, there are also websites like udemy, edx, Coursera, and many others that will offer you the education, some for free, some for money but you can get a glimpse and part of university quality education for just a fraction of price.
Online shopping
Sites like Amazon have used the internet and launched themselves as today's multi-billion companies. In today's world, there is not a single thing you can not buy online. Many sites today are going from the large online marketplace where you can find everything to small niche specialized ones. Also every major brand in the world today has its own online store.
Other shops will offer you music, movies, games, etc. Services like steam, xbox pass, sony pass etc, will let you buy games online, other music, movies, and many more.
Streaming services
Days, when you had to buy movies in order to watch them at home, are gone, thanks to the internet we have plenty of streaming services for movies and tv shows as well as ones for music. If you do not want to spend money on actually purchasing things then a good idea is to have a streaming plan set up when you want it.
Email and messaging
Communication is a great thing and since the dawn of mankind people have been talking and sharing with each other, the internet has made it possible to send mail electronically and instantly and modern chat communication is everywhere. We can not just talk with our friends and family that can be on the other side of the world, we can also talk in real-time with the sales representative, with technical service, or attend online classes with a group of people.
Cloud storage services
Saving your pictures in this digital media age on the hard drive can be risky but thanks to modern technologies you can save most of your precious files on cloud servers for safekeeping. From pictures to documents and even other files that you need and want to save. There are some of them that will offer you a free amount and some basic free plans as well.
Bad sides of the internet
Malware, viruses, and phishing
We could not talk about the bad side of the internet if we do not mention its greatest threat. Bad sites, infected software, phishing emails, and many more malicious threats. Problem is that these kinds of tricks and attacks have become more and more sophisticated and harder to detect and avoid.
Pornography
Pornography is bad, having it freely available to children is even worse. Sadly the only way to regulate this is on a computer-by-computer basis by turning on parent control on each one. There are many studies that go into detail about why this is bad, sadly currently there are no effective ways to isolate this content.
No privacy
When we say there is no privacy we do not mean by using social media and not setting your privacy settings altho that also fits in this point, what we are talking about is data mining of your habits and things you do. It is well known that today lot of websites are using some form of AI recommender system in order to tailor your internet experience to suit your needs better. Most of these AI systems are trained by mining your data and analyzing your habits.
If you have 2 google accounts there is a high probability chance that for the same query you will get different results, depending on your so far browsing habits. The same goes for other services as well.
Dark webshops
There are some great things in dark and deep WEB-like sites with true news and information. Even some legit libraries where you can find and download rare books. Sadly as goes with the internet dark and deep WEB also has its well, dark sides, from disturbing content to shops that sell stolen items to straight stealing your money by parading as legit shops but only to steal your money.
Dating sites
We all try to find someone that is perfectly matched with us but using the online dating site has many proven bad effects on psychology. It also devaluates interaction between people and can lower self-esteem.
Bad habits
Since the internet has become wildly available and popular on various devices like tablets and mobile phones more and more people are spending an unhealthy amount of time on it. Harvesting the benefits of the internet is great but find some time for other people as well.
Recent Facebook, Instagram, WhatsApp, Messenger & Oculus fiasco and downtime reminded us that even big IT tech behemoth is vulnerable and can go offline. The situation has been resolve in not so fast manner but not long also, let’s say it was resolved in time that people have not left and switched to another platform.
That being said, now when services are back we stopped and reflected on the platform itself and on its users. If Facebook is vulnerable so are its users, but sometimes users themselves are responsible for being a target. We step back and take a look at posts that manifest on Facebook and have come with some advice on what things you should never post on Facebook and on other social platforms.
Pictures of any kind of ID, bill, vaccine cards or similar document
This should be a no-brainer at all but we see people posting this kind of information. They go on a rant about how the bill is too high and place a picture of it, or they took their vaccine shot and posted a vaccine card as proof. Why this is a bad idea is that any of these documents contain certain things like birthdays, names, and even more like addresses and other information that can be used against users.
Information about where you live
This could be tied to the previous point but it is very crucial that a living address is not something that you wish to share publicly. A lot of burglars are stalking social media for exactly this kind of information so they can then analyze when and how to strike and this time you have done all work for them providing them with the information on where to find your flat.
Daily routines and vacation plans
The most burglary happens to believe it or not during the day, in hours when people are at work. So by providing the world with your daily routines and when you are not at home you are putting your home at risk of being broken into. Posting vacation plans are even worse or posting pictures and status when you are on vacation will send a clear message to anyone that your home is empty and unattended.
Pictures of your home interior
This can also sadly disclosure more information that you wish like maybe some interesting facts like address or birthday on certificates, diplomas, or other documents accidentally caught in the taken picture. Also, these kinds of pictures can show much about your home security, alarm positions if you have some, how is your front door secured, etc.
Content that can get you fired
We hear all the time, famous star or director has some tweets that have resurfaced and now it is fired. I know that many of us are not famous stars but we can also be fired. Sharing some offensive opinions, inappropriate content or just plain pure lies like took sick leave to play this new game can have not so great resolution for your working relationship with your employer. We do not support lies nor do any kind of inappropriate content but posting it online on social media will just make things worse for you personally.
Your login info or sites and services that you are using
It is fairly safe to say hey we are chilling with Netflix or watching the new season of Mandalorian on Disney plus but speaking of things like made a new account on freelancer service of got my new e-banking in this cool new bank, etc. is not very wise. Cyber crooks are always on the lookout for identity theft and will use available information to steal data and money. You are risking also losing provided accounts this way leaving you with tons of work to explain that you got mugged to service providers.
Conclusion
We know that this article seems paranoid and maybe assumes that among your friends there are some crocks and people trying to take advantage of you. As this certainly was not our attention nor goal, we had to point to extremes in order to protect you the most.
RSAT or Remote Server Administration Tools for Windows 10 is a collection of programs for IT experts. It helps in managing Servers from a Windows 10 PC and starting with the Windows 10 v1809 or the October 2018 update, users have to install the Remote Server Administration Tools for Windows 10 as Features on Demand or as Optional Features.
The program includes the Microsoft Management Console or MMC snap-ins, Server Manager, consoles, Windows PowerShell cmdlets, and providers as well as command-line tools for managing roles and features that run on the Windows Server. So if you have updated your Windows 10 pc to v1809 or later then the RSAT tool has to be installed as a set of Features on Demand right from Windows 10. You can install RSAT Tools on Windows 10 Enterprise or Windows 10 Professional and once you install it, make sure that you do not install RSAT tools from the Microsoft Download page directly.
Step 1: Open Settings and then go to Apps > Apps & Features.
Step 2: Next, click on Manage Optional Features.
Step 3: After that, click on Add a Feature which will load all the optional features one can install.
Step 4: Now scroll to find the listing of all 18 RSAT tools and depending on what you need, click and install them.
Step 5: Then go back to where you should see the progress of the installation. Click on the Manage Optional Features page to check the status.
Note: If you are well-versed with the command line or automation, you can also install Remote Server Administration Tools for Windows 10 via DISM /add-capability. And when you install anything via Features on Demand, they stay across Windows 10 version upgrades.
On the other hand, if you feel that you don’t need a particular RSAT feature, you have the option to uninstall it using the Manage Option Features. However, bear in mind that some tools depend on one another which means that if you uninstall anything that has a dependency, it will only fail that’s why you need to be careful.
To uninstall an RSAT feature, here’s what you have to do:
Step 1: Go to Settings > Apps > Manage Optional Features.
Step 2: After that, look for the list of installed feature that appears before this.
Step 3: Now select the feature you want to uninstall and go back.
If you have some system-related issues that need to get fixed, there is a one-click solution known as [product-name] you could check out to resolve them. This program is a useful and efficient tool that could repair corrupted registries and optimize your PC’s overall performance. Aside from that, it also cleans out your computer for any junk or corrupted files that help you eliminate any unwanted files from your system. This is basically a solution that’s within your grasp with just a click. It’s easy to use as it is user-friendly. For the complete set of instructions in downloading and using it, refer to the steps below.
If you encounter the CLOCK_WATCHDOG_TIMEOUT Blue Screen of Death error while using your Windows 10 computer then it is most likely caused by a specified processor which is not processing interrupts. This occurs when the processor is deadlocked or nonresponsive.
Specifically, this kind of Stop error occurs when the processor is having a hard time with the cooperation of its threads and cores. The threads are the tasks performed by cores and some cores can have many threads at the same time. And this is where the problem begins – one thread is waiting for an adequate response from another thread or one kernel is waiting for a response from another kernel and those responses are not coming. In other words, when the processor is unable to continue the processing of tasks since its resources are occupied and are interdependent to get free, such a state is called Deadlock.
The CLOCK WATCHDOG TIMEOUT bug check has a value of 0x00000101 which means that an expected clock interrupt on a secondary processor, in a multiprocessor system, was not received within the allocated interval. To troubleshoot the problem, you can check out the possible fixes provided below but before you proceed, make sure that you boot your computer into Safe Mode with Networking only.
Option 1 – Undo or disable overclocking if you have overclocked your system
Go to the Start Menu and open Settings.
Next, select Update and Security and go to the Recover tab.
From there, click on Restart now in Advanced startup. This will restart your computer.
Once you’re in the Advanced startup, go to Troubleshoot and then select the Advanced Options.
From there, select the UEFU Firmware Settings.
Now click on Restart. Once your computer has restarted, it will automatically open BIOS.
From the BIOS, go to the Advanced tab and navigate to Performance and then look for Overclocking.
Once you’ve found Overclocking, make sure that it is disabled. If it’s not, then disable it and then save the changes made by tapping the F10 key.
Start your computer normally and check if the CLOCK_WATCHDOG_TIMEOUT 0x00000101 error is now fixed.
Option 2 – Try running the Memory Diagnostic Tool
The Memory Diagnostic tool in windows can help resolve the CLOCK_WATCHDOG_TIMEOUT 0x00000101 Blue Screen error by checking and automatically fixing any memory-based issues. To run it, refer to these steps:
Tap the Win + R keys to open Run and type mdsched.exe and hit Enter to open the Windows Memory Diagnostic Tool.
After that, it will give two options such as:
Restart now and check for problems (Recommended)
Check for problems the next time I start my computer
Once your computer has restarted, perform a basic scan or you could also go for the “Advanced” options such as “Test mix” or “Pass count”. Simply tap the F10 key to start the test.
Option 3 – Try to rollback, update or disable drivers
The next thing you can do to fix the CLOCK_WATCHDOG_TIMEOUT 0x00000101 Stop error is to roll back, or update, or disable device drivers. It is most likely that after you updated your Windows computer that your driver also needs a refresh. On the other hand, if you have just updated your device drivers then you need to roll back the drivers to their previous versions. Whichever applies to you, refer to the steps below.
Open the Devices Manager from the Win X Menu.
Then locate the device drivers and right-click on them to open the Properties.
After that, switch to the Driver tab and click on the Uninstall Device button.
Follow the screen option to completely uninstall it.
Finally, restart your computer. It will just reinstall the device drivers automatically.
Note: You can install a dedicated driver on your computer in case you have it or you could also look for it directly from the website of the manufacturer.
Option 4 – Try running the Blue Screen Troubleshooter
The Blue Screen troubleshooter is a built-in tool in Windows 10 that helps users in fixing BSOD errors like CLOCK_WATCHDOG_TIMEOUT 0x00000101. It can be found on the Settings Troubleshooters page. To use it, refer to these steps:
Tap the Win + I keys to open the Settings panel.
Then go to Update & Security > Troubleshoot.
From there, look for the option called “Blue Screen” on your right-hand side and then click the “Run the troubleshooter” button to run the Blue Screen Troubleshooter and then follow the next on-screen options. Note that you might have to boot your PC into Safe Mode.
Option 5 – Try to disconnect or disable newly installed hardware
In this option, you will have to disable or remove the hardware you’ve just installed recently since external devices could be the one that’s causing the Blue Screen of Death error to appear. To do that, just disconnect any external device that’s connected to your computer physically and then check if it fixes the CLOCK_WATCHDOG_TIMEOUT Blue Screen error.
Option 6 – Troubleshoot the BSOD error in Clean Boot State
You can also troubleshoot the Blue Screen error in a Clean Boot state. There are times when third-party applications cause BSOD errors. Putting your computer in this state can help you identify which program is the culprit and thus isolates the problem. In a Clean Boot state, your computer will start using only the pre-selected minimal set of drivers and startup programs. Note that you have to disable and enable one process at a time.
Log onto your PC as an administrator.
Type in MSConfig in the Start Search to open the System Configuration utility.
From there, go to the General tab and click “Selective startup”.
Clear the “Load Startup items” check box and make sure that the “Load System Services” and “Use Original boot configuration” options are checked.
Next, click the Services tab and select the “Hide All Microsoft Services” check box.
Click Disable all.
Click on Apply/OK and restart your PC. (This will put your PC into a Clean Boot State. And to configure Windows to use the usual startup, just simply undo the changes.)
From there, start to isolate the problem by checking which one of the programs you installed recently is the root cause of the problem.
Option 7 – Try to update the BIOS
Updating the BIOS can help you fix the CLOCK_WATCHDOG_TIMEOUT BSOD error but as you know, BIOS is a sensitive part of a computer. Even though it is a software component, the functioning of the hardware depends on it largely. Thus, you must be careful when modifying something in the BIOS. So if you don’t know much about it, it’s best if you skip on this option and try the other ones instead. However, if you are well-versed in navigating the BIOS, then follow the steps below.
Tap the Win + R keys to open the Run dialog box.
Next, type “msinfo32” in the field and press Enter to open System Information.
From there, you should find a search field on the bottom where you have to search for the BIOS version and then press Enter.
After that, you should see the developer and version of the BIOS installed on your PC.
Go to your manufacturer’s website and then download the latest version of BIOS on your computer.
If you are using a laptop, make sure that you keep it plugged in until you have updated the BIOS.
Now double click on the downloaded file and install the new BIOS version on your computer.
Now restart your computer to apply the changes made.
Windows is one of the most popular operating systems in today's world. Plenty of software and plenty of hardware is working on it without any issues. In order for Windows to deal with this ever-growing hardware and in order for hardware manufacturer's to have stable products in the Windows environment is accomplished via Drivers.
A driver is a small piece of software whose sole purpose is to control and communicate with specific hardware and create a bridge between it and Windows itself. it is made in such a way that even if it brakes the rest of the operating system will continue working uninterrupted.
Having updated drivers means better performance and better stability for device performance so it is crucial to have the latest drivers installed. Outdated drivers can also lead to some security issues which could be exploited by malicious applications.
Here, in today's article, we are presenting you with 4 ways on how to keep your drivers updated and tidy for best performance and stability. The list goes from the most simple way to the most complex and time-consuming one.
Use one-click solution, DRIVEFIX
The most simple and most straightforward solution, install DRIVEFIX, and with only one click on a mouse button, you can have all drivers fixed and updated. This application is made for this purpose and it is doing its job pretty well.
Update Windows
Windows updates come with new drivers for new hardware and with newer versions of existing ones, do update on regular basis and you should have all of your drivers up to date.
Download drivers from the manufacturer's website
Go to the manufacturer's website for your device and download and install the latest driver package.
Use device manager to update drivers
Go to the device manager and right-click on the device which you would like to update the driver. Choose update device driver.
Error 0x80070003 is a type of Windows file backup and restore error code. This error occurs when you copy files or try to create backup and restore files and folders by using Windows Backup and Restore.
This error stops you from using browse for files or folders. It hampers your ability to browse and restore files in the File Restore Wizard on your PC.
Solution
Error Causes
Error 0x80070003 may occur due to numerous reasons such as:
Registry files are corrupted and damaged
Missing directories
Boot sector corrupted
Outdated drivers
Faulty software installation
Malware infection
Improper maintenance and incomplete installation
Further Information and Manual Repair
Here are some manual and easy do-it-yourself methods that you can try at home and resolve the issue on your own and save hundreds of dollars that you would be otherwise spending to hire a professional for the job.
Method 1 - Use Search Functionality in the File Restore Wizard to restore files
To work out and resolve error 0x80070003 on your system simply use the search functionality in the File Restore Wizard to locate and restore the files. This can be done by going to the start menu and then click on search.
Now enter the keywords in the search for box and then click search again. Click to select the files that you want to restore from the list and then click OK. This will help you restore the files and resolve the issue.
Method 2 - Recreate the Missing Directory
If the re-parse point is deleted, then you will have to recreate the missing directory.
The deletion of the re-parse point can be identified if the error code is displayed in this format ‘Filename: C:\Myfolder\11111.txt, Error: the system cannot find the path specified (0x80070003)’.
To resolve, simply follow the path that is pointed out in the error and create the corresponding folder. Create the folder Myfolder in Drive C.
Then try the restore operation again. Now click to clear the Restore the files to their original subfolders check box and then run the File Restore Wizard. This is most likely going to resolve the issue.
Method 3 - Scan for Viruses
Sometimes error 0x80070003 may occur due to malware. This stops you from creating file backup and restore files. If this is the cause then simply download and run an antivirus to remove malware programs on your PC.
Method 4 - Clean and Repair the Corrupted Registry
Error 0x80070003 can be triggered due to registry corruption. If this is the cause then simply download Restoro. This is a user-friendly and powerful multi-functional PC Fixer integrated with a registry cleaner.
The registry cleaner scans for all registry-related errors, wipe out all unnecessary and junk files, and also cleans and repairs the damaged registry in seconds.
Click here to download Restoro and resolve error 0x80070003 today!

 Choosing default browser in settings

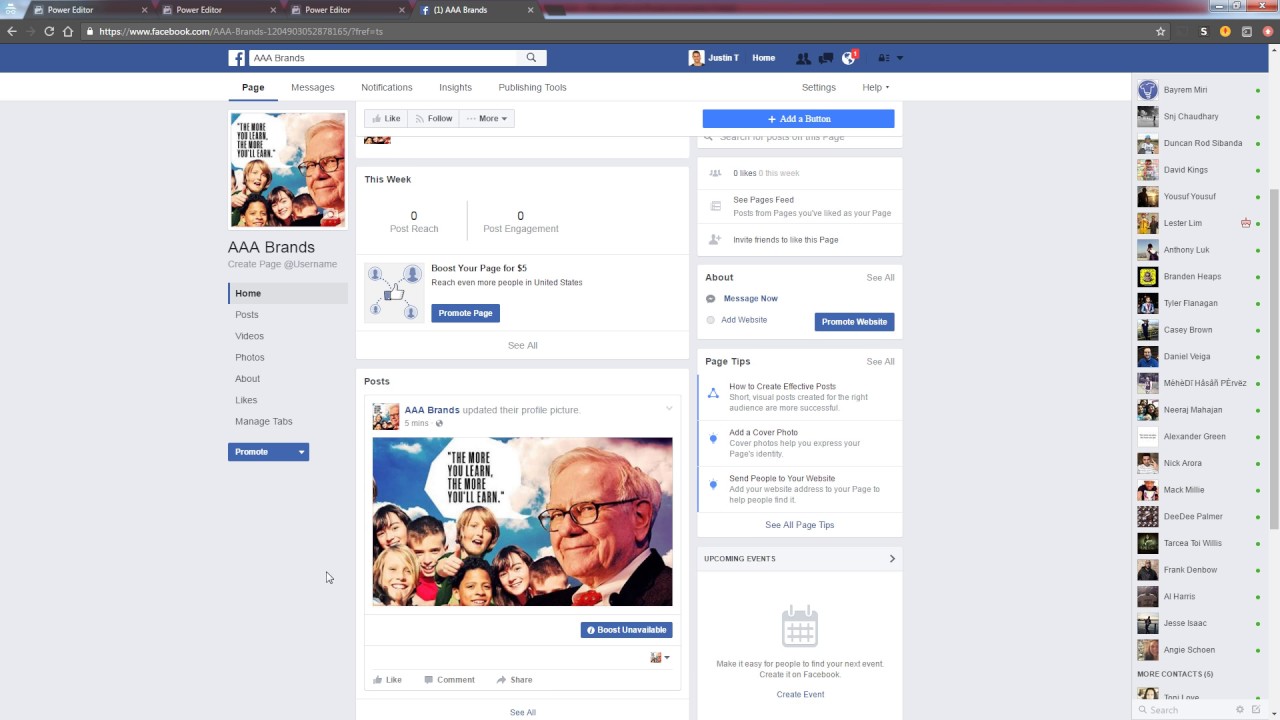 That being said, now when services are back we stopped and reflected on the platform itself and on its users. If Facebook is vulnerable so are its users, but sometimes users themselves are responsible for being a target. We step back and take a look at posts that manifest on Facebook and have come with some advice on what things you should never post on Facebook and on other social platforms.
