As you know, Windows Hello offers you quick access to computers since you can log in to your Windows devices three times faster compared to passwords with the help of the camera via Face recognition and fingerprint reader. This way, Windows Hello will recognize you right away. However, there are also times when you might encounter some problems when using Windows Hello. For one, if you are trying to add the PIN method to Windows Hello on your Windows 10 computer but you suddenly encountered an error code of 0x801c004d or if you are trying to use your existing pin and you encounter an error code of 0x80070490 along with an error message that says, “Not recognized”, then read on as this post will guide you on how you can fix both of these errors. Here is the complete content for both errors:
If you got any of these two errors, there are several potential fixes you can check out to resolve them. You can try to check for any Windows Updates or create the PIN again or check the CNG Key Isolation Service. You could also try to reset the TPM or create a new User Account. For more information, follow the instructions provided below.
The first thing you can do is to check for any available Windows Updates. It is possible that your computer may be outdated and is the reason why you’re having troubles with Windows Hello. To check for Windows Updates, just go to Settings and from there, head over to the Update and Security section and click on Windows Updates located on the left pane, and then click on the Check for Updates option. Wait until the process of checking updates is completed and if it finds new updates, install it. After you install the new Windows Updates, check if you can now add the PIN on Windows Hello or not.
The next thing you can do is to create the PIN again by signing out and signing in again and then try creating the PIN once more. If this does not work, you can try restarting your computer and creating the PIN again. You could also try removing the PIN and then change it.
The CNG Key Isolation Service is the one that stores and uses long-lived keys in a secure process complying with the common criteria requirements and it is possible that the error could be related to this service. This service is hosted in the LSA processes and provides key process isolation to private keys and associated cryptographic operations as required by the common criteria. Thus, you need to check this service to see if it’s the one that’s causing the error.
You might also want to try resetting the Trusted Platform Module or TPM to fix the error. You can do this by opening Windows PowerShell and then executing the “Clear-Tpm” command. After that, check if the error is now resolved.
You could also try to create a new User Account on your Windows 10 computer to fix the Windows Hello error. Once you have created a new local user or administrator account in Windows 10, check if you are now able to add the PIN from this newly created user account.

AMD and ATI Technologies ULC have filed a complaint in the United States International Trade Commission against Realtek Semiconductor and TCL Industries Holdings claiming that they have violated five patents.
The complaint has automatically triggered an investigation from USITC which has responded that they will look into certain graphics systems, components thereof, and digital televisions with components from Taiwan-based Realtek and the China/Hong Kong-based TCL Industries Holdings (and its subsidiaries).
AMD and ATI are seeking an exclusion order and cease and desist orders for the sale of the products. The investigation officially started on July the first. AMD and ATI claim that Mediatek and TLC Industries violated five patents on various technologies used in graphic cards.
The ATI patents include texture decompression techniques, a graphics processing architecture with a unified shader, and a multi-threaded graphics processing system (patents 7,742,053 claims 1-9, 8,760,454 claims 2-11, and 11,184,628 claims 7-12). The AMD patents cover a method and system for synchronizing thread wavefront data and events. A patent covers a processing unit that enables asynchronous task dispatch (patents 8,468,547 claims 16-21, and 8,854,381 claims 15-20).
This is not the first time AMD and ATI have asked for a USITC investigation, in 2017 they were targeting LG, Vizio, Mediatek, and Sigma Designs. The previous investigation has been concluded with the settlement between parties, how this one will go we shall see and keep you updated as we move along.
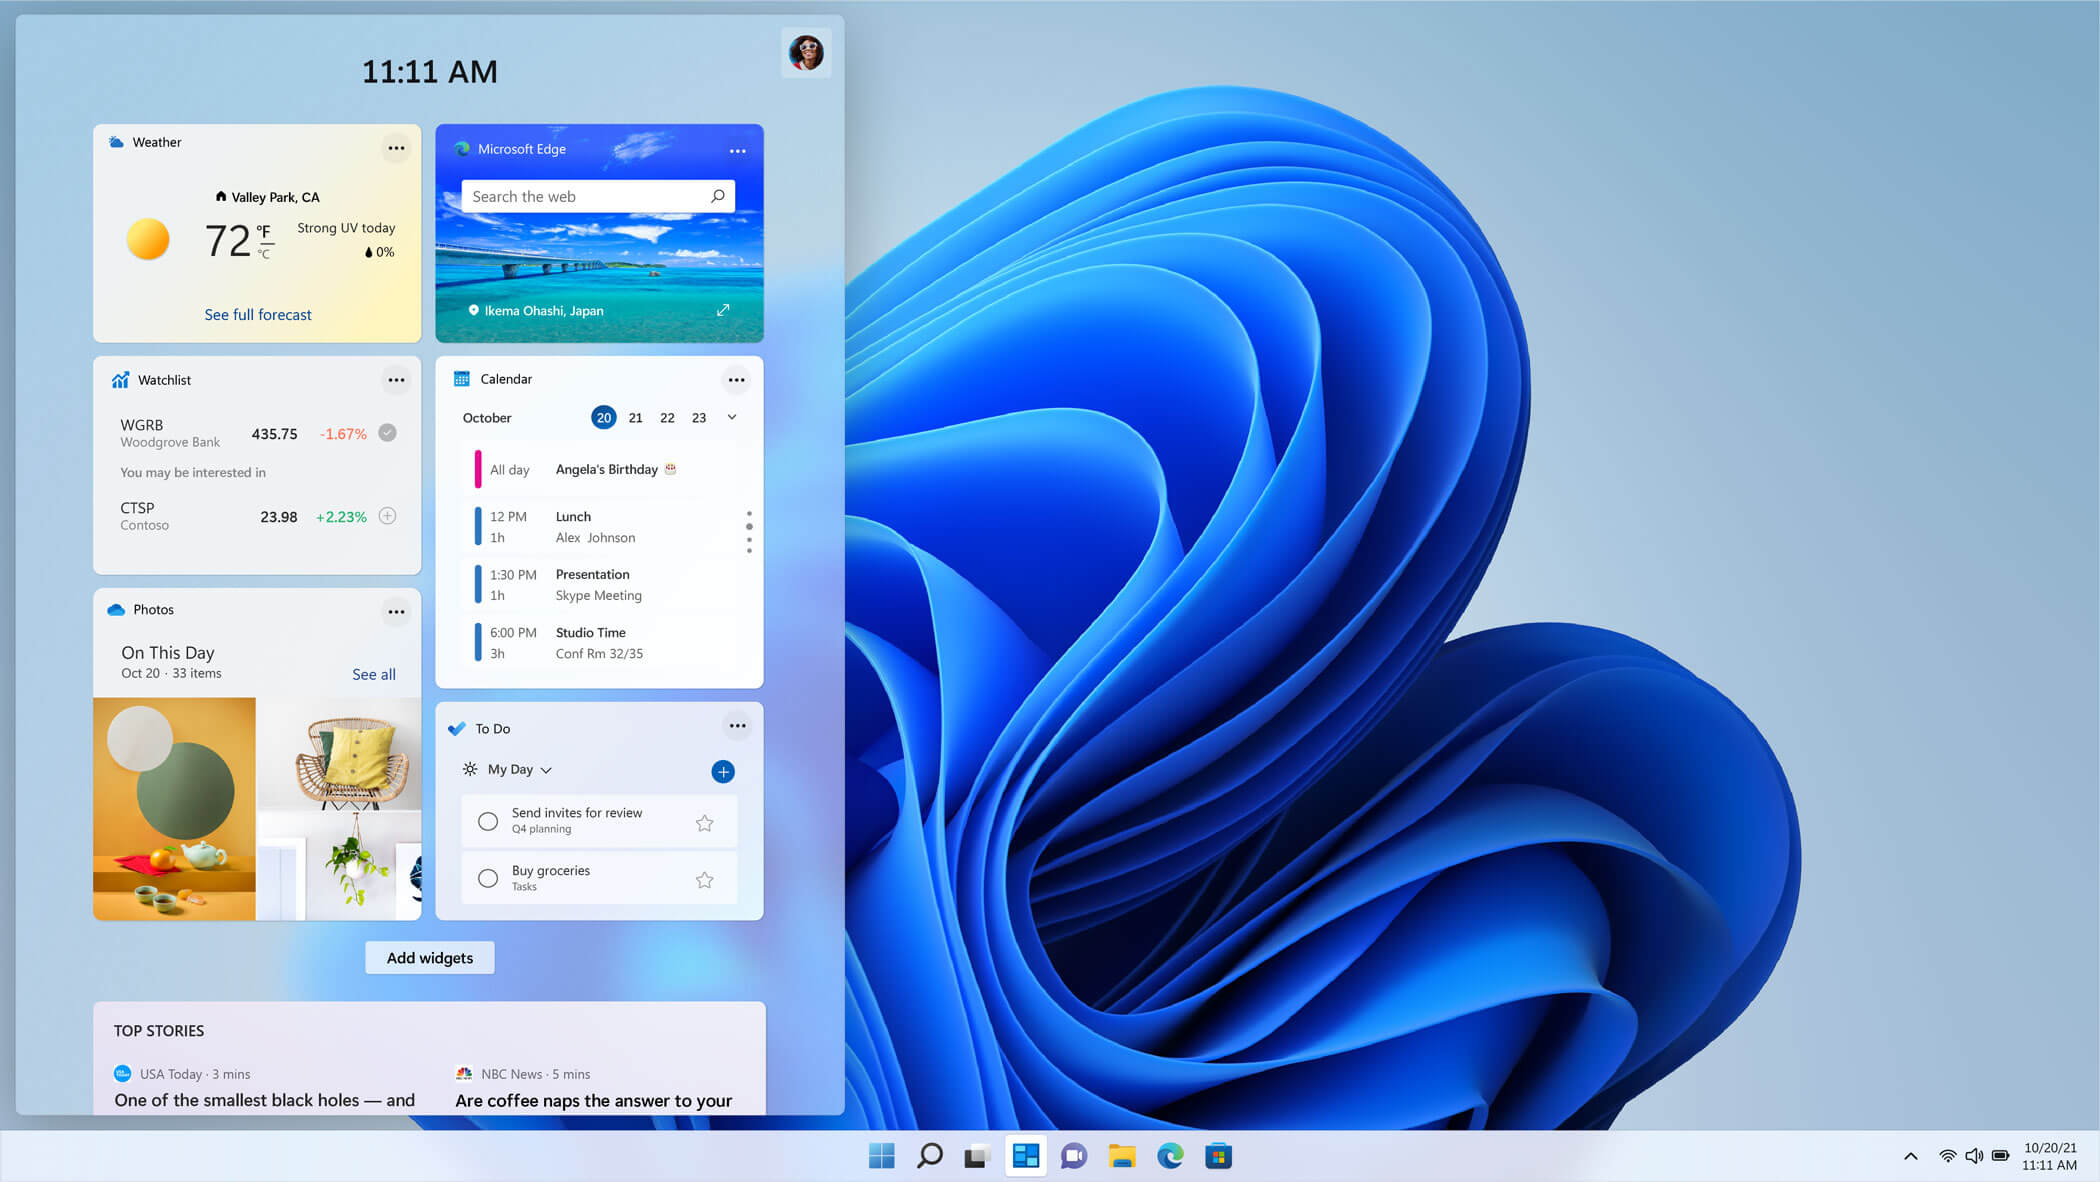 The new widget's menu inside Windows 11 is generally met with a positive attitude but there are still users which prefer not to have it. Luckily for them, Microsoft included a very easy way to turn the widgets menu on or off. Follow this easy guide to see how.
Right-click on the widget button in the taskbar and click on Hide from Taskbar and that’s it
Alternatively, you can also turn it off via the setting app.
Go to the settings app and navigate to Personalization > Taskbar > Taskbar Items and flipping the switch beside Widgets to Off.
Please note that both methods will only hide the button to toggle widgets menu, at the current state there is no really a way to actually turn it off, only hide it and make it not available to bring it up.
The new widget's menu inside Windows 11 is generally met with a positive attitude but there are still users which prefer not to have it. Luckily for them, Microsoft included a very easy way to turn the widgets menu on or off. Follow this easy guide to see how.
Right-click on the widget button in the taskbar and click on Hide from Taskbar and that’s it
Alternatively, you can also turn it off via the setting app.
Go to the settings app and navigate to Personalization > Taskbar > Taskbar Items and flipping the switch beside Widgets to Off.
Please note that both methods will only hide the button to toggle widgets menu, at the current state there is no really a way to actually turn it off, only hide it and make it not available to bring it up. When downloading a Windows update, it is important to remember that these updates are what keeps your computer safe. Some users have reported seeing error code 0x80070490 when allowing updates for their Windows PC. This error code may appear when the user is trying to connect to the update site for Windows and maybe a result of a corrupted CBS manifest. Having this error code will not only stop the update of the system, but it will also certainly halt any work being done with the computer. Quite a few Windows users have written in complaints about this error while updating from any prior Windows update to Windows 10.
Common symptoms include:
There is not a lot known about what exactly causes the error code 0x80070490, but it is something critical that makes Windows abruptly stop its updates. It could be caused by a simple glitch in the computer system, or it could be caused by a larger problem. One thought is that the CBS (Component-Based Servicing) manifest can be corrupt. Another thought is that the computer's anti-virus software may be interfering with the computer's ability to perform the necessary updates.
There is very little information known about error code 0x80070490 and why it exists, but there are a few methods in which to correct it. Users should be careful when trying to fix this error themselves. If the user feels that the methods are too complicated or they are uncomfortable taking it on themselves, they should contact a Windows repair technician to fix the problem. Not all methods listed will suit the user's needs, but it is dependent upon the problem at hand as to which method will be the best fit to fix the error code. If these steps are taken and the error is not corrected, it is vital to contact the Windows repair technician.
Create a new local account on the computer, and allow administrator privileges on it. Next, move all of your documents and personal files to the new account. Delete the old account (you will no longer be using this) and switch over to the new one. After switching to the new local account, add the Microsoft account to it.
Press the Windows key and R. Then, type in services.msc. After the Services window starts up, find the following services: BITS, MSI Installer, Cryptographic, and Windows Update Services. When these services are found, make sure that they are up and running. If one or more of these services is not running, make sure that they are started. To do this, select the service and then click on Start the Service.
Press the Windows key plus W and then type in “troubleshooting”. Select Troubleshooting. On the top left corner, select View All. Click on Windows Update troubleshooter. After this, follow the on-screen instructions in order to run the troubleshooter. After the troubleshooter has run, the issue should be fixed.
 This is a very interesting decision by Microsoft and I fully support it, this time users will be able to pay less and to choose only applications that they need instead of paying for the whole package and not using it.
  Error Causes