Logo

How to Fix the Low Disk Space Notification on Windows 10

As you know, Microsoft constantly releases new updates with the main goal of fixing bugs as well as deliver users with new and exciting features. However, there are times when the latest update comes with an unwanted bug. One of these bugs is an error message saying, “Low Disk Space. You are running out of disk space on Local Disk (G:). Click here to see if you can free space on this drive.” So if you have recently installed a Windows 10 update, then you’ll most likely see a completely new drive on your computer which will appear right after the installation of the update and you’ll also start seeing the aforementioned error message.

It gets irritating as this error message keeps on popping up even if you still have a lot of free space on your other drivers. Obviously, the main reason why this error message pops up all the time is the bug brought along by the Windows Update. This bug unhides the recovery partition drive and allocates it a drive letter which is why you are seeing a new drive in your computer. Thus, you can get rid of the pesky error message by simply removing the letter of the new drive. Just remember that you must not delete anything from the recovery partition drive nor format the drive. Formatting or deleting the recovery partition drive can heavily affect the recovery of Windows since the data on the drive is used by the Windows Recovery Environment or your system’s manufacturer.

A lot of users have reported that removing the drive letter has resolved the issue. And if you worry that removing the drive letter will delete the drive, you are mistaken. This solution is basically harmless and is proven effective to make the notifications go away.

Carefully follow the instructions below to get rid of the Low Disk Space notification by removing the drive letter.

  • Step 1: Tap the Windows key once.
  • Step 2: Next. In the Windows Start Search, type in “command prompt” and right-click on Command Prompt from the search results and select the “Run as administrator” option or you could simply tap Win + R keys and then input “cmd” and hit Enter to open Command Prompt.
  • Step 3: After opening Command Prompt, type in “diskpart” and tap Enter.
  • Step 4: Next, type in “list volume” and tap Enter. After that, you will see a list of drives.
  • Step 5: Take note of the letter associated with the newly created drive.
  • Step 6: Afterwards, type in “select volume <drive letter>” and tap Enter. Take note that you must replace the <drive letter> with the drive letter you’ve found in Step 5.
  • Step 7: Now type in “remove letter=<drive letter>” and then tap Enter. Once again, replace the <drive letter> with the letter you took note of in Step 5.

Do You Need Help with Your Device?

Our Team of Experts May Help
Troubleshoot.Tech Experts are There for You!
Replace damaged files
Restore performance
Free disk space
Remove Malware
Protects WEB browser
Remove Viruses
Stop PC freezing
GET HELP
Troubleshoot.Tech experts work with all versions of Microsoft Windows including Windows 11, with Android, Mac, and more.

Share this article:

You might also like

Free Quake upgrade comes to Steam and more
quake remaster
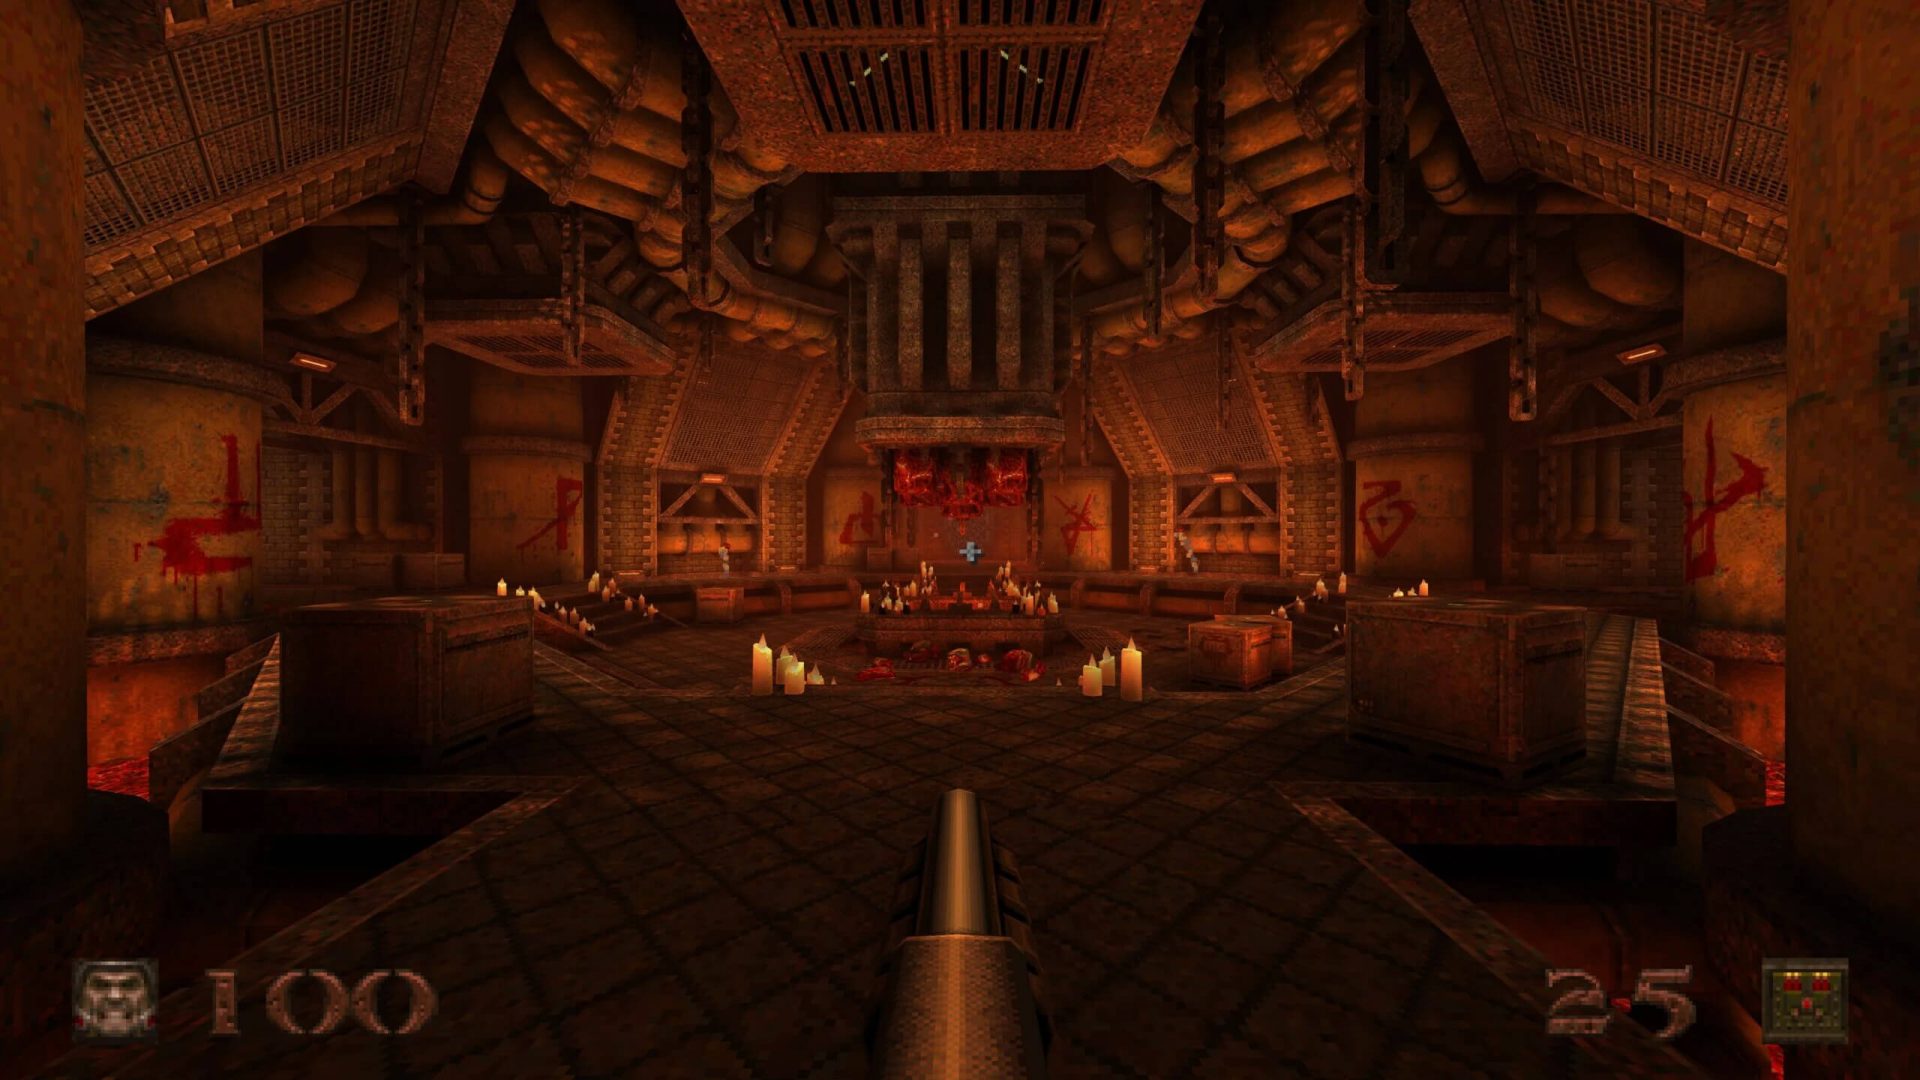
Without any fanfare, news, or information Bethesda has released a completely free upgrade for legendary Quake 1. Free upgrade is automatically applied to all users who possess the original game and it has already been rolled out.

What has changed for good?

New textures, effects, and resolutions are one thing that will come first into your focus when you start the game. From the moment game is started it feels and looks like a game you remember from a long time ago. Models are also upgraded with a higher polygon count. Another thing that will hit you right away is the legendary OST by Trent Reznor in its full glory. If you have the original Quake and played it you will know that OST was missing from the Steam release and having it fully back is a great feature. I would argue that placing just OST alone in the steam release is enough for people to play it again since it adds so much atmosphere. Deathmatch and other multiplayer goodies are all here as well and there is a completely free new episode in the game with several levels. Yes, you get a free Quake upgrade in HD with an extra episode completely free.

The bad side of Quake coin

So this might come as a purist or obsessive nit-picking but there were two things that I, personally am not a fan of and have noticed during my gameplay. Please know that this is personal preference and by no other chance reflects the quality of the game itself but I just had to talk about it. Quake remake is made in a new engine and as such dynamic and gunplay feel different from the original, granted they have done the best they could to replicate the authentic feeling of the original game but there are parts of the game where I have felt that simply put, it feels different. Another thing is also tied to technology and the overall game is somewhat a little brighter and in some areas little softer in dark areas. Like I said this is purely personal preference and might come as nitpicking but I preferred the darker and grittier look of the original game. Darkplaces, the free custom-made upgrade did this in my opinion better.
Read More
Stopping automatic redirects in Browsers
As you know, the internet has changed the world immensely. Nowadays, JavaScript is pushing the modern web ahead. One of the things that make these experiences with the internet seamless and with less clutter is redirection. It is often used on web pages and there are times when a user is prompted about them and most of the time, we barely notice them. However, there are also instances when things can go wrong with redirects as they could become a loop that could mess things up. And since the browser takes a lot of system resources, redirection can result in a poor user experience. That’s why in this post, you will be guided on how you can stop these automatic redirects on browsers such as Microsoft Edge, Google Chrome, and Mozilla Firefox, on your Windows 10 computer. To get started, refer to each one of the options provided below to stop automatic redirects in Microsoft Edge, Google Chrome, and Mozilla Firefox.

Option 1 – Configure the browsers to stop pop-ups and deceptive contents

There are a lot of browsers with built-in settings that allow users to stop pop-ups and deceptive content. To configure these settings, refer to these steps:
  • Microsoft Edge:

    • Click on the three horizontal dots icon or the menu button.
    • Next, click on Settings and select Privacy & Security from the left side navigation.
    • After that, scroll down on the right-side panel and look for Block pop-ups and Windows Defender SmartScreen and then turn their toggle buttons to On.
  • Google Chrome:

    • Open Google Chrome and click on the three vertical dots icon for the menu located in the top right corner of the browser.
    • Next, click on Settings and scroll down until you see the Advanced option. Click on it to open the Advanced Settings.
    • Now scroll down until you reach the Privacy and Security section and look for the Safe browsing option and turn its toggle button to On.
  • Mozilla Firefox

    • Open Mozilla and click on the three horizontal lines icon for the menu button located in the top right corner of the browser and click on Options.
    • Next, go to the Settings section and click the Privacy & Security tab and scroll down and then click on Permissions.
    • From there, make sure that the Block pop-up windows checkbox is checked.
    • Finally, scroll down until you reach the Security section and make sure that the checkbox for the Block dangerous and deceptive content is checked.

Option 2 – Try to reset Winsock, TCP/IP & Flush DNS

To stop redirects, you can also reset Winsock and the TCP/IP as well as flush the DNS cache. To do so, follow these steps:
  • Right-click on the Start button and click on Command Prompt (administrator) so you can pull up an elevated Command Prompt.
  • After that, execute each one of the commands listed below. And after you typed in one after the other, you have to hit Enter.
  1. netsh winsock reset – type in this command to reset Winsock
  2. netsh int ip reset resettcpip.txt – type in this command to reset TCP/IP
  3. ipconfig /flushdns – type in this command to flush the DNS cache
  • Next, restart your PC and check if the problem’s fixed.

Option 3 – Edit your Hosts File

  • Tap the Win + R keys to open then type in %WinDir% and then click OK.
  • Go to System32/drivers/etc.
  • Open the host file using Notepad.
  • Delete all the suspicious entries.
  • After that, save the changes you’ve made and close the file.
Read More
Fix Error 0x8024a11a or 0x8024a112
What is Error 0x8024a11a or 0x8024a112 ? If you are trying to update your Windows 10 computer and just when you were done downloading the feature update and about to install it, you encounter an error message saying:
“We’re having trouble restarting to finish the install, Error 0x8024a11a, 0x8024a112, 0x80070005 or 0x80070032”
And so to fix this problem, this post will give you a couple of possible solutions. Refer to the options given below to get started.

Option 1 – Restart your computer many times

This is the first thing you can try since there are instances when the Windows Update process gets stuck for a minor thing and restarting the computer usually helps in resolving the issue. All you have to do is click the Restart now button. However, if it does not work, you can use the Power buttons from the Start Menu or WinX Menu. Aside from that, you can also use your power buttons such as Alt + Ctrl + Del to restart your computer. And during the boot process, it is recommended that you restart your computer in Safe Mode or even in a Clean Boot State. After that, you can restart your computer in normal mode. This will make sure that no third-party processes will be able to interfere with the Windows Update process. To put your PC in a Clean Boot State, here’s what you have to do:
  • Log onto your PC as an administrator.
  • Type in MSConfig in the Start Search to open the System Configuration utility.
  • From there, go to the General tab and click “Selective startup”.
  • Clear the “Load Startup items” check box and make sure that the “Load System Services” and “Use Original boot configuration” options are checked.
  • Next, click the Services tab and select the “Hide All Microsoft Services” check box.
  • Click Disable all.
  • Click on Apply/OK and restart your PC. (This will put your PC into a Clean Boot State. And configure Windows to use the usual startup, just simply undo the changes.)
  • After that, try to install the Windows Updates or upgrade again.

Option 2 – Try running the Windows Module Installer

The Windows Module Installer is a built-in service in the Windows operating system that could help you resolve the Windows update error 0x8024a11a or 0x8024a112. You need to make sure that this service is Started and that its Startup type is set to Automatic – you can do this via Services Manager or by executing the command given below in an elevated Command Prompt.
  • Tap the Win + R keys to open the Run dialog box.
  • Then type “command prompt” in the field and hit Enter to open Command Prompt.
  • And in the elevated Command Prompt type in the following command and hit Enter:
SC config trustedinstaller start=auto
  • After executing the command successfully, you should see the “[SC] ChangeServiceConfig SUCCESS” message on the Command Prompt window.

Option 3 – Run the DISM tool

You can also run the DISM Tool as it helps in repairing the Windows System Image as well as the Windows Component Store in Windows 10. Using this built-in tool, you have various options such as the “/ScanHealth”, “/CheckHealth”, and “/RestoreHealth” which could help in fixing the Windows update error 0x8024a11a or 0x8024a112.
  • Open the Command Prompt with admin privileges.
  • Then type in the following commands and make sure to hit Enter right after you type each one of them:
    • Dism /Online /Cleanup-Image /CheckHealth
    • Dism /Online /Cleanup-Image /ScanHealth
    • exe /Online /Cleanup-image /Restorehealth
  • Do not close the window if the process takes a while as it will probably take a few minutes to finish.

Option 4 – Run the System File Checker

System File Checker or SFC is a built-in command utility that helps in restoring corrupted files as well as missing files. It replaces bad and corrupted system files to good system files that might be the cause why you’re getting the errors 0x8024a11a and 0x8024a112. To run the SFC command, follow the steps given below.
  • Tap Win + R to launch Run.
  • Type in cmd in the field and tap Enter.
  • After opening Command Prompt, type in sfc /scannow
The command will start a system scan which will take a few whiles before it finishes. Once it’s done, you could get the following results:
  1. Windows Resource Protection did not find any integrity violations.
  2. Windows Resource Protection found corrupt files and successfully repaired them.
  3. Windows Resource Protection found corrupt files but was unable to fix some of them.

Option 5 – Run the Windows Update Troubleshooter

Running the built-in Windows Update troubleshooter could also help you resolve the Windows update error 0xca00a000. To run it, go to Settings and then select Troubleshoot from the options. From there, click on Windows Update and then click the “Run the troubleshooter” button. After that, follow the next on-screen instructions and you should be good to go.

Option 6 – Run Microsoft’s online troubleshooter

Running Microsoft’s online troubleshooter might also help you fix the Windows update error 0x8024a11a or 0x8024a112. This online troubleshooter is known to help in fixing Windows Update errors, it scans your computer for issues that might be causing the problem and then fixes them automatically.
Read More
Not enough USB controller resources Error
As you know, USB is now being widely used in all devices with USB A as the leading type with most devices based on it. Peripheral devices such as Pen Drives, External Hard disks, and many more also use a USB port. On the other hand, USB C is also coming up to be the next big standard in the computing world because of its high transfer speeds, wider compatibility as well as support for external Graphics Processing Units. However, just recently, USB 3.0 ports have been reported to cause the following error to pop up on Windows 10 computers every time a USB device is plugged in.
“Not enough USB controller resources. The controller does not have enough resources for this device.”
To fix this error, here are some guidelines you can check out. Make sure to follow them carefully.

Option 1 – Try to use a lower generation USB port

The first thing you can do is to try using a lower generation USB port as this issue mostly occurs when a device is connected to a USB 3,0 port. This means that you have to plug in your device to a USB 2.0 port and then see if it fixes the error or not. You can easily decipher a USB 3.0 port from a USB 2.0 port as the former is in blue.

Option 2 – Try to use a dock

You could also try to use a dock to resolve the error. Note that when too much power on laptops and notebooks are drawn from the USB ports and as a USB 3.0 port draws more power compared to a USB 2.0 port. Thus, if you plug in your USB storage device into a USB 2.0 port with the help of a dock, it should fix the problem.

Option 3 – Try disabling the xHCI Mode option in the BIOS

  • First, boot your computer into the BIOS.
  • Once your computer has booted, go to the Advanced tab.
  • Next, make sure that the entry for “xHCI Pre-boot mode” is set to Disabled under the USB Configuration section.
  • Now save the changes you’ve made and then restart your computer to Windows 10 and see if the error is now fixed.

Option 4 – Update or reinstall the Universal Serial Bus Controller driver

Since it could be a driver issue, you can try to update or reinstall the Universal Serial Bus Controller drivers using the Device Manager. Refer to the following steps:
  • First, click the Start button and type “device manager”.
  • Then click on the “Device Manager” from the search results to open it.
  • From there, look for the “Universal Serial Bus controllers” option and then right click on each one of the USB drivers, especially the Generic USB Hub driver, and then select the Update Driver from the menu.
  • Restart your PC and then click the “Search automatically for updated driver software” option.
Note: If updating the USB Controller drivers didn’t work, you can try to reinstall them instead.

Option 5 – Run the Hardware and Devices Troubleshooter

You could also run the Hardware and device Troubleshooter to try and fix the “Not enough USB controller resources” error.
  • The first thing you need to do is click on Start and then on the gear-like icon to pull up the window for Settings.
  • After opening Settings, look for the Update and Security option and select it.
  • From there, go to the Troubleshoot option located on the left-hand side of the list.
  • Next, select Hardware and Devices from the list and open the Troubleshooter and run it. Once it is doing its job, wait for it to complete the process and then restart the system.
  • After the system restarts, check if the problem’s now fixed. If not, refer to the next option given below.
Read More
Fix Windows Update Install Error 0x80070020
Getting a few errors here and there when updating your Windows 10 computer is not uncommon. Some of these errors won’t allow the Windows Update service to initiate while the other ones will halt the process while it’s running. So in this post, we’ll show you what you can do to fix the Windows Update error 0x80070020. The Windows Update error 0x80070020 is most likely caused by some programs installed in the system which interferes with the Windows Update process. It might be an antivirus program, an incompatible program, a potentially unwanted program, or worse, malware. In addition, corrupted or missing files might also be the culprit. Whichever the cause may be, here are some suggestions you need to check out to resolve the problem.

Option 1 – Try to reset the Windows Update components manually

  • To manually reset the Windows Update components, first, you need to stop the Background Intelligent Transfer Service, Windows Update, and the Cryptographic Services. To do so, run the following command in Command Prompt and make sure to press Enter after you enter each one of them:
    • net stop bits
    • net stop wuauserv
    • net stop cryptsvc
  • Next, delete the “qmgr*.dat” file in order to reset the Windows Update components. To do delete this file, run the following command in Command Prompt:
    • Del “%ALLUSERSPROFILE%Application DataMicrosoftNetworkDownloaderqmgr*.dat
  • Now you have to rename both the SoftwareDistribution and Catroot2 folders by entering the following command in Command Prompt:
    • Ren %systemroot%SoftwareDistributionSoftwareDistribution.bak
    • Ren %systemroot%system32catroot2catroot2.bak
  • Reset BITS and Windows Update service by entering the following commands in Command Prompt:
    • sc.exe sdset bits D:(A;;CCLCSWRPWPDTLOCRRC;;;SY)(A;;CCDCLCSWRPWPDTLOCRSDRCWDWO;;;BA)(A;;CCLCSWLOCRRC;;;AU)(A;;CCLCSWRPWPDTLOCRRC;;;PU)
    • sc.exe sdset wuauserv D:(A;;CCLCSWRPWPDTLOCRRC;;;SY)(A;;CCDCLCSWRPWPDTLOCRSDRCWDWO;;;BA)(A;;CCLCSWLOCRRC;;;AU)(A;;CCLCSWRPWPDTLOCRRC;;;PU)
  • Now enter the following command:
  • cd /d %windir%system32
  • RE-register BITS and other Windows Update related files by typing each one of the following commands:
    • regsvr32.exe atl.dll
    • regsvr32.exe urlmon.dll
    • regsvr32.exe mshtml.dll
    • regsvr32.exe shdocvw.dll
    • regsvr32.exe browseui.dll
    • regsvr32.exe jscript.dll
    • regsvr32.exe vbscript.dll
    • regsvr32.exe scrrun.dll
    • regsvr32.exe msxml.dll
    • regsvr32.exe msxml3.dll
    • regsvr32.exe msxml6.dll
    • regsvr32.exe actxprxy.dll
    • regsvr32.exe softpub.dll
    • regsvr32.exe wintrust.dll
    • regsvr32.exe dssenh.dll
    • regsvr32.exe rsaenh.dll
    • regsvr32.exe gpkcsp.dll
    • regsvr32.exe sccbase.dll
    • regsvr32.exe slbcsp.dll
    • regsvr32.exe cryptdlg.dll
    • regsvr32.exe oleaut32.dll
    • regsvr32.exe ole32.dll
    • regsvr32.exe shell32.dll
    • regsvr32.exe initpki.dll
    • regsvr32.exe wuapi.dll
    • regsvr32.exe wuaueng.dll
    • regsvr32.exe wuaueng1.dll
    • regsvr32.exe wucltui.dll
    • regsvr32.exe wups.dll
    • regsvr32.exe wups2.dll
    • regsvr32.exe wuweb.dll
    • regsvr32.exe qmgr.dll
    • regsvr32.exe qmgrprxy.dll
    • regsvr32.exe wucltux.dll
    • regsvr32.exe muweb.dll
    • regsvr32.exe wuwebv.dll
  • Now type each one of those commands below.
    • net start bits
    • net start wuauserv
    • net start cryptsvc

Option 2 – Install the updates in a Clean Boot State

You might want to try putting your computer in a Clean Boot state and then install Windows Updates again without any trouble. During this state, you can start the system with a minimum number of drivers and startup programs that will surely help you in isolating the root cause of the issue.
  • Log onto your PC as an administrator.
  • Type in msconfig in the Start Search to open the System Configuration utility.
  • From there, go to the General tab and click “Selective startup”.
  • Clear the “Load Startup items” check box and make sure that the “Load System Services” and “Use Original boot configuration” options are checked.
  • Next, click the Services tab and select the “Hide All Microsoft Services” check box.
  • Click Disable all.
  • Click on Apply/OK and restart your PC. (This will put your PC into a Clean Boot State. And configure Windows to use the usual startup, just simply undo the changes.)
  • After that, try to install the Windows Updates or upgrade again.

Option 3 – Clear the contents of both the SoftwareDistribution and Catroot2 folders

  • Open the WinX Menu.
  • From there, open Command Prompt as admin.
  • Then type in the following command – don’t forget to hit Enter right after typing each one of them.
net stop wuauserv net stop bits
  • After entering these commands, it will stop the Windows Update Service and the Background Intelligent Transfer Service.
  • Next, go to the C:/Windows/SoftwareDistribution folder and get rid of all the folders and files thereby tapping the Ctrl + A keys to select them all and then click on Delete. Note that if the files are in use, you won’t be able to delete them.
  • Once all the contents in the Software Distribution folder are deleted, restart your PC and then go back to Command Prompt and input the following commands again.
net start wuauserv net start bits
 Since the folder has already been flushed, it will be populated afresh the instant your restart your computer and open Windows Update.

Option 4 – Try to run the Windows Update Troubleshooter

Running the built-in Windows Update troubleshooter could also help you resolve the Windows Update error 0x80070020. To run it, go to Settings and then select Troubleshoot from the options. From there, click on Windows Update and then click the “Run the troubleshooter” button. After that, follow the next on-screen instructions and you should be good to go.

Option 5 – Try restarting the Windows Update Services

  • Open the Services Manager.
From there, make sure that you set the following services and Startup types:
  • Background Intelligent Transfer Service: Manual
  • Cryptographic Service: Automatic
  • Windows Update Service: Manual (Triggered)
Read More
Microsoft Surface Dial fails to pair with PC
One of the most interesting innovations that were released by Microsoft is the Surface Dial. This only goes to show that Microsoft is very competent not just in hardware but in overall innovation. Although it’s quite a piece of technology and as far as the consensus is concerned, it works pretty well, there are still some issues encountered by users. One of the particular issues experienced by users is that the Surface Dial fails to pair with every Windows 10 PC. At a time of writing, it is still not clear what the cause of the problem really is. However, their possible solutions are provided in this post that might help you resolve the problem. Before you get started troubleshooting the problem, make sure that there are two AAA batteries fitted inside properly.

Option 1 – Check if your PC supports Bluetooth 4.0 LE

In case you don’t know, the Surface Dial only works with the Windows 10 Anniversary Update and later PCs that support Bluetooth 4.0 LE. Thus, you have to check if this is supported or not before you troubleshoot further.
  • Tap the Win + R keys on your keyboard to open the Run dialog box.
  • Next, type “devmgmt.msc” in the field and hit Enter to open the Device Manager.
  • From there, click on Bluetooth and select “Microsoft Bluetooth LE Enumerator” from the drop-down menu. However, if it is not there, then it simply means that your computer does not support this standard which is most likely why you were unable to pair with other Windows 10 PCs. On the other hand, if you were able to see it, then proceed to the next troubleshooting steps below.

Option 2 – Check if Bluetooth is on

The next thing you have to do is to check if Bluetooth is turned on. As you know, the Surface Dial connects to your computer using Bluetooth and so you need to check if it’s really on or not. Aside from that, you also have to verify pairing.
  • Tap the Win + I keys to open Windows Settings.
  • Next, select Devices from the menu and click on Bluetooth.
  • After that, make sure that the toggle switch for Bluetooth is turned on.
  • Now all you have to do is to verify pairing by pressing and holding the pairing button located beside the batteries and then wait for a few seconds until the Bluetooth light begins to flash.
  • Then go back to the Bluetooth section and click on Bluetooth or other devices.
  • From there, click on Add Bluetooth and select Surface Dial.
  • Follow the next instructions on the screen and click on Done once everything is completed. That should fix the problem.

Option 3 – Check if Surface Dial is connected to another PC

If you think that connecting a Bluetooth device to two different PCs at the same time is wise, then think again as it does not really bode well for the overall user experience. Thus, you need to disconnect the Surface Dial from the system that you are currently using. On the other hand, if everything fails, then it’s most likely that the Bluetooth adapter is the one at fault. So you may have to get a third-party device that connects to your system via USB and then see if it works or not.
Read More
Check if your data has been stolen for free

Website breaches and stealing user data is nothing new in the world of the internet. Although a very unpleasant experience it still happens even on some high-quality websites. In this article, we will not focus on how can you not be the target of this kind of attack, because you really cannot. Weel you can kind of if you decide not to have your data on websites at all, but let's just say that is not something you are willing to do.

stolenSo, in this case, you have some social, forum, or gaming accounts but you heard that service has been breached and that your email or password might be stolen. Well in this case all you need to do is of course to login into the service and change your password. But, what happens if you are not aware at all that service has been compromised?

Mozilla foundation has asked themselves this same question it seems and they have decided to help us out. They have placed a free online service where you can just by typing in your email address find out if your email or data has been compromised in any way.

Go to https://monitor.firefox.com/ and check it out, if you find out that there is some website that you did not know was breached, change your password right away, and if you have used the same password for anything else (I hope not), change them as well.

Read More
Windows got stuck on Preparing Windows screen
You might have experienced a situation when you restarted your Windows 10 PC after an upgrade and you tried logging into your account but only a screen with a message saying, “Preparing Windows”. If the screen only stays that way, this indicates that Windows 10 is trying to complete the upgrade or waiting for some files to load up so that you can use your account. Some users also reported that when they tried logging into their accounts, they also get the same message on their screens. To resolve this issue, read on as this post will show you what you can do if your Windows 10 PC is stuck on the “Preparing Windows” screen. A lot of users have tried logging back into their account once more but to no avail as the same screen still greets them. And even when they tried the Ctrl + Alt + Del combo, it still didn’t work. This only goes to show that your account might somehow be corrupted.

Option 1 – Try booting your PC into Safe Mode

The first thing you can do to resolve the issue is to try booting your computer into Safe Mode and then log in using an Admin account. If it seems like your admin account has caused the problem, you need to create an admin account first and then log in after you reboot into the account and then log off. After that, restart your PC normally and check if the problem’s resolved or not. If not, refer to the next given option below.

Option 2 – Try to repair your corrupted profile via Registry

In this second option, you can try to repair the corrupted profile using the Registry but before you proceed, make sure to create a System Restore Point and then follow the steps below.
  • Tap the Win + R keys to open the Run dialog box.
  • Then type “regedit” in the field and hit Enter or click OK to open the Registry Editor.
  • Next, go to this registry key: ComputerHKEY_LOCAL_MACHINESOFTWAREMicrosoftWindows NTCurrentVersionProfileList
  • Once you’ve opened the registry key, you should see a list of all the user profiles on your computer. Now click on each S-1-5 folder and look for the “ProfileImagePath” entry and double-click on it to check which user account it is related to. You will see a path like “CUsersACK” where “ACK” is the username.
  • You should know which among the user account is corrupted. Just look for a key named “RefCount” and change its Value data to “0” and click OK. And if it isn’t available, simply right-click on the right pane and create it.
  • After that, double click on the key named “State” and make sure that the Value data is “0” and click OK.
  • Exit the Registry Editor and restart your computer to apply the changes made.

Option 3 – Try running the System File Checker

System File Checker or SFC is a built-in command utility that helps in restoring corrupted files as well as missing files. It replaces bad and corrupted system files with good system files that might be the cause why your screen is stuck at “Preparing Windows”. To run the SFC command, follow the steps given below.
  • Tap Win + R to launch Run.
  • Type in cmd in the field and tap Enter.
  • After opening Command Prompt, type in sfc /scannow
The command will start a system scan which will take a few whiles before it finishes. Once it’s done, you could get the following results:
  1. Windows Resource Protection did not find any integrity violations.
  2. Windows Resource Protection found corrupt files and successfully repaired them.
  3. Windows Resource Protection found corrupt files but was unable to fix some of them.

Option 4 – Try to repair hard disk errors using the Chkdsk utility

You can also run the Chkdsk utility to resolve the problem. If your hard drive has issues with integrity, the update will really fail as the system will think that it’s not healthy and that’s where the Chkdsk utility comes in. The Chkdsk utility repairs hard drive errors that might be causing the problem.
  • Open Command Prompt with admin privileges.
  • After opening Command Prompt, execute the commands listed below, and don’t forget to hit Enter right after you type in each one of them.
  • chkntfs /t
  • chkntfs /t:10
Read More
Fatal error occurred while trying to sysprep
There are several kinds of errors you could encounter when you are running Windows 10 on a virtual machine. The Windows OS knows the difference between booting up in a standalone computer or in a virtual machine. This is why some specific drivers and system capabilities are used while emulating the Windows OS on software and during this phase, there are times when the System Preparation may throw up an error that says, “A fatal error occurred while trying to sysprep the machine”. This kind of error arises due to a race condition wherein the Sysprep command tries to stop the Microsoft Distributed Transaction Coordinator or MSDTC service and the VMware tool tries to start the MSDTC service. You may also see the following messages logged in the Setuperr.log file:
  • [0x0f0082] SYSPRP LaunchDll:Failure occurred while executing ‘C:Windowssystem32msdtcprx.dll,SysPrepDtcCleanup’, returned error code -2146434815[gle=0x000000b7]
  • [0x0f0070] SYSPRP RunExternalDlls:An error occurred while running registry sysprep DLLs, halting sysprep execution. dwRet = -2146434815[gle=0x000000b7]
  • [0x0f00a8] SYSPRP WinMain:Hit failure while processing sysprep cleanup providers; hr = 0x80100101[gle=0x000000b7]
To fix the 0x0f0082, 0x0f0070, 0x0f00a8 Sysprep errors, you can check out two potential fixes. First, you have to check the status of the MSDTC service and the second one is to check the settings in the Windows Registry. Note that these fixes are proven to be effective on many users and apply to several versions of Windows, including Windows 10.

Option 1 – Check the status of the MSDTC service via Command Prompt

As mentioned, the error could be caused by the malfunctioning of the MSDTC service or it. Thus, you have to uninstall and reinstall the MSDTC service to resolve the problem and you can do that using Command Prompt. Follow the steps below.
  • In the Start Search, type “command prompt” and from the results, right-click on Command Prompt and then select the “Run as administrator” option to open it with admin privileges.
  • If a User Account Control or UAC prompt appears, just click on Yes to proceed.
  • Once you’ve opened Command Prompt, execute this command: msdtc –uninstall
  • The command you just entered will uninstall the MSDTC service. After that, you need to execute this second command to reinstall the service: msdtc –install
  • Now exit Command Prompt and check if the error is now fixed.

Option 2 – Check the Registry settings

  • Tap the Win + R keys to open the Run dialog box and type “Regedit” in the field and click OK or hit Enter to open the Registry Editor.
  • After opening the Registry Editor, navigate to this registry path: HKEY_LOCAL_MACHINESOFTWAREMicrosoftWindows NTCurrentVersionSoftwareProtectionPlatform
  • From there, look for a DWORD value that’s named “SkipRearm” and double click on it.
  • Then change its value data to “1”.
  • Restart your computer to apply successfully apply the changes made and check if it was able to fix the error.
Read More
Program Cannot Start Because MSVCR100.Dll Is Missing, What Can I Do?
When you get the error information, "The Software Can Not Begin Because MSVCR100.Dll Is Missing", what this implies is that the Computer will be lacking the  MS Visual C++ 2010 libraries. The malfunction is rather frequent throughout installations. It doesn't matter the number of times you try to reinstall the program. The malfunction can happen whether you've been utilizing your pc for many years, or it's really a recent one.

Solution

Restoro box imageError Causes

a) Missing MSVCR100.DLL: As the problem message indicates, you get this information mainly because MSVCR100.DLL is completely missing. b) Broken MSVCR100.DLL: When the msvcr100.dll is broken, you will also get the same error, suggesting the software won't start. The thing you need to understand is the fact that MSVCR100.DLL is playing an important role in the application referred to as MS Visual C++ 2010 Redistributable Package. Without the MS Visual C++ 2010 Redistributable Package, any software that you simply make an effort to install won't start. You could possibly complete installing it by pursuing proper installation procedures, and then end up getting the "The Software Can Not Begin Because MSVCR100.Dll Is Missing" error.

Further Information and Manual Repair

If you get the "The Software Can Not Begin Because MSVCR100.Dll Is Missing" error information on an effective setup of any software, you shouldn't worry. You can really repair the issue and commence your recently installed software without any more hassle. Start by checking whether you presently use 64-bit or 32-bit Windows. Visit the start button, in case you use Winxp. Type winver. On the window that appears, click Run, subsequently push enter. Head to Start, in case you use both Win7 or Vista. Subsequently, click on the search box and type “Computer”. Right-click windows and subsequently click on Properties. Under Windows Edition, you'll find whether your Windows is 64-bit or 32-bit. Search for the correct variation of MS Visual C++ 2010 Redistributable Package, as soon as you discover whether your Windows is 64-bit or 32-bit. Down load the x86 variant of MS Visual C++ Redistributable Package if your version is 32-bit and you must obtain the x64 variant of MS Visual C++, for those who own a-64-bit version of Windows Operating System. You must never obtain MS Visual C++ 2010 Redistributable Package from third-party websites. This is because Microsoft doesn't charge a cent for the files. The files are openly and easily available on Microsoft. These files come in many different variants. Consequently, select what's suitable for your own Computer with regards to the version of Windows which you operate.
  • Never pick the edition of MS Visual C++ 2010 Redistributable Package that's not compatible or appropriate to your Windows Operating System.

Make use of the release date, when installing MS Visual C++ 2010 Redistributable Package. You might also look out for Service Pack 1 and obtain it for your Windows. Service Pack 1 only ensures that you simply obtain the latest edition. As soon as you end installing the most up-to-date version of MS Visual C++ 2010 Redistributable Package as demonstrated above, reboot your computer and you'll not have to worry about getting the annoying"The Software Can Not Begin Because MSVCR100.Dll Is Missing" error message anymore.
Read More
1 2 3 171
Logo
Copyright © 2023, ErrorTools. All Rights Reserved
Trademark: Microsoft Windows logos are registered trademarks of Microsoft. Disclaimer: ErrorTools.com is not affiliated with Microsoft, nor claims direct affiliation.
The information on this page is provided for information purposes only.
DMCA.com Protection Status