SafeSearch is an ad-supported, cross web browser plugin for Internet Explorer and Firefox/Chrome. The browser extension will modify the default or custom settings of the browser including the home page, search settings, and in some cases will modify Internet Explorer’s load time threshold, place a lock file within Firefox to prevent changing settings as well as disable the browser’s Content Security Policy in order to allow for cross-site scripting of the plugin. For these reasons, it has been classified as a browser hijacker.
From the publisher: SafeSearch created by AVSoftware is the unique search engine that filters malicious sites or sites with bad reputations. Every website is weighted on several critical factors – vendor reliability, child safety, privacy issues, user opinions, and ratings.
SafeSearch has been found to be bundled with 3rd party software and malware and therefore is not recommended to keep on your computer.
About Browser Hijackers
Browser hijacking is amongst the internet’s constant problems that target browsers. It’s a kind of malware program that directs web browser requests to some other malicious sites. They’re created to disrupt browser functions for several purposes. Typically, the idea is to force users to visit certain websites that are trying to improve their visitor traffic and produce higher ad revenue. Even though it might seem naive, all browser hijackers are damaging and therefore always regarded as security risks. Furthermore, hijackers can make the entire infected system vulnerable – other dangerous malware and viruses will take hold of these opportunities to intrude into your PC effortlessly.
Browser hijacking symptoms
There are several signs of web browser hijacking: home-page is changed; you see new unwanted bookmarks or favorites added, usually directed to advertisement-filled or pornography websites; the main web browser settings are altered and undesirable or insecure sites are added to the trusted websites list; you notice many toolbars on your internet browser; unstoppable flurries of pop-up advertisements show up on your PC screen; web pages load very slowly and at times incomplete; you cannot visit specific sites like homepages of security software.
So how does a PC get infected with a browser hijacker?
Browser hijackers infect computers in numerous ways, including via a drive-by download, a file-share, or an infected e-mail. They could be included with toolbars, add-ons, BHO, plugins, or browser extensions. Also, some shareware and freeware can put the hijacker within your computer through “bundling”. An example of some notorious browser hijacker includes Conduit, Anyprotect, Babylon, SweetPage, DefaultTab, Delta Search, and RocketTab, but the names are continually changing.
Browser Hijacker Malware – Removal
Certain hijackers could be removed simply by uninstalling the related freeware or add-ons through the Add or Remove Programs in the Microsoft Windows control panel. However, the majority of hijacking codes are certainly not simple to remove manually, as they go much deeper into the operating system. Moreover, manual removal expects you to perform several time-consuming and intricate procedures that are tough to conduct for novice computer users.
What you can do if Virus Stops You From Downloading Anything?
Malware can cause all kinds of damage once they invade your PC, from stealing your personal information to erasing data files on your PC. Certain malware variants alter internet browser settings by adding a proxy server or modify the computer’s DNS settings. In these instances, you will be unable to visit certain or all of the websites, and thus not able to download or install the necessary security software to eliminate the malware. If you are reading this, you may have got infected by malware that stops you from downloading a computer security program like Safebytes Anti-Malware. Even though this type of issue will be tougher to get around, there are a few actions you can take.
Install antivirus in Safe Mode with Networking
Safe Mode is actually a unique, basic version of Windows where only minimal services are loaded to counteract malware and other troublesome applications from loading. In case the malware is set to load automatically when PC boots, switching into this particular mode may well prevent it from doing so. In order to get into Safe Mode or Safe Mode with Networking, press F8 while the system is booting up or run MSCONFIG and locate the “Safe Boot” options under the “Boot” tab. Once you reboot into Safe Mode with Networking, you can download, install, as well as update anti-malware software from there. At this point, you could run the antivirus scan to remove computer viruses and malware without hindrance from another application.
Switch over to an alternate browser
Malicious program code might exploit vulnerabilities in a particular browser and block access to all anti-malware software websites. If you suspect that your Internet Explorer has been hijacked by a computer virus or otherwise compromised by hackers, the most effective approach is to switch over to an alternate web browser such as Google Chrome, Mozilla Firefox, or Apple Safari to download your favorite security program – Safebytes Anti-Malware.
Install security software on a flash drive
To successfully eliminate the malware, you might want to approach the issue of installing an antivirus software program on the affected PC from a different perspective. Do these simple measures to clean up your infected computer using a portable antivirus.
1) Use another virus-free PC to download Safebytes Anti-Malware.
2) Mount the pen-drive onto the same system.
3) Run the setup program by double-clicking the executable file of the downloaded application, which has a .exe file extension.
4) Select the USB drive as the location when the wizard asks you exactly where you would like to install the application. Follow the on-screen instructions to finish the installation.
5) Transfer the flash drive from the uninfected PC to the infected computer.
6) Double-click the antivirus software EXE file on the thumb drive.
7) Click on the “Scan Now” button to start the virus scan.
Ensure the Safety of Your Computer by Installing SafeBytes Anti-Malware
If you’re looking to install an anti-malware application for your computer, there are numerous tools in the market to consider but you just cannot trust blindly anyone, irrespective of whether it is a free or paid program. Some of them are good but there are several scamware applications that pretend as authentic anti-malware software waiting to wreak havoc on the computer. When searching for an anti-malware program, choose one that provides solid, efficient, and full protection against all known computer viruses and malware. When considering the dependable software programs, Safebytes AntiMalware is certainly the strongly recommended one.
SafeBytes can be described as a powerful, real-time anti-spyware application that is made to assist regular computer users in safeguarding their PC from malicious threats. This tool can easily identify, remove, and protect your computer from the latest malware intrusions such as spyware, adware, trojan horses, ransomware, parasites, worms, PUPs, along with other potentially harmful software applications.
SafeBytes anti-malware comes with a myriad of enhanced features that sets it aside from all others. Here are a few popular features present in this software:
Anti-Malware Protection: By using a critically acclaimed malware engine, SafeBytes gives multi-layered protection which is designed to catch and eliminate threats that are hidden deep inside your computer system.
Real-time Active Protection: Malware programs trying to get into the computer are identified and stopped as and when detected by the SafeBytes active protection shields. They’re highly efficient in screening and getting rid of various threats because they are continuously revised with the latest updates and safety measures.
Safe Web Browsing: SafeBytes provides an instant safety rating on the web pages you are about to visit, automatically blocking risky sites and ensure that you’re certain of your safety while browsing the net.
Low CPU and Memory Usage: This software is lightweight and will work quietly in the background, and will not have an effect on your computer efficiency.
24/7 Customer Service: SafeBytes provides 24/7 technical support, automatic maintenance, and updates for the best user experience.
Technical Details and Manual Removal (Advanced Users)
If you wish to manually remove SafeSearch without the use of an automated tool, it may be possible to do so by removing the program from the Windows Add/Remove Programs menu, or in cases of browser extensions, going to the browsers AddOn/Extension manager and removing it. You will likely also want to reset your browser.
To ensure the complete removal, manually check your hard drive and registry for all of the following and remove or reset the values accordingly. Please note that this is for advanced users only and may be difficult, with incorrect file removal causing additional PC errors. In addition, some malware is capable of replicating or preventing deletion. Doing this in Safe Mode is advised.
The following files, folders, and registry entries are created or modified by SafeSearch
Files:
C:Program FilesPrimesoftSafeSearchsafesearch.dll
C:Program FilesPrimesoftSafeSearch_safesearch.dll
C:Program FilesPrimesoftSafeSearchaanyvkcf.exe
C:Program FilesPrimesoftSafeSearchsafesearch.exe
C:Program FilesPrimesoftSafeSearchrgzcdhtn.exe
Registry:
HKEY_LOCAL_MACHINESOFTWAREMicrosoftWindowsCurrentVersionRunaanyvkcf
HKEY_LOCAL_MACHINESOFTWAREMicrosoftWindowsCurrentVersionRunSafeSearch
HKEY_LOCAL_MACHINESOFTWAREMicrosoftWindowsCurrentVersionRunrgzcdhtn
HKEY_CURRENT_USERSoftwarePrimeSoft
HKEY_CURRENT_USERSoftwareSafeSearch
HKEY_CLASSES_ROOT.QSCH
HKEY_CLASSES_ROOTQSCH File
HKEY_CLASSES_ROOTSafeSearch.SafeSearchBHO
HKEY_CLASSES_ROOTSafeSearch.SafeSearchBHO.1
HKEY_CLASSES_ROOTCLSID00000000-0000-0000-0000-000000000001
HKEY_CLASSES_ROOTInterface28E6CCE2-3F2C-4B3D-9CB4-2FC8715A3ECE
HKEY_CLASSES_ROOTTypelib82E9DE01-D860-40E4-B9C1-91F0E8272962
HKEY_CLASSES_ROOTTypelibCB5006EE-F57D-4116-B7B6-48EB564FE0F0
HKEY_CLASSES_ROOTmimedatabasecontent typeapplication/x-QSCH
HKEY_USERS.defaultSoftwareNetscapeNetscape NavigatorTrusted External Applications%System%aanyvkcf.exe=yes
HKEY_USERS.defaultSoftwareNetscapeNetscape NavigatorSuffixesApplication/x-QSCH
HKEY_LOCAL_MACHINESoftwareMicrosoftInternet ExplorerToolbar00000000-0000-0000-0000-000000000001
HKEY_LOCAL_MACHINESOFTWAREMicrosoftWindowsCurrentVersionUninstallaanyvkcf
HKEY_LOCAL_MACHINESOFTWAREMicrosoftWindowsCurrentVersionUninstallrgzcdhtn

 Microsoft office has two major packages, an online one, and an offline version. The online version of the course is Office 365 that requires a monthly subscription and it is always regularly updated and maintained. Another version is more of a typical old school application, install it and use it, no constant internet connection is required and no monthly subscription is required, buy once and use it.
The last version of buying it once and use it was Office 2019 and after two years we are going to receive a new version soon. Microsoft has set its release date for October 5th of this year and as always it will feature the current latest version of office applications and one-time purchase.
The new office will support dark mode and other improvements tied to the new Windows 11 and some specific features tied to Office itself.
Microsoft office has two major packages, an online one, and an offline version. The online version of the course is Office 365 that requires a monthly subscription and it is always regularly updated and maintained. Another version is more of a typical old school application, install it and use it, no constant internet connection is required and no monthly subscription is required, buy once and use it.
The last version of buying it once and use it was Office 2019 and after two years we are going to receive a new version soon. Microsoft has set its release date for October 5th of this year and as always it will feature the current latest version of office applications and one-time purchase.
The new office will support dark mode and other improvements tied to the new Windows 11 and some specific features tied to Office itself. 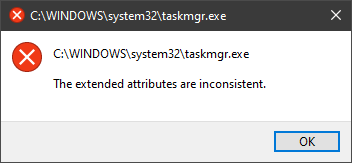 In this guide, we will show you common ways in fixing Extended Attributes are inconsistent errors inside your Windows that are easy to do and less time-consuming than complete reinstallation of the system.
