How to Fix Remote Computer requires network level authentication Error in Windows 10
A couple of Windows 10 users have reported an error on domain-connected systems when they tried accessing their computer systems remotely. This occurs when the network level authentication or NLA is enabled on the computer. If you are one of these users, you better keep reading as this post will guide you on how you can fix this error. To resolve this issue, there are several workarounds you can try. You can either disable this option directly via properties or you can also modify some registry entries or sub-keys and restart the system.
When you encounter this problem, an error message pops up that states:
“The remote computer that you are trying to connect to requires network level authentication (NLA), but your windows domain controller cannot be contacted to perform NLA. If you are an administrator on the remote computer, you can disable NLA by using the options on the Remote tab of the System Properties dialog box.”
Or you could also see this error message instead:
“The remote computer requires Network Level Authentication, which your computer does not support. For assistance, contact your system administrator or technical support.”
Before you proceed in troubleshooting the problem using the options provided below, you need to create a backup for your data or system restore point as well as make a copy of any registry entries you are going to modify.
Option 1 – Disable Network Level Authentication via Properties
The NLA is a useful tool that provides your computer with extra security and helps network administrators in controlling who can log into the system with just a click of a single box. However, there are times when it can become a disadvantage and could prevent you from accessing your system remotely. Thus, you need to disable it using Properties.
Tap the Win + R keys to open the Run dialog box.
After that, type in “sysdm.cpl” and tap Enter to open System Properties.
Next, go to the remote tab and uncheck the checkbox for the “Allow connections only from computers running Remote Desktop with Network Level Authentication (recommended)” option.
Now click the Apply button to save the changes made and exit System Properties and then try logging into the remote computer again and see if the problem is fixed or not.
Option 2 – Disable NLA via Registry Editor
Note that you can only use this option if the first one didn’t work for you. Take note that this option will require you to restart your PC completely which could mean some downtime if your computer is running a production server. So make sure to save all your work.
Tap the Win + R keys to open the Run dialog box and then type in “Regedit” in the field and tap Enter to open the Registry Editor.
From there, click on File > Connect Network Registry and input the details of the remote computer and then try to connect.
Navigate to the path below after you’re connected:
HKLM >SYSTEM > CurrentControlSet > Control >Terminal Server > WinStations > RDP-Tcp
After that, change the values given below to “0”
SecurityLayer
UserAuthentication
The navigate to PowerShell and execute this command – restart-computer
Option 3 – Disable NLA via PowerShell
PowerShell allows you to tap into the remote computer and once you’ve targeted the machine, you can execute the commands given below to disable NLA.
Tap the Win + S to open Search and then type in “PowerShell” in the field. Right-click on the related result and select the “Run as administrator” option.
After opening PowerShell, execute the command below:
Once in the PowerShell, execute the following command:
Note: In the command given, the “Target-Machine-Name” is the name of the machine you are targeting.
Option 4 – Use the Group Policy Editor to disable NLA
Another option you can use to disable NLA is via the Group Policy Editor. This is ideal for you if you are blanket disabling. Just take note that the Group Policy Editor is a powerful tool and that if you make some mistakes by changing values you have no clue about, you can render your computer useless so make sure that you create a backup for all the values before you proceed.
Tap the Win + R keys to open the Run dialog box.
Then type in “gpedit.msc” and tap Enter to open the Group Policy Editor.
From there, go to this path – Computer Configuration > Administrative Templates > Windows Components > Remote Desktop Services > Remote Desktop Session Host > Security
After that, search for “Require user authentication for remote connections by using Network Level Authentication” and set it to disabled.
As you know, USB is now being widely used in all devices with USB A as the leading type with most devices based on it. Peripheral devices such as Pen Drives, External Hard disks, and many more also use a USB port. On the other hand, USB C is also coming up to be the next big standard in the computing world because of its high transfer speeds, wider compatibility as well as support for external Graphics Processing Units. However, just recently, USB 3.0 ports have been reported to cause the following error to pop up on Windows 10 computers every time a USB device is plugged in.
“Not enough USB controller resources. The controller does not have enough resources for this device.”
To fix this error, here are some guidelines you can check out. Make sure to follow them carefully.
Option 1 – Try to use a lower generation USB port
The first thing you can do is to try using a lower generation USB port as this issue mostly occurs when a device is connected to a USB 3,0 port. This means that you have to plug in your device to a USB 2.0 port and then see if it fixes the error or not. You can easily decipher a USB 3.0 port from a USB 2.0 port as the former is in blue.
Option 2 – Try to use a dock
You could also try to use a dock to resolve the error. Note that when too much power on laptops and notebooks are drawn from the USB ports and as a USB 3.0 port draws more power compared to a USB 2.0 port. Thus, if you plug in your USB storage device into a USB 2.0 port with the help of a dock, it should fix the problem.
Option 3 – Try disabling the xHCI Mode option in the BIOS
First, boot your computer into the BIOS.
Once your computer has booted, go to the Advanced tab.
Next, make sure that the entry for “xHCI Pre-boot mode” is set to Disabled under the USB Configuration section.
Now save the changes you’ve made and then restart your computer to Windows 10 and see if the error is now fixed.
Option 4 – Update or reinstall the Universal Serial Bus Controller driver
Since it could be a driver issue, you can try to update or reinstall the Universal Serial Bus Controller drivers using the Device Manager. Refer to the following steps:
First, click the Start button and type “device manager”.
Then click on the “Device Manager” from the search results to open it.
From there, look for the “Universal Serial Bus controllers” option and then right click on each one of the USB drivers, especially the Generic USB Hub driver, and then select the Update Driver from the menu.
Restart your PC and then click the “Search automatically for updated driver software” option.
Note: If updating the USB Controller drivers didn’t work, you can try to reinstall them instead.
Option 5 – Run the Hardware and Devices Troubleshooter
You could also run the Hardware and device Troubleshooter to try and fix the “Not enough USB controller resources” error.
The first thing you need to do is click on Start and then on the gear-like icon to pull up the window for Settings.
After opening Settings, look for the Update and Security option and select it.
From there, go to the Troubleshoot option located on the left-hand side of the list.
Next, select Hardware and Devices from the list and open the Troubleshooter and run it. Once it is doing its job, wait for it to complete the process and then restart the system.
After the system restarts, check if the problem’s now fixed. If not, refer to the next option given below.
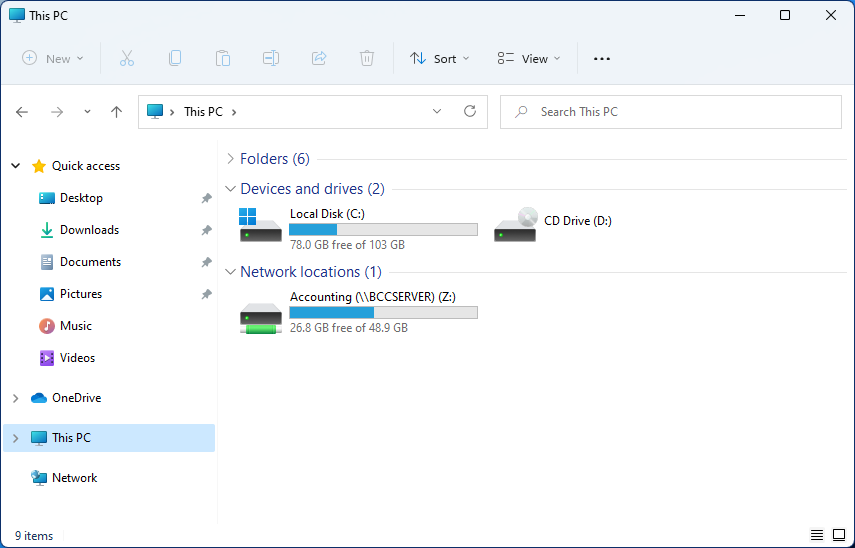
Mapping network drive has many benefits in terms of speed and ease of access of files via network. It lets you access the hard drive over the whole network like it was the hard drive inside your PC case. In order to easily and quickly map a folder as a network drive follow the guide below.
Open File Explorer
Click on the three dots icon in the Toolbar
Select Map Network Drive
Click the Drive drop-down menu
Select a driver letter that you wish to assign as a network drive
In the folder field enter network device and share name (click on browse to see all devices on local network)
Check the box beside Reconnect at sign-in if you wish to automatically connect to a network drive on Windows startup
Check Connect Using Different Credentials if you wish to connect to a network drive using different credentials that one used to login into Windows.
Click Finish
After finishing setting Windows 11 will try to connect to the network drive and if successful drive icon will appear inside File Explorer and the drive will open up to see its content.
If for any reason it cannot connect try checking user credentials, cables, network adapters, etc.
According to some reports, using RDP or Remote Desktop Protocol on recent versions of Windows 10 results in a black screen. One encounters this issue is when using the Remote Desktop Connection feature on Windows 10. The real causes of this black screen are either the display drivers or some misconfiguration with the Remote Desktop Connection utility.
In most cases, the Remote Desktop in Windows 10 will display a black screen and then disconnects afterward. To fix this kind of issue on your Remote Desktop, there are two suggestions you need to check out. First, you can try to disable the persistent bitmap caching, and then you can also try to update your display driver. Follow the given options below for more troubleshooting instructions.
Option 1 – Try to disable Persistent Bitmap caching
The first thing you can do to resolve the black screen issue with the remote desktop is to disable the persistent bitmap caching. All you have to do is follow these steps:
First, open the Remote Desktop Connection client.
Next, click on the Show Options button to configure the Remote Desktop Connection.
After that, go to the Experience tab and uncheck the Persistent bitmap caching option.
Once done, you should now be able to connect to the remote computer without the black screen.
Option 2 – Try to update or rollback the Graphics driver
You can try to update your Graphics card driver using the Device Manager in your computer to resolve the blank dialog boxes problem or you can also go directly to the website of your graphics card manufacturers like NVIDIA, Intel, or AMD and go to the section called Drivers then check if there’s a new available update – if there is, download and install it.
To update your Graphics driver via Device Manager, refer to these steps:
First, boot your computer into Safe Mode.
After that, tap the Win + R keys to launch Run.
Type in devmgmt.msc into the box and tap Enter or click OK to open the Device Manager.
After that, a list of device drivers will be displayed. From there, look for the Display Adapters and click on them.
After that, right-click on each entry under the Display Adapters and select the “Uninstall Device” option from the menu.
Now restart your computer.
After restarting your computer, go to the Settings app and Check for Updates in the Windows Update section.
Note: If updating the Graphics driver didn’t fix the problem, you can also try to roll back to its previous version and see if that helps or you could also try to roll back, update or reinstall the Network Adapter drivers.
Option 3 – Try performing a System Restore
You might also want to perform a System Restore that might help you in fixing the error. You can do this option either by booting into Safe Mode or in System Restore. If you are already in the Advanced Startup Options, just directly select System Restore and proceed with the next steps. And if you have just booted your PC into Safe Mode, refer to the steps below.
Tap the Win + R keys to open the Run dialog box.
After that, type in “sysdm.cpl” in the field and tap Enter.
Next, go to the System Protection tab then click the System Restore button. This will open a new window where you have to select your preferred System Restore point.
After that, follow the on-screen instructions to finish the process and then restart your computer and check if the problem is fixed or not.
The touchscreen feature inside Windows 11 is a pretty good thing but sometimes can be very impractical. The screen can easily and constantly get dirty due to fingers touching it all the time and there are users that do not wish or want to have this feature at all.
If you are one of the mentioned users and for any reason, you do not wish to have a touchscreen-enabled then sit back and relax, we have you covered in this tutorial on how to fully disable touchscreen inside Windows 11.
Turn off touchscreen via device manager
Click on the Windows Search icon in the taskbar
Type Device Manager
Click on Device Manager from the list of results
Inside locate Human Interface Devices and click on the right arrow
In the list, find HID-Compliant Touch Screen and select Disable Device
Click on Yes to confirm
Disable it via Windows Terminal
Right-click on the Windows icon in the taskbar
Click on Windows Terminal (admin)
Inside run this command: Get-PnpDevice | Where-Object {$_.FriendlyName -like '*touch screen*'} | Disable-PnpDevice -Confirm:$false
Conclusion
No matter which method you prefer, both of them will disable the touch screen inside Windows 11. Thank you for reading trough article and I hope to see you again. Take care.
Recently, several users reported an issue on their Windows 10 computers where the taskbar is not visible when they tried to connect to a computer via Remote Desktop Protocol or RDP. The Remote Desktop Connection feature uses the RDP which allows users to access a computer remotely. This is actually different from the taskbar being hidden automatically until the pointer hovers on it since, in this scenario, the taskbar is completely not accessible which makes using the remote computer entirely difficult, if not impossible.
There are several suggestions you can check out to resolve this problem, you can try to restart the process of Windows Explorer via Task Manager or you could clear the cache for multiple processes. You could also try to reinstall the Shell Experience components or show the local taskbar in the Remote desktop. Moreover, you could also try to update, uninstall or roll back the display driver/graphics card driver. For more details, refer to each one of the options given below.
Option 1 – Try to restart the Windows Explorer process
The first option you have to try to fix the problem with the taskbar is to simply restart the Windows Explorer process in the Task Manager.
Tap the Ctrl + Shift + Esc keys to open the Task Manager.
Next, go to the Processes tab and find the process of Windows Explorer.
Once you find it, right-click on it and select Restart to restart its process.
After that, restart your computer and see if you can now see the Taskbar.
Option 2 – Try clearing the cache of multiple processes
The next thing you can do to resolve the problem is to clear the cache of many processes in your computer. To do so, follow these steps:
Open the Notepad app and paste the following content in the text area:
After that, tap the Ctrl + S keys to save the changes you’ve made in Notepad and select the “All files” as its file type, and then name it “CacheClearTWC.bat”.
Next, go to the location where you saved the file using File Explorer and then run it. This will run a couple of batch scripts which will clear the cache of multiple processes in the system.
Tap the Win + X keys and select the “Windows PowerShell (Admin)” option to open PowerShell as admin.
Next, execute this command in the command line: Get-appxpackage -all *shellexperience* -packagetype bundle |% {add-appxpackage -register -disabledevelopmentmode ($_.installlocation + “appxmetadataappxbundlemanifest.xml”)}
After the command has been executed, this will reinstall the Shell Experience components and should fix the problem with the taskbar.
Option 4 – Update, uninstall or rollback the Graphics card drivers
First, boot your computer into Safe Mode.
After that, tap the Win + R keys to launch Run.
Type in MSC into the box and tap Enter or click OK to open the Device Manager.
After that, a list of device drivers will be displayed. From there, look for the Display Adapters and click on them.
After that, right-click on each entry under the Display Adapters and select the “Uninstall Device” option from the menu.
Now restart your computer.
After restarting your computer, go to the Settings app and Check for Updates in the Windows Update section.
Note: You also have the option to go directly to the website of your graphics card manufacturers like NVIDIA, Intel, or AMD and go to the section called Drivers then check if there’s a new available update – if there is, download and install it.
The Windows Defender program can both scan and monitor almost the entire folder on a Windows 10 computer. So if you have a folder that may have files that could trigger an alarm to Windows Security, then it would be better if you add an exclusion to Windows Security.
Note that it is okay to do this as long as you’re certain that the contents of the folder you want to exclude are safe and that Windows Defender is only throwing out warnings for nothing. This way, Windows Defender won’t scan those folders in the future. And besides, there are also some Windows folders and files that you may exclude from the Antivirus scans, especially if you want to save your scan time. This kind of feature also comes in handy when you trust a file type or folder or any process that you believe is safe but the Windows Security considers as malicious.
To exclude a folder or a file or process or a file type from the Windows Security scan, here are some steps you can follow. Make sure to do them carefully.
Step 1: Search for “Windows Security” in the Search box and then click on it from the search results to open it.
Step 2: Next, click on Virus & threat protection > Manage settings > Add or remove exclusions.
Step 3: After that, on the next screen, click on Add an exclusion > Folder. It will show you a list that includes File, Folder, File Type, and Process.
Step 4: Now click on “+Add and exclusion” on the next window and then select a folder you want to exclude and click OK to add it in the Exclusions list.
Step 5: Click on the down arrow button to remove it and then click on the Remove button.
Note: If you want to only ignore a few file types, it’s better if you configure your antivirus program to ignore these files with a specific extension. This way, it will ignore all of them no matter what their location is. Also keep in mind that when you select a folder, all the subfolders in it will also be excluded from the scan. Thus, you need to understand what you’re about to do. Once you’re done excluding the folder, it is recommended that you protect the folder using the Controlled Folder Access since this folder is not monitored for threat. The Controlled Folder Access will ensure that an external program does not alter it. This way, you can be sure that even though this folder is not included in the scan, it is still secure.
If you are trying to copy a folder or a file but encountered an error that says, “An unexpected error is keeping you from copying the folder. If you continue to receive this error, you can use the error code to search for help with this problem”, read on as this post will guide you on how you can fix this error.
This kind of error is a CHKDSK error. It is the “Volume is dirty” error message with error code 0x80071AC3 which indicates that the CHKDSK operation on your computer did not go through due to some corrupted sector of your hard drive, data corruption, corrupted system files, malware infection, as well as improper installation of an application that left some residual folders and files and many more.
To fix the Error 0x80071AC3, here are some potential fixes you can check out to resolve it:
Option 1 – Run the Check Disk utility
You can also run the Check Disk utility to fix the error when you connect your USB or external device.
In the Windows Search box, type “command prompt” and from the search results, right-click on Command Prompt and select “Run as administrator”.
After opening Command Prompt, type this command and tap Enter: chkdsk /r /f <PARTITION LETTER>
The command you entered will start to check for errors and fix them automatically. Else, it will throw an error message saying, “Chkdsk cannot run because the volume is in use by another process. Would you like the schedule this volume to be checked the next time the system restarts? (Y/N)”.
Tap the Y key to schedule Disk Check the next time your computer restarts.
Option 2 – Try to check if a particular volume is dirty and exclude it
The next thing you can do to fix the problem is to check if the particular volume is dirty and exclude it. To do so, follow these steps:
In the Start Search, type “command prompt” in the field and right-click on Command Prompt from the search results, and then select the “Run as administrator” option.
After opening Command Prompt with admin privileges, execute this command: fsutil dirty query <PARTITION LETTER>
After that, you will see either of the following results of the command you just executed:
“Volume <PARTITION LETTER> is dirty”
“Volume <PARTITION LETTER> is not dirty”
If you see the “Volume <PARTITION LETTER> is dirty” message, then you can just skip checking the drive for errors by executing this command: CHKNTFS /X <PARTITION LETTER>
Option 3 – Try to format the destination drive
If the first two options above didn’t work, then you might want to try formatting the drive can also help you resolve the error. To format it, follow these steps:
To get started formatting your drive, tap the Win + E keys and then go to the access page of the drive.
Next, right-click on the drive and select Format.
After that, uncheck the “Quick Format” option and then format your drive properly.
Now once the formatting process is finished, unplug the drive and plug it back in afterward.
Check if the error is already fixed. If the drive is not initialized, tap the Win + R keys and hit Enter.
After opening the Run dialog box, type “diskmgmt.msc” and hit Enter to open Disk Management.
From there, right-click on the drive volume and select initialize disk.
Next, select the correct partition type and proceed.
In an operating system, it is ideal for an administrator to have permission to access all the folders and files. However, there are times when you try to access the security settings or attempt to view the properties of a file, you could encounter an error saying, “You do not have permission to view this object’s security properties, even as an administrative user”.
This kind of error may be caused by several reasons. For one, if your computer is infected with a virus or malware which might have caused some changes to the concerned folder or file. It could also occur if a program or service is using the folder or file simultaneously which explains why you’re not able to access the system. It could also be that the folder or file might have been owned by a user account that no longer exists or you might not have the permissions to view the targeted folder or file even though you’re logged in as administrator.
To fix the “You do not have permission to view this object’s security properties, even as an administrative user” error, here are some options that might help.
Option 1 – Put your computer in a Clean Boot State
You can also troubleshoot the problem in a Clean Boot state. It could be that there are some third-party applications in your computer that’re preventing you from accessing security settings or properties of a file and to isolate this possibility, you need to boot your computer in a Clean Boot State and then try installing the program again. Putting your computer in this state can help you identify which program is the culprit and thus isolates the problem. In a Clean Boot state, your computer will start using only the pre-selected minimal set of drivers and startup programs. Note that you have to disable and enable one process at a time.
Log onto your PC as an administrator.
Type in MSConfig in the Start Search to open the System Configuration utility.
From there, go to the General tab and click “Selective startup”.
Clear the “Load Startup items” check box and make sure that the “Load System Services” and “Use Original boot configuration” options are checked.
Next, click the Services tab and select the “Hide All Microsoft Services” check box.
Click Disable all.
Click on Apply/OK and restart your PC. (This will put your PC into a Clean Boot State. And configure Windows to use the usual startup, just simply undo the changes.)
After you’ve set your computer into a Clean Boot State, try to check if the error is now fixed and that you can now view the Properties.
Option 2 – Try booting your computer into Safe Mode and delete inactive users
Aside from the Clean Boot State, you can also reboot your computer in Safe Mode and then delete all the inactive users. There are instances when the folder was created or owned by a user account that’s either deleted or inactive now and so you need to get rid of these inactive user accounts to resolve the error.
First, boot your computer in Safe Mode.
Then right-click on the concerned folder or file and select Properties.
Next, select Advanced in the Security tab and click on Add.
A new window will appear and from there, click on “Select a principal”.
And then type the name of the user to who you wish to give permissions in the “Enter the object name to select” box.
Now select Check Names and this would resolve the user name.
After that, click OK to save the settings. This will close the window and take you back to the previous one.
Next, from the drop-down menu, change the Type to Allow and select the Full Control checkbox.
Click OK to save the changes made and then restart your computer in a normal mode.
Option 3 – Try to take ownership of the folder or file
Another thing you can do to fix the problem is to take ownership and force the system into giving permissions to the Administrator. How? Refer to these steps:
Type “command prompt” in the Windows Search bar and then right-click on the relevant search result and select “Run as administrator”.
After that, if a User Account Control or UAC prompt appears, just click on Yes to proceed.
Next, type and enter this command: TAKEOWN /F <path>
Note that the <path> is the location of the folder or file in File Explorer.
Now type and enter this second command: ICACLS <path> /grant administrators:F
Finally, once the command has been executed, restart your computer and then see if you can now access the folder or file.
Option 4 – Try scanning your computer using Windows Defender
As mentioned, the error when accessing the security settings or properties of a folder or file might be due to a virus or malware. It could be that it had made some modifications that prevents you from accessing security settings or properties. To eliminate it, you have to scan your computer using security programs like Windows Defender.
Tap the Win + I keys to open Update & Security.
Then click on the Windows Security option and open Windows Defender Security Center.
Next, click on Virus & threat protection > Run a new advanced scan.
Now make sure that Full Scan is selected from the menu and then click the Scan Now button to get started.
Have you been feeling anxious in the digital space? Feeling like you have a million eyes on you each time you visit a website? It can definitely make you uneasy. Luckily there’s an easy fix, and it’s called a VPN.
In this article we’ll take you through the basics of what a VPN does and some of the biggest benefits you can reap from buying one.
VPN: definition and how it works
VPN stands for Virtual Private Network, so its name already says a lot about what it does.
A VPN is specialized software that keeps your browsing private and secure. Essentially it hides your identity, preventing possible cyberattacks and data theft. This is especially important in cases of public network use, where you’re highly exposed to potential threats.
To be more specific, this software encrypts your Internet Protocol (IP) address by filtering it through a server hosted by the VPN provider first. That way, it prevents your Internet service provider, third parties and lurking online thieves from tracking the actual you.
Credit: FLY:D on Unsplash
Some providers, such as Surfshark VPN with its IP Rotator feature, even make it a habit to frequently change your IP address to further protect your identity. With most VPN providers, you can also appear to be in a completely different country, adding to your disguise.
There are tons of advantages you can look forward to if you decide to use a VPN. Take a look at some of the crucial ones.
Benefits of using a VPN
When choosing a VPN, you can find both free and paid options. We recommend you go with the paid ones, since they have stronger security, encryption and data protection, as well as more advanced features. Free VPNs come with limitations and risk of malicious attacks on the software itself.
You can choose to buy a singular VPN service or opt for antivirus software that has a VPN built in, for example Bitdefender’s Ultimate Security plan. That depends on what you use your computer for and how much.
When you pick one, here’s what it can do for you.
1. Access region-specific content
When we said you could change your location, we meant it. Say you’re using a streaming service and a show you desperately want to watch isn’t available in your country. You can use your VPN to make it look like you’re browsing from a country where it’s unlocked.
This option is also convenient for gamers who want to access maps, skins and other in-game items unavailable in their location.
In addition, you can use this powerful feature when you’re traveling to a region where some of your favorite content may not be accessible.
Do keep in mind that you need to read the Terms and Conditions (yeah, we know - who does that?) of your games and services before doing this, since you could end up getting a penalty. It’s also important to remember that there are entire countries that have strict regulations or even bans on VPNs, for example Belarus, Russia and China. So make sure to be very cautious with your VPN use, friends.
2. Browse like no one’s watching
VPNs shield your browsing habits from prying eyes on the web. Those can be malicious hackers or just third-party cookies tracking your every move to later bombard you with targeted ads. For example, Surfshark VPN features a Cookie blocker that blocks all cookie-related pop-ups and lets you browse in peace (and secret). It works even when the VPN is turned off, which is also pretty neat.
In addition, their CleanWeb 2.0 technology makes sure ads and especially malware don’t stand a chance at all, since they’re blocked before they can even load.
The inability of sites to track your browsing means they can’t collect and analyze any of your data. So, your personal information - or your company’s information in case that’s what you’re using your computer for - is entirely hidden and secure.
3. Save money
It’s well-known that the prices of certain items and services vary based on your location, browsing time, age and many other factors. This most commonly goes for airline tickets and hotel stays.
You can use your VPN to avoid high prices and surcharges. Clear all cookies, turn on your VPN and visit an online shopping site to check out their prices. Then compare your findings with the offers you see when your VPN is off, when you spend a long time on the site or have an active account with the company.
Sometimes this can really help you find the best deals and avoid breaking the bank. But again, check the Terms and Conditions before you purchase something using a VPN.
4. Secure your smart home
The more smart devices you have connected to your network, the more exposed you are to potential cyberattacks. Phones and computers are generally designed to be decently secure even without a VPN or antivirus, but smart home devices leave a lot to be desired in that regard.
Protecting your home network with a VPN software means all devices connected to it are secure, be it an air purifier or Alexa.
Credit: Bence Boros on Unsplash
5. Prevent connection slowdown
Your ISP can intentionally slow down your internet speed based on how much data you’ve consumed (data throttling) or your activities online (bandwidth throttling).
But with a VPN, what kind of data you send and receive and how much is entirely hidden. Therefore, if your ISP can’t see you, they can’t control you and they can’t throttle down your speed.
The bottom line
You can never be too safe online. So definitely think about getting yourself a solid VPN to pump up your privacy and security as much as you can. And if you have any questions or need help choosing the perfect software for you, feel free to reach out to us.
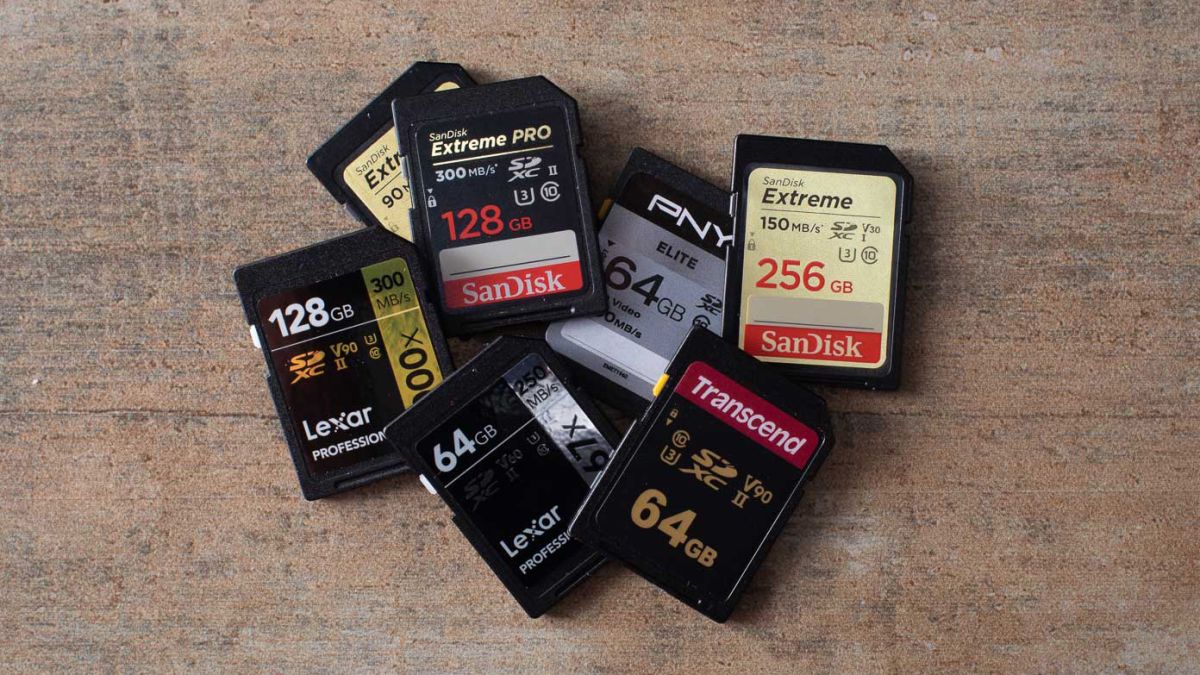
SD memory cards have surfaced as standard cards for digital cameras and microSD as phone standard memory cards. Most people have and use at least one daily, so naturally copying files and even formatting SD cards is a natural thing to do, but what if you cannot copy files or format SD cards?
Fear not because we had this issue and tried several things in order to overcome the problem and after some time here is a list of what can you do if you are facing this exact issue. The list is written from most simple solutions to more complex ones and it is advisable to follow it as presented. That being said, let's dive into solving the problem.
1. Remove Write Protection on SD card
First and in my experience the most usual thing preventing deleting, copying files, and formating SD card is due to write protection. Take an SD card out of the laptop, camera, or card reader and visually inspect it. On side of almost every SD card, there is a hardware lock switch and mark where it needs to be positioned in order to be locked. Even if the switch is positioned on unlocked state, switch it to locked and then back to unlocked. Sometimes this easy moving of switch can resolve some contact issues and the card will start working normally.
Another type of lock that could be turned ON is a software one. If for any kind of reason data protection has been turned ON, you will need to turn it off in order to be able to format an SD card. In order to do this follow this guide:
Press ⊞ WINDOWS + R to open the Run dialog
In run dialog type in diskpart and press ENTER
Once diskpart is opened in command prompt type in: list disk and press ENTER
Locate your SD card and type in select disk x, where x is disk number followed by ENTER
After the SD card is selected type in: attributes disk clear read-only and press ENTER
This process will clear the software lock on the SD card, after following this method try to format the card again, if the problem still exists go to the next solution.
2. Format SD card using Command prompt
Command prompt is a great tool and can perform some commands that are not been able to be completed using file explorer or another tool inside Windows.
In the taskbar search box, search for cmd and select the Command prompt
On the right part select run as administrator
If needed click on YES on UAC prompt
Inside command prompt type in diskpart and press ENTER
type in list disk followed by ENTER
Select your SD card by locating its number in the list and typing select disk X, where is X SD cards number in list and press ENTER
Once SD card is selected type in format fs=ntfs quick and press ENTER
This should format SD card but if for reason even this step is provided as unproductive, go to the next solution.
3. Format your card with the Disk Management tool
Go into the taskbar and search for Disk Management and open it
Select SD card partition that you wish to format
Right-click on the partition and select format
After the format is done, enter the volume label, file system, and allocation unit size. Confirm with OK
Press OK again to confirm the formatting process.
If you have not managed to format your SD card even with this method go to the next solution.
4. Repartition card with Disk part
If all previous solutions have failed there is a chance that the SD card has bad sectors on it. If this is the case that we will need to partition cards in order to isolate bad sectors and use healthy ones.
Press ⊞ WINDOWS + R to open the Run dialog
In run dialog type in diskpart and press ENTER
Once diskpart is opened in command prompt type in: list disk and press ENTER
Locate your SD card and type in select disk x, where x is disk number followed by ENTER
Type in Clean and press ENTER
Type in Create partition primary and press ENTER
To select a new partition type select partition 1 followed by ENTER
Make partition active by typing active and pressing ENTER
Format the drive by typing format fs=ntfs label=SDCard quick followed with ENTER
Assign a letter to drive by typing assign letter=h followed with ENTER
Type exit to close Command prompt followed again by ENTER and open File Explorer to check if the drive is active
5. Try a dedicated SD card formating fool
If anything failed so far, one last thing you could do is to download and try a dedicated SD card formatting tool. One that I would recommend is SD Memory Card Formatter, which is free software make specifically for formatting SD memory cards.

 Mapping network drive has many benefits in terms of speed and ease of access of files via network. It lets you access the hard drive over the whole network like it was the hard drive inside your PC case. In order to easily and quickly map a folder as a network drive follow the guide below.
 If you are one of the mentioned users and for any reason, you do not wish to have a touchscreen-enabled then sit back and relax, we have you covered in this tutorial on how to fully disable touchscreen inside Windows 11.


 Fear not because we had this issue and tried several things in order to overcome the problem and after some time here is a list of what can you do if you are facing this exact issue. The list is written from most simple solutions to more complex ones and it is advisable to follow it as presented. That being said, let's dive into solving the problem.