Fix LoadLibrary failed with error 1114

If you are using a couple of graphics-intensive applications like video rendering software or some games, then something in the background of the system could get messed up and you might encounter the “LoadLibrary failed with error 1114, A dynamic link library (DLL) initialization routine failed” error message. This kind of error can usually get fixed by twerking some graphic settings, fixing and updating the drivers, and allowing your PC to work by leveraging the maximum use of the resources it’s got. Thus, in this post, you will be guided on some measures you can apply to resolve this kind of error message as soon as possible.

Before you go over the options given below, if you have made any changes to any software component in your computer or installed new software recently, then you might want to undo them and then check if it fixes the “LoadLibrary failed with error 1114 “ error. Once you have that covered but you’re still getting the error, use the options given below as a reference to fix the error.

Option 1 – Try to modify the Dynamic Graphics Settings

You might want to modify the Dynamic Graphics Settings in order to fix the error. To do so, follow the steps below.

  • Open Control Panel and then Power Options.
  • From there, click on the Change plan settings option for your chosen power plan.
  • After that, click on Change advanced power settings.
  • Then look for the Switchable Dynamic Graphics option and then click on it to expand it.
  • Afterward, expand the Global Settings option and then select Maximize Performance for both the “On battery” and “Plugged in” options.
  • Now click on the Apply button and then OK to save the changes made.

Note: If the Switchable Dynamic Graphics option is not available on your computer, you can try the next given option below.

Option 2 – Try switching the Graphics card to High-Performance mode

Note that this second option varies from computer to computer since most computers use the Graphics card made by NVIDIA, while some by AMD and others use Intel HD Graphics. Thus, depending on which graphics card your computer uses, pick one of the three fixes below.

NVIDIA Graphics Drivers:

If your computer uses a graphics card made by NVIDIA and has the drivers are properly installed and updated, then follow the steps below.

  • Right-click on any empty space on your desktop and then click on the NVIDIA Control Panel.
  • After that, expand the 3D Settings on the left-hand side tree-structured list and then click on Manage 3D Settings.
  • Next, select your preferred GPU on the right-side panel and then set it to the High-Performance NVIDIA Card from the drop-down menu.
  • As an alternative, you can also go to the Program Settings tab,
  • From there, select the program that you are trying to run from the drop-down menu and click on Add.
  • Now set the graphics processor to a High-performing processor and then restart your computer to apply the changes made.

AMD Graphics card:

If your computer uses a graphics card made by AMD and has the drivers are properly installed and updated, then follow the steps below.

  • Right-click on any empty space on your desktop.
  • Click on AMD Control or Configure Switchable Graphics.
  • Next, click on Browse and select the program where you encounter the error.
  • Finally, click on High Performance for the selected program and then restart your computer to successfully apply the changes made.

Intel HD graphics:

If your computer uses the Intel HD graphics and then its drivers are properly installed and updated, then follow these steps:

  • Right-click on any empty space on your desktop and then click on the Intel Graphics Settings.
  • Next, click on the Power menu.
  • After that, select a Graphics Power Plan for both the “On battery” and “Plugged in” options to High-Performance Power Plan.
  • Then click on the Apply button and restart your computer.

Do You Need Help with Your Device?

Our Team of Experts May Help
Troubleshoot.Tech Experts are There for You!
Replace damaged files
Restore performance
Free disk space
Remove Malware
Protects WEB browser
Remove Viruses
Stop PC freezing
GET HELP
Troubleshoot.Tech experts work with all versions of Microsoft Windows including Windows 11, with Android, Mac, and more.

Share this article:

You might also like

Instagram posts available now on computer
Instagram posting has been reserved for mobile phones for a very long time but in October 2021 that privilege has come to an end. Instagram added the long-awaited ability to post to Instagram from the website. You get nearly all of the same filters and editing tools that you can find in the iPhone and Android app, too. Instagram logoIn order to post via computer on your Instagram account all you need is a browser. The first step, of course, is to go to instagram.com and login into your account, if you do not have an account, you can make one for free. Next, click on the + icon in the upper right corner. Create a new post screen will open, in this screen click on the Select from computer blue button on the bottom. The file manager will open, choose your desired photo and confirm. After that, you will be presented will an adjustment screen for a photo, here you can crop the photo, zoom in, adjust the aspect ratio, or if you wish add more photos to create a slide show. Once you are done will all of these adjustments, click on Next in the upper right. From there you will be taken into a filter screen where you can apply one of many filters or if you want, you can adjust brightness, contrast, saturation, temperature, etc. just like in the application on your phone. Once you have the desired result, again click on Next in the upper right part of the screen. Lastly, you will be given an option to write a caption for the photo if you wish and add a location. Once this step is finished you can post the feed by clicking on share in the upper right part. That is all to it, just like in a mobile application you can now use your computer for Instagram posting.
Read More
A Guide to Quickly Fixing Error 103

What Is Error 103?

Error 103 is an error that is usually encountered by those who use Google Chrome. This error is usually generated because of a conflict arising between Google Chrome and the antivirus program running on the user’s computer. Primarily, error 103 is an incompatibility issue. It is not critical in nature. However, since it will disrupt the smooth functioning of the browser, it is strongly advised to rectify this error that is generated due to any temporary conflicts between the logic of the two programs namely Google Chrome and antivirus. In layman's terms, it would be only justified to say that this error has a lot to do with the way programs react to each other in real-time.

Solution

Restoro box imageError Causes

When the error is displayed to the user, it usually states something like ‘chrome error 103 connection aborted’, ‘chrome error 103 err_connection_aborted’ or ‘Error 103 (net: ERR_CONNECTION_ABORTED): Unknown error. This begs the question, what triggers this error? Here it is important to understand that Google Chrome constantly applies to upgrade. In most instances, the upgrades almost go unnoticed. In the meanwhile, there are other programs running on any system such as firewall, Antispyware, or antivirus programs. All such programs govern the functionality of the web browser. Now, when the web browser attempts to update and any programs on the system view the update as a threat, the connection to the internet will be terminated. It is also important to understand that these programs will keep you from upgrading or from doing anything with your browser.

Further Information and Manual Repair

google chrome error 103Before we move on to the discussion of fixing the underlying causes for error 103, it is important to understand all those programs that are most likely to generate this error. A list of all such programs is outlined below as follows.
  • Kaspersky Pure 3.0
  • Kaspersky ONE
  • Kaspersky small office security 2013
  • Kaspersky internet security 2013
  • Kaspersky antivirus 2013
A downside associated with error 103 is that it won’t disappear on its own. That’s why it is important to make some manual changes as there are no tools available online to rectify this error automatically. Follow the steps listed below to easily fix the problem.
  • Click on the Start button.
  • In the search box, enter ‘expand.exe’.
  • Right-click on the file that appears and select the option ‘Open Folder Location’.
  • Now, copy the file and paste it at the destination ‘C:\Windows\System32’.
  • If you are not able to find the file, it is advised you copy it from Windows Installation Disk.
  • Now, click on the ‘Start’ button again.
  • Find and select ‘Run’.
  • Now enter ‘C: ’ in the search box and press Ok.
  • Now right-click anywhere on the screen, select new, and then select folder.
  • Rename this folder. Change the name from ‘New Folder’ to ‘Temp’.
  • Now go to the Start button again.
  • Select ‘Run’ once again.
  • Type ‘cmd.exe’ in the command prompt and press Ok.
  • Now type Command. Press enter.
  • Now type this code as it is: ‘set TMP=C:temp’ and press enter.
  • Now restart the browser.
  • If it fails, install Google Chrome once again.
  • Just make sure everything is in sync to avoid any data loss.
Read More
Fix Failed to play test tone Error in Windows
If you are testing your headphone or your speaker but all of a sudden encountered an error that says, “Failed to play test tone” in your Windows 10 computer, worry not for this post will walk you through how you can fix this problem. The test tone is used to check the right-left balance of the headphones and speakers in your computer, however, if you are not able to use it, there are several options you can check out. You can try to run the Playing Audio troubleshooter or restart the services that are related to Windows Audio. Aside from these, you could also disable Audio Enhancements or you could also change the default test tone rate and bit depth.

Option 1 – Try to run the Playing Audio Troubleshooter

Since the Windows 10 operating system has the Playing Audio Troubleshooter, you can use this troubleshooter to try and fix the problem with the “No Audio Output Device is installed” error. You can access this tool in the Control Panel or in the Taskbar Search and even on the Troubleshooters page of Windows 10. Run this troubleshooter and see if it can fix the issue or not.

Option 2 – Try to restart the Windows Audio-related services

The next thing you can do to fix the problem is to restart the services related to Windows Audio. Although the audio services start automatically on every system boot, there are times when they might fail to start. Thus, you can start these services manually by following these steps:
  • Tap the Win + R keys to launch the Run utility and type “services.msc” in the field and hit Enter to open the Services Manager.
  • Then look for the services named “Windows Audio” and “Windows Audio Endpoint Builder”.
  • Double click on each one of these services and check if their Service Status is set to Running or not and also check if the Startup Type is set to Automatic.
  • If none of the services are running, just click on the Start button and select the Automatic option from the drop-down menu.
  • Now click on the Apply and OK buttons to save the changes made and then check if the error is fixed.

Option 3 – Try to update the Audio driver

You might also want to consider updating or the Audio driver as it could help in fixing the error.
  • Tap the Win + R keys to open the Run dialog box and then type in devmgmt.msc and tap Enter or click OK to open the Device Manager.
  • Expand the section for the outdated device drivers.
  • And then select the outdated driver(s) and right-click on it/them.
  • From the drop-down menu, select the Update Driver option and follow the on-screen instructions to install the latest version of the driver.
  • Then also click on the option, “Search automatically for updated driver software.
  • Restart your PC after the installation.
Note: If updating or reinstalling the Audio driver didn’t work, you can go to the manufacturer’s website and look for the support section where you can download the drivers for your computer. You just need to take note of your PC’s correct model and model number so you can find the appropriate driver.

Option 4 – Try changing the default test tone rate and bit depth

Windows selects a default test tone rate and bit depth depending on your headphone or speaker. This allows you to look for the best sound quality from your audio output device. So if your headphone or speaker has some problems with the default settings, then it’s no wonder why you’re getting the “Failed to play test tone” error. To fix this, you can try to change the default test tone rate and bit depth by following the steps below.
  • First, you need to open the Windows Settings panel and then go to System > Sound.
  • Next, look for the Device properties option located on your right-hand side and click on it.
  • After that, select the Additional device properties option and go to the Advanced tab.
  • From there, select a different test tone rate and bit depth and then click on the Test button.
  • Once done, check if it was able to fix the problem or not.

Option 5 – Try disabling the Sound or Audio enhancements

To make your operating system’s specific hardware sound nothing but perfect, both Microsoft and third-party vendors have shipped audio enhancement packages which are usually referred to as “Audio Enhancements” in Windows 10. However, there are instances when instead of improving the sound or audio quality of your computer, it can cause problems so to fix the problem you need to turn off these audio enhancements. How? Simply follow the steps below.
  • Type in “Sound” in the taskbar search and then from the list of results, select “Sound Control Panel”.
  • After clicking Sound, the Sound properties box will pop up. From there, go to the Playback tab and right-click on the default device i.e. Speakers or Headphones then select Properties.
  • After that, the Speakers properties box will appear. From there, go to the Enhancements tab and select the checkbox for the “Disable all enhancements” option.
Read More
DDR5 what we know so far about it
DDR5 memory moduleNext-generation of RAM, DDR5 supposed to hit shelves around late summer or fall in 2021if everything goes as planned. Its goal is to increase speed and efficiency, wants to pack more memory in a single stick, and have better power management.

Hardware requirements for DDR5

Using the latest memory technology will require other hardware to follow certain standards and the first ones that will need to follow are CPUs and Motherboards. Intel is already prepared with its Alder Lake CPUs that suppose to come out also later this year. AMD on other hand has not stated anything at the time of this writing but it is a bet that their next generation that will come in 2022 will have full support. It is speculated that bot companies and their respective CPUs will have both support for DDR4 and DDR5. A story about motherboards is a little different. Motherboards will support DDR4 or DDR5 memory banks, not both, so make sure that your motherboard will support the memory you plan on getting.

Capacity of memory

The goal and aim for the DDR5 memory stick are to reach a whopping 126GB per stack. This will be done by using a dual in-line module or DIMM enabling larger capacity. That being said, the first modules that we will see are more likely to be 16GB as standard and 8GB as low entry ones.

Power consumption of DDR5 memory

The standard voltage that DDR4 operates under is 1.2V. DDR5 wants to lower this to 1.1V without sacrificing speed. Voltage regulation on modules themselves will be now integrated on memory banks instead of leaving that to motherboards which will help to detect memory errors directly on the memory bank.

Speed of memory

The most common speed of DD4 memory banks is 2,666MHz, more expansive ones go from 3,600 to 4,000MHz. DD5 aims to raise this bar to 4,800MHz and offers greater speed.

Should you get it right away?

Hardware is ever-evolving, we have PCIe 3.0 to PCIe 4.0, and taking into account that sometimes the newest tech can cause some unexpected behavior it is always the best strategy to wait for a little. Price for the newest tech has also been in its heist just when it is released and seeing how DDR5 will benefit mostly servers mostly since even today memory, processors, and other available equipment can tackle all daily tasks.
Read More
How to Fix Windows Update Error 0x800706be
Error 0x800706be is a Windows error code that pops up when a particular system file is having some issue. This error pops up on other Windows-compatible software as well as driver vendors. This error signifies a misconfigured or corrupted system file so you might encounter this error in different instances. For instance, this error might pop up when you click the audio icon from the system tray or when the Windows Upgrade or Update has failed. Needless to say, this error can be caused by different factors. Anyhow, this post will show you what you can do to fix the problem when the error pops up during a Windows Update or Upgrade. If you are seeing this error when you try to install the latest Windows updates, it will show a Windows Update failed message and you obviously won’t be able to update your Windows 10 PC until you fix this error. You will keep seeing this error even when you try to reboot or update it a couple of times. As mentioned, the error code 0x800706be appears when there is something wrong with your system files – they are either corrupted or misconfigured. This error is most likely caused by the corrupted Windows Update Components. Corruption of these files is not unusual and it could happen anytime. So since the Windows Update files or components are corrupted, you won’t be able to successfully install the latest Windows Updates. Here are some options you can try to fix the problem.

Option 1 – Try running the Windows Update Troubleshooter

Running the Windows Update troubleshooter is one of the basic things to do when facing any kind of issue with Windows Updates. As long as it can it will detect the issue and automatically solve them so that there will be no need for you to do more technical steps to resolve the issue.
  • Tap the Windows and R keys on your keyboard to open the Run dialog box.
  • Then type in “control.exe /name Microsoft.Troubleshooting” in the field and tap Enter to open the Windows Update Troubleshooter.
  • After that, click Windows Update and follow the next on-screen instructions.

Option 2 – Try resetting the Windows Update Components

This is another basic thing to do in fixing the error 0x800706be. It is also one of the solutions that mostly worked for users who also got this error when trying to install Windows updates. And since the problem is caused by corrupted Windows update components, the most logical thing to do is to delete old files and reset components. To reset the Windows Update components, follow the given instructions below carefully.
  • Tap the Windows key once.
  • Then in the Windows Start Search, type in “command prompt”.
  • From the search results displayed, right-click on Command Prompt and select the “Run as administrator” option.
  • After that, type in “net stop wuauserv” and tap Enter.
  • Next, type in “net stop cryptSvc” and tap Enter.
  • Then type in “net stop bits” and tap Enter.
  • Type in “ren C:\Windows\Software\Distribution Software\Distribution.old” and then tap Enter.
  • Afterward, type in “C:\Windows\System32\catroot2\Catroot2.old” and tap Enter.
  • Next, type “net start cryptSvc” and tap Enter.
  • Then type “net start bits” and tap Enter.
  • Finally, type in “net start msiserver” and tap Enter.
  • Now close Command Prompt and then try updating Windows once more.
Read More
0x800703EE when copying to external storage
If you are trying to copy or move files to and from your external storage device but you suddenly encounter the error 0x800703EE, then you’ve come to the right place as this post will guide you on how you can fix this error in your Windows 10 computer. This kind of error when copying files may be accompanied by an error message that says, “The volume for a file has been externally altered so that the opened file is no longer valid”. This error prevents you from copying or moving the files to and from the external storage device. This kind of issue might be caused by a service that belongs to a backup program that could be blocking the operation or a conflict with your third-party antivirus program. In addition, the error could also be due to corrupted or outdated USB drivers or it could be caused by a disabled Windows Backup and Volume Shadow copy service. It is also possible that some system files are corrupted or that the drivers for the external device are also corrupted. Whatever the cause is, here are some options you need to check out to fix the error. Before you troubleshoot the error, you might want to try moving the files to another location on your local drive and remove the USB drive and insert it back again. After that, try to move or copy the file to the USB drive and see if it still throws an error. If it does, then you need to troubleshoot the problem further by following each one of the suggestions given below.

Option 1 – Update or reinstall the Universal Serial Bus Controller driver

Since it could be a driver issue, you can try to update or reinstall the Universal Serial Bus Controller drivers using the Device Manager. Refer to the following steps:
  • First, click the Start button and type “device manager”.
  • Then click on the “Device Manager” from the search results to open it.
  • From there, look for the “Universal Serial Bus controllers” option and then right-click on each one of the USB drivers and select the Update Driver from the menu.
Note: If it is a regular USB drive, then it will be listed as a USB Mass Storage Device but if you have a USB 3.0 device, then look for a USB 3.0 Extensible Host Controller.
  • Restart your PC and then click the “Search automatically for updated driver software” option.
Note: If updating the USB Controller drivers didn’t work, you can try to reinstall them instead.

Option 2 – Try checking the Volume Shadow Copy and Windows Backup services

The next thing you can do to fix error 0x800703EE is to check the Volume Shadow Copy and Windows Backup service.
  • First, tap the Win + R keys to open the Run dialog box and type “services.msc” in the field, and hit Enter to open the Services Manager.
  • From there, look for the Volume Shadow Copy service and right-click on it, and then select Properties.
  • After that, make sure that its Startup type is set to Manual and that its status is “Started” so if it isn’t, you need to click on the Start button and then on the Apply and OK buttons to save the changes made.
  • Once done, look for the Windows Backup Service and repeat the same process you did with the Volume Shadow Copy service.
  • After you complete the steps, restart your computer and see if the error is now fixed.

Option 3 – Restart your computer in a Clean Boot State

If a third party program like antivirus is the one that’s causing the problem, you can try to put your computer in a Clean Boot State to isolate the issue by following these steps:
  • Log onto your PC as an administrator.
  • Type in MSConfig in the Start Search to open the System Configuration utility.
  • From there, go to the General tab and click “Selective startup”.
  • Clear the “Load Startup items” check box and make sure that the “Load System Services” and “Use Original boot configuration” options are checked.
  • Next, click the Services tab and select the “Hide All Microsoft Services” check box.
  • Click Disable all.
  • Click on Apply/OK and restart your PC. (This will put your PC into a Clean Boot State. And configure Windows to use the usual startup, just simply undo the changes.)
  • Now try to copy the files to your external storage device again and check if the error is now gone.

Option 4 – Try to run System File Checker or SFC scan

  • Tap Win + R to launch Run.
  • Type in cmd in the field and tap Enter.
  • After opening Command Prompt, type in sfc /scannow and hit Enter.
  • Once done, restart your computer.

Option 5 – Try to delete the Filter drivers

Note that this option is only applicable if you see the error 0x800703EE accompanied with the “The volume for a file has been externally altered so that the opened file is no longer valid” error message. Before you start, create a System Restore Point first.
  • Open the Registry Editor and navigate to this registry path: HKEY_LOCAL_MACHINESYSTEMCurrentControlSetControlClass{4D36E965-E325-11CE-BFC1-08002BE10318}
  • After that, select the “{4D36E965-E325-11CE-BFC1-08002BE10318}” key and check if you can find the “Upperfilters” and “Lowerfilters” value in the right pane. If you can find them, right-click on them and select Delete.
  • Once done, exit the Registry Editor and restart your computer.
Read More
Adobe Express review

Social media is here to stay it seems, from Facebook, Instagram, Twitter, etc each site has its users and its rules. Companies, bloggers, public figures, and people, in general, are using them on a daily basis and some are posting cool ads, nice graphics, videos, and many more in order to gain followers or just to share something that they think is worth.

adobe express

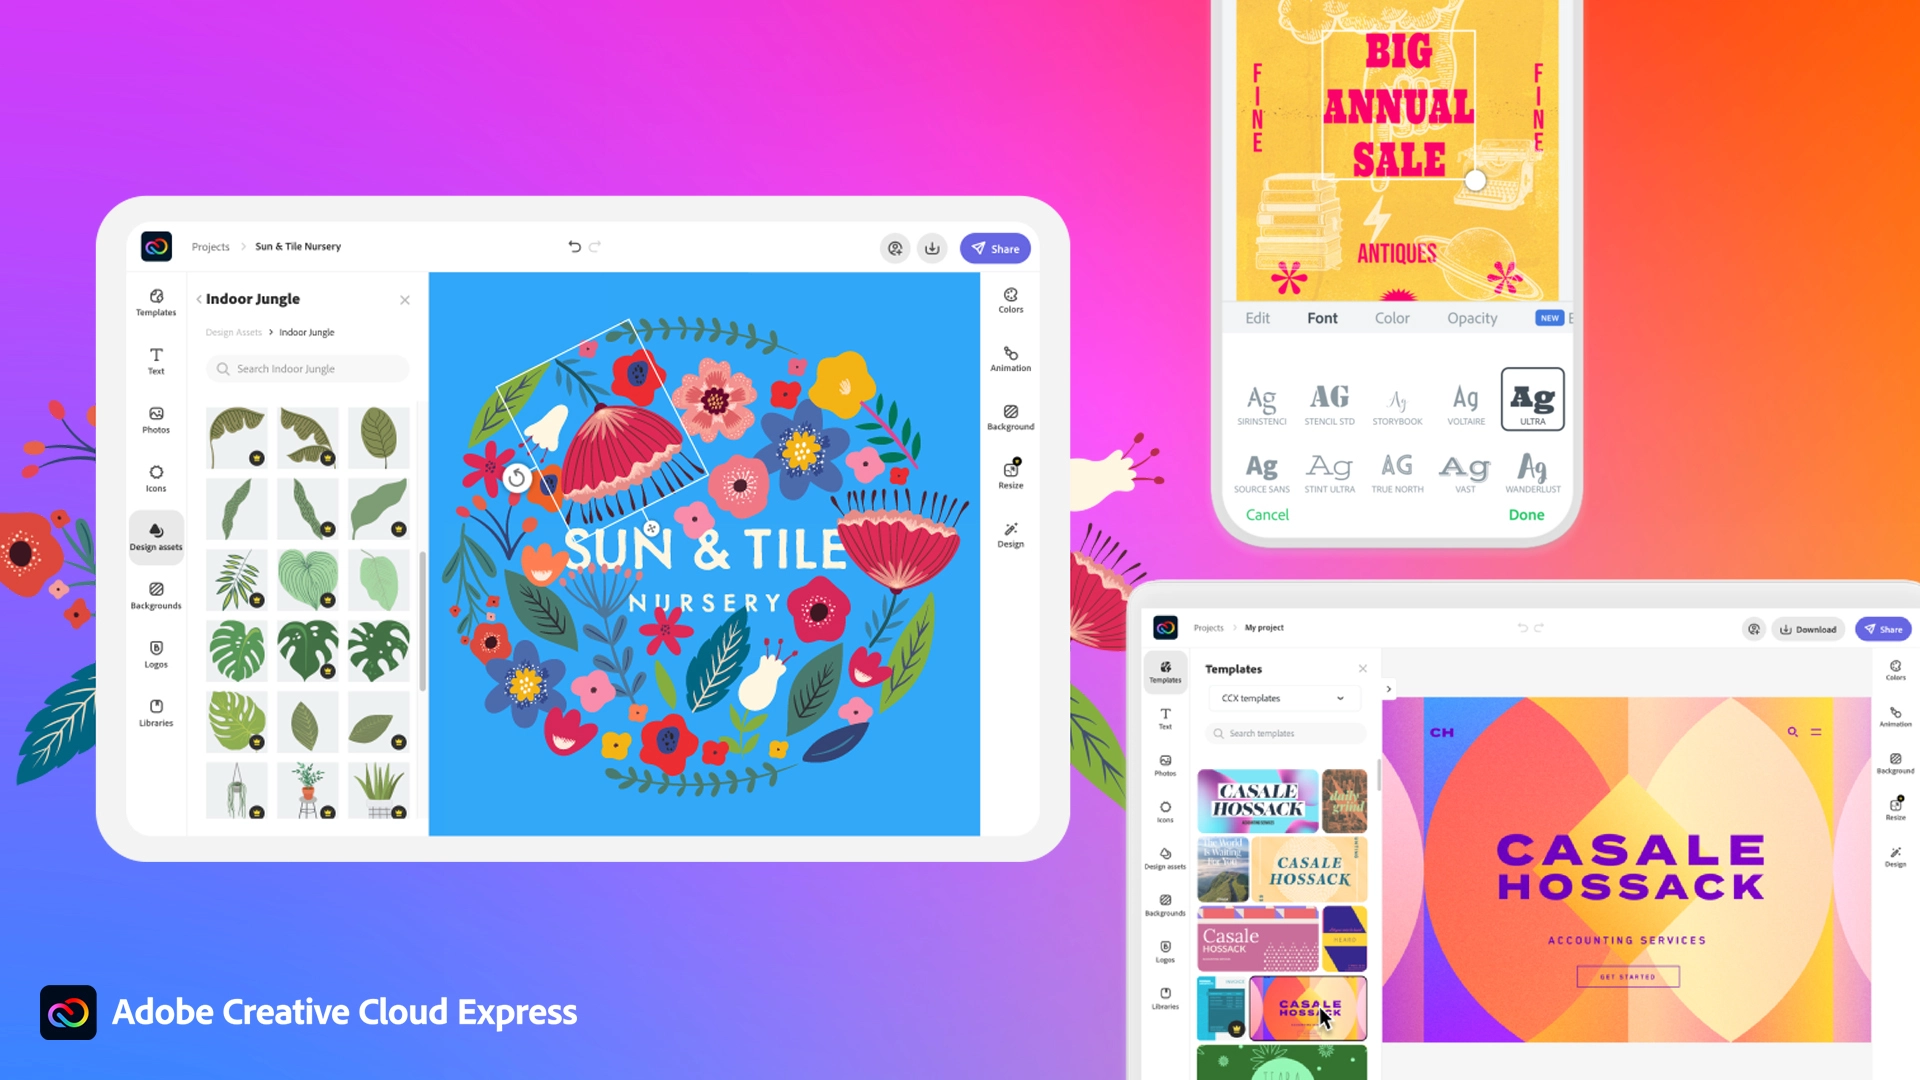
Making your post look good is somewhat essential if you plan on reaching a larger audience and Adobe's Express aims to fill that gap. It is the latest Adobe product that is purposely made for graphic and video creation for social media.

Adobe is well known in the world of professional design in all spheres like print, web, and motion, with this application, they want to take over social media design with Express. The direct competitor to Spark and canva, Express is filled with high-quality adobe templates and some great stuff found in photoshop like automatic background removal which gives it an edge over other applications.

The good thing about Express is that there is a completely free version and premium, like its competitors but with some benefits that clearly show that Adobe is determined to place its application on top of the game. The free plan includes:

  • Thousands of unique templates, design assets, and Adobe Fonts.
  • A limited collection of royalty-free Adobe Stock-free collection photos.
  • Basic editing and photo effects including remove background and animate.
  • Create on both web and mobile.
  • 2GB of storage.

For 10 USD per month of 100 USD prepaid annual fee, you get a premium plan that includes:

  • All premium templates and design assets.
  • The entire collection of over 160 million royalty-free Adobe Stock collection* photos.
  • Over 20,000 licensed Adobe Fonts, curved type, grids, and font pairs.
  • Premium features like refine cutout, resize, and graphic groups.
  • Plan, schedule, and publish social media content across multiple channels.
  • Add your branding, logo, colors, and fonts in one tap.
  • Convert & export to and from PDFs and other file types.
  • Create, manage, and share your templates and assets with Creative Cloud Libraries.
  • Create on both web and mobile.
  • 100GB of storage.

The application itself is incredibly easy to learn and to work with and literally, anyone can pick it up and start creating immediately. No matter are you just starting with social media or using Canva or Spark, give Express a go, make a free account and try it, I guarantee that you will find some features amazing, and its ease of use relaxing.

Read More
Cannot Create User Account During Out Of Box Experience or Sign In, Non-Responsive Behavior (Welcome Back) Page

When you upgrade your Windows 7 or Windows 8.1 system to Windows 10, you’ll undergo a phase called Out of Box Experience, or simply OOBE. This phase is intended to allow users to customize their Windows 10 experience, which includes defining personal settings, creating user accounts, and more. Some users reported having issues when creating their user account during the Out of Box Experience (OOBE) on Windows 10 upgrade. Some also reported issues about non-responsive behavior (Welcome Back) page.

Solution

Restoro box imageError Causes

Unfortunately, there’s no known cause for this error. However, some users reported that this occurs when:

  • There’s a problem with the ISO or CD used to install Windows 10
  • There’s hardware malfunctioning on the computer

Further Information and Manual Repair

Your Windows 10 upgrade will not be successful if you’re not able to create a user account or finish the Out of the Box (OOBE) phase of the installation. Here are some methods that will help you fix this manually.

Method 1 – Wait and retry

Some users reported that waiting for about an hour and retrying the process again will solve this problem. It’s also recommended that you keep your computer in a ventilated place while you wait to retry the process.

Method 2 – Load default user manually

This method has 2 requirements in order to work.

  1. You need to be upgrading from a previous Windows version, and
  2. Your Windows was originally configured to automatically boot to desktop

If you meet these two requirements, you can solve the error by following the steps below:

  1. Hold CTRL+ESC keys. Windows should load the default user after doing this step.
  2. Press the Windows key + X. Then, click the Computer Management icon
  3. Choose “Local Users and Groups”
  4. Double click on Users
  5. Right-click on the right pane, and then choose “New User”
  6. Create a new user account and password

Method 3 – Power down your laptop

This method only applies if you’re a laptop user.

  1. Power down your laptop
  2. Remove the battery of your laptop
  3. Wait for about 10 minutes
  4. Connect your laptop using direct current
  5. Turn on your laptop again
  6. Create a new user account and log in

Method 4 – Create a local account if you’re trying to set up a Microsoft account

Instead of connecting to a Microsoft Account after the set-up, you might want to try creating a local account. To do this, follow the steps below:

  1. Power down your computer if you are to set up a Local Account.
  2. Disconnect your computer from the Internet, either Wired or Wireless
  3. Unplug your computer, and wait for about 10 minutes.
  4. Reconnect your computer and start Windows. Do NOT connect to the Internet and make sure you’re disconnected to any devices you don’t need.
  5. Try creating a user account again

 If the steps above don’t work, you might want to try Startup repair.

Method 5 – Boot your computer from Windows 10 media

In order to do this step, you need to have official Windows 10 ISO files.

  1. Go to the “Install Now” screen
  2. Choose Repair your computer
  3. Click Advanced Options
  4. Click Safe Mode

After doing the steps above, there’s a chance you get an error message that says “installation cannot be completed in safe mode”. When you see this, just press Shift+F10. This will execute and open the command prompt of your computer.

 From the command prompt, you can try and create a new user account.

 For example, net user Username Password /add

 The username here should be replaced with the account name you want to add, and the Password here should be replaced with the password you want to use for the account.

 After replacing the username and password on the text, press the Enter button on your keyboard. You’ll know if the command is successful once you see the message, “The command completed successfully.”

You can now close the command prompt. Restart your computer and try to log in using the account you just created.

Method 6 – Use a powerful automated software

If all the above methods still don’t work, it might be best to try automated software to help you fix this problem.

Read More
Software review series: Tor Browser
Back in the mid-'90s, when the US Navy was looking into ways to securely communicate sensitive intelligence information, a mathematician and two computer scientists emerged from the Naval Research Lab with something called "onion routing." It was a new kind of technology that would protect your internet traffic with layers of privacy. By 2003, The Onion Routing project, acronym Tor, was in the hands of the public, where its vast network of users the engine enabling Tor has since continued to grow. Today, thousands of volunteers all over the world are connecting their computers to the internet to create the Tor network by becoming "nodes" or "relays" for your internet traffic.

What is Tor?

At a basic level, Tor is a type of internet-connected network with its own internet browser. Once you connect to the internet with the Tor browser, your internet traffic is stripped of its first layer of identifying information as it enters the Tor network and is then sent bouncing through those relay nodes, which serve to encrypt and privatize your data, layer by layer like an onion. Finally, your traffic hits an exit node and leaves the Tor network for the open web. Once you're in the Tor network, it's nearly impossible for others to track your traffic's manic pinballing path across the globe. And once you leave the Tor network via an exit node, the website you view (assuming it has HTTPS in front of its address) isn't sure which part of the world you're hailing from, offering you more privacy and protection. Because Tor is a volunteer-run network, speed can often be an issue. As your traffic moves from node to node, you're likely to notice more speed loss than you would, for instance, with most commercial virtual private networks. This becomes particularly noticeable if you try to watch streaming Netflix content over Tor or make voice-over-IP phone calls or video calls with an app like Zoom. Tor technology isn't necessarily built to provide seamless audio-video experiences.

Tor and plugins

Speaking of videos, there are also limits to the amount of privacy Tor can offer you if you enable certain browser media plugins like Flash. Likewise, your browser's JavaScript plug-in which enables you to view a lot of websites' embedded media can still leak your IP address information. Torrenting files with Tor also exposes you to privacy risks. Because of these risks, Tor's privacy settings have these kinds of plug-ins disabled by default. If you're just looking to do general, daily internet perusal using a browser that will better hide your traffic from spying eyes, Tor probably isn't the best choice due to its slow speeds and incompatibility with most embedded media. But if you're concerned enough about privacy around a particular topic of internet research (and you don't have a VPN), Tor is probably the best choice for you.
If you would like to read more helpful articles and tips about various software and hardware visit errortools.com daily.
Read More
How to remove PC Fix Speed from your Windows PC

PC Fix Speed is a Potentially Unwanted Program designed to improve the speed of your computer. This program usually comes bundled with other software, and when installs automatically scan your PC and displays exaggerated messages on the status of the PC’s performance, to get users to pay for the PRO version of the software. It also adds registry entities that allow it to run each time the computer is started, and the application itself will constantly keep reminding users that they have errors by putting the application windows on top.

From the Author: The Service is provided by PCRx through Crawler, LLC. Clean and repair your PC’s registry, optimize PC performance and free up disk and memory space. With everything you do on your PC, including adding on devices, a new entry is created in your Windows® registry, and seldom are any removed after they’re no longer needed. As a result, your PC gets bogged down with unnecessary entries, slowing your PC speed, the start-up, and your Internet browser. PC Fix Speed cleans up registry entries and puts your PC back on track for optimal performance. PC Fix Speed is an essential application that should be a part of every computer. PC Fix Speed especially helps computers that are unusually slow, freeze up often or show error messages, by cleaning the system registry and improving overall performance.

About Potentially Unwanted Applications

If you have ever downloaded software from the internet (shareware, freeware, etc,), it’s quite possible you’ve unconsciously installed unwanted programs on your computer system. A Potentially Unwanted Program, often known as PUP, in short, is software that contains adware, installs toolbars, or has other hidden goals. These kinds of programs are usually bundled up with free applications that you download from the internet or will also be bundled inside the custom installers on many download sites. It’s clear by its name – unwanted programs – but did not actually constitute “malware” in the traditional sense. An important difference between malware and PUP is distribution. Malware is normally dropped through vulnerability exploitation while PUP gets installed with the consent of the user, who intentionally or unwittingly approves the PUP installation on their computer. PUP developers can argue their programs aren’t malicious software however, it can nevertheless be unsafe software and put your PC at risk much the same way malware does.

Exactly how do PUPs look like?

Unwanted programs come in various forms. More often, they can be found in adware bundlers which are known to utilize aggressive and misleading advertising. Most bundlers install many adware programs from a number of vendors, each of which possesses its own EULA policy. Safebytes Anti-malware entirely eliminates this threat and safeguards your computer against unwanted programs or adware infection. Several PUPs also show up as toolbars or add-ons, mounted on your preferred web browser. These toolbars change your homepage and your search engine in the installed browser, track your web activities, control your search results with redirects and sponsored links, and eventually slow down your browser and diminish your web browsing experience. Potentially Unwanted Programs occasionally act very much like viruses or spyware. Some PUPs carry keyloggers, dialers, and other software to collect your personal details that can cause identity theft. Because of this unwanted program, your application may freeze, your security protections can get disabled which could leave your computer susceptible, your system may get ruined, and the list goes on and on.

Some tips on protecting yourself from PUPs

• Read meticulously before you install anything. Don’t click accept until you have read the fine print. There could be a clause about PUPs. • Use ONLY custom or manual install method – and don’t blindly click Next, Next, Next. • Use good anti-malware software. Try Safebytes Anti-malware which can spot PUPs and handle them as malware by flagging them for removal. • Be alert if you install freeware, open-source programs, or shareware. Disable or eliminate toolbars and browser extensions you don’t really need. • Only download applications from the original providers’ websites. Avoid download portals since they use their very own download manager to pack additional programs together with the initial download. Remember the fact that although PUPs could cause damage and hinder the proper function of the computer, they can’t get into your system without your consent, so be watchful not to provide them with it.

What To Do If You Cannot Install Any Antivirus?

Malware could cause a great deal of damage to your PC. Some malware sits in between your PC and your net connection and blocks some or all internet sites that you would like to check out. It could also prevent you from adding anything to your PC, especially the antivirus program. So what should you do when malware prevents you from downloading or installing Anti-Malware? Although this kind of issue will be tougher to get around, there are some steps you can take.

Start your computer in Safe Mode

If the malware is set to load at Windows start-up, then booting in Safe Mode should prevent it. Only the bare minimum required applications and services are loaded whenever you start your laptop or computer into Safe Mode. Listed below are the steps you should follow to boot into the Safe Mode of your Windows XP, Vista, or 7 computers (check out the Microsoft website for instructions on Windows 8 and 10 PCs). 1) At power-on/startup, tap the F8 key in 1-second intervals. This will bring up the Advanced Boot Options menu. 2) Make use of the arrow keys to select Safe Mode with Networking and press ENTER. 3) When you are into this mode, you will have an internet connection again. Now, use your web browser to download and install an anti-malware program. 4) After the application is installed, allow the diagnostic scan run to eliminate trojans and other threats automatically.

Switch to an alternate web browser

Web-based viruses could be environment-specific, aiming for a particular internet browser or attacking specific versions of the web browser. The ideal way to avoid this problem is to select an internet browser that is well known for its security features. Firefox contains built-in Malware and Phishing Protection to keep you safe online.

Make a bootable USB anti-virus drive

Here’s yet another solution which is using a portable USB anti-malware software package that can check your computer for malware without needing installation. To run anti-virus from a USB drive, follow these simple steps: 1) Make use of another virus-free PC to download Safebytes Anti-Malware. 2) Plug in the pen drive to a USB port on the uninfected computer. 3) Double-click the executable file to run the installation wizard. 4) Choose a USB drive as the location when the wizard asks you where you want to install the application. Follow the instructions on the computer screen to finish off the installation process. 5) Now, insert the USB drive into the corrupted PC. 6) Double-click the EXE file to run the Safebytes tool right from the thumb drive. 7) Click the “Scan” button to run a full system scan and remove viruses automatically.

SafeBytes AntiMalware Overview

Want to download the best anti-malware software program for your system? There are various applications available that come in free and paid versions for Microsoft Windows systems. A few are good ones, some are decent, while some are merely bogus anti-malware programs that can damage your personal computer themselves! When searching for an anti-malware tool, select one which gives dependable, efficient, and complete protection against all known viruses and malware. On the list of highly recommended software is SafeBytes Anti-Malware. SafeBytes carries a superb track record of excellent service, and customers appear to be happy with it. SafeBytes can be described as a powerful, real-time antivirus application that is created to assist the typical computer end user in protecting their PC from malicious threats. This tool can easily detect, remove, and protect your computer from the most advanced malware intrusions including adware, spyware, trojan horses, ransomware, worms, PUPs, parasites, and other potentially harmful software programs.

There are plenty of amazing features you will get with this particular security product. Here are some of the features you will like in SafeBytes.

Active Protection: SafeBytes provides a totally hands-free active protection that is set to observe, block, and remove all computer threats at its first encounter. This utility will always keep track of your PC for suspicious activity and updates itself continuously to keep abreast of the constantly changing threat landscape. Anti-Malware Protection: This deep-cleaning anti-malware software goes much deeper than most antivirus tools to clean your computer system. Its critically acclaimed virus engine finds and disables hard-to-remove malware that hides deep inside your PC. Web protection: Through its unique safety rating, SafeBytes informs you whether a site is safe or not to access it. This will make sure that you’re always certain of your online safety when browsing the web. Low Memory/CPU Usage: SafeBytes is a lightweight and easy-of-use anti-virus and antimalware solution. As it uses very little computer resources, this application leaves the computer’s power exactly where it belongs: with you. 24/7 Premium Support: SafeBytes provides 24/7 technical support, automatic maintenance, and updates for the best user experience. SafeBytes has developed a wonderful anti-malware solution that can help you conquer the latest malware threats and virus attacks. You can rest assured that your computer system will be protected in real-time as soon as you put this software to use. So if you need sophisticated forms of protection features and threat detections, purchasing SafeBytes Anti-Malware will be well worth the dollars!

Technical Details and Manual Removal (Advanced Users)

If you do not want to use malware removal software and prefer to get rid of PC Fix Speed manually, you might do so by going to the Add/Remove Programs menu in the control panel and removing the offending software; in cases of web browser plug-ins, you could un-install it by going to the browser’s Add-on/Extension manager. You will definitely also want to reset your browser. Finally, examine your hard drive for all of the following and clean your computer registry manually to remove leftover application entries after uninstalls. However, this is a tough task and only computer professionals can perform it safely. Moreover, some malware keeps replicating which makes it tough to get rid of. It is advised that you carry out the removal procedure in Windows Safe Mode.
Folders: C:\Program files\PC Fix Speed\ C:\Documents and Settings\All Users\Start menu\Programs\PC Fix Speed\ C:\Program filesx7Help\ Registry: HKLM\SOFTWARE\PCFixSpeed HKCU\Software\PCFixSpeed HKLM\SOFTWARE\Microsoft\Windows\CurrentVersion\Run\PCFixSpeed
Read More
1 2 3 171
Logo
Copyright © 2023, ErrorTools. All Rights Reserved
Trademark: Microsoft Windows logos are registered trademarks of Microsoft. Disclaimer: ErrorTools.com is not affiliated with Microsoft, nor claims direct affiliation.
The information on this page is provided for information purposes only.
DMCA.com Protection Status