What is Mastodon? Mastodon is an open-source microblogging network very similar to Twitter. You can make 500 characters post messages called toot (tweet), share videos or images, and follow other people. But unlike Twitter, Mastodon is decentralized, meaning the entire Mastodon is not run by a single company pulling all strings.

Mastodon can be used directly in your web browser or through a mobile client on a smartphone or tablet. It includes features that seem copied from Twitter-like replies, boosts (retweets), favorites (loves), a timeline view, blocking, and voluntary content warnings that hide sensitive content.
Mastodon also has some great features that Twitter does not have like automated post deletion for the older post of a certain age, requiring approval for follows without restricting your account, and opting out of search engine indexing.
Currently, there are also no ads on Mastodon meaning no ad tracking or ad network surveillance.
How Does Mastodon Work?
Mastodon is a social media network made of nodes called servers or instances each running special software meaning anyone can run their own Mastodon instance (if they have a proper dedicated server). When you have your own instance it can be linked in the federation or remain private, so individuals or companies can have control over individual Mastodon servers.
The software itself is open source based on the social networking protocol ActivityPub which was developed by WWW Consortium.
While using Mastodon, people sign up for accounts with specific instances. Once logged in, you can view a local timeline (of posts from that instance only) or, if the instance is federated with others, see a federated timeline comprised of toots from people in other instances. Mastodon users can send messages to each other using their Mastodon account names that are similar to email addresses in that they feature the server address as well as the user name.

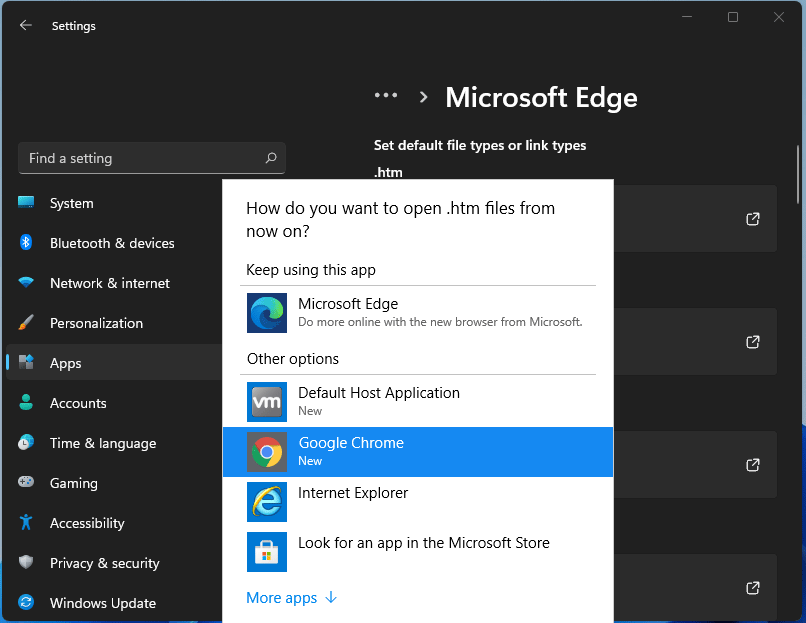 For anyone who is not aware, when Windows 11 was released if you wanted to switch to another browser you had to go into the settings app and choose the default browser for different types of file extensions like HTML, HTM, PDF for opening on the web, etc. Of course, this was completely unnecessary and it was not well received by users. So after some time, Microsoft backpedaled to standard one click, choose your default browser solution that existed in the previous version of Windows OS.
Altho sometimes Microsoft knows how to irritate its users base, it is good to know that they can also listen and fix things that are required.
For anyone who is not aware, when Windows 11 was released if you wanted to switch to another browser you had to go into the settings app and choose the default browser for different types of file extensions like HTML, HTM, PDF for opening on the web, etc. Of course, this was completely unnecessary and it was not well received by users. So after some time, Microsoft backpedaled to standard one click, choose your default browser solution that existed in the previous version of Windows OS.
Altho sometimes Microsoft knows how to irritate its users base, it is good to know that they can also listen and fix things that are required.