If you suddenly encounter an error message saying, “ File Record Segment is Unreadable ” on a blue screen while booting your PC, it means that your hard drive is in an error state. This particular blue screen of death error might have a lot of bad sectors or might have reached its end.
The workarounds you can try to resolve the issue is by locating the bad sectors or checking your hard drive for any discrepancies in the mapping and fix them. Follow the detailed instructions laid out below for these workarounds.
Option 1 – Try to check for any bad sectors and wrong configurations in your hard drive
The first thing you have to check is the boot files on your PC. As you know, your PC boots from these files and if there is anything wrong with any one of them or if one of them ends up getting corrupted, you will most likely see the blue screen of death error or a prompt with an error message saying, “File record segment is unreadable”. According to some users who reported this issue, new hard drives aren’t exempted from this error. That’s why it is recommended that you carry out this solution no matter what kind of scenario you are in. You will have to launch the Command Prompt in recovery mode and see if you can fix the problem by executing the check disk commands.
Upon booting, restart your PC and tap F11 to go to the recovery environment then select Troubleshoot.
Next, click Advanced from the given options and select Command Prompt.
After opening Command Prompt, execute the commands listed below, and don’t forget to hit Enter right after you type in each one of them and if you have installed Windows to some different directory, you must replace “C” with the name of the drive you’ve installed Windows with.
chkdsk C: /r /x
chkdsk C: /f
Note: The Chkdsk function might take a while before it finishes its operations so you need to be patient and wait until the entire process is completed. And depending on the situation, it might even take a day at most so patience is really the key here.
Option 2 – Try connecting the hard drive to a different computer
If option 1 didn’t work for you and you’re still seeing the error, you can try connecting the hard drive to a different computer and then copy the data first. Make it a priority to salvage the data just in case the hard drive won’t make it in the future.
After replicating your hard drive, you can then try running the chkdsk commands that are listed in option 1 above in the new computer you’re connecting your hard drive to and make sure that you key in the correct drive letter that’s assigned to the hard drive you’re using. After executing the chkdsk commands, plug your hard drive back into the previous computer and then check if you can now boot it without any issues.
Option 4 – Replace the faulty hard drive
If none of the options provided above really worked out then maybe it’s time to consider getting a replacement for your hard drive. In about 50% of the cases about this error, some unfortunate users were left with no choice but to replace the hard drive since the problem is with the hard drive itself. Hard drives have a complex running mechanism which includes a head and the disk that rotates accordingly so you can check if the cables connected to the hard drive are connected properly and if it is in a correct position or not. In addition, you also have to make sure that the SATA adapters where the hard drive is connected are working properly.
If the drive is showing problems in the I/O operation, there is little chance for you to use it as a normal hard drive. If the hard drive is in warranty, get it checked and replace it. If not, you might consider taking it to the service center for the specialists to take a look into it.
Blue Screen of Death or Stop errors are definitely one of the most difficult issues to face in your Windows computer. One of them is the UNEXPECTED STORE EXCEPTION BSOD error. When you encounter this Stop error on your Windows 10 computer, this means that the store component has caught an unexpected exception. There are many potential causes for this error, but we’ve narrowed it down to a few specific causes – for one, this error could be caused by your antivirus program installed on your computer, two, it could also be caused by outdated hardware drivers on your computer, it could also be an error in the file system as well as some issue with the lock screen app, or even output to an unexpected port. Whichever the cause may be, you can use a couple of fixes laid out below. Make sure to carefully follow them.
Option 1 – Try to update your Display driver
First, boot your computer into Safe Mode.
After that, tap the Win + R keys to launch Run.
Type in devmgmt.msc into the box and tap Enter or click OK to open the Device Manager.
After that, a list of device drivers will be displayed. From there, look for the Display Adapters and click on them.
After that, right-click on each entry under the Display Adapters and select the “Uninstall Device” option from the menu.
Now restart your computer.
After restarting your computer, go to the Settings app and Check for Updates in the Windows Update section.
Note: You also have the option to go directly to the website of your graphics card manufacturers like NVIDIA, Intel, or AMD and go to the section called Drivers then check if there’s a new available update – if there is, download and install it.
Option 2 – Run both the System File Checker scan and DISM tool
If the problem is caused by corrupted system files, then you can use both the System File Checker and the DISM tool. To use them, follow the instructions below.
Tap the Win + X keys or right-click on the Start button and click the “Command Prompt (Admin)” option. Alternatively, you can also search for “cmd” in the Cortana search box and right-click on Command Prompt from the search results, and select the “Run as administrator” option.
After that, if a User Account Control prompt pops up, click on Yes to proceed.
Once the Command Prompt window is pulled up, type the following command and hit Enter:
DISM.exe /Online /Cleanup-image /Restorehealth
Wait for the process to be completed. Once it’s done, type the following command and hit Enter:
sfc /scannow
The command will start a system scan which will take a few whiles before it finishes. Once it’s done, you could get the following results:
Windows Resource Protection did not find any integrity violations.
Windows Resource Protection found corrupt files and successfully repaired them.
Windows Resource Protection found corrupt files but was unable to fix some of them.
Restart your PC.
Note: You should see the “Windows Resource Protection found corrupt files and successfully repaired them. Details are included in the CBS.Log %WinDir%LogsCBSCBS.log” message on your screen.
On the other hand, if you see the “Windows Resource Protection found corrupt files but was unable to fix some of them. Details are included in the CBS.Log %WinDir%LogsCBSCBS.log” message instead, then you should run the following command in Command Prompt:
The command you entered will open up the logs on your Desktop where you can look for files that are causing the error on your computer manually.
Option 3 – Disable Fast Start-up
If you want your computer to boot faster, then you might have enabled Fast Start-up. This feature is ideal for computers that are using a hard disk drive. However, turning on this feature also means that when the computer boots, it might lag some drivers that are loaded when it initially boots up. Thus, it might be the potential cause of the UNEXPECTED STORE EXCEPTION BSOD error. Thus, you need to disable Fast Start-up. To do that, follow these steps:
Boot your PC into Safe Mode.
Then tap the Win + R keys to open the Run dialog box.
Next, type in “control” to open Control Panel.
After that, select Hardware and Sound and click on Power Options.
Select “Choose what the power buttons do” from the left side menu pane and click on Change settings that are currently unavailable.
Afterward, uncheck the “Turn on fast startup (Recommended)” entry and click on Save Changes.
Now restart your PC for the changes to take effect and then check if the problem’s fixed afterward.
Option 4 – Try to run the Chkdsk utility
You can also run the Chkdsk utility to resolve the UNEXPECTED STORE EXCEPTION BSOD error. If your hard drive has issues with integrity, the update will really fail as the system will think that it’s not healthy and that’s where the Chkdsk utility comes in. The Chkdsk utility repairs hard drive errors that might be causing the problem.
Open Command Prompt with admin privileges.
After opening Command Prompt, execute the following command and hit Enter:
chkdsk /f /r
Wait for the process to be completed and then restart your computer.
If your USB keeps disconnecting and reconnecting after you connect your USB device on its own randomly, then the problem might have something to do with a hardware or driver issue. The first thing you have to do in such a case is to make sure that the device is working on another computer. This will help you isolate the problem and if it turns out that it works, then the problem lies in your computer and not your USB device.
To fix this connection problem between your USB device and Windows 10 computer, you can use the options given below as a reference.
Option 1 – Update or reinstall the Universal Serial Bus Controller driver
Since it could be a driver issue, you can try to update or reinstall the Universal Serial Bus Controller drivers using the Device Manager. Refer to the following steps:
First, click the Start button and type “device manager”.
Then click on the “Device Manager” from the search results to open it.
From there, look for the “Universal Serial Bus controllers” option and then right-click on each one of the USB drivers and select the Update Driver from the menu.
Note: If it is a regular USB drive, then it will be listed as a USB Mass Storage Device but if you have a USB 3.0 device, then look for a USB 3.0 Extensible Host Controller.
Restart your PC and then click the “Search automatically for updated driver software” option.
Note: If updating the USB Controller drivers didn’t work, you can try to reinstall them instead.
Option 2 – Try to change the USB port
You might want to change the USB port since modern computers have a variety of USB ports. So if your USB drive supports USB 3.0 or 3.1, make sure that you plug it inside a USB 3.0 or 3.1 ports. If you’re not sure which port, just keep in mind that the USB 3 port is usually blue or you can also use your computer’s documentation or manual as a reference to locate it.
Option 3 – Try to turn off the Power Saving option
You could also try to turn off the Power Saving option to resolve the problem. All you have to do is switch to Power Management after you select the Properties of the USB device and from there, uncheck the “Allow the computer to turn off the device to save power” option. On the other hand, if you are using a laptop and did not use the USB device for a long time, then it could be powered off. This will ensure that the system does not turn off the USB device.
Option 4 – Try to reinstall the latest Universal Serial Bus controller drivers in Compatibility Mode
If you were unable to install the Universal Serial Bus controller drivers you’ve downloaded, you can try installing them again but this time using Compatibility mode. Follow the steps below to do so:
You need to download the driver and place it on your desktop.
After that, right-click on it and select Properties.
Next, switch to the Compatibility tab where you should see two options:
Compatibility troubleshooter, and let Windows figure out what works best for you. If it fails, follow the next.
Manually choose the version of Windows it was correctly working.
Now right-click on the file and select the “Run as administrator” option to install. After that, you should now be able to change your screen aspect ratio to what you were using early on.
Note: If you have other programs that won’t work on the existing version of Windows, then make sure to run the program in a Compatibility mode.
Option 5 – Run the Hardware and Devices Troubleshooters
The first thing you need to do is click on Start and then on the gear-like icon to pull up the window for Settings.
After opening Settings, look for the Update and Security option and select it.
From there, go to the Troubleshoot option located on the left-hand side of the list.
Next, select Hardware and Devices from the list and open the Troubleshooter and run it. Once it is doing its job, wait for it to complete the process and then restart the system.
After the system restarts, check if the problem’s now fixed. If not, refer to the next option given below.
Mswrd632.wpc is a Microsoft Office Word error message. This error message is often displayed in the following format:
‘Word cannot start the converter mswrd632.wpc’
The error message mswrd632.wpc may pop up when computer users try to open certain MS Word documents using the .doc extension.
Solution
Error Causes
Error Mswrd632.wpc may be triggered due to several reasons. Some of the common reasons for the mswrd632.wpc error code include:
Issues with Microsoft Word application
MSwrd632.wpc file corrupted
Changes in the registry configuration settings
Issues with security updates
Sometimes when you attempt to access the Word file of the older version of the MS Word application after new security updates, you may experience this error code.
This happens because the new security features that you have installed in the updated version blocks old files from being accessed.
Further Information and Manual Repair
If you can’t access important MS Word files on your PC, due to the error Mswrd632.wpc, then don’t you worry! The good news is that it is easy to fix and repair. By following a few simple methods, you can easily resolve this issue and access your MS Word files.
Try the methods listed below to repair error Mswrd632.wpc on your system:
Method 1: Copy the MSwrd632.wpc file From Another Computer
The error may also occur if the MSwrd632.wpc file is corrupted. In such as situation, copy the MSwrd632.wpc file on your PC from another computer.
You can usually find this file in the following path C:\Program Files\Common Files\Microsoft SharedTextConv.
However, please note this method is not secure and may make your PC vulnerable to a possible security hack. Do it when your PC is not connected to the internet.
Method 2: Unregister the Text Converter
This issue can also be resolved by unregistering the converter. Here is a step-by-step guide to unregister the converter.
First, go to the start menu and select RUN.
Type REGEDIT and press the OK button.
Next, what you have to do is find and click on registry subkeys. Here are the keys that you have to click on
HKEY_LOCAL_MACHINESOFTWAREMicrosoftSharedToolsText ConvertersImportMSWord6.wpc (Windows 32 bit OS)HKEY_LOCAL_MACHINESOFTWAREWow6432NodeMicrosoftSharedToolsText ConvertersImportMSWord6.wpc (Windows 64 bit OS)
Choose the key according to your Windows bit operating system. After that, click on the Edit menu, select the Delete option and click ‘Yes’ to activate changes.
This change will effectively unregister the text converter and disable it for third-party applications and for Microsoft Office enabling you to access your desired MS Word files easily.
Method 3 - Download Restoro to Resolve Registry issues
If the error is related to the registry, then the best and most efficient way to fix it is to download Restoro.
This is a powerful registry cleaner and a PC Fixer deployed with a user-friendly interface and compatible with all Windows versions. It scans and removes all registry errors and repairs the registry in seconds.
Click here and download Restoro to resolve the MSwrd632.wpc error now!
In today's world any professional, whatever be design, print, web design or similar is using one or more Adobe programs. Adobe has cemented itself as a must-have software for any kind of serious and even amateur work. Sadly in the latest Windows 11 adobe software in some instances can slow down your computer and put some hard load on the CPU. If you are one of these unfortunate users, keep reading because we have a few things you can do to solve this.
1. Run SFC scan
SFC scan is a built-in Windows tool aimed at diagnosing and repairing system files inside Windows itself. Running an SFC scan usually solves most issues of these kinds so we will try that one first.
Press ⊞ WINDOWS + S to open the Search bar and type in cmd
Select command prompt and on the right side click on Run as administrator
Inside command prompt type in: sfc /scannow and press ENTER
Wait for the whole process to finish and reboot your system
2. Update Windows
Windows updates are designed to fix issues and solve problems, check to see if a new update is available to install.
Press ⊞ WINDOWS + I to open the Settings app
Click on Windows Update in the bottom left pane
On the right check visually if there is an update pending and if there is, install it
3. Temporary turn off antivirus and firewall
Antivirus and firewall can interfere with adobe applications and background services, try turning your preferred protection software temporarily off and check if your CPU is still under high load.
4. Reinstall Adobe suite
Uninstall and install a clean version of the adobe creative suite or individual applications that you are using. Check your CPU load after reinstallation.
5. Uninstall Adobe CEF Helper
This is not a really advisable course of action but if non of the previous solutions have produced results then this might be the only option if you would like to keep using the software. Open File Explorer and paste the following line in the path box on top: C\:Program Files>Adobe Systems>Adobe CEF Helper or Adobe Creative Cloud >Adobe CEF Helper_uninstall.exe. Double click on the file and uninstall the CFT helper.
It really sucks when you can’t fully enjoy the newest version of your favorite OS.
Windows 11 is still relatively fresh and consequently has some annoying little bugs that really ruin our experience. The good news is that you’re not alone and most of them are easy to fix.
Here are 5 commonly reported Windows 11 issues and what you can do to get rid of them.
1. Windows 11 audio problems
One of the absolute most irritating things in the world is struggling with the sound on your computer. Windows 11 users have reported facing the issue of low or no sound. If you’re currently experiencing the same frustration, you can be relieved. Chances are fixing it will only take a few minutes.
The first thing to check would be whether you accidentally muted your device by pressing the mute button on your keyboard. Yes, we know it sounds a lot like the old “have you tried turning it off and on again?” But it’s important to leave no stone unturned, and the most obvious things are usually the ones we easily overlook.
Moreover, if you have several audio output sources, check whether the right one is selected. You can do this via the Action Center or through Settings. If you want to use the same source every time, we also recommend you set it as the default one.
It’s also important to have a good, up-to-date audio driver. More often than not, this will be the true cause of your audio struggles. Make sure to update your driver, and if that doesn’t work out, you can always un- and reinstall it or install a different one.
Lastly, if all attempts remain unsuccessful, run the audio troubleshooter to figure out what’s actually going wrong.
2. Unable to find files
Such a powerful new operating system, yet it can’t seem to do the simplest thing imaginable? The File Explorer not responding on Windows 11 is one of the most frustrating and most common problems with Microsoft’s newest iteration of its awesome OS.
However, 9/10 times it can be fixed by simply restarting your PC. You could also try killing the Windows Explorer process in the Task Manager and then rerunning it.
If these don’t help, check whether there are any pending Windows 11 updates. A single missing update can compromise your PC’s functionality, so always make sure to install them all on time.
Should none of that work, then there are other ways to solve the File Explorer problem. However, then the issue is probably a bit deeper and it’s no longer in the ‘easy fix’ territory.
3. Start menu not working
Just like the File Explorer, the Start menu is a fundamental element of your OS. So, it’s only natural that its malfunction grinds your gears. It may be more customizable than on previous Windows versions, but it doesn’t always work smoothly.
If you’re facing the so-called Start menu critical error, there are a few things this could be caused by. Usually it means you turned off your system while an important update was still being installed, there is a corrupt file on your PC, or Windows forcefully stopped a program.
Whatever the reason, the solution should be pretty simple. Try the basic steps: restarting your File Explorer (like we explained above) and signing out and back into your account. If that doesn’t do anything, you may want to try uninstalling third-party start menu apps (if you have any), since they can interfere with your default programs’ functionality.
Now, those are the easy fixes. If you get nowhere with them, you might need to identify the root cause and search for more complex solutions than that.
4. Snipping tool not working
Our beloved screenshot tool was introduced with Windows 10 and Microsoft decided to keep it. However, you were probably just as disappointed as us when you tried to run it and failed.
Normally, this can be fixed by installing the latest Out-of-band (OOB) update, or even pending updates in general. Even if your system appears to be up-to-date, run the checker just in case.
Another cool thing Windows 11 lets you do is ‘Repair’ and ‘Reset’, which is the easiest way to troubleshoot your Snipping tool. If this fails, you can also try the good old un- and reinstall method. Simply uninstall the tool through the Control Panel and reinstall it from the Microsoft Store.
Furthermore, in the case of an upgrade from Windows 10 to 11, it may be that the old Snipping tool version is interfering with the launch of the new one. If you don’t care that much about the additional options available with the enhanced screenshot tool, you can use the old version instead.
Simply go to your C Drive, find the Windows.old folder, search for the tool and open it from there. Make sure to pin it to your taskbar as well, if you know you’re going to use it often.
5. Can’t install the latest update
The latest Windows 11 version, 22H2, has brought tons of enhancements to our dearest operating system. Unfortunately, a lot of users still haven’t had the opportunity to experience it. A mere update of your OS version should be the one thing that goes smoothly, but sometimes that’s not the case.
Failure to install 22H2 can be caused by a few things. Most commonly, the issue is caused by lack of storage space or corrupted files, but there could be other culprits.
There are a couple of things you could try. For example, it’s crucial that your drivers be up-to-date and some important services be enabled. These are: Windows Modules Installer, Background Intelligent Transfer Service, Cryptographic Service, Windows Update services.
To enable them, search ‘Services’, find the service you need and right-click on it. Open ‘Properties’ and select the startup type ‘Automatic’.
It may also be necessary to unplug all peripherals that aren’t crucial and disable third-party antivirus tools until after the update is finished.
Ultimately, you can run the Windows Update troubleshooter to detect and fix other possible issues.
Summary
Tiny bugs like these are nothing out of the ordinary. That said, we still all hate when they happen.
Hopefully some of our solutions have helped you to a smoother Windows 11 experience. But if you’re still struggling, feel free to reach out to us. We’d be happy to help!
Ms-Outlook is the widely used and most favored program to get and to send e-mails within workplaces.
In addition, it eases customers' business execution through additional features like producing schedule records to retaining track of important dates and sessions, preserving details on addresses, producing several files for handling significant e-mails and accessories, and additionally preserving drafts of emails individuals intend to send in future.
Ms-Outlook helps individuals handle functions and organize with each other effectively and economically.
Nevertheless, everything may suddenly halt when the problem code information screen is experienced by the Outlook user, you.
This is time-consuming and annoying as it prevents you from getting into your account and could lock you away from your view e-mail account.
Error code 0x80040116 is a familiar Outlook error that jumps up with no caution on the display.
Besides restricting your capacity to utilize your Outlook account, it presents a critical risk to the private data you've stored inside. Additionally, there is the chance of losing parts and information preserved in your e-mail account.
Error Causes
Finding and determining error code 0x80040116 cause isn't fairly easy. The truth is that there are several distinct causes that could activate this error
A few of the major causes of this error include:-
Broken PST list document. Ms-outlook uses this file to handle the users' requests. You can encounter this problem signal when it gets ruined.
2 gigabytes limit is exceeded by the PST record. You have been incorporating data to Outlook accounts for years frequently without any erasures. When the 2GB limit is reached this error may surface.
PST file gets damaged. This generally occurs thanks to virus contamination to the System or sudden system shutdown.
Problems with account settings.
Further Information and Manual Repair
The error 0x80040116 is displayed in just one of these types:
"Outlook.pst cannot be accessed - 0x80040116(where "Outlook.pst" is PST file name)"
"Sending and receiving reported error (0x80040116): Unknown error 0x80040116"
"Outlook.pst cannot be accessed – 0x80040116"
When you have this error, it is advisable to correct it promptly to ensure it doesn't interfere with your productivity and work.
You do not require to contact an IT expert, to solve this issue. It's graded as an error signal that's easy to repair. So you do not want need deep IT knowledge to fix it.
There are two methods to remove this problem signal. Erase some memory if the error is created by excessive data.
This technique functions in the event the error's cause is PST size. However, that is not likely the best method to repair it if dropping the data that is outdated is no alternative.
Maybe the one that is greatest and the 2nd alternative is to install and to obtain Stellar Phoenix Outlook PST Repair.
Why is this the solution that is most effective to repair and solve the problem code 0x80040116 out there is that the software can fix the malfunction no matter the trigger?
What this means is you do not have to understand the nitty-gritty of determining a problem signal and then locate a unique option to fix its cause.
Wait there is a lot more! Stellar Phoenix Outlook PST fix tool is compatible with all versions of Windows.
Therefore, whether you've got 2007, the 2000 version, or 2010 Outlook editions, you do not have to be concerned about the compatibility like with several other repair resources out there.
Also, it solves the issue in a short while as well as re-establishes each of the e-mails, contact records, and diary info. That means that if you had lost the info as a result of error code 0x80040116, it is possible to heave a sigh of relief as everything is going to be regained right back.
What you need to do is click here, Download, and run Stellar Phoenix Outlook PST on your computer to recover your ms-outlook accounts now and fix error code 0x80040116.
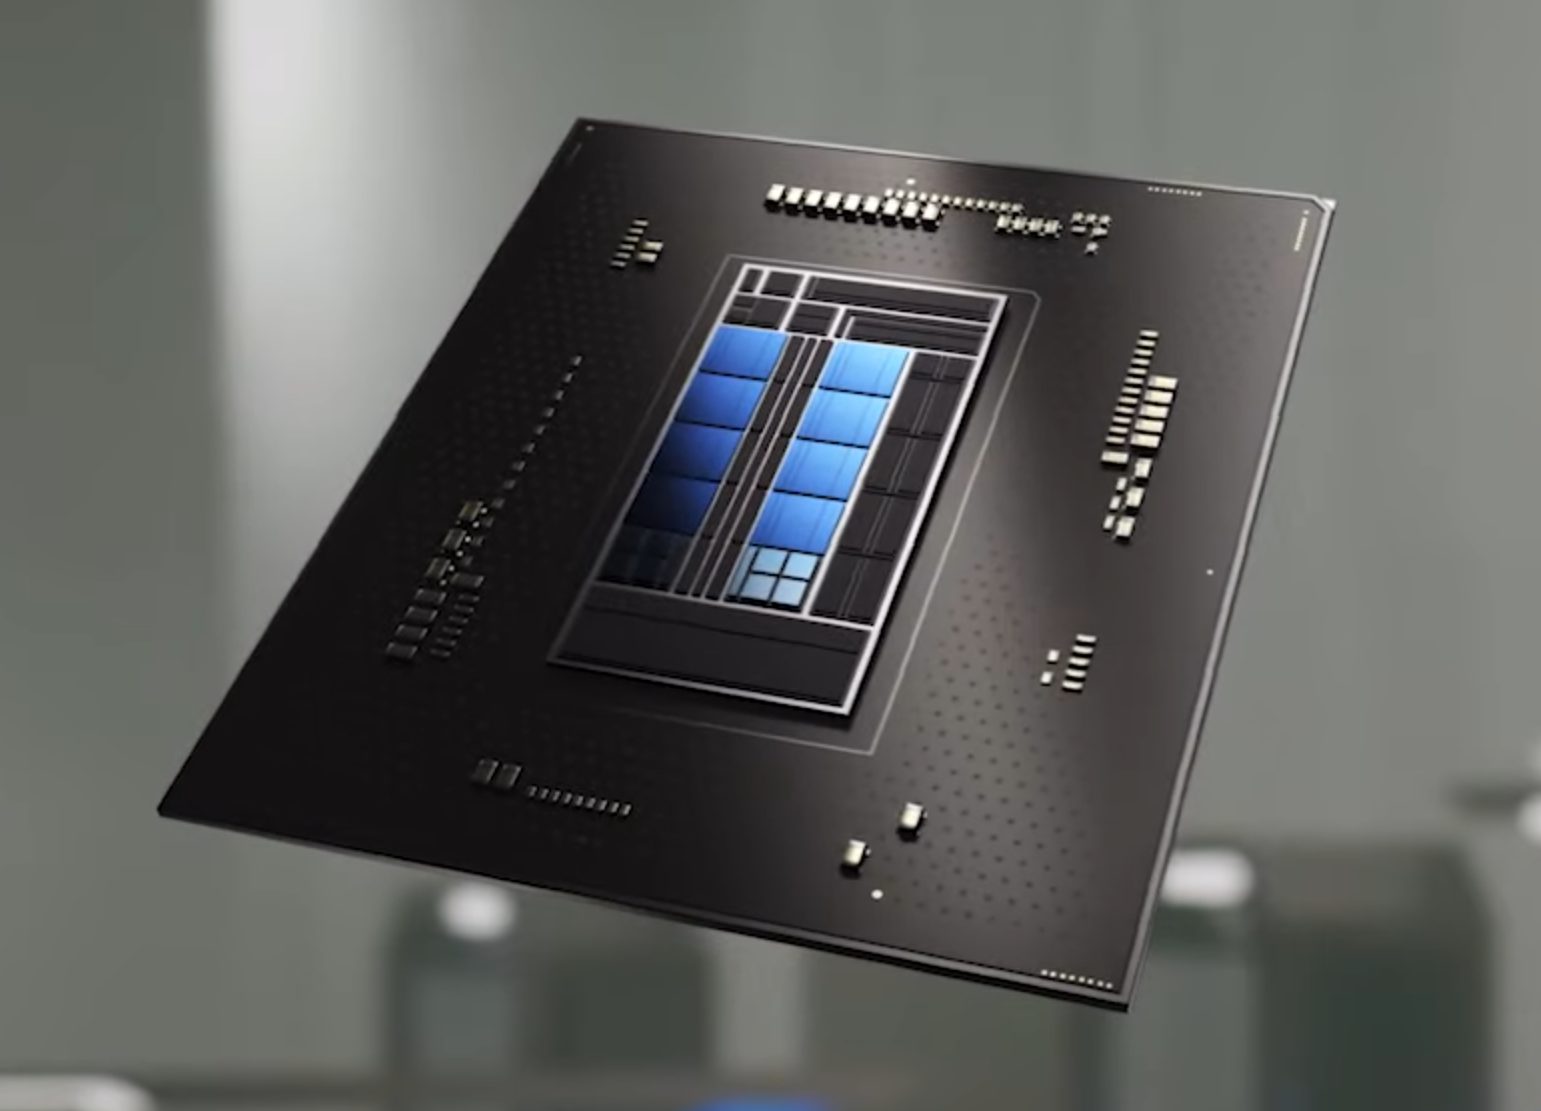
We are all waiting for the release of Intel’s Alder Lake series of processors and real-world results on its performance. Sadly lately it came to our attention that some games might have issues with the processor.
Now before you go on the bandwagon on bashing Intel itself take note that it is not Intel’s fault at all. The issue that arises is mostly due to DRM software and how it works. As you might know or not, Alder Lake has two sets of cores, standard performance cores, and power cores, and with Intel’s Thread Director on-chip right cores will be used for the right tasks, and here lies the issue.
DRM software might detect Thread Director as something suspicious and malicious, and then cut access to the game because of this. Intel, of course, has reached DRM manufacturers and places documentation about how software should be developed with this hybrid technology in mind.
Of course, newer games will be updated if needed and everything will work fine, also games on GOG will work fine because of GOG’s policy of no DRM store but some older ones might be left in limbo. They could work fine but DRM might be triggered and prevent them from loading, usually, game developer itself removes DRM protection after some time but that is not really always the case and there is a chance that some games might simply just not work on Alder Lake CPU only because of DRM protection.
Conclusion
I will admit that I have not been a great fan of DRM in general, I understand that game developer want to protect themselves from piracy but how it looks they were not really successful with it. Even today single-player games get pirated on the day they are released and legally bought ones always make trouble for people that actually paid for them.
I remember times when DRM was awful and you could install a game a limited number of times, luckily this was removed but it seems that many old habits still remain sadly and DRM is present even today in various forms. GOG is proof that people will buy DRM-free games and that they will support this kind of model. Maybe it is time to forget about fighting against piracy, you will not make it go away and people who do not want to buy games will not buy them, on other hand many users that do buy games, if they cannot use them they will rest to pirated version since that one will work.
It is sad to see that pirated software can work better than a legal one and offer a more pleasant experience.
Windows Vista had in it animated wallpapers on desktop but sadly how they were heavy on system resources Microsoft abandoned the idea. Moving forward a couple of years later we have Windows 10 but still, we do not have live animated wallpapers. Since I am the kind of person who does not want to wait on Microsoft and now it is time to bring animated wallpapers back I am going to make one all by myself and you are welcome to join the ride and do the same for you as well.
Enough talk, let's dive into how we can make animated wallpaper for our Windows 10.
Choosing the application
First, we will need some form of application which can we look at our animated wallpapers and since they are animations it means video, so we will need a video player and what better choice than a VLC player, an open-source light weighs all-format player.
Get a VLC player from here and install it.
Finding video source
The next thing is to of course have some looping video that we will use as background. There are many sites and ways to get seamless loop videos, I use this youtube channel for my backgrounds. Altho you can use any video footage you want it is recommended that it is not too long, that it is hi-resolution so we do not have pixels on-screen, and if you can, get it as seamless since we do not want to see stutter when the video is lopped from the beginning.
So hopefully you have desired video and VLC player installed.
Putting it all together
Copy the following code and paste it into your search bar in Windows to open the Startup folder, or navigate to the Startup folder yourself via file explorer if you know where it is.
%appdata%\Microsoft\Windows\Start Menu\Programs\Startup
Now, next thing is to copy and past the VLC shortcut into this folder so it is started when Windows is first time booted.
Right-click on the shortcut and in the edit field paste this:
"C:\Program Files\VideoLAN\VLC\vlc.exe" --video-wallpaper --qt-start-minimized --no-qt-fs-controller --repeat --no-video-title-show --qt-notification=0 "C:\videopath\filename.mp4"
where "C:\Program Files\VideoLAN\VLC\vlc.exe" is the path where VLC is installed, point this to where you have installed it
"C:\videopath\filename.mp4" is the path where you have your video that you wish to use as animated wallpaper. Please note also that in my case there is mp4 as an extension but it does not need to be mp4, just use any extension VLC can open and play.
Conclusion
And that's it, you have successfully made an animated background or live wallpaper on your Windows 10 computer. You can change your wallpaper anytime by editing shortcut and giving it a new path to a new video or simply overwrite the existing one with a new baring same name.
MSI.chm error is a common Windows Error code that occurs when the Windows OS becomes overloaded with invalid system references.
Solution
Error Causes
The MSI.chm error is normally triggered by the following causes:
Poor PC maintenance
You may experience the MSI.chm error if you don’t pay attention to its maintenance. This usually happens when you don’t run antivirus software or update programs and drivers frequently.
Registry files get corrupt and damaged
This error may also occur when the registry files of your PC get corrupt and damaged. This normally happens due to continuous writing, editing and deleting of information from your PCs registry over time as programs are installed, modified and deleted.
Other causes include: malware and system conflicts.
Further Information and Manual Repair
When you come across the MSI.chm error on your PC, it is advisable to repair it immediately without any delays. If you procrastinate in repairing this error, your PC is likely to be exposed to risks like:
Slow PC performance
System failure and crashes
Nonetheless, to resolve this error you don’t have to get the assistance of an IT professional. The MSI.chm is easy to repair and you can resolve it in no time even if you aren’t technically adept.
Here are some of the best ways to repair the MSI.chm error on your PC successfully in the shortest time:-
Cause: Corrupt and Damaged Registry Files
Quick Fix: If you think the MSI.chm Windows error on your system is related to Windows registry issues, then the best way to resolve this error is to download and install a Registry cleaner tool. A word of advice here is to always download such tools from a reliable and a trusted website.
Once you download the Restoro, run it on your PC to scan for errors. The scanning will usually take a couple of minutes. So, it is advisable to be patient. After the scanning is complete, you will see a detailed scanning report highlighting the registry errors on your PC.
Now to resolve the MSI.chm error that has occurred on your PC due to registry issues, click on the ‘Repair’ button to fix the error.
Once the repairing process is complete, restart your PC.
Restoro helps you not only fix the MSI.chm error but it also helps improve the speed of your PC, and protects it from failure and crashes.
Cause: Poor PC Maintenance
Quick Fix: If the cause of the MSI.chm error is poor PC maintenance, then the best way to resolve the error is to update the drivers. You can do this by installing the latest drivers for the devices that you think are now old and need to be updated.
Here’s what you need to do:
First find which devices don’t have drivers installed. For this go to the start menu and then click on the Control Panel. Now open the Device Manager. The Device Manager will list down all the devices that don’t have drivers installed with yellow exclamation point icons next to the device name.
As for the updates, the general rule of thumb if the driver does not support the program you are trying to run, then this means that you probably need to update the driver to ensure compatibility. For example your video card driver does not support a newly launched game, then you definitely need a driver update to play the game on your PC.
To install or update drivers on your PC, you can either get CDs from the market or you can download updated versions of the drivers from the main manufacturer’s website for free.
You can also use automated solution for all of your driver issues:So, next time when you or your friends encounter this problem, try these quick fixes to repair the error without any hassle.
Error 0x8000ffff prevents you from using the Microsoft store. Altho it is not a critical error that will break Windows, it is annoying enough that will require fixing so we can use the store once again and install apps when we want to. Interesting thing is that this error was present inside Windows 10 as well causing some annoyance, you think Microsoft would learn, and then you see reality. Anyway, we have not come here to bash Microsoft, we came to solve errors.
So there are several problems that can cause this error like issues with accessing the Microsoft servers, corrupt system files, settings being misconfigured, malware infections, or conflicting applications. We will cover all solutions for each scenario taking approaches from most simple solutions to more complex ones. Follow the guide and let's fix this annoyance.
Wait for Microsoft's servers to become accessible
Yes, just wait. If the problem is tied to Microsoft servers having heavy load or being temporarily down there is not much you can do except for their tech team to resolve the issue. Go to Twitter or Facebook and check the Microsoft page to see if anyone else has this issue, if several people are reporting the same error then it is due to server problems. In this case, the only thing you can do is to wait.
Run troubleshooter
If servers are working fine then the issue is within your system so let's get down to fixing. Most simple and easiest solution is to let Windows try and resolve the problem by itself. We will use troubleshooter for this, Windows's integrated fixing solution:
Press ⊞ WINDOWS + I to open the settings app
Click on System in the left panel, then on Troubleshoot on the right
Click on Other troubleshooters
In most Frequent section find Windows Update and click on the Run button
Wait for the troubleshooter to finish and follow on-screen instructions
Clear Store cache
If the troubleshooter has not found the issue or was unable to repair it, the next step is cleaning the Microsoft store cache in order to eliminate corrupted or partial cache files.
Press ⊞ WINDOWS + R to open the run dialog
In run dialog type in: wsreset and press OK or press ENTER
A black screen will appear and it will not give any kind of feedback about progress, so it might seem like Windows has frozen, but do not panic nor try to do anything, this kind of behavior is normal, just wait for the process to finish and once it is done Microsoft store will launch with the cleared cache.
Disable Proxy
Proxy setting can interfere with establishing a connection to the store servers and if previous solutions have not worked we will check proxy next.
Press ⊞ WINDOWS + R to open the run dialog
Inside run dialog type: inetcpl.cpl and hit ENTER or press OK button
Inside Internet Properties click on the Connections tab and then on LAN settings
Uncheck the box next to Use a proxy server for your LAN and click on OK
Turn off antivirus
If nothing worked so far, turn off your anti-virus software, there is a slight possibility that your antivirus is misconfigured or preventing the system from accessing the store. Turn off antivirus and firewall to make sure that this is not an issue.
Delete the software distribution folder
So, we have tried a lot of things, and the error still persists? Let's then go to the next step and delete the software distribution folder in order to be remade new so we can eliminate corruption in the folder itself. To do this follow the guide:
Press ⊞ WINDOWS + S to open the search menu
Inside search type in Windows terminal, right-click on the terminal and click on Run as administrator.
Confirm with YES on UAC prompt pop up
Inside terminal press CTRL + SHIFT + 2 to open command prompt
inside command prompt type in: net stop wuauserv and press ENTER
Then type in: net stop bits followed with ENTER
Next press ⊞ WINDOWS + R to open the run dialog
Inside run dialog type in C:\Windows\SoftwareDistribution and press the OK button or ENTER
File Explorer will open and you will find yourself inside SoftwareDistribution folder. Press CTRL + A to select all files inside
Press on the delete icon or press DEL, confirm with YES
Once all files are deleted, the system will redownload new ones.
Enable Cryptographic service
Windows 11 has come with a cryptographic service that aims to make your computer more secure but if the service is turned off it can be the cause of 0x8000ffff error. In order to turn this service back ON, follow the guide:
Press ⊞ WINDOWS + R to open the run dialog
In run dialog type in services.msc and press ENTER or click on the OK button
In the list find Cryptographic Services and double click on it
Inside properties click on Startup type dropdown menu and select Automatic from the list
Click on the Start button to run service and then on the OK button to save the changes
Run SFC scan
SFC is an internal Windows tool for fixing corrupt system files, application will scan all system files and repair ones that are corrupted. To run an SFC scan do the following:
Press ⊞ WINDOWS + S to open the search menu
Inside search type in Windows terminal, right-click on the terminal and click on Run as administrator.
Confirm with YES on UAC prompt pop up
Inside terminal press CTRL + SHIFT + 2 to open command prompt
inside command prompt type in: SFC /scannow and press ENTER
Wait for the whole process to finish and reboot your system
Run DISM scan
Similar to SFC, DISM scan will scan your system Windows image and if required it will repair it.
Press ⊞ WINDOWS + S to open the search menu
Inside search type in Windows terminal, right-click on the terminal and click on Run as administrator.
Confirm with YES on UAC prompt pop up
Inside terminal press CTRL + SHIFT + 2 to open command prompt
inside command prompt type in: DISM /Online /Cleanup-Image /RestoreHealth and press ENTER
Wait for the whole process to finish and restart your computer


 In today's world any professional, whatever be design, print, web design or similar is using one or more Adobe programs. Adobe has cemented itself as a must-have software for any kind of serious and even amateur work. Sadly in the latest Windows 11 adobe software in some instances can slow down your computer and put some hard load on the CPU. If you are one of these unfortunate users, keep reading because we have a few things you can do to solve this.


 Now before you go on the bandwagon on bashing Intel itself take note that it is not Intel’s fault at all. The issue that arises is mostly due to DRM software and how it works. As you might know or not, Alder Lake has two sets of cores, standard performance cores, and power cores, and with Intel’s Thread Director on-chip right cores will be used for the right tasks, and here lies the issue.
DRM software might detect Thread Director as something suspicious and malicious, and then cut access to the game because of this. Intel, of course, has reached DRM manufacturers and places documentation about how software should be developed with this hybrid technology in mind.
Of course, newer games will be updated if needed and everything will work fine, also games on GOG will work fine because of GOG’s policy of no DRM store but some older ones might be left in limbo. They could work fine but DRM might be triggered and prevent them from loading, usually, game developer itself removes DRM protection after some time but that is not really always the case and there is a chance that some games might simply just not work on Alder Lake CPU only because of DRM protection.
Now before you go on the bandwagon on bashing Intel itself take note that it is not Intel’s fault at all. The issue that arises is mostly due to DRM software and how it works. As you might know or not, Alder Lake has two sets of cores, standard performance cores, and power cores, and with Intel’s Thread Director on-chip right cores will be used for the right tasks, and here lies the issue.
DRM software might detect Thread Director as something suspicious and malicious, and then cut access to the game because of this. Intel, of course, has reached DRM manufacturers and places documentation about how software should be developed with this hybrid technology in mind.
Of course, newer games will be updated if needed and everything will work fine, also games on GOG will work fine because of GOG’s policy of no DRM store but some older ones might be left in limbo. They could work fine but DRM might be triggered and prevent them from loading, usually, game developer itself removes DRM protection after some time but that is not really always the case and there is a chance that some games might simply just not work on Alder Lake CPU only because of DRM protection.

 So there are several problems that can cause this error like issues with accessing the Microsoft servers, corrupt system files, settings being misconfigured, malware infections, or conflicting applications. We will cover all solutions for each scenario taking approaches from most simple solutions to more complex ones. Follow the guide and let's fix this annoyance.