One of the most common and bothersome issues with a printer is when it refuses to get configured or set up on your computer. Thus when your printer has some configuration issues, you will most likely encounter the error 0x00000709.
This occurs if there is already a default printer set and configured or Windows does not want to configure the new printer at all.
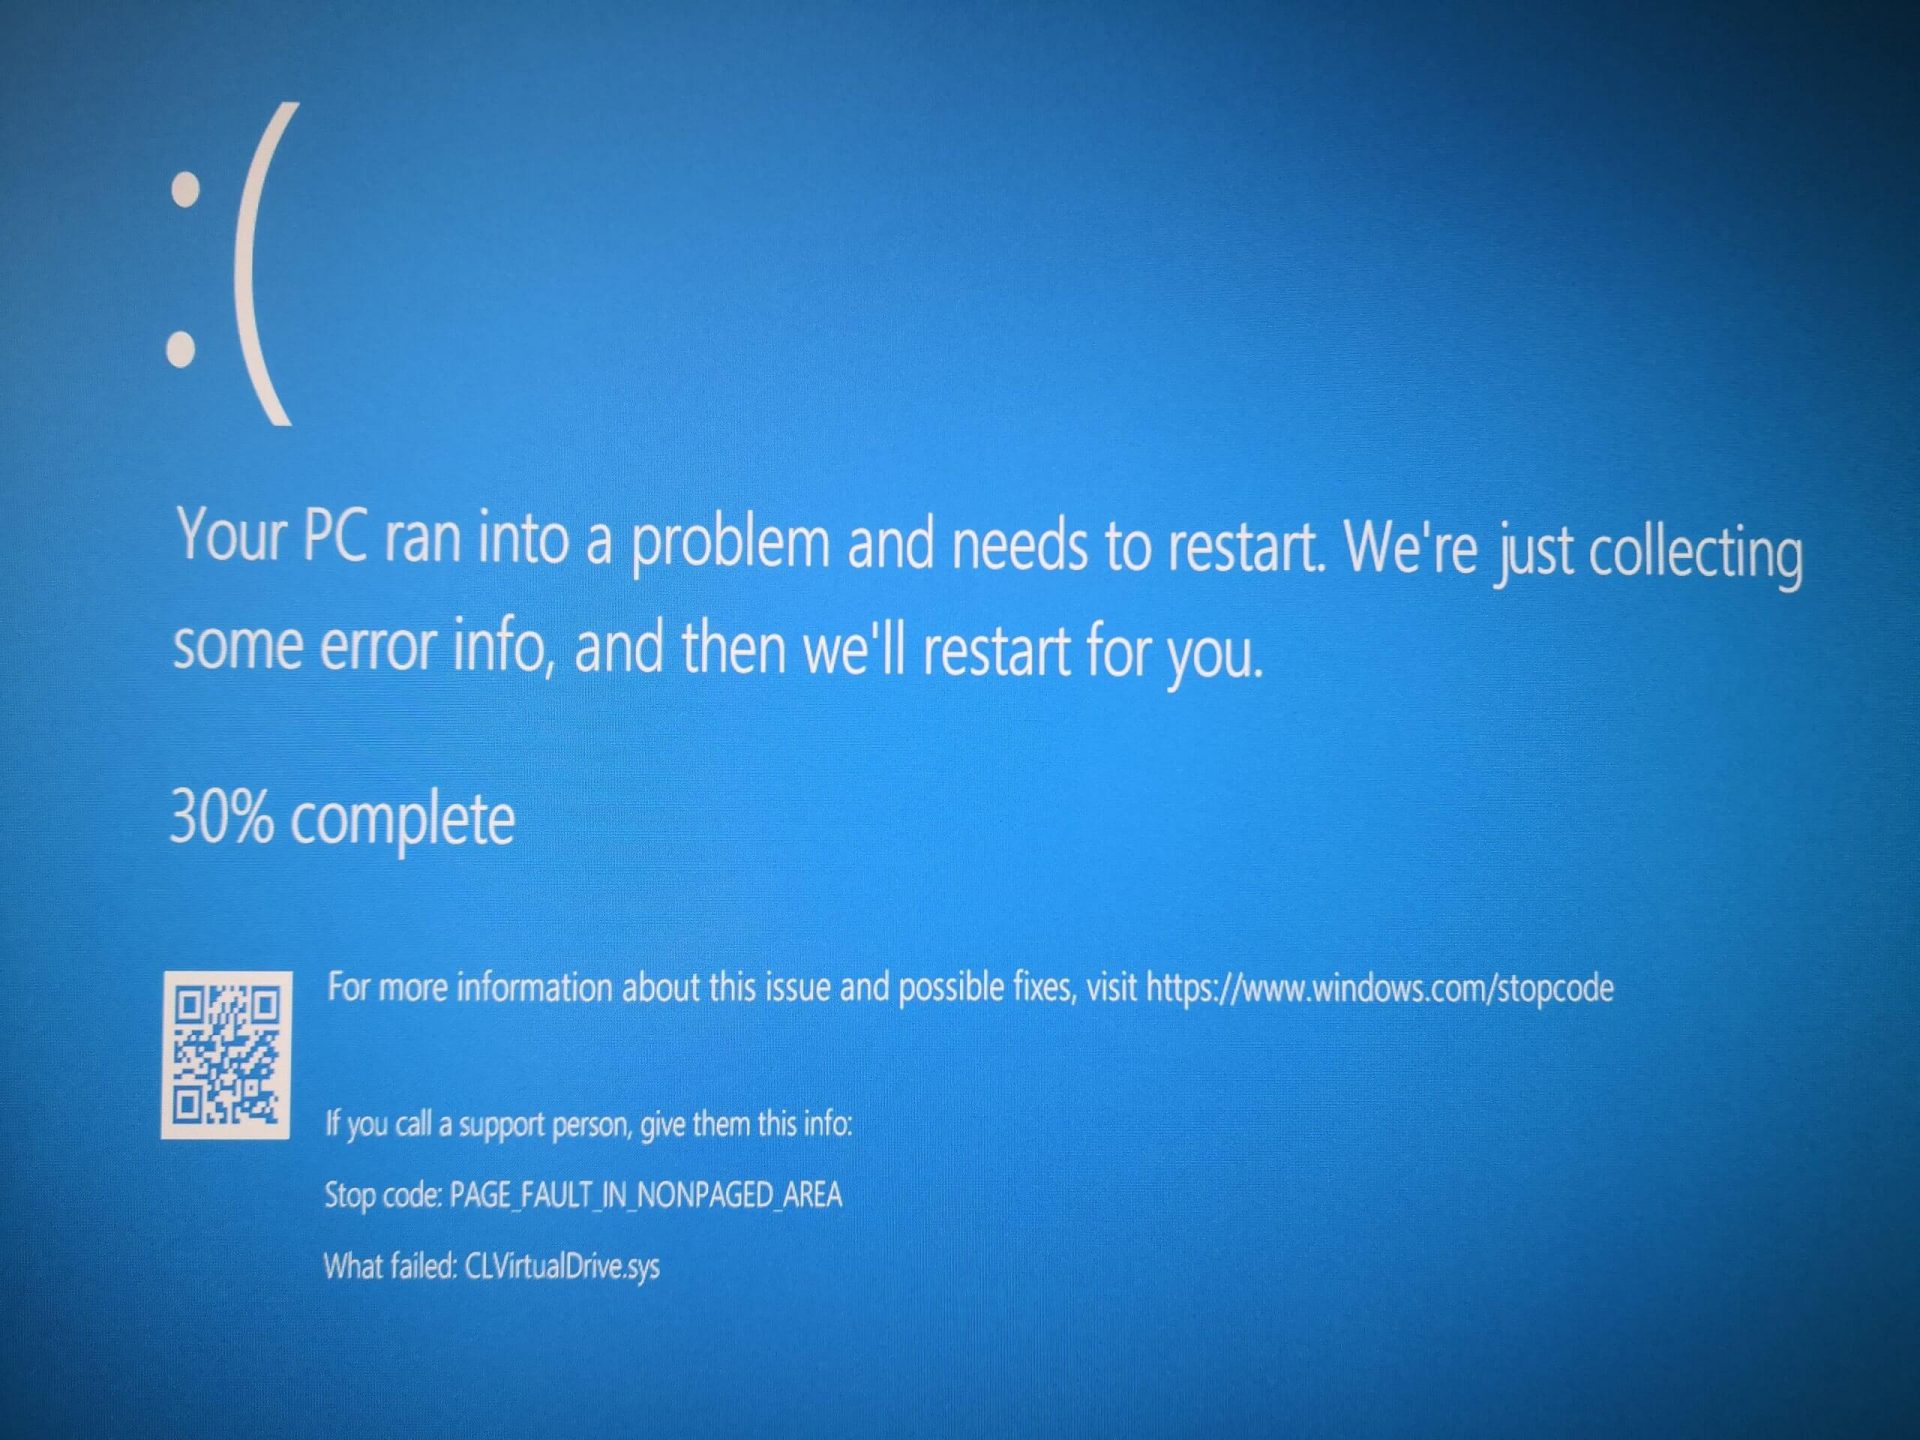
The operation could not be completed (error 0x00000709), Double check the printer name and make sure that the printer is connected to the network.
Today, we will try two fixes that may help you get rid of this error.
Option 1 – Run the Printer Troubleshooter
One of the first basic troubleshooting you can perform to resolve the printer issue is running the Printer Troubleshooter. This built-in troubleshooter can detect and automatically fix the problem for you. To use it, follow these steps:
Tap the Win + R keys to open the Run dialog box.
Next, type “exe /id PrinterDiagnostic” in the field and click OK or hit Enter to open the Printer Troubleshooter.
Then click the Next button and follow the next on-screen instructions to fix the issue with the printer.
Option 2 – Try to use some Registry tweaks to add the Printer
You might want to use some tweaks to add the Printer but before you proceed, make sure to create a System Restore Point so that if anything goes out of hand, you can always undo the changes you’ve made.
Tap the Win + R keys to open the Run dialog box.
Next, type “Regedit” in the field and hit Enter to open the Registry Editor.
When a UAC or User Account Control prompt appears, click Yes.
Once you’ve opened the Registry Editor, go to the following key location:
From there, double click on the file named “Device on the right side pane under the Windows folder.
Now add the name of your printer in the Value Data field as you can see below and then click the OK button.
Note: As you can see on the image above, you must not change the “.winspool.Ne02:” part and only the first one which is the name of your printer.
After that, you will get a message that says, “Cannot edit Device: Error writing the value’s new contents, simply click on OK again. You have to take note of the existing permissions before you proceed to the next step. Once you’ve added the Printer, make sure to reverse the changes you’ve made to the Permissions.
Now right click on the Windows folder located on the left pane and click on Permission.
Select Restricted under the Group or user names section.
Then check the checkboxes for “Full Control”, “Read” and “Special Permissions” under the Permissions for RESTRICTED section.
After that click the Apply button and then OK to save the changes made.
Next, right-click on the file named “UserSelectdDefault” and select Rename to rename it to your printer’s name.
Now restart your computer to successfully apply the changes made.
After the printer is added, don’t forget to reverse the Permission changes you’ve made early on.
Option 3 – Try updating the Printer drivers
You might also want to try updating your printer drivers. All you have to do is locate the USB Composite Device. For complete details, follow the steps below.
First, click the Start button and type “device manager”.
Then click on the “Device Manager” from the search results to open it.
From there, look for the USB Composite Device option and right-click on it, and select the Update Driver from the options.
Restart your PC and then click the “Search automatically for updated driver software” option.
Note: You also have the option to download the latest version of your Printer from the manufacturer’s website.
Page Fault in Non-Paged Area is a blue screen error usually happening with faulty drivers but it can come from different issues like faulty RAM.
In this short article, we will cover usual ways on how to approach and solve this error.
Solving Page fault in Non-Paged Area
Rollback using system restore
Simple and easy solution, roll back to the previous system restore point where Windows was stable and working.
Fix Page Fault in Non-Paged Area using device manager
Press ⊞ WINDOWS + X to open the hidden menu
Click on device manager
Find a device with a question mark and right-click on it
Click on the rollback driver button
Fix via command prompt
Press ⊞ WINDOWS + X to open the hidden menu
Click on command prompt (admin)
Inside command prompt type in SFC / scannow and press ENTER
Wait for the process to be finished and then reboot the PC
Fix via DISM tool
Press ⊞ WINDOWS + X to open the hidden menu
Click on command prompt (admin)
Inside command prompt type in DISM /Online /Cleanup-image /Restorehealth and press ENTER
Wait for the process to be finished and then reboot the PC
Page fault in Non-Paged Area via a dedicated tool
Sometimes manual and provided solutions just simply cannot cut it because the issue is triggered also with something else and not just a single issue.
Use DRIVERFIX to fix this specific issue with a single click.
Error code 80004002 will be encountered when there are absent registry keys. These missing registry keys will hinder an update process when initiated. However, this error code can be averted once the user makes a reinstall of the Windows Update Client. The steps will be highlighted throughout the article.
Solution
Error Causes
Error code 80004002 might occur for various valid reasons. In cases of installing programs, a user might mistakenly install a new program over another, that was not properly (completely) uninstalled. This could cause a stack-up of registry keys and error messages. Additionally, error code 80004002 might be a consequence of malware, viruses, and adware.
Further Information and Manual Repair
If left unchecked, error code 80004002 could amount to system freezes and crashes, slow computer performance, error codes upon installation, and even blue screen errors. To fix this error code, you might want to attempt one or all the methods below. This is due to the fact that the problem might stem from various reasons.
Method 1: Safe Mode
Ensure to boot your computer in safe mode. This is to ensure that you are properly able to troubleshoot Windows update error code 80004002. To load your computer in safe mode, turn on the computer, press F8 before it fully loads to the ‘sign in’ screen.
Method 2: Update Outdated Drivers
One of the many reasons why you’ll encounter error code 80004002 is in light of the fact that your drivers might have been outdated. To check if your driver is outdated, Right click on the Start menu, select the Device Manager option. From there, you’ll be able to tell which device(s) is corrupted and needs updating.
Method 3: Reinstall Windows Update Client
To perform this process, follow the steps below:
Locate “My Computer” or “This PC” on your device.
Select the “Properties” option.
Under the System option, determine whether your System type is 64-bit or 32-bit version of Windows.
Use the links below to install the Windows Update client:
After installation, search for Windows Update from the Search option.
Select the Check for Updates option.
Once any updates are found, hit Install Updates.
Method 4: Use An Automated Tool
If you wish to always have at your disposal a utility tool to fix these Windows 10 and other related issues when they do arise, download and install a powerful automated tool.
Spying via some malicious app on the target phone is not a new thing but it can be very uncomfortable and even against the law in some countries.
Infecting the target phone can be done in various ways, another person can intentionally download and install applications on it, and you can install them via some phishing attacks or by an online scam. Once installed this piece of software presents a very serious invasion of privacy since it can track text messages, track phone location in real-time, record calls in real-time, eavesdrop on calls, take control of the camera and microphone, and many other applications.
Here are some common symptoms of mobile phones infected with spyware.
Symptoms of spyware
Random reboots Slow performance Strange text messages Overheating Unusual high data usage Non-familiar apps in the app list The fast drain of the battery Long shutdown time Strange interference and sounds during calls Signs of activity during standby mode
If your phone exhibits any of these symptoms you might have a spyware app installed and running on it.
Common spy apps
There are many apps that have been designed to spy on people that can be downloaded in the app store or on Google Play today. Most of these spyware apps are aimed at parents wanting to keep an eye on and protect their children. However, these can be used by anyone in order to spy on a target person via their phone.
Below is a list of common apps that can be used to spy on you. Many spyware apps require a phone to be ‘jailbroken’ or ‘rooted’ before being installed, this is when the phone’s operating system is changed to allow the phone to become unlocked and customizable.
mSpy : An undetectable spying app for iOS devices. It can be used to read your chats, see your location, view your email, check your call history, record your keystrokes, and more.
Spyera : This app requires rooted and jail-broken iPhones to work. It can go undetected and monitors phone calls and your call history. It even allows call recording and eavesdropping on live calls.
Flexispy : Flexispy prides itself as the #1 phone monitor for parents and can monitor everything from calls to social texts.
Umobix : This powerful spyware app has a dashboard that allows users to easily monitor someone’s location, calls, texts, keystrokes, all major social media, and more. You can detect Umobix because it heats up the infected phone and greatly affects the battery life of the infected device.
Ikey Monitor : Although it requires the device to be rooted for Android or jailbroken for iPhones, this spy app captures keystrokes, passwords, and screenshots, allows for call recording and supports multiple languages.
Clevguard : Available for both iOS and Android, Clevguard allows users to track GPS and Wi-Fi locations, capture screenshots remotely, and more. Due to a recent update, the spy app drains the target phone’s battery significantly.
Remove spyware from your phone
If any of the beforementioned apps are present on your phone you need to remove them right away.
Go to your phone settings and remove the malicious applications, then download some protection suite and scan the whole phone for any other trace of software remains or other malware apps.
Device drivers serve as a connection between the hardware in your computer and the operating system. So if any of the device drivers fail, the concerned hardware will stop communicating with Windows. And when you encounter some network-related issues, you can run the Network Adapter troubleshooter to fix them. However, this built-in troubleshooter does not work all the time as there are still problems that it can’t fix on its own and you’ll see the following error message:
“Windows could not find a driver for your network adapter.”
If you encounter this kind of error, read on as this post will help you in fixing the problem but before you get started in troubleshooting the problem, try running the Network Adapter Troubleshooter again.
Open the Search bar on your computer and type in “troubleshoot” to open the Troubleshoot settings.
Next, scroll down and select the “Network Adapter” option from the right pane.
Then click on the Run Troubleshooter” button.
After that, your computer will check for any possible errors and will pinpoint the root cause of the problem if possible.
Refer to each one of the solutions given below to get started:
Option 1 – Update the Network Adapter drivers
Of course, the first thing you can try to do is to update the Network Adapter drivers to resolve the error.
Tap the Win + R keys to launch the Run window and then type in the “devmgmt.msc” command and hit Enter to open the Device Manager window.
Under the Device Manager, you will see a list of drivers. From there, look for the Network Adapters and expand it.
Then right-click on each one of the Network drivers and update them all.
Restart your PC and see if it helped in fixing the BSOD error.
Note: If updating the network drivers didn’t help in fixing the “Windows could not find a driver for your network adapter” error, you can also try to uninstall the very same drivers and restart your Windows 10 PC. After that, the system itself will reinstall the drivers you just uninstalled. Alternatively, you can also download and install the drivers from the manufacturer’s website directly.
To reinstall the network adapter driver, refer to these steps:
Open the Devices Manager from the Win X Menu.
Then locate the device drivers and right-click on them to open the Properties.
After that, switch to the Driver tab and click on the Uninstall Device button.
Follow the screen option to completely uninstall it.
Finally, restart your computer. It will just reinstall the device drivers automatically.
Option 2 – Try running the Hardware and Devices Troubleshooter
Apart from the Network Adapter Troubleshooter, you can also run another built-in troubleshooter in Windows, the Hardware and Devices Troubleshooter, as it can also help you in resolving the “Windows could not find a driver for your network adapter” error.
The first thing you need to do is click on Start and then on the gear-like icon to pull up the window for Settings.
After opening Settings, look for the Update and Security option and select it.
From there, go to the Troubleshoot option located on the left-hand side of the list.
Next, select Hardware and Devices from the list and open the Troubleshooter and run it. Once it is doing its job, wait for it to complete the process and then restart the system.
After the system restarts, check if the problem’s now fixed. If not, refer to the next option given below.
Option 3 – Try performing a System Restore
You might also want to perform a System Restore that might help you in fixing the error. You can do this option either by booting into Safe Mode or in System Restore. If you are already in the Advanced Startup Options, just directly select System Restore and proceed with the next steps. And if you have just booted your PC into Safe Mode, refer to the steps below.
Tap the Win + R keys to open the Run dialog box.
After that, type in “sysdm.cpl” in the field and tap Enter.
Next, go to the System Protection tab then click the System Restore button. This will open a new window where you have to select your preferred System Restore point.
After that, follow the on-screen instructions to finish the process and then restart your computer and check if the problem is fixed or not.
There is a built-in tool in Windows 10 the Disk Cleanup Utility which can help you restore hard disk space by removing temporary files, Thumbnails, old Windows files, Windows Upgrade logs, Delivery optimization files, and many more. However, from time to time, this built-in tool also experiences some issues. One of these issues is when it gets stuck on Windows Update Cleanup. Read on to find out what you can do in such a case.
When the Disk Cleanup Utility is stuck on the Windows Update Cleanup, the process could be slow and take a long time to complete when purging the files. If this happens, click on Cancel to close the dialog box. After that, try running the Disk Cleanup Tool again as administrator and check if the files that you want to clean is still there or not. If it isn’t there, then this means that the cleanup has been done, otherwise, you need to refer to the options given below.
Option 1 – Try to manually delete the contents in the SoftwareDistribution folder
Open the WinX Menu.
From there, open Command Prompt as admin.
Then type in the following command – don’t forget to hit Enter right after typing each one of them.
net stop wuauservnet start cryptSvcnet start bitsnet start msiserver
After entering these commands, it will stop the Windows Update Service, Background Intelligent Transfer Service (BITS), Cryptographic, and the MSI Installer
Next, go to the C:/Windows/SoftwareDistribution folder and get rid of all the folders and files thereby tapping the Ctrl + A keys to select them all and then click on Delete. Note that if the files are in use, you won’t be able to delete them.
After resetting the SoftwareDistribution folder, you need to reset the Catroot2 folder to restart the services you just stopped. To do that, follow these steps:
Type each one of the following commands.
net start wuauservnet start cryptSvcnet start bitsnet start msiserver
After that, exit Command Prompt and restart your computer and then try to run Windows Update once more.
Option 2 – Try to manually delete the contents of the Windows.old folder
The Windows.old folder is the one that holds the older version of Windows when you upgrade. It comes really useful when you want to revert to the previous version of Windows 10. Thus, you can delete the Windows.old files in case the cleanup tool is stuck.
Option 3 – Try running Disk Cleanup in a Clean Boot State or Safe Mode
Another thing you can try is to restart your computer in a Clean Boot State or Safe Mode. Chances are, there are some programs that are preventing the Disk Cleanup Utility tool to run properly. After you restart your computer in a Clean Boot State or Safe Mode, try to run the Disk Cleanup tool again and then see if it now works or not.
Option 4 – Run the Windows Update Troubleshooter
You might also want to run the Windows Update Troubleshooter as it could also help in fixing this issue. To run it, go to Settings and then select Troubleshoot from the options. From there, click on Windows Update and then click the “Run the troubleshooter” button. After that, follow the next on-screen instructions and you should be good to go.
Option 5 – Run the DISM tool to fix the corruption in the Component Store
You can try running the Deployment Imaging and Servicing Management or DISM tool to fix the Wdf01000.sys Blue Screen error. Using this built-in tool, you have various options such as the “/ScanHealth”, “/CheckHealth”, and “/RestoreHealth”.
Open the Command Prompt with admin privileges.
Then type in the following commands and make sure to hit Enter right after you type each one of them:
Dism /Online /Cleanup-Image /CheckHealth
Dism /Online /Cleanup-Image /ScanHealth
exe /Online /Cleanup-image /Restorehealth
Do not close the window if the process takes a while as it will probably take a few minutes to finish.
Have you ever come across 0x8007043c error message pop up on your PC? If yes, then you should know that this error message is generated when any corresponding process or operation cannot be completed successfully by the application.
This is a critical Windows OS Error message that should be fixed immediately.
Solution
Error Causes
The 0x8007043c error code is usually triggered by the following reasons:
Missing or corrupt registry files
Failure to update Windows Installer
Viruses and Spyware
Common signs of this error code are pop-up messages, program lock-ups, problems with opening documents, and screen freeze.
Further Information and Manual Repair
As soon as you experience this error on your PC, it is advisable to repair it immediately because this error poses high-security risks. Malwares and viruses are notorious for data theft.
To fix the 0x8007043c error on your PC, you don’t need to take on the services of an IT professional. This error code is rated as easy to repair.
By following the instruction and repair solutions given below, you can easily fix this Window error 0x8007043c in a couple of minutes by yourself.
Here’s what you need to do:
Step 1: Scan for Viruses and Spyware
To stop hackers from sneaking into your PC and stealing your confidential data, you must first scan your computer for viruses and spyware on your PC. It is advisable to use a powerful antivirus to ensure your computer is totally virus and spyware clean.
Step 2: Download and Install a Registry Cleaner
After you scan for viruses, you should now download and install a registry cleaner. This is needed because an antivirus does not detect corrupt registry entries. To detect such entries, the registry cleaner tool is the best. After you download a registry cleaner on your system, click the scan button.
You will have to wait for a few seconds for the scanning to finish. Once the scanning is complete, click on the ‘Repair’ button to fix the errors.
After fixing all the errors, restart your computer. This is important because the registry changes will only come into effect after the system restarts.
By following these 2 simple steps, you can easily resolve the 0x8007043c error on your system. However, to prevent this error from occurring again, it is recommended to run the antivirus every time you use your PC.
Hello and welcome to errortools another tutorial which aims to make your computer life easier and more relaxed. This time we will be talking about how to switch sound output devices in Windows 10 in a matter of seconds between Headphones and external speakers, Between 2 different speakers, or any other audio output device in general.
Windows 10 with its updates has really gone from OK to one of the greats, little hacks and shortcuts which every update has introduced have really made life easier.
Now, your typical switching from one audio output device to another can be accomplished with your standard go to settings, go to devices, choose audio, pick one which you prefer and click on OK. This way altho nothing wrong with it is a little slow and if you need to switch your output devices several times in a single day often it can be time-consuming as well. Lucky for you we have a quick solution for you.
Switching guide
All right, now in order to be able to actually switch between your audio output devices make sure that all of them are working and that they are plugged in. For example, make sure that both of your headphones and speakers are turned ON and plugged in. Once you have confirmed that everything is in working order:
Click with a left mouse button on a speaker icon located on the right part of your taskbar next to the clock
Click on the small up arrow on the right next to your current audio output device.
The list will open, choose, and left click with the mouse button on your choice.
And that's it, you have changed your default audio output device in a matter of seconds.
The good thing about this method is that Windows will remember output audio levels for each device.
Potential issue
If by any chance when switching your audio devices this way freezes volume control just go to the task manager and restart Windows Explorer.
To restart Windows explorer:
Instagram posting has been reserved for mobile phones for a very long time but in October 2021 that privilege has come to an end. Instagram added the long-awaited ability to post to Instagram from the website. You get nearly all of the same filters and editing tools that you can find in the iPhone and Android app, too.
In order to post via computer on your Instagram account all you need is a browser. The first step, of course, is to go to instagram.com and login into your account, if you do not have an account, you can make one for free. Next, click on the + icon in the upper right corner.
Create a new post screen will open, in this screen click on the Select from computer blue button on the bottom. The file manager will open, choose your desired photo and confirm. After that, you will be presented will an adjustment screen for a photo, here you can crop the photo, zoom in, adjust the aspect ratio, or if you wish add more photos to create a slide show.
Once you are done will all of these adjustments, click on Next in the upper right. From there you will be taken into a filter screen where you can apply one of many filters or if you want, you can adjust brightness, contrast, saturation, temperature, etc. just like in the application on your phone. Once you have the desired result, again click on Next in the upper right part of the screen.
Lastly, you will be given an option to write a caption for the photo if you wish and add a location. Once this step is finished you can post the feed by clicking on share in the upper right part.
That is all to it, just like in a mobile application you can now use your computer for Instagram posting.
AVFoundationCF.dll is a type of Dynamic Link Library file.
This DLL file is associated with AVFoundationCF and is developed by Apple Computer Inc. for Windows PC. This file functions similarly to any other DLL files. It comprises of small programs. This DLL file is typically needed to load and start the Apple iTunes utility.
The inability to call this file or the files to load triggers the AVFoundationCF.dll error message on your system.
The error message can be displayed in either of the formats on your PC:
“The program can’t start because AVFoundationCF.dll is missing from your computer. Try reinstalling the program to fix this problem.”"This application failed to start because avfoundationcf.dll was not found.”"Cannot find %COMMONFILES%AppleApple Application Supportavfoundationcf.dll.""Cannot start AVFoundationCF. A required component is missing: avfoundationcf.dll.”“Avfoundationcf.dll Access Violation." "Cannot register avfoundationcf.dll."
Solution
Error Causes
AVFoundationCF.dll error can occur due to numerous reasons. However, the most common reasons for this error code include:
Viral infection
Corrupt or invalid registry entries
Apple Computer Inc. hardware failure such as bad hard drive
Missing or deleted Avfoundationcf.dll file
It is recommended to resolve the error as soon as you experience it virtually because if the error code is related to viral infection on your system, it can expose your PC to privacy errors and data security risk.
And if the error is triggered by registry issues, it can lead to serious threats like system crash, failure, and data loss.
Therefore, the AVFoundationCF.dll error not only hampers your ability to access and start Apple iTunes program but it also puts your PC at serious risk.
Further Information and Manual Repair
To fix the error AVFoundationCF.dll on your PC, here are some of the best and easy to do solutions that you can try:
Check your Recycle Bin
Since dll files are shared files, there is a possibility that this file accidentally got deleted when you were uninstalling some other program on your system. If you experience missing AVFoundationCF dll file error message after performing any program on your PC, then chances are that it got deleted and maybe in your recycle bin.
So, first, check your recycle bin and search for the dll file. If you find it, restore it to fix the error.
Update Device Driver
To resolve the issue, try performing a driver update.
This can be done by downloading the latest drivers from the hardware manufacturer’s website. Now open Device Manager from the Control Panel and locate the hardware device that you want to update the driver for.
Once you find the hardware you are updating the driver for, right-click on the hardware icon and choose properties. In the properties windows, click the driver tab. Now click the update driver button. To activate changes, restart your PC.
To automatically update your computer's drivers when necessary, download and install DriverFIX.
Try Re-installing Apple iTunes Program
To do this, simply go to the control panel, select programs and then uninstall a program and then select iTunes. Uninstall it and then repeat the same program and install the Apple iTunes program again on your PC by downloading the program from Apple’s official website.
Scan for Viruses
If the error still persists, then it is advisable to scan your PC for viruses. This can be easily done by running a powerful antivirus on your PC. However, please note anti-viruses are notorious for slowing down PC performance. So, may have to compromise on the speed of your system.
Clean and Repair the Registry
If the error is caused by invalid and corrupt registry entries and damaged Avfoundationcf dll file, then the best way to resolve is to download a powerful registry cleaner.
We advise you to install Restoro on your PC. This is an advanced and a multi-functional PC Fixer integrated with multiple powerful utilities including a high functional registry cleaner, an antivirus and a system optimizer.
The registry cleaning utility scans all the registry issues and removes all errors triggered by the registry immediately.
It cleans the registry by wiping out all the unnecessary, obsolete and redundant files including invalid entries and bad registry keys. Furthermore, it also fixes the damaged and corrupt dll files including Avfoundationcf dll file. Thereby resolving the error right away.
Furthermore, the antivirus deployed in this software scans for all types of malicious codes like viruses, Trojans, spyware, and malware and removes them. To ensure you don’t compromise on your PC performance, it is deployed with a system optimizer utility that boosts the speed of your computer dramatically.
This tool is bug free, has a user-friendly interface and compatible with all Windows versions.
Click here to download Restoro and resolve Avfoundationcf.dll error on your PC today!
One of the cool and interesting features in Windows is the Screensaver which allows users to display animation or change the wallpaper automatically when the computer is not being used. This feature can also time out and lock your computer when it remains idle for quite some time. However, if you notice that the screensaver of your computer turns on a lot earlier, then you’ve come to the right place as this post will guide you on how you can change the timeout settings of the screensaver of your Windows 10 computer.
Usually, the screensaver in Windows 10 is turned off by default, however, if some other user has turned it on or if you have turned it on, you can actually change the timeout settings of the screensaver using several methods. You can do it through the Personalization settings, Registry Editor, as well as the Group Policy Editor.
Before you proceed with the instructions provided below, make sure that you create a System Restore point first. Once done, follow each one of the suggestions carefully to successfully change the Screensaver timeout settings in Windows 10.
Option 1 – Modify the timeout settings of Screensaver via Personalization settings
Open the Start menu and type “screen saver” in the field.
On the search results that appear, click on the “Change Screen Saver” option.
From there, you have the option to change the screen saver type, preview, open settings, change the wait time, as well as choose to display lock screen on your resume.
Now to change the timeout settings of your screensaver, you have to increase the wait time from 1 to 15 or anything that works for you.
Once done, click OK and exit to save the changes made.
Option 2 – Try to change the screensaver time via Registry Editor
The next option you can try to change the timeout settings in the screensaver is using the Registry Editor. To get started, follow these steps:
Tap the Win + R keys to launch the Run utility and type “regedit” in the field and hit Enter to open the Registry Editor.
Next, navigate to this registry path: ComputerHKEY_CURRENT_USERSoftwarePoliciesMicrosoftWindows
From there, right-click on Windows located in the right pane and select New > Key.
Name the key as “Control Panel” and right-click on it and select New > Key and then name it as “Desktop”.
Once done, click on the newly created Desktop key to highlight it.
After that, right-click on any empty space in the right pane and select New > String Value and then type “ScreenSaveTimeOut” and hit Enter to save it.
Now right-click on ScreenSaveTimeOut and select Modify and then set its value data in seconds.
Click on OK and exit the Registry Editor to save the changes made.
Option 3 – Change Screensaver timeout settings via Group Policy Editor
Tap the Win + R keys to open the Run dialog box and type “gpedit.msc” in the field and hit Enter to open the Group Policy Editor.
Next, navigate to User Configuration > Administrative Templates > Control Panel > Personalization.
Then look for a policy setting named “Screen saver timeout” and double click on it and then click on the Enabled option to enable it.
Add the screen timeout in seconds and click on the Apply and OK buttons to save the changes.
Restart your computer.
Note: If you want to disable the screensaver feature in your computer, you can always do so by disabling a policy setting named “Enable Screen Saver”.

 Rollback using system restore
