Logo

Fix ERR TUNNEL CONNECTION FAILED error

One of the errors you can encounter while browsing the web using your Google Chrome browser is the ERR_TUNNEL_CONNECTION_FAILED error. If you happen to encounter this error, then this post could help you resolve it. This kind of error in Chrome can occur due to incorrect website domain configuration, conflicting browser data, incorrect proxy settings, and DNS connection issues.

To resolve the ERR_TUNNEL_CONNECTION_FAILED error in Chrome, here are some suggestions you can check out.

Option 1 – Try disabling the proxy server for your LAN

If your PC was just attacked by some adware or malware as of late, it is possible that it has changed the network settings in the system and might display spam advertisements. Thus, you have to disable the proxy server for your LAN. To do that, refer to these steps:

  • Tap the Win + R keys to open the Run dialog box.
  • Then type “inetcpl.cpl” in the field and hit Enter to pull up the Internet Properties.
  • After that, go to the Connections tab and select the LAN settings.
  • From there. Uncheck the “Use a Proxy Server” option for your LAN and then make sure that the “Automatically detect settings” option is checked.
  • Now click the OK and the Apply buttons.
  • Restart your PC.

Note: If you are using a third-party proxy service, you have to disable it.

Option 2 – Try to reset Winsock, TCP/IP & Flush DNS

Resetting Winsock, TCP/IP, and flushing DNS might help you resolve the ERR_TUNNEL_CONNECTION_FAILED error. To do so, follow these steps:

  • Right-click on the Start button and click on Command Prompt (administrator) so you can pull up an elevated Command Prompt.
  • After that, execute each one of the commands listed below. And after you typed in one after the other, you have to hit Enter.
  1. netsh winsock reset – type in this command to reset Winsock
  2. netsh int ip reset resettcpip.txt – type in this command to reset TCP/IP
  3. ipconfig /flushdns – type in this command to flush the DNS cache
  • Next, restart your PC and check if the problem’s fixed.

Option 3 – Try using a VPN connection

There are instances when the network that your computer is logged on might have blocked your access to the website you are trying to open and so to fix it, you can try to use a VPN connection. Once you’ve connected using VPN, try to open the website again and see if you can now access it.

Option 4 – Try clearing browser data

There are times when some data in the browser is conflicting with the loading of the website and triggers errors like ERR_TUNNEL_CONNECTION_FAILED. And so you can try to clear your browser’s data. This might be a very basic solution but oftentimes it works in fixing this kind of error in Google Chrome. Follow the steps below to clear the data in your browser.

  • Open your Google Chrome browser.
  • After that, tap the Ctrl + H keys. Doing so will open a new panel that allows you to delete the browsing history and other data in your browser.
  • Now select every checkbox that you see and click on the Clear browsing data button.
  • Then restart your Chrome browser and check if you can now open any website or not.

Option 5 – Get rid of any conflicting browser extensions

  • Open Chrome and press Alt + F keys.
  • Go to More tools and click Extensions to look for any suspicious browser extensions or toolbars.
  • Click the Recycle bin and select Remove.
  • Restart Chrome and press Alt + F keys again.
  • Proceed to On Startup and mark Open a specific page or set of pages.
  • To check if the browser hijacker is still active, click Set pages, if it is active, overwrite the URL.

Note: If removing the browser extensions or toolbars didn’t work, you can also try to reset your Google Chrome browser.

  • Open Google Chrome, then tap the Alt + F keys.
  • After that, click on Settings.
  • Next, scroll down until you see the Advanced option, once you see it, click on it.
  • After clicking the Advanced option, go to the “Restore and clean up option and click on the “Restore settings to their original defaults” option to reset Google Chrome.
  • Now restart Google Chrome.

Do You Need Help with Your Device?

Our Team of Experts May Help
Troubleshoot.Tech Experts are There for You!
Replace damaged files
Restore performance
Free disk space
Remove Malware
Protects WEB browser
Remove Viruses
Stop PC freezing
GET HELP
Troubleshoot.Tech experts work with all versions of Microsoft Windows including Windows 11, with Android, Mac, and more.

Share this article:

You might also like

Best Free Stock Photo WEB sites of 2021
The Internet has become an essential human right as stated in many countries around the world. Among many benefits that the internet offers are various sites selling Stock photographs for all of your needs. No matter are you working in the design industry or just want to make something for yourself there is a high chance that you will eventually need some photos for your work. Stock photo workIn this article we are going to go through the best Stock Photo sites BUT, we will focus on ones that give you royalty-free Photos, so no paying stuff here, just the best of the free world.

Adobe Stock free collection

https://tracker.tradedoubler.com In the last year of 2020, Adobe has made more than 70000 photos, videos, illustrations, and templates completely free. You are free to use provided material for personal, commercial, and creative work. Since this is adobe’s collection, well part of it, all of the given material is of high quality. You can also upload pictures to do a visual search to find similar ones.

Unsplash

https://unsplash.com/ Unsplash is a place where you will go if you want to find free-quality pictures. Since a lot of photographers are donating their selected work there you will find always consistently high-quality work there. Unsplash also has applications for Android and iOS so you can go through their stock on your mobile device as well. Photos are organized into categories that make searching much easier.

Pixabay

https://pixabay.com/ Pixabay is maybe well known due to its huge collection of both images and illustrations. There are tons and tons of stuff in there all royalty-free for use. The bad side is due to its strongest one, since there are so many images on its site, quality is not always top-notch like on Unsplash for comparison but you might find stuff here that you will not be able to do it anywhere else.

Pexels

https://www.pexels.com/ This is a great choice for web or app developers since you can find various UI ideas and designs on it. Many UI ideas ready for implementation will be found here and a decent amount of photos as well. The overall site is great for that purpose but please do read the license on each image since some of them are limited in use and cannot be used in commercial projects.

Pikwizard Stock

https://www.pikwizard.com/ Stock photography from Pikwizard is a place where you will go if you need high-quality pictures of people. There are a lot of images of people in natural poses doing things, nothing cheesy or unnatural, just pure and great-looking ones. Among other things is also a vast selection of cityscapes. Sadly as in the case of Pexels, not all pictures have the the same license so make sure to check terms of use before using one.

Gratisography Stock photos

http://gratisography.com/ Last on our list is a Stock site with a strange name and if you visit it you will see that it is not just the name that is strange. Gratisography is a stock site that aims to provide you with high-quality photographs but in different take from another site. These images are more artistic and surreal than other competitor sites. Images are uploaded almost on daily basis but since thematic is somewhat niche collection itself is relatively small.

Conclusion

That’s it, we hope that we have helped you in any way to find some material for your next project and I hope to see you soon back on errortools.com. Take care and all the best.
Read More
Fix UNEXPECTED STORE EXCEPTION in Windows 10
Blue Screen of Death or Stop errors are definitely one of the most difficult issues to face in your Windows computer. One of them is the UNEXPECTED STORE EXCEPTION BSOD error. When you encounter this Stop error on your Windows 10 computer, this means that the store component has caught an unexpected exception. There are many potential causes for this error, but we’ve narrowed it down to a few specific causes – for one, this error could be caused by your antivirus program installed on your computer, two, it could also be caused by outdated hardware drivers on your computer, it could also be an error in the file system as well as some issue with the lock screen app, or even output to an unexpected port. Whichever the cause may be, you can use a couple of fixes laid out below. Make sure to carefully follow them.

Option 1 – Try to update your Display driver

  • First, boot your computer into Safe Mode.
  • After that, tap the Win + R keys to launch Run.
  • Type in devmgmt.msc into the box and tap Enter or click OK to open the Device Manager.
  • After that, a list of device drivers will be displayed. From there, look for the Display Adapters and click on them.
  • After that, right-click on each entry under the Display Adapters and select the “Uninstall Device” option from the menu.
  • Now restart your computer.
  • After restarting your computer, go to the Settings app and Check for Updates in the Windows Update section.
Note: You also have the option to go directly to the website of your graphics card manufacturers like NVIDIA, Intel, or AMD and go to the section called Drivers then check if there’s a new available update – if there is, download and install it.

Option 2 – Run both the System File Checker scan and DISM tool

If the problem is caused by corrupted system files, then you can use both the System File Checker and the DISM tool. To use them, follow the instructions below.
  • Tap the Win + X keys or right-click on the Start button and click the “Command Prompt (Admin)” option. Alternatively, you can also search for “cmd” in the Cortana search box and right-click on Command Prompt from the search results, and select the “Run as administrator” option.
  • After that, if a User Account Control prompt pops up, click on Yes to proceed.
  • Once the Command Prompt window is pulled up, type the following command and hit Enter:
DISM.exe /Online /Cleanup-image /Restorehealth
  • Wait for the process to be completed. Once it’s done, type the following command and hit Enter:
sfc /scannow
  • The command will start a system scan which will take a few whiles before it finishes. Once it’s done, you could get the following results:
  1. Windows Resource Protection did not find any integrity violations.
  2. Windows Resource Protection found corrupt files and successfully repaired them.
  3. Windows Resource Protection found corrupt files but was unable to fix some of them.
  • Restart your PC.
Note: You should see the “Windows Resource Protection found corrupt files and successfully repaired them. Details are included in the CBS.Log %WinDir%LogsCBSCBS.log” message on your screen. On the other hand, if you see the “Windows Resource Protection found corrupt files but was unable to fix some of them. Details are included in the CBS.Log %WinDir%LogsCBSCBS.log” message instead, then you should run the following command in Command Prompt:
findstr /c:"[SR]" %windir%LogsCBSCBS.log >"%userprofile%Desktopsfclogs.txt"
The command you entered will open up the logs on your Desktop where you can look for files that are causing the error on your computer manually.

Option 3 – Disable Fast Start-up

If you want your computer to boot faster, then you might have enabled Fast Start-up. This feature is ideal for computers that are using a hard disk drive. However, turning on this feature also means that when the computer boots, it might lag some drivers that are loaded when it initially boots up. Thus, it might be the potential cause of the UNEXPECTED STORE EXCEPTION BSOD error. Thus, you need to disable Fast Start-up. To do that, follow these steps:
  • Boot your PC into Safe Mode.
  • Then tap the Win + R keys to open the Run dialog box.
  • Next, type in “control” to open Control Panel.
  • After that, select Hardware and Sound and click on Power Options.
  • Select “Choose what the power buttons do” from the left side menu pane and click on Change settings that are currently unavailable.
  • Afterward, uncheck the “Turn on fast startup (Recommended)” entry and click on Save Changes.
  • Now restart your PC for the changes to take effect and then check if the problem’s fixed afterward.

Option 4 – Try to run the Chkdsk utility

You can also run the Chkdsk utility to resolve the UNEXPECTED STORE EXCEPTION BSOD error. If your hard drive has issues with integrity, the update will really fail as the system will think that it’s not healthy and that’s where the Chkdsk utility comes in. The Chkdsk utility repairs hard drive errors that might be causing the problem.
  • Open Command Prompt with admin privileges.
  • After opening Command Prompt, execute the following command and hit Enter:
chkdsk /f /r
  • Wait for the process to be completed and then restart your computer.
Read More
Fixing Your Firefox profile cannot be loaded
Caching is used to enhance the performance of applications in Windows and other operating systems. It helps applications to load faster but there are times when the cache can get damaged or corrupted and as a result, you might encounter some issues. One of them is in the Firefox browser where the “Your Firefox profile cannot be loaded, It may be missing or inaccessible” error message may appear. You could also encounter this kind of error when Firefox is unable to access or find the profile folder. In case you don’t know what the profile folder is, it is where Firefox stores your user data and settings by default. Firefox pulls information from this folder each time you choose to open it. You can find this default Firefox profile folder under the %APPDATA%MozillaFirefoxProfiles folder. If you experience issues when trying to access the Profile Manager, you have the option to create a new default Firefox profile folder. This will fix the “Your Firefox profile cannot be loaded, It may be missing or inaccessible” error. How? Simply follow the given steps below. Step 1: Tap the Win key or click the Windows Start button to open the Start menu. Step 2: Next, type “%appdata%” in the field and hit Enter to open the hidden AppDataRoaming folder. Step 3: Now double click the Mozilla folder as well as the Firefox folder. Step 4: From there, look for the “profiles.ini” file and delete it. Make sure that you don’t delete the Profiles folder which should have the icon of a file folder. Note: Keep in mind that the .ini file extension is identified as the file that features a gear icon beside the “Configuration settings” or “Application settings”. Step 5: Once you open Firefox, a new profile will be created. On the other hand, if you know where your profile exists, you can try the following steps below to help Firefox locate it.
  • First, you need to move the profile folder back to its original location.
  • Next, restore the profile folder’s original name if you have modified it.
  • Then create a new profile using the Profile Manager and give it an appropriate name.
  • Now click on the Choose Folder button and select the profile folder you have moved or renamed before you exit the Create a new profile wizard.
Read More
Gigabit internet showing as 100MB in Windows
In today's world setting up a LAN network or internet connection is no longer a daunting task that will require having a bachelor's degree in computer science nor a specialized technician. But even in the present-day environment issues and problems can occur. One of these problems is detecting or running a network at a slower 100MB speed instead of 1GB. Troubleshooting of this nature is somewhat more complex than your typical troubleshooting issue because several things including hardware could be involved in this particular problem but do not worry, we are here to back you up and guide you Setting up a home or small office network no longer requires a specialist technician to constantly monitor and optimize the LAN routers and connected PCs. As Windows networking has improved and new features have become available on the hardware, configuring a 1GB network should be as simple as connecting the LAN to a router that came with this capability. If however the network’s rated speed only gives 100MB, troubleshooting the issue is more complex. To find the problem, you’ll need to check the hardware devices, cable connections, and the software you are using to connect and manage the network.

Hardware checks

If you are using the switch in your LAN configuration check its hardware details as well to see if it can handle 1GB speeds.
The next step is network cables, some cables are not designed and their copper can not transfer 1GB of flow, check to see if your cable is classified for the desired speed. To visually check cables do the following
  1. Check both connection jacks to see if it has any loose or frayed wires. If any of the wires are loose, it can be the cause of the performance issue. You should replace the cable if you discover damage to the connectors.
  2. Inspect the entire length of the cable and check if the harness shows any clear signs of damage. A bent or damaged cable can reduce the amount of information it’s capable of transferring between the PC and LAN router. If you find any damage to the cable, replace it to restore your network speed.
  3. Is the cable capable of transferring 1GB speeds? Different network cables support different network speeds. A Cat-5 cable will only provide 100MB transfers, while a Cat-5e or Cat-6 can support up to 10GB transfers. Check the cable’s labels to make sure you are using a Cat-5e or higher-rated data cable.

Now when the hardware issue is out of the way we can focus a little more on the software part.

Let's try the first easy solution, run Windows built-in troubleshooter

  1. Click the Windows button and type Control Panel. Then select the top result.
  2. If your Control Panel shows the Category View, change it to display Small Icons instead.
  3. From the list of available applications, select Network and Sharing Center.
  4. In your Network and Sharing Center, you can see the active network, set up a new network connection, troubleshoot problems, or change your adapter settings. Before making changes to your device properties, you can let Windows run a troubleshooter on your adapters to see if it can automatically fix your connection issues.
  5. Click on Troubleshoot Problems from the Change Your Network Settings section.
  6. In the Troubleshooter Application, scroll down and find the Network Adapter option.
  7. Click on Run Troubleshooter to let Windows check your network adapter’s configuration for any issues.
  8. Select the Ethernet Adapter you’re currently using from the list and click Next to proceed.
  9. Wait for the process to complete and check the results. If Windows detects any issues, it will recommend a fix. However, if the configuration of your network adapters does not have any problems, you’ll see a message that Windows couldn’t detect any problems.
  10. If there are any issues with the cable, the troubleshooter will detect the connection issue and request you replace the cable and connect it to your PC.
  11. It can occur that even after inspecting the cable and you didn’t find any visible damage on the housing or connectors, it could still be faulty. Replace the cable with a new one and rerun the troubleshooter to see if the cable is working as required.

If the troubleshooter finished and you received a Windows Couldn’t Detect Any Issues result, you’ll need to verify your adapter’s speed settings.

  1. In your Network and Sharing Center, select the Change Adapter Settings option from the left menu.
  2. On the list of adapters, choose the one you’re using and click the Right Mouse Button to open the context menu.
  3. Select Properties from the Context Menu to access your adapter’s settings.
  4. On the Ethernet Properties window, you can enable or disable different features and install additional protocols. To change the device settings, click on Configure to continue.
  5. This will open the Device Controller Properties window where you can check the status, make changes to the settings, find out information about the driver, or check historical events on the device. Select the Advanced tab to access the device settings.
  6. On the Advanced tab, locate the Speed and Duplex setting.
  7. The Auto-Negotiation option may cause network performance issues on certain Ethernet adapters and routers. The setting allows your adapter to change the speed settings according to the LAN configuration you connect to your PC. If you connect to different LAN networks regularly with different speeds, it can occur that the setting doesn’t update from 100MB to 1GB while switching.
  8. Change the Value to match the network speed of the LAN you’re connecting to your PC and use the manual speed setting.
  9. Click OK to apply the setting and test your network performance. If your adapter doesn’t have the 1GB setting available but you know the rating should go up to that speed, it could indicate that you aren’t using the right driver for the device.

If you don’t have the setting available or the device still only provides 100MB speeds after changing the Speed setting to a manual value, you may have to update the driver for the device.

  1. On the Ethernet Properties Window, once again click on Configure to access the Device Properties Window. Then select the Driver Tab to access your driver details.
  2. Select Update Driver from the available options.
  3. On the Update Driver window, select the option to let Windows Search Automatically for Updated Driver Software.
  4. Windows will connect to the internet and search for the latest drivers online. If a newer driver exists, Windows will download and install the driver for you. If you’re using the latest driver, Windows will inform you that no updated drivers are available.
Read More
The Extended Attributes Are Inconsistent Error
One of the most critical errors inside your Windows operating system is The Extended Attributes Are Inconsistent error. This error means that your operating system has been corrupted and it may produce many annoying issues like for example time lags, random crashes, and even freezing of the system when running multiple applications. There are a lot of reasons for this error, from the registry to faulty application installations to sometimes even hardware issues like bad RAM memory or bad hard drive. Mostly issue is due to corrupted files inside Windows and most often people only think that resetting the PC or complete reinstallation is the only way to fix this problem. Although reinstalling the system or resetting the PC will solve this error for sure there are other less time-consuming ways to fix this error. The Extended Attributes Are Inconsistent Error
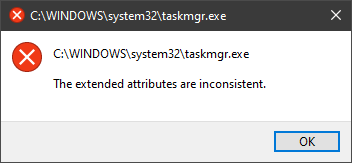
In this guide, we will show you common ways in fixing Extended Attributes are inconsistent errors inside your Windows that are easy to do and less time-consuming than complete reinstallation of the system.

Fixing Extended Attributes Are Inconsistent error

Run SFC scan

  1. Press ⊞ WINDOWS + X to open the hidden menu
  2. Click on command prompt (admin)
  3. In command prompt type in SFC /scannow and press ENTER
  4. Wait for the operation to complete
  5. Reboot your PC

Use System Image Repair Tool

  1. Press ⊞ WINDOWS + X to open the hidden menu
  2. Click on command prompt (admin)
  3. In command prompt type in Dism /Online /Cleanup-Image /RestoreHealth and press ENTER
  4. Wait for the operation to complete
  5. Reboot your PC

Change all user accounts to the administrator

  1. Press ⊞ WINDOWS + R to open the run dialog
  2. Type in netplwiz and press ENTER
  3. Select a first user account and click on Properties
  4. Click on the Group Membership tab
  5. Choose Others from the options
  6. Select administrator (if all accounts are already administrators change all to users)
  7. Repeat process for all other accounts
  8. Click OK to save settings

Change Windows Sound scheme to default

  1. Right-click on the sound icon in the taskbar
  2. Click on Sound options
  3. Go to the Sounds tab
  4. In Sound Scheme click and choose Windows Default
  5. Under Program Events choose Windows User Account Control
  6. Click on the drop-down menu and choose None
  7. Click on Apply
  8. Click on OK

Downgrade the Sound driver

  1. Press ⊞ WINDOWS + X to open the hidden menu
  2. Click on Device Manager
  3. Find your Audio driver and right-click on it
  4. Click on uninstall and then on OK
  5. Reboot your system

Do System Restore

If none of the provided solutions have worked, perform a system restore to the last point where everything was working fine.

Reset PC

If even system restore has not solved the issue or you do not have valid point in system restore time, perform Reset this PC and hopefully, the error will be finally fixed.

Conclusion

If all of the provided methods have not managed to repair this error that checks your hardware, your computer might have some faulty components if after complete PC reset error persists.
Read More
How to Fix Entry Point not Found Dll Errors

What is ‘Entry Point not found dll’ Error?

Entry Point not found dll errors are common in Windows PC. These errors indicate poor PC maintenance. An entry point is basically the memory address inside the dynamic link library. It contains the call being made. A dynamic link library on the other hand is a collection of small programs which use and request this call to run and load programs successfully on your PC. However, when this process is unable to be executed successfully, you come across ‘entry point not found dll’ error messages.

Solution

Restoro box imageError Causes

Generally speaking, some of the typical causes of ‘entry point not found dll’ errors are:
  • Missing, corrupted, and damaged dll files
  • Registry overloaded with invalid entries
  • Disk fragmentation
  • Viral infection
It is advisable to resolve these ‘entry point not found dll’ errors on your PC immediately because dll errors can cause you a great deal of inconvenience as you may be locked out and unable to access your desired programs. Furthermore, if dll errors are left unresolved, such errors can expose your PC to serious threats like system failure, system damage, corruption, and crash.

Further Information and Manual Repair

Though ‘entry point not found dll’ errors are critical errors but the good news is that these can be easily resolved. To fix dll errors on your PC, you don’t always have to hire a professional technician or be a computer programmer yourself. Here are some of the best DIY (do it yourself) ways to resolve ‘entry point not found dll’ errors on your system:

1. Reinstall the Deleted Program

This method to resolve ‘entry point not found dll’ error code is very basic. It is advisable to uninstall and then reinstall the deleted program to retrieve the missing or deleted dll files. Here’s why: dll files are shared files. There are multiple programs on your PC that may be using one type of dll file to load. Now when you uninstall a program that you no more need on your PC, chances are that it may also delete that particular dll file. And when this happens the other programs supported by the deleted dll file are unable to load. Therefore, in such an event the best way to retrieve the missing dll file is to uninstall the program that displays the errors message and then reinstall it. This will help you restore the missing dll file and run the program successfully.

2. Install an Antivirus and a Registry Cleaner

As mentioned above, ‘entry point not found dll’ errors indicate poor PC maintenance. If you don’t maintain your system, the registry overloads with bad and invalid entries, redundant and obsolete files, junk files and cookies. These files acquire a lot of space which damages dll files and the registry. Furthermore, due to data volume overload and less storage space, files are then saved in different places. This is also known as disk fragmentation. When these files are called, it takes a lot of time for the disk to consolidate fragmented data and execute the function successfully. To resolve these issues, you need to clean and restore the registry. Though this can be done manually it may be slightly complicated and time consuming therefore it is advisable to install and run a registry cleaner.

Restoro.

In addition to this, due to poor PC maintenance, viruses and malware can also enter your system unknowingly through file downloads and phishing emails. These can also damage dll files. To remove viruses and malware from your PC it is important to run an anti-virus. Instead of downloading both tools separately on your system, we recommend Restoro. This is a multi-functional and advanced PC fixer embedded with an intuitive algorithm and a user-friendly interface. It includes multiple utilities including a powerful antivirus, a high functional registry cleaner, and Active X controls and class scanner. It also functions as a system optimizer. By running this software on your system, you can easily scan all registry issues and viruses simultaneously. It repairs the damaged registry and dll files, removes unnecessary files and all types of malicious software. It is compatible with all Windows versions. It is easy to use and high on performance. It is a one-stop solution for all ‘entry point not found dll’ errors on your PC. In just a few clicks you can resolve system errors and optimize your PC performance dramatically. Click here to download Restoro and resolve ‘entry point not found dll’ errors.
Read More
Fix ERR_CACHE_MISS error in Google Chrome
One of the most popular and most used web browsers commonly used by Windows users is Google Chrome. This well-known web browser has been introducing various features recently in order to stay at the top. However, it makes the web browser a lot more complex and thus prone to errors. Although this may not be a big deal, it can be quite annoying as it can interrupt your web browsing. There are various errors that can come up with this level of complexity of the web browser. One of these errors is the “This site can’t be loaded from the cache, ERR_CACHE_MISS” error message that can suddenly appear while you browse the web using your Google Chrome browser on your Windows 10 PC. Take note that when you encounter this particular error, there really is no direct fault in the Chrome browser as there are also issues with caching the website data locally in the computer. Moreover, this error can also occur when a website is coded in an incorrect manner or if there are some browser extensions or toolbars that are in conflict with the proper functioning of the website. To fix the ERR_CACHE_MISS error in Google Chrome, refer to the possible solutions laid out below.

Option 1 – Try clearing browser data

There are times when some data in the browser is conflicting with the loading of the website and triggers errors like ERR_CACHE_MISS. And so you can try to clear your browser’s data. This might be a very basic solution but oftentimes it works in fixing this kind of error in Google Chrome. Follow the steps below to clear the data in your browser.
  • Open your Google Chrome browser.
  • After that, tap the Ctrl + H keys. Doing so will open a new panel that allows you to delete the browsing history and other data in your browser.
  • Now select every checkbox that you see and click on the Clear browsing data button.
  • Then restart your Chrome browser and check if you can now open any website or not.

Option 2 – Try using the Developer Tools

You can also try using the Developer tools in Google Chrome to help you fix the ERR_CACHE_MISS error. Refer to the steps below to do so.
  • Open Google Chrome.
  • Tap the Ctrl + Shift + I keys on your keyboard and then tap the F1 key to open the Settings tab inside the Chrome Developer Tools.
  • Next, select the Disable cache option while DevTools is open and apply those settings.
  • After that, refresh your browser and check if the entries you’ve seen previously in the Network tab are gone.
  • Now try to load the same webpage again and see if the problem is resolved.

Option 3 – Reset Winsock, TCP/IP & Flush DNS

Resetting Winsock, TCP/IP, and flushing DNS might help you resolve the ERR_CACHE_MISS error. To do so, follow these steps:
  • Right-click on the Start button and click on Command Prompt (administrator) so you can pull up an elevated Command Prompt.
  • After that, execute each one of the commands listed below. And after you typed in one after the other, you have to hit Enter.
  1. netsh winsock reset – type in this command to reset Winsock
  2. netsh int ip reset resettcpip.txt – type in this command to reset TCP/IP
  3. ipconfig /flushdns – type in this command to flush the DNS cache
  • Next, restart your PC and check if the problem’s fixed.

Option 4 – Get rid of any conflicting browser extensions

  • Open Chrome and press Alt + F keys.
  • Go to More tools and click Extensions to look for any suspicious browser extensions or toolbars.
  • Click the Recycle bin and select Remove.
  • Restart Chrome and press Alt + F keys again.
  • Proceed to On Startup and mark Open a specific page or set of pages.
  • To check if the browser hijacker is still active, click Set pages, if it is active, overwrite the URL.
Note: If removing the browser extensions or toolbars didn’t work, you can also try to reset your Google Chrome browser.
  • Open Google Chrome, then tap the Alt + F keys.
  • After that, click on Settings.
  • Next, scroll down until you see the Advanced option, once you see it, click on it.
  • After clicking the Advanced option, go to the “Restore and clean up option and click on the “Restore settings to their original defaults” option to reset Google Chrome.
  • Now restart Google Chrome.
Read More
Removing BEEP when adjusting volume in Windows
I often switch between my desktop speakers and headphones and because of this I very often use the volume adjustment bar to adjust sound levels so it is not too loud and each time when I set it I get annoying BEEP at the end. Now personally this might not bother you and you might want to leave it since it can be a useful feature to tell you how much volume is loud but if you are adjusting multiple times volume during the say it can become really frustrating to hear it each time, especially when switching to headphones and it beeps into your ears. In this guide, I will show you how to remove the beep so it is not heard anymore when you adjust the volume. Please know that beep is part of the Windows sound scheme and you can either remove specific sound with a completely silent wave or just turn off all windows alert sounds.
  • Open Windows settings and go to system > sound
  • in system sound, go to the right part of the screen and click on the sound control panel
  • In the sound control panel click on the Sounds tab
  • In the sounds, tab click on the drop-down menu under the sound scheme and choose no sounds.
There you go! You have successfully removed annoying BEEP each time you adjust the volume in Windows 10
Read More
How to Fix Htmlayout.dll Error

What Is Htmlayout.dll Error?

Htmlayout.dll is a linked library which is also known as HTMLayout. In simple words, it is an embeddable HTML layout and rendering component. htmlayout.dll is generally associated with Avast Internet Security, Bit Defender Internet Security 2011, and other similar programs. If you’re noticing that a continuous popup that reads:-
‘HTMLayout.dll cannot be loaded to properly start GUI. Therefore process cannot continue’, ‘Htmlayout.dll not found’, ‘The file htmlayout.dll is missing’,
and so on, then your system may be exposed to serious privacy and security threats.

Solution

Restoro box imageError Causes

To begin with, DLL files are shared files, and they can and do exist outside the software applications. While these files do provide benefits to software developers, once they are separated, they can only spell trouble. Hence, you start seeing the HTMLayout error, which will most probably occur at system startup, program startup, or when trying to use specific functions in a program. There are a number of reasons why the HTMLayout errors occur, and some of the common ones include:
  • The file is missing because it was accidentally deleted from the system.
  • The file was damaged by a virus and as a result, your system cannot access it.
  • The file was related to the registry and is now corrupt or obsolete.
  • The program that was related to the file was not uninstalled properly.
  • The file was overwritten by a corrupt or outdated version.
  • The spyware or malware deleted the original file and disguised it as the HTMLayout.

Further Information and Manual Repair

While the HTMLayout DLL error may sound like too much trouble, it is rather easy to resolve with a few steps. If you are getting the error because of a specific program or file, then you should reinstall to make sure the error does not pertain. For that, follow these steps:
  1. Go to Start and select the Control Panel.
  2. Click on the Add/Remove Programs icon and select the programs that show the error on the list.
  3. Select Remove/Uninstall to safely remove the program from your system.
  4. Restart the system and reinstall the program again.
This is the easy way out if the HTMLayout DLL error is occurring as a result of the file missing. However, there can be cases when the file has been tampered with by virus or registry issues. For that, the safest bet is to download Restoro. Restoro is not just another registry cleaner. Instead, it is a multi-functional PC Fixes that works as an antivirus, registry cleaner, system optimizer, and much more. What’s more interesting about Restoro is that it provides real-time results as opposed to other registry cleaners. In other words, you will actually feel a difference in PC performance and security after installing and using the program. The software is compatible with all Windows versions. So just click here and download Restoro to get rid of HTMLayout error and other issues in your system!
Read More
Fix Windows Update Error 0x80240034
There are cases when you encounter some issues while updating your Windows 10 computer. One of these issues is the error 0x80240034. This particular error is a Windows Update Error that appears on the Windows Update pane every time an update fails to install. When this happens, your Windows Update will only get stuck at 1% and nothing happens afterward and eventually fails. If you click on the View Installed Update History, you will see the error code 0x80240034 for the failed updates. You will see this error each time you try to update your Windows PC. Take note that this issue doesn’t only happen to a specific version of the Windows Update but on various different Windows builds based on many users. What’s more, is that some users are also seeing a different error code when their Windows Update fails but they still end up seeing the error code 0x80240034 when they check the Windows Update history. At the time of writing, it isn’t determined yet what really causes this error but it’s most likely due to some corrupted files in the computer which is why the most common solution you can try is resetting the Windows Update cache. On the other hand, other users also resolved the issue by using the ISO and selecting the “Do not keep previous settings” option during the Windows Update so it might be something to do with transferring the previous settings through the update client. For clear instructions in fixing this issue, refer to the two options provided below.

Option 1 – Try to clear the Windows Update Cache/Distribution Folder

As mentioned earlier, a lot of users tried clearing the Windows Update cache to fix the problem and so far it has worked. Like them, you can try clearing the Windows Update cache by simply deleting the contents of the folder named “SoftwareDistribution” since Windows apparently can’t clear and re-download the update contents once they are corrupted. Thus, deleting the contents of this folder will make Windows download the contents again which will fix the problem. To do that, follow the steps below.
  • Step 1: Tap the Windows key once.
  • Step 2: Next, type in “command prompt” in the Windows Start Search, and from the search results that appear, right-click on Command Prompt and select the “Run as administrator” option from the context menu.
  • Step 3: After opening Command Prompt, type in “net start wuauserv” and hit Enter.
  • Step 4: Then type in “rmdir %windir%SoftwareDistribution /S /Q” and hit Enter.
  • Step 5: Now type in “net start wuauserv” and hit Enter. Once it’s done, try updating your Windows PC again, it should now work just fine.

Option 2 – Update Windows via ISO file

If option 1 didn’t work for you, you can try this second option of updating your Windows 10 computer using an ISO file which means that you will have to create a Windows 10 bootable media and use it to install the latest Windows 10 version. The most user reported that this option works and the reason why it does have something to do with the Windows Update client since the Windows Updates downloaded from the regular Windows Update client seems to create issues such as the error 0x80240034. However, issues like this one don’t occur when the very same Windows Updates are downloaded and installed via an ISO file. Take note that when using a Windows ISO file, you will be asked to choose what you want to do with the previous settings and apps. A lot of users opted for the “Not to keep the old Windows settings” option which has resolved the issue. So if you want to keep the previous settings then you must try to update Windows first while keeping the old settings. However, if it doesn’t work, you have to try installing the latest version of Windows without keeping the previous settings.
  • Step 1: Click this link and then click the Download Tool Now button.
  • Step 2: Next, click the “Use the tool to create installation media (USB flash drive, DVD, or ISO file)…” option and follow the next given instructions on the screen.
  • Step 3: Now select the ISO file option in step 5.
  • Step 4: After that, you should now have an ISO file.
  • Step 5: Next, go to the location where you’ve downloaded the ISO file.
  • Step 6: Then right-click on the Windows 10 ISO file and select the Open with an option and then select File Explorer.
  • Step 7: Now click on “setup.exe” and follow the next instructions that appear on the screen. When asked, you have to select either: Nothing (clean install) or Keep personal files only option. Take note that you must not select the “Keep personal files, apps, and Windows settings since it doesn’t really work.
Read More
1 2 3 171
Logo
Copyright © 2023, ErrorTools. All Rights Reserved
Trademark: Microsoft Windows logos are registered trademarks of Microsoft. Disclaimer: ErrorTools.com is not affiliated with Microsoft, nor claims direct affiliation.
The information on this page is provided for information purposes only.
DMCA.com Protection Status