As you know, Diskpart is a useful utility that helps in managing the disks in a computer. It is a very useful tool that even when the GUI-based disk management tools in Windows 10 operating system fails, the Diskpart utility still tends to work. However, it also does not mean that this utility does not experience issues as it still does, from time to time. One of the issues you may encounter when using the Diskpart utility is when you encounter an error message that says, “DiskPart has encountered an error, Access is denied”.
This kind of error in the Diskpart utility could be caused by a number of factors. For one, it could be that the Write-Protection is enabled on the drive where the operating is being performed or it could also be that the Command Prompt terminal does not have administrator-level permissions to carry out the command. Thus, you can try to run the Diskpart utility again but this time with admin privileges or you could also remote the Write-Protection from the concerned drive. For more details, refer to the instructions given below.
Option 1 – Try running Command Prompt with Administrator-level permissions
In the Start Search, type “command prompt” and from the search results that appear, look for Command Prompt.
Once you found it, right-click on it and select the “Run as administrator” option.
After that, try to execute the Diskpart operation once again and see if you still encounter the same error.
Option 2 – Try to remove the Write Protection from the drive
As mentioned, removing the Write-Protection on the concerned drive could also help you fix the problem and there are two ways to get rid of the write protection – you can either use the Diskpart utility or the Registry Editor. How? Refer to the following steps.
Via Diskpart utility:
Open Command Prompt with admin privileges and then type the “diskpart” command and tap Enter to execute it.
Next, type “list disk” and tap Enter to get the list of all the Disk connects or all the partitions that are formed on those disks.
After that, you need to choose one command depending on the list of commands you entered. Type “select disk #” and tap Enter to select the disk or partition you want to select.
Then type “attribute disk clear readonly” and tap Enter to Disable the Write Protection on the selected disk or partition.
Via Registry Editor:
Tap the Win + R keys to open the Run utility and type “Regedit” in the field and then tap Enter to open the Registry Editor.
Magcore.dll is a type of Dynamic Link Library. This file is associated with software developed by ArcSoft, a renowned multimedia application developer.
Magcore.dll consists of small programs that help load and run software developed by ArcSoft on your system smoothly.
This file virtually comes into function when you use certain audio and video features incorporated in ArcSoft programs for example ArcSoft Media converter.
However, you may experience Magcore.dll error code on when this DLL file fails to run and load programs. The error may hamper your ability to access ArcSoft programs on your system and cause you a great deal of inconvenience.
Magcore.dll error is often displayed in any one of the following formats:
“The file magcore.dll is missing”“MagCore.dll cannot be found”"Cannot find [PATH]magcore.dll"“This application has failed to start because MagCore.dll was not found. Reinstalling the application may fix the error.”
Solution
Error Causes
This DLL file is known to be prone to errors. MagCore.dll error occurs due to several reasons such as:
Missing or damaged MagCore.dll file
Hardware failure
Viral infection
Registry issues
If you experience MagCore.dll error on your system, it is advisable to fix it right away. Though it is not fatal, but if you don’t repair it, you may not be able to access practically all ArcSoft programs on your PC.
Further Information and Manual Repair
Here are some of the efficient and easy manual methods to resolve error MagCore.dll on your PC:
Method 1 - Scan and Remove Malware
MagCore.dll error can be triggered by viral or other malware infection. Malware can easily damage DLL files and masquerade as the MagCore.dll file. To resolve, simply download a powerful antivirus on your system.
Run it to scan your entire PC for viruses and remove them right away.
Method 2 - Update the Drivers for Hardware Devices
As we mentioned above the error may be related to hardware failure too. In times like these, it is advisable to update the drivers for hardware devices.
For example if you try to play a 3D video game and it fails to run showing you MagCore.dll error message, then simply try updating the drivers for your video card. Drivers can be updated in Windows by using a driver update wizard from within Device Manager.
Method 3 - Use System Restore to Undo Recent System Changes
After trying method 1 and 2, if the error code still persists, then it is opt for method 3.
Use Windows System Restore utility to undo recent system changes and bring your PC to its normal previous condition before the error occurred. To restore, simply go to the start menu, type System Restore.
Now click on System Restore and just pick a point in the past called a restore point to return important Windows files and settings.
Method 4 - Repair the Registry
If the underlying cause of the MagCore.dll error code is related to registry issues, then simply repair the registry. You can fix it manually but it is a little complicated and time-consuming. You may find it difficult if you are not a technical whiz.
Nonetheless to resolve and repair it in seconds, download Restoro. This is a powerful and a user-friendly PC Fixer embedded with a registry cleaner and several other highly functional scanners.
Run it to scan your entire PC for registry problems. The registry cleaner utility removes all bad and invalid entries, cleans up the registry space, and repairs the damaged files.
Click here to download Restoro and repair MagCore.dll error code on your PC.
Error code 707 is a typical Gmail error. Gmail is an email service provided by the largest internet giant Google Inc. It is an email service that is most widely used by web-based email providers with more than 425 million active users worldwide.
The error code 707 is usually displayed in any one of the following formats:
“Oops... the system encountered a problem (#707)”“Server error occurred and your email was not sent (error 707)”
Solution
Error Causes
The error code 707 may be triggered due to many reasons. These include:
Enabled Lab ‘Background Send’ feature on Gmail
Web browser history and cache is full of junk content
Outdated browser
Though this error code is not fatal it is advisable to fix it right away to avoid inconvenience and to ensure your email is sent right away without any delays.
Further Information and Manual Repair
Here are some of the easy DIY methods to repair and fix the error code 707 on your PC. These methods are simple and do not require any kind of technical expertise. So, even if you are not technically sound, you can repair the error code 707 on your system in no time.
Method 1
Sometimes you may experience error code 707 while sending email via Gmail because of the enabled Background send labs feature. To fix this error here’s what you must do: Log in to your Gmail account, click on the Gear Box, and select settings.
Now simply switch to the lab tab under the settings. Here search for Background Send. If you can’t locate it, then scroll down and insert background Send in the find box. Once you find this lab feature, disable it. After disabling this feature, try resending the email.
Hopefully, this will resolve the issue. Nonetheless, if the error 707 still persists, then try method 2 given below.
Method 2
The error 707 may also be triggered if your web browser becomes outdated. If so, then it is advisable to update the browser to resolve the issue. Simply download the latest browser version from a reliable website.
After the installation is complete, log on to your Gmail account and then try to send an email. If the email is sent successfully, then the issue is fixed.
Method 3
Try clearing cache and web browser history. When the web browser history and cache are full of junk files, then you might experience this error on your system. Sometimes this can also lead to registry issues. To remove the error and repair the registry immediately, download Restoro.
This is a multi-functional and user-friendly PC Fixer compatible with all Windows versions and embedded with multiple powerful scanners including a registry cleaner.
It scans your entire PC for such errors. It clears the registry, removes all obsolete and unnecessary files including cookies, web browser history, junk files, and invalid entries, and cleans it right away thereby fixing the error immediately.
Click here to download Restoro and resolve error code 707.
DirectX encountered unrecoverable error usually face gamers when they try to star certain game. In this guide, we will help you to get over it and solve the issue.
Follow steps in this guide one after another since they go from most simple ones to complex ones so following is advised in order not to waste a ton of time and resources doing wrong tasks.
Check your game page and your DirectX
The first and most common thing that can cause this type of error is when your installed DirectX is not the same version that the game requires. Check the game store page to see system requirements and write down which DirectX version it requires in order to run. Then press ⊞ WINDOWS + R to bring run dialog and type in it DXDIAG and press ENTER
DX diagnostic window will pop up and at the bottom, you can find which DirectX version is installed on your system. If versions are different, install the required DirectX version and run the game.
Update or reinstall GPU drivers
DirectX can get corrupted via bad driver update, in order to fix this, reinstall or update your Graphic drivers to the latest version from the official manufacturers' website.
Set custom scaling to 100
Go into Windows settings and set custom Display scaling to a value of 100, sign out, and then sign back in.
Delete registry key
Note that you should do this as the last option and be very careful since you can crash whole Windows in this way. Press ⊞ WINDOWS + R to open the run dialog and type RegEdit in it to open the registry editor. Find this key:
ComputerHKEY_CLASSES_ROOTPROTOCOLSFiltertext/XML
and delete it from the registry, you might want to do a backup of the registry first, just in case.
You have the option to choose to configure the Network to Private or Public when you set it on Windows 10 PC. On the other hand, if the option to change the Network from Public to Private goes missing in Windows Settings then this post will surely help. You can find this setting under Settings > Network and Internet > Ethernet and appears when you click on it.
If you are not able to see the option to change the network profile, then you either can’t open the settings, or the option to change it has been disabled. To resolve this issue, you can either use the Registry Editor or Windows PowerShell. Refer to the options given below for more details.
Option 1 – Change the Network Profile via Registry Editor
Changing the Network Profile can be done using the Registry Editor. But before you proceed, make sure that you create a System Restore Point first just in case. Refer to the steps below to do so.
Tap the Win + R keys to open the Run dialog box.
Then type “Regedit” in the field and hit Enter to open the Registry Editor.
After that, navigate to this key: HKEY_LOCAL_MACHINESOFTWAREMicrosoftWindows NTCurrentVersionNetworkListProfiles
Now expand the Profiles key folder located in the left pane to see one or more folders.
Next, expand each one of these folders and look for the “Description” sub-key which should match the name of your network.
After you find the Description sub-key, look for another sub-key named “Category” and double click on it to open it.
Now change its value from “0” to “1” to change the Network Profile from Public to Private.
Option 2 – Change the Network Profile via Windows PowerShell
Aside from the Windows Registry, you can also use Windows PowerShell in changing the Network Profile from Public to Private and so on. Take note that you have to use PowerShell with admin privileges. Just refer to the steps below to do so.
Tap the Win + X keys and then select the “PowerShell (Admin)” option.
Next, click on Yes if the User Account Control prompt appears.
After that, execute the commands listed below. Hit Enter right after you key in each one of them.
Some Windows users are encountering the 0x800705b3 error code after failing to install a pending update on Windows 10. Most commonly this particular issue is reported to occur with Integrated webcam drivers updates and Bluetooth adapter driver updates.
Follow the guide below in order to fix the issue and update your Windows successfully
Running the Windows Update Troubleshooter
The majority of users that were dealing with this issue reported that the issue was fixed after they ran the Windows Update Troubleshooter and applied the recommended fix.
Open a Run dialog box by pressing ⊞ WINDOWS + R. Inside the text box, type ‘ms-settings:troubleshoot’ and press ENTER to open up the Troubleshooting menu.
Opening the Troubleshooting tab on Windows 10
Once you’re inside the Troubleshooting tab, move over to the right-hand section of the screen and click on Windows Update (under Get up and Running). Next, from the context menu that just appeared, click on Run the Troubleshooter.
Once you’re inside the Windows Update troubleshooter, wait until the initial scan is complete and see if a viable repair strategy is found.
If the scan has identified a strategy with the potential to fix your ongoing issue, click on Apply this fix and wait until the procedure is complete.
Applying the fix
Note: Depending on the type of fix that was recommended, you might need to follow an additional set of instructions before the fix will be properly imposed.
After you’ve done this, reboot your computer and wait for the next startup to complete.
Open Windows Update once again and see if the installation of this pending update is now successful.
Installing the pending Update Manually
Whether you’re experiencing this issue with an integrated webcam driver or with anything else, chances are you’ll be able to circumvent the apparition of the 0x800705b3 error by using the Microsoft Update Catalog to find, download and install the pending update manually.
Once you’re inside the Microsoft Update Catalog, use the search function (top-right corner of the screen) to search for the update that is failing.
After the search is completed and you get the list of results, look for an updated driver version that is compatible with your Windows version and CPU architecture.
Once you manage to identify the correct Windows Update, click on the hyperlink associated with the update that you want to install, then click the Download button and wait for the process to complete.
After the download is complete, use File Explorer to navigate to the location where you previously downloaded the update.
When you get to the correct location, right-click on the .inf file and choose Install from the context menu that just appeared.
Note: If you have multiple failing updates with the same 0x800705b3, repeat the instructions above with every Windows Update that you’re having trouble installing.
At the end of this operation, reboot your computer and see if the problem is fixed at the next computer startup.
Enabling the Windows Installer Service
The Windows installer service is responsible for installing pending updates that get downloaded by the Windows Update component. If this service is disabled on your configuration, none of the updates waiting to get installed will get completed.
Press ⊞ WINDOWS + R to open up a Run dialog box. Inside the text box, type ‘services.msc’ and press ENTER to open up the Services utility.
Once you’re inside the Services screen, move over to the right-hand tab of the screen, scroll down through the list of services and locate the Windows Installer service. When you find it, right-click on it and choose Properties from the context menu that just appeared.
Once you are inside the Properties screen of the Windows Installer services, access the General tab, click on the Start button to force-start the service.
Note: If you can, also change the Startup type to Automatic via the associated drop-down menu. However, depending on your administrator settings, this might not be possible.
Restart your computer and wait for the next startup to complete. Once your PC boots back up, attempt to reinstall the driver that was previously triggering the 0x800705b3 error and see if the issue is now fixed.
Performing a Winsock Reset
In case the 0x800705b3 error is related to some kind of network inconsistency (TCP or IP related), you might see Windows Updates failing due to bad data that forces the Windows to abort the installation of new pending updates.
In this case, you should proceed by doing a complete Winsock reset procedure to fix the majority of the socket and temporary data-related issues that might cause this behavior.
Several affected users have confirmed that this method was the only thing that allowed them to finally fix the Windows Update issue and install pending updates normally.
Here are some step-by-step instructions that will walk you through the process of performing Winsock Reset:
Open up a Run dialog box by pressing ⊞ WINDOWS + R. Inside the text box, type ‘cmd’, then press CTRL + SHIFT + ENTER to open up an elevated Command Prompt.
Accessing an elevated CMD prompt
Note: When prompted by the UAC (User Account Control) prompt, click Yes to grant admin access.
Inside the elevated CMD prompt, type and taste the following commands in order and press ENTER after each one to effectively reset the TCP and IP data that might be responsible for the apparition of the 0x800705b3 error code:
nbtstat -R
nbtstat -RR
netsh int reset all
netsh int ip reset
netsh winsock reset
Once every command above is processed successfully, you can go ahead and close the elevated Command Prompt and reboot your computer.
After the next startup is complete, repeat the installation of the Windows Update that was previously failing and see if the issue is now fixed.
Performing SFC and DISM Scans
If none of the ‘superficial’ causes have worked in your case, you should start considering some type of system corruption that might affect your computer’s ability to complete pending updates that are currently waiting to be installed.
In case you find yourself in this particular scenario, you should run a couple of built-in utilities capable of fixing corrupted instances that might be currently affecting the Windows Update component.
Our recommendation is to start with a simple System File Checker scan. An SFC scan will cross-check every Windows File against a local archive that maintains healthy copies. In case corrupted instances are found, this utility will swap the corrupted instance with the healthy equivalent.
Performing an SFC scan
Once the SFC scan is complete, reboot your computer and wait for the next startup to complete.
After your computer boots back up, initiate a DISM scan. This utility works differently in the sense that it relies on a sub-component of Windows Update to download healthy copies for the corrupted Windows files that need to be replaced. Because of this, it’s important to make sure that you have a reliable Internet connection before initiating this operation.
Doing a DISM scan
After the DISM scan is complete, reboot your computer one final time and see if the issue is fixed once the next startup is complete.
0x800ccc7d is an SSL (Secure Sockets Layer) error message code that occurs in applications like Microsoft Outlook or Outlook Express. The error message is displayed as: ‘ unknown error 0x800ccc7d- secure sockets layer ’.
Many offices use Microsoft Outlook for email communication and sending instant messages within the office. This is a highly functional application that enables users to interact with peers efficiently, manage contacts, journals, and reminders.
However, the error 0x800ccc7d may hamper your ability to send and receive emails efficiently. Therefore it is advisable to repair it right away.
Solution
Error Causes
The error 0x800ccc7d is triggered by the following causes:
Damaged profile in Outlook
Incorrect email account settings
The Outlook installation is corrupt and damaged. This usually happens due to issues in hard disk storage.
The outgoing SMTP server does not support secure connections
Further Information and Manual Repair
If you come across 0800ccc7d error code while using Microsoft Outlook or Outlook Express, then don’t you worry! This problem can be easily resolved. In fact, it is so easy to repair that you can do it by yourself even if you are not a technical expert.
Here are some ways to fix the 0800ccc7d SSL Outlook error:
Solution 1: Use Scanpst.exe
You may not know this but Microsoft offers an inbuilt Outlook Repair tool. This tool is technically known as Scanpst.exe. This tool is useful when you need to repair Basic header corruption. However, it may not be the best choice if the problem is big and complex.
Solution 2: Reset Your Outlook Settings
Sometimes this error message may occur when the STMP server requires authentication or does not recognize the senders' email addresses. In this scenario, you should check your Outlook settings to make sure that your STMP username and server are correct. For this follow this procedure:
Go to the Tools menu and then click on Accounts
Now click on your email account then check its properties
Click general and make sure that your email address is created in your account’s control panel. If not, then edit and create.
Next, click servers and see if the box next to the option that says My server requires authentication is checked or not. If not, then check it to resolve the error.
Solution 3: Disable any Anti-Virus
Another alternative to resolve this error is to disable any Anti-virus or Firewall you have installed on your PC. Once you disable it then try sending or receiving the email again. This usually works.
Solution 4: Download 0x800ccc7d Repair Tool
The fourth solution available to resolve this issue is by downloading the 0x800ccc7d repair tool. Though it is similar to Microsoft Outlook built-in scanpst.exe tool, but as compared to it the 0x800ccc7d repair tool is a highly functional tool.
There are many 0x800ccc7d repair tools available but we recommend you to Restoro.
This tool is a third-party tool that can deal, scan, and fix 0x800cc7d error in no time. What makes this repair tool an excellent choice is that it can repair all broken PST files and emails, recover Outlook items, retrieve deleted files, recover password-protected data, split files to recover oversize PST files, and more.
To access and install the 0x800ccc7d repair tool all you need to do is download it here and install it on your PC. Now run it to scan errors. Once the errors are scanned, hit the repair tab to resolve.
So, next time when you experience the error 0x800ccc7d, try using these solutions to fix the problem right away!
If you got the FAULTY_HARDWARE_CORRUPTED_PAGE Blue Screen error on your Windows 10 computer then it is most likely caused by various factors. It could be caused by an incomplete installation or uninstallation of some applications or program, or it could also be caused by some exploit that intervenes with the normal functioning of the computer, as well as bad sectors on the hard disk, damaged system files, malfunctioned system drivers, modified Windows Registry files, or a Blue Screen occurrence during a Windows Update and many more. Getting this bug check means that a single-bit error was found on this page. It also indicates that this is a hardware memory error and to resolve it, you need to follow the suggestions laid out below but before that, it is recommended for you to create a System Restore Point first so that if anything goes wrong, you can always go back to the previous state.
Option 1 – Run a Memory Check to test RAM
Since the problem might have something to do with hardware memory, you need to test RAM by running a Memory Check using the Windows Memory Diagnostic. Refer to these steps to do so.
Tap the Win + R keys to open the Run dialog box.
Then type “mdsched.exe” in the field and hit Enter to open the Windows Memory Diagnostic.
After that, the Windows Memory Diagnostic will give out two options such as:
Restart now and check for problems (recommended)
Check for problems the next time I start my computer
Select any of the given options. After that, your computer will restart and check for memory-based issues upon the restart. If there are any issues, it will automatically them.
Option 2 – Run the System File Checker
System File Checker or SFC is a built-in command utility that helps in restoring corrupted files as well as missing files. It replaces bad and corrupted system files with good system files that might be the cause why you’re getting the FAULTY_HARDWARE_CORRUPTED_PAGE Blue Screen error. To run the SFC command, follow the steps given below.
Tap Win + R to launch Run.
Type in cmd in the field and tap Enter.
After opening Command Prompt, type in sfc /scannow
The command will start a system scan which will take a few whiles before it finishes. Once it’s done, you could get the following results:
Windows Resource Protection did not find any integrity violations.
Windows Resource Protection found corrupt files and successfully repaired them.
Windows Resource Protection found corrupt files but was unable to fix some of them.
Option 3 – Check for conflicting or incompatible programs by putting your PC in a Clean Boot state
As mentioned, the FAULTY_HARDWARE_CORRUPTED_PAGE Blue Screen error might be caused by some problematic programs that clash with your existing operating system. Several users reported that numerous programs that are supposedly designed to enhance computer performance are causing conflict in the system instead. To identify which program is causing the problem, you need to put your computer in a Clean Boot State. To do so, follow the steps below.
Log onto your PC as an administrator.
Type in MSConfig in the Start Search to open the System Configuration utility.
From there, go to the General tab and click “Selective startup”.
Clear the “Load Startup items” checkbox and make sure that the “Load System Services” and “Use Original boot configuration” options are checked.
Next, click the Services tab and select the “Hide All Microsoft Services” checkbox.
Click Disable all.
Click on Apply/OK and restart your PC. (This will put your PC into a Clean Boot State. And configure Windows to use the usual startup, just simply undo the changes.)
From there, start to isolate the problem by checking which one of the programs you installed recently is the root cause of the problem.
Option 4 – Update or rollback drivers
If the first few options didn’t work for you, then it’s time to either update or roll back the device drivers. It is most likely that after you updated your Windows computer that your driver also needs a refresh. On the other hand, if you have just updated your device drivers then you need to roll back the drivers to their previous versions. Whichever applies to you, refer to the steps below.
Open the Devices Manager from the Win X Menu.
Then locate the device drivers and right-click on them to open the Properties.
After that, switch to the Driver tab and click on the Uninstall Device button.
Follow the screen option to completely uninstall it.
Finally, restart your computer. It will just reinstall the device drivers automatically.
Note: You can install a dedicated driver on your computer in case you have it or you could also look for it directly from the website of the manufacturer.
Anxiety from all these digital threats lurking everywhere? An antivirus program can help put your mind at ease.
What can a virus do to your device?
A virus is malicious software that can affect pretty much any device and does so in a variety of ways. Be it your computer, your phone or your smart lightbulb - as long as there’s access to the internet, malware can get to it.
How exactly does this kind of attack manifest itself? Well, there’s a wide variety of effects ranging from mild to severe. Among other things, they depend on which type of malware attacks your device - a virus, spyware, ransomware, adware or something else.
These are some of the things you can expect to happen:
Slow performance
System crashes
Theft of data and sensitive information
Connectivity issues
Constant browser redirects
Strange messages sent to your contacts
Interference with files
It really can be the stuff of nightmares. So, if you want to sleep peacefully knowing that your devices are completely safe, you should definitely consider getting an antivirus.
P.S. don’t let its name fool you - an antivirus does indeed protect your devices against more than just viruses.
What is antivirus software exactly?
Antivirus software is designed to help you battle and ward off malware. Basically, it scans your device to detect any suspicious activity and offers tools to get rid of the culprit.
At first, antiviruses were developed to fight against viruses only, but nowadays they cover a lot more ground. Here are some of the biggest benefits of getting yourself a powerful defender.
Advantages of antivirus software
1. It fights those pesky ads
Look, constant ads that pop up everywhere aren’t the absolute worst thing that can happen on your computer. If anything, they are annoying, like when you’re trying to sleep but that one fly in your room just won’t stop buzzing.
Now, there’s a free, well-established solution for that - installing an ad blocker. And we’re about a hundred and ten percent sure you’ve already done that on each and every browser you use.
However, “if I can’t see it, it doesn’t exist” isn’t the most ideal approach for your online safety. Ad blockers can’t block everything and they won’t protect you from potential adware. An antivirus on the other hand offers that layer of protection against malware snuck into pop-ups and spammy websites.
2. It protects you from hackers
Hackers don’t target government institutions only. They’ll target regular people too if they have something to gain.
Credit: Clint Patteron (Unsplash)
There are different types of hacking, such as phishing e-mails, transmission of malicious programs, credential reuse, denial of service and more. In any case, they take control of your device and hijack your data.
The good thing is that, as threats evolve, antiviruses evolve too and there are tons of quality programs on the market that can keep you secure for an affordable price.
3. It keeps your files and data safe
When malware enters your device, it can target pretty much any file and get access to any and all data.
Installing an antivirus program will make sure that every single file, new or old, is monitored at all times, warning you against threats immediately. That way, you can make sure to react before your other files become infected and data is lost or stolen.
Another great thing for data protection is that the best antivirus software normally comes with a password manager, so no one can use malware to steal your passwords.
4. It blocks all kinds of malware
As we already stated, malicious attacks can be performed in many ways and malware comes in in different shapes an sizes, such as:
Trojan horse
Spyware
Ransomware
Adware
Rootkit
RAT (remote access Trojan)
Keyloggers
Worms
Botnets
Credit: Growtika (Unsplash)
Nowadays, antivirus software is designed to fight against all of these types. That’s why more often than not we hear the term 'antivirus' used interchangeably with 'anti-malware,' like in this article.
5. It keeps your children protected
You can’t keep your eyes on your kid every second of the day and you can’t protect them from everything. But at least you can limit their exposure to the threats they can encounter at every corner of the digital world.
An antivirus program will block harmful or suspicious websites and ads, which is great both for you and your children. To take it a step further, though, many such programs come with special parental controls and offer monitoring as well. It’s a great solution for keeping your kids safe online without sounding like the irritating, overbearing, controlling parent who “just doesn’t get it!”
How to pick one
There are definitely lots of different antivirus programs out there, both free and paid. We recommend you look for a paid option, since free ones are unfortunately a lot more susceptible to being compromised through malicious attacks.
Now, there are a few factors to consider when choosing the right software. If you use your PC for basic things then a basic antivirus will suffice. However, the more complex your use and the more sensitive the data you deal with, the stronger it needs to be.
It’s also crucial that you take into account the features it includes. As we already mentioned, some programs have additional security options. For example, depending on the package you select, Bitdefender provides:
Some are included in plans and some are separate products, so make sure to check out all the offers.
And don’t worry if you have multiple PCs or you’re looking for protection for your smartphone or tablet as well; Bitdefender has suitable solutions for your needs. Of course, you can also just pick their classic antivirus software if you’re not in need of advanced protection.
Another important point is how regularly the software is updated and enhanced. The more frequent the updates the better, as bugs can make the program more vulnerable. Other things we advise you consider are user-friendliness, impact on performance, reputation (user reviews especially) and, of course, price.
The bottom line
Fact is: anyone can be a malware victim. Don’t let it be you.
You can’t put a price on peace and security, so don’t be reluctant to pay for yours - especially since a lot of options out there are extremely affordable. Is $159.00 a year really too much to pay for cross-platform protection for up to 10 devices? We don’t think so.
Explore your options and protect your files and data before it’s too late.
TPM 2.0 requirement for Windows 11 has produced a lot of discussions since it was announced. A lot of somewhat older hardware seems to be left behind with this decision from Microsoft.
So naturally, when something like this is announced, especially when it is stated it is the must-have thing, people find a way to break it and to prove it is not the case.
In that spirit, I am proud to present you with not one but three-way you can install Windows 11 on hardware that does not has TPM 2.0. Please note that by bypassing this you will not be able to use some Windows 11 features tied to modules like Device encryption, vTPM in Hyper-V, and all TPM-related services.
I will cover methods from the most simple and straightforward ones to the more complicated using registry editor.
Bypass TPM with changing installation media
For this method to work you will need both Windows 10 ISO and Windows 11 ISO since it will require some file copying between them.
You will also need Rufus or another tool to make a new installation media once files are copied
All you have to do in this method is to go into your Windows 10 ISO and delete the install.esd, then just copy install.wim from Windows 11 installation media into the same place, and you are done.
Make install ISO with Rufus and install Windows 11.
Change DLL on installation media method
For this method, you will need everything like in the previous one and the process is almost the same, but this time instead of migrating the whole installation file, we will just replace the appraiserres.dll file.
Copy appraiserres.dll file from your Windows 10 installation media over the same file on Windows 11 installation and you are good to go.
Bypassing TPM via registry editor
If for some reason previous easy solutions have not worked for you do not lose hope just yet, there is one more way you can bypass TPM.
In this given method you will not need Windows 10 installation media but the process is a little more complicated than previous ones.
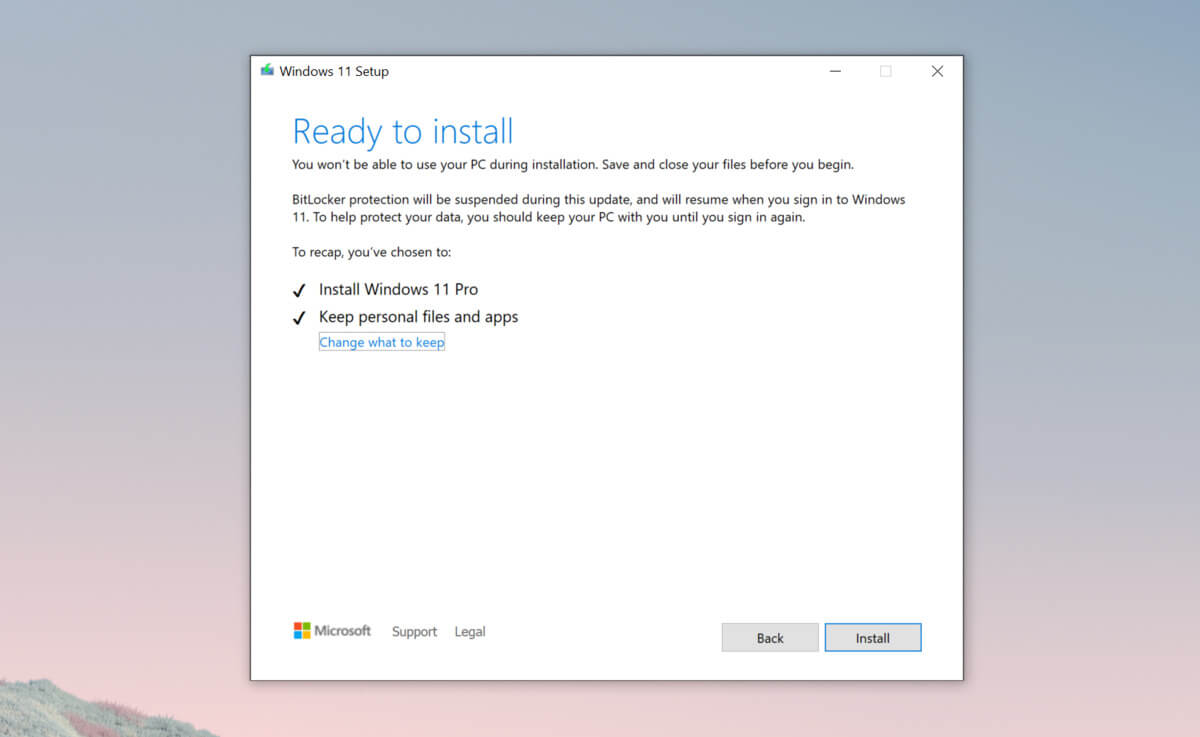
Create Windows 11 media installation
Start the installation process
Click the Next button.
Select region, language, and time when asked. You can change these settings later.
Click the Install now button.
If your device was already activated, click the I don’t have a product key option to continue.
Click the Next button.
Select the edition of Windows. When you’re installing the OS on an existing device, Windows won’t activate if you select the incorrect edition.
Click the Next button.
Select the I accept the license terms option and click next.
Select Custom: Install Windows only (Advanced)
During the Windows installation screen, now you will see a message stating that the PC can’t run Windows 11 if you do not have TPM 2.0
On this screen, press SHIFT + F10 to open Command Prompt window.
Launch the registry editor, type regedit.exe in Command Prompt, and press ENTER
Create a new key “LabConfig” by right-clicking on the Setup key and select New > Key under HKEY_LOCAL_MACHINE\SYSTEM\Setup.
Type LabConfig and press ENTER.
Right-click on the LabConfig key.
Select New > DWORD (32-bit) value.
Create two values: BypassTPMCheck and BypassSecureBootCheck.
Set their DWORD32 value to 1.
Press ENTER.
Close the Registry Editor.
Type exit in the Command Prompt and press ENTER or close its window.
Press the back button in the Windows installation setup if it still says “This PC can’t run Windows 11”.
Accept the terms & conditions.
Select Custom: Install Windows only (Advanced) option and configure the partition with the current installation.
There are a lot of reasons to ban or block different websites in your Windows. From wanting to limit yourself from distraction to block certain sites for sake of kids not going into them. Whatever your reason might be, keep reading in order to find out how you can block any website inside Windows for all browsers.
The technique I am going to share with you is universal and not tied to Windows versions, they will work in any Windows from XP onward. Also, the technique will block desired websites on any browser, already installed or even ones that will be installed after doing the trick. And we will also be looking at applications that can help you in this task if you do not wish to do it manually.
Block websites using dedicated software
A small free application called Focal Filter which can be found here: https://www.focalfilter.com/ is a software solution for your needs. It is a pretty straightforward and easy-to-understand application and not really much can be said here about it. You simply download and install it, set your websites, and you are done, the app does rest.
Blocking manually via host file
Another method besides mentioned one using the dedicating application is to manually set site addresses inside the Windows host file.
The first thing, of course, is to open the host file, run a notepad with administrator privileges, go to file open, and navigate to c:\windows\system32\drivers\etc\hosts.
Once the file is opened go all the way down and add:
127.0.0.1 SITENAME
For example: 127.0.0.1 www.youtube.com or 127.0.0.1 www.facebook.com
This way each time user on a PC tries to access a listed website computer will reroute it to the given address which is your PC's local address and asked website will not be able to load.

 Error Causes

 Bypass TPM with changing installation media