One of the issues with external storage devices is that unplugging them right away without using the “Safely Remove Hardware” feature is not safe and doing so could lead to data corruption and data loss. However, in some cases, even when you use the “Safely Remove Hardware” feature, you could get an error that says:
“Windows can’t stop your ‘Generic volume’ device because a program is still using it. Close any programs that might be using the device, and then try again later.”
It is possible that the system is still using the external device – for instance, a copy operation might still be in progress, or Windows is still indexing the contents of the drive in the background or it could also be that the drive is not configured to be quickly removed. To fix this error, there are a couple of suggestions you can try. You can try to close all the open programs and file explorer windows, or you could also configure the Device Removal Policy or change its file system to FAT32. In addition, you can also try to change its drive letter or use the DISKPART utility to get the drive to be offline or simply manage the hogging process that prevents it from being safely removed.
Follow each one of the given potential fixes below to resolve the error when using the Safely Remove Hardware feature.
The first thing you have to do to resolve the error is to close any open programs as well as File Explorer windows. This is because there are some programs and File Explorer instances that could be using the external device in the background which explains why you’re getting the error when you try to safely remove your device.
The next thing you can do is to configure the Device Removal Policy. How? Refer to these steps:
You could also try managing the hogging process to get rid of the error.
The next thing you can try to resolve the issue is to use DISKPART. Refer to the given steps below to do so.
If you keep getting this error on a particular USB device, you might have to format the disk and change its file system to FAT32. Make sure that you copy its contents safely into another location before you format the disk. Keep in mind that formatting the disk will remove all the contents of your drive.

Error Code 48 is a device driver error code that users can encounter on any Windows 2000 operating system and later versions.
It occurs when the connected peripheral device cannot be run as the Windows operating system’s driver required to install the programs for peripheral devices has either been corrupted or is incompatible with the system.
It prompts the user with the following message on the screen:
The software for this device has been blocked from starting because it is known to have problems with Windows. Contact the hardware vendor for a new driver. (Code 48)
 Error Causes
Like most other Windows error codes, error code 48 is triggered by the following factors.
Identifying and removing the viruses in the system registry and in the connected devices is the easiest method to fix the corrupted registry files.
Viruses such as spyware and malware infect the registry entries and eat up the files that lead to incomplete or missing data. This creates problems for installing external devices as the driver required to install them is not complete.
You can also use system restore to eliminate the problem. Here is how you can use it:
By restoring the system via the last saved system checkpoint, you can obtain undamaged Windows system registry files that can help resolve the error code.
Since Error Code 48 is due to a missing or an out-of-date device driver, uninstalling and then reinstalling the device driver can help solve the error.
You can do this by firstly logging in as Administrator and opening Device Manager. Select the device that is causing the problem and double click it; make sure that the peripheral is connected properly to the PC.
Upon opening, click on the ‘Driver’ tab and then select ‘Update Driver’. Make sure to refer to the system documentation that you received with your PC or computer to check for the motherboard details and driver specifics.
 Error Causes
“Sfc /scannow”
GoodShopLanding is a browser extension for Google Chrome, Mozilla Firefox, and Safari. This extension offers the latest coupons from a range of variety stores. While this may seem useful, this extension only offers coupons from sponsored stores, not all coupons available, so the only coupons that you will get are from the Extensions Ad network. You may see additional new tabs opening randomly while browsing the internet, these tabs are opened by GoodShopLanding and usually contain last-minute store deals.
As it is often distributed via potentially unwanted advertising, and impacts browser performance in a way that many users do not want, it is classified as a Browser Hijacker and thus flagged for optional removal. From the Author:Shop online? Here’s your free automatic coupon finder, Gumdrop. Never miss a coupon again Gumdrop automatically applies the best coupons for you at checkout. Get the best deals anywhere With over 500,000 coupons, Gumdrop finds deals for thousands of stores, including Amazon, Expedia, and Papa John’s.

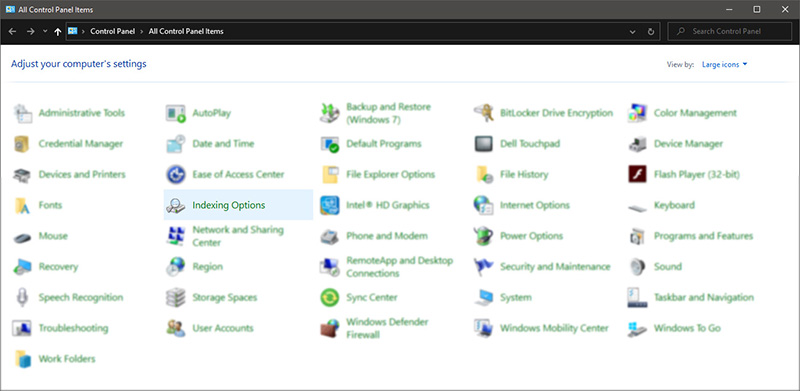
 Once you are in the control panel, switch your view to large icons and locate Indexing options.
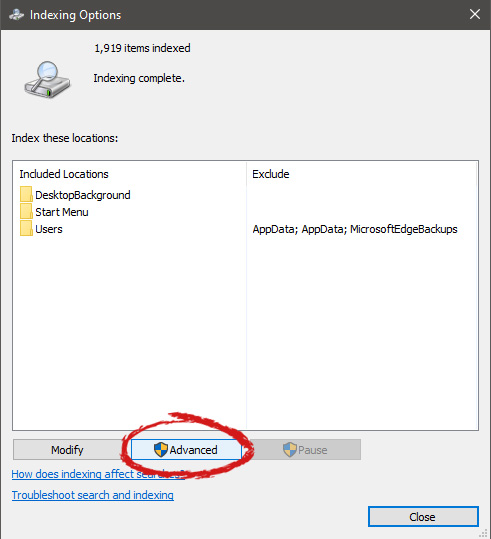
 Inside indexing options, click on advanced.
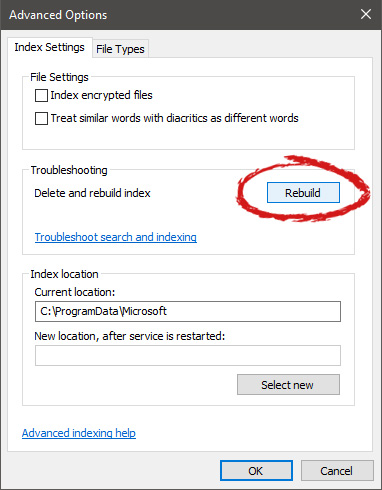
 In advanced options click on the rebuild and confirm.
 Leave your computer to finish and your searches should be working fine now.
 Windows cannot connect to the printer. Operation failed with error 0x0000007c.If you are experiencing this type of annoyance, fear now we are providing you with several solutions to this problem.
 Update Windows 11
“Close other apps. It looks as though another app is already using the camera. If you need it, here’s the error code: 0xA00F4243 (0xC00D3704)”To fix the error code: 0xA00F4243 (0xC00D3704) in the Camera UWP app, you can try to run the Windows Store Apps troubleshooter or reset the Camera app or update or reinstall the driver or apply some tweaks in the Registry Editor. In addition, you can also try checking the Windows Services or run the System File Checker.
DigiSmirkz is a Browser Extension by Mindspark Inc. This extension offers users the ability to enrich their emails or chats with tons of new emojis. When installed it will replace your default new tab page with a variety of search.myway.com, hosted at hp.myway.com. This search engine uses information about you, collected by the extension to display unwanted targeted ads by Mindspark Partners and Ad Networks.
While surfing the internet with this extension installed and enabled, you will see additional pop-up ads, inserted ads into search results and sponsored content on web pages.
Several anti-virus applications have marked this extension as a Browser Hijacker and is therefore recommended to be removed from the Computer.