TelevisionFanatic is a potentially unwanted browser hijacking extension developed by Mindspark Interactive Network. It is marketed to enjoy one-click access to local TV listings, watch recently-aired episodes of your favorite shows and viral web videos, plus TV news and show recaps. However, all of these services require registration and sensitive personal data, that is later sold/forwarded to serve ads.
Upon installation, this extension adds registry entries that allow it to run each time the computer is started. It also changed your default search engine to MyWebSearch and hijacks your default new tab behavior opening MyWebSearch instead. These search results display unwanted ads, and clutter pages with sponsored links that negatively affect your browsing experience. Multiple anti-virus scanners have detected TelevisionFanatic as a browser hijacker, and therefore it is flagged for optional removal.
About Browser Hijackers
Browser hijacking is amongst the web’s constant problems that target browsers. It’s a kind of malware program that alters your web browser’s configuration settings and redirects you to sites or pages that you had no intention of visiting. Browser hijackers could do a variety of things on your PC. It redirects you to the sponsored internet sites and injects ads on the web browser that helps its creator generate income. While it might appear naive, all browser hijackers are damaging and thus always regarded as security risks. Some browser hijackers are designed to make certain modifications beyond the browsers, like altering entries on the computer registry and letting other types of malware further damage your PC.
Browser hijacking signs and symptoms
When your browser is hijacked, the following could happen:
1. home-page is changed
2. new bookmarks pointing to porn sites have been added to your favorite pages
3. the default online search engine and/or the default browser settings are modified
4. you see unwanted new toolbars added
5. you may see many pop-up ads on your computer screen
6. your internet browser starts running slowly or displays frequent glitches
7. you are blocked to access those sites of antivirus solution providers.
Exactly how browser hijacker finds its way to your computer
Browser hijackers may use drive-by downloads or file-sharing websites or an e-mail attachment to reach a targeted PC. Many internet browser hijackings come from add-on software, i.e., browser helper objects (BHO), toolbars, or plug-ins added to web browsers to provide the extra features. Browser hijackers sneak into your pc in addition to free software application downloads that you unwittingly install alongside the original. Common examples of browser hijackers include Conduit, CoolWebSearch, Coupon Server, OneWebSearch, RocketTab, Snap.do, Delta Search, and Searchult.com.
Browser hijackers can record user keystrokes to collect potentially important information leading to privacy concerns, cause instability on systems, severely disrupt user’s browsing experience, and finally slow down the system to a stage where it will become unusable.
Removing browser hijackers
Some hijackers can be removed by uninstalling the freeware they came with or by deleting any extension you’ve recently added to your browser. However, most hijackers are hard to get rid of manually. Irrespective of how much you try to remove it, it might return over and over again. And there is no denying the very fact that manual repairs and removal can certainly be a difficult job for an inexperienced PC user. Besides, there are various risks connected with tinkering around with the system registry files.
What To Do When You Cannot Download Safebytes Anti-Malware?
Viruses can cause plenty of damage to your personal computer. Some malware sits in between your computer and your internet connection and blocks a few or all sites that you would like to visit. It might also block you from the installation of anything on your system, particularly antivirus applications. So what you should do if malicious software prevents you from downloading or installing Anti-Malware? There are some steps you can take to get around this issue.
Make use of Safe Mode to fix the issue
In Safe Mode, you may modify Windows settings, uninstall or install some software, and remove hard-to-delete viruses. In the event the malware is obstructing internet connection and affecting the computer, launching it in Safe Mode allows you to download anti-malware and run a diagnostic scan whilst limiting potential damage. To start the computer into Safe Mode, hit the “F8” key on the keyboard right before the Windows boot screen comes up; Or right after normal Windows boot up, run MSCONFIG, check the Safe Boot under Boot tab, and click Apply. Once you are in safe mode, you can attempt to download and install your anti-malware program without the hindrance of malicious software. Following installation, run the malware scanner to eliminate standard infections.
Switch over to an alternate web browser
Malicious program code could exploit vulnerabilities on a specific web browser and block access to all antivirus software websites. If you suspect that your Internet Explorer has been hijacked by malware or otherwise compromised by online hackers, the most effective thing to do would be to switch to an alternate web browser such as Firefox, Chrome, or Safari to download your favorite computer security program – Safebytes Anti-Malware.
Run anti-malware from your USB drive
Here’s another solution which is utilizing a portable USB anti-virus software that can check your system for malware without the need for installation. To run anti-virus using a thumb drive, follow these simple steps:
1) Download Safebytes Anti-Malware or Windows Defender Offline onto a clean PC.
2) Plug the USB drive into the clean PC.
3) Double-click the Setup icon of the antivirus software to run the Installation Wizard.
4) Select the drive letter of the flash drive as the location when the wizard asks you where you want to install the antivirus. Do as instructed on the screen to finish off the installation process.
5) Disconnect the flash drive. Now you can utilize this portable anti-virus on the infected computer system.
6) Double-click the anti-malware software EXE file on the pen drive.
7) Press the “Scan” button to run a full system scan and remove malware automatically.
A Look at the Best Anti-Malware Program
Do you want to download the best anti-malware program for your laptop or computer? There are many applications in the market that comes in free and paid versions for Microsoft Windows computers. A few of them are good and some are scamware applications that pretend as genuine anti-malware software waiting around to wreak havoc on your PC. You need to select one that is dependable, practical, and has a strong reputation for its malware source protection. One of the highly recommended software programs is SafeBytes Anti-Malware. SafeBytes carries a superb reputation for top-quality service, and customers seem to be happy with it.
SafeBytes anti-malware is a trustworthy tool that not only secures your computer completely but is also very user-friendly for people of all skill levels. With its outstanding protection system, this software will automatically detect and get rid of the majority of the security threats, which include adware, viruses, browser hijackers, ransomware, PUPs, and trojans.
SafeBytes anti-malware provides a plethora of enhanced features which sets it aside from all others. Let’s check out some of them below:
Anti-Malware Protection: Safebytes is built on the best virus engine within the industry. These engines will identify and remove threats even during the early stages of a malware outbreak.
Real-time Active Protection: Malware programs looking to get into the computer are discovered and stopped as and when detected by the SafeBytes active protection shields. This utility will continuously monitor your PC for suspicious activity and updates itself regularly to keep abreast of the constantly changing threat situation.
Internet Security: SafeBytes gives an instant safety rating on the pages you are about to visit, automatically blocking dangerous sites and ensuring that you are certain of your safety while browsing the web.
High-Speed Malware Scanning Engine: SafeBytes Anti-Malware has got a multi-thread scan algorithm that works up to 5 times faster than any other antivirus software.
Minimal CPU and Memory Usage: SafeBytes is well-known for its low influence on processing power and great detection rate of numerous threats. It works quietly and efficiently in the background so you’re free to use your computer or laptop at full power all of the time.
24/7 Guidance: SafeBytes provides you with 24/7 technical support, automatic maintenance, and updates for the best user experience.
Technical Details and Manual Removal (Advanced Users)
If you wish to manually remove TelevisionFanatic without the use of an automated tool, it may be possible to do so by removing the program from the Windows Add/Remove Programs menu, or in cases of browser extensions, going to the browsers AddOn/Extension manager and removing it. You will likely also want to reset your browser.
To ensure the complete removal, manually check your hard drive and registry for all of the following and remove or reset the values accordingly. Please note that this is for advanced users only and may be difficult, with incorrect file removal causing additional PC errors. In addition, some malware is capable of replicating or preventing deletion. Doing this in Safe Mode is advised.
The following files, folders, and registry entries are created or modified by TelevisionFanatic
Files:
%APPDATA%TelevisionFanatic
%PROGRAMFILES%TelevisionFanatic
%PROGRAMFILES%TelevisionFanaticEI
%PROGRAMFILES%TelevisionFanaticEITelevisionFanaticauxstb.dll
%PROGRAMFILES%TelevisionFanaticEITelevisionFanaticbar.dll
%PROGRAMFILES%TelevisionFanaticEITelevisionFanaticbarsvc.exe
%PROGRAMFILES%TelevisionFanaticEITelevisionFanaticbprtct.dll
%PROGRAMFILES%TelevisionFanaticEITelevisionFanaticbrmon.exe
%PROGRAMFILES%TelevisionFanaticEITelevisionFanaticbrstub.dll
%PROGRAMFILES%TelevisionFanaticEITelevisionFanaticdatact.dll
%PROGRAMFILES%TelevisionFanaticEITelevisionFanaticdlghk.dll
%PROGRAMFILES%TelevisionFanaticEITelevisionFanaticdyn.dll
%PROGRAMFILES%TelevisionFanaticEITelevisionFanaticfeedmg.dll
%PROGRAMFILES%TelevisionFanaticEITelevisionFanatichighin.exe
%PROGRAMFILES%TelevisionFanaticEITelevisionFanatichkstub.dll
%PROGRAMFILES%TelevisionFanaticEITelevisionFanatichtmlmu.dll
%PROGRAMFILES%TelevisionFanaticEITelevisionFanatichttpct.dll
%PROGRAMFILES%TelevisionFanaticEITelevisionFanaticidle.dll
%PROGRAMFILES%TelevisionFanaticEITelevisionFanaticieovr.dll
%PROGRAMFILES%TelevisionFanaticEITelevisionFanaticimpipe.exe
%PROGRAMFILES%TelevisionFanaticEITelevisionFanaticmedint.exe
%PROGRAMFILES%TelevisionFanaticEITelevisionFanaticmlbtn.dll
%PROGRAMFILES%TelevisionFanaticEITelevisionFanaticmsg.dll
%PROGRAMFILES%TelevisionFanaticEITelevisionFanaticPlugin.dll
%PROGRAMFILES%TelevisionFanaticEITelevisionFanaticradio.dll
%PROGRAMFILES%TelevisionFanaticEITelevisionFanaticregfft.dll
%PROGRAMFILES%TelevisionFanaticEITelevisionFanaticreghk.dll
%PROGRAMFILES%TelevisionFanaticEITelevisionFanaticregiet.dll
%PROGRAMFILES%TelevisionFanaticEITelevisionFanaticscript.dll
%PROGRAMFILES%TelevisionFanaticEITelevisionFanaticskin.dll
%PROGRAMFILES%TelevisionFanaticEITelevisionFanaticsknlcr.dll
%PROGRAMFILES%TelevisionFanaticEITelevisionFanaticskplay.exe
%PROGRAMFILES%TelevisionFanaticEITelevisionFanaticSrcAs.dll
%PROGRAMFILES%TelevisionFanaticEITelevisionFanaticSrchMn.exe
%PROGRAMFILES%TelevisionFanaticEITelevisionFanatictpinst.dll
%PROGRAMFILES%TelevisionFanaticEITelevisionFanaticuabtn.dll
%PROGRAMFILES%TelevisionFanaticEITelevisionFanaticAppIntegrator64.exe
%PROGRAMFILES%TelevisionFanaticEITelevisionFanaticAppIntegratorStub64.dll
%PROGRAMFILES%TelevisionFanaticEITelevisionFanaticBOOTSTRAP.JS
%PROGRAMFILES%TelevisionFanaticEITelevisionFanaticffxtbr.jar
%PROGRAMFILES%TelevisionFanaticEITelevisionFanaticCHROME.MANIFEST
%PROGRAMFILES%TelevisionFanaticEITelevisionFanaticCREXT.DLL
%PROGRAMFILES%TelevisionFanaticEITelevisionFanaticCrExtP64.exe
%PROGRAMFILES%TelevisionFanaticEITelevisionFanaticDPNMNGR.DLL
%PROGRAMFILES%TelevisionFanaticEITelevisionFanaticEXEMANAGER.DLL
%PROGRAMFILES%TelevisionFanaticEITelevisionFanaticHpg64.dll
%PROGRAMFILES%TelevisionFanaticEITelevisionFanaticINSTALL.RDF
%PROGRAMFILES%TelevisionFanaticEITelevisionFanaticinstallKeys.js
%PROGRAMFILES%TelevisionFanaticEITelevisionFanaticLOGO.BMP
%PROGRAMFILES%TelevisionFanaticEITelevisionFanaticNP64Stub.dll
%PROGRAMFILES%TelevisionFanaticEITelevisionFanaticT8EXTEX.DLL
%PROGRAMFILES%TelevisionFanaticEITelevisionFanaticT8EXTPEX.DLL
%PROGRAMFILES%TelevisionFanaticEITelevisionFanaticT8HTML.DLL
%PROGRAMFILES%TelevisionFanaticEITelevisionFanaticT8RES.DLL
%PROGRAMFILES%TelevisionFanaticEITelevisionFanaticT8TICKER.DLL
%PROGRAMFILES%TelevisionFanaticEITelevisionFanaticVERIFY.DLL
%PROGRAMFILES%TelevisionFanaticEITelevisionFanaticEIPlug.dll
%PROGRAMFILES%TelevisionFanaticEITelevisionFanaticEZSETP.dll
%PROGRAMFILES%TelevisionFanaticEITelevisionFanaticNP64EISb.dll
%PROGRAMFILES%TelevisionFanaticEITelevisionFanatic%APPDATA%TelevisionFanatic
%PROGRAMFILES%TelevisionFanatic
%PROGRAMFILES%TelevisionFanaticEI
%PROGRAMFILES%TelevisionFanaticEITelevisionFanaticauxstb.dll
%PROGRAMFILES%TelevisionFanaticEITelevisionFanaticbar.dll
%PROGRAMFILES%TelevisionFanaticEITelevisionFanaticbarsvc.exe
%PROGRAMFILES%TelevisionFanaticEITelevisionFanaticbprtct.dll
%PROGRAMFILES%TelevisionFanaticEITelevisionFanaticbrmon.exe
%PROGRAMFILES%TelevisionFanaticEITelevisionFanaticbrstub.dll
%PROGRAMFILES%TelevisionFanaticEITelevisionFanaticdatact.dll
%PROGRAMFILES%TelevisionFanaticEITelevisionFanaticdlghk.dll
%PROGRAMFILES%TelevisionFanaticEITelevisionFanaticdyn.dll
%PROGRAMFILES%TelevisionFanaticEITelevisionFanaticfeedmg.dll
%PROGRAMFILES%TelevisionFanaticEITelevisionFanatichighin.exe
%PROGRAMFILES%TelevisionFanaticEITelevisionFanatichkstub.dll
%PROGRAMFILES%TelevisionFanaticEITelevisionFanatichtmlmu.dll
%PROGRAMFILES%TelevisionFanaticEITelevisionFanatichttpct.dll
%PROGRAMFILES%TelevisionFanaticEITelevisionFanaticidle.dll
%PROGRAMFILES%TelevisionFanaticEITelevisionFanaticieovr.dll
%PROGRAMFILES%TelevisionFanaticEITelevisionFanaticimpipe.exe
%PROGRAMFILES%TelevisionFanaticEITelevisionFanaticmedint.exe
%PROGRAMFILES%TelevisionFanaticEITelevisionFanaticmlbtn.dll
%PROGRAMFILES%TelevisionFanaticEITelevisionFanaticmsg.dll
%PROGRAMFILES%TelevisionFanaticEITelevisionFanaticPlugin.dll
%PROGRAMFILES%TelevisionFanaticEITelevisionFanaticradio.dll
%PROGRAMFILES%TelevisionFanaticEITelevisionFanaticregfft.dll
%PROGRAMFILES%TelevisionFanaticEITelevisionFanaticreghk.dll
%PROGRAMFILES%TelevisionFanaticEITelevisionFanaticregiet.dll
%PROGRAMFILES%TelevisionFanaticEITelevisionFanaticscript.dll
%PROGRAMFILES%TelevisionFanaticEITelevisionFanaticskin.dll
%PROGRAMFILES%TelevisionFanaticEITelevisionFanaticsknlcr.dll
%PROGRAMFILES%TelevisionFanaticEITelevisionFanaticskplay.exe
%PROGRAMFILES%TelevisionFanaticEITelevisionFanaticSrcAs.dll
%PROGRAMFILES%TelevisionFanaticEITelevisionFanaticSrchMn.exe
%PROGRAMFILES%TelevisionFanaticEITelevisionFanatictpinst.dll
%PROGRAMFILES%TelevisionFanaticEITelevisionFanaticuabtn.dll
%PROGRAMFILES%TelevisionFanaticEITelevisionFanaticAppIntegrator64.exe
%PROGRAMFILES%TelevisionFanaticEITelevisionFanaticAppIntegratorStub64.dll
%PROGRAMFILES%TelevisionFanaticEITelevisionFanaticBOOTSTRAP.JS
%PROGRAMFILES%TelevisionFanaticEITelevisionFanaticffxtbr.jar
%PROGRAMFILES%TelevisionFanaticEITelevisionFanaticCHROME.MANIFEST
%PROGRAMFILES%TelevisionFanaticEITelevisionFanaticCREXT.DLL
%PROGRAMFILES%TelevisionFanaticEITelevisionFanaticCrExtP64.exe
%PROGRAMFILES%TelevisionFanaticEITelevisionFanaticDPNMNGR.DLL
%PROGRAMFILES%TelevisionFanaticEITelevisionFanaticEXEMANAGER.DLL
%PROGRAMFILES%TelevisionFanaticEITelevisionFanaticHpg64.dll
%PROGRAMFILES%TelevisionFanaticEITelevisionFanaticINSTALL.RDF
%PROGRAMFILES%TelevisionFanaticEITelevisionFanaticinstallKeys.js
%PROGRAMFILES%TelevisionFanaticEITelevisionFanaticLOGO.BMP
%PROGRAMFILES%TelevisionFanaticEITelevisionFanaticNP64Stub.dll
%PROGRAMFILES%TelevisionFanaticEITelevisionFanaticT8EXTEX.DLL
%PROGRAMFILES%TelevisionFanaticEITelevisionFanaticT8EXTPEX.DLL
%PROGRAMFILES%TelevisionFanaticEITelevisionFanaticT8HTML.DLL
%PROGRAMFILES%TelevisionFanaticEITelevisionFanaticT8RES.DLL
%PROGRAMFILES%TelevisionFanaticEITelevisionFanaticT8TICKER.DLL
%PROGRAMFILES%TelevisionFanaticEITelevisionFanaticVERIFY.DLL
%PROGRAMFILES%TelevisionFanaticEITelevisionFanaticEIPlug.dll
%PROGRAMFILES%TelevisionFanaticEITelevisionFanaticEZSETP.dll
%PROGRAMFILES%TelevisionFanaticEITelevisionFanaticNP64EISb.dll
%PROGRAMFILES%TelevisionFanaticEITelevisionFanatic%#MANIFEST#%18369B.exe
%PROGRAMFILES%TelevisionFanaticauxstb.dll
%PROGRAMFILES%TelevisionFanaticbar.dll
%PROGRAMFILES%TelevisionFanaticbarsvc.exe
%PROGRAMFILES%TelevisionFanaticbprtct.dll
%PROGRAMFILES%TelevisionFanaticbrmon.exe
%PROGRAMFILES%TelevisionFanaticbrstub.dll
%PROGRAMFILES%TelevisionFanaticdatact.dll
%PROGRAMFILES%TelevisionFanaticdlghk.dll
%PROGRAMFILES%TelevisionFanaticdyn.dll
%PROGRAMFILES%TelevisionFanaticfeedmg.dll
%PROGRAMFILES%TelevisionFanatichighin.exe
%PROGRAMFILES%TelevisionFanatichkstub.dll
%PROGRAMFILES%TelevisionFanatichtmlmu.dll
%PROGRAMFILES%TelevisionFanatichttpct.dll
%PROGRAMFILES%TelevisionFanaticidle.dll
%PROGRAMFILES%TelevisionFanaticieovr.dll
%PROGRAMFILES%TelevisionFanaticimpipe.exe
%PROGRAMFILES%TelevisionFanaticmedint.exe
%PROGRAMFILES%TelevisionFanaticmlbtn.dll
%PROGRAMFILES%TelevisionFanaticmsg.dll
%PROGRAMFILES%TelevisionFanaticPlugin.dll
%PROGRAMFILES%TelevisionFanaticradio.dll
%PROGRAMFILES%TelevisionFanaticregfft.dll
%PROGRAMFILES%TelevisionFanaticreghk.dll
%PROGRAMFILES%TelevisionFanaticregiet.dll
%PROGRAMFILES%TelevisionFanaticscript.dll
%PROGRAMFILES%TelevisionFanaticskin.dll
%PROGRAMFILES%TelevisionFanaticsknlcr.dll
%PROGRAMFILES%TelevisionFanaticskplay.exe
%PROGRAMFILES%TelevisionFanaticSrcAs.dll
%PROGRAMFILES%TelevisionFanaticSrchMn.exe
%PROGRAMFILES%TelevisionFanatictpinst.dll
%PROGRAMFILES%TelevisionFanaticuabtn.dll
%PROGRAMFILES%TelevisionFanaticAppIntegrator64.exe
%PROGRAMFILES%TelevisionFanaticAppIntegratorStub64.dll
%PROGRAMFILES%TelevisionFanaticBOOTSTRAP.JS
%PROGRAMFILES%TelevisionFanaticffxtbr.jar
%PROGRAMFILES%TelevisionFanaticCHROME.MANIFEST
%PROGRAMFILES%TelevisionFanaticCREXT.DLL
%PROGRAMFILES%TelevisionFanaticCrExtP64.exe
%PROGRAMFILES%TelevisionFanaticDPNMNGR.DLL
%PROGRAMFILES%TelevisionFanaticEXEMANAGER.DLL
%PROGRAMFILES%TelevisionFanaticHpg64.dll
%PROGRAMFILES%TelevisionFanaticINSTALL.RDF
%PROGRAMFILES%TelevisionFanaticinstallKeys.js
%PROGRAMFILES%TelevisionFanaticLOGO.BMP
%PROGRAMFILES%TelevisionFanaticNP64Stub.dll
%PROGRAMFILES%TelevisionFanaticT8EXTEX.DLL
%PROGRAMFILES%TelevisionFanaticT8EXTPEX.DLL
%PROGRAMFILES%TelevisionFanaticT8HTML.DLL
%PROGRAMFILES%TelevisionFanaticT8RES.DLL
%PROGRAMFILES%TelevisionFanaticT8TICKER.DLL
%PROGRAMFILES%TelevisionFanaticVERIFY.DLL
%PROGRAMFILES%TelevisionFanaticEIPlug.dll
%PROGRAMFILES%TelevisionFanaticEZSETP.dll
%PROGRAMFILES%TelevisionFanaticNP64EISb.dll
%PROGRAMFILES%TelevisionFanatic%#MANIFEST#%18369B.exe
%APPDATA%TelevisionFanaticauxstb.dll
%APPDATA%TelevisionFanaticbar.dll
%APPDATA%TelevisionFanaticbarsvc.exe
%APPDATA%TelevisionFanaticbprtct.dll
%APPDATA%TelevisionFanaticbrmon.exe
%APPDATA%TelevisionFanaticbrstub.dll
%APPDATA%TelevisionFanaticdatact.dll
%APPDATA%TelevisionFanaticdlghk.dll
%APPDATA%TelevisionFanaticdyn.dll
%APPDATA%TelevisionFanaticfeedmg.dll
%APPDATA%TelevisionFanatichighin.exe
%APPDATA%TelevisionFanatichkstub.dll
%APPDATA%TelevisionFanatichtmlmu.dll
%APPDATA%TelevisionFanatichttpct.dll
%APPDATA%TelevisionFanaticidle.dll
%APPDATA%TelevisionFanaticieovr.dll
%APPDATA%TelevisionFanaticimpipe.exe
%APPDATA%TelevisionFanaticmedint.exe
%APPDATA%TelevisionFanaticmlbtn.dll
%APPDATA%TelevisionFanaticmsg.dll
%APPDATA%TelevisionFanaticPlugin.dll
%APPDATA%TelevisionFanaticradio.dll
%APPDATA%TelevisionFanaticregfft.dll
%APPDATA%TelevisionFanaticreghk.dll
%APPDATA%TelevisionFanaticregiet.dll
%APPDATA%TelevisionFanaticscript.dll
%APPDATA%TelevisionFanaticskin.dll
%APPDATA%TelevisionFanaticsknlcr.dll
%APPDATA%TelevisionFanaticskplay.exe
%APPDATA%TelevisionFanaticSrcAs.dll
%APPDATA%TelevisionFanaticSrchMn.exe
%APPDATA%TelevisionFanatictpinst.dll
%APPDATA%TelevisionFanaticuabtn.dll
%APPDATA%TelevisionFanaticAppIntegrator64.exe
%APPDATA%TelevisionFanaticAppIntegratorStub64.dll
%APPDATA%TelevisionFanaticBOOTSTRAP.JS
%APPDATA%TelevisionFanaticffxtbr.jar
%APPDATA%TelevisionFanaticCHROME.MANIFEST
%APPDATA%TelevisionFanaticCREXT.DLL
%APPDATA%TelevisionFanaticCrExtP64.exe
%APPDATA%TelevisionFanaticDPNMNGR.DLL
%APPDATA%TelevisionFanaticEXEMANAGER.DLL
%APPDATA%TelevisionFanaticHpg64.dll
%APPDATA%TelevisionFanaticINSTALL.RDF
%APPDATA%TelevisionFanaticinstallKeys.js
%APPDATA%TelevisionFanaticLOGO.BMP
%APPDATA%TelevisionFanaticNP64Stub.dll
%APPDATA%TelevisionFanaticT8EXTEX.DLL
%APPDATA%TelevisionFanaticT8EXTPEX.DLL
%APPDATA%TelevisionFanaticT8HTML.DLL
%APPDATA%TelevisionFanaticT8RES.DLL
%APPDATA%TelevisionFanaticT8TICKER.DLL
%APPDATA%TelevisionFanaticVERIFY.DLL
%APPDATA%TelevisionFanaticEIPlug.dll
%APPDATA%TelevisionFanaticEZSETP.dll
%APPDATA%TelevisionFanaticNP64EISb.dll
%APPDATA%TelevisionFanatic%#MANIFEST#%18369B.exe
Registry:
Key HKLMSOFTWARETelevisionFanatic
Key HKLMSOFTWAREMicrosoftWindowsCurrentVersionUninstallTelevisionFanaticbar Uninstall Internet Explorer
Key HKLMSOFTWAREMicrosoftWindowsCurrentVersionUninstallTelevisionFanaticbar Uninstall Firefox
Key HKLMSOFTWAREMicrosoftWindowsCurrentVersionExplorerBrowser Helper Objectscb41fc95-f1b3-4797-8bb6-1012ff62abba
Key HKLMSOFTWAREMicrosoftWindowsCurrentVersionExplorerBrowser Helper Objects5d79f641-c168-40df-a32f-bacea7509e75
Key HKLMSOFTWAREClassesTelevisionFanatic.XMLSessionPlugin.1CLSID
Key HKLMSOFTWAREClassesTelevisionFanatic.XMLSessionPlugin.1
Key HKLMSOFTWAREClassesTelevisionFanatic.XMLSessionPluginCurVer
Key HKLMSOFTWAREClassesTelevisionFanatic.XMLSessionPluginCLSID
Key HKLMSOFTWAREClassesTelevisionFanatic.XMLSessionPlugin
Key HKLMSOFTWAREClassesTelevisionFanatic.UrlAlertButton.1CLSID
Key HKLMSOFTWAREClassesTelevisionFanatic.UrlAlertButton.1
Key HKLMSOFTWAREClassesTelevisionFanatic.UrlAlertButtonCurVer
Key HKLMSOFTWAREClassesTelevisionFanatic.UrlAlertButtonCLSID
Key HKLMSOFTWAREClassesTelevisionFanatic.UrlAlertButton
Key HKLMSOFTWAREClassesTelevisionFanatic.ToolbarProtector.1CLSID
Key HKLMSOFTWAREClassesTelevisionFanatic.ToolbarProtector.1
Key HKLMSOFTWAREClassesTelevisionFanatic.ToolbarProtectorCurVer
Key HKLMSOFTWAREClassesTelevisionFanatic.ToolbarProtectorCLSID
Key HKLMSOFTWAREClassesTelevisionFanatic.ToolbarProtector
Key HKLMSOFTWAREClassesTelevisionFanatic.ThirdPartyInstaller.1CLSID
Key HKLMSOFTWAREClassesTelevisionFanatic.ThirdPartyInstaller.1
Key HKLMSOFTWAREClassesTelevisionFanatic.ThirdPartyInstallerCurVer
Key HKLMSOFTWAREClassesTelevisionFanatic.ThirdPartyInstallerCLSID
Key HKLMSOFTWAREClassesTelevisionFanatic.ThirdPartyInstaller
Key HKLMSOFTWAREClassesTelevisionFanatic.SkinLauncherSettings.1CLSID
Key HKLMSOFTWAREClassesTelevisionFanatic.SkinLauncherSettings.1
Key HKLMSOFTWAREClassesTelevisionFanatic.SkinLauncherSettingsCurVer
Key HKLMSOFTWAREClassesTelevisionFanatic.SkinLauncherSettingsCLSID
Key HKLMSOFTWAREClassesTelevisionFanatic.SkinLauncherSettings
Key HKLMSOFTWAREClassesTelevisionFanatic.SkinLauncher.1CLSID
Key HKLMSOFTWAREClassesTelevisionFanatic.SkinLauncher.1
Key HKLMSOFTWAREClassesTelevisionFanatic.SkinLauncherCurVer
Key HKLMSOFTWAREClassesTelevisionFanatic.SkinLauncherCLSID
Key HKLMSOFTWAREClassesTelevisionFanatic.SkinLauncher
Key HKLMSOFTWAREClassesTelevisionFanatic.SettingsPlugin.1CLSID
Key HKLMSOFTWAREClassesTelevisionFanatic.SettingsPlugin.1
Key HKLMSOFTWAREClassesTelevisionFanatic.SettingsPluginCurVer
Key HKLMSOFTWAREClassesTelevisionFanatic.SettingsPluginCLSID
Key HKLMSOFTWAREClassesTelevisionFanatic.SettingsPlugin
Key HKLMSOFTWAREClassesTelevisionFanatic.ScriptButton.1CLSID
Key HKLMSOFTWAREClassesTelevisionFanatic.ScriptButton.1
Key HKLMSOFTWAREClassesTelevisionFanatic.ScriptButtonCurVer
Key HKLMSOFTWAREClassesTelevisionFanatic.ScriptButtonCLSID
Key HKLMSOFTWAREClassesTelevisionFanatic.ScriptButton
Key HKLMSOFTWAREClassesTelevisionFanatic.RadioSettings.1CLSID
Key HKLMSOFTWAREClassesTelevisionFanatic.RadioSettings.1
Key HKLMSOFTWAREClassesTelevisionFanatic.RadioSettingsCurVer
Key HKLMSOFTWAREClassesTelevisionFanatic.RadioSettingsCLSID
Key HKLMSOFTWAREClassesTelevisionFanatic.RadioSettings
Key HKLMSOFTWAREClassesTelevisionFanatic.Radio.1CLSID
Key HKLMSOFTWAREClassesTelevisionFanatic.Radio.1
Key HKLMSOFTWAREClassesTelevisionFanatic.RadioCurVer
Key HKLMSOFTWAREClassesTelevisionFanatic.RadioCLSID
Key HKLMSOFTWAREClassesTelevisionFanatic.Radio
Key HKLMSOFTWAREClassesTelevisionFanatic.PseudoTransparentPlugin.1CLSID
Key HKLMSOFTWAREClassesTelevisionFanatic.PseudoTransparentPlugin.1
Key HKLMSOFTWAREClassesTelevisionFanatic.PseudoTransparentPluginCurVer
Key HKLMSOFTWAREClassesTelevisionFanatic.PseudoTransparentPluginCLSID
Key HKLMSOFTWAREClassesTelevisionFanatic.PseudoTransparentPlugin
Key HKLMSOFTWAREClassesTelevisionFanatic.MultipleButton.1CLSID
Key HKLMSOFTWAREClassesTelevisionFanatic.MultipleButton.1
Key HKLMSOFTWAREClassesTelevisionFanatic.MultipleButtonCurVer
Key HKLMSOFTWAREClassesTelevisionFanatic.MultipleButtonCLSID
Key HKLMSOFTWAREClassesTelevisionFanatic.MultipleButton
Key HKLMSOFTWAREClassesTelevisionFanatic.HTMLPanel.1CLSID
Key HKLMSOFTWAREClassesTelevisionFanatic.HTMLPanel.1
Key HKLMSOFTWAREClassesTelevisionFanatic.HTMLPanelCurVer
Key HKLMSOFTWAREClassesTelevisionFanatic.HTMLPanelCLSID
Key HKLMSOFTWAREClassesTelevisionFanatic.HTMLPanel
Key HKLMSOFTWAREClassesTelevisionFanatic.HTMLMenu.1CLSID
Key HKLMSOFTWAREClassesTelevisionFanatic.HTMLMenu.1
Key HKLMSOFTWAREClassesTelevisionFanatic.HTMLMenuCurVer
Key HKLMSOFTWAREClassesTelevisionFanatic.HTMLMenuCLSID
Key HKLMSOFTWAREClassesTelevisionFanatic.HTMLMenu
Key HKLMSOFTWAREClassesTelevisionFanatic.FeedManager.1CLSID
Key HKLMSOFTWAREClassesTelevisionFanatic.FeedManager.1
Key HKLMSOFTWAREClassesTelevisionFanatic.FeedManagerCurVer
Key HKLMSOFTWAREClassesTelevisionFanatic.FeedManagerCLSID
Key HKLMSOFTWAREClassesTelevisionFanatic.FeedManager
Key HKLMSOFTWAREClassesTelevisionFanatic.DynamicBarButton.1CLSID
Key HKLMSOFTWAREClassesTelevisionFanatic.DynamicBarButton.1
Key HKLMSOFTWAREClassesTelevisionFanatic.DynamicBarButtonCurVer
Key HKLMSOFTWAREClassesTelevisionFanatic.DynamicBarButtonCLSID
Key HKLMSOFTWAREClassesTelevisionFanatic.DynamicBarButton18369B.exe
%PROGRAMFILES%TelevisionFanaticauxstb.dll
%PROGRAMFILES%TelevisionFanaticbar.dll
%PROGRAMFILES%TelevisionFanaticbarsvc.exe
%PROGRAMFILES%TelevisionFanaticbprtct.dll
%PROGRAMFILES%TelevisionFanaticbrmon.exe
%PROGRAMFILES%TelevisionFanaticbrstub.dll
%PROGRAMFILES%TelevisionFanaticdatact.dll
%PROGRAMFILES%TelevisionFanaticdlghk.dll
%PROGRAMFILES%TelevisionFanaticdyn.dll
%PROGRAMFILES%TelevisionFanaticfeedmg.dll
%PROGRAMFILES%TelevisionFanatichighin.exe
%PROGRAMFILES%TelevisionFanatichkstub.dll
%PROGRAMFILES%TelevisionFanatichtmlmu.dll
%PROGRAMFILES%TelevisionFanatichttpct.dll
%PROGRAMFILES%TelevisionFanaticidle.dll
%PROGRAMFILES%TelevisionFanaticieovr.dll
%PROGRAMFILES%TelevisionFanaticimpipe.exe
%PROGRAMFILES%TelevisionFanaticmedint.exe
%PROGRAMFILES%TelevisionFanaticmlbtn.dll
%PROGRAMFILES%TelevisionFanaticmsg.dll
%PROGRAMFILES%TelevisionFanaticPlugin.dll
%PROGRAMFILES%TelevisionFanaticradio.dll
%PROGRAMFILES%TelevisionFanaticregfft.dll
%PROGRAMFILES%TelevisionFanaticreghk.dll
%PROGRAMFILES%TelevisionFanaticregiet.dll
%PROGRAMFILES%TelevisionFanaticscript.dll
%PROGRAMFILES%TelevisionFanaticskin.dll
%PROGRAMFILES%TelevisionFanaticsknlcr.dll
%PROGRAMFILES%TelevisionFanaticskplay.exe
%PROGRAMFILES%TelevisionFanaticSrcAs.dll
%PROGRAMFILES%TelevisionFanaticSrchMn.exe
%PROGRAMFILES%TelevisionFanatictpinst.dll
%PROGRAMFILES%TelevisionFanaticuabtn.dll
%PROGRAMFILES%TelevisionFanaticAppIntegrator64.exe
%PROGRAMFILES%TelevisionFanaticAppIntegratorStub64.dll
%PROGRAMFILES%TelevisionFanaticBOOTSTRAP.JS
%PROGRAMFILES%TelevisionFanaticffxtbr.jar
%PROGRAMFILES%TelevisionFanaticCHROME.MANIFEST
%PROGRAMFILES%TelevisionFanaticCREXT.DLL
%PROGRAMFILES%TelevisionFanaticCrExtP64.exe
%PROGRAMFILES%TelevisionFanaticDPNMNGR.DLL
%PROGRAMFILES%TelevisionFanaticEXEMANAGER.DLL
%PROGRAMFILES%TelevisionFanaticHpg64.dll
%PROGRAMFILES%TelevisionFanaticINSTALL.RDF
%PROGRAMFILES%TelevisionFanaticinstallKeys.js
%PROGRAMFILES%TelevisionFanaticLOGO.BMP
%PROGRAMFILES%TelevisionFanaticNP64Stub.dll
%PROGRAMFILES%TelevisionFanaticT8EXTEX.DLL
%PROGRAMFILES%TelevisionFanaticT8EXTPEX.DLL
%PROGRAMFILES%TelevisionFanaticT8HTML.DLL
%PROGRAMFILES%TelevisionFanaticT8RES.DLL
%PROGRAMFILES%TelevisionFanaticT8TICKER.DLL
%PROGRAMFILES%TelevisionFanaticVERIFY.DLL
%PROGRAMFILES%TelevisionFanaticEIPlug.dll
%PROGRAMFILES%TelevisionFanaticEZSETP.dll
%PROGRAMFILES%TelevisionFanaticNP64EISb.dll
%PROGRAMFILES%TelevisionFanatic%APPDATA%TelevisionFanatic
%PROGRAMFILES%TelevisionFanatic
%PROGRAMFILES%TelevisionFanaticEI
%PROGRAMFILES%TelevisionFanaticEITelevisionFanaticauxstb.dll
%PROGRAMFILES%TelevisionFanaticEITelevisionFanaticbar.dll
%PROGRAMFILES%TelevisionFanaticEITelevisionFanaticbarsvc.exe
%PROGRAMFILES%TelevisionFanaticEITelevisionFanaticbprtct.dll
%PROGRAMFILES%TelevisionFanaticEITelevisionFanaticbrmon.exe
%PROGRAMFILES%TelevisionFanaticEITelevisionFanaticbrstub.dll
%PROGRAMFILES%TelevisionFanaticEITelevisionFanaticdatact.dll
%PROGRAMFILES%TelevisionFanaticEITelevisionFanaticdlghk.dll
%PROGRAMFILES%TelevisionFanaticEITelevisionFanaticdyn.dll
%PROGRAMFILES%TelevisionFanaticEITelevisionFanaticfeedmg.dll
%PROGRAMFILES%TelevisionFanaticEITelevisionFanatichighin.exe
%PROGRAMFILES%TelevisionFanaticEITelevisionFanatichkstub.dll
%PROGRAMFILES%TelevisionFanaticEITelevisionFanatichtmlmu.dll
%PROGRAMFILES%TelevisionFanaticEITelevisionFanatichttpct.dll
%PROGRAMFILES%TelevisionFanaticEITelevisionFanaticidle.dll
%PROGRAMFILES%TelevisionFanaticEITelevisionFanaticieovr.dll
%PROGRAMFILES%TelevisionFanaticEITelevisionFanaticimpipe.exe
%PROGRAMFILES%TelevisionFanaticEITelevisionFanaticmedint.exe
%PROGRAMFILES%TelevisionFanaticEITelevisionFanaticmlbtn.dll
%PROGRAMFILES%TelevisionFanaticEITelevisionFanaticmsg.dll
%PROGRAMFILES%TelevisionFanaticEITelevisionFanaticPlugin.dll
%PROGRAMFILES%TelevisionFanaticEITelevisionFanaticradio.dll
%PROGRAMFILES%TelevisionFanaticEITelevisionFanaticregfft.dll
%PROGRAMFILES%TelevisionFanaticEITelevisionFanaticreghk.dll
%PROGRAMFILES%TelevisionFanaticEITelevisionFanaticregiet.dll
%PROGRAMFILES%TelevisionFanaticEITelevisionFanaticscript.dll
%PROGRAMFILES%TelevisionFanaticEITelevisionFanaticskin.dll
%PROGRAMFILES%TelevisionFanaticEITelevisionFanaticsknlcr.dll
%PROGRAMFILES%TelevisionFanaticEITelevisionFanaticskplay.exe
%PROGRAMFILES%TelevisionFanaticEITelevisionFanaticSrcAs.dll
%PROGRAMFILES%TelevisionFanaticEITelevisionFanaticSrchMn.exe
%PROGRAMFILES%TelevisionFanaticEITelevisionFanatictpinst.dll
%PROGRAMFILES%TelevisionFanaticEITelevisionFanaticuabtn.dll
%PROGRAMFILES%TelevisionFanaticEITelevisionFanaticAppIntegrator64.exe
%PROGRAMFILES%TelevisionFanaticEITelevisionFanaticAppIntegratorStub64.dll
%PROGRAMFILES%TelevisionFanaticEITelevisionFanaticBOOTSTRAP.JS
%PROGRAMFILES%TelevisionFanaticEITelevisionFanaticffxtbr.jar
%PROGRAMFILES%TelevisionFanaticEITelevisionFanaticCHROME.MANIFEST
%PROGRAMFILES%TelevisionFanaticEITelevisionFanaticCREXT.DLL
%PROGRAMFILES%TelevisionFanaticEITelevisionFanaticCrExtP64.exe
%PROGRAMFILES%TelevisionFanaticEITelevisionFanaticDPNMNGR.DLL
%PROGRAMFILES%TelevisionFanaticEITelevisionFanaticEXEMANAGER.DLL
%PROGRAMFILES%TelevisionFanaticEITelevisionFanaticHpg64.dll
%PROGRAMFILES%TelevisionFanaticEITelevisionFanaticINSTALL.RDF
%PROGRAMFILES%TelevisionFanaticEITelevisionFanaticinstallKeys.js
%PROGRAMFILES%TelevisionFanaticEITelevisionFanaticLOGO.BMP
%PROGRAMFILES%TelevisionFanaticEITelevisionFanaticNP64Stub.dll
%PROGRAMFILES%TelevisionFanaticEITelevisionFanaticT8EXTEX.DLL
%PROGRAMFILES%TelevisionFanaticEITelevisionFanaticT8EXTPEX.DLL
%PROGRAMFILES%TelevisionFanaticEITelevisionFanaticT8HTML.DLL
%PROGRAMFILES%TelevisionFanaticEITelevisionFanaticT8RES.DLL
%PROGRAMFILES%TelevisionFanaticEITelevisionFanaticT8TICKER.DLL
%PROGRAMFILES%TelevisionFanaticEITelevisionFanaticVERIFY.DLL
%PROGRAMFILES%TelevisionFanaticEITelevisionFanaticEIPlug.dll
%PROGRAMFILES%TelevisionFanaticEITelevisionFanaticEZSETP.dll
%PROGRAMFILES%TelevisionFanaticEITelevisionFanaticNP64EISb.dll
%PROGRAMFILES%TelevisionFanaticEITelevisionFanatic%#MANIFEST#%18369B.exe
%PROGRAMFILES%TelevisionFanaticauxstb.dll
%PROGRAMFILES%TelevisionFanaticbar.dll
%PROGRAMFILES%TelevisionFanaticbarsvc.exe
%PROGRAMFILES%TelevisionFanaticbprtct.dll
%PROGRAMFILES%TelevisionFanaticbrmon.exe
%PROGRAMFILES%TelevisionFanaticbrstub.dll
%PROGRAMFILES%TelevisionFanaticdatact.dll
%PROGRAMFILES%TelevisionFanaticdlghk.dll
%PROGRAMFILES%TelevisionFanaticdyn.dll
%PROGRAMFILES%TelevisionFanaticfeedmg.dll
%PROGRAMFILES%TelevisionFanatichighin.exe
%PROGRAMFILES%TelevisionFanatichkstub.dll
%PROGRAMFILES%TelevisionFanatichtmlmu.dll
%PROGRAMFILES%TelevisionFanatichttpct.dll
%PROGRAMFILES%TelevisionFanaticidle.dll
%PROGRAMFILES%TelevisionFanaticieovr.dll
%PROGRAMFILES%TelevisionFanaticimpipe.exe
%PROGRAMFILES%TelevisionFanaticmedint.exe
%PROGRAMFILES%TelevisionFanaticmlbtn.dll
%PROGRAMFILES%TelevisionFanaticmsg.dll
%PROGRAMFILES%TelevisionFanaticPlugin.dll
%PROGRAMFILES%TelevisionFanaticradio.dll
%PROGRAMFILES%TelevisionFanaticregfft.dll
%PROGRAMFILES%TelevisionFanaticreghk.dll
%PROGRAMFILES%TelevisionFanaticregiet.dll
%PROGRAMFILES%TelevisionFanaticscript.dll
%PROGRAMFILES%TelevisionFanaticskin.dll
%PROGRAMFILES%TelevisionFanaticsknlcr.dll
%PROGRAMFILES%TelevisionFanaticskplay.exe
%PROGRAMFILES%TelevisionFanaticSrcAs.dll
%PROGRAMFILES%TelevisionFanaticSrchMn.exe
%PROGRAMFILES%TelevisionFanatictpinst.dll
%PROGRAMFILES%TelevisionFanaticuabtn.dll
%PROGRAMFILES%TelevisionFanaticAppIntegrator64.exe
%PROGRAMFILES%TelevisionFanaticAppIntegratorStub64.dll
%PROGRAMFILES%TelevisionFanaticBOOTSTRAP.JS
%PROGRAMFILES%TelevisionFanaticffxtbr.jar
%PROGRAMFILES%TelevisionFanaticCHROME.MANIFEST
%PROGRAMFILES%TelevisionFanaticCREXT.DLL
%PROGRAMFILES%TelevisionFanaticCrExtP64.exe
%PROGRAMFILES%TelevisionFanaticDPNMNGR.DLL
%PROGRAMFILES%TelevisionFanaticEXEMANAGER.DLL
%PROGRAMFILES%TelevisionFanaticHpg64.dll
%PROGRAMFILES%TelevisionFanaticINSTALL.RDF
%PROGRAMFILES%TelevisionFanaticinstallKeys.js
%PROGRAMFILES%TelevisionFanaticLOGO.BMP
%PROGRAMFILES%TelevisionFanaticNP64Stub.dll
%PROGRAMFILES%TelevisionFanaticT8EXTEX.DLL
%PROGRAMFILES%TelevisionFanaticT8EXTPEX.DLL
%PROGRAMFILES%TelevisionFanaticT8HTML.DLL
%PROGRAMFILES%TelevisionFanaticT8RES.DLL
%PROGRAMFILES%TelevisionFanaticT8TICKER.DLL
%PROGRAMFILES%TelevisionFanaticVERIFY.DLL
%PROGRAMFILES%TelevisionFanaticEIPlug.dll
%PROGRAMFILES%TelevisionFanaticEZSETP.dll
%PROGRAMFILES%TelevisionFanaticNP64EISb.dll
%PROGRAMFILES%TelevisionFanatic%#MANIFEST#%18369B.exe
%APPDATA%TelevisionFanaticauxstb.dll
%APPDATA%TelevisionFanaticbar.dll
%APPDATA%TelevisionFanaticbarsvc.exe
%APPDATA%TelevisionFanaticbprtct.dll
%APPDATA%TelevisionFanaticbrmon.exe
%APPDATA%TelevisionFanaticbrstub.dll
%APPDATA%TelevisionFanaticdatact.dll
%APPDATA%TelevisionFanaticdlghk.dll
%APPDATA%TelevisionFanaticdyn.dll
%APPDATA%TelevisionFanaticfeedmg.dll
%APPDATA%TelevisionFanatichighin.exe
%APPDATA%TelevisionFanatichkstub.dll
%APPDATA%TelevisionFanatichtmlmu.dll
%APPDATA%TelevisionFanatichttpct.dll
%APPDATA%TelevisionFanaticidle.dll
%APPDATA%TelevisionFanaticieovr.dll
%APPDATA%TelevisionFanaticimpipe.exe
%APPDATA%TelevisionFanaticmedint.exe
%APPDATA%TelevisionFanaticmlbtn.dll
%APPDATA%TelevisionFanaticmsg.dll
%APPDATA%TelevisionFanaticPlugin.dll
%APPDATA%TelevisionFanaticradio.dll
%APPDATA%TelevisionFanaticregfft.dll
%APPDATA%TelevisionFanaticreghk.dll
%APPDATA%TelevisionFanaticregiet.dll
%APPDATA%TelevisionFanaticscript.dll
%APPDATA%TelevisionFanaticskin.dll
%APPDATA%TelevisionFanaticsknlcr.dll
%APPDATA%TelevisionFanaticskplay.exe
%APPDATA%TelevisionFanaticSrcAs.dll
%APPDATA%TelevisionFanaticSrchMn.exe
%APPDATA%TelevisionFanatictpinst.dll
%APPDATA%TelevisionFanaticuabtn.dll
%APPDATA%TelevisionFanaticAppIntegrator64.exe
%APPDATA%TelevisionFanaticAppIntegratorStub64.dll
%APPDATA%TelevisionFanaticBOOTSTRAP.JS
%APPDATA%TelevisionFanaticffxtbr.jar
%APPDATA%TelevisionFanaticCHROME.MANIFEST
%APPDATA%TelevisionFanaticCREXT.DLL
%APPDATA%TelevisionFanaticCrExtP64.exe
%APPDATA%TelevisionFanaticDPNMNGR.DLL
%APPDATA%TelevisionFanaticEXEMANAGER.DLL
%APPDATA%TelevisionFanaticHpg64.dll
%APPDATA%TelevisionFanaticINSTALL.RDF
%APPDATA%TelevisionFanaticinstallKeys.js
%APPDATA%TelevisionFanaticLOGO.BMP
%APPDATA%TelevisionFanaticNP64Stub.dll
%APPDATA%TelevisionFanaticT8EXTEX.DLL
%APPDATA%TelevisionFanaticT8EXTPEX.DLL
%APPDATA%TelevisionFanaticT8HTML.DLL
%APPDATA%TelevisionFanaticT8RES.DLL
%APPDATA%TelevisionFanaticT8TICKER.DLL
%APPDATA%TelevisionFanaticVERIFY.DLL
%APPDATA%TelevisionFanaticEIPlug.dll
%APPDATA%TelevisionFanaticEZSETP.dll
%APPDATA%TelevisionFanaticNP64EISb.dll
%APPDATA%TelevisionFanatic%#MANIFEST#%18369B.exe
Key HKLMSOFTWARETelevisionFanatic
Key HKLMSOFTWAREMicrosoftWindowsCurrentVersionUninstallTelevisionFanaticbar Uninstall Internet Explorer
Key HKLMSOFTWAREMicrosoftWindowsCurrentVersionUninstallTelevisionFanaticbar Uninstall Firefox
Key HKLMSOFTWAREMicrosoftWindowsCurrentVersionExplorerBrowser Helper Objectscb41fc95-f1b3-4797-8bb6-1012ff62abba
Key HKLMSOFTWAREMicrosoftWindowsCurrentVersionExplorerBrowser Helper Objects5d79f641-c168-40df-a32f-bacea7509e75
Key HKLMSOFTWAREClassesTelevisionFanatic.XMLSessionPlugin.1CLSID
Key HKLMSOFTWAREClassesTelevisionFanatic.XMLSessionPlugin.1
Key HKLMSOFTWAREClassesTelevisionFanatic.XMLSessionPluginCurVer
Key HKLMSOFTWAREClassesTelevisionFanatic.XMLSessionPluginCLSID
Key HKLMSOFTWAREClassesTelevisionFanatic.XMLSessionPlugin
Key HKLMSOFTWAREClassesTelevisionFanatic.UrlAlertButton.1CLSID
Key HKLMSOFTWAREClassesTelevisionFanatic.UrlAlertButton.1
Key HKLMSOFTWAREClassesTelevisionFanatic.UrlAlertButtonCurVer
Key HKLMSOFTWAREClassesTelevisionFanatic.UrlAlertButtonCLSID
Key HKLMSOFTWAREClassesTelevisionFanatic.UrlAlertButton
Key HKLMSOFTWAREClassesTelevisionFanatic.ToolbarProtector.1CLSID
Key HKLMSOFTWAREClassesTelevisionFanatic.ToolbarProtector.1
Key HKLMSOFTWAREClassesTelevisionFanatic.ToolbarProtectorCurVer
Key HKLMSOFTWAREClassesTelevisionFanatic.ToolbarProtectorCLSID
Key HKLMSOFTWAREClassesTelevisionFanatic.ToolbarProtector
Key HKLMSOFTWAREClassesTelevisionFanatic.ThirdPartyInstaller.1CLSID
Key HKLMSOFTWAREClassesTelevisionFanatic.ThirdPartyInstaller.1
Key HKLMSOFTWAREClassesTelevisionFanatic.ThirdPartyInstallerCurVer
Key HKLMSOFTWAREClassesTelevisionFanatic.ThirdPartyInstallerCLSID
Key HKLMSOFTWAREClassesTelevisionFanatic.ThirdPartyInstaller
Key HKLMSOFTWAREClassesTelevisionFanatic.SkinLauncherSettings.1CLSID
Key HKLMSOFTWAREClassesTelevisionFanatic.SkinLauncherSettings.1
Key HKLMSOFTWAREClassesTelevisionFanatic.SkinLauncherSettingsCurVer
Key HKLMSOFTWAREClassesTelevisionFanatic.SkinLauncherSettingsCLSID
Key HKLMSOFTWAREClassesTelevisionFanatic.SkinLauncherSettings
Key HKLMSOFTWAREClassesTelevisionFanatic.SkinLauncher.1CLSID
Key HKLMSOFTWAREClassesTelevisionFanatic.SkinLauncher.1
Key HKLMSOFTWAREClassesTelevisionFanatic.SkinLauncherCurVer
Key HKLMSOFTWAREClassesTelevisionFanatic.SkinLauncherCLSID
Key HKLMSOFTWAREClassesTelevisionFanatic.SkinLauncher
Key HKLMSOFTWAREClassesTelevisionFanatic.SettingsPlugin.1CLSID
Key HKLMSOFTWAREClassesTelevisionFanatic.SettingsPlugin.1
Key HKLMSOFTWAREClassesTelevisionFanatic.SettingsPluginCurVer
Key HKLMSOFTWAREClassesTelevisionFanatic.SettingsPluginCLSID
Key HKLMSOFTWAREClassesTelevisionFanatic.SettingsPlugin
Key HKLMSOFTWAREClassesTelevisionFanatic.ScriptButton.1CLSID
Key HKLMSOFTWAREClassesTelevisionFanatic.ScriptButton.1
Key HKLMSOFTWAREClassesTelevisionFanatic.ScriptButtonCurVer
Key HKLMSOFTWAREClassesTelevisionFanatic.ScriptButtonCLSID
Key HKLMSOFTWAREClassesTelevisionFanatic.ScriptButton
Key HKLMSOFTWAREClassesTelevisionFanatic.RadioSettings.1CLSID
Key HKLMSOFTWAREClassesTelevisionFanatic.RadioSettings.1
Key HKLMSOFTWAREClassesTelevisionFanatic.RadioSettingsCurVer
Key HKLMSOFTWAREClassesTelevisionFanatic.RadioSettingsCLSID
Key HKLMSOFTWAREClassesTelevisionFanatic.RadioSettings
Key HKLMSOFTWAREClassesTelevisionFanatic.Radio.1CLSID
Key HKLMSOFTWAREClassesTelevisionFanatic.Radio.1
Key HKLMSOFTWAREClassesTelevisionFanatic.RadioCurVer
Key HKLMSOFTWAREClassesTelevisionFanatic.RadioCLSID
Key HKLMSOFTWAREClassesTelevisionFanatic.Radio
Key HKLMSOFTWAREClassesTelevisionFanatic.PseudoTransparentPlugin.1CLSID
Key HKLMSOFTWAREClassesTelevisionFanatic.PseudoTransparentPlugin.1
Key HKLMSOFTWAREClassesTelevisionFanatic.PseudoTransparentPluginCurVer
Key HKLMSOFTWAREClassesTelevisionFanatic.PseudoTransparentPluginCLSID
Key HKLMSOFTWAREClassesTelevisionFanatic.PseudoTransparentPlugin
Key HKLMSOFTWAREClassesTelevisionFanatic.MultipleButton.1CLSID
Key HKLMSOFTWAREClassesTelevisionFanatic.MultipleButton.1
Key HKLMSOFTWAREClassesTelevisionFanatic.MultipleButtonCurVer
Key HKLMSOFTWAREClassesTelevisionFanatic.MultipleButtonCLSID
Key HKLMSOFTWAREClassesTelevisionFanatic.MultipleButton
Key HKLMSOFTWAREClassesTelevisionFanatic.HTMLPanel.1CLSID
Key HKLMSOFTWAREClassesTelevisionFanatic.HTMLPanel.1
Key HKLMSOFTWAREClassesTelevisionFanatic.HTMLPanelCurVer
Key HKLMSOFTWAREClassesTelevisionFanatic.HTMLPanelCLSID
Key HKLMSOFTWAREClassesTelevisionFanatic.HTMLPanel
Key HKLMSOFTWAREClassesTelevisionFanatic.HTMLMenu.1CLSID
Key HKLMSOFTWAREClassesTelevisionFanatic.HTMLMenu.1
Key HKLMSOFTWAREClassesTelevisionFanatic.HTMLMenuCurVer
Key HKLMSOFTWAREClassesTelevisionFanatic.HTMLMenuCLSID
Key HKLMSOFTWAREClassesTelevisionFanatic.HTMLMenu
Key HKLMSOFTWAREClassesTelevisionFanatic.FeedManager.1CLSID
Key HKLMSOFTWAREClassesTelevisionFanatic.FeedManager.1
Key HKLMSOFTWAREClassesTelevisionFanatic.FeedManagerCurVer
Key HKLMSOFTWAREClassesTelevisionFanatic.FeedManagerCLSID
Key HKLMSOFTWAREClassesTelevisionFanatic.FeedManager
Key HKLMSOFTWAREClassesTelevisionFanatic.DynamicBarButton.1CLSID
Key HKLMSOFTWAREClassesTelevisionFanatic.DynamicBarButton.1
Key HKLMSOFTWAREClassesTelevisionFanatic.DynamicBarButtonCurVer
Key HKLMSOFTWAREClassesTelevisionFanatic.DynamicBarButtonCLSID
Key HKLMSOFTWAREClassesTelevisionFanatic.DynamicBarButton18369B.exe
%APPDATA%TelevisionFanaticauxstb.dll
%APPDATA%TelevisionFanaticbar.dll
%APPDATA%TelevisionFanaticbarsvc.exe
%APPDATA%TelevisionFanaticbprtct.dll
%APPDATA%TelevisionFanaticbrmon.exe
%APPDATA%TelevisionFanaticbrstub.dll
%APPDATA%TelevisionFanaticdatact.dll
%APPDATA%TelevisionFanaticdlghk.dll
%APPDATA%TelevisionFanaticdyn.dll
%APPDATA%TelevisionFanaticfeedmg.dll
%APPDATA%TelevisionFanatichighin.exe
%APPDATA%TelevisionFanatichkstub.dll
%APPDATA%TelevisionFanatichtmlmu.dll
%APPDATA%TelevisionFanatichttpct.dll
%APPDATA%TelevisionFanaticidle.dll
%APPDATA%TelevisionFanaticieovr.dll
%APPDATA%TelevisionFanaticimpipe.exe
%APPDATA%TelevisionFanaticmedint.exe
%APPDATA%TelevisionFanaticmlbtn.dll
%APPDATA%TelevisionFanaticmsg.dll
%APPDATA%TelevisionFanaticPlugin.dll
%APPDATA%TelevisionFanaticradio.dll
%APPDATA%TelevisionFanaticregfft.dll
%APPDATA%TelevisionFanaticreghk.dll
%APPDATA%TelevisionFanaticregiet.dll
%APPDATA%TelevisionFanaticscript.dll
%APPDATA%TelevisionFanaticskin.dll
%APPDATA%TelevisionFanaticsknlcr.dll
%APPDATA%TelevisionFanaticskplay.exe
%APPDATA%TelevisionFanaticSrcAs.dll
%APPDATA%TelevisionFanaticSrchMn.exe
%APPDATA%TelevisionFanatictpinst.dll
%APPDATA%TelevisionFanaticuabtn.dll
%APPDATA%TelevisionFanaticAppIntegrator64.exe
%APPDATA%TelevisionFanaticAppIntegratorStub64.dll
%APPDATA%TelevisionFanaticBOOTSTRAP.JS
%APPDATA%TelevisionFanaticffxtbr.jar
%APPDATA%TelevisionFanaticCHROME.MANIFEST
%APPDATA%TelevisionFanaticCREXT.DLL
%APPDATA%TelevisionFanaticCrExtP64.exe
%APPDATA%TelevisionFanaticDPNMNGR.DLL
%APPDATA%TelevisionFanaticEXEMANAGER.DLL
%APPDATA%TelevisionFanaticHpg64.dll
%APPDATA%TelevisionFanaticINSTALL.RDF
%APPDATA%TelevisionFanaticinstallKeys.js
%APPDATA%TelevisionFanaticLOGO.BMP
%APPDATA%TelevisionFanaticNP64Stub.dll
%APPDATA%TelevisionFanaticT8EXTEX.DLL
%APPDATA%TelevisionFanaticT8EXTPEX.DLL
%APPDATA%TelevisionFanaticT8HTML.DLL
%APPDATA%TelevisionFanaticT8RES.DLL
%APPDATA%TelevisionFanaticT8TICKER.DLL
%APPDATA%TelevisionFanaticVERIFY.DLL
%APPDATA%TelevisionFanaticEIPlug.dll
%APPDATA%TelevisionFanaticEZSETP.dll
%APPDATA%TelevisionFanaticNP64EISb.dll
%APPDATA%TelevisionFanatic%APPDATA%TelevisionFanatic
%PROGRAMFILES%TelevisionFanatic
%PROGRAMFILES%TelevisionFanaticEI
%PROGRAMFILES%TelevisionFanaticEITelevisionFanaticauxstb.dll
%PROGRAMFILES%TelevisionFanaticEITelevisionFanaticbar.dll
%PROGRAMFILES%TelevisionFanaticEITelevisionFanaticbarsvc.exe
%PROGRAMFILES%TelevisionFanaticEITelevisionFanaticbprtct.dll
%PROGRAMFILES%TelevisionFanaticEITelevisionFanaticbrmon.exe
%PROGRAMFILES%TelevisionFanaticEITelevisionFanaticbrstub.dll
%PROGRAMFILES%TelevisionFanaticEITelevisionFanaticdatact.dll
%PROGRAMFILES%TelevisionFanaticEITelevisionFanaticdlghk.dll
%PROGRAMFILES%TelevisionFanaticEITelevisionFanaticdyn.dll
%PROGRAMFILES%TelevisionFanaticEITelevisionFanaticfeedmg.dll
%PROGRAMFILES%TelevisionFanaticEITelevisionFanatichighin.exe
%PROGRAMFILES%TelevisionFanaticEITelevisionFanatichkstub.dll
%PROGRAMFILES%TelevisionFanaticEITelevisionFanatichtmlmu.dll
%PROGRAMFILES%TelevisionFanaticEITelevisionFanatichttpct.dll
%PROGRAMFILES%TelevisionFanaticEITelevisionFanaticidle.dll
%PROGRAMFILES%TelevisionFanaticEITelevisionFanaticieovr.dll
%PROGRAMFILES%TelevisionFanaticEITelevisionFanaticimpipe.exe
%PROGRAMFILES%TelevisionFanaticEITelevisionFanaticmedint.exe
%PROGRAMFILES%TelevisionFanaticEITelevisionFanaticmlbtn.dll
%PROGRAMFILES%TelevisionFanaticEITelevisionFanaticmsg.dll
%PROGRAMFILES%TelevisionFanaticEITelevisionFanaticPlugin.dll
%PROGRAMFILES%TelevisionFanaticEITelevisionFanaticradio.dll
%PROGRAMFILES%TelevisionFanaticEITelevisionFanaticregfft.dll
%PROGRAMFILES%TelevisionFanaticEITelevisionFanaticreghk.dll
%PROGRAMFILES%TelevisionFanaticEITelevisionFanaticregiet.dll
%PROGRAMFILES%TelevisionFanaticEITelevisionFanaticscript.dll
%PROGRAMFILES%TelevisionFanaticEITelevisionFanaticskin.dll
%PROGRAMFILES%TelevisionFanaticEITelevisionFanaticsknlcr.dll
%PROGRAMFILES%TelevisionFanaticEITelevisionFanaticskplay.exe
%PROGRAMFILES%TelevisionFanaticEITelevisionFanaticSrcAs.dll
%PROGRAMFILES%TelevisionFanaticEITelevisionFanaticSrchMn.exe
%PROGRAMFILES%TelevisionFanaticEITelevisionFanatictpinst.dll
%PROGRAMFILES%TelevisionFanaticEITelevisionFanaticuabtn.dll
%PROGRAMFILES%TelevisionFanaticEITelevisionFanaticAppIntegrator64.exe
%PROGRAMFILES%TelevisionFanaticEITelevisionFanaticAppIntegratorStub64.dll
%PROGRAMFILES%TelevisionFanaticEITelevisionFanaticBOOTSTRAP.JS
%PROGRAMFILES%TelevisionFanaticEITelevisionFanaticffxtbr.jar
%PROGRAMFILES%TelevisionFanaticEITelevisionFanaticCHROME.MANIFEST
%PROGRAMFILES%TelevisionFanaticEITelevisionFanaticCREXT.DLL
%PROGRAMFILES%TelevisionFanaticEITelevisionFanaticCrExtP64.exe
%PROGRAMFILES%TelevisionFanaticEITelevisionFanaticDPNMNGR.DLL
%PROGRAMFILES%TelevisionFanaticEITelevisionFanaticEXEMANAGER.DLL
%PROGRAMFILES%TelevisionFanaticEITelevisionFanaticHpg64.dll
%PROGRAMFILES%TelevisionFanaticEITelevisionFanaticINSTALL.RDF
%PROGRAMFILES%TelevisionFanaticEITelevisionFanaticinstallKeys.js
%PROGRAMFILES%TelevisionFanaticEITelevisionFanaticLOGO.BMP
%PROGRAMFILES%TelevisionFanaticEITelevisionFanaticNP64Stub.dll
%PROGRAMFILES%TelevisionFanaticEITelevisionFanaticT8EXTEX.DLL
%PROGRAMFILES%TelevisionFanaticEITelevisionFanaticT8EXTPEX.DLL
%PROGRAMFILES%TelevisionFanaticEITelevisionFanaticT8HTML.DLL
%PROGRAMFILES%TelevisionFanaticEITelevisionFanaticT8RES.DLL
%PROGRAMFILES%TelevisionFanaticEITelevisionFanaticT8TICKER.DLL
%PROGRAMFILES%TelevisionFanaticEITelevisionFanaticVERIFY.DLL
%PROGRAMFILES%TelevisionFanaticEITelevisionFanaticEIPlug.dll
%PROGRAMFILES%TelevisionFanaticEITelevisionFanaticEZSETP.dll
%PROGRAMFILES%TelevisionFanaticEITelevisionFanaticNP64EISb.dll
%PROGRAMFILES%TelevisionFanaticEITelevisionFanatic%#MANIFEST#%18369B.exe
%PROGRAMFILES%TelevisionFanaticauxstb.dll
%PROGRAMFILES%TelevisionFanaticbar.dll
%PROGRAMFILES%TelevisionFanaticbarsvc.exe
%PROGRAMFILES%TelevisionFanaticbprtct.dll
%PROGRAMFILES%TelevisionFanaticbrmon.exe
%PROGRAMFILES%TelevisionFanaticbrstub.dll
%PROGRAMFILES%TelevisionFanaticdatact.dll
%PROGRAMFILES%TelevisionFanaticdlghk.dll
%PROGRAMFILES%TelevisionFanaticdyn.dll
%PROGRAMFILES%TelevisionFanaticfeedmg.dll
%PROGRAMFILES%TelevisionFanatichighin.exe
%PROGRAMFILES%TelevisionFanatichkstub.dll
%PROGRAMFILES%TelevisionFanatichtmlmu.dll
%PROGRAMFILES%TelevisionFanatichttpct.dll
%PROGRAMFILES%TelevisionFanaticidle.dll
%PROGRAMFILES%TelevisionFanaticieovr.dll
%PROGRAMFILES%TelevisionFanaticimpipe.exe
%PROGRAMFILES%TelevisionFanaticmedint.exe
%PROGRAMFILES%TelevisionFanaticmlbtn.dll
%PROGRAMFILES%TelevisionFanaticmsg.dll
%PROGRAMFILES%TelevisionFanaticPlugin.dll
%PROGRAMFILES%TelevisionFanaticradio.dll
%PROGRAMFILES%TelevisionFanaticregfft.dll
%PROGRAMFILES%TelevisionFanaticreghk.dll
%PROGRAMFILES%TelevisionFanaticregiet.dll
%PROGRAMFILES%TelevisionFanaticscript.dll
%PROGRAMFILES%TelevisionFanaticskin.dll
%PROGRAMFILES%TelevisionFanaticsknlcr.dll
%PROGRAMFILES%TelevisionFanaticskplay.exe
%PROGRAMFILES%TelevisionFanaticSrcAs.dll
%PROGRAMFILES%TelevisionFanaticSrchMn.exe
%PROGRAMFILES%TelevisionFanatictpinst.dll
%PROGRAMFILES%TelevisionFanaticuabtn.dll
%PROGRAMFILES%TelevisionFanaticAppIntegrator64.exe
%PROGRAMFILES%TelevisionFanaticAppIntegratorStub64.dll
%PROGRAMFILES%TelevisionFanaticBOOTSTRAP.JS
%PROGRAMFILES%TelevisionFanaticffxtbr.jar
%PROGRAMFILES%TelevisionFanaticCHROME.MANIFEST
%PROGRAMFILES%TelevisionFanaticCREXT.DLL
%PROGRAMFILES%TelevisionFanaticCrExtP64.exe
%PROGRAMFILES%TelevisionFanaticDPNMNGR.DLL
%PROGRAMFILES%TelevisionFanaticEXEMANAGER.DLL
%PROGRAMFILES%TelevisionFanaticHpg64.dll
%PROGRAMFILES%TelevisionFanaticINSTALL.RDF
%PROGRAMFILES%TelevisionFanaticinstallKeys.js
%PROGRAMFILES%TelevisionFanaticLOGO.BMP
%PROGRAMFILES%TelevisionFanaticNP64Stub.dll
%PROGRAMFILES%TelevisionFanaticT8EXTEX.DLL
%PROGRAMFILES%TelevisionFanaticT8EXTPEX.DLL
%PROGRAMFILES%TelevisionFanaticT8HTML.DLL
%PROGRAMFILES%TelevisionFanaticT8RES.DLL
%PROGRAMFILES%TelevisionFanaticT8TICKER.DLL
%PROGRAMFILES%TelevisionFanaticVERIFY.DLL
%PROGRAMFILES%TelevisionFanaticEIPlug.dll
%PROGRAMFILES%TelevisionFanaticEZSETP.dll
%PROGRAMFILES%TelevisionFanaticNP64EISb.dll
%PROGRAMFILES%TelevisionFanatic%#MANIFEST#%18369B.exe
%APPDATA%TelevisionFanaticauxstb.dll
%APPDATA%TelevisionFanaticbar.dll
%APPDATA%TelevisionFanaticbarsvc.exe
%APPDATA%TelevisionFanaticbprtct.dll
%APPDATA%TelevisionFanaticbrmon.exe
%APPDATA%TelevisionFanaticbrstub.dll
%APPDATA%TelevisionFanaticdatact.dll
%APPDATA%TelevisionFanaticdlghk.dll
%APPDATA%TelevisionFanaticdyn.dll
%APPDATA%TelevisionFanaticfeedmg.dll
%APPDATA%TelevisionFanatichighin.exe
%APPDATA%TelevisionFanatichkstub.dll
%APPDATA%TelevisionFanatichtmlmu.dll
%APPDATA%TelevisionFanatichttpct.dll
%APPDATA%TelevisionFanaticidle.dll
%APPDATA%TelevisionFanaticieovr.dll
%APPDATA%TelevisionFanaticimpipe.exe
%APPDATA%TelevisionFanaticmedint.exe
%APPDATA%TelevisionFanaticmlbtn.dll
%APPDATA%TelevisionFanaticmsg.dll
%APPDATA%TelevisionFanaticPlugin.dll
%APPDATA%TelevisionFanaticradio.dll
%APPDATA%TelevisionFanaticregfft.dll
%APPDATA%TelevisionFanaticreghk.dll
%APPDATA%TelevisionFanaticregiet.dll
%APPDATA%TelevisionFanaticscript.dll
%APPDATA%TelevisionFanaticskin.dll
%APPDATA%TelevisionFanaticsknlcr.dll
%APPDATA%TelevisionFanaticskplay.exe
%APPDATA%TelevisionFanaticSrcAs.dll
%APPDATA%TelevisionFanaticSrchMn.exe
%APPDATA%TelevisionFanatictpinst.dll
%APPDATA%TelevisionFanaticuabtn.dll
%APPDATA%TelevisionFanaticAppIntegrator64.exe
%APPDATA%TelevisionFanaticAppIntegratorStub64.dll
%APPDATA%TelevisionFanaticBOOTSTRAP.JS
%APPDATA%TelevisionFanaticffxtbr.jar
%APPDATA%TelevisionFanaticCHROME.MANIFEST
%APPDATA%TelevisionFanaticCREXT.DLL
%APPDATA%TelevisionFanaticCrExtP64.exe
%APPDATA%TelevisionFanaticDPNMNGR.DLL
%APPDATA%TelevisionFanaticEXEMANAGER.DLL
%APPDATA%TelevisionFanaticHpg64.dll
%APPDATA%TelevisionFanaticINSTALL.RDF
%APPDATA%TelevisionFanaticinstallKeys.js
%APPDATA%TelevisionFanaticLOGO.BMP
%APPDATA%TelevisionFanaticNP64Stub.dll
%APPDATA%TelevisionFanaticT8EXTEX.DLL
%APPDATA%TelevisionFanaticT8EXTPEX.DLL
%APPDATA%TelevisionFanaticT8HTML.DLL
%APPDATA%TelevisionFanaticT8RES.DLL
%APPDATA%TelevisionFanaticT8TICKER.DLL
%APPDATA%TelevisionFanaticVERIFY.DLL
%APPDATA%TelevisionFanaticEIPlug.dll
%APPDATA%TelevisionFanaticEZSETP.dll
%APPDATA%TelevisionFanaticNP64EISb.dll
%APPDATA%TelevisionFanatic%#MANIFEST#%18369B.exe
Key HKLMSOFTWARETelevisionFanatic
Key HKLMSOFTWAREMicrosoftWindowsCurrentVersionUninstallTelevisionFanaticbar Uninstall Internet Explorer
Key HKLMSOFTWAREMicrosoftWindowsCurrentVersionUninstallTelevisionFanaticbar Uninstall Firefox
Key HKLMSOFTWAREMicrosoftWindowsCurrentVersionExplorerBrowser Helper Objectscb41fc95-f1b3-4797-8bb6-1012ff62abba
Key HKLMSOFTWAREMicrosoftWindowsCurrentVersionExplorerBrowser Helper Objects5d79f641-c168-40df-a32f-bacea7509e75
Key HKLMSOFTWAREClassesTelevisionFanatic.XMLSessionPlugin.1CLSID
Key HKLMSOFTWAREClassesTelevisionFanatic.XMLSessionPlugin.1
Key HKLMSOFTWAREClassesTelevisionFanatic.XMLSessionPluginCurVer
Key HKLMSOFTWAREClassesTelevisionFanatic.XMLSessionPluginCLSID
Key HKLMSOFTWAREClassesTelevisionFanatic.XMLSessionPlugin
Key HKLMSOFTWAREClassesTelevisionFanatic.UrlAlertButton.1CLSID
Key HKLMSOFTWAREClassesTelevisionFanatic.UrlAlertButton.1
Key HKLMSOFTWAREClassesTelevisionFanatic.UrlAlertButtonCurVer
Key HKLMSOFTWAREClassesTelevisionFanatic.UrlAlertButtonCLSID
Key HKLMSOFTWAREClassesTelevisionFanatic.UrlAlertButton
Key HKLMSOFTWAREClassesTelevisionFanatic.ToolbarProtector.1CLSID
Key HKLMSOFTWAREClassesTelevisionFanatic.ToolbarProtector.1
Key HKLMSOFTWAREClassesTelevisionFanatic.ToolbarProtectorCurVer
Key HKLMSOFTWAREClassesTelevisionFanatic.ToolbarProtectorCLSID
Key HKLMSOFTWAREClassesTelevisionFanatic.ToolbarProtector
Key HKLMSOFTWAREClassesTelevisionFanatic.ThirdPartyInstaller.1CLSID
Key HKLMSOFTWAREClassesTelevisionFanatic.ThirdPartyInstaller.1
Key HKLMSOFTWAREClassesTelevisionFanatic.ThirdPartyInstallerCurVer
Key HKLMSOFTWAREClassesTelevisionFanatic.ThirdPartyInstallerCLSID
Key HKLMSOFTWAREClassesTelevisionFanatic.ThirdPartyInstaller
Key HKLMSOFTWAREClassesTelevisionFanatic.SkinLauncherSettings.1CLSID
Key HKLMSOFTWAREClassesTelevisionFanatic.SkinLauncherSettings.1
Key HKLMSOFTWAREClassesTelevisionFanatic.SkinLauncherSettingsCurVer
Key HKLMSOFTWAREClassesTelevisionFanatic.SkinLauncherSettingsCLSID
Key HKLMSOFTWAREClassesTelevisionFanatic.SkinLauncherSettings
Key HKLMSOFTWAREClassesTelevisionFanatic.SkinLauncher.1CLSID
Key HKLMSOFTWAREClassesTelevisionFanatic.SkinLauncher.1
Key HKLMSOFTWAREClassesTelevisionFanatic.SkinLauncherCurVer
Key HKLMSOFTWAREClassesTelevisionFanatic.SkinLauncherCLSID
Key HKLMSOFTWAREClassesTelevisionFanatic.SkinLauncher
Key HKLMSOFTWAREClassesTelevisionFanatic.SettingsPlugin.1CLSID
Key HKLMSOFTWAREClassesTelevisionFanatic.SettingsPlugin.1
Key HKLMSOFTWAREClassesTelevisionFanatic.SettingsPluginCurVer
Key HKLMSOFTWAREClassesTelevisionFanatic.SettingsPluginCLSID
Key HKLMSOFTWAREClassesTelevisionFanatic.SettingsPlugin
Key HKLMSOFTWAREClassesTelevisionFanatic.ScriptButton.1CLSID
Key HKLMSOFTWAREClassesTelevisionFanatic.ScriptButton.1
Key HKLMSOFTWAREClassesTelevisionFanatic.ScriptButtonCurVer
Key HKLMSOFTWAREClassesTelevisionFanatic.ScriptButtonCLSID
Key HKLMSOFTWAREClassesTelevisionFanatic.ScriptButton
Key HKLMSOFTWAREClassesTelevisionFanatic.RadioSettings.1CLSID
Key HKLMSOFTWAREClassesTelevisionFanatic.RadioSettings.1
Key HKLMSOFTWAREClassesTelevisionFanatic.RadioSettingsCurVer
Key HKLMSOFTWAREClassesTelevisionFanatic.RadioSettingsCLSID
Key HKLMSOFTWAREClassesTelevisionFanatic.RadioSettings
Key HKLMSOFTWAREClassesTelevisionFanatic.Radio.1CLSID
Key HKLMSOFTWAREClassesTelevisionFanatic.Radio.1
Key HKLMSOFTWAREClassesTelevisionFanatic.RadioCurVer
Key HKLMSOFTWAREClassesTelevisionFanatic.RadioCLSID
Key HKLMSOFTWAREClassesTelevisionFanatic.Radio
Key HKLMSOFTWAREClassesTelevisionFanatic.PseudoTransparentPlugin.1CLSID
Key HKLMSOFTWAREClassesTelevisionFanatic.PseudoTransparentPlugin.1
Key HKLMSOFTWAREClassesTelevisionFanatic.PseudoTransparentPluginCurVer
Key HKLMSOFTWAREClassesTelevisionFanatic.PseudoTransparentPluginCLSID
Key HKLMSOFTWAREClassesTelevisionFanatic.PseudoTransparentPlugin
Key HKLMSOFTWAREClassesTelevisionFanatic.MultipleButton.1CLSID
Key HKLMSOFTWAREClassesTelevisionFanatic.MultipleButton.1
Key HKLMSOFTWAREClassesTelevisionFanatic.MultipleButtonCurVer
Key HKLMSOFTWAREClassesTelevisionFanatic.MultipleButtonCLSID
Key HKLMSOFTWAREClassesTelevisionFanatic.MultipleButton
Key HKLMSOFTWAREClassesTelevisionFanatic.HTMLPanel.1CLSID
Key HKLMSOFTWAREClassesTelevisionFanatic.HTMLPanel.1
Key HKLMSOFTWAREClassesTelevisionFanatic.HTMLPanelCurVer
Key HKLMSOFTWAREClassesTelevisionFanatic.HTMLPanelCLSID
Key HKLMSOFTWAREClassesTelevisionFanatic.HTMLPanel
Key HKLMSOFTWAREClassesTelevisionFanatic.HTMLMenu.1CLSID
Key HKLMSOFTWAREClassesTelevisionFanatic.HTMLMenu.1
Key HKLMSOFTWAREClassesTelevisionFanatic.HTMLMenuCurVer
Key HKLMSOFTWAREClassesTelevisionFanatic.HTMLMenuCLSID
Key HKLMSOFTWAREClassesTelevisionFanatic.HTMLMenu
Key HKLMSOFTWAREClassesTelevisionFanatic.FeedManager.1CLSID
Key HKLMSOFTWAREClassesTelevisionFanatic.FeedManager.1
Key HKLMSOFTWAREClassesTelevisionFanatic.FeedManagerCurVer
Key HKLMSOFTWAREClassesTelevisionFanatic.FeedManagerCLSID
Key HKLMSOFTWAREClassesTelevisionFanatic.FeedManager
Key HKLMSOFTWAREClassesTelevisionFanatic.DynamicBarButton.1CLSID
Key HKLMSOFTWAREClassesTelevisionFanatic.DynamicBarButton.1
Key HKLMSOFTWAREClassesTelevisionFanatic.DynamicBarButtonCurVer
Key HKLMSOFTWAREClassesTelevisionFanatic.DynamicBarButtonCLSID
Key HKLMSOFTWAREClassesTelevisionFanatic.DynamicBarButton18369B.exe
Key HKLMSOFTWARETelevisionFanatic
Key HKLMSOFTWAREMicrosoftWindowsCurrentVersionUninstallTelevisionFanaticbar Uninstall Internet Explorer
Key HKLMSOFTWAREMicrosoftWindowsCurrentVersionUninstallTelevisionFanaticbar Uninstall Firefox
Key HKLMSOFTWAREMicrosoftWindowsCurrentVersionExplorerBrowser Helper Objectscb41fc95-f1b3-4797-8bb6-1012ff62abba
Key HKLMSOFTWAREMicrosoftWindowsCurrentVersionExplorerBrowser Helper Objects5d79f641-c168-40df-a32f-bacea7509e75
Key HKLMSOFTWAREClassesTelevisionFanatic.XMLSessionPlugin.1CLSID
Key HKLMSOFTWAREClassesTelevisionFanatic.XMLSessionPlugin.1
Key HKLMSOFTWAREClassesTelevisionFanatic.XMLSessionPluginCurVer
Key HKLMSOFTWAREClassesTelevisionFanatic.XMLSessionPluginCLSID
Key HKLMSOFTWAREClassesTelevisionFanatic.XMLSessionPlugin
Key HKLMSOFTWAREClassesTelevisionFanatic.UrlAlertButton.1CLSID
Key HKLMSOFTWAREClassesTelevisionFanatic.UrlAlertButton.1
Key HKLMSOFTWAREClassesTelevisionFanatic.UrlAlertButtonCurVer
Key HKLMSOFTWAREClassesTelevisionFanatic.UrlAlertButtonCLSID
Key HKLMSOFTWAREClassesTelevisionFanatic.UrlAlertButton
Key HKLMSOFTWAREClassesTelevisionFanatic.ToolbarProtector.1CLSID
Key HKLMSOFTWAREClassesTelevisionFanatic.ToolbarProtector.1
Key HKLMSOFTWAREClassesTelevisionFanatic.ToolbarProtectorCurVer
Key HKLMSOFTWAREClassesTelevisionFanatic.ToolbarProtectorCLSID
Key HKLMSOFTWAREClassesTelevisionFanatic.ToolbarProtector
Key HKLMSOFTWAREClassesTelevisionFanatic.ThirdPartyInstaller.1CLSID
Key HKLMSOFTWAREClassesTelevisionFanatic.ThirdPartyInstaller.1
Key HKLMSOFTWAREClassesTelevisionFanatic.ThirdPartyInstallerCurVer
Key HKLMSOFTWAREClassesTelevisionFanatic.ThirdPartyInstallerCLSID
Key HKLMSOFTWAREClassesTelevisionFanatic.ThirdPartyInstaller
Key HKLMSOFTWAREClassesTelevisionFanatic.SkinLauncherSettings.1CLSID
Key HKLMSOFTWAREClassesTelevisionFanatic.SkinLauncherSettings.1
Key HKLMSOFTWAREClassesTelevisionFanatic.SkinLauncherSettingsCurVer
Key HKLMSOFTWAREClassesTelevisionFanatic.SkinLauncherSettingsCLSID
Key HKLMSOFTWAREClassesTelevisionFanatic.SkinLauncherSettings
Key HKLMSOFTWAREClassesTelevisionFanatic.SkinLauncher.1CLSID
Key HKLMSOFTWAREClassesTelevisionFanatic.SkinLauncher.1
Key HKLMSOFTWAREClassesTelevisionFanatic.SkinLauncherCurVer
Key HKLMSOFTWAREClassesTelevisionFanatic.SkinLauncherCLSID
Key HKLMSOFTWAREClassesTelevisionFanatic.SkinLauncher
Key HKLMSOFTWAREClassesTelevisionFanatic.SettingsPlugin.1CLSID
Key HKLMSOFTWAREClassesTelevisionFanatic.SettingsPlugin.1
Key HKLMSOFTWAREClassesTelevisionFanatic.SettingsPluginCurVer
Key HKLMSOFTWAREClassesTelevisionFanatic.SettingsPluginCLSID
Key HKLMSOFTWAREClassesTelevisionFanatic.SettingsPlugin
Key HKLMSOFTWAREClassesTelevisionFanatic.ScriptButton.1CLSID
Key HKLMSOFTWAREClassesTelevisionFanatic.ScriptButton.1
Key HKLMSOFTWAREClassesTelevisionFanatic.ScriptButtonCurVer
Key HKLMSOFTWAREClassesTelevisionFanatic.ScriptButtonCLSID
Key HKLMSOFTWAREClassesTelevisionFanatic.ScriptButton
Key HKLMSOFTWAREClassesTelevisionFanatic.RadioSettings.1CLSID
Key HKLMSOFTWAREClassesTelevisionFanatic.RadioSettings.1
Key HKLMSOFTWAREClassesTelevisionFanatic.RadioSettingsCurVer
Key HKLMSOFTWAREClassesTelevisionFanatic.RadioSettingsCLSID
Key HKLMSOFTWAREClassesTelevisionFanatic.RadioSettings
Key HKLMSOFTWAREClassesTelevisionFanatic.Radio.1CLSID
Key HKLMSOFTWAREClassesTelevisionFanatic.Radio.1
Key HKLMSOFTWAREClassesTelevisionFanatic.RadioCurVer
Key HKLMSOFTWAREClassesTelevisionFanatic.RadioCLSID
Key HKLMSOFTWAREClassesTelevisionFanatic.Radio
Key HKLMSOFTWAREClassesTelevisionFanatic.PseudoTransparentPlugin.1CLSID
Key HKLMSOFTWAREClassesTelevisionFanatic.PseudoTransparentPlugin.1
Key HKLMSOFTWAREClassesTelevisionFanatic.PseudoTransparentPluginCurVer
Key HKLMSOFTWAREClassesTelevisionFanatic.PseudoTransparentPluginCLSID
Key HKLMSOFTWAREClassesTelevisionFanatic.PseudoTransparentPlugin
Key HKLMSOFTWAREClassesTelevisionFanatic.MultipleButton.1CLSID
Key HKLMSOFTWAREClassesTelevisionFanatic.MultipleButton.1
Key HKLMSOFTWAREClassesTelevisionFanatic.MultipleButtonCurVer
Key HKLMSOFTWAREClassesTelevisionFanatic.MultipleButtonCLSID
Key HKLMSOFTWAREClassesTelevisionFanatic.MultipleButton
Key HKLMSOFTWAREClassesTelevisionFanatic.HTMLPanel.1CLSID
Key HKLMSOFTWAREClassesTelevisionFanatic.HTMLPanel.1
Key HKLMSOFTWAREClassesTelevisionFanatic.HTMLPanelCurVer
Key HKLMSOFTWAREClassesTelevisionFanatic.HTMLPanelCLSID
Key HKLMSOFTWAREClassesTelevisionFanatic.HTMLPanel
Key HKLMSOFTWAREClassesTelevisionFanatic.HTMLMenu.1CLSID
Key HKLMSOFTWAREClassesTelevisionFanatic.HTMLMenu.1
Key HKLMSOFTWAREClassesTelevisionFanatic.HTMLMenuCurVer
Key HKLMSOFTWAREClassesTelevisionFanatic.HTMLMenuCLSID
Key HKLMSOFTWAREClassesTelevisionFanatic.HTMLMenu
Key HKLMSOFTWAREClassesTelevisionFanatic.FeedManager.1CLSID
Key HKLMSOFTWAREClassesTelevisionFanatic.FeedManager.1
Key HKLMSOFTWAREClassesTelevisionFanatic.FeedManagerCurVer
Key HKLMSOFTWAREClassesTelevisionFanatic.FeedManagerCLSID
Key HKLMSOFTWAREClassesTelevisionFanatic.FeedManager
Key HKLMSOFTWAREClassesTelevisionFanatic.DynamicBarButton.1CLSID
Key HKLMSOFTWAREClassesTelevisionFanatic.DynamicBarButton.1
Key HKLMSOFTWAREClassesTelevisionFanatic.DynamicBarButtonCurVer
Key HKLMSOFTWAREClassesTelevisionFanatic.DynamicBarButtonCLSID
Key HKLMSOFTWAREClassesTelevisionFanatic.DynamicBarButton
 Error Causes

 This error is very frustrating and it annoys pretty much anyone who encountered it but do not worry we have a solution for you.
First thing is to confirm the error prompt, Click on the OK button and then on X to exit Windows 10 installation wizard. Click on yes to confirm that you want to exit the setup.
You will find yourself in original installation windows.
On that screen choose and click on Repair your computer. Choose an option screen that will pop up, click on Troubleshoot. In the advanced options, click on the command prompt.
Once you are in command prompts type DISKPART and hit ENTER
In the diskpart prompt type LIST DISK and hit ENTER again.
type SELECT DISK #, where # is listed disk number where you would like to install Windows.
type LIST VOLUME in order to list volumes in the selected disk and hit ENTER
You need to select the volume on which you would like to place your WINDOWS, to do this type in SELECT VOLUME #, where # is the listed number of the volume
Finally, type FORMAT FS=NTFS and hit ENTER
You have successfully formated a given volume, you can now exit DISKPART and return to setup, to exit DISKPART simply type exit and hit ENTER.
Leave command prompt as well by again typing exit and hitting ENTER
You will be returned to Choose an option screen, click on Turn off your PC.
Your drive has been successfully formatted and it is ready for clean Windows installation, you can now restart your Windows 10 installation and the process will complete without errors.
 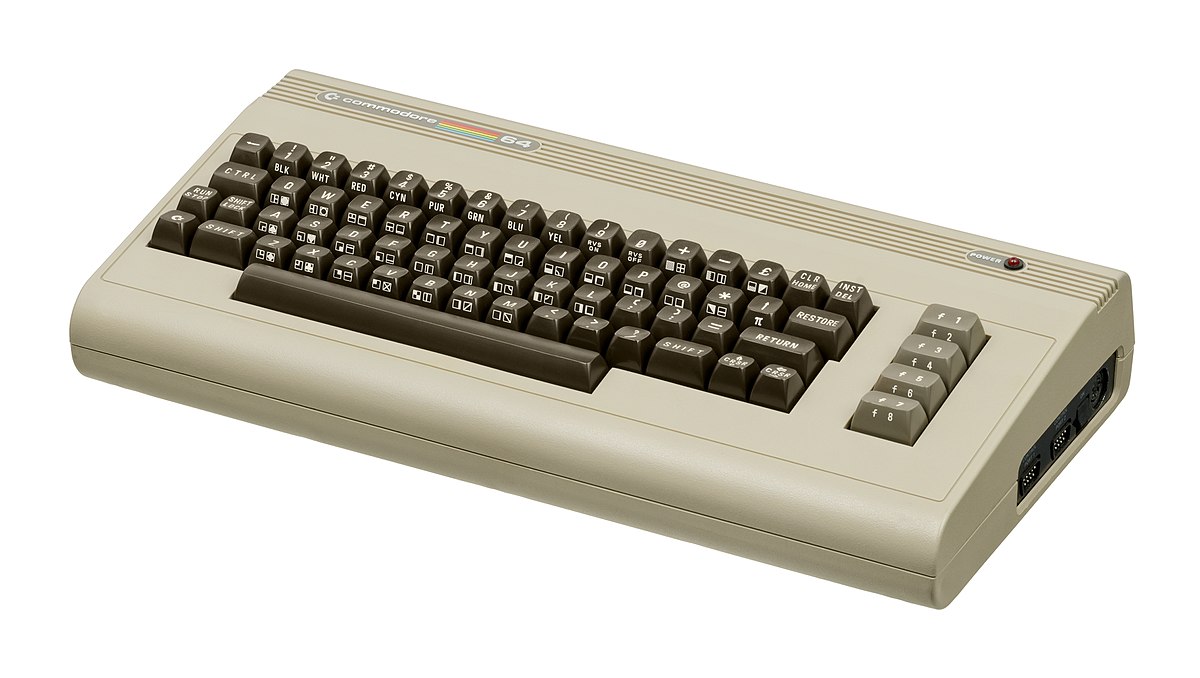 History of Commodore
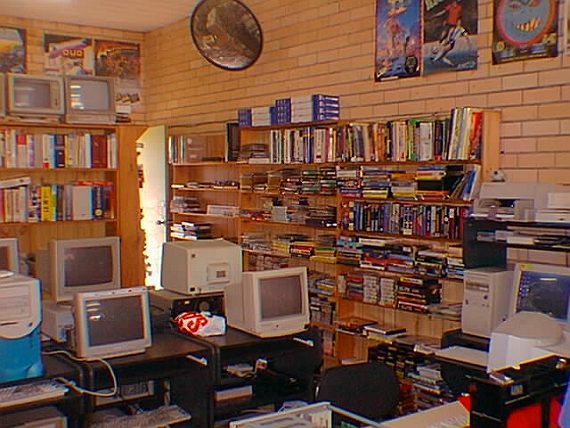 With sales booming and the early reliability issues with the hardware addressed, software for the C64 began to grow in size and ambition during 1984. This growth shifted to the primary focus of most US game developers. The two holdouts were Sierra, who largely skipped over the C64 in favor of Apple and PC compatible machines, and Broderbund, who was heavily invested in educational software and developed primarily around the Apple II. In the North American market, the disk format had become nearly universal while cassette and cartridge-based software all but disappeared. So most US-developed games by this point grew large enough to require multi-loading.
At a mid-1984 conference of game developers and experts at Origins Game Fair, Dan Bunten, Sid Meier, and a representative of Avalon Hill said that they were developing games for the C64 first as the most promising market. By 1985, games were an estimated 60 to 70% of Commodore 64 software. Over 35% of SSI's 1986 sales were for the C64, ten points higher than for the Apple II.
Everything was great for Commodore but the industry was moving forward and by the year 1988, PC compatible computers were stated to be the largest and fastest-growing home entertainment systems pushing C64 on to second place. Also, Nintendo’s gaming system has started to take hold in the world with amazing 7 million systems sold in 1988 only.
By the year 1991, many developers exited the gaming market for Commodore 64 home computer system and its popularity started to fall due to lack of software and not so many hardware changes.
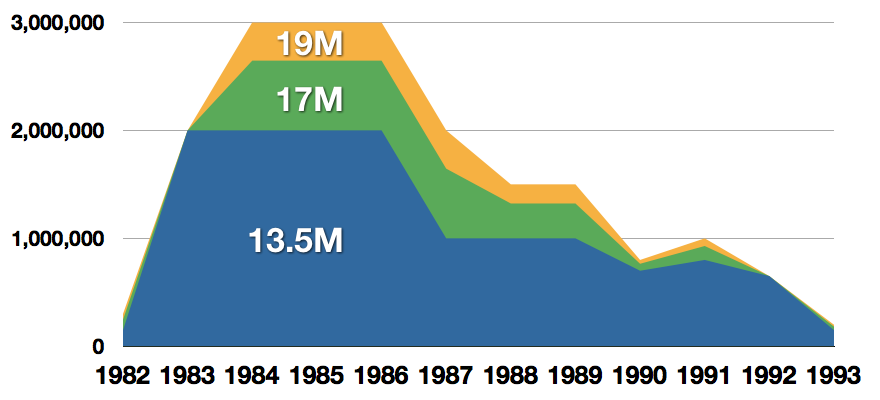 Commodore announced that the C64 would be finally discontinued in 1995.
However, only one month later in April 1994, the company filed for bankruptcy. When Commodore went bankrupt, all production on their inventory, including the C64, was discontinued, thus ending the C64's 11 and a half year production.
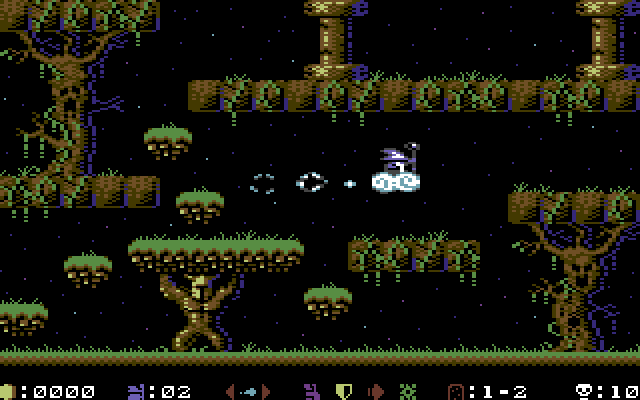 Zak McKracken and the Alien Mindbenders
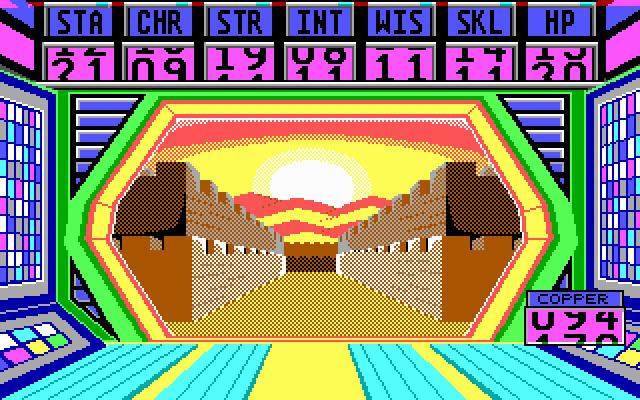
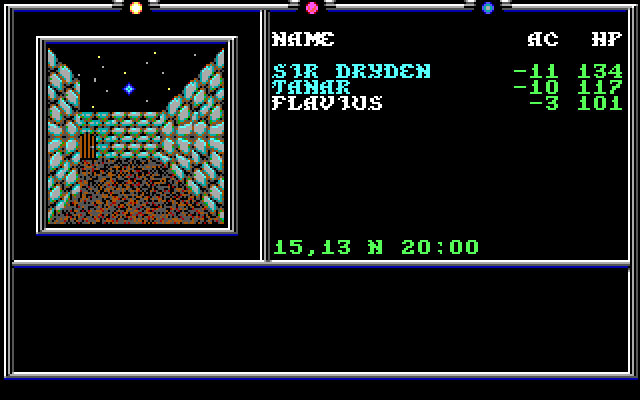
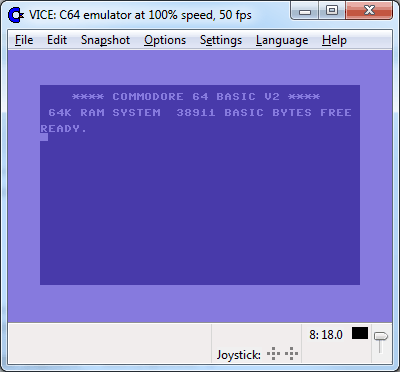 If you are not keen on spending money for reliving and checking games or software of C64 here are some links to help you to at least experience part of it completely free.
Commodore 64
  A few days ago we celebrated fixing of months-long PrintNightmare vulnerability by Microsoft, sadly a new bug and issue have been found.
Firstly discovered Microsoft stated:

