 So if you ever wanted to learn about photoshop, maya, substance, unreal engine, or some general skills like sketching, drawing, etc. Now is the perfect time to level up your skills. Drop to the artstation website and start learning today!
 To understand the Xpcom.dll error better, first, you need to know what Xpcom.dll file is. Xpcom.dll is basically a typical DLL (Dynamic Link Library) file. It is associated with Firefox developed by Mozilla Foundation for the Windows Operating System.
DLL file contains small programs similar to exe (executable) files. Just like any other DLL file, Xpcom.dll helps loads and run programs smoothly. Xpcom.dll functions as a shared file that can be used to run multiple programs on your PC.
Xpcom.dll error code occurs when Windows cannot properly load the xpcom.dll file. The error may pop up on the screen in any one of the following formats:
The xpcom.dll error can occur during program installation or while rebooting your PC or when shutting it down.[/section]
 Error Causes
It is difficult to narrow down a single cause of this error code simply because the Xpcom.dll error code may be triggered due to several reasons. Some of the common causes include:
Here are the best, quick and easy DIY methods to resolve Xpcom.dll error code on your system within minutes:
To resolve the xpcom.dll error on your system, try updating Window drivers. To do this simply use the driver update wizard from within Device Manager.
The driver update wizard walks you through the entire drive update process, making it easy and hassle-free for you to update drivers.
Since DLL are shared files and used to run and load multiple programs, it is possible that you might have accidentally removed this file while uninstalling a program on your system. This is the reason why the Xpcom.dll file goes missing.
To retrieve the Xpcom.dll file simply go to the recycle bin. Reinstall the deleted program. However, if it still doesn’t resolve the error, then it is advisable to download and install the Xpcom.dll file from a trusted DLL file website over the internet.
If the error code occurs due to malware infection or is related to registry issues, then simply download Restoro. This is a user-friendly and multi-functional PC Fixer deployed with 6 scanners including a powerful antivirus and a registry cleaner.
It is compatible with all Windows versions. Simply run it to remove all types of viruses infecting your system and clean/repair the registry.
Click here to download Restoro and resolve the Xpcom.dll error on your PC.
 So if you ever wanted to learn about photoshop, maya, substance, unreal engine, or some general skills like sketching, drawing, etc. Now is the perfect time to level up your skills. Drop to the artstation website and start learning today! Error Causes
One of the most common errors encountered by Microsoft users upgrading from Windows 7 or Windows 8/8.1 to Windows 10 is the Error Code 0xc1900106. Microsoft users experience a failure in the installation process. Either they will be notified that the installation process was ended but failed or that Windows is not able to install the update.
Error CausesMore and more Windows users are having trouble upgrading their operating system to Windows 10. There are a lot of errors being encountered by users and one of them is the Error Code 0xc1900106. This error is normally due to the misconfigured system files. If a Windows user encounters this error, most likely their device has some registry problems.
Fixing error code-related issues could be best resolved to do manual repair methods. Applying repair methods manually can help Windows users address the root causes of the errors they encounter, as well as apply definite solutions to rectify the issue.
Most Windows users can be able to implement manual repair methods themselves but there are some cases where help from a Windows professional is needed. If you’re not a very tech-savvy person and not confident performing the manual repair methods yourself, it would be advisable to seek help from a professional Windows technician who is knowledgeable enough to address the errors or problems you are encountering. However, if you don’t want to resort to seeking help from a professional, you can also consider using a powerful automated tool.
In trying to fix Error Code 0xc1900106, here are the following manual repair methods you can take:
net stop wuauserv net stop cryptSvc net stop bits net stop msiserver ren C:WindowsSoftwareDistribution SoftwareDistribution.old ren C:WindowsSystem32catroot2 catroot2.old net start wuauserv net start cryptSvc net start bits net start msiserver pause
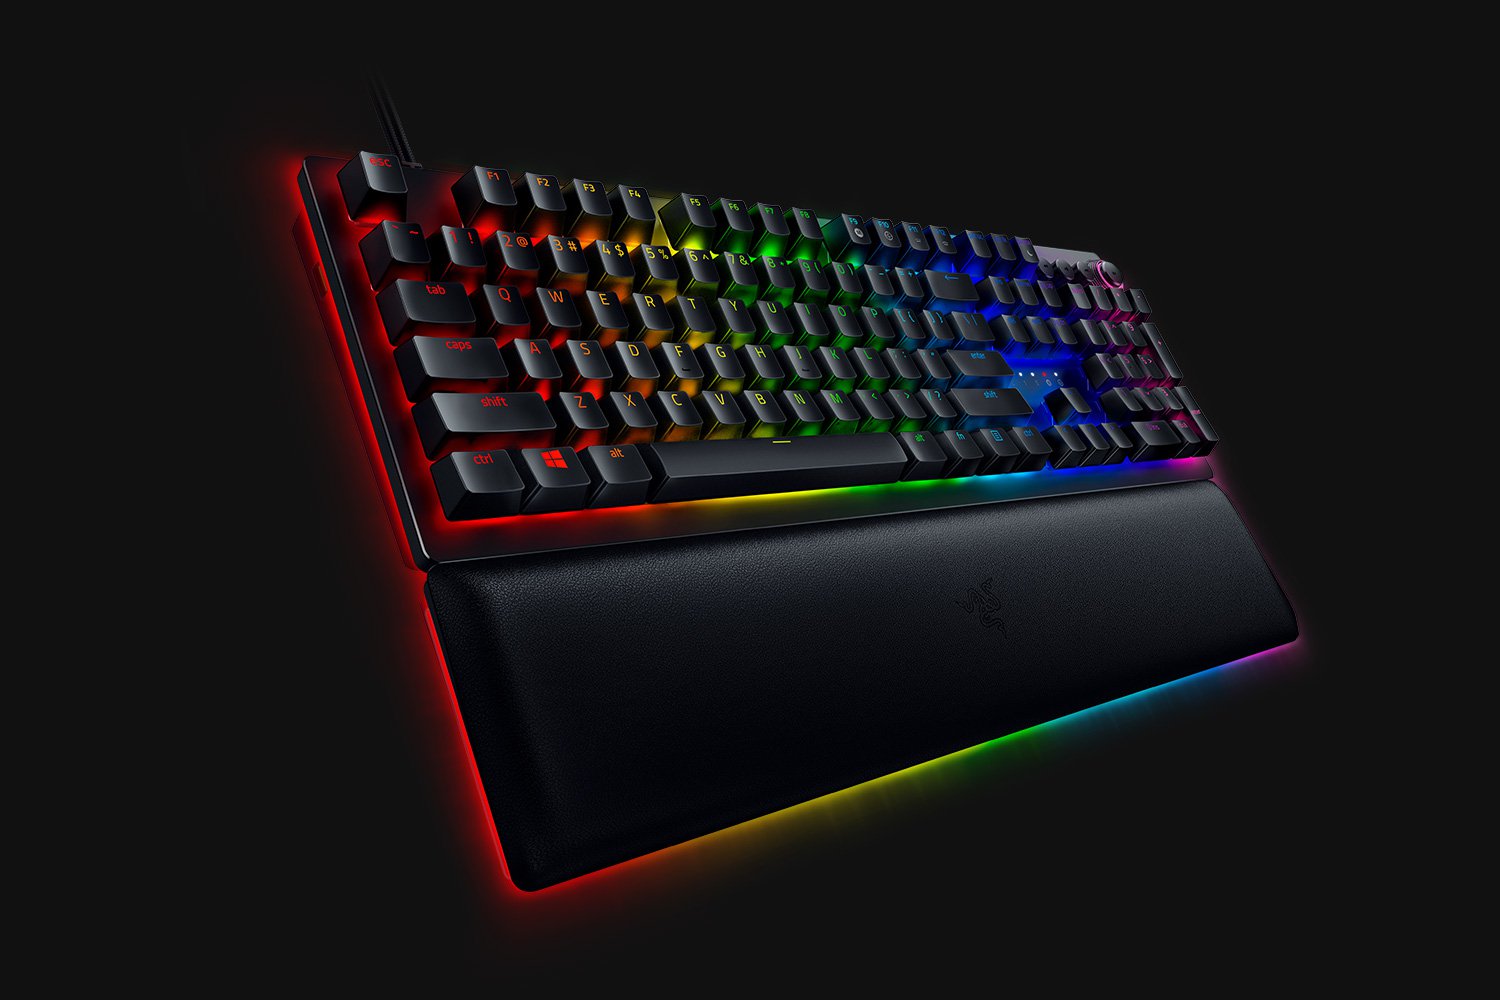 When it comes to computer peripherals first thing that comes to people's minds is probably Mouse and Keyboard. Also when discussing peripherals brands, Razer is not a stranger and over the years it has built its name and cult following.
Razer’s mechanical keyboards have been always in the upper field of quality and trust from users and Huntsman is no different.
When it comes to computer peripherals first thing that comes to people's minds is probably Mouse and Keyboard. Also when discussing peripherals brands, Razer is not a stranger and over the years it has built its name and cult following.
Razer’s mechanical keyboards have been always in the upper field of quality and trust from users and Huntsman is no different.
“Error in loading dll” “Object library not registered”
Error Causes I do not know about you, but I prefer to set my Windows to be more to my liking and not how Microsoft thinks it should be. Let’s face it, not all users feel comfortable whit Microsoft settings and idea how things should be.
One of the things I particularly did not like even in Windows 10 is icons that come by default on my taskbar, now so far, well until the latest Windows 11 update you could remove default taskbar icons the same way as in Windows 10, just right-click on them and unpin, sadly with latest update build on Windows 11 this option has been removed.
In order to remove default icons from the taskbar, one must go now to Windows 11 settings and choose from there which one you would like to be placed on it. Of course, this is nothing game-breaking but it still feels strange why the standard option has been removed, it just makes no sense but lately not many things that come from Microsoft do.
I do not know about you, but I prefer to set my Windows to be more to my liking and not how Microsoft thinks it should be. Let’s face it, not all users feel comfortable whit Microsoft settings and idea how things should be.
One of the things I particularly did not like even in Windows 10 is icons that come by default on my taskbar, now so far, well until the latest Windows 11 update you could remove default taskbar icons the same way as in Windows 10, just right-click on them and unpin, sadly with latest update build on Windows 11 this option has been removed.
In order to remove default icons from the taskbar, one must go now to Windows 11 settings and choose from there which one you would like to be placed on it. Of course, this is nothing game-breaking but it still feels strange why the standard option has been removed, it just makes no sense but lately not many things that come from Microsoft do. Recently Meta has gone viral that it is working on an AI video-making algorithm named Make a Video. AI will like in picture making AI take text input and produce a video from it.
Now, a new player enters the AI video battlefield, its name is GOOGLE!

The Google research project Imagen Video is also text to video generator similar to Meta's Make a Video with one little difference. unlike Meta's offering which includes only sign-up, Google is withholding access for now under the veil of safeguarding issues.
Google has been in the Ai space before with their Imagen, a DALL-E style generator capable of photorealistic picture generation based on text prompts. The new Google tool works in a similar way but with better functions. Ai can generate a diverse range of high-fidelity videos across different aesthetic styles and with a deep understanding of 3D models thus creating high-definition, 24-frames-per-second videos.
"With the help of progressive distillation, Imagen Video can generate high-quality videos using just eight diffusion steps per sub-model. This speeds up video generation time substantially, by a factor of ~18x,”
Jonathan Ho, author of the research paper
Despite filtering for “undesirable content”, the team admits “there is a risk that Imagen has encoded harmful stereotypes and representations”. So, until the AI - and its users - can be trusted, Google refuses to release Imagen Video without additional safeguards in place.