Linkury Smartbar Engine is a Brower Toolbar for Internet Explorer. Upon investigation, we discovered that this toolbar does not work with the latest versions of Internet Explorer.
From the Author:
What the Smartbar does:
– Changes the default search engine in your web browser’s built-in search box.
– Changes the default home page of your web browser.
– Adds alternative “page not found” functionality.
– Enable search from the address bar of your web browser.
– Allows software updates of the application once a new version is released.
– Adds, removes, or modifies components interacting with search input fields.
While installed, users may see additional unwanted ads throughout their browsing sessions.
Several anti-virus applications have marked this toolbar as a Browser Hijacker, and it is not recommended to keep it on your computer, especially if you are using a newer version of internet explorer that renders this toolbar useless.
About Browser Hijackers
Browser hijacking means a malicious program code has taken control over and modified the settings of your browser, without your permission. Browser hijackers will do a number of things on a computer. These are typically used to force visitors to a particular site, manipulating web traffic to earn ad revenue. It may appear naive, but the majority of these sites are not legitimate and may pose a serious threat to your online safety. They did not just screw up your web browsers, but browser hijackers can also modify the system registry, leaving your computer susceptible to other attacks.
How you can determine if your browser is hijacked
When your browser is hijacked, the following could happen: home-page is changed; you see new unwanted favorites or bookmarks added, usually directed to advertisement-filled or pornography sites; the default browser settings are changed and/or your default web engine is altered; you find unsolicited new toolbars added; never-ending pop-up adverts appear and/or your web browser pop-up blocker is disabled; your web browser starts running slowly or exhibits frequent errors; you can’t visit specific websites like home pages of security software.
Precisely how browser hijacker infects computer systems
Browser hijackers could use drive-by downloads or file-sharing websites or perhaps an e-mail attachment in order to reach a targeted computer. They may also come from any BHO, browser extension, add-on, toolbar, or plug-in with malicious intent. A browser hijacker can be installed as a part of freeware, shareware, demoware, and fake programs. A good example of a well-known browser hijacker is the latest Chinese malware called “Fireball”, which has infected 250 million PCs across the world. It works as a hijacker but can be turned into a fully functioning malware downloader afterward.
The existence of any browser hijacker malware on your system could substantially diminish the web browsing experience, monitor your internet activities that lead to serious privacy concerns, create system stability problems and ultimately cause your PC to slow down or to a nearly unusable state.
Removing browser hijackers
Some kinds of browser hijackers can be removed from your computer by deleting malicious software applications or any other recently added freeware. At times, it could be a tough job to find and eliminate the malicious program since the associated file could be running as part of the operating system process. Also, manual removals require in-depth system understanding and thus can be a very difficult job for novice computer users.
Browser hijackers could be effectively removed by installing and running an anti-malware program on the affected PC. To eradicate any kind of browser hijacker from your laptop or computer, you could download this certified malware removal application – SafeBytes Anti-Malware. Utilize a system optimizer together with your anti-malware software to fix various computer registry problems, eliminate computer vulnerabilities, and enhance your computer's overall performance.
Help! Malware Blocking Anti-virus Installation And Access To The Web
Practically all malware is bad, but certain kinds of malware do a lot more damage to your computer than others. Some malware sits in between the computer and your net connection and blocks some or all websites that you really want to check out. It would also block you from installing anything on your machine, especially anti-virus software. If you are reading this now, you have probably recognized that a malware infection is the real cause of your blocked web traffic. So how to proceed if you need to download and install an anti-malware application such as Safebytes? There are some steps you can take to circumvent this issue.
Eliminate viruses in Safe Mode
If the malware is set to load at Windows start-up, then booting in Safe Mode should prevent it. Only the minimum required applications and services are loaded whenever you start your laptop or computer in Safe Mode. You need to do the following to remove malware in Safe mode.
1) After switching on the computer, hit the F8 key before the Windows splash screen starts to load. This should bring up the Advanced Boot Options menu.
2) Select Safe Mode with Networking using arrow keys and hit ENTER.
3) As soon as this mode loads, you will have an internet connection. Now, utilize your web browser normally and navigate to https://safebytes.com/products/anti-malware/ to download and install Safebytes Anti-Malware.
4) Right after installation, run a complete scan and let the program get rid of the threats it detects.
Switch over to some other browser
Web-based malware can be environment-specific, aiming for a particular web browser or attacking particular versions of the web browser. The best solution to overcome this issue is to choose a browser that is well known for its security features. Firefox has built-in Phishing and Malware Protection to help keep you safe online.
Install antivirus on a USB drive
To successfully remove the malware, you will need to approach the issue of installing an antivirus program on the infected computer system from a different angle. To run antivirus using a thumb drive, follow these simple measures:
1) On a virus-free computer, install Safebytes Anti-Malware.
2) Plug the Thumb drive into the clean computer.
3) Double click on the exe file to run the installation wizard.
4) Choose a USB drive as the location when the wizard asks you where you wish to install the software. Follow activation instructions.
5) Transfer the pen drive from the clean PC to the infected PC.
6) Double-click the antivirus software EXE file on the USB flash drive.
7) Simply click “Scan Now” to run a scan on the affected computer for malware.
SafeBytes Anti-Malware Features
In order to protect your personal computer from many different internet-based threats, it’s important to install anti-malware software on your PC. But with so many anti-malware companies in the market, these days it’s challenging to decide which one you should purchase for your laptop. Some are really worth your money, but most aren’t. You must choose one that is efficient, practical, and has a strong reputation for its malware protection. While considering the trustworthy applications, Safebytes Anti-Malware is undoubtedly the strongly recommended one.
SafeBytes anti-malware is really a powerful, highly effective protection application created to assist users of all levels of IT literacy in identifying and eliminating harmful threats from their PC. With its most advanced virus detection and repair technology, this software protects your PC against infections caused by different kinds of malware and similar internet threats, including adware, spyware, viruses, worms, trojans, keyloggers, potentially unwanted program (PUPs), and ransomware.
SafeBytes anti-malware offers a myriad of advanced features that sets it aside from all others. Here are some of the best ones:
Most Reliable AntiMalware Protection: Built upon a highly acclaimed antivirus engine, this malware removal application can detect and get rid of the most stubborn malware threats like browser hijackers, PUPs, and ransomware that other common anti-virus programs will miss.
Real-time Threat Response: SafeBytes provides totally hands-free live protection and is set to check, block, and get rid of all computer threats at its very first encounter. They’re extremely efficient in screening and getting rid of numerous threats since they’re constantly revised with the latest updates and alerts.
Web Protection: SafeBytes checks the links present on a web page for possible threats and notifies you whether the site is safe to browse or not, through its unique safety rating system.
“Fast Scan” Features: Safebytes AntiMalware, using its enhanced scanning engine, gives super-fast scanning that can quickly target any active internet threat.
Light-weight: This program is lightweight and can work silently in the background, and will not have an effect on your PC efficiency.
24/7 Online Support: Support service is accessible 24 x 7 x 365 days via email and chats to answer your concerns.
To sum it up, SafeBytes has developed a meaningful anti-malware solution that is aimed to protect you against various malware. You can be sure that your PC will be protected in real-time once you put this software to use. So when you want advanced forms of protection features & threat detections, buying SafeBytes Anti-Malware could be worth the money!
Technical Details and Manual Removal (Advanced Users)
If you do not wish to use an automated tool and prefer to eliminate Linkury Smartbar Engine manually, you might do so by going to the Add/Remove Programs menu in the control panel and removing the offending program; in cases of web browser plug-ins, you may uninstall it by visiting the browsers Add-on/Extension manager. You’ll likely also want to reset your web browser.
To be certain of complete removal, find the following Windows registry entries on your system and eliminate them or reset the values appropriately. Please note that this is for advanced users only and might be difficult, with wrong file removal leading to additional system errors. Furthermore, certain malware is capable of replicating itself or preventing deletion. Carrying out this in Safe Mode is suggested.
Files:
%LOCALAPPDATA%\Smartbar\Application\Lrcnta.exe
%LOCALAPPDATA%\Linkury\Application\Linkury.exe
%LOCALAPPDATA%\Smartbar\Application\QuickShare.exe
%USERPROFILE%\Local\AppData\Smartbar\Application\Delta.exe
%ALLUSERSPROFILE%\WCService\WCService.exe
%LOCALAPPDATA%\Smartbar\Application\Luckysave.exe
%LOCALAPPDATA%\Smartbar\Application\Muvic.exe
%LOCALAPPDATA%\Linkury\Application\Smartbar.exe
%LOCALAPPDATA%\Smartbar\Application\SavePass.exe
%LOCALAPPDATA%\Smartbar\Application\SafeFinder.exe
%LOCALAPPDATA%\Smartbar\Application\WhiteSmoke.exe
%LOCALAPPDATA%\Smartbar\Application\BrowserHelper.exe
%LOCALAPPDATA%\Smartbar\Application\SnapDo.exe
%LOCALAPPDATA%\Smartbar\Application\ProductsRemovalTool.exe
%LOCALAPPDATA%\Smartbar\Application\MagicBox.exe
Registry:
HKEY_LOCAL_MACHINE\SOFTWARE\Microsoft\Tracing\Linkury_RASMANCS
HKEY_LOCAL_MACHINE\SOFTWARE\Microsoft\Tracing\Linkury_RASAPI32
HKEY_LOCAL_MACHINE\SOFTWARE\Wow6432Node\Microsoft\Tracing\Linkury_RASMANCS
HKEY_LOCAL_MACHINE\SOFTWARE\Wow6432Node\Microsoft\Tracing\Linkury_RASAPI32
HKEY_CURRENT_USER\Software\Microsoft\Internet Explorer\Main\FeatureControl\FEATURE_BROWSER_EMULATION, value: Linkury.exe
HKEY_CURRENT_USER\Software\Microsoft\Installer\Products\C5670CA607D1C7C4AA305DE018401AA3
HKEY_CURRENT_USER\Software\Microsoft\Installer\Features\C5670CA607D1C7C4AA305DE018401AA3
HKEY_CURRENT_USER\Software\Linkury
HKEY_LOCAL_MACHINE\SOFTWARE\Microsoft\Shared Tools\MSConfig\startupreg\Browser Infrastructure Helper
HKEY_LOCAL_MACHINE\SOFTWARE\Classes\LinkurySmartBar.LinkurySmartBarBandObject
HKEY_LOCAL_MACHINE\SOFTWARE\Classes\LinkurySmartBar.LinkuryMenuForm
HKEY_LOCAL_MACHINE\SOFTWARE\Classes\LinkurySmartBar.DockingPanel
HKEY_LOCAL_MACHINE\SOFTWARE\Classes\LinkurySmartBar.BandObjectAttribute
HKEY_LOCAL_MACHINE\SOFTWARE\Microsoft\Windows\CurrentVersion\Run, value: Linkury Chrome Smartbar
HKEY_LOCAL_MACHINE\SOFTWARE\Microsoft\Tracing\Mntz_Installer_RASAPI32
HKEY_LOCAL_MACHINE\SOFTWARE\Microsoft\Tracing\Mntz_Installer_RASMANCS
HKEY_LOCAL_MACHINE\SOFTWARE\Wow6432Node\Microsoft\Tracing\Mntz_Installer_RASAPI32
HKEY_LOCAL_MACHINE\SYSTEM\CurrentControlSet\services\sulpnar
HKEY_LOCAL_MACHINE\SYSTEM\ControlSet002\Services\Stpro
HKEY_LOCAL_MACHINE\SYSTEM\ControlSet001\Services\Stpro
HKEY_LOCAL_MACHINE\SOFTWARE\mtPlusdax
HKEY_LOCAL_MACHINE\SOFTWARE\Wow6432Node\mtPlusdax


 Therefore we are presenting a couple of solutions that will fix your issue, it is advisable to follow them as presented since they will go from the most common to the more complex one.
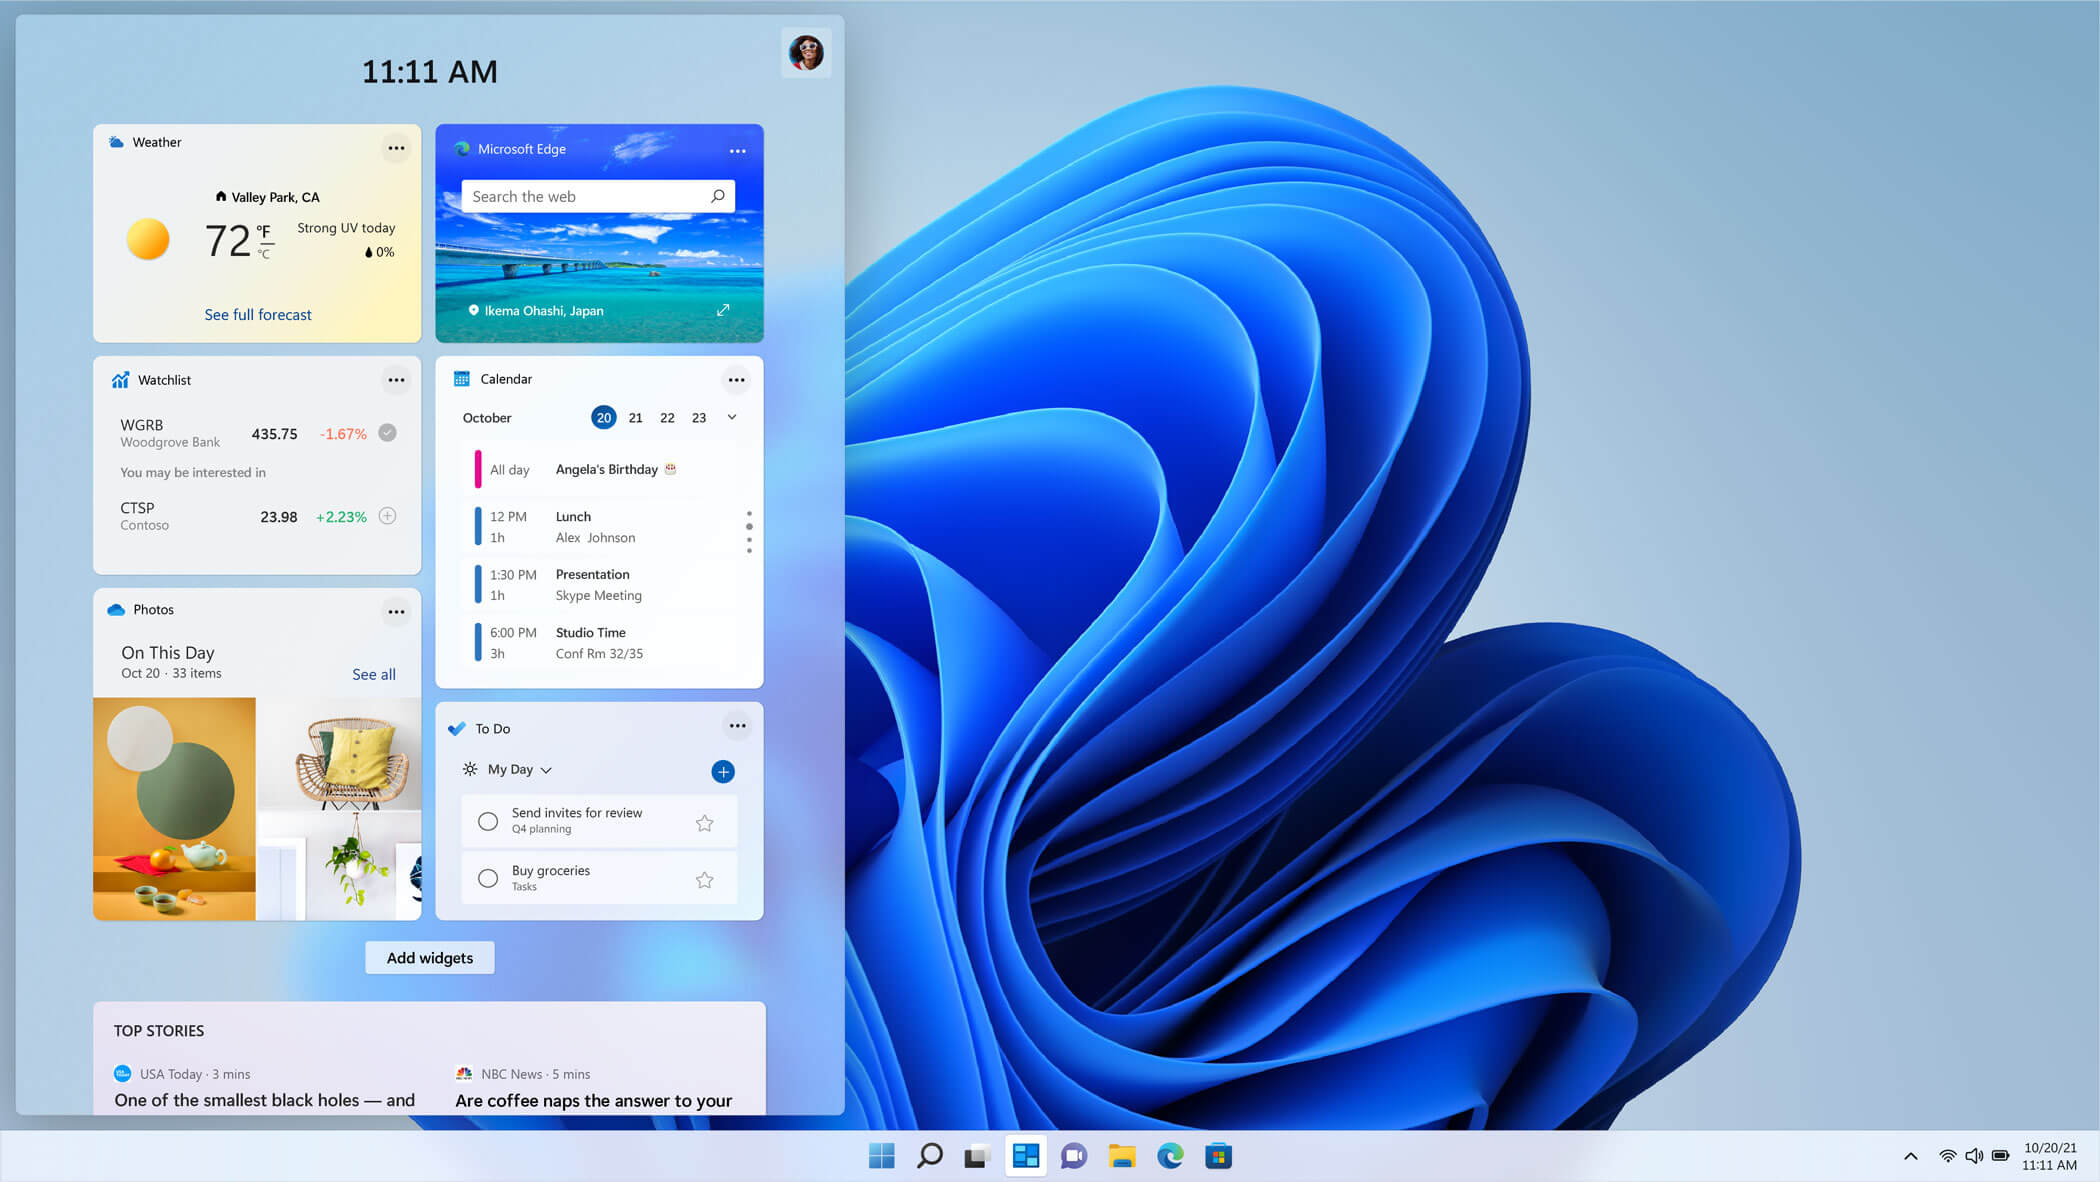 The new widget's menu inside Windows 11 is generally met with a positive attitude but there are still users which prefer not to have it. Luckily for them, Microsoft included a very easy way to turn the widgets menu on or off. Follow this easy guide to see how.
Right-click on the widget button in the taskbar and click on Hide from Taskbar and that’s it
Alternatively, you can also turn it off via the setting app.
Go to the settings app and navigate to Personalization > Taskbar > Taskbar Items and flipping the switch beside Widgets to Off.
Please note that both methods will only hide the button to toggle widgets menu, at the current state there is no really a way to actually turn it off, only hide it and make it not available to bring it up.
The new widget's menu inside Windows 11 is generally met with a positive attitude but there are still users which prefer not to have it. Luckily for them, Microsoft included a very easy way to turn the widgets menu on or off. Follow this easy guide to see how.
Right-click on the widget button in the taskbar and click on Hide from Taskbar and that’s it
Alternatively, you can also turn it off via the setting app.
Go to the settings app and navigate to Personalization > Taskbar > Taskbar Items and flipping the switch beside Widgets to Off.
Please note that both methods will only hide the button to toggle widgets menu, at the current state there is no really a way to actually turn it off, only hide it and make it not available to bring it up.