If you are facing a missing sechost.dll error in your Windows 10, welcome, you have come to the right place to solve it and get back your computer in working order. Sechost.dll is a file that allows other programs to function and complete their tasks as well as control and change the behavior of other programs.
The file is found in Windows subfolder System32, it is a completely safe file and should not be deleted. Sometimes however various other reasons can corrupt it or delete it. This guide will lead you to common solutions on how to get file back up and running.
Update device driver
Have you installed a new device and all of a sudden you get the error message that Sechost is missing? Update device driver, it is possible that the file has been corrupted or replaced with an older version and therefore reported as missing. Update device driver to lastest version and issue should run away.
Re-register file via command prompt
If Sechost got corrupted re-registering will solve the issue, press ⊞ WINDOWS + X and choose Command prompt (administrator), click on it.
type regsvr32 sechost.dll and press ENTER
Reboot your PC
Reinstall application
Usually, Sechost gone bad or missing is due to the installation of another application that corrupts the file. Reinstall the application to try to solve errors. In order to properly reinstall the application first use the control panel to remove it completely from the system and then install it again, hopefully, this time correct version of Sechost.dll will be installed in the system.
Check your hard drive
In some cases, a hard drive malfunction can cause several files to be corrupted or gone missing. To eliminate hard drive malfunction run check disk from Windows on C drive to check it and find if there are any errors.
Uninstall Windows update
Same as with some application, even Windows update could corrupt some files due to update not being properly downloaded. Try uninstalling the latest update and revert to the previous Windows state, then update it again.
If you are currently facing the “A required device isn’t connected or cannot be accessed” error with codes 0xc0000185, 0xc0000225, 0xc0000001, 0xc00000f, and 0xc000000e on your Windows 10 computer, worry not for this post will help you resolve this problem. All these error codes point out the same thing – your computer needs to be repaired. Some of these error codes are related to the “winload.efi” file which means that you are using the UEFI system. This file also loads up important drivers in order to start the Windows Kernel. And if you got a remark from any of these error codes indicating that there is a hardware failure or that the driver configuration is incorrect, then you must physically check if the wires are connected properly.
This kind of error occurs mostly when your computer wasn’t able to locate the system files that are needed to boot up your computer. Thus, the only way to fix this problem is to correct the boot record. It is recommended that you utilize the “/RebuildBCD” option in order to rebuild the BCD files. To do so, follow these steps:
You can start by booting into the installation environment for Windows 10 from an installation media.
After that, click on Repair your computer and on the blue screen, select Troubleshoot and then select the Advanced options menu.
From there, select Command Prompt and once you open it, enter each one of the commands given below by sequence.
bootrec /FixMbr
bootrec /FixBoot
bootrec /ScanOS
bootrec /RebuildBcd
Once you’re done executing the commands given above, type “exit” to close the Command Prompt window and then restart your computer and see if it fixed error code 0xc000014c.
On the other hand, if rebuilding the BCD using the /RebuildBCD option didn’t help, you can try a crude way to rebuild the boot record from scratch. You can do that by following the given steps below which will export and delete/backup the BCD available in the system.
Go to the Advanced Recovery Mode.
From there, go to Command Prompt and execute the commands given below and make sure to enter them one after the other.
bcdedit /export C:BCD_Backup
c:
cd boot
attrib bcd -s -h –r
ren c:bootbcd bcd.old
bootrec /RebuildBcd
If it still didn’t help, then troubleshoot the problem further with the help of the following instructions.
Option 1 – Disable the Secure Boot in the BIOS
Disabling the Secure Boot in the BIOS settings is definitely recommended to resolve the error. To disable Secure Boot, here’s what you have to do:
First, boot your computer into Windows 10.
Next, go to Settings > Windows Update. From there, check if there is anything that you have to download and install if you see any available updates. Usually, OEMs send and update the list of trusted hardware, drivers, and operating systems for your computer.
After that, go to the BIOS of your computer.
Then go to Settings > Update & Security > Advanced Startup options. If you click on Restart Now, it will restart your computer and give you all the advanced options.
Next, select Troubleshoot > Advanced Options. As you can see, this screen offers you further options including System restore, Startup repair, Go back to the previous version, Command Prompt, System Image Recovery, and UEFI Firmware Settings.
Select the UEFI Firmware Settings which will take you to the BIOS.
From there, go to the Security > Boot > Authentication tab where you should see Secure Boot. Note that every OEM has its own way of implementing the options so it varies.
Next, set Secure Boot to Disabled and set Legacy Support to On or Enabled.
Save the changes made and exit. Afterward, your computer will reboot.
Option 2 – Run System File Checker
You could also run a System File Checker or SFC scan. All you have to do is select Command Prompt from the Advanced Options. Once you’ve opened Command Prompt, type the “sfc /scannow” command and tap Enter to execute it.
Option 3 – Disable the Early Launch Anti-Malware Protection
You need to restart your computer in the Start Menu first while holding down the Shift key on your keyboard.
After that, it will restart your computer to Startup Settings.
Now ensure that the 8th option is labeled as “Disable early launch anti-malware protection.
Then tap the F8 key since the aforementioned option above is listed at number 8. This should launch and load Windows on your PC with the Early Anti-malware protection disabled for that session only when you try to carry out the same task and then check if the error related to the Winload.efi file is now fixed.
Option 4 – Try to run Automatic Startup Repair
In this option, you need to boot your computer into the Advanced Startup Options and from there, run the Automatic Startup Repair and then wait until the process is completed.
Option 5 – Try to reset the BIOS or the UEFI Settings
If updating the BIOS didn’t help in fixing the error, you can try to reset the BIOS instead.
Start your computer and tap the F10 key during the booting process to enter the BIOS. If it does not work, you can try tapping the F1 or F2 key as well as the Del key.
Once you’re already in the BIOS, tap the F9 key to get the prompt to RestoreLoad default configuration now for the BIOS.
Next, click on Yes and then follow the next on-screen instructions that appear to set the BIOS back to its default settings.
Once you’re done restoring the default settings of the BIOS, restart your computer and then check if it now boots properly.
Option 6 – Try to physically check the hardware
You should also check the physical status of the hardware in your computer. You can clean the dust off the hardware components like the Network Card of the computer. You might want to use a small blower or you could also use a soft cloth and run the components gently. Make sure that you don’t damage any parts with moisture or cause harm to any circuits while you carry out this task.
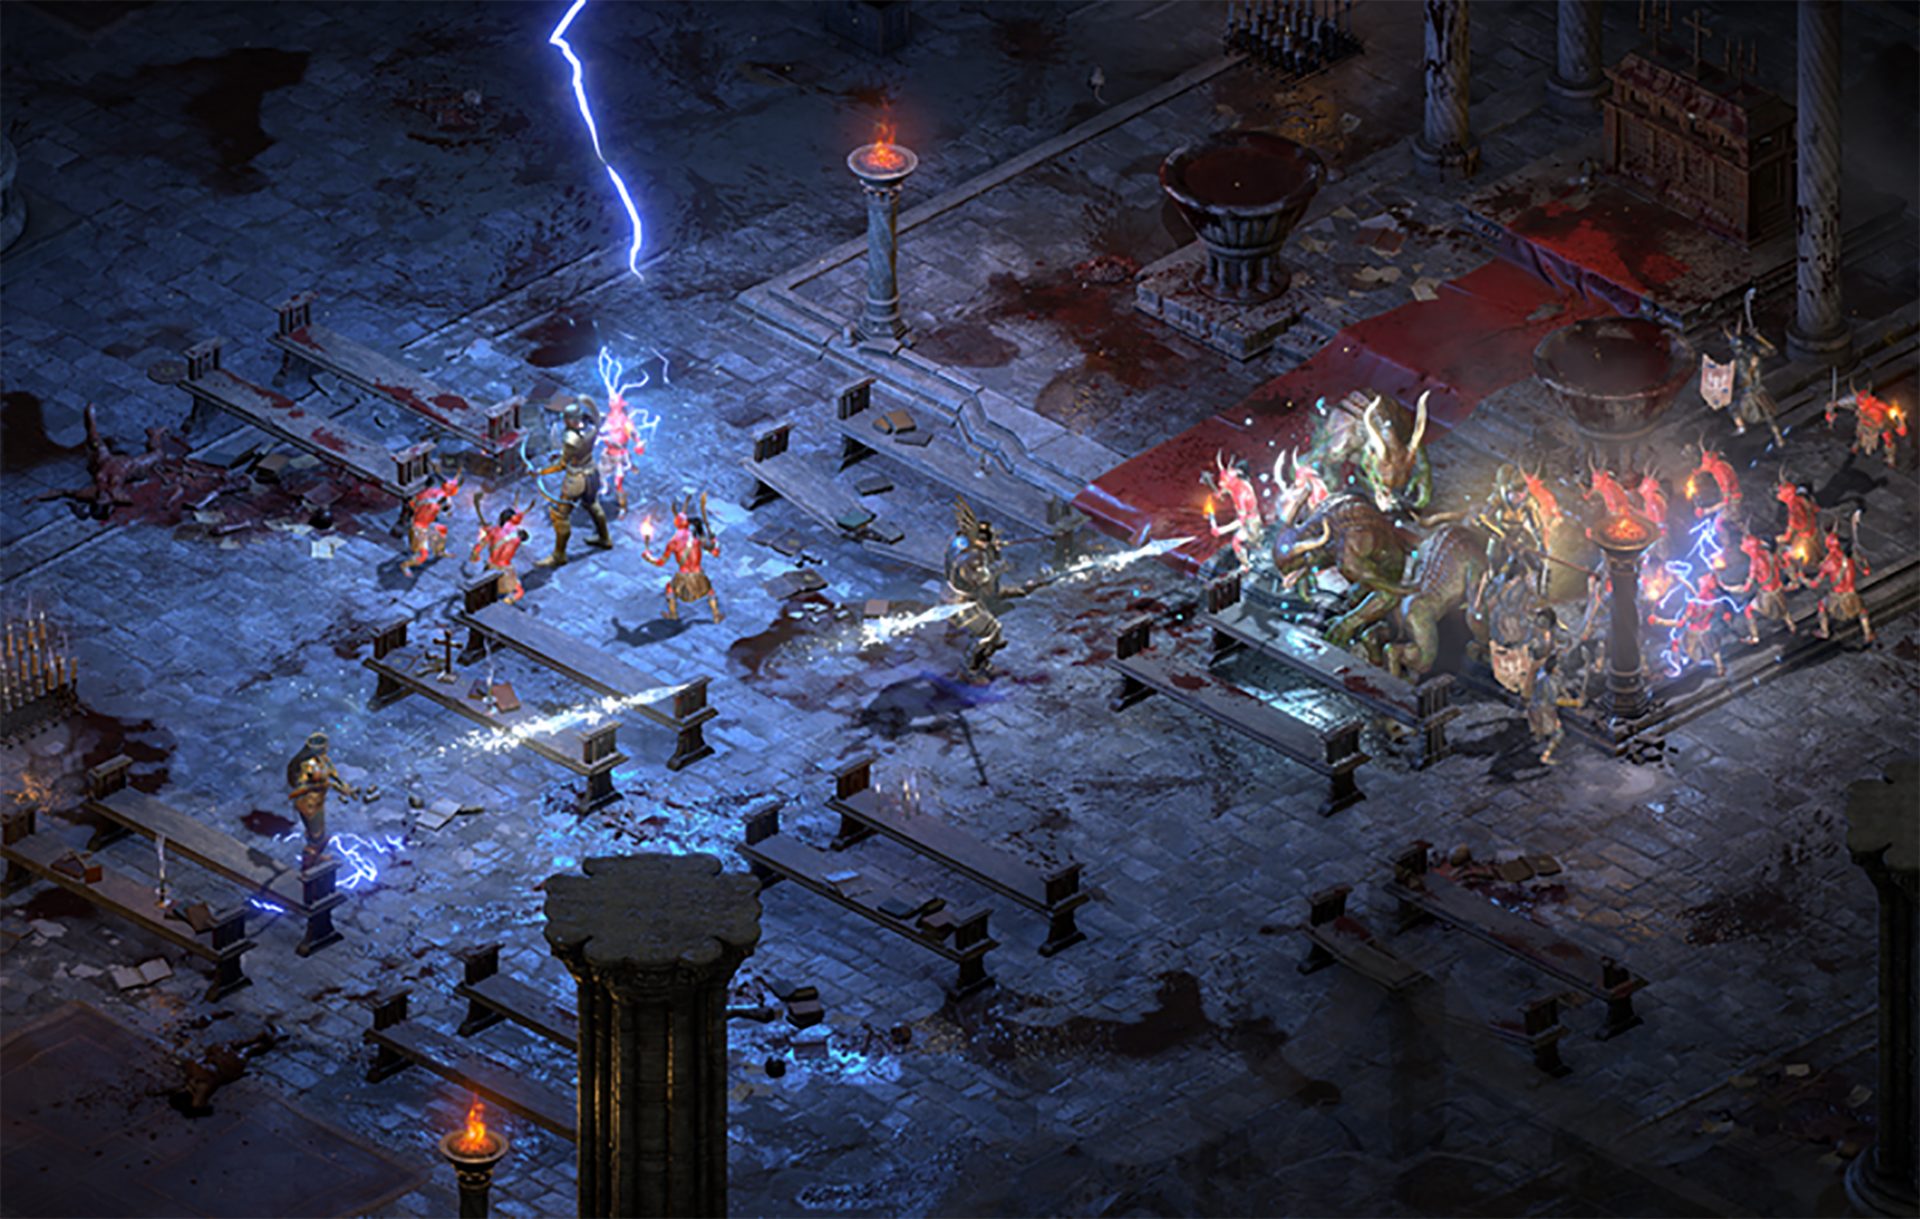
Diablo 2 resurrected has hit official release and servers seem to be finally taken care of and everything seems to be running smoothly now. The game also received great praise from gamers and attracted old players of the original Diablo 2 game.
Speaking of old players of old Diablo 2, they can transfer their old characters into remaster and continue playing them within this new great HD environment. There are some steps and requirements but we are here to help and transferred characters will bring full stash, inventory, and equipped items with them.
Requirements
There are not many requirements for this transfer to occur but they must be respected in order to be successful. The first thing is a minor requirement and somewhat annoying but it needs to be done, firstly fire up Diablo 2 resurrected and create a character, any kind of character with any kind of name, any kind of class. This strange requirement is to actually create a character folder and register it inside D2 resurrected so we can copy old ones there.
The second requirement will be that characters that you wish to be transferred must be offline characters. Old battle net online characters cannot be transferred at this moment and probably will not be in the future as well. So for all of you that wish to transfer online characters, bad luck, for the rest of us casuals playing offline single-player mode, we can enjoy our characters.
Process of diablo 2 character trasfer
The process itself of transferring characters when previously mentioned requirements are met is just a simple and copy operation. If you have somewhere backed your characters go into your backup folder and copy files in c:\users\*current user*\saved games\*diablo 2 resurrected folder*
If you do not have characters backed up and just have old Diablo 2 installed and playing it, you can go to c:\users\*current user*\saved games\*diablo 2 folder* and just copy all characters files into c:\users\*current user*\saved games\*diablo 2 resurrected folder*
Your old characters end with .d2s extension, grab all that you want to transfer, and copy them into D2R. Take note that copied characters cannot be brought back into Diablo 2, once they are copied into Diablo 2 resurrected all further progress on them will be tied to the new game.
Conclusion
That’s it about the transfer process and requirements for it. Fire up the new game version and enjoy.
Getting errors while trying to update your Windows 10 computer is not an uncommon occurrence. Although some of them are easy to fix, there are others that need a lot of time and research in order to resolve. One of these tough Windows Update errors is Error 0x80244007. This kind of Windows Update error halts the process of Windows Update and a simple system restart won’t help much to fix it.
When you encounter this Windows Update error, you will see a description that says, “SOAP client failed because there was a SOAP fault for reasons of WU_E_PT_SOAP_* error codes”. One of the main causes of such an error is that Windows was not able to renew the cookies for Windows Update. To fix this error, here are some suggestions that might be useful.
Option 1 – Clear up temporary or junk files
The error could be caused by some temporary or junk files in your computer and so you need to clear them up to fix the problem. You can achieve that using the Storage Sense feature.
Open Setting > System > Storage from the WinX Menu.
From there, you will see a list of all the local and connected storage devices along with the details on the free space. Make sure that Storage Sense is on.
Next, find a link that says “Free Up Space” and click it to open.
After that, a screen which is the built-in program in Windows 10 will appear and will scan your computer for the following junk files so you can free up disk space:
Windows Upgrade Log Files
The system created Windows Error Reporting Files
Thumbnails
Temporary Internet Files
Previous Windows Installation Files
Delivery Optimisation Files
DirectX Shader Cache
Choose the files you want to get rid of and then click on the remove files option. Note that you’ll have an idea of the total size as you select any of the junk files listed above.
Now go to the “Free Up Space Now” section and click the Clear Now button. This will get rid of all the temporary or junk files in your computer and should hopefully fix the Windows Update error 0x80244007.
Option 2 – Try running the Windows Update troubleshooter
Windows 10 have various troubleshooters that can help you resolve many system issues. So if you’re dealing with Windows Update errors like Error 0x80244007, you can run the Windows Update troubleshooter to resolve it.
To run it, go to Settings and then select Troubleshoot from the options. From there, click on Windows Update and then click the “Run the troubleshooter” button. After that, follow the next on-screen instructions and you should be good to go.
Option 3 – Try to reset the Windows Update components
If by any chance that the second option didn’t work, resetting the Windows Update components could also help you resolve the problem. How? Refer to the following steps:
Open Command Prompt with admin privileges.
After that, type each one of the following commands and hit Enter after you key in one after the other.
net stop wuauserv
net stop cryptsvc
net stop bits
net stop msiserver
Note: The commands you entered will stop the Windows Update components such as Windows Update service, Cryptographic services, BITS and MSI Installer.
After disabling WU components, you need to rename both the SoftwareDistribution and Catroot2 folders. To do that, type each one of the following commands below and don’t forget to hit Enter after you type one command after the other.
Next, restart the services you’ve stopped by entering another series of commands. Don’t forget to hit Enter after you key in one command after the other.
One of the most popular and most used web browsers commonly used by Windows users is Google Chrome. This well-known web browser has been introducing various features recently in order to stay at the top. However, it makes the web browser a lot more complex and thus prone to errors. Although this may not be a big deal, it can be quite annoying as it can interrupt your web browsing.
There are various errors that can come up with this level of complexity of the web browser. One of these errors is the “This site can’t be loaded from the cache, ERR_CACHE_MISS” error message that can suddenly appear while you browse the web using your Google Chrome browser on your Windows 10 PC.
Take note that when you encounter this particular error, there really is no direct fault in the Chrome browser as there are also issues with caching the website data locally in the computer. Moreover, this error can also occur when a website is coded in an incorrect manner or if there are some browser extensions or toolbars that are in conflict with the proper functioning of the website.
To fix the ERR_CACHE_MISS error in Google Chrome, refer to the possible solutions laid out below.
Option 1 – Try clearing browser data
There are times when some data in the browser is conflicting with the loading of the website and triggers errors like ERR_CACHE_MISS. And so you can try to clear your browser’s data. This might be a very basic solution but oftentimes it works in fixing this kind of error in Google Chrome. Follow the steps below to clear the data in your browser.
Open your Google Chrome browser.
After that, tap the Ctrl + H keys. Doing so will open a new panel that allows you to delete the browsing history and other data in your browser.
Now select every checkbox that you see and click on the Clear browsing data button.
Then restart your Chrome browser and check if you can now open any website or not.
Option 2 – Try using the Developer Tools
You can also try using the Developer tools in Google Chrome to help you fix the ERR_CACHE_MISS error. Refer to the steps below to do so.
Open Google Chrome.
Tap the Ctrl + Shift + I keys on your keyboard and then tap the F1 key to open the Settings tab inside the Chrome Developer Tools.
Next, select the Disable cache option while DevTools is open and apply those settings.
After that, refresh your browser and check if the entries you’ve seen previously in the Network tab are gone.
Now try to load the same webpage again and see if the problem is resolved.
Option 3 – Reset Winsock, TCP/IP & Flush DNS
Resetting Winsock, TCP/IP, and flushing DNS might help you resolve the ERR_CACHE_MISS error. To do so, follow these steps:
Right-click on the Start button and click on Command Prompt (administrator) so you can pull up an elevated Command Prompt.
After that, execute each one of the commands listed below. And after you typed in one after the other, you have to hit Enter.
netsh winsock reset – type in this command to reset Winsock
netsh int ip reset resettcpip.txt – type in this command to reset TCP/IP
ipconfig /flushdns – type in this command to flush the DNS cache
Next, restart your PC and check if the problem’s fixed.
Option 4 – Get rid of any conflicting browser extensions
Open Chrome and press Alt + F keys.
Go to More tools and click Extensions to look for any suspicious browser extensions or toolbars.
Click the Recycle bin and select Remove.
Restart Chrome and press Alt + F keys again.
Proceed to On Startup and mark Open a specific page or set of pages.
To check if the browser hijacker is still active, click Set pages, if it is active, overwrite the URL.
Note: If removing the browser extensions or toolbars didn’t work, you can also try to reset your Google Chrome browser.
Open Google Chrome, then tap the Alt + F keys.
After that, click on Settings.
Next, scroll down until you see the Advanced option, once you see it, click on it.
After clicking the Advanced option, go to the “Restore and clean up option and click on the “Restore settings to their original defaults” option to reset Google Chrome.
Ever gotten an e-mail offer that seemed just a little bit too good to be true? Might’ve been a phishing attempt! These are everywhere and can come in many different forms.
So what’s phishing exactly, how can you detect it and how can you keep safe?
What is phishing?
Phishing (pronounced like fishing) is a type of cyberattack that tricks the user into trusting the source and revealing sensitive information. Fishing being the perfect analogy, the bait is a legitimate-looking site, e-mail or file and when you take a bite, your identity, banking information and much more can be revealed and stolen.
Credit: Anne Nygård on Unsplash
Some phishing attempts are incredibly obvious, others are super elaborate. Like with most types of malware, cybercriminals have become extremely well-versed in phishing and anyone can fall for it. To help you recognize and avoid it, we’ll take you through a couple of phishing types and give you tips on what to do if faced with them.
Phishing techniques
E-mail phishing
This is actually the most common type of phishing. A cybercriminal creates an e-mail containing stuff like attractive offers, legitimate-looking attachments or links and makes it appear as though it’s coming from a trusted source.
Credit: Justin Morgan on Unsplash
For example, it looks like it’s coming from your bank or your favorite retailer. The logo looks legit and the structure of the e-mail seems familiar, so you might get tricked into clicking on whatever clickable content is in it.
Unfortunately this exposes your device to malware that hands your data off to the hacker, who can decide what to do with it further.
SMS and social media phishing
Like the above example, you could be approached with lucrative offers or links via text messages or social media messages. Typically, the messages seem relevant to the user as they will be made to look like they’re related to apps or services you’re using.
Voice phishing
Voice phishing attacks are schemes that appear as though they’re coming from a credible number. Normally, you’ll get a call about something related to credit cards or taxes to get you into a state of worry, leading you to disclose personal information on the phone.
Spear phishing, whaling and BEC
Spear phishing normally targets specific individuals within a company who are likely to have access to sensitive data. Spear phishers spend time collecting information they can use to reach out to the individual looking as trustworthy as possible. They’ll typically lead with something relevant, for example mentioning an upcoming company event, and make a seemingly legitimate request.
Whaling is a more elaborate form of spear phishing, which targets people in even stronger positions such as executives or high-value individuals. The ultimate goal is to get them to transfer financial or other sensitive information that can be used to compromise the entire business.
Credit: Azamat E on Unsplash
BEC, or Business e-mail compromise, is a specific spear phishing technique carried out via e-mail. While there are many ways this is done, most commonly you’ll see instances where the phisher poses as a CEO or similar executive, or as a lower-level employee in specific positions (e.g. sales managers or financial controllers).
In the first situation, the impersonator reaches out to employees requesting them to transfer certain files or pay invoices. In the second situation, the phisher takes control of the employee’s e-mail account and sends false instructions to other employees in order to obtain data and information from them.
What can you do?
There are many ways you can be aware and spot a phishing attempt. Here are some tips:
Always check the sender’s address in your e-mails, even when they seem to come from a familiar source.
In any instance where payment information is requested, be very, very careful.
If you are receiving attachments you never asked for and definitely didn’t expect, better not click on them.
Beware of content that transmits a sense of urgency (sales deals, urgent updates to login credentials, etc.).
Bad spelling and grammar are usually a telltale sign of phishing.
Links that look shortened (e.g. Bit.ly) or just suspicious in general - if you have a bad feeling, do not click on them.
If you are receiving threats, you probably shouldn’t be clicking on anything in that message.
Always examine first-time senders in detail.
Block suspicious e-mail addresses, numbers and social media accounts.
If you are receiving a coupon for free stuff… You aren’t.
If you’re being asked to update your payment details by a service you use, such as Netflix, chances are it’s an impersonator.
Those are some of the ways to identify and prevent phishing attacks. However, sometimes phishers disguise themselves a little too well or a misclick happens and there you go - you’ve been exposed to malware.
Credit: FLY:D on Unsplash
This won’t happen if you invest in powerful protection software from the get-go, though. A good antivirus program like Bitdefender will keep you safe from becoming a victim of phishing scams. In fact, it will protect you from malicious attacks overall.
Be it your household or your business you’re concerned about, there are a bunch of different packages and options available, providing different kinds of cybersecurity services. That’s the only way you can ever really be sure you aren’t at risk of a digital attack.
Summary
Have you ever been targeted by phishers and didn’t know that’s what it was until you read this article? Many can relate. Protect yourself before it’s too late!
In case you don’t know, when you visit a website that uses HTTPS, it also offers an SSL certificate to the browser in order to verify the website’s identity. Although it may contain lots of things inside it, one of them is the URL of the website. So if the certificate does not match the URL to what you entered, you will most likely get the “Server’s certificate does not match, ERR CERT COMMON NAME INVALID” error which indicates that the connection is not private and the site may try to steal your data but worry not, as this post will guide you in resolving this issue.
To fix the ERR_CERT_COMMON_NAME_INVALID error, here are some suggestions that might help.
Option 1 – Check the website’s certificate
If you own the website where you’re getting the error, then you might have to check if the website’s certificate is installed properly and configured on the server as it could be the reason why you’re suddenly getting the error.
Option 2 – Check the Windows Host file
You can also try to cross-check the Windows Hosts file to find out if the website you are trying to open has been blocked, because if it is, then it’s no wonder why you’re getting the ERR_CERT_COMMON_NAME_INVALID error. There are instances when some third-party application modifies the file and adds some websites to the blocklists. So if the website is indeed blocked, you need to remove it from the list.
Option 3 – Use the Google Public DNS
You might want to change your DNS to Google Public DNS as it could also help you in fixing the ERR_CERT_COMMON_NAME_INVALID error in Chrome. To do so, follow the steps below.
The first thing you have to do is right-click on the network icon in the Taskbar and select Network and Sharing Center.
Next, click on the “Change Adapter Settings” option.
After that, search for the network connection that you are using to connect to the internet. Note that the option might be “Wireless Connection” or “Local Area Connection”.
Right-click on your network connection and click on Properties.
Then select the new window to choose the “Internet Protocol 4 (TCP/IPv4)” option.
After that, click on the Properties button and click the checkbox in the new window for the option “Use the following DNS server addresses”.
Type in “8.8.8.8” and “8.8.4.4” and click OK and exit.
Option 4 – Run the built-in Malware Scanner and Cleanup Tool in Chrome
In case you don’t know, there is actually a built-in malware scanner and cleanup tool in Chrome that helps you get rid of any unwanted ads, pop-ups, and even malware, as well as unusual startup pages, toolbars, and other things that could affect the performance of the browser. In addition, this built-in tool in Chrome might also help in fixing the ERR_CERT_COMMON_NAME_INVALID error.
Option 5 – Reset Chrome
Resetting Chrome can also help you get rid of the error. Resetting Chrome means restoring its default settings, disabling all the extensions, add-ons, and themes. Aside from that, the content settings will be reset as well and the cookies, cache, and site data will also be deleted. To reset Chrome, here’s what you have to do:
Open Google Chrome, then tap the Alt + F keys.
After that, click on Settings.
Next, scroll down until you see the Advanced option, once you see it, click on it.
After clicking the Advanced option, go to the “Restore and clean up option and click on the “Restore settings to their original defaults” option to reset Google Chrome.
Mousepads are a common thing among computer users, everyone is using them and know what are they good for. Recently in the past few years, there are a lot of gaming mousepads on the rise, do you really need them, and do they back up their price? Short answer: YES, long answer: keep reading below.
Size advantage
One of the first things that one can see is the great difference in sizes between a regular mouse pad and a gaming one. Gaming pads have much more variety in size spawning all the way to really judge ones that you can use on your whole desk and place both keyboard and mouse on them. This will, of course, let you move your mouse more freely and have a much larger surface to use without the need to always lift the mouse up and center it on the regular pad.
Material advantage
Material on what are gaming pads built upon is extremely high in quality and usually even water phobic or water-resistant and it will allow great mouse movements on it. The backside is usually made of high-quality fabric that will stop slipping on the desk so the pad will stay at its pace during long sessions of work or gaming. Usually, standard mousepads are made with plastic or some other cheap material whereas gaming pads are made from fiber, high-quality fiber.
Other advantages
Among other great stuff that gaming pads have are wrist gel for hand resting and RBG light that looks cool, although RGB light is just a vanity that looks good gel for the wrist is a really good feature that will place less stress on your hands during long sessions of time spent in front of the computer.
If you suddenly noticed that your Onscreen keyboard in Windows 10 has become completely white or transparent for some reason, then you’ve come to the right place as this post will guide you on what you can do to resolve this kind of issue in your computer.
As you know, the on-screen keyboard is included in Windows 10 and has an executable file named “osk.exe”. The on-screen keyboard is a part of the Ease of Access feature in Windows 10 which allows users to navigate the computer with the help of the mouse instead of the physical keyboard. However, there are times when you might encounter some issues when using the on-screen keyboard. One of the issues reported recently is that the on-screen keyboard becomes transparent or it only displays the borders but there is no way for you to access it. You also won’t be able to move it from the view completely. To fix this problem, there are several suggestions you can check out. You can try to check the Fade button or run the Windows Touch Keyboard troubleshooter. You can also restart its process in the Task Manager. For more details, refer to each one of the given options below.
Option 1 – Try to check the Fade button
The first thing you can do is to check the Fade button on the on-screen keyboard. You can find it at the bottom right corner of the keyboard. If it is enabled, then it’s probably the reason why your on-screen keyboard is transparent as it lets it fade in the background. Thus, you have to disable it to resolve the problem.
Option 2 – Try to run the Windows Touch Keyboard troubleshooter
The next option you can check out is running the Windows Touch Keyboard troubleshooter. This troubleshooter will help you identify the problem and would fix them automatically.
Option 3 – Try to restart the process of the on-screen keyboard via Task Manager
The next thing you can do is to restart the on-screen keyboard’s process in the Task Manager. Just follow the steps below.
First, tap the Ctrl + Shift + Esc keys to open the Task Manager.
Next, go to the Processes tab and look for the option that says, “Accessibility On-screen Keyboard”.
Once you found it, click on the drop-down arrow next to it and right click on the “On-screen Keyboard” option, and select End task to end its process.
After that, tap the Win + R keys to launch the Run utility and type “osk.exe” in the field, and then hit Enter to open the on-screen keyboard.
Users are reporting that randomly their screen will just go black for a second and come back. When this happens, it usually distorts any video currently on the screen; sometimes, they can resume working on the PC normally. However, when they view the event logs, they see the error message Display driver nvlddmkm stopped responding and has successfully recovered.
In this article, we will address solutions to this issue and how to not have it again.
Remove Aura iCUE plugin (applies to only ASUS motherboards)
Some PC users discovered that iCue adds an Aura plugin for ASUS MOBOs. That, combined with EVGA Precision X1, was causing the error it seems – this was determined when the screen would turn off and on when opening EVGA x1 software. In this case, the issue was resolved by removing the Aura iCUE plugins.
Change Power Management mode
Right-click the battery icon on the notification area on the right of the Taskbar.
Select Power Options.
In the Power Options window, locate your current Power Plan.
Select High performance, if that’s not your current power plan.
Now, click on Change plan settings next to it.
Now click on Change advanced power settings.
Expand PCI Express section.
Expand Link State Power Management.
Now set power saving to Off for both On battery and Plugged in state. This would fix any issues caused by the low power of the video card.
Click Apply > OK to save changes.
Update graphics driver
Go into device manager
Expand display adapter section
Right-click on adapter
Click on update driverReboot
Rollback graphics driver
Go into device manager
Expand display adapter section
Right-click on adapter
Click on Roll back driverReboot
Uninstall and reinstall graphics card driver
Go into device manager
Expand display adapter section
Right-click on adapter
Click on Uninstall deviceReboot
Replace the graphics card
If everything else failed, replace the graphic card
RSAT or Remote Server Administration Tools for Windows 10 is a collection of programs for IT experts. It helps in managing Servers from a Windows 10 PC and starting with the Windows 10 v1809 or the October 2018 update, users have to install the Remote Server Administration Tools for Windows 10 as Features on Demand or as Optional Features.
The program includes the Microsoft Management Console or MMC snap-ins, Server Manager, consoles, Windows PowerShell cmdlets, and providers as well as command-line tools for managing roles and features that run on the Windows Server. So if you have updated your Windows 10 pc to v1809 or later then the RSAT tool has to be installed as a set of Features on Demand right from Windows 10. You can install RSAT Tools on Windows 10 Enterprise or Windows 10 Professional and once you install it, make sure that you do not install RSAT tools from the Microsoft Download page directly.
Step 1: Open Settings and then go to Apps > Apps & Features.
Step 2: Next, click on Manage Optional Features.
Step 3: After that, click on Add a Feature which will load all the optional features one can install.
Step 4: Now scroll to find the listing of all 18 RSAT tools and depending on what you need, click and install them.
Step 5: Then go back to where you should see the progress of the installation. Click on the Manage Optional Features page to check the status.
Note: If you are well-versed with the command line or automation, you can also install Remote Server Administration Tools for Windows 10 via DISM /add-capability. And when you install anything via Features on Demand, they stay across Windows 10 version upgrades.
On the other hand, if you feel that you don’t need a particular RSAT feature, you have the option to uninstall it using the Manage Option Features. However, bear in mind that some tools depend on one another which means that if you uninstall anything that has a dependency, it will only fail that’s why you need to be careful.
To uninstall an RSAT feature, here’s what you have to do:
Step 1: Go to Settings > Apps > Manage Optional Features.
Step 2: After that, look for the list of installed feature that appears before this.
Step 3: Now select the feature you want to uninstall and go back.
If you have some system-related issues that need to get fixed, there is a one-click solution known as [product-name] you could check out to resolve them. This program is a useful and efficient tool that could repair corrupted registries and optimize your PC’s overall performance. Aside from that, it also cleans out your computer for any junk or corrupted files that help you eliminate any unwanted files from your system. This is basically a solution that’s within your grasp with just a click. It’s easy to use as it is user-friendly. For the complete set of instructions in downloading and using it, refer to the steps below.

 Speaking of old players of old Diablo 2, they can transfer their old characters into remaster and continue playing them within this new great HD environment. There are some steps and requirements but we are here to help and transferred characters will bring full stash, inventory, and equipped items with them.


