When upgrading to Microsoft Windows 10, some users may encounter Error Code 8024402C. This error, while attempting to update, is a result of five possible issues. The error code itself is not a critical concern, yet while the error is occurring, users will not be able to upgrade their Windows software. As with any Microsoft error code, even if it is not critical, it is recommended that the error be addressed sooner rather than later. An insignificant error now could lead to a larger, more catastrophic error later on.
Common symptoms include:
 Error Causes
As previously stated, there are five major reasons why error code 8024402C occurs.
The sooner these known causes are addressed, the sooner you will be able to successfully upgrade to Microsoft Windows 10.
Microsoft Support posits four different resolutions to these known error code 8024402C issues. Some of these methods will be more comfortable for at-home users than others. If you are experiencing this issue in a corporate or business setting, it may be better to have your IT tech or department attempt the methods.
Again, not all of these methods are meant for computer users who do not usually explore and change software settings of this nature. If you do not feel comfortable with any of these methods, you can opt to download and install a powerful automated tool to repair Windows error code 8024402C.

 What exactly is GitHub?
HKEY_LOCAL_MACHINESOFTWAREMicrosoftWindows NTCurrentVersionScheduleMaintenance
format F: /fs:ntfsIn the command given above, “F” is the drive letter and “NTFS” is the file system you want. Just remember to replace “F” with the drive letter you want to format as well as the file system you prefer. Brace yourself as this process might take quite a while even if you only have a 4 GB USB drive – so you must not close the window under any circumstances as the drive might get corrupted and wait for the process to finish.
“EventData BugcheckCode 159 BugcheckParameter1 0x3 BugcheckParameter2 0xfffffa80029c5060 BugcheckParameter3 0xfffff8000403d518 BugcheckParameter4 0xfffffa800208c010 SleepInProgress false PowerButtonTimestamp 0Converts to 0x9f (0x3, 0xfffffa80029c5060, 0xfffff8000403d518, 0xfffffa800208c010)”This kind of BSOD error is caused by an issue with the Power Supply components in both the software and hardware parts of your computer. In such cases, if your computer is stuck in a reboot loop, you need to troubleshoot the problem via Safe Mode or in the Advanced Startup options screen.
iLivid is a video download manager for YouTube and other third-party video-hosted websites. iLivid download manager has powerful features that make it the fastest and easiest way to download hosted files. iLivid includes XBMC plug-ins that let you play almost all popular audio and video formats, in any available protocol and in any media type: streaming, CDs, DVDs, and RAR and archived files from your hard drive.
Livid is a program developed by Bandoo Media Inc. Upon installation, it defines an auto-start registry entry which allows the program to run on each boot for the user who installed it. A scheduled task is added to Windows Task Scheduler in order to launch the program at various scheduled times. The software is designed to connect to the Internet and adds a Windows Firewall exception in order to do so without being interfered with.
Multiple Anti-Virus scanners have detected iLivid as a possible Malware and are therefore not recommended.
 Razer is a well-known brand among PC gamers and users, it started as a peripheral manufacturer focused on keyboards and mouse but after years passed Razer expanded its inventory offerings. It soon started offering headphones and lately has branched into wider product lines like gaming chairs and protection masks.
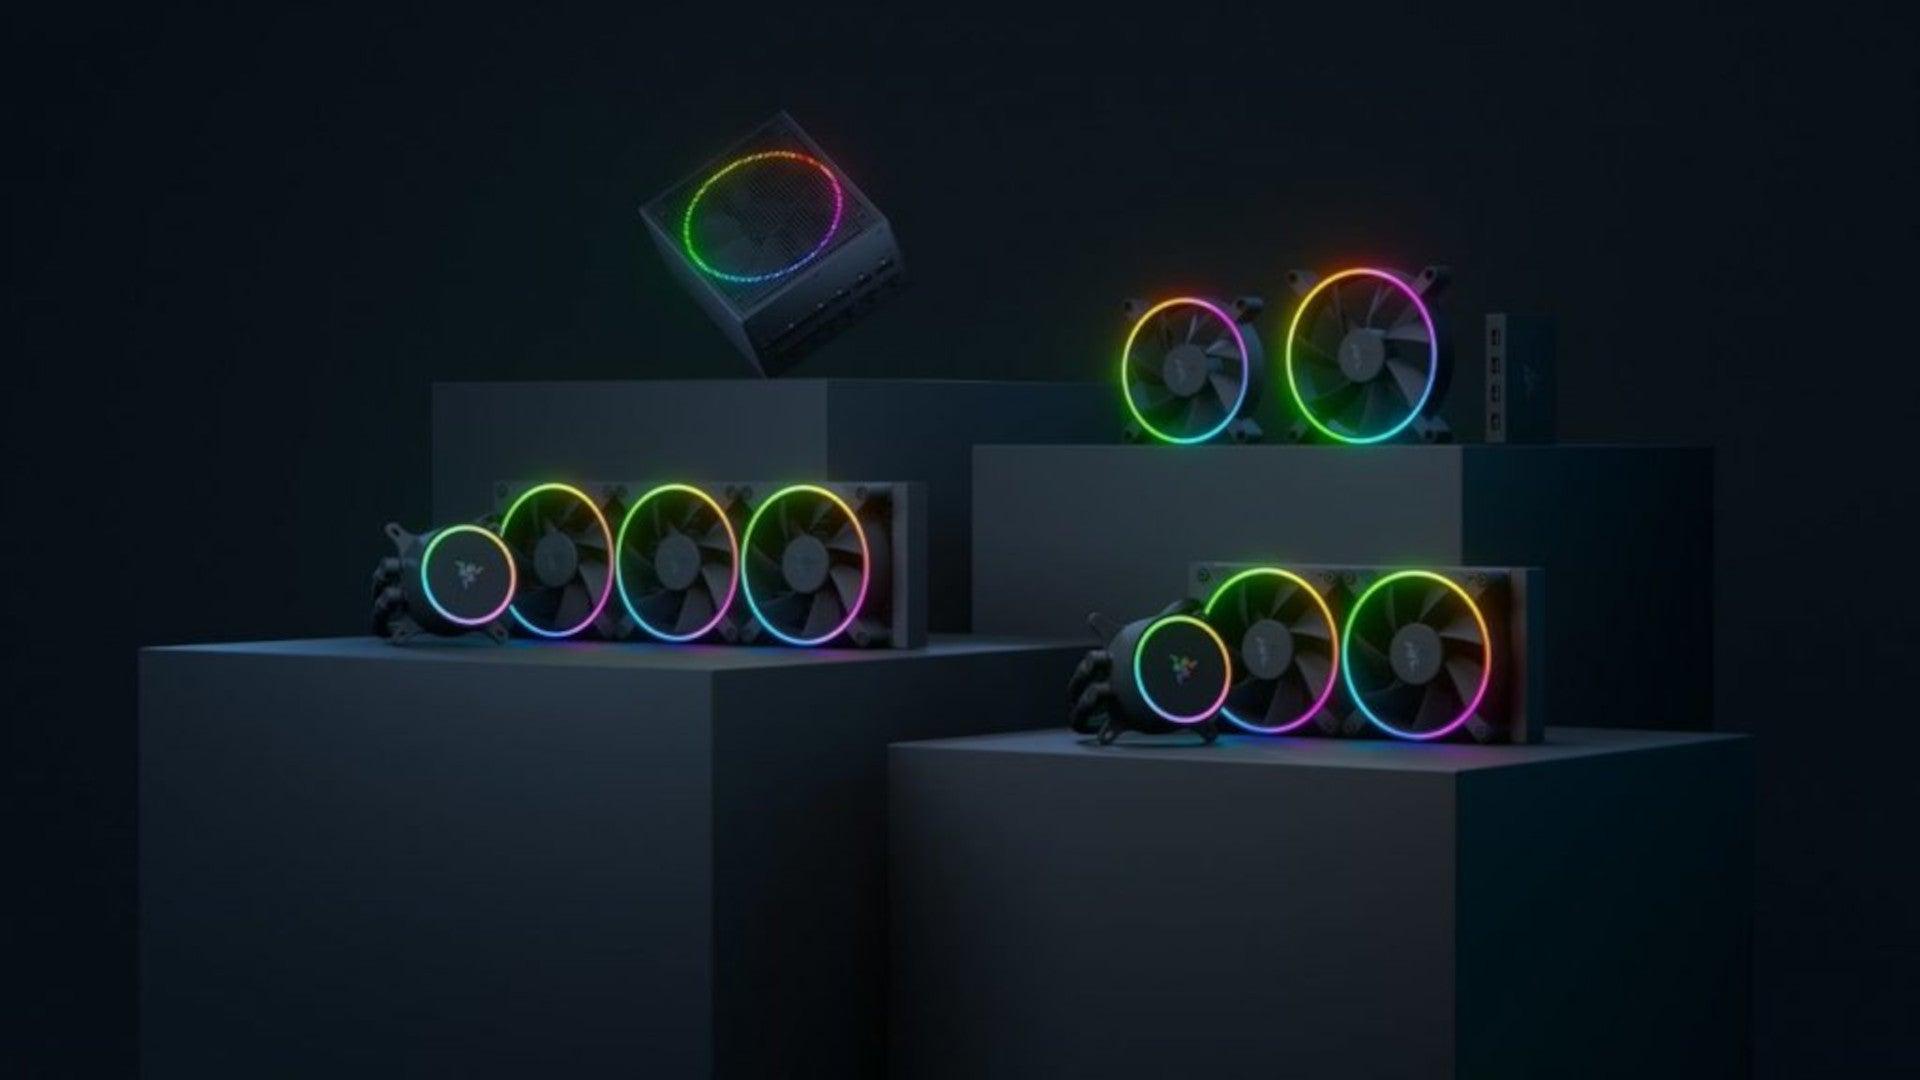
It is not a big surprise that Razer is expanding into other branches of the PC industry. This time, however, it has revealed not one but three new hardware for your PC. Case fans, all in one liquid cooler and power supply.
There are not many details about the products themselves but one thing is one hundred percent confirmed, they come with Razer Chroma, all of them, even the fans.
Razer is a well-known brand among PC gamers and users, it started as a peripheral manufacturer focused on keyboards and mouse but after years passed Razer expanded its inventory offerings. It soon started offering headphones and lately has branched into wider product lines like gaming chairs and protection masks.
It is not a big surprise that Razer is expanding into other branches of the PC industry. This time, however, it has revealed not one but three new hardware for your PC. Case fans, all in one liquid cooler and power supply.
There are not many details about the products themselves but one thing is one hundred percent confirmed, they come with Razer Chroma, all of them, even the fans.
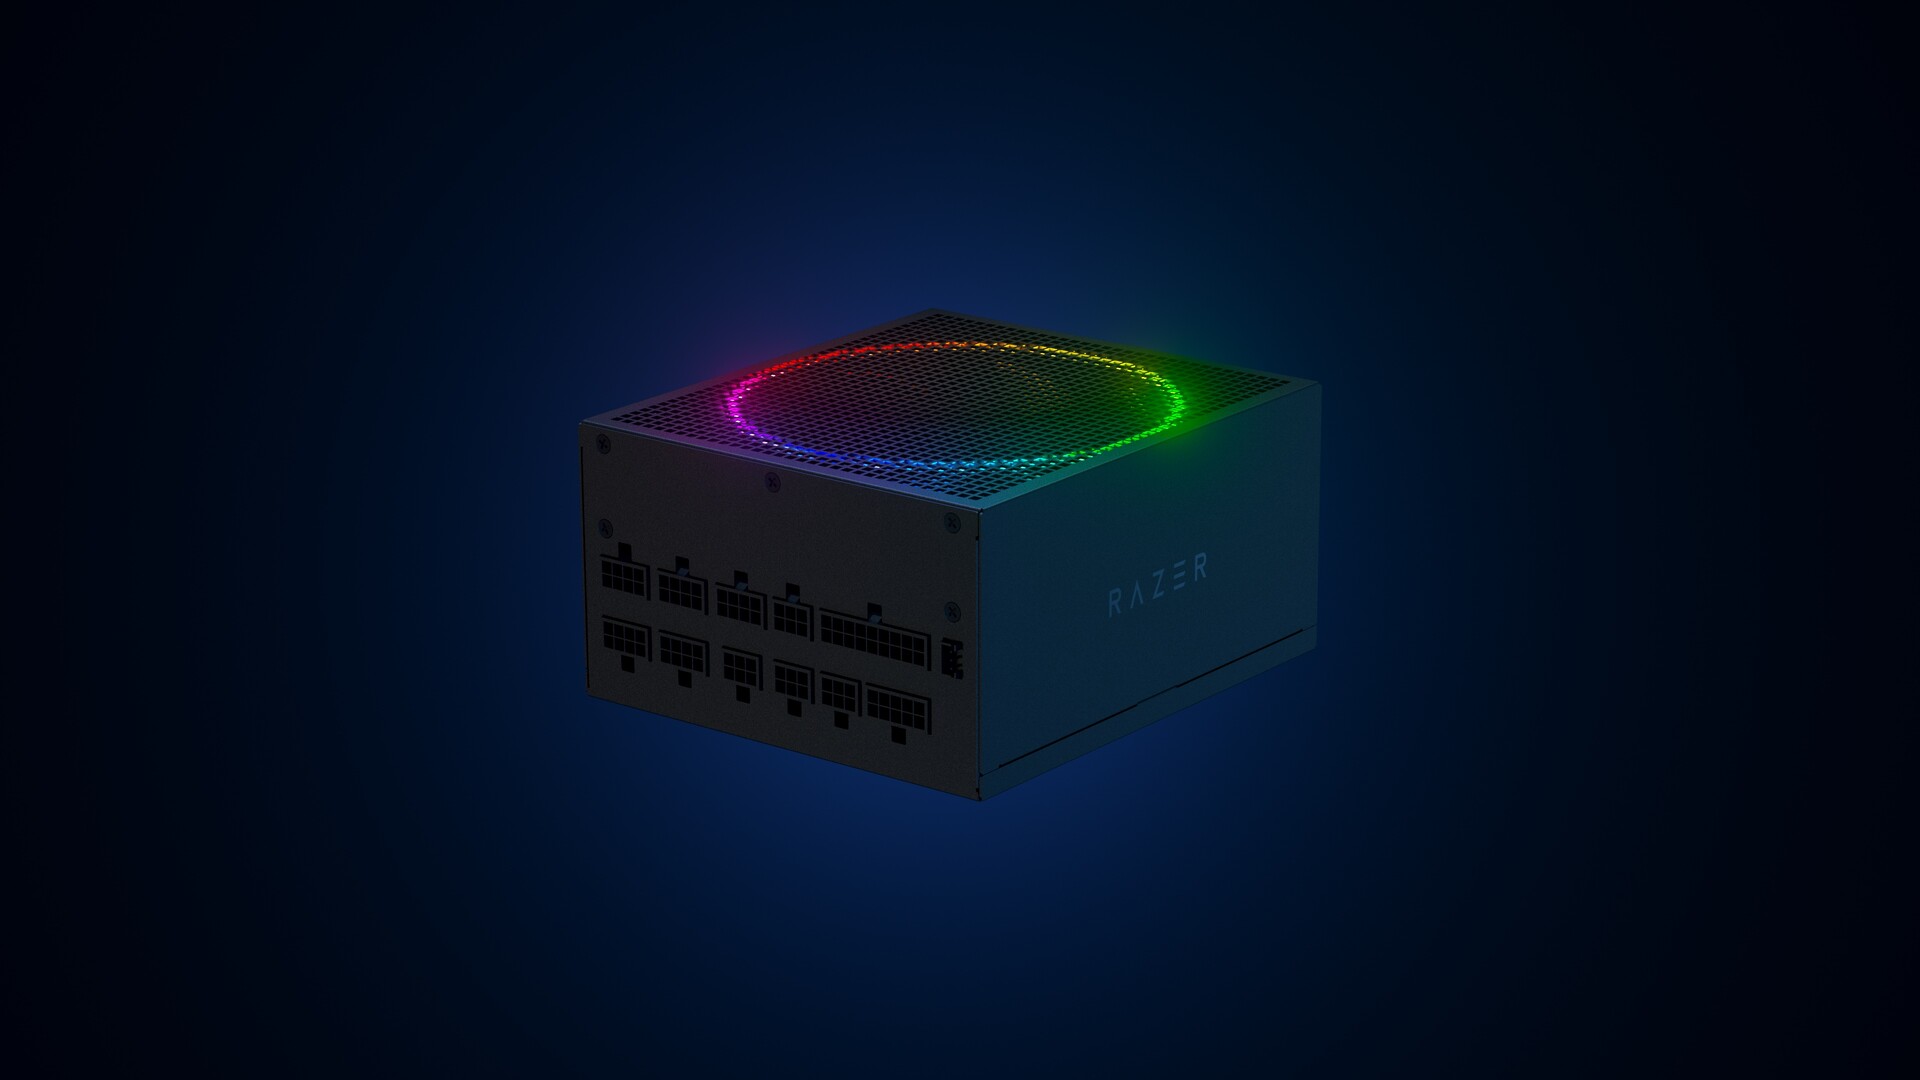 Most interesting for me personally is Razers Katana, the power supply unit. It is a modular power supply ranging from 750W to 1200W with the additional option of Titanium rated one with an impressive 1600W of power. Power supply will start shipping in early 2022 and at the time of writing this article no price range has been released.
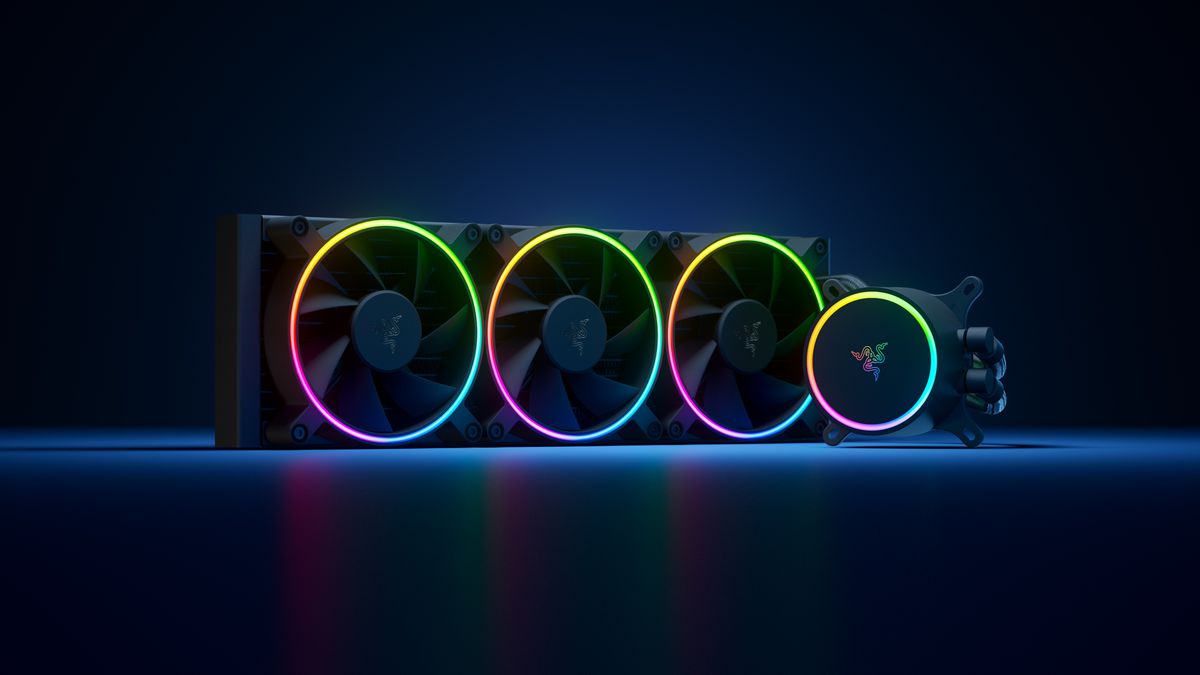 Hanbo liquid cooler will feature an optimized intake design so it can ensure greater heat transfer and fluid dynamic for improved reliability and silent operation. Radiator comes in 240mm size with two fans and a larger one of 360mm with three fans. The pump will be able to rotate in any direction of full 360 degrees so it can fit in any case. Hanbo will be released in November this year but no pricing has been released so far.
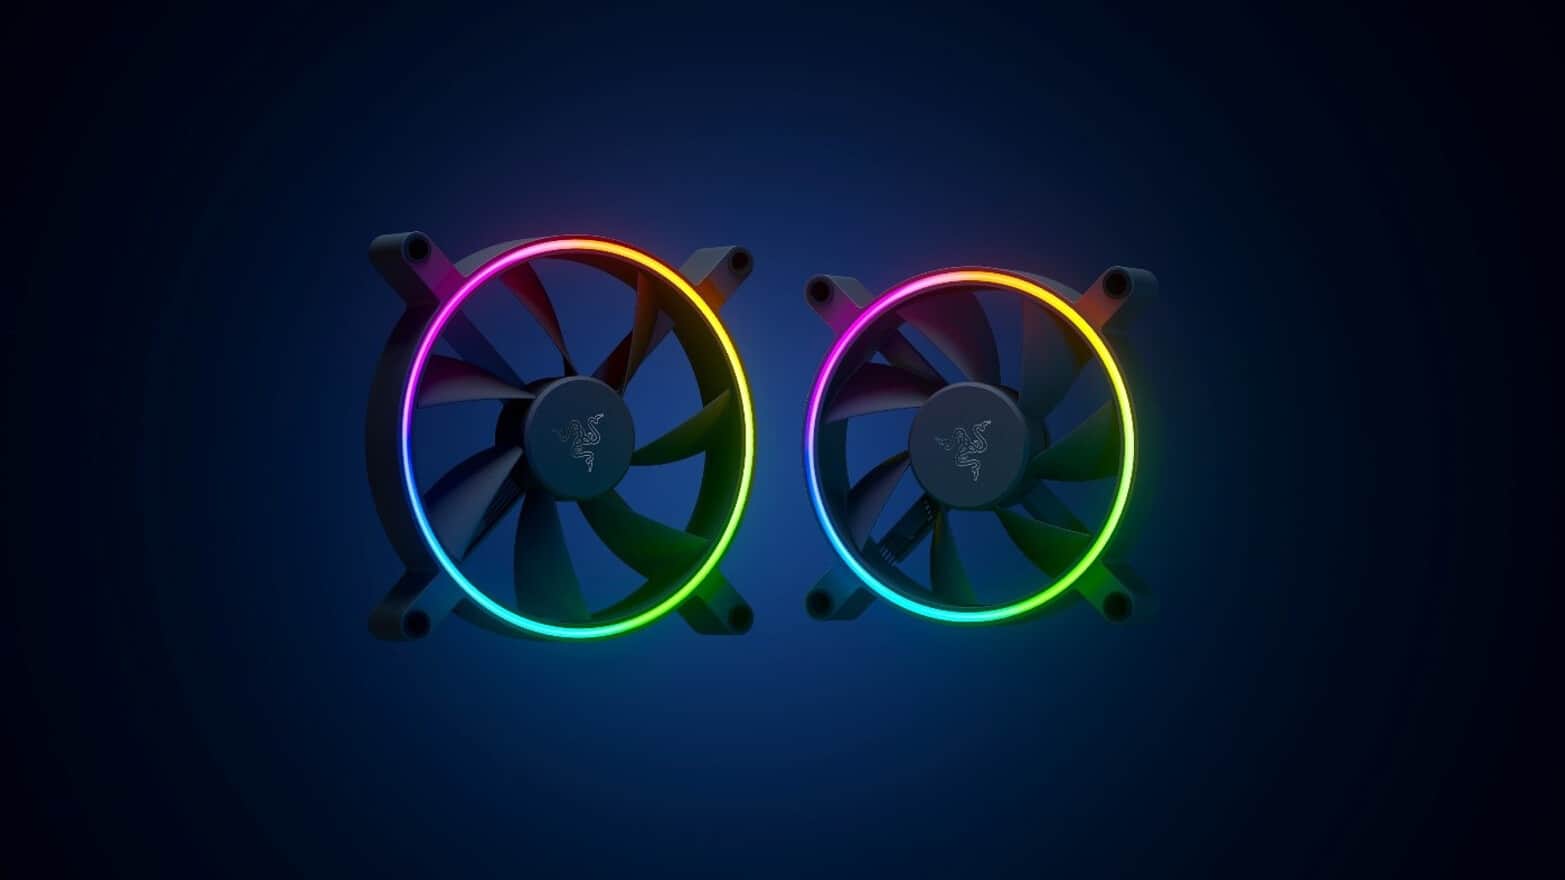 Kunai fans will boast high static pressure performance with lowered noise. They will go as far as 2200rpm for the 120mm version where the 140mm version will go up to 1600rpm. They will come with addressable LEDs and up to eight fans will be able to be connected to Razer’s PWM fan controller that will come with a magnet at the back for easy attachment to any steel part of PC casing.
PWM will use Razer’s Synapse software to customize pulse width modulation in order to improve airflow and noise. PWM will be priced at $49.99 in the Razer Store and it is available for preorder. Fans are priced at $44.99 for one 120mm or $129.99 for a three-pack of 120mm. One 140mm will go for $49.99 and a three-pack will be $129.99.
Kunai fans will boast high static pressure performance with lowered noise. They will go as far as 2200rpm for the 120mm version where the 140mm version will go up to 1600rpm. They will come with addressable LEDs and up to eight fans will be able to be connected to Razer’s PWM fan controller that will come with a magnet at the back for easy attachment to any steel part of PC casing.
PWM will use Razer’s Synapse software to customize pulse width modulation in order to improve airflow and noise. PWM will be priced at $49.99 in the Razer Store and it is available for preorder. Fans are priced at $44.99 for one 120mm or $129.99 for a three-pack of 120mm. One 140mm will go for $49.99 and a three-pack will be $129.99. “The site can’t be reached, This site on the company, organization, or school intranet has the same URL as an external website. Try contacting your system administrator. ERR ICAN NAME COLLISION.”This kind of error is caused by an error in a private namespace or a random redirection to an incorrect proxy server. There are several ways to fix this error. You can try to check the integrity of the Hosts file or check the proxy. You could also try to use the Registry Editor and apply some tweaks or remove any conflicting browser extensions or flush the DNS cache, as well as run a malware scan.
Presented next are essential steps in order to recognize a dying graphic card.
“A USB device has malfunctioned and exceeded the power limits of its hub port. You should disconnect the device”.To easily fix the problem, you can try to disconnect the device and click on Reset and if you click on Close, the port will not work until you unplug it and then restart your computer. On the other hand, if disconnecting the device did not resolve the problem, you can try running the Hardware & USB troubleshooter or use a USB hub. You can also try to reinstall, uninstall or roll back the USB drivers or run the OEM diagnostics. For more information, refer to each one of the potential fixes provided below.