Error code 0x803f7001 results when users fail to update their Windows operating system. This often occurs when they seek to update from Windows 8 or 8.1 to Windows 10. Users will be able to identify error code 0x803f7001 because of the following common symptoms which occur:
Inability to upgrade your Windows operating system to Windows 10
Message box with error code 0x803f7001
Solution
Error Causes
The causes for error code 0x803f7001 are usually associated with the use of an unlicensed version of Windows 8 when upgrading to Windows 10. In such cases, the error code occurs when there is no valid Windows license or product key on your device.
Further Information and Manual Repair
To fix error code 0x803f7001, users may not necessarily need technical knowledge or the help of a Windows repair technician. Usually, the process is simple and can be resolved with the use of a valid product key. However, if users have trouble implementing the instructions found in the manual repair methods listed below, contact a Windows repair specialist for help or use an automated tool that provides the best solutions for problems like error code 0x803f7001.
Method One: Use a Valid Product Key
A product key is a 25-character code that enables users to activate their Windows operating system. To successfully activate your operating system and resolve error code 0x803f7001, enter the product key in the correct order. Once you have a valid product key in your possession, begin to resolve the error code by following the instructions below:
Step one: Click the Start button then select Settings
Step two: Select Update & security then Activation
Step three: Click the Change product key
Step four: Type in your valid product key. (Ensure you include the 25 characters of your product key in the correct order.)
Once you type in the valid product key, you should be able to successfully upgrade to the latest version of Windows. However, this method is only effective if the error code 0x803f7001 on your device is caused by issues related to the product key.
If the error code reappears after attempting manual repair method one, move to the next manual method suggested below.
Method Two: Reinstall Genuine Version of Windows 8
This method is crucial for you to perform if method one was not successful. Begin the reinstallation process by ensuring you have a genuine version of Windows 8. After reinstalling this version of your Windows operating system, attempt to upgrade to Windows 10 by following the instructions below:
Step one: Type Settings in the search box near the Start button or click the Start button and select Settings
Step two: After clicking Settings, select Update & Security
Step three: Select Windows Update then the Check for updates tab
Step four: Activate Windows 10 update
If this method is successful, you will no longer see error code 0x803f7001 pop up in a message box. You will also be able to access Windows 10, and all the benefits it provides users, on your device.
Method Three: Install an Automated Tool
Automated tools help PC users eliminate common issues such as Windows error codes. To address or rectify error codes like error code 0x803f7001 download a powerful automated tool on your machine. This tool enables users to access quick solutions. It also scans for and corrects issues that may result in error codes or poor PC performance.
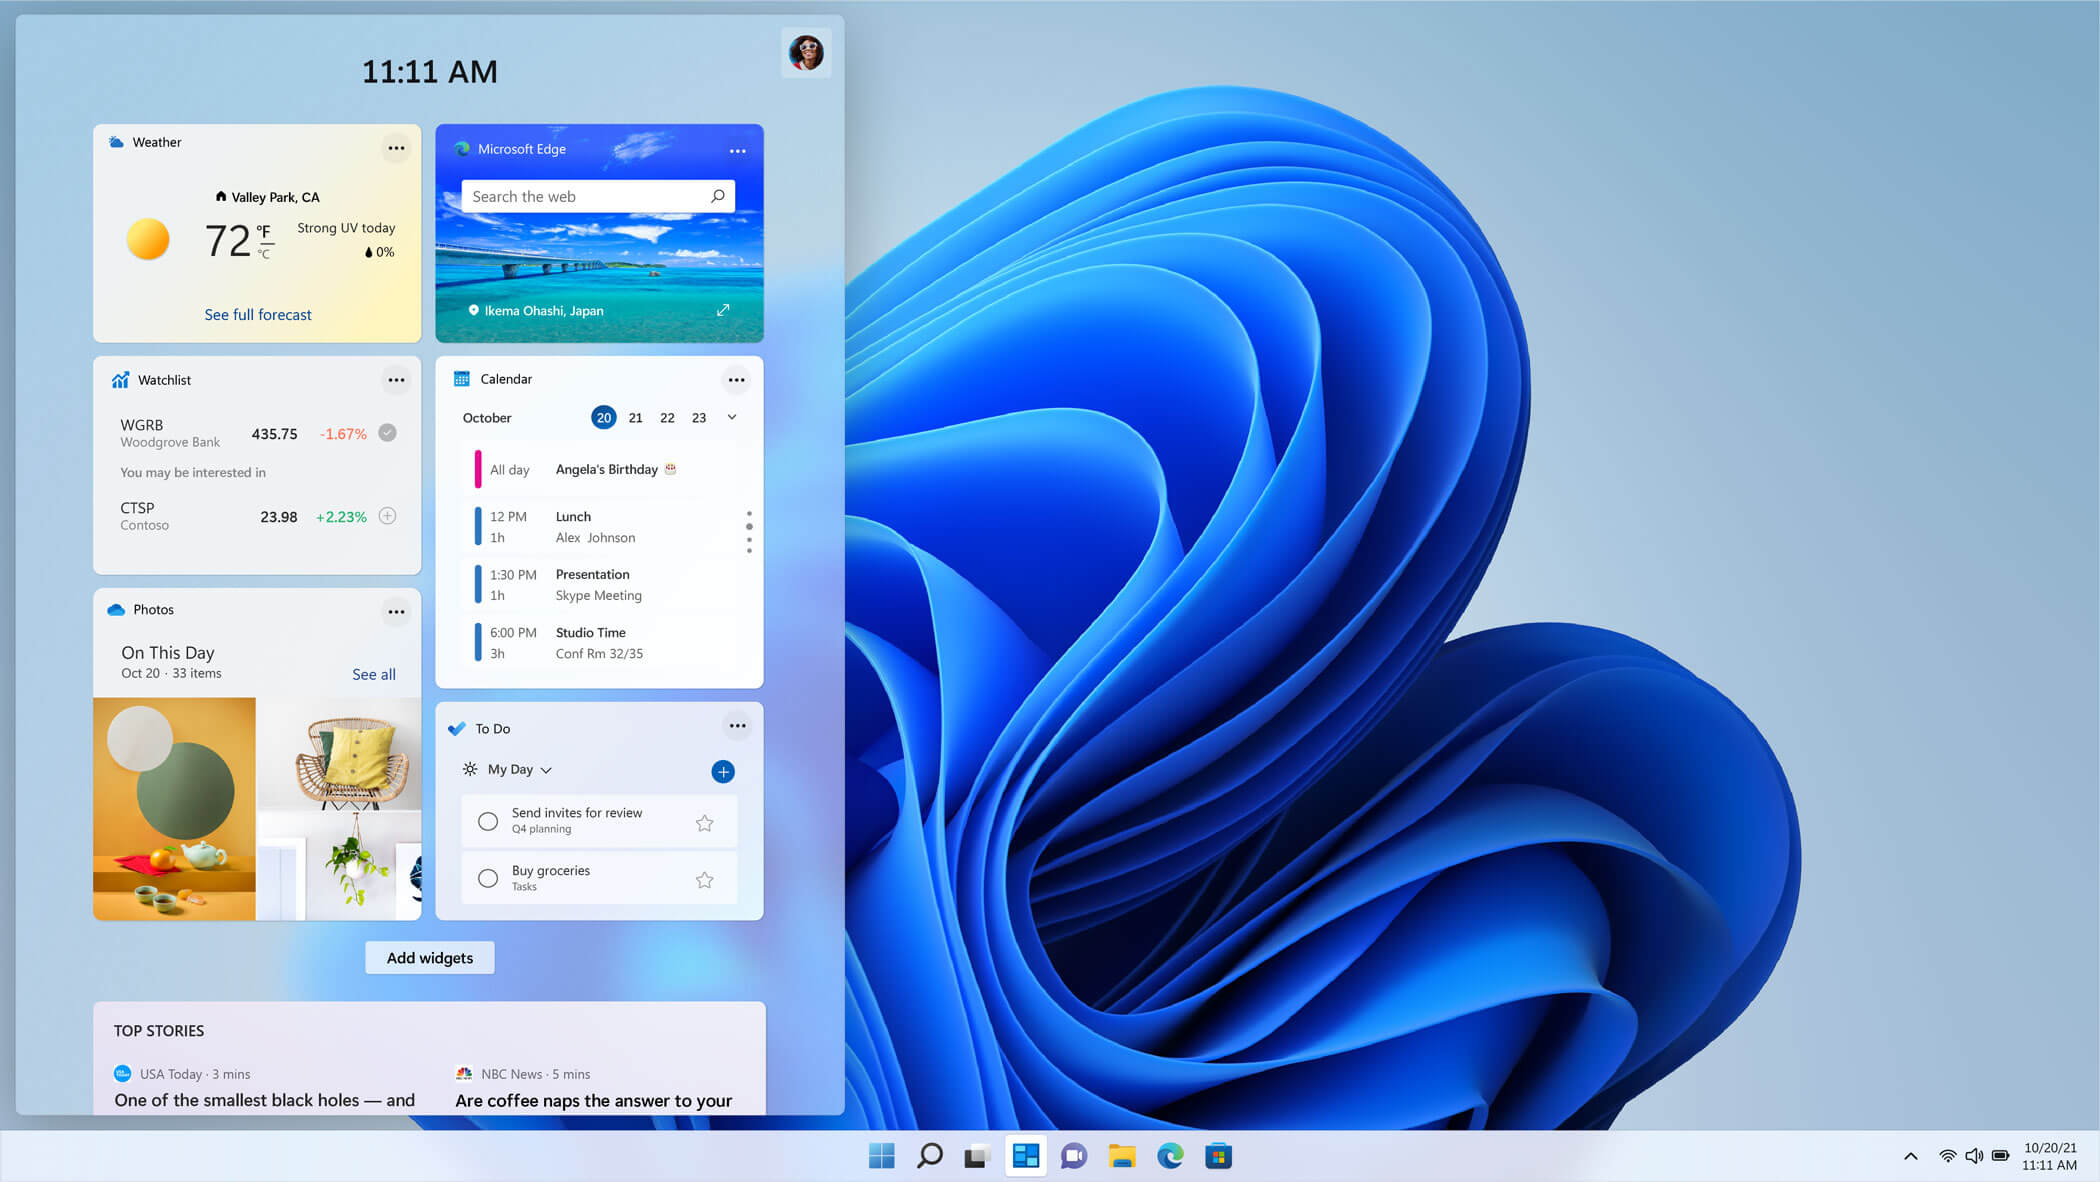
The new widget's menu inside Windows 11 is generally met with a positive attitude but there are still users which prefer not to have it. Luckily for them, Microsoft included a very easy way to turn the widgets menu on or off. Follow this easy guide to see how.
Right-click on the widget button in the taskbar and click on Hide from Taskbar and that’s it
Alternatively, you can also turn it off via the setting app.
Go to the settings app and navigate to Personalization > Taskbar > Taskbar Items and flipping the switch beside Widgets to Off.
Please note that both methods will only hide the button to toggle widgets menu, at the current state there is no really a way to actually turn it off, only hide it and make it not available to bring it up.
A solid reason to switch to Mac from Windows PC is Mac OS. Based on Linux, offers more stability and better security than Windows but you will not be able to find a vast array of applications on it.
Even when Mac OS X (the first big one) was first introduced, it looked and felt like ages beyond Windows (Microsoft just recently made a slick and modern design with Windows 11). Under the hood, it turned out that the operating system itself is stable and incredibly fast & responsive. If you value stability and easiness of use, Mac OS is the Operating system for you.
Apple ecosystem
This one is easy, if you are already invested in apple devices like iPhone and iPad, having an apple computer is one step forward into the apple ecosystem and one more step into easy sharing of documents and data between devices.
Calendars, emails, photos, videos, documents, and many more can easily be shared and synched between devices with a single apple ID making workflows much easier than on other operating systems.
Development
Developers all around the world say that developing on Mac is much better and smoother than on PC, this has probably to do something with OS being based on Linux but whatever the case is, it is much smoother and it just feels better. Apple laptops are often the go-to choice of developers for a reason.
Also if you are in the development business for applications and services aimed at iPhone or iPod then there is no really another way than to be into the apple ecosystem and own apple hardware.
Professional software
A lot of professional-grade software exists for both the Windows platform and Mac OS but there is some software that exists exclusively for Apple hardware like Final Cut Pro or Logic Pro. Both applications are used by professionals and are industry-standard software.
Logic pro is used by industrial audio specialists all around the world and is used in professional studios. Final Cut Pro is also used worldwide by video editors and if you are specializing in any of these two fields Mac seems like a very reasonable platform since the software can not be found on Windows. These two are examples, there are other similar applications that are only available on Mac OS
Longevity
Apple hardware is made of high-quality materials and components and it is proven over time that it lasts longer than usual. There are iPhones out there that have 13 years and they are still working, G3 and G4 Macs that are still functional.
When buying Apple products they will outlive other ones if treated properly so in the end you could be saving money by purchasing them.
One of the essential parts of the Windows 10 operating system is the Microsoft Store as it is the distribution hub of numerous applications such as Netflix, Facebook, and many more. In fact, Microsoft is planning to make it a hub not just for UWP applications but also Windows Classic applications. Microsoft has already built a bridge with the power of Project Centennial which allows developers to migrate and upload their Windows Classic applications to the Microsoft Store. Although the Microsoft Store has been constantly improving, there are still times when you might face an error while using it. One of these errors is error 0x80131500. When you encounter this error, you will get the following error message on your screen:
“Try that again, Something happened at our end, Waiting a bit might help, The error code is 0x80131500 in case you need it.”
To fix this error, you can try changing your internet connection, toggle the date & time settings, change DNS, create a new user account, run the Microsoft Store Apps troubleshooter or reset the Microsoft Store as well re-register it using Windows PowerShell.
Option 1 – Try changing your internet connection
The first thing you can do is to change your internet connection. If you are using Ethernet, you can try to connect to a Wi-Fi connection instead and see if it helps.
Option 2 – Try to toggle the Date and Time settings
The first thing you can try is to sync the Date and Time of your computer as the wrong Date and Time settings are one of the most common causes of connection problems like the error 0x80131500. This is because of the incompatibility between the SSL Certificate validation date and the System Clock. Thus, you have to sync your System Clock. Refer to the steps below to do so.
Start by tapping the Win + I keys to open the Windows Settings.
Next, go to Time & Language > Date & time.
From there, turn the toggle on for the “Set time automatically and Set time zone automatically” option on the right-side panel.
After that, click on Region & language located on the left side panel and make sure that the Country or region on the right-side panel is set to the country you live in.
Now close the Settings app and restart your computer and see if it fixes the problem or not.
Option 3 – Try to change the DNS Server
In this option, you can try changing your current DNS settings to the Google Public DNS as it could also help in fixing error 0x80131500. To do so, follow the steps below.
The first thing you have to do is right-click on the network icon in the Taskbar and select Network and Sharing Center.
Next, click on the “Change Adapter Settings” option.
After that, search for the network connection that you are using to connect to the internet. Note that the option might be “Wireless Connection” or “Local Area Connection”.
Right-click on your network connection and click on Properties.
Then select the new window to choose the “Internet Protocol 4 (TCP/IPv4)” option.
After that, click on the Properties button and click the checkbox in the new window for the option “Use the following DNS server addresses”.
Type in “8.8.8.8” and “8.8.4.4” and click OK and exit.
Option 4 – Try to create a new Administrator User account
If you have a standard account, you can try creating a new account but this time, you create an administrator user account and then see if the error is fixed or not. Note that you have to sign in with your main account before you can create an admin account.
Option 5 – Run the Microsoft Store Apps troubleshooter
The Microsoft Store Apps Troubleshooter will help you in fixing the error 0x80131500. This is a great built-in tool from Microsoft that helps users fix any app installation issues. So this is worth a try to solve the problem. This built-in tool also helps you fix the Windows 10 Store if it isn’t working.
To use the Windows Store Troubleshooter, follow the steps below.
Tap Win + I keys again to open the Windows Settings panel.
Go to Update & Security and then go to Troubleshoot.
On your right-hand side, scroll down to find the Windows Store Apps and then click on the Run the troubleshooter option and see if it fixes the problem.
Option 6 – Try to reset the Microsoft Store cache
Just like browsers, Microsoft Store also caches as you view apps and games so it is most likely that the cache is no longer valid and must be removed. To do so, follow the steps below.
Right-click on the start button and click on Command Prompt (administrator).
Next, type in the command, “exe” and tap Enter. Once you do, the command will clear the cache for the Windows Store app.
Now restart your PC and afterward, try opening Microsoft Store again and then try to install your app or update your computer again.
Option 7 – Try to re-register the Microsoft Store app via PowerShell
Tap the Win + X key combination or right-click on the Start button and click on the Windows PowerShell (Admin) option.
If a User Account Control or UAC prompt appears, just click on Yes to proceed and open the Windows PowerShell window.
Next, type in or copy-paste the following command to re-register the Microsoft Store app and tap Enter:
The newest piece of hardware for PC or console users is not really what anyone has expected and for sure not from a company like Cooler Master.
I going to admit right here that I am a big fan of Cooler Master PC cases, I like them and they are always one of the things that I consider when building a new PC, overall I like their ideas and quality so personal for me it was quite a surprise to see that they are one that is making a new generation gaming chair.
Now truth to be told Orb X is not your typical gaming chair as you can clearly see from the pictures. The chair itself will come in two colors: white or black and RGB lighting looks to be prominently featured throughout.
The chair itself is advertised as both meant and aimed for professional and gaming crowds but I believe the gaming crowd is in general more interested in this hardware piece.
Hardware is enclosed in a fully motorized shuttle dome which aims to maximize your privacy, it supports a single 49inch display or three 27inch monitors along with surround speakers if you do not wish to use headphones.
It offers an adjustable headrest, lumbar support, and footrest so you can spend some time in it and be comfortable. Controls on the chair itself allow you to raise or lower the dome for easier getting in and out of it.
Orb X also has a compartment in its backside, it folds out and has a sliding tray designed to hold your PC or console. Everything is enclosed so wiring is not the issue.
Overall Orb X seems really like the computer chair of the future, Cooler Master expects to release the Orb X by December 2021, priced around $12,000-$14,000.
It is officially confirmed, Windows 11 release date is October 5th. Windows 11 will be released as a free upgrade to all registered Windows 10 users that have supported hardware for it.
The rest of the users will be able to install it via ISO file as a clean installation if their computer supports Windows 10 hardware requirements. The official price for the license for Windows 11 has not yet been set but I assume after release it will be set.
Priority for W11 will have users who are upgrading from W10 as stated by Microsoft.
Also, it was officially confirmed that Android apps will not be running natively in this first release of Windows 11, that feature will come in a future update, official statement below:
"We look forward to continuing our journey to bring Android apps to Windows 11 and the Microsoft Store through our collaboration with Amazon and Intel; this will start with a preview for Windows Insiders over the coming months,"
The rest of the features will be all included inside Windows 11 on launch.
As you know, System Restore is a useful tool in Windows operating system that helps users in fixing system issues by undoing any recent changes to the computer that may have caused the problem. However, there are times when you might encounter some issues when running this tool and one of these issues is when System Restore suddenly gets stuck or hangs up on initializing the restoration of the Registry in Windows 10. If you encounter a similar problem, read on as this post will guide you on what you can do in such cases.
There are several things you can do when you face this kind of problem in System Restore. First, you can try to wait it out, give it more time to load, which should not take longer than 5 minutes. And if it’s still stuck after that time, give it another hour. However, if nothing changed after an hour, then you need to troubleshoot the problem further. Keep in mind that you must not interrupt System Restore by shutting it down abruptly, it could result in an unbootable system.
To get started in troubleshooting the problem, you need to follow each one of the suggestions offered below.
Option 1 – Try to use the Windows Recovery Environment
The first troubleshooting option you need to try is to simply tap the power button for about 10 seconds. This is what you have to do when you have to interrupt System Restore or reset your Windows 10 computer. Tapping the power button for 10 seconds will perform a hard shutdown and once your computer shuts down, restart your computer again and follow the steps below but before you do that, make sure that you have a Windows bootable USB or DVD.
First, insert the bootable USB or DVD and boot into it, and select the “Repair your computer” option.
Next, once you see the manufacturer logo on your computer, tap the key to enter into Windows Recovery Environment.
After that, change the Boot sequence to DVD drive under the UEFI Firmware settings and restart your computer.
Once your computer has restarted, select the boot order and make changes accordingly as displayed in the BIOS.
Option 2 – Try to run the Automatic Repair Utility
You might also want to use Automatic Repair in fixing the error. To do so, follow the steps below.
You can start by creating and booting from a bootable Windows 10 USB Stick.
After that, click on Repair your computer located on the bottom left corner when you are on the initial Windows Startup screen.
Next, click on Troubleshoot, and then on the other screen, click the Startup Repair option.
Now select the operating system you want to repair. Once you do that, it will start to repair your operating system. Wait until the process is completed and then check if the problem’s now fixed.
Option 3 – Try to run System Restore in Safe Mode
If you can’t boot into your Windows 10 computer, you can try to run System Restore again in the Advanced Startup Options.
Boot your computer into Safe Mode.
After that, select an option > Troubleshoot > Advanced Options > Startup Settings > Restart.
Once your computer has restarted, tap the F6 key to enable Safe Mode with Command Prompt and to run System Restore from there.
Now in Command Prompt, type the “rstrui.exe” command to run System Restore in Safe Mode. This will help in fixing the problem since it would be safer to perform System Restore of the computer.
The error code 0x8024a000 is related to Windows Update. You might see this error when you try to update Windows from the Microsoft site to use the latest and new features and technologies. A connection interruption between your computer and the Windows Update server may be the cause of this error. Operating system overload or corrupt registry may also cause this error. Check your modem, router, cable, etc. to be sure that these components are working well.
Common symptoms
You are trying to update Windows and its components such as system driver. The process suddenly stops and shows the error code 0x8024a000.
Your PC frequently crashes with Error 0x8024A000 when running the same program.
Windows runs sluggishly and responds slowly to mouse or keyboard input.
You cannot connect to the Windows update server and the update will not start.
You may also receive the error message saying that some files could not be updated.
Solution
Error Causes
There may be various causes for this error. Some of which are:
No Internet connection
Windows operating system is overloaded with invalid system references
Corrupt download or incomplete installation of Windows Update software.
Faulty cable, router or modem
Windows update services are missing
The system is infected with malicious programs
Corrupted or deleted system registry files. PC registry errors occur over time because of constant writing, editing, moving, and deleting of information and files from your computer's registry time as programs are installed, modified, and removed.
Further Information and Manual Repair
We are going to discuss some easiest ways to fix up such issues and get your PC working so that you can install new updates.
Method 1:
Press the Windows button + W on your keyboard
In the search box type “troubleshooting”
In the troubleshooting box, select the View all tab
Run the troubleshooter for these services, and then try installing updates
Method 2:
Since most of the installation-related errors can be fixed by System File Checker
System File Checker is a very efficient way to fix errors. Most of the installation-related errors can be fixed by a System File Checker. To use this tool follow instructions below:
Swipe in from the right edge of the screen, and then tap Search. If you are using a mouse, point to the upper-right corner, move the pointer down, and then click Search. OR On the keyboard, press the Windows + W key. A search box will appear. Type cmd in the search box.
On the command prompt, type sfc/scannow
This will scan the system files and fix any error
Reboot the computer and try to install updates
OR
In the command prompt type sfc/scannow.
This will scan the system files and fix any errors.
Reboot the computer and try to install updates.
Method 3:
Press Windows + R
A run dialog box will appear
type services.msc and press OK
Then in Services window, look for Background Intelligent Transfer Service. Click on it.
If it is the Services issue, then it will stop the service. Click on Start in the window below, and then click Apply and OK.
Reboot your machine and retry installing updates.
Method 4:
Click Start or open search box
Type cmd
Right-click on cmd in start menu and select ‘Run as Administrator’
Type net stop wuauserv
Hit Enter
Type ren c:windowsSoftwareDistribution softwaredistribution.old
Hit Enter
Type Exit
Hit Enter
Method 5:
Your PC is always accumulating junk files from normal web surfing and computer usage. If these junk files aren’t occasionally cleaned, it can cause Windows Update to respond slowly and display an error message 0x8024A000, possibly due to conflict with files or an overloaded hard drive. Cleaning up these temporary files will not only solve this problem, but it will also speed up PC performance. Follow the steps below to clean up this junk:
Click Start
Type "command" in the search box and DO NOT hit ENTER yet!
While holding CTRL-Shift on your keyboard, hit ENTER.
You will be prompted with a permission dialog box.
Click Yes.
A black box will open with a blinking cursor.
Type "cleanmgr" and hit ENTER.
Disk Cleanup will begin calculating how much occupied space you can get back.
The Disk Cleanup dialog box will show a series of checkboxes to select. In most cases, the "Temporary Files" category will occupy the most disk space.
Check the boxes of the categories you want to clean and click OK.
If you do not possess the technical expertise required to accomplish this yourself or do not feel comfortable doing so, download and install a powerful automated tool to get the job done.
Operating systems now give users a feature that allows them to create separate partitions out of HDD or SSD-based storage in order to store data in an organized manner. This small yet powerful feature has always been supported by Microsoft. However, there are times when users might fill up on some particular very soon. This may result in the lack of space for that partition which makes the entire process of using PCs slower since there is a large chunk of files that has to be indexed in a smaller partition. If you are one of the users experiencing this dilemma, you need to either delete the other partitions to allocate their storage to the partition that is short on storage or simply recreate the partition so that all the useless data will be deleted and you can start afresh with the overflowing partition.
In this post, you will be guided on how you can delete any storage partition from your Windows 10 PC via Disk Management, Command Prompt as well as Windows PowerShell.
Option 1 – Delete storage partition via Disk Management
This is one of the simplest ways you can use to delete a storage partition. Go to the WinX Menu and from there, open Disk Management and then select the Drive you want to get rid of, right-click on it and then select Delete Volume.
Option 2 – Delete storage partition via Command Prompt
Tap the Win + X keys or right-click on the Start button and select Command Prompt (Admin) or you could also type in “cmd” in the Cortana search box and right-click on the Command Prompt icon and then select the “Run as Administrator” option from the context menu.
Once you have Command Prompt pulled up as admin, type in and enter this command – diskpart
After entering this command, the Diskpart Utility will start. Diskpart Utility is a command line-based utility just like Command Prompt but it will get a UAC Prompt after you invoke it so you have to click Yes for the UAC Prompt.
After that, type in list volume and tap Enter to see the list of all the partitions created on your PC. This includes both types of partitions that are visible to a normal user in the File Explorer as well as the ones that are created by Windows 10 by default which helps it in storing the boot files and other essential system files.
You should see a list of all the partitions made on your computer. Select the partition you want to delete by its Unique Identification number as Volume X where X denotes the Unique Identification Number.
Next, type in the select volume number command and hit Enter to select the desired volume.
Then delete the volume you’ve selected and type in the delete volume command and hit Enter to delete the volume you just selected and convert it into unallocated space.
Option 3 – Delete storage partition via Windows PowerShell
Start by tapping the Win + X keys or simply right click on the Start button and select Windows PowerShell (Admin) or you could also type in “windows powershell” in the Cortana search box and right-click on the Windows PowerShell icon and select the “Run as administrator” option.
Once you’ve opened the Windows PowerShell, type in the Get-Volume command and hit Enter to get a list of all the partitions on your PC.
Next, select the drive letter you want to delete and then type in the Remove-Partition –DriveLetter command and hit Enter to delete the selected partition. Note that you need to replace the drive letter with the letter of the partition you want to get rid of.
After that, it will ask you for confirmation. Just hit the Y key for Yes or hit the A key to say Yes to All. This will delete all the partition you’ve selected and will move them in as unallocated space.
And that’s how you delete a Drive Partition or Volume in Windows 10. Note that you should only follow the last two options given in case the Disk Management is not able to fulfill the user requirements.
This is a typical system error that occurs during Windows setup. To be precise, this error may pop on your computer screen during the text mode portion of Windows setup.
The setup hangs and stops responding and the error message is displayed in either one of the following formats:
‘The file I386Ntkrnlmp.exe could not be loaded. The error code is 7.’or ‘The file I386L_intl.nlf could not be loaded. The error code is 7.’
Solution
Error Causes
Error 7 may be triggered due to several reasons but the 2 most common causes for this error code are:
Incorrect settings of the BIOS
Faulty RAM modules
Registry corruption
Further Information and Manual Repair
To resolve this error on your system, here are some easy and effective DIY methods that you can try.
Method 1 - Change Back the BIOS to its Default Settings
If the underlying cause of error code 7 is related to incorrect BIOS settings, then it is recommended to restore default settings to resolve.
You can reset your computer’s BIOS (basic input and output system) settings to factory defaults by selecting the restore defaults option within BIOS or by removing CMOS ( Complementary Metal Oxide Semi-Conductor) battery from your unplugged computer for about five minutes.
The battery removal method requires opening the computer case, so only attempt it if you are unable to access BIOS.
To reset BIOS follow these steps, reboot your PC and then press the key assigned to loading BIOS during your computer boot splash screen.
The key assigned to load and access BIOS varies from manufacturer to manufacturer but usually, it's F1, F2, or F12. Once you enter the BIOS, select the ‘Restore Defaults’ option listed in the menu. I
t may be a keyboard shortcut or be under the Advanced settings menu. Confirm settings and then exit BIOS. Hopefully, this will resolve Error 7.
Method 2 - Remove the Faulty RAM
When error code 7 is triggered by faulty RAM modules, then to resolve it simply remove the memory modules that are installed in the computer.
If the error code is displayed again after you remove the memory module, remove a different memory module. This procedure requires you to reboot your PC several times to identify the specific memory module that is not working properly.
Method 3 - Repair the Corrupted Registry
Error code 7 is sometimes also linked with registry issues. If the reason for the error occurrence is a damaged or corrupted registry, then simply download Restoro.
This is a powerful PC Fixer embedded with a registry cleaner. It is easy to operate and user-friendly. The registry cleaner detects and removes all errors in seconds. It cleans the registry and repairs the damages in no time.
Click here to download Restoro.
QR code or if you want to be more technical Quick Response code is a two-dimensional code made of square dots creating a pattern that can be scanned via QR scanner and then interpreted. Usually, they are present on product packaging, on business cards, websites, etc.
When you decode a QR code you can get a link to a website or link to a file or whatever, you can get text, image, email, contact information, etc.
QR Code Desktop Reader & Generator sample code
How to decode a QR Code? You can scan it with your mobile devices like iPhone, iPad, Android or Blackberry equipped with additional software for scanning QR Codes. You might want to check out tools like Barcode Scanner or Red Laser. If you don’t have a mobile device or you need to scan a barcode on your PC, simply use CodeTwo QR Code Desktop Reader & Generator.
How this program works
QR Code reading
CodeTwo QR Code Desktop Reader & Generator is a free tool that will let you quickly scan any QR Code from your screen – be it a part of the website, email, banner, or document. Simply run the program and hit From the screen on the top menu.
Your standard mouse cursor will change into a cross to help you make a selection on your screen. Simply select an area with a QR Code and the program will automatically scan it. You can scan QR codes from websites, documents, movie files – you name it.
You can also select an image file that contains a QR Code and the program will locate it automatically and decode it. To do that, simply click From file on the top menu of the program and select the desired image from your hard drive.
If you have a file copied to your clipboard, or if you make a screenshot of a QR Code, QR Code Desktop Reader & Generator will let you decode those QR codes in one click. Just click From clipboard and the program will automatically locate and decode the QR code for you.
That is not all, you can also use your camera to scan QR codes. If you have more than one camera, the program will let you choose which one to use. To use this option, simply click From webcam, and you will be able to scan QR codes with your recording device.
QR Code generation
CodeTwo QR Code Desktop Reader & Generator also acts as a QR code generator. Creating QR codes is as easy as reading them. Here is how to generate a QR code:
In the top menu, click Generate mode on and enter the text you want to translate into QR Code
Choose if you want to copy it to the clipboard or save it in a file. The QR Code will be scaled automatically, but you can resize it in the Size settings tab.
The resulting QR code can be used however you like. To name just a few options, you can:
Upload it to your blog/website which is especially useful for mobile users.
Print it on a poster, providing easily accessible links with more information on your event.
Send it in newsletters, or include it in your email signature.
QR Codes in email signatures
Inserting QR codes in email signatures lets mobile users quickly grab your contact details, or provides them with links so that they can get more information on your company or topic you were discussing. You can also provide your recipients with a link to QR Code Desktop Reader & Generator. This will help them easily decode QR codes when they open your email on a PC.
QR code
If you want to include a QR code automatically in email signatures throughout a whole organization, try CodeTwo central email signature management solution. It is a very useful tool, which enables you to unify email signatures on Exchange Server and Office 365 (Microsoft 365).


 The new widget's menu inside Windows 11 is generally met with a positive attitude but there are still users which prefer not to have it. Luckily for them, Microsoft included a very easy way to turn the widgets menu on or off. Follow this easy guide to see how.
Right-click on the widget button in the taskbar and click on Hide from Taskbar and that’s it
Alternatively, you can also turn it off via the setting app.
Go to the settings app and navigate to Personalization > Taskbar > Taskbar Items and flipping the switch beside Widgets to Off.
Please note that both methods will only hide the button to toggle widgets menu, at the current state there is no really a way to actually turn it off, only hide it and make it not available to bring it up.
The new widget's menu inside Windows 11 is generally met with a positive attitude but there are still users which prefer not to have it. Luckily for them, Microsoft included a very easy way to turn the widgets menu on or off. Follow this easy guide to see how.
Right-click on the widget button in the taskbar and click on Hide from Taskbar and that’s it
Alternatively, you can also turn it off via the setting app.
Go to the settings app and navigate to Personalization > Taskbar > Taskbar Items and flipping the switch beside Widgets to Off.
Please note that both methods will only hide the button to toggle widgets menu, at the current state there is no really a way to actually turn it off, only hide it and make it not available to bring it up. 
 I going to admit right here that I am a big fan of Cooler Master PC cases, I like them and they are always one of the things that I consider when building a new PC, overall I like their ideas and quality so personal for me it was quite a surprise to see that they are one that is making a new generation gaming chair.
Now truth to be told Orb X is not your typical gaming chair as you can clearly see from the pictures. The chair itself will come in two colors: white or black and RGB lighting looks to be prominently featured throughout.
I going to admit right here that I am a big fan of Cooler Master PC cases, I like them and they are always one of the things that I consider when building a new PC, overall I like their ideas and quality so personal for me it was quite a surprise to see that they are one that is making a new generation gaming chair.
Now truth to be told Orb X is not your typical gaming chair as you can clearly see from the pictures. The chair itself will come in two colors: white or black and RGB lighting looks to be prominently featured throughout.
 The chair itself is advertised as both meant and aimed for professional and gaming crowds but I believe the gaming crowd is in general more interested in this hardware piece.
Hardware is enclosed in a fully motorized shuttle dome which aims to maximize your privacy, it supports a single 49inch display or three 27inch monitors along with surround speakers if you do not wish to use headphones.
The chair itself is advertised as both meant and aimed for professional and gaming crowds but I believe the gaming crowd is in general more interested in this hardware piece.
Hardware is enclosed in a fully motorized shuttle dome which aims to maximize your privacy, it supports a single 49inch display or three 27inch monitors along with surround speakers if you do not wish to use headphones.
 It offers an adjustable headrest, lumbar support, and footrest so you can spend some time in it and be comfortable. Controls on the chair itself allow you to raise or lower the dome for easier getting in and out of it.
Orb X also has a compartment in its backside, it folds out and has a sliding tray designed to hold your PC or console. Everything is enclosed so wiring is not the issue.
Overall Orb X seems really like the computer chair of the future, Cooler Master expects to release the Orb X by December 2021, priced around $12,000-$14,000.
It offers an adjustable headrest, lumbar support, and footrest so you can spend some time in it and be comfortable. Controls on the chair itself allow you to raise or lower the dome for easier getting in and out of it.
Orb X also has a compartment in its backside, it folds out and has a sliding tray designed to hold your PC or console. Everything is enclosed so wiring is not the issue.
Overall Orb X seems really like the computer chair of the future, Cooler Master expects to release the Orb X by December 2021, priced around $12,000-$14,000.  It is officially confirmed, Windows 11 release date is October 5th. Windows 11 will be released as a free upgrade to all registered Windows 10 users that have supported hardware for it.
The rest of the users will be able to install it via ISO file as a clean installation if their computer supports Windows 10 hardware requirements. The official price for the license for Windows 11 has not yet been set but I assume after release it will be set.
Priority for W11 will have users who are upgrading from W10 as stated by Microsoft.
Also, it was officially confirmed that Android apps will not be running natively in this first release of Windows 11, that feature will come in a future update, official statement below:
It is officially confirmed, Windows 11 release date is October 5th. Windows 11 will be released as a free upgrade to all registered Windows 10 users that have supported hardware for it.
The rest of the users will be able to install it via ISO file as a clean installation if their computer supports Windows 10 hardware requirements. The official price for the license for Windows 11 has not yet been set but I assume after release it will be set.
Priority for W11 will have users who are upgrading from W10 as stated by Microsoft.
Also, it was officially confirmed that Android apps will not be running natively in this first release of Windows 11, that feature will come in a future update, official statement below: