Error code 0x80070652 occurs when Windows users attempt to upgrade their operating system while another program is in the process of being downloaded. It may also occur due to problems related to previously failed update attempts within Window Update. When this Windows 10 upgrade occurs, Windows users fail to access the version of Windows they are attempting to download. Instead, a message box occurs stating that error code 0x80070652 has occurred on the device. If this error message is not rectified, it could give birth to other Windows 10 errors such as error code 0x80072EE2.
Solution
Error Causes
Error code 0x80070652 may result from Windows 10 users attempting to download another program while upgrading their operating system. It may also be caused by an issue related to previous installations of updates. For instance, in some cases, your previous installation of the Windows process may have been interrupted or it was simply not completed properly. This causes any other upgrade process that follows to result in error code 0x80070652.
Further Information and Manual Repair
But what can be done in such a situation to resolve the error code? Windows users have several options available. For instance, they can wait on any additional program that may be in the process of downloading to complete the process before attempting to upgrade Windows. They may also troubleshoot problems related to any failed updates or select a system restore point in which the error code was not present.
The manual repair methods Windows 10 users choose may involve any of the solutions mentioned previously. The choice is largely dependent on the user and his determination to fix the error code. However, note that automated tools or Windows repair technicians may also provide solutions to PC issues like error code 0x80070652.
Method One: Verify and Troubleshoot Failed Upgrades
Since previously failed updates within Windows Update can lead to the occurrence of error code 0x80070652, Windows 10 users will need to verify which of these failed updates occurred by checking the history section of the Windows Update tool. Once you’ve been able to verify that failed updates have occurred in the recent past, you’ll need to troubleshoot these problems to rectify the error code. Follow the instructions below to check for updates that have failed to install properly via Windows Update.
Step one: Type Windows Update in the Search box near Start Menu
Step two: Select Windows Update settings
Step three: Select Update history
Step four: Review updates from the most recent to least recent to see which updates have failed
Step five: Click failed updates for more details and troubleshoot accordingly.
Once you’ve completed the troubleshooting of any updates which failed, proceed by rebooting your device. You may then reattempt to upgrade to the latest version of Windows 10 once no other program is in the process of being downloaded.
If the problem causing error code 0x80070652 was related to failed updates of the past, these issues will likely be resolved once you successfully troubleshoot them. However, if the error code reoccurs, apply the next manual repair solution mentioned in this article.
Method Two: Download Updates Manually via Microsoft Download Center
Another option available to users is simply downloading updates manually by visiting the official Microsoft website, specifically the Windows section which provides downloads. To successfully complete this process, ensure you look for stand-alone packages of these downloads available on the website. You will need to know the Microsoft Knowledge Base (KB) article number related to the specific update(s) which failed.
Once a Windows user has verified the KB article number of the specific update, download it from the Microsoft website, then select Run to install the update. Reboot your PC, then check Windows Update to see if you are able to successfully complete the Windows 10 upgrade.
If the upgrade fails, you may need to implement the next manual repair method as is mentioned below.
Method Three: Use Windows System Restore
One of the best options for Windows 10 users facing certain PC problems is to apply System Restore. This allows them to reset their machine for a period of time in which the problem was not present. This is known as the restore point. To apply this manual repair method, follow the steps below.
Step one: In the search box beside the Start Menu, type System Restore
Step two: Select Create a restore point
Step three: Select the System Protection tab then Configure or Create
Step four: Provide details regarding a system restore point of your choice
Step five: Select Create, then OK.
Method Four: Download an Automated Tool
If you wish to always have at your disposal a utility tool to fix these Windows 10 and other related issues when they do arise, download and install a powerful automated tool.
Social media is here to stay it seems, from Facebook, Instagram, Twitter, etc each site has its users and its rules. Companies, bloggers, public figures, and people, in general, are using them on a daily basis and some are posting cool ads, nice graphics, videos, and many more in order to gain followers or just to share something that they think is worth.
Making your post look good is somewhat essential if you plan on reaching a larger audience and Adobe's Express aims to fill that gap. It is the latest Adobe product that is purposely made for graphic and video creation for social media.
Adobe is well known in the world of professional design in all spheres like print, web, and motion, with this application, they want to take over social media design with Express. The direct competitor to Spark and canva, Express is filled with high-quality adobe templates and some great stuff found in photoshop like automatic background removal which gives it an edge over other applications.
The good thing about Express is that there is a completely free version and premium, like its competitors but with some benefits that clearly show that Adobe is determined to place its application on top of the game. The free plan includes:
Thousands of unique templates, design assets, and Adobe Fonts.
A limited collection of royalty-free Adobe Stock-free collection photos.
Basic editing and photo effects including remove background and animate.
Create on both web and mobile.
2GB of storage.
For 10 USD per month of 100 USD prepaid annual fee, you get a premium plan that includes:
All premium templates and design assets.
The entire collection of over 160 million royalty-free Adobe Stock collection* photos.
Over 20,000 licensed Adobe Fonts, curved type, grids, and font pairs.
Premium features like refine cutout, resize, and graphic groups.
Plan, schedule, and publish social media content across multiple channels.
Add your branding, logo, colors, and fonts in one tap.
Convert & export to and from PDFs and other file types.
Create, manage, and share your templates and assets with Creative Cloud Libraries.
Create on both web and mobile.
100GB of storage.
The application itself is incredibly easy to learn and to work with and literally, anyone can pick it up and start creating immediately. No matter are you just starting with social media or using Canva or Spark, give Express a go, make a free account and try it, I guarantee that you will find some features amazing, and its ease of use relaxing.
If you are trying to upgrade your computer but encounter the Windows Update Error 0x800F081F – 0x20003 instead, then read on as this post will guide you in fixing this Windows Update error. This kind of error is commonly encountered when upgrading your copy of Windows 10 and is caused by errors with various developer-related settings that are being enabled in the system.
When you encounter Windows Update Error 0x800F081F – 0x20003, you will see either of these error messages:
“We couldn’t install Windows 10. The installation failed in the SAFE_OS phase with an error during INSTALL_UPDATES operation: Error 0x800F081F”“The installation failed in the Safe_OS phase with an error during apply_image operation: Error: 0x800f081f – 0x20003”
To fix this kind of Windows Update error, you need not use external programs but you can try to disable the Developer Mode, run the Windows Update troubleshooter or restart all the Windows Update-related services and components. For more details, refer to the options provided below.
Option 1 – Try to disable Developer Mode
You might have to disable Developer Mode to fix the Windows Update Error 0x800F081F – 0x20003. How? Refer to these steps:
Tap the Win + I keys on your keyboard to open the Settings app.
Next, go to Update & Security > For Developers.
From there, select the toggle for Sideload apps or Microsoft Store apps located on the right-side panel.
If you get any prompt, just click on Yes.
After that, navigate to Apps > Apps & features and then click on Optional features on the right-side panel.
Then scroll down to locate the Windows Developer Mode entry and select it and click on Uninstall.
Once you’re done uninstalling the Windows Developer Mode component, close the Settings app and restart your computer to apply the changes made.
Option 2 – Try to run the Windows Update Troubleshooter
You should also try to run the built-in Windows Update troubleshooter as it could help you resolve the Windows Update Error 0x800F081F – 0x20003. To run it, go to Settings and then select Troubleshoot from the options. From there, click on Windows Update and then click the “Run the troubleshooter” button. After that, follow the next on-screen instructions and you should be good to go.
Option 3 – Try restarting various Windows Update-related services and components
Tap the Win + X key combination and select Command Prompt (Admin) to open Command Prompt with admin privileges.
After opening Command Prompt, copy and paste each one of the commands listed below one by one and tap Enter right after you enter each command.
Once you’ve entered all the commands given above, they will stop all the Windows Update services that are running on your computer as well as clear the SoftwareDistribution folder, and reset the Catroot2 folder. Now you have to start all these Windows Update services you’ve just stopped by executing the following commands:
net start wuauserv
net start bits
net start appidsvc
net start cryptsvc
After that, restart your computer and try to run the setup again, and see if the error is now fixed.
What is PyLocky ransomware? And how does it execute its attack?
PyLocky ransomware is a file-locking malware created in order to lock important files and demand ransom from victims in exchange for data recovery. This new ransomware uses the .lockymap extension in marking the files it encrypts. It starts to execute its attack by dropping the following malicious payload in the system:
After dropping its malicious payload, this crypto-malware connects the infected computer to a remote server where it downloads more malicious files and places them on system folders. It then applies a data gathering module used to gather data about the user and the computer. The malicious files that were downloaded earlier along with the data obtained are used for another module called stealth protection. This allows PyLocky ransomware to execute its attack without detection from any security or antivirus programs installed in the system. It also modifies some registry keys and entries in the Windows Registry such as:
Once all the modifications are carried out, PyLocky ransomware will begin encrypting its targeted files using a sophisticated encryption cipher. Following the encryption, it adds the .lockymap extension to each one of the encrypted files and releases a ransom note named “LOCKY-README.txt” which contains the following content:
“Please be advised:All your files, pictures document and data has been encrypted with Military Grade Encryption RSA ABS-256.Your information is not lost. But Encrypted.In order for you to restore your files, you have to purchase a Decrypter.Follow these steps to restore your files.1* Download the Tor Browser. ( Just type in google “Download Tor“2‘ Browse to URL: http://4wcgqlckaazungm.onion/index.php3* Purchase the Decryptor to restore your files.It is very simple. If you don’t believe that we can restore your files, then you can restore 1 file of image format for free.Be aware the time is ticking. Price will be doubled every 96 hours so use it wisely.Your unique ID :CAUTION:Please do not try to modify or delete any encrypted file as it will be hard to restore it.SUPPORT:You can contact support to help decrypt your files for you.Click on support at http://4wcgqlckaazungm.onion/index.php”
How does PyLocky ransomware spread over the web?
PyLocky ransomware spreads using malicious spam email campaigns. Creators of this threat embed an infected attachment to spam emails and send them using a spambot. Crooks may even use deceptive tactics to trick you into opening the malware-laden immediately which is something you must not do. Thus, before opening any emails, make sure that you’ve thoroughly checked them.
To successfully obliterate PyLocky ransomware from your computer, refer to the removal guide laid out below.
Step 1: Launch the Task Manager by simply tapping Ctrl + Shift + Esc keys on your keyboard.
Step 2: Under the Task Manager, go to the Processes tab and look for the process named facture_4739149_08.26.2018.exe and any suspicious-looking process which takes up most of your CPU’s resources and is most likely related to PyLocky ransomware.
Step 3: After that, close the Task Manager.
Step 4: Tap Win + R, type in appwiz.cpl and click OK or tap Enter to open Control Panel’s list of installed programs.
Step 5: Under the list of installed programs, look for PyLocky ransomware or anything similar, and then uninstall it.
Step 6: Next, close the Control Panel and tap Win + E keys to launch File Explorer.
Step 7: Navigate to the following locations below and look for PyLocky ransomware’s malicious components such as facture_4739149_08.26.2018.exe and LOCKY-README.txt as well as other suspicious files, then delete all of them.
Step 11: Delete the registry keys and sub-keys created by PyLocky ransomware.
Step 12: Close the Registry Editor and empty the Recycle Bin.
Try to recover your encrypted files using the Shadow Volume copies
Restoring your encrypted files using Windows Previous Versions feature will only be effective if PyLocky ransomware hasn’t deleted the shadow copies of your files. But still, this is one of the best and free methods there is, so it’s definitely worth a shot.
To restore the encrypted file, right-click on it and select Properties, a new window will pop up, then proceed to Previous Versions. It will load the file’s previous version before it was modified. After it loads, select any of the previous versions displayed on the list like the one in the illustration below. And then click the Restore button.
A copy of Windows gets into a grace period when it is installed on a computer which means that you can use your Windows computer without any constraints on its feature. However, if you suddenly encounter an error code 0xC004F009 then this means that the grace period has already expired. In such cases, you will see the following error message on your screen:
“Error Code 0xC004F009, The Software Licensing Service reported that the grace period expired.”
One of the possible causes of this error is that it could be that the grace period has already expired way before the system was activated which is a result of which the system is in the Notifications state at this moment.
The error code 0xC004F009 has something to do with MAK-enabled computers in an enterprise when it comes to Volume Licensing. One of the reasons that this error pops up is due to the possibility that the computer was not activated yet even when it was already connected to the Enterprise. Another most likely cause of the error is when the system was never connected with the Enterprise at all and the given grace period has expired before your computer system is activated. Whatever the real cause of this error, this post will guide you in fixing it. Just refer to the instructions given below to fix it.
Option 1 – Try activating Windows using the command-line tool
First, you need to obtain your MAK key from the IT administrator.
Once you have it, tap the Win + R keys on your keyboard and then type “cmd” in the field and hit Enter to open an elevated Command Prompt.
After that, type this command and hit Enter to install the product key or replace the existing one: Slmgr.vbs –ipk <your mak key>
Next, type another command and hit Enter: slmgr.vbs –ato
Once you’ve executed the given commands, Windows should be activated after it connects to Microsoft servers and then gives it some time and try to check if error code 0xC004F009 is now fixed or not.
Option 2 – Try activating Windows using your mobile phone
Activating Windows 10 can also be done using your phone. Just note that you have to call Microsoft to do so.
In the Start Search box, type in “Slui 4” and tap Enter.
Next, select your country and click on Next.
Keep the window open and call the toll-free number of the country you’re from.
Afterward, a confirmation ID should be given by the automated system which you must take a note of.
Finally, in the box on the window, type in the confirmation ID and click on the Activate button. That should do it.
Option 3 – Try to prolong the grace period
On the other hand, it is also possible for you to prolong the grace period but you might have to get another genuine Windows key for that. Before you proceed, you need to create a System Restore point first afterwards, refer to the steps given below to increase the grace period of the Software Licensing Service on your Windows 10 computer.
Tap the Win + R keys to open the Run dialog box and type “Regedit” in the field then hit Enter to open the Registry Editor.
After that, navigate to this registry key: HKEY_LOCAL_MACHINESOFTWAREMicrosoftWindowsCurrentVersionSetupOOBEmediabootinstall
Next, change the value of the “mediabootinstall” key to “0”.
Now open Command Prompt with admin privileges and then type this command and hit Enter: slmgr –rearm
The command you just entered will add another grace period to your system activation. After that, you have to obtain a new key and then activate Windows.
Option 4 – Try running the Windows 10 Activation Troubleshooter
You can also try to run the Windows 10 Activation troubleshooter to help resolve the error code 0xC004F009.
Go to Settings and then select Activation.
After that, click on the Windows Activation and then troubleshoot. This will help you address most of the commonly found activation issues in Windows devices.
Error Code 38 is a device driver error that users encounter on any Windows 2000 operating system and its following versions.
It occurs when the peripheral device that you connect to your PC cannot be accessed due to an inability of the Windows system to acknowledge the driver as a previous record of the driver being loaded is found in its memory.
It is a common error that users come across and appears on your PC with the following message:
“Windows cannot load the device driver for this hardware because a previous instance of the device driver is still in memory. (Code 38)”
Solution
Error Causes
Error Code 38 is prompted when incomplete program files are left in the Windows system which damage or corrupt its files. There are various factors that contribute to this, some of which are:
An incomplete program installation
An incomplete program uninstallation
Hardware is not removed properly
System recovery from viruses
An improper system shut down
The above triggers are very likely to create incomplete files within the Windows registry thereby leading to its damage and corruption.
This is especially true in the case of your PC when it has recovered from viruses when using anti-virus software. The anti-virus in its effort to remove the virus also could remove the files which contain them thereby increasing the risk of the error code.
These damaged files can severely impact the health of your PC and are imperative to fix it immediately to prevent further problems.
Further Information and Manual Repair
Although this error code may pose serious problems for your PC, thankfully, it is very similar to other PC driver errors and thus is an easy one to get rid of. Here are various methods that you can use to get your PC running smoothly again.
Method 1 – Restart your PC
The easiest method you can use to solve your PC error code is to simply restart your PC. It may be that the error prompted upon connecting the device you have connected is merely a temporary problem, and upon restart, will resume functioning smoothly.
Method 2 – Run the Troubleshooting Wizard
If restarting your PC does not help, you will have to find the exact nature of the problem by running the troubleshooting wizard for the device and then address the problem accordingly. To do this, proceed with the following steps:
Run Device Manager on your PC
Click on the program under the installed programs that is creating problems for you
Click on the ‘General’ Tab
Click ‘Troubleshoot’
Upon opening, the Troubleshooting Wizard will ask a series of questions regarding the error. Answer the questions and follow its directions for solving the error code.
After following the directions of the Troubleshooting wizard, make sure to restart your PC for the changes to take effect. Now check if your device is still causing problems.
Method 3 – Use System Restore
If the error persists, you can use system restore to eliminate the problem. Here is how to do so:
Log in using an Administrator account
Click ‘Start’ button and select All Programs > Accessories > System Tools > System Restore
Click ‘Restore my computer to an earlier time’ and click ‘Next’
Select the last Windows to restore point from the ‘On this list, click a restore point’ list, and click ‘Next’
Click ‘Next’ on the confirmation window to proceed
Restart your PC after restoration is complete
By restoring the system via a last saved system checkpoint, you can obtain undamaged Windows system files that can help resolve the error code.
Method 4 – Manually uninstall and reinstall the device driver
If using system restore does not work either, you may have to resort to manually uninstalling and then reinstalling the device driver causing the problem.
This would be necessary since the remaining incomplete files due to a partial removal or installation of programs are responsible for the error code. By uninstalling and reinstalling the device driver program, it would lead to the completion of the files.
You can do this by firstly logging in as Administrator and opening Device Manager. Select the device that is causing the problem and double click it; make sure that the peripheral is connected properly to the PC.
Upon opening, click on the ‘Driver’ tab and then select ‘Update Driver’. Make sure to refer to the system documentation that you received with your PC or computer to check for the motherboard details and driver specifics.
Method 5 – Use software to automatically download the driver
Manually uninstalling and reinstalling the driver will do the trick; however, it may be time-consuming especially when you would have to resort to your hardware user manual.
Using a program such as DriverFIX can save you a lot of time and frustration in having your device to work properly on your computer.
DriverFIX, with its user-friendly approach to help you fix your PC issues, comes with an integrated database that detects which drivers you need to reconfigure within just a few seconds and downloads it automatically.
It further ensures that your drivers are installed in their entirety leaving no room for any incomplete files to remain that create Error Code 38, or any other driver-related errors for that matter.
It also has the added advantage of being able to backup and restores your files should there be the slightest possibility of system file damage. DriverFIX is the answer to fixing your PC error codes accurately and quickly.
Click here to download DriverFIX to fix Error Code 38 quickly and effectively!
If you are using a Windows Update Standalone Installer to install Windows Updates in your Windows 10 computer but you suddenly encounter an error saying, “Installer encountered an error: 0x80096002, The certificate for the signer of the message is invalid or not found”, read on as this post will guide you on how you can fix it.
This kind of error could be due to the vendor’s certificate that might have become invalid, compromised, or pulled. Aside from that, it is also possible that the update is not targeted at your OS version. You could get this error when you try to install an incompatible update or software on your computer. This error can also appear due to misconfigured system files or when you try to install BitLocker To Go Drive Encryption or BitLocker Drive Preparation Tool. To fix this error, you can try to run the standalone installer in Compatibility mode or enable the Windows Identity Foundation or run the Windows Update troubleshooter.
Make sure to check if the error was resolved after every suggestion. It will help you learn what fixed the problem.
Option 1 – Try to run the installer in Compatibility mode
Look for the setup file.
Once you find it, right-click on it and select Properties from the context menu.
After that, go to the Compatibility tab and mark the checkbox for “Run this program in compatibility mode for:” and from the drop-down list, select the Windows OS version you want the installer to run on.
You also have to check the “Run as administrator” option.
Now click the Apply button and then click OK to save the changes made and check if it has resolved the issue or not.
Option 2 – Try to troubleshoot compatibility
This option is almost the same as the first one except it is an alternative way of fixing the error 0x80096002 in case the first one didn’t work. In this option, you will troubleshoot the compatibility issue.
Look for the setup file.
Then right-click on it and select the “Troubleshoot compatibility” from the context menu.
After that, click on the “Try recommended setting” option. Once the process is done, the error message should be gone.
Option 3 – Try to enable the Windows Identity Foundation
You might also want to enable the Windows Identity Foundation as some users reported that it helped in resolving the error for them. To do so, follow these steps:
In the Windows Start Search, type “Turn Windows features on or off” and click on the matching result.
This will open a list of Windows Features and from there, look for the Windows Identity Foundation.
Once you found it, click on its checkbox and click OK to enable it and save the changes made.
Now see if it has fixed the error or not. If not, you have to disable the feature.
Option 4 – Run the Windows Update Troubleshooter
Running the built-in Windows Update troubleshooter is one of the things you can first check out as it is known to automatically resolve any Windows Update errors like error 0x80096002. To run it, go to Settings and then select Troubleshoot from the options. From there, click on Windows Update and then click the “Run the troubleshooter” button. After that, follow the next on-screen instructions and you should be good to go.
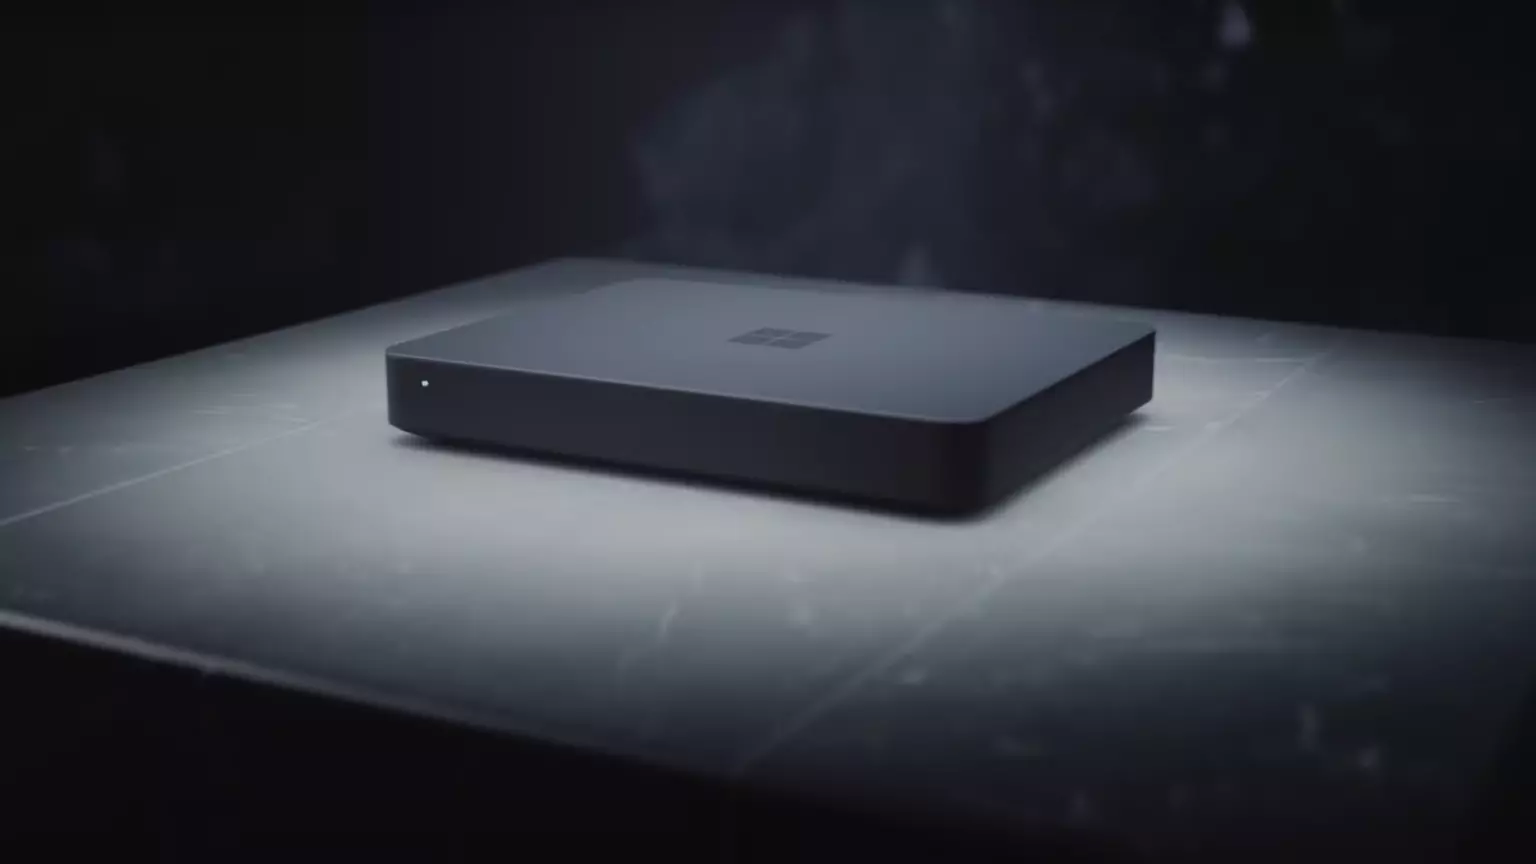
Microsoft will soon offer 4 CPU computer specifically aimed at developers and its name is Volterra. The machine as stated will come with 4 processors but the strange thing is that they will be ARM-based instead of x86.
CEO of Microsoft, mister Satya Nadella has introduced the product and Microsoft has released a youtube video promoting it.
https://youtu.be/yICVNta8jMU
The computer system will have Qualcomm's NPU or built-in neural processing unit to use AI's power to help developers write and produce better and faster code. The sad news is that besides processors used there is no other information on other components that will go into this system.
As seen in the video, the computer reminds me a lot of the apple MAC mini with its size and design, and as stated it is made from recycled plastic which in our opinion will bring the price under $1000.
Microsoft has not provided an official price tag for Volterra, but our hope is that it will be more affordable than building your own development PC. Also, there was nothing said about computer availability, we suspect that the selling model will be typical Microsoft one with first models available only in the USA and moving forward slowly opening it to other markets.
Volterra specifications
As previously said nothing except the number of CPUs and their type has been officially said but we managed to get some information about some other specific things not including its inside components.
The unit will have a fan inside of it for cooling purposes and better performance and that is what was officially stated by Microsoft. On the outside, it is known that the computer will have three USB-A ports, a mini DisplayPort, and an ethernet input. All of these will be positioned on the back of the device, on its left side there will be two USB-C ports.
The unit itself will be running on Windows 11 but it was not disclosed anything about the version, we presume since this is a model aimed for professional use that it will come with Windows 11 PRO version.
Currently available tools for ARM
Since this product is aimed at developers logically support for developing software is a must-have and at the time of this writing software that will come and that will run on Volterra is:
Visual Studio 2022
Visual Studio Code
Visual C++
Modern .NET 6 & JAVA
Classic .NET
Windows Terminal
Windows Subsystem for Android
Windows Subsystem for Linux
Conclusion
Once MAC studio has been released it showed that specific builds have their audience and can be sold for less of a price than full-fledged custom-made workstations. There is no doubt that Microsoft Volterra will find its audience but will that be enough to have more versions of this compact computer only time will tell.
The Sysfader iexplore.exe Application Error - What is it?
To understand Sysfader iexplore.exe application error, first, it is important to learn what is Sysfade.exe file.
Sysfader.exe is basically an IE (Internet Explorer) application file that provides cool animation effects. These animation effects include fading menus in and out, animated windows and etc. It is responsible for the graphical enhancements for animated pages.
The Sysfader iexplore.exe application error occurs when this file fails to execute properly and open animated websites on Internet Explorer.
The error code is displayed in the following format:
“SysFader: iexplore.exe – Application ErrorThe instruction at “0×00000000″ referenced memory at “0×00000000″. The memory could not be “read”.”
Solution
Error Causes
The Sysfader iexplorer.exe application error may be triggered due to many causes. These include:
Sysfader.exe file corrupted by malware and spyware
Recently upgraded Internet Explorer which resulted in the Sysfader iexplorer.exe application error due to incompatibility issues with the system program.
Issues with IE configuration
Damaged registry files
Damaged DLL files
Obsolete and bad registry entries
Due to Sysfader iexplorer.exe application error, your Internet Explorer browser may crash. Furthermore if the error is not fixed timely, it may result in even more severe PC problems like system slowdown, system crash and failure.
This happens especially when Sysfader iexplorer.exe application error is related to the registry.
The registry saves all the activities performed on the computer. This also includes junk files, invalid registry entries, bad registry keys, cookies, temporary internet files, and files of the programs uninstalled.
If the registry is not cleaned frequently, these obsolete files overload the RAM causing great deal of damage to the registry. When you try to upgrade your browser, the installation fails and results in browser incompatibility issues because of the previous files of the uninstalled program saved in the registry.
Furthermore, the error code may also pop up due to the Sysfader.exe file corrupted by malicious software like spyware and adware on your system if you don’t run an antivirus on your system regularly.
Further Information and Manual Repair
To prevent IE web browser and your PC from coming crashing, here are some solutions that you can try to resolve the Sysfader iexplorer.exe application error:
Repair and restore the registry by changing the configuration settings in the Registry Editor Window. This is accessible by typing ‘Regedit’ in the Run window. However, to edit the configuration settings manually and restore the registry, you should be technically sound. If not then making the changes would be slightly complex and time-consuming for you.
However, another alternative to this is to download Restoro. Restoro is a powerful, advanced, and highly functional PC repair tool that includes multiple utilities such as a registry cleaner and a system optimizer. The registry cleaning feature scans your entire PC for registry issues triggering error codes like Sysfader iexplorer.exe.It wipes out all the unnecessary and obsolete files and fixes the damaged dll files thus simultaneously restoring the registry. The antivirus utility scans for and removes viruses and spyware from your PC which as we explained earlier could be the reason for Sysfader error code.
With Restoro, it takes only a few seconds to resolve this error and repair the registry. If you have system slowdown issues, it takes care of that too.
It has simple navigations and a user-friendly interface which makes it very easy to operate even if you are not technically sound. It is safe, efficient, and compatible on all Windows versions including Vista, XP, Windows 7, 8, 8.1, and 10.
Click here to download Restoro and resolve Sysfader iexplorer.exe application error on your PC today!
We have gathered and want to share with you all of the Windows 11 wallpapers if you would like to place them on your desktop now and now wait for the official W11 release.
Hope that you will like some of them and I hope to see you again on errortools.com
Download Windows 11 Wallpapers here!
Wondering if upgrading to Windows 11 will boost your gaming experience? We can’t give you a straightforward answer, sadly. But we can take you through the tweaks you can expect if you have all the right requirements and help you make a final decision.
Is Windows 11 good for gaming?
Essentially, the answer to this question is yes. Microsoft has definitely added a bunch of enhancements and features to its latest OS to give gamers the best possible experience. However, you have to keep in mind that this may not work out smoothly for every single user.
Whether you’ll be able to fully take advantage of the Windows 11 gaming features really depends on your setup. As expected, Windows 11 has more demanding system requirements than its predecessor.
Credit: Florian Olivo on Unsplash
So, unless your hardware can run the new OS comfortably, you might not be able to make the most of all these gaming perks. In that case, we recommend you first upgrade your hardware and then make the switch. Be prepared to be a little surprised by a few other interesting changes in comparison to Windows 10, though!
For some of the new gaming features to work, it’ll also be necessary for you to have an NVMe SSD and an HDR-compatible monitor. So let’s take a look at 4 big improvements you can expect if your setup is compatible.
Gaming enhancements on Windows 11
1. Enjoy faster loading speed with DirectStorage
For this powerful feature to work, you need a compatible graphics card and, as stated before, an NVMe SSD. It’s also important for your GPU to support the DirectX 12 graphics API at least. And since we’re on that subject, you’ll be happy to know that Windows 11 has also introduced a new version of the API called DirectX 12 Ultimate.
Now, what does DirectStorage do? It’s a new feature designed to make full use of the speedy storage of NVMe SSDs. It also transfers game data directly onto the graphics card, lightening the load on your CPU. Normally the CPU would have to decompress the data first, but DirectStorage helps bypass this. That’s how loading times are reduced and games run more smoothly.
2. Fully immerse yourself through Game Mode
Windows 11’s Game Mode is certainly a welcomed addition. When you turn on Game Mode, usage of background apps that aren’t essential to your game is reduced. This results in the game you’re running becoming a priority process. This way, it uses your hardware and system resources to the max. Ultimately, the Game Mode means less lag and higher frame rates so you can play undisturbed and fully enjoy your gaming session.
3. Vibrant visual experience thanks to AutoHDR
For this one you’ll absolutely need an HDR-compatible monitor. Basically, HDR (High Dynamic Range) means a wider range of contrasts and colors that can be displayed on a monitor.
Windows 10 has an HDR feature, but you have to turn it on and off manually (“Use HDR”). Plus, users have reported that, if left on, it results in an unappealing appearance of content other than movies and games.
Windows 11 fixes that problem with its AutoHDR feature. Toggling it results in the system automatically adjusting the color contrast, balance and brightness based on what you’re currently looking at. For gamers, this means vivid imagery in every single game, resulting in a supreme visual experience. You can check out Microsoft’s own video showcasing the power of AutoHDR.
Aside from AutoHDR, another way Windows 11 improves the visual aspect is through its support for refresh rates of up to 360Hz.
4. Xbox Game Pass & Game Bar
It’s no secret that Microsoft wants to integrate Windows and Xbox. We’ve seen some attempts with Windows 10, but they’re pretty wonky compared to the new OS.
Windows 11’s built-in Xbox Game Bar enables quite a few options all gamers desire. You can take screenshots and videos of your game and send them, for starters. Furthermore, you can use it to see audio settings and monitor your PC’s performance without having to leave the game or open the Task Manager.
Widgets are also a really cool part of the Game Bar. You can choose from a wide variety of widgets, such as Xbox Achievements, Spotify, Gallery, Xbox Social and more.
Moreover, the Xbox Game Pass has been streamlined on Windows 11. Game Pass is a subscription service that unlocks hundreds of awesome games and supports cloud streaming. Do keep in mind that the games are only unlocked for a certain period of time, as the selection rotates once in a while.
What can you do for a better gaming experience?
Windows 11 does offer tweaks that require zero input from you. However, there are a few things you can do manually to get even more out of your new OS while gaming.
Turn off enhanced pointer precision. Most games enhance precision by default, so having this feature on might interfere with that.
Make sure to select your high performance graphics card for each game. Go to Settings > Gaming > Game Mode and tap ‘Graphics’ from the ‘Related settings’ menu. Find the game you want to adjust, click on ‘Options’ and choose your high performance graphics card to be the default setting. While there, you can also turn on ‘Hardware-accelerated GPU scheduling’ at the top.
Disable unnecessary apps and programs. As long as they aren’t essential to running your game, they might take up valuable system resources, so disable them to make space for your gaming requirements.
Check for pending updates and install them. It’s well-known that out-of-date software causes bugs, latency and crashes. The same goes for your GPU drivers.
Use the High-performance power plan (Control Panel > Power Options > Additional plans) to maximize the use of resources for the best possible performance.
Summary
Windows 11 has done quite a bit for avid gamers. We hope your setup is compatible with all these new features and you can experience these enhancements ASAP!