Logo

Can the Adobe.Dll Error Be Fixed?

Adobe.DLL is one of the numerous Dll files you are going to encounter on your Personal Computer.

This isn't a system-established service and is usually the consequence of the sort of applications you install on your own Personal Computer.

Because adobe.dll is a low-program process, in the event that you find it present on your pc, you can easily end it. It isn't required for the normal working of your OS but might trigger permanent harm if left unchecked.

Don't forget that the Computer uses the AdobePDF.dll file for assorted tasks, and you need to make sure it's installed correctly.

Solution

Restoro box imageError Causes

When the adobe.dll is left un-fixed, you may shortly have to deal with sluggishness on your Computer. Simply put, this impedes the standard and amount of work you do while using your PC and impacts your productivity.

Sometimes, adobe.dll happens because your computer experiences an overload. As a result, while resolving the malfunction, you've got to look for methods of decreasing the system overload. It's possible that lots of processes are functioning on your PC concurrently. Quit these processes.

Lousy setup of the adobe.dll file causes this error too. Check and fix the files and settings that Adobe.Dll requires to run and you may not have to content with these error anymore.

Further Information and Manual Repair

Even though the adobe.dll may severely influence the functioning of your Computer, it is really a trouble or malfunction that one can fix manually.

  • Permanently Un-Installing the Adobe.dll Component is one of the better methods for repairing the malfunction.

Yes, you are able to completely eliminate the adobe.dll issue. The thing you really need to do is un-install it from your own computer fully, and for good.

  • Quit the many processes operating on your Computer and you may get rid of the adobe.dll malfunction.

Adobe.dll regularly happens due to system overload. Thus, the first thing you need to assess is if several processes are operating on the device. If they're, search for methods to stop them, and you'll not have to worry about the adobe.dll error anymore.

  • Utilize Microsoft System Configuration Utility

The MS System-Configuration Utility will settle the system overload problem, thus freeing up space for your programs to run smoothly and possibly avoid malfunctions, including adobe.dll. The Microsoft System-Configuration Utility manually locates and eliminates all running processes.

  • Perform Scans On Your Computer

Running scans on your own Computer may enhance or increase its operation. This technique may also aid in examining your Computer for adobe.dll, or such associated malfunctions, and resolve them forever.

  • Repair Adobe.Dll Files and Settings' Errors.

Considering that the adobe.dll malfunctions can be a result of the existence of malfunctions on your own PC's files and options, fix these properly. Begin by fixing the settings on the files and options utilized by your Computer to perform the adobe.dll, and you may have removed this issue completely.

Finally, establish the source of the error message to effectively solve it. Once you do that and fix it, your PC will resume normal operations and even boost your work and productivity.

Do You Need Help with Your Device?

Our Team of Experts May Help
Troubleshoot.Tech Experts are There for You!
Replace damaged files
Restore performance
Free disk space
Remove Malware
Protects WEB browser
Remove Viruses
Stop PC freezing
GET HELP
Troubleshoot.Tech experts work with all versions of Microsoft Windows including Windows 11, with Android, Mac, and more.

Share this article:

You might also like

Fix PNP_DETECTED_FATAL_ERROR in Windows
If you suddenly encounter a PNP_DETECTED_FATAL_ERROR Blue Screen error, then this post can help you out. The PNP_DETECTED_FATAL_ERROR BSOD usually occurs when any new hardware that is mostly the Plug and Play type is attached. In such cases, when the device is plugged, and the driver for that device crashes or isn’t found or is not compatible, you will most likely encounter this particular BSOD error. There are several error codes that come under this category, some of them are 0x000000CA (0x01681690, 0xEA96A7BE, 0x938A81AD, 0xF8362881. This BSOD error can also occur at any time. However, the only constant thing here is when you plug a PNP device like earphones, microphones, USB drives, and many more. The PNP_DETECTED_FATAL_ERROR bug check has a value of 0x000000CA which indicates that the Plug and Play Manager encountered some severe error which is most likely have something to do with a problematic Plug and Play driver. To fix this error, here are some possible solutions that could help.

Option 1 – Run the Blue Screen Troubleshooter

The Blue Screen troubleshooter is a built-in tool in Windows 10 that helps users in fixing BSOD errors like PNP_DETECTED_FATAL_ERROR Blue Screen error. It can be found on the Settings Troubleshooters page. To use it, refer to these steps:
  • Tap the Win + I keys to open the Settings panel.
  • Then go to Update & Security > Troubleshoot.
  • From there, look for the option called “Blue Screen” on your right-hand side and then click the “Run the troubleshooter” button to run the Blue Screen Troubleshooter and then follow the next on-screen options. Note that you might have to boot your PC into Safe Mode.

Option 2 – Try disabling or removing newly installed hardware

In this option, you will have to disable or remove the hardware you’ve just installed recently since external devices could be the one that’s causing the Blue Screen of Death error to appear. To do that, just disconnect any external device that’s connected to your computer physically and then check if it fixes the PNP_DETECTED_FATAL_ERROR Blue Screen error.

Option 3 – Try disabling BIOS Memory options namely Caching Shadowing

Disabling the BIOS Memory options such as Caching and Shadowing can help you in fixing the PNP_DETECTED_FATAL_ERROR Blue Screen error. All you have to do is enter the BIOS first and then use the Arrow and Enter keys to select your choices. And if you can’t seem to find it, look for specific instructions from your OEM or you could also look out for instructions from the manufacturer of your motherboard.

Option 4 – Try to run the CHKDSK utility

Running the CHKDSK utility might also help you resolve the PNP_DETECTED_FATAL_ERROR Blue Screen error. If your hard drive has issues with integrity, the update will really fail as the system will think that it’s not healthy and that’s where the CHKDSK utility comes in. The CHKDSK utility repairs hard drive errors that might be causing the problem.
  • Open Command Prompt with admin privileges.
  • After opening Command Prompt, execute the following command and hit Enter:
chkdsk /f /r
  • Wait for the process to be completed and then restart your computer.

Option 5 – Try to uninstall programs you’ve installed recently

Chances are, some programs that you just installed might be the one that’s causing the BSOD error. Thus, you need to uninstall the program to resolve the problem.
  • In the search box, type in “control” and then click on Control Panel (desktop app) among the search results.
  • After that, select Programs and Features from the list which will give you a list of all the programs installed on your computer.
  • From there, look for the concerned program and select it and then uninstall it.

Option 6 – Update the Device drivers

  • Tap the Win + R keys to launch Run.
  • Type in devmgmt.msc into the box and tap Enter or click OK to open the Device Manager.
  • After that, a list of device drivers will be displayed. Look for the device driver you and then select either “Update driver” or “Uninstall device”. And if you find any “Unknown device”, you need to update it as well.
  • Select the “Search automatically for updated driver software” option and then follow the instructions to complete the process.
  • If you have chosen to uninstall the driver, follow the screen options to complete the process and then restart your PC.
  • Connect the device and Scan for hardware changes – you can see this option under Device Manager > Action.

Option 7 – Perform a System Restore

Performing System Restore might help you in fixing the PNP_DETECTED_FATAL_ERROR Blue Screen error. You can do this option either by booting into Safe Mode or in System Restore. If you are already in the Advanced Startup Options, just directly select System Restore and proceed with the next steps. And if you have just booted your PC into Safe Mode, refer to the steps below.
  • Tap the Win + R keys to open the Run dialog box.
  • After that, type in “sysdm.cpl” in the field and tap Enter.
  • Next, go to the System Protection tab then click the System Restore button. This will open a new window where you have to select your preferred System Restore point.
  • After that, follow the on-screen instructions to finish the process and then restart your computer and check if the problem is fixed or not.
Read More
Disable Windows 11 animations for fast work
windows 11 animationsWindows 11 has some cool animations including fading effects which make working in it feels nice and futuristic but the cost of this is that there is a slight delay to certain actions performed. If you want the snap fast feature in Windows 11 and do not care about this eye candy there is an easy way to turn animations off inside it.
  • First, open Windows Settings by pressing ⊞ Windows + I on your keyboard
  • Alternatively, click on Start, search for Settings, and then click its icon.
  • When Settings appears, look in the sidebar and select Accessibility.
  • In Accessibility settings, click on Visual Effects.
  • In Visual Effects, switch Animation Effects to Off.
That’s it, changes will be applied automatically, you can close settings and continue working inside Windows 11 without animations and fades. You can always switch animations back On via settings if you change your mind.
Read More
Fix DRIVER_CORRUPTED_EXPOOL Error
If you suddenly encounter the DRIVER_CORRUPTED_EXPOOL Blue Screen of Death error when using your computer, then there might be some issues with the device drivers on your Windows 10 computer. This kind of BSOD error can occur at any point while you are using your PC. Its main cause is due to some error in the System Pool where a driver becomes incompatible with the operating system or when the configuration files get corrupted for some reason. If you are one of the users who are currently inconvenienced by the DRIVER_CORRUPTED_EXPOOL error, worry not, as this post will give you some potential fixes that might help resolve the problem.

Option 1 – Perform a System Restore

Performing System Restore might help you in fixing the DRIVER_CORRUPTED_EXPOOL Blue Screen error. You can do this option either by booting into Safe Mode or in System Restore. If you are already in the Advanced Startup Options, just directly select System Restore and proceed with the next steps. And if you have just booted your PC into Safe Mode, refer to the steps below.
  • Tap the Win + R keys to open the Run dialog box.
  • After that, type in “sysdm.cpl” in the field and tap Enter.
  • Next, go to the System Protection tab then click the System Restore button. This will open a new window where you have to select your preferred System Restore point.
  • After that, follow the on-screen instructions to finish the process and then restart your computer and check if the problem is fixed or not.

Option 2 – Run the Blue Screen Troubleshooter

The Blue Screen troubleshooter is a built-in tool in Windows 10 that helps users in fixing BSOD errors like DRIVER_CORRUPTED_EXPOOL error. It can be found on the Settings Troubleshooters page. To use it, refer to these steps:
  • Tap the Win + I keys to open the Settings panel.
  • Then go to Update & Security > Troubleshoot.
  • From there, look for the option called “Blue Screen” on your right-hand side and then click the “Run the troubleshooter” button to run the Blue Screen Troubleshooter and then follow the next on-screen options. Note that you might have to boot your PC into Safe Mode.

Option 3 – Update the Device drivers

The device driver installed in your computer might be incompatible with your operating system which is the reason why the DRIVER_CORRUPTED_EXPOOL Blue Screen error occurs. To fix that, you have to update your device drivers.
  • Tap the Win + R keys on your keyboard to open the Run dialog box.
  • After that, type “msc” in the field and hit Enter or click OK to open the Device Manager.
  • After opening the Device Manager, update all the outdated Device drivers on your computer.
  • Next, right-click on all the driver entries that are appropriately labeled, and then click the Update driver option.
  • Now restart your PC and check if the BSOD error is fixed or not.

Option 4 – Uninstall any faulty device drivers

  • Tap the Win + R keys on your keyboard to open the Run dialog box.
  • After that, type “msc” in the field and hit Enter or click OK to open the Device Manager.
  • From there, look for any device driver which has a yellow exclamation mark which indicates that something is wrong with them.
  • And then right-click on each one of them and click on Uninstall.
  • Once you’re done uninstalling the faulty drivers, restart your computer and allow your computer to reinstall the drivers you just uninstalled.

Option 5 – Try running the System File Checker

System File Checker or SFC is a built-in command utility that helps in restoring corrupted files as well as missing files. It replaces bad and corrupted system files with good system files that might be causing the Machine Check Exception BSOD error. To run the SFC command, follow the steps given below.
  • Tap Win + R to launch Run.
  • Type in cmd in the field and tap Enter.
  • After opening Command Prompt, type in sfc /scannow
The command will start a system scan which will take a few whiles before it finishes. Once it’s done, you could get the following results:
  1. Windows Resource Protection did not find any integrity violations.
  2. Windows Resource Protection found corrupt files and successfully repaired them.
  3. Windows Resource Protection found corrupt files but was unable to fix some of them.

Option 6 – Try updating the BIOS

As you know, the BIOS is a sensitive part of a computer. Even though it is a software component, the functioning of the hardware depends on it largely. Thus, you must be careful when modifying something in the BIOS. So if you don’t know much about it, it’s best if you skip on this option and try the other ones instead. However, if you are well-versed in navigating the BIOS, then follow the steps below.
  • Tap the Win + R keys to open the Run dialog box.
  • Next, type “msinfo32” in the field and press Enter to open System Information.
  • From there, you should find a search field on the bottom where you have to search for the BIOS version and then press Enter.
  • After that, you should see the developer and version of the BIOS installed on your PC.
  • Go to your manufacturer’s website and then download the latest version of BIOS on your computer.
  • If you are using a laptop, make sure that you keep it plugged in until you have updated the BIOS.
  • Now double click on the downloaded file and install the new BIOS version in your computer.
  • Now restart your computer to apply the changes made.

Option 7 – Try resetting Windows 10

To fix this BSOD error, you can try resetting Windows 10. Doing so won’t get rid of any file in your system – instead of erasing all your media files and documents, this reset option resets all the system settings and files.
Read More
Apple gaming is coming!!!

New Apple's upscaling technology called MetalFX will place iOS and macOS devices back into the gaming world. Apple had great games back in the old days and some all-time hits like the prince of Persia have been made first for apple but along the way, it just lost it.

Same as NVIDIA's DLSS and Intel's XeSS systems, Apple MetalFX also uses AI algorithms to upscale the resolution of output game frames. So, for example, the GPU inside your MAC might render the game at 1080p, but through MetalFX and AI upscaling it will look like a 4K image but have a good frame rate since it is rendered in base resolution.

apple metalfx

The ability to make AI strike a good balance between performance and image quality is a key to technology in today's modern gaming and having this technology will help developers a ton to be able to achieve great results on Apple hardware.

The First MetalFX Games

So far three official games that will use this technology and be released natively for Appl hardware are Resident Evil 8 Village, GRID legends, and No Man's Sky. All three games have been confirmed and Resident Evil 8 Village is already sent for review people are impressed since the game can run smoothly on all Apple devices, even ones with an M1 CPU.

Apple is back into gaming

When you say Apple gaming is probably the last thing that comes to your mind but truth be told Apple makes more money from games than Microsoft, Nintendo and Sony combined. Also, Apple itself was a big player once regarding computer games as well, Myst and Prince of Persia are games that were made and have been released for Apple first. Bungie was also founded by Apple developers and Halo was originally announced as a Mac game.

Apple has been trying and pushing gaming on its platform since it kind of died down. Today all Sony, Nintendo, and Microsoft controllers work without any issues with all Apple products. Apple also has its own gaming subscription service, Apple Arcade, and its Apple TV is packed with GPU that can rival Xbox ones.

MetalFX API ties and brings it all together, it is designed to get the most performance from the hardware by minimizing overhead.

Now, computers and laptops do not hold any large numbers if we look at the user base, and that could deter developers but if we look at iPad and iPhone things are different there, much different. How same CPU power these devices and how MetalFX is available across all products it is clear that there is a market for games there. No Man's Sky is coming to iPad using these technologies and bringing full computer experience to tablets.

Read More
Windows 11 android apps update

One of the selling points of Windows 11 was the ability to run Android apps natively in it without the need for any third-party software. It is not a big surprise that even after its release Microsoft is evolving and expanding Windows 11 and its features.

Windows 11 Android apps

Microsoft is now rolling out an update for the Windows Subsystem for Android on the Dev Channel of the Windows Insiders program. The new version upgrades the core operating system from Android 11 to Android 12.1 (also known as Android 12L), which means the new system and app features in Android 12 and 12.1 are now available on Windows for the first time. However, not the new features in those updates apply to the modified version that runs on top of Windows. For example, one of the main improvements in 12.1 was a dual-pane notification panel for larger screens, but Android app notifications on Windows just show up in the Windows notification panel.

The upgrade also improves how Android apps integrate into Windows. The Windows taskbar will now show which Android apps are currently using the microphone, location, and other system services — similar to many native Windows applications. Toasts messages (the small popups that some apps use for temporary messages) are now displayed as Windows notifications, and the titlebar on Android apps will use the current activity name for the title.

Full changelog

  • Windows Subsystem for Android updated to Android 12.1
  • Advanced networking on by default for newer x64 Windows builds
  • Updated Windows Subsystem for Android Settings app: redesigned UX and diagnostics data viewer added
  • Simpleperf CPU profiler recording now works with Windows Subsystem for Android
  • Windows taskbar now shows which Android apps are using microphone and location
  • Improvements to Android app notifications appearing as Windows notifications
  • Reduced flicker when apps are restored from minimized state
  • Apps are not restarted when devices come out of connected standby on recent Windows builds
  • New video hardware decoding (VP8 and VP9)
  • Fixes for on-screen keyboard in apps
  • Fixes for full-screen Android apps and auto-hidden Windows taskbar
  • Windows Subsystem for Android updated with Chromium WebView 100
  • Added support for Android NetworkLocationProvider in addition to GpsLocationProvider
  • Improved general stability, performance, and reliability

The new update is limited to Windows Insiders for now, but once Microsoft fixes all the bugs, it should start rolling out to everyone on Windows 11 that has the Android Subsystem enabled.

Read More
Installing Windows 11 on Raspberry Pi 4
A lot of controversies and mixed emotions have come from statements about Windows 11 minimum system requirements, especially ones linked to TPM. Naturally, each time some software company giant announces how things are must have there are people who go out and prove them wrong. This time Raspberry Pi community was one which demonstrated that not only Raspberry Pi does not have a TPM module, it can run the full desktop version of Windows 11

Windows 11 on Raspberry Pi 4
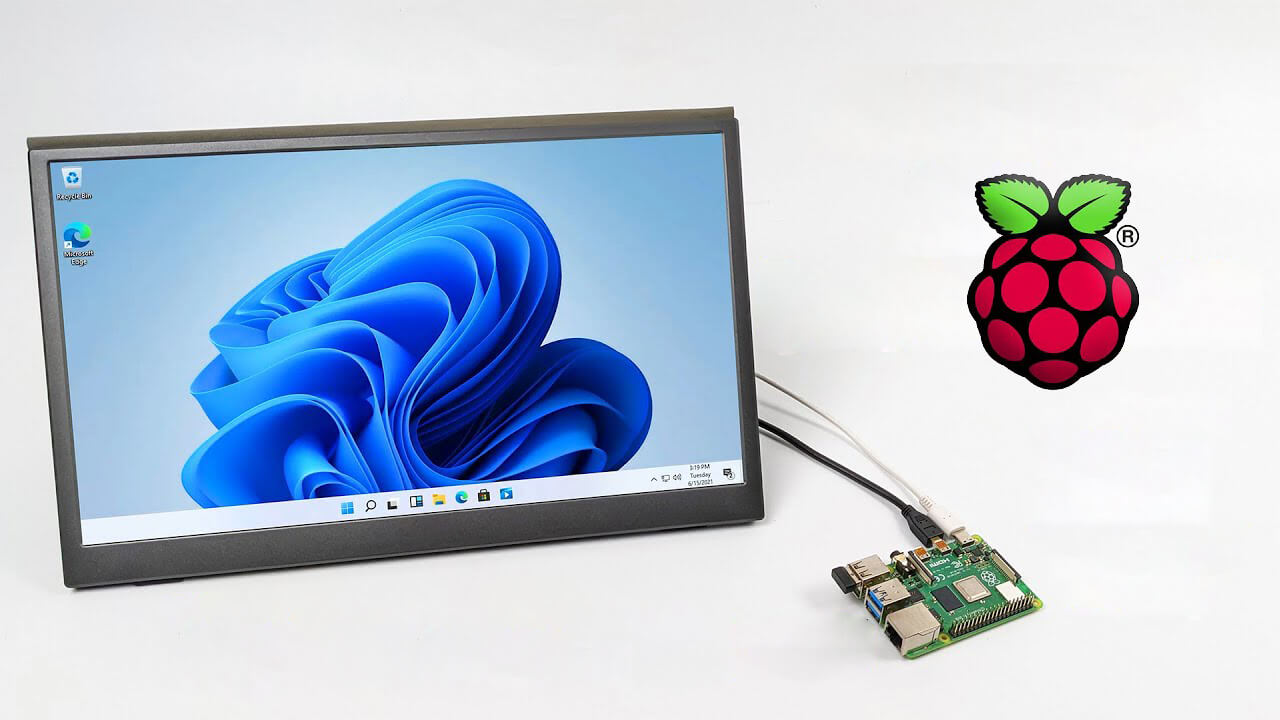
Raspberry Pi 4 and things you need for Windows 11 installation

In order to actually install Windows 11 on your Pi, there are certain things that you will need. Check out the below list and prepare everything.
  • Raspberry Pi 4 4GB or 8GB
  • A 32GB or larger SSD via a USB 3 caddy. Best for performance or 16GB or larger microSD card
  • USB boot enabled, see below.
  • A micro SD card with the latest Raspberry Pi OS
  • Windows 10 PC
  • USB to Ethernet or WiFi dongle
  • Bluetooth dongle (if you want Bluetooth)
  • Keyboard, mouse, HDMI, and power for your Raspberry Pi

Configuring Pi to boot from SSD

In order to boot from SSD be sure that firmware and bootloader are up to date on the latest version and upgrade if needed. Be aware that this firmware update can only be performed using the official Raspberry Pi OS. Also if you are eager and want to use a standard microSSD card instead of an SSD to run Windows 11 feel free to skip this entire section.
  1. Boot from microSSD with the latest Raspberry Pi OS on it.
  2. Update firmware and OS using the terminal by typing sudo apt update sudo apt full-upgrade sudo rpi-update
  3. Reboot your Pi
  4. Install the latest version of bootloader again using the terminal with the command sudo rpi-eeprom-update -d – a
  5. Reboot Pi
  6. Launch raspi-config on your Pi via terminal with sudo raspi-config
  7. Select option 3 (Boot options – Configure options for start-up) from boot options
  8. Select Boot ROM version and press ENTER
  9. Select latest and then OK
  10. Select NO when prompted to reset boot ROM to defaults on the latest version boot ROM selected screen. Press OK
  11. Select Boot order and press ENTER
  12. Select USB Boot and click on OK and remove microSD card from Pi
  13. Select Finish and click on NO when prompted to reboot

Creating Windows 11 installation image for Pi 4

In order to install Windows 11 on our Pi, we must create an installation image, follow the steps below explaining the process.
  1. Go to https://uupdump.net/
  2. Search for Windows 11 Arm
  3. Select the latest build for arm64
  4. Select Language on which you would like installer and Windows
  5. Pick Windows edition you would like
  6. Set download method to Download and convert to ISO and click on Create download package
  7. Extract downloaded content into win11 folder and go into it
  8. Double click on uup_download_windows.cmd
  9. On the security warning screen click on More info and then on Run anyway
  10. Wait for the process to finish completely
  11. Once the process is finished, press 0 to close the prompt

Installing image on microSSD or SSD

If previous steps of instruction were follower precisely you now have an ISO image that can be installed onto microSSD or SSD
  1. Connect SSD or insert microSSD card into your PC
  2. Go to https://www.worproject.ml/downloads
  3. Download Windows on Raspberry imager and extract it into the win11 folder
  4. Open Imager and allow it to make changes to your computer, set your language, and click on next
  5. Select storage drive where you would like to install Windows
  6. Set device type and click on next
  7. Select our Windows 11 ISO image we created and click on next
  8. On the drivers screen select Use the latest driver package available on the server
  9. On UEFI firmware select screen choose Use the latest firmware available on the server
  10. On configuration screen click on next
  11. Check your setting on the installation overview and if everything is ok click on install
  12. Wait for the whole process to be finished
  13. Once the process is completed, close Windows on Raspberry imager, take out SSD or microSSD card from PC and connect it on your Pi along with Pi peripherals.

Setting Windows 11 on Pi

In order to actually use Windows 11 on our Raspberry Pi we now have to set up the Windows 11 install using the standard post-installation setup sequence.
  1. Power up Pi and press ESC when prompted
  2. Go to Device manager and press ENTER
  3. Select Raspberry Pi Configuration
  4. Select Advanced configuration
  5. Set Limit RAM to 3GB to a disabled state, press F10 to save, and ESC to exit.
  6. Select Display configuration
  7. Set the resolution to desired option and press ENTER, F10 to save, and ESC to exit
  8. Go to CPU configuration
  9. Check if the CPU clock is set to default, if not set it
  10. Press ESC to go back all the way to the main menu
  11. Select Continue to exit BIOS and boot your Raspberry Pi with Windows 11 on it
And there you have it, fully working Windows 11 OS on Raspberry Pi despite what Microsoft says Note that due to lack of some drivers performance can be less than optimal, for example, full HD videos will not work since there are no compatible graphic drivers for Pi and some other stuff like Wi-Fi will also cause some issues but overall Windows 11 is working pretty well.
Read More
Microsoft acquires Activision Blizzard
In the latest news, Microsoft has reached a deal to purchase Activision Blizzard for 67.8 billion. Now franchises like Warcraft, Starcraft, Overwatch, Call of duty, Diablo are now the property of Microsoft and I am sure that some of these games we can expect to be included in the Xbox game pass. microsoft activision blizzardThis is the second large game company acquisition by Microsoft, Acquiring Bethesda first and a big hit to Sony since Xbox will now have more games in its catalog and as exclusives. Of course, the sale has to go through the standard closing conditions and completion of regulatory review and Activision Blizzard’s shareholder approval before it’s finalized. Assuming that all goes well, the deal is slated to be completed during the fiscal year 2023, which is July 1, 2022, through June 30, 2023.
Read More
How to Fix Windows Store Error Code 0x80240017

Error Code 0x80240017 – What is it?

Error code 0x80240017 is associated with installing or updating a Windows Store app. This error is more common in Windows 8 and Windows 8.1. It appears due to missing certain system files and also corrupt registry.

Common symptoms

  • When you try to install a Windows Store app on a PC running Windows RT 8.1, Windows 8.1, or Windows Server 2012 R2, the installation fails and you receive an error message: 0x80240017
  • Certain apps may become unresponsive.
  • You may not be able to download apps or Windows update
  • You may have difficulty updating or installing and uninstalling other built-in programs inside Windows 8 and Windows 8.1.
  • When you have multiple applications running, you may experience crashes and freezes.

Solution

Restoro box imageError Causes

The error code 0x80240017 in Windows 8.1 or Windows 8 usually appears due to the fact that your system has changed after you installed a third-party application. It might also appear if registry entry has changed after a reboot of the operating system and you do not have the required permissions. Other causes may be due to:
  • Corrupted, broken, or missing system files.
  • Malware/spyware infection or virus attack
  • Hardware/RAM decline
  • Fragmented file
  • Unnecessary or redundant program installations

Further Information and Manual Repair

Repairing Error Code 0x80240017 in Windows 8/Windows 8.1

Method 1:

Resetting Windows Store app:
  1. Press and hold the Windows key and press R. This will open up the Run command
  2. Now, type exe and hit Enter
  3. Just wait for it to finish and it will re-launch Windows Store. Now, try and install the app you were trying to install which was previously showing an error.
This basic solution will delete the cache and reset Windows Store.

Method 2:

Using Windows troubleshooter:
  1. Click on Search on the Charm bar and type Troubleshooting. Click on the very first option.
  2. A new window will open. Click View all from the left pane.
  3. Scroll down to the bottom and click on Windows update.
  4. Troubleshooter window for Windows update will pop up. Click on NEXT. It may ask you for administrative permission.
  5. The troubleshooter will automatically detect problems and fix them.
  6. Now, close this window and try download/install the app which was previously showing an error.

Method 3:

Disable Proxy Settings: Disable proxy server on Internet Explorer
  1. Press the Windows + R Run window will appear.
  2. Type cpl and hit Enter
  3. Click the Connections tab and click LAN settings
  4. Under proxy server uncheck “Use a proxy server for your LAN”
  5. Click OK
Now try to install apps from Windows Store.

Method 4:

Boot in Safe Mode:
  1. Open Run command as previously described
  2. Type MSConfig
  3. Click on the Boot tab
  4. Tick Safe boot in Boot option
  5. Select Network
  6. Click Apply and OK
  7. Reboot your system
Your system will boot in Safe mode with Networking. You may now try and open Windows Store and should not see any errors.

Method 5:

Note: It is recommended that you back up your files and folders before attempting this step:
  1. Move the mouse cursor over to the upper right side of the screen.
  2. A menu will pop up on the left. Click on the “Settings” feature on the menu.
  3. On the Settings window, click on the “Change PC settings.”
  4. Now, left-click on the “Update and recovery” feature.
  5. For the next step, left-click on the “Recovery” feature.
  6. There is an option here saying “Refresh your PC without affecting your files.” There, left-click on the “Get started” button.
  7. Now, follow the instructions on the screen to finish the Refresh process.
  8. After the Refresh process has finished restart your Windows 8.1 or Windows 8 device.
  9. Check again to see if the error 0x80240017 has been fixed.
If you do not possess the technical expertise required to accomplish this yourself or do not feel comfortable doing so, download and install a powerful automated tool to get the job done.
Read More
Removing old drivers from Windows 10
So you have just got home from that new computer store with your fancy and all-new mouse, screen, keyboard, etc. You plugged in your new component, Windows detected it, installed drivers for it and it is working like a charm. A few months later down the road and the computer starts little by little to slow down. Plug and play is a great concept, and automatic detection is even greater but how time passes old unused stuff piles in your hard drive and in Windows itself thus slowing down your computer and taxing it more and more as new components and software are added. Old drivers from old components sadly are not removed from Windows itself and over some larger period of time they can pile up and slow down your daily operations on the computer or even cause some problems in it. This guide will teach you how to manually remove old unused device drivers from your Windows so it is fresh and like new again.

Making old devices visible

In order for us to remove old drivers, the first thing we must do is make them visible in our device manager, old drivers are hidden and will not show up, we must make this happen. We do this by pressing WINDOWS + X keys on your keyboard to bring up a hidden menu in Windows. keyboard with windows and x markedOnce the menu appears, click on Command Prompt (admin) Windows menu command prompt adminOnce the command prompt with administrator privileges comes on-screen type in it following string: The device manager will open, go to view > snow hidden devices in order to show unused devices. device manager show hidden devices

Removing old device

Open any category and if there is a device that was once used and still has its drivers in the system it will be shown as faded out. device manager hidden device shownRight-click on the device and click on uninstall device to remove it completely from your system. device manager uninstall device driverPlease always be careful when removing devices so you do not remove the device which is being used by mistake and always double-check that you are removing something that you used to have on your system. This method will show all hidden devices even ones that are hidden but crucial to the system working properly.
Read More
Quick Workarounds to Repair Error 126

What Is Error 126?

Error 126 is a very commonly occurring error that is often the result of damaged system files of Windows. They usually occur during the installation of some Windows program or application. When Error 126 is generated, it terminates the installation process almost instantly. It is important to take corrective measures immediately to ensure that no such problems are encountered again in the future.

Solution

Restoro box imageError Causes

There are a variety of conditions that may trigger Error 126. These conditions are listed below as follows.
  • Corruption of the service-related DLL file
  • Missing or damage service-related DLL file
  • Corrupt, damaged, or Misconfigured system files
  • Improper hardware or application installations or uninstallations
  • Existence of viruses, malware, adware, or spyware in the system
  • Corrupt or incorrect registry entries in the system files
When any of the above-listed conditions occur, the corrupt system files will go to the improper links or missing information. Eventually, the problems with the files will keep the applications or programs from responding in the usual manner. Whatever are the reasons for error generation, it is of utmost importance that the error is removed to ensure smooth functioning of the system.

Further Information and Manual Repair

There are many different ways this error can be rectified. However, the two most effective solutions are listed below as follows.
  • This solution is for the advanced user. Turn on the system and log on to it as the Administrator. Now click on the Start button. Now click on All programs -> Accessories -> System Tools. Here you will come across the option for System Restore. Click on it. A new window will appear. Select 'restore my computer to an earlier time' point. Now clock on Next. A list of restore points will now appear in front of you. Choose the latest restore point you come across from this list and click on ‘Next’. In the next window that opens, click on ‘Next’ again. This is the confirmation window. Once the restoration finishes, restart your computer.
  • This solution is for novice users. Download an Error 126 repair utility program. Install it on your system. Now use it to scan your system for errors. Find out if there is an option to fix/repair error. When you come across it, click on it as soon as the scan is complete. Restart your computer. Your system is now free of Error 126.
Read More
1 2 3 171
Logo
Copyright © 2023, ErrorTools. All Rights Reserved
Trademark: Microsoft Windows logos are registered trademarks of Microsoft. Disclaimer: ErrorTools.com is not affiliated with Microsoft, nor claims direct affiliation.
The information on this page is provided for information purposes only.
DMCA.com Protection Status