Windows 11 has some cool animations including fading effects which make working in it feels nice and futuristic but the cost of this is that there is a slight delay to certain actions performed. If you want the snap fast feature in Windows 11 and do not care about this eye candy there is an easy way to turn animations off inside it.
First, open Windows Settings by pressing ⊞ Windows + I on your keyboard
Alternatively, click on Start, search for Settings, and then click its icon.
When Settings appears, look in the sidebar and select Accessibility.
In Accessibility settings, click on Visual Effects.
In Visual Effects, switch Animation Effects to Off.
That’s it, changes will be applied automatically, you can close settings and continue working inside Windows 11 without animations and fades.
You can always switch animations back On via settings if you change your mind.
There are times when after you upgrade your Windows operating system, the System Logs under the Event Viewer will display an error message saying, “Event ID 10010 error – The server did not register with DCOM within the required timeout”.
What is DCOM? DCOM stands for “Distributed Component Object Model”. It is a proprietary Microsoft technology that allows the Component Object Model or COM software to communicate across a network. You can consider it as an extension of COM which is equipped with the capability of solving a couple of inherent problems related to the COM model to the better use over a network. COM is a tool that’s used for advanced configuration and troubleshooting in Windows 10. Developers usually use it to configure routine components and application behavior like participation in transactions and object pooling and so on.
The Component Services needs the DCOM wire protocol in order to communicate with the Component Object Model components on other computers. By default, in a Windows-based system, the network computers are configured initially to enable DCOM.
There are also some components in Windows that might require registering themselves with DCOM. However, if they fail to do so, you will encounter the “The server did not register with DCOM within the required timeout” error. To fix this, here are some suggestions you can check out.
Option 1 – Try to use the Component Services
Tap the Win + R keys to open the Run dialog box.
Then type “dcomcnfg” in the field and tap Enter to pull up Component Services.
Next, double click on the Computers folder located in the right pane and right-click on My Computer, and select the Properties option.
After that, switch to the COM Security tab under My Computer Properties and then go to the Access Permissions section.
From there, click the Edit Default button and in the new window that appears, apply the correct permission to objects under the Group or user names section.
Once you’re done, click OK and exit. This should fix the error.
Option 2 – Make sure that Function Discovery Resource Publication Properties Services is running
In the Cortana search box, type “services” and click on the Services icon to open the Services Manager. Alternatively, you can also tap the Win + R keys to launch the Run prompt and then type “services.msc” in the field and hit Enter to open the Services Manager.
Next, scroll down and look for the “Function Discovery Resource Publication” entry and double click on it.
Then switch to the General tab and from there, make sure that the Startup Type is set to “Manual (Triggered).
You also have to make sure that the service is running so if it’s not, just click on the Start button to start the service.
Now click on Apply to save the changes made.
Option 3 – Try resetting the default DCOM permissions
Tap the Win + R keys to open the Run dialog box.
Then type “dcomcnfg” in the field and tap Enter to pull up Component Services.
After that, expand Component Services > Computers and right-click on My Computer, and then select Properties.
Next, go to the Default Properties tab, and in the Default Distributed COM Communication Properties section, make sure that:
Error Code C19000101 - 2000B on Windows 10– What is it?
Error Code C19000101 - 2000B is a Blue Screen of Death (BSOD) error encountered by Windows users in an attempt to upgrade their operating system from Windows 7 or Windows 8/8.1 to Windows 10. The system upgrade does not successfully finish and when the installation is resurrected, it fails then reverts back to the original operating system. More and more Windows users come across this error that may have been triggered by a few reasons to be discussed in this article.
Solution
Error Causes
Microsoft users can experience the BSOD error C19000101-2000B due to the following reasons:
There’s an incompatibility with the drivers
Antivirus software
Further Information and Manual Repair
In fixing error code C19000101-2000B, you can try doing it manually. Manual repair methods can offer users solutions effectively and efficiently, having to address the root causes and issues in relation to a number of Windows error codes. If properly implemented, these manual repair methods can help Windows users resolve problems at hand immediately. However, there are cases where the help of a Windows professional is necessary. In such instances, it would be best to consult a certified Windows expert or you can also try using a powerful automated tool whenever needed.
To be able to fix error code C19000101-2000B, implement the first method used in resolving errorcode 0xc000021a, then you can proceed with this first method:
Method One: Perform Clean-Boot
Prior to performing an upgrade, you need to disable your antivirus. Or, better yet, uninstall it.
Ensure that your PC name is simple without hyphens, periods, or dashes.
Restart your device several times, then try again.
Disable all USB devices such as a smart card reader.
If you are using a SCSI hard disk, be sure to have the drivers ready and available for a storage device like a thumb drive to be connected. While on the Windows 10 setup, select the Custom Advanced Option then use the Load Driver command to load the right driver for the SCSI drive. If the setup still fails, try switching to an IDE-based hard disk.
Launch a clean boot, restart your device, then try again.
If you are upgrading to Windows 10 using the .ISO file, make sure to disconnect from your internet connection during setup. If your device is connected by Wi-Fi or through LAN, you need to disable both before attempting to run a system upgrade again.
Switch to a local account if you are connected to a domain.
Ensure that all external devices such as USB keys, external hard drives, gaming controllers, or printers are not attached to your device.
If you are upgrading to Windows 10 using Windows Update, you can perform a manual repair using the next method.
Method Two: Upgrading Via Windows Update
Make sure to disconnect from the Wi-Fi or LAN once the download reaches 100% before you proceed with the system upgrade.
Press Windows + X to open the command prompt window as an administrator.
Stop the Windows Update service, BITS, MSI Installer, and Cryptographic by inputting the following commands one by one, hitting Enter after every command:
Net stop wuauserv
Net stop bitsNet stop msiserverNet stop cryptSvc
Restart both Software Distribution and Catroot2 folders. You can do this by typing Ren C: WindowsSoftwareDistribution SoftwareDistribution.old and Ren C: WindowsSystem32catroot2 Catroot2.old in the command prompt to change the names of both Software Distribution and Catroot2 files.
Restart the Windows Update service, BITS, MSI Installer, and Cryptographic by inputting the following commands one by one, hitting Enter after every command:
Net start wuauserv
Net start bitsNet start msiserverNet start cryptSvc
Exit the command prompt then restart your device. You can now try to proceed with the system upgrade again.
Method Three: Disable or Uninstall Antivirus
If you opt to just disable your antivirus, you just have to right-click on the antivirus’ icon from your toolbar then choose Disable.
Press Ctrl + Alt + Del to open the Task Manager.
Check if all the files or services linking to your antivirus are turned off.
If you choose to uninstall your antivirus (which is recommended), open Control Panel.
Once the Control Panel window is open, select Programs then Uninstall a Program.
Look for your antivirus on the list, right-click it then choose Uninstall.
Changing Taskbar location in your Windows 10 is an easy task but lately, Microsoft has removed the option to just drag it to one side of the screen and place it there, now in order to change location we need to do a little more work but do not worry it is not difficult at all.
Right-click on the taskbar to open its properties menuin the menu, on the bottom choose taskbar settings. Once the settings dialog opens, on the right side locate the taskbar location on screen.
Click on the dropdown menu and choose the desired location for the taskbar.
Error 421 is a common SMTP (Simple Mail Transfer Protocol) Outlook error message. MS Outlook is one of the best and popular email applications widely used by PC Windows users for sending and receiving emails within and outside workplaces.
It is most commonly used in offices by professionals for faster communication.
This error may occur while sending and receiving emails on the server. The error 421 messages is displayed in either of the following formats:
“An unknown error has occurred: Server error 421”"Could not send your message. Error 421"421 4.2.1 : (DYN:T1) http://postmaster.info.aol.com/errors/421dynt1.html 421 4.3.1 Out of disk space for temp file 421 4.3.2 All server ports are busy421 Downstream server error 421 Fork failed 421 Greylisting enabled, please try later“An unknown error has occurred. Subject ‘Testing’, Account: ‘pop.charter.net’, Server: ‘mail.charter.net’, Protocol: SMTP, Server Response: ’421 Message rejected’, Port: 25, Secure(SSL): No, Server Error: 421, Error Number: 0x800CCC67”
Solution
Error Causes
Some common causes for this critical Outlook error are:
PST storage size exceeds 2GB file size
Improper ISP settings
Slow internet connection
PST file corruption
Trojan attack and viral infection
This is a critical Outlook error that should be resolved timely. If you delay, it may cause you a great deal of inconvenience.
The error code 421 hampers your ability to access your email account, send and receive emails, add new contacts, view emails, calendar entries, and journals. In other words, it just brings your email activities to a standstill locking you out of the account.
Further Information and Manual Repair
To resolve this error code on your system, you don’t always have to hire a professional or call the network personnel to do the job. It may be a critical error but the good news is that it is quite easy to fix. Even if you don’t have technical expertise, you can still repair it.
Here are some of the best methods to repair this issue on your system:
1. Change the Server Settings to its Maximum Limit
Try changing your server settings. Here set the inbound connections limit at the maximum limit.
To do this, open the Microsoft Exchange Server Administrator utility. The access path of this utility will vary depending on the installation procedure used to set up Exchange Server.
Once you open the MS Exchange Server Administrator utility, click the ‘Connections’ icon in the left side navigation pane. Now double click the internet mail service icon in the right side pane. As you click it, the Properties window will open.
Now click the ‘Connections’ tab in the Properties window and then click the ‘Advanced’ button. This will open the configuration window.
Here reset the number for ‘Maximum Number of Inbound Connections’ to a high number, its maximum limit. After changing the settings, close all open Exchange Server Administrator program windows to successfully complete the process.
After the process is complete, try accessing your Outlook email account again; if it works, then that’s great the error 421 is resolved. However, if it doesn’t, then the problem could be related to viral infection.
2. Download a PST Repair Tool
If the cause of the error is PST files corruption, then not only will you be locked out of your email account, you are also at risk of losing all the data stored in your email account.
However, the best way to resolve the error and ensure full data recovery is to download a reliable PST repair tool. By running a PST repair tool on your system, you can resolve the error 421 right away. It recovers your data, repairs corrupt and damaged PST files.
3. Scan Your PC with Restoro.
If viral infection and Trojans are causing the error 421 to pop up on your system, then it is recommended to download and scan your PC with Restoro.
This is an advanced, intuitive, and user-friendly PC fixer. It is not just an antivirus but also a system optimizer and a registry cleaner.
Unlike common antivirus software that only removes viruses and simultaneously slows down the system’s speed, Restoro removes all types of malicious software on your PC including malware, spyware, Trojans, and viruses, and also boosts the speed of your PC significantly.
It is safe, easy to operate, and a quick fixer. It is compatible with all Windows versions.
Click here to download Restoro and resolve error 421 today!
For a while now, Microsoft has been working hard to add various built-in troubleshooters in Windows 10. In fact, there is a troubleshooter for almost every standard or common error in Windows 10. And now with the newly released Windows 10 v1903, Microsoft has added the Recommended Troubleshooting which allows Windows 10 to automatically fix a lot of critical issues on your computer, and in this post, you will be guided on how you can turn on or off the Recommended Troubleshooting in Windows 10.
The Microsoft Diagnostic & Feedback data only provides two settings – Basic and Full. So if you want to turn off the Recommended Troubleshooting for some reason, the only way to do so is to stop it from collecting complete data from your PC. And to turn it on or off, you can choose to switch between them. To do that, navigate to Settings > Privacy > Diagnostics & feedback and from there, select Basic under the Diagnostic Data section. After that, go back to Settings and go to Update & security > Troubleshoot. Once you’re there, you should see a warning message saying, “Share Full Diagnostic data to get additional troubleshooting recommendations”. Based on the message, Microsoft will only offer the recommended troubleshooting based on the Full Diagnostic data which it collects from your computer.
On the other hand, if you know how to navigate and use the Windows Registry, then you can enable or disable the Recommended Troubleshooting via Registry Editor but before you proceed, make sure that you create a System Restore point. Once that’s covered, follow these steps:
Tap the Win + R keys to open the Run dialog box and type “regedit” in the field and tap Enter to open the Registry Editor.
Next, navigate to this registry path: HKEY_LOCAL_MACHINESOFTWAREMicrosoft
From there, look for the key named “WindowsMigration”. If you can’t find it, just right-click on the left pane and create a new key and then name it “WindowsMigration”.
After that, create a DWORD “UserPreference” and double click on it to set its value to “0” if you want to turn it off or “1” if you want to turn it on.
Exit the Registry Editor and restart your computer to apply the changes made.
Note: The Recommended Troubleshooting functionality can look into the error logs sent back to the Microsoft team and use an algorithm to set up a solution for you and they’re nothing but Diagnostics and Feedback data that Windows collects and sends back to Microsoft. Moreover, the recommendations are only visible if you are connected to the internet, else it will show the same message.
Bluetooth perhaps is slowly becoming an outdated feature but sometimes you can really used it and need it.
By default, in Windows 11 Bluetooth is turned OFF so if you need it, you will need to turn it ON first. Luckily turning it ON is easy and we will guide you through the process
Turning Bluetooth using the Quick Settings menu
The easiest and fastest way to turn the Bluetooth ON is using the quick setting menu:
Click on indicator icons located left of date and time in Taskbar
Click on the Bluetooth icon (if the icon is not displayed, click on the pencil icon, then click on Add and add Bluetooth icon from the list)
Right-click on the Bluetooth icon and select go to Settings
Go to Adding a Bluetooth Device to Windows 11 section
Switch it ON via Windows Settings
Open Windows settings by using ⊞ WINDOWS + I combination
Click on Bluetooth & Devices
Inside settings turn Switch to ON beside Bluetooth
Click + Add Device large button on top
Click Bluetooth
Select device in the list of found devices (make sure device is turned ON, it has Bluetooth sharing ON, and that it is in pairing mode)
If the device needs the password, type it in
When the message Your device is ready to go is showed on the screen click on the Done
Advice on Bluetooth devices
Note that the Bluetooth devices you connect to Windows 11 stay linked to your PC unless you pair them with a different PC, smartphone, or tablet later.
After a time, most Bluetooth devices power down automatically to save battery life. To continue where you left off, either power the Bluetooth device up (if it has a power button) or press a button on a keyboard or mouse, and it should automatically turn on and reconnect with your PC.
If you’re having trouble connecting your Bluetooth device, make sure that Windows 11 is fully updated and that you’ve installed any drivers that came with your device.
Make sure that the device is fully charged or that it has a fresh set of batteries.
while Windows is searching. You’ll need to remove the device from Windows 11 first and then attempt to pair it with your PC again.
Removing devices
If you need to remove (un-pair) a Bluetooth device, just open Windows Settings and navigate to Bluetooth & Devices. Locate the name of the device that you want to remove, click the three dots button in the corner of its square and select Remove Device.
Windows 11 has come a long way from its infant stage. Today it is incredibly good and stable operating system that also looks good and modern. Unfortunately, fancy animations and good graphics come with a price, in this case, slower performance on some little older and weaker computers.
Animations itself which include also fading effects can sometimes feel slugging and laggy and have a general overall feeling of delay. For a more old-school instant experience, you can turn off animations.
In order to turn animations inside Windows 11 follow this simple guide:
First thing is to open Settings by pressing Windows + i key combination or you could open Start and in the search box type in Settings and then click on its icon.
Once inside settings on the left side find Accessibility and click on it to select it. Once it is selected on the right side choose Visual effects. Inside the visual effects section click on the switch next to Animation effects to OFF. You can also turn off transparency effects in this section if you wish if you have an older GPU in order to speed it up a little.
That is all you need to do, settings will be automatically saved and all animations will be turned off for a quicker and more responsive feeling when working inside W11
Blue screen locale id 1033 error as the name suggests, is a type of BSoD error. This error may occur during Windows startup, program load, or while the program is running. The error indicates poor PC maintenance and occurs without any warning.
The error message is prompted in the following format:
Problem signature: Problem Event Name: BlueScreen OS Version: 6.0.6002.2.2.0.16.7 Locale ID: 1033
When the error occurs, the computer screen turns blue and the user is unable to view or access the program. It is advisable to fix the error right away, virtually because BSoD is a critical PC error, it can pose serious threats to your system.
Error Causes
The two most common causes of the occurrence of the Blue Screen Locale ID1033 error code are:
Registry issues
Viral infection
Further Information and Manual Repair
You don’t need to hire a technician or be a computer whiz to resolve Blue Screen Locale ID1033 error code. Here are some methods that you can try to resolve this error on your PC. These methods are easy to perform and result-driven.
Method 1: Perform a PC Scan by Downloading an Anti-Virus
Since this error is indicative of a viral infection, it is suggested you perform a PC scan by installing an antivirus on your system. Make sure you download an antivirus that is powerful and has the ability to scan all kinds of viruses.
Method 2: Clean and Repair the Registry
Another alternative method is to clean and repair the registry.
The Registry is a component of the PC that stores all information and activities performed on the PC. This includes both important and unnecessary files like junk files, cookies, internet history, temporary files, invalid entries, bad registry keys, and more.
These files not only accumulate in the registry but also damage and corrupt it thereby generating error codes like the Blue Screen Locale ID1033 error code.
A surprisingly large amount of things present at your home can and do interfere with your wi-fi signal making it weak so devices are dropping it, having trouble connecting, or being slow.
Hello and welcome to our latest article where we will take a look at all things that are present in a lot of homes but are very bad for your WI-Fi signal.
Bad router placement
Having a router in a bad position can have some really large effects on WI-Fi signal strength and its availability. Usually, we do not give great attention to where we are placing our router but it has been proved over and over again that being close to certain objects does indeed have a great influence on the wireless signal strength and performance.
So, what are these objects and bad positions where we could place the router and effectively kill his Wi-Fi capabilities?
Fish Tanks
Water will block all radio waves including Wi-FI signals and waves themselves, so having a router next to the aquarium or any large source of water is a bad idea. You should always look at water as something bad for your Wi-Fi and move your router away from it as far as possible.
Bookshelves
Paper is another story and example of the dampening effect on radio waves. Did you know that various patterns of paper are used in silent rooms and recording studios in order to eliminate sound reflection from surfaces? Well besides absorbing sound waves, the paper also absorbs Wi-Fi signals and if you have a large bookshelf with a lot of books packed one beside another you just have a great wall of signal absorbing.
Mirrors
The problem with mirrors is in their coating that goes over the glass in order to turn it into the mirror, that coating is metal and as such, it is absorbing signals in large amounts. If you have an old or high-quality mirror that has a silver coating things are even worse since silver will absorb even more waves than modern cheap ones.
TV
Yup, TV is also on this list and for a similar reason as a mirror, although TV does not have coatings of metal, they have something even worse: a large metal plating on the back. Metal plating is there to produce structural integrity of the TV set and provide it with shielding from electromagnetic waves and as such it will prevent Wi-Fi waves as well. Do not place the router behind your TV.
Things that influence signals in homes
Any kind of metal decoration
Now when we covered mirrors and TV because of the metal they have, we must take a look at the metal itself. Any kind of metal stuff that you might have like baskets, figures, statues, frames, etc will effectively block your signal.
Kitchen appliances and Home utilities
Kitchen appliances like refrigerators, microwaves, ovens, stoves, etc. along with home appliances and utilities like dishwashers, washing machines, dryers, etc are large metal objects enclosed in a metal cage that will block signals from spreading further and it is no secret that most kitchens have weaker Wi-Fi because of this reason.
Home gyms
This is a logical conclusion as to everything explained so far if you have a workout room or small gym at home it is probably filled with weights that are metal and have mirrors inside, all of that will interfere and block signals.
Things blocking your Wi-Fi that you have no easy control over
Walls
Thick walls will dampen signals, thick walls from bricks will dampen even more and concrete walls will kill it almost completely. Any kind of metal reinforcement wiring inside walls will reduce and kill signals as well.
Floors and ceiling
This is somewhat important if you have a floor beneath or under the room where is your router located, but for the same reason how walls are blocking your signal floor and ceiling can do it as well, especially since most of the time they are made of some stronger material like concrete with metal fence inside.
Heating systems
If you have a heating system that is composed of metal radiators with water inside, then in terms of Wi-Fi signal strength you have an aquarium but in a metal box, and as such it will greatly reduce signal strength.
In case you don’t know, Groove Music is due to retire its OneDrive streaming service this month. Despite that being the case, there is actually a workaround you can try to still continue enjoying music streaming. The app also allows you to play your own local files and if required, you can also modify or tailor the experience with new features – for instance, Groove Music brings an Equalizer to the settings of the app.
As the name suggests, the equalizer allows you to tweak frequency responses to your liking. On top of being able to tweak individual bands, the equalizer supports few pre-set settings to enable quick changes. This post will guide you on the process of accessing and using the equalizer in the Groove Music app. To get started, refer to the instructions provided below.
Step 1: You need to make sure that you are running the latest version of the Groove Music app or version 10.18011.1211.0 or higher in order to use the equalizer in Groove Music. If needed, you can check the version number from Windows Store.
Step 2: Open Windows Store and then click on the ellipses icon and select the Downloads and Updates option.
Step 3: Next, search for Groove Music and check its version number.
Step 4: Now that you’ve verified the version number of Groove Music, you need to open the equalizer setting. It is enabled by default and to access it, click on the gear icon for Settings and select equalizer under the Playback settings.
Step 5: After that, the Equalizer window will pop up. It is where you can configure the equalizer settings using the drop-down menu. Here are the following presets you can choose from:
Flat
Treble Boost
Bass Boost
Headphones
Laptop
Portable speakers
Home Stereo
TV
Car
Custom
Step 6: Drag the dots upwards or downwards to set your own preferences, as needed.
Note: The only downside to this setting is that there is no shortcut available for quick access as you have to navigate through the Settings section manually to access it and change the preset configurations. In addition, the Groove Music app also works on the mobile version of Windows 10.
 Windows 11 has some cool animations including fading effects which make working in it feels nice and futuristic but the cost of this is that there is a slight delay to certain actions performed. If you want the snap fast feature in Windows 11 and do not care about this eye candy there is an easy way to turn animations off inside it.

 in the menu, on the bottom choose taskbar settings. Once the settings dialog opens, on the right side locate the taskbar location on screen.
 Click on the dropdown menu and choose the desired location for the taskbar.
 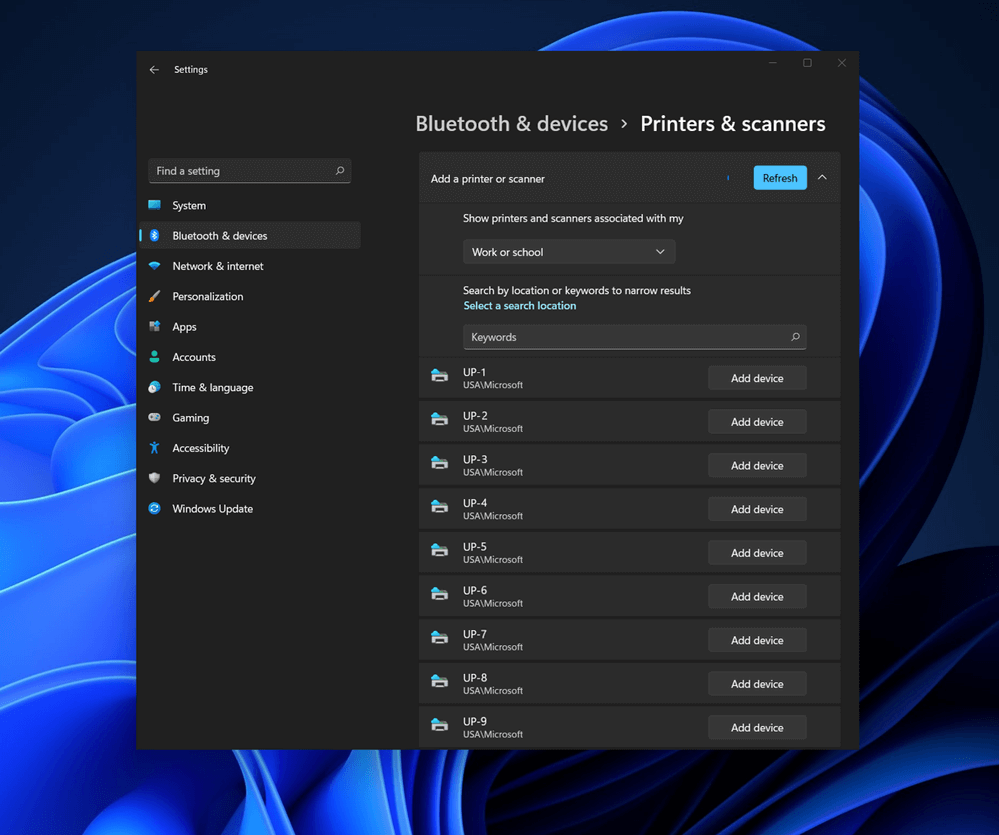 Bluetooth perhaps is slowly becoming an outdated feature but sometimes you can really used it and need it.
By default, in Windows 11 Bluetooth is turned OFF so if you need it, you will need to turn it ON first. Luckily turning it ON is easy and we will guide you through the process
Bluetooth perhaps is slowly becoming an outdated feature but sometimes you can really used it and need it.
By default, in Windows 11 Bluetooth is turned OFF so if you need it, you will need to turn it ON first. Luckily turning it ON is easy and we will guide you through the process
