Error Code 1723 is a peculiar error type common in Windows PC. It is related to the Windows Installer package. This error is displayed in the following format:
"Error 1723- There is a problem with this Windows Installer package. A DLL required for this install could not be run. Contact your support personnel or package vendor...”
You are most likely to come across the error code 1723 if the Java installation is not completed successfully. In other words, the error indicates that the installation process has failed.
 Error Causes
The 1723 error may occur due to several reasons, the most common being:
To resolve this issue on your PC, you don’t always have to hire a professional technician and pay hundreds of dollars to get it fixed. The error code 1723 may not be a common Windows PC error but it is easy to fix.
Here we have listed some of the best and easiest DIY ways to resolve this error on your system. These solutions are so easy to perform that even if you are not a computer programmer or technically adept, you can work through them and resolve the error in just a few simple clicks.
So, let’s get started:
If the Java version previously installed on your system is not working properly and showing 1723 error messages then it is advisable to install the latest Java version.
However, to do this first you will have to uninstall the old version and then download the latest Java version on your PC from a trusted website to ensure it does not contain malicious viruses and malware.
Another method to resolve the 1723 error code is to check whether the required files are extracted in the temp folder for installers or not.
The error may occur if the location is incorrect and the account is not permitted to extract files in the temp folder.
In this scenario, the best way to resolve the issue is to change the permissions of the temp folder. This can be done by logging in to your account and opening file explorer or ‘My Computer’. Now copy and paste this link address in the address bar: DL:UsersUSERNAMEAppDataLocal.
Please note, here DL is the drive letter of the Windows drive, and in the username insert the username of the account that you are using.
Now right-click the ‘temp’ folder. Select properties and click on the Security tab.
After that click edit below the list and press add. Again type the username here and click OK. The next step is to select the added account from the list and tick ‘FULL CONTROL’ box under ‘Permissions for Username’. Click OK and then close the properties. Once this process is complete, now try running the installer again. This will most likely resolve the issue.
Nonetheless, if the error still persists, then this means the underlying cause of the error is deeper than you think. The error may be related to registry issues. In such situations, try solution 3 to fix the error 1723 on your system.
When the error code 1723 is triggered due to registry issues, then it is advisable to scan your PC with Restoro. Registry issues should be resolved immediately because they pose serious threats to your system. It can lead to system failure, crash and valuable data loss.
Registry basically saves practically all the information and activities performed on your PC including the unnecessary and obsolete files like junk files, cookies, temporary files, and invalid entries.
If these files are not removed they can corrupt the registry, damage dll files and installers thereby generating error codes like 1723 on your system.
The easiest way to repair and clean the registry in seconds is to run Restoro on your PC.
It is a smart, intuitive, advanced, and multi-functional PC repair tool. It is embedded with multiple powerful utilities and is a one-stop solution for all PC related issues. This software is compatible with all Windows versions.
It is deployed with a highly functional registry cleaner that scans and detects all registry issues on your PC and removes them right away. It wipes out the unwanted files, repairs the damaged dll files and restores the registry.
Other powerful utilities that are embedded in this software include an antivirus, a system optimizer and Active X controls and class modules.
To resolve 1723 error code on your PC today, click here to download Restoro.


You probably heard about switches for LAN but not a lot of people heard about KVM switches. So what exactly is KVM switch?
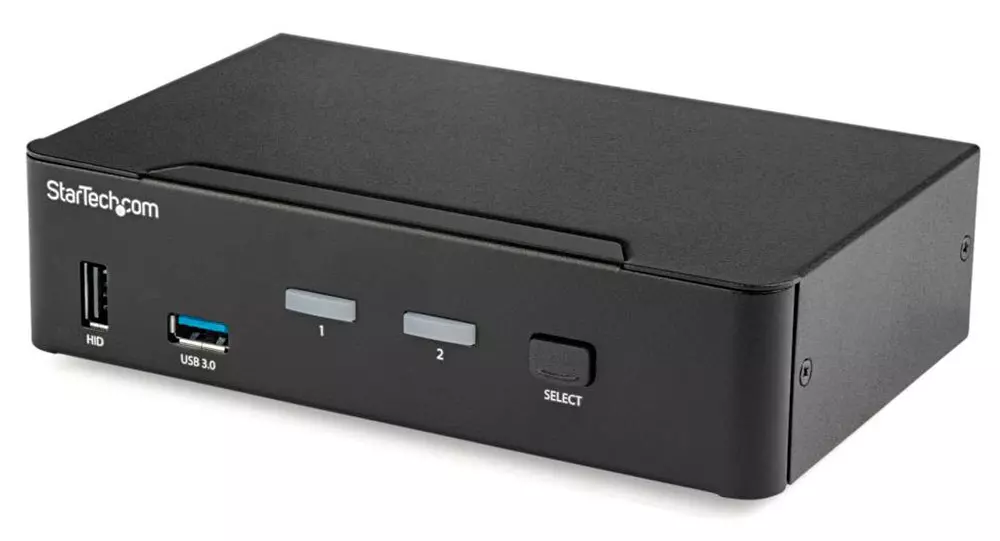
If we look at the name, it is a shortcut for Keyboard, Video & Mouse and the original idea was to have multiple computers but one keyboard, mouse, and monitor. These peripherals would be connected to the KVM switch and other computers could all use one set of these on the fly when needed.
The technology behind the switch is a little interesting since it will actively fake signals to other computers that are not using peripherals. Once they are switched to them the transition is smooth and not noticeable. In old days these switches were more important than today since on every mouse or keyboard disconnection you had to reboot the computer, and although today that is not the case CPU will still detect disconnection and on the next connection it will run through the ID of the device and try to use the existing driver and if peripheral was connected in other USB port, it will install the same driver but connect it to the new USB port.
This type of reconnection can slow down work and place unnecessary load on the CPU so that is why KVM will fake connection in order to make switching externals on the computer smooth and in nick of a time.
These days modern KVM switches will offer you more options than just being able to switch between keyboard, mouse, and monitor. Modern switches now offer Lan, audio, and many more various options.
There are also different kinds of switches offering you only one option, like for example just a Video switch that will let you use one monitor on three computers and many more other specialized options.
So far we talked about Hardware switches, a real device being able to take peripherals into it and switch computers on the fly. On the other line, we have software switch solutions that will have specific software installed on all computers and have it run at all times, and switching between them will be through specific software.
There are two very good and main advantages of using software solutions instead of a hardware one. First, of course, is the price, since the most popular Synergy is an open-source solution, completely free of charge. The second big advantage is that software switch is not limited to how many computers can you use. Hardware switches tend to go to a large number like 16 but if you have a large cluster of computers over a LAN, let's say 30 then the box solution might be difficult.
On the other hand software solution will switch only keyboard and mouse since each other computer will have to have some screen on it in order to work. Both solutions have their strong advantages and disadvantages and it is up to you to choose one that best suits you.
If you are multitasking with a lot of computers or just need your peripherals from time to time to connect to another machine then the KVM switch is something that you might find the use of. Just be aware that if you go for some cheap switch you might experience some lag on your peripherals, but if that is not a concern you can get hardware one for as low as $50 USD.
Wondering if upgrading to Windows 11 will boost your gaming experience? We can’t give you a straightforward answer, sadly. But we can take you through the tweaks you can expect if you have all the right requirements and help you make a final decision.
Essentially, the answer to this question is yes. Microsoft has definitely added a bunch of enhancements and features to its latest OS to give gamers the best possible experience. However, you have to keep in mind that this may not work out smoothly for every single user.
Whether you’ll be able to fully take advantage of the Windows 11 gaming features really depends on your setup. As expected, Windows 11 has more demanding system requirements than its predecessor.

So, unless your hardware can run the new OS comfortably, you might not be able to make the most of all these gaming perks. In that case, we recommend you first upgrade your hardware and then make the switch. Be prepared to be a little surprised by a few other interesting changes in comparison to Windows 10, though!
For some of the new gaming features to work, it’ll also be necessary for you to have an NVMe SSD and an HDR-compatible monitor. So let’s take a look at 4 big improvements you can expect if your setup is compatible.
For this powerful feature to work, you need a compatible graphics card and, as stated before, an NVMe SSD. It’s also important for your GPU to support the DirectX 12 graphics API at least. And since we’re on that subject, you’ll be happy to know that Windows 11 has also introduced a new version of the API called DirectX 12 Ultimate.
Now, what does DirectStorage do? It’s a new feature designed to make full use of the speedy storage of NVMe SSDs. It also transfers game data directly onto the graphics card, lightening the load on your CPU. Normally the CPU would have to decompress the data first, but DirectStorage helps bypass this. That’s how loading times are reduced and games run more smoothly.
Windows 11’s Game Mode is certainly a welcomed addition. When you turn on Game Mode, usage of background apps that aren’t essential to your game is reduced. This results in the game you’re running becoming a priority process. This way, it uses your hardware and system resources to the max. Ultimately, the Game Mode means less lag and higher frame rates so you can play undisturbed and fully enjoy your gaming session.
For this one you’ll absolutely need an HDR-compatible monitor. Basically, HDR (High Dynamic Range) means a wider range of contrasts and colors that can be displayed on a monitor.
Windows 10 has an HDR feature, but you have to turn it on and off manually (“Use HDR”). Plus, users have reported that, if left on, it results in an unappealing appearance of content other than movies and games.
Windows 11 fixes that problem with its AutoHDR feature. Toggling it results in the system automatically adjusting the color contrast, balance and brightness based on what you’re currently looking at. For gamers, this means vivid imagery in every single game, resulting in a supreme visual experience. You can check out Microsoft’s own video showcasing the power of AutoHDR.
Aside from AutoHDR, another way Windows 11 improves the visual aspect is through its support for refresh rates of up to 360Hz.
It’s no secret that Microsoft wants to integrate Windows and Xbox. We’ve seen some attempts with Windows 10, but they’re pretty wonky compared to the new OS.
Windows 11’s built-in Xbox Game Bar enables quite a few options all gamers desire. You can take screenshots and videos of your game and send them, for starters. Furthermore, you can use it to see audio settings and monitor your PC’s performance without having to leave the game or open the Task Manager.

Widgets are also a really cool part of the Game Bar. You can choose from a wide variety of widgets, such as Xbox Achievements, Spotify, Gallery, Xbox Social and more.
Moreover, the Xbox Game Pass has been streamlined on Windows 11. Game Pass is a subscription service that unlocks hundreds of awesome games and supports cloud streaming. Do keep in mind that the games are only unlocked for a certain period of time, as the selection rotates once in a while.
Windows 11 does offer tweaks that require zero input from you. However, there are a few things you can do manually to get even more out of your new OS while gaming.
Windows 11 has done quite a bit for avid gamers. We hope your setup is compatible with all these new features and you can experience these enhancements ASAP!
CalendarSpark is a browser extension developed by MindSpark. This extension allows an easy way to print or view calendar templates and make schedulers for a day/week/month/year. This browser extension hijacks your browser home page and search engine, changing them to MyWay.com. While the extension is installed it monitors your browsing activity and collets visited websites, clicked links, and sometimes even personal information, which it later uses to display targeted unwanted ads through your browsing sessions.
While browsing the internet with this extension installed you will see additional sponsored links, ads, and sometimes even pop-up ads on websites that are not supposed to have any of these. Several anti-virus scanners have detected this extension as a Browser Hijacker, and due to its data collecting behavior, it is not recommended to keep it on your computer.
 Inside personalization, click on the Lock Screen tab.
 On the right screen, under the picture, you will find Windows spotlight, click on it to bring a drop-down menu up.
 Your choice is presented as a single picture for background or slideshow, a series of pictures that are going to be looped in a given time interval.
If you would like just a single picture for your background, choose that and click on it.
Your choice is presented as a single picture for background or slideshow, a series of pictures that are going to be looped in a given time interval.
If you would like just a single picture for your background, choose that and click on it.
 Once you are in choose picture dialog, click on the browse button and navigate to the picture on your storage which you would like to have as a background.
If however, you fancy slideshow as your lock screen background, click on the background drop-down menu and choose the slideshow. Next, click on add a folder and navigate to a folder where you have pictures that you would like to have as a slideshow for your Windows lock screen.
Once you are in choose picture dialog, click on the browse button and navigate to the picture on your storage which you would like to have as a background.
If however, you fancy slideshow as your lock screen background, click on the background drop-down menu and choose the slideshow. Next, click on add a folder and navigate to a folder where you have pictures that you would like to have as a slideshow for your Windows lock screen.

diskpartStep 5: Afterwards, type in either of the following commands to help you in either listing all the Disk connects or all the partitions on those disks formed.
diskpart or list volumeStep 6: Next, you need to select any of the two given commands below depending on the list you entered on the previous step.
select disk # or select volume #Step 7: After you enter the command, it will select the Disk or the Partition you want to select. Now you have to type and enter the following command to clean your drive.
cleanStep 8: Now enter any of the two following commands.
list disk or list volumeStep 9: Then type the next command below to create a specified partition.
create partition primaryStep 10: Once done, type in the following command to select the newly created partition.
select partition 1Step 11: Next, type the following command to mark the selected partition as active.
activeStep 12: Finally, restart your computer to successfully apply the changes made and then see if it has fixed the problem or not.