Enable or disable Fast User Switching

When your computer is slow, you don’t have much choice but to wait until it gets done with a task at its own pace, albeit a slow one. So if you want to switch user accounts on your computer a couple of times daily, then a slow computer can get really irritating. What makes system processes slow is that the accounts have some programs or applications running and resources allocated to them. And besides, if your computer is already low on performance, it will kill the natural fluidic flow of the user. But worry not, for this post will guide you in switching user accounts with the help of some minor tweaks in your Windows 10 computer.

To disable or enable Fast User Switching, you have two methods to do that using the Registry Editor and the Group Policy Editor. Either way, refer to the instructions laid out below.

Option 1 – Enable or disable Fast User Switching via Registry Editor

  • Tap the Win + R keys to open the Run dialog box.
  • After that, type “Regedit” in the field and tap Enter to open the Registry Editor.
  • Next, go to this registry key: HKEY_LOCAL_MACHINESOFTWAREMicrosoftWindowsCurrentVersionPoliciesSystem
  • Then right-click on System and select New > DWORD (32-bit) Value and name this newly created DWORD as “HideFastUserSwitching”.
  • Now double click on it. If you want to enable Fast User Switching, input “0” as the value, and if you want to disable it, input “1” as its value.
  • Restart your PC to successfully apply the changes made.

Option 2 – Enable or disable Fast User Switching via Group Policy Editor

Take note that this option will not work if you are using the Windows 10 Home edition since the Group Policy Editor does not come with Windows 10 Home. Refer to the steps below to enable or disable Fast User Switching using Group Policy Editor.

  • Tap the Win + R keys to open the Run dialog box and then type in “gpedit.msc” in the field and hit Enter to open the Group Policy Editor.
  • Next, navigate to this path inside the Group Policy Editor: Computer ConfigurationAdministrative TemplatesSystemLogon
  • Now double click on the configuration listing labeled as “Hide entry points for Fast User Switching” to open the configuration page.

Note: On the configuration page, you will see the following description:

“This policy setting allows you to hide the Switch User interface in the Logon UI, the Start menu, and the Task Manager. If you enable this policy setting, the Switch User interface is hidden from the user who is attempting to log on or is logged on to the computer that has this policy applied. The locations that the Switch User interface appears in the Logon UI, the Start menu, and the Task Manager. If you disable or do not configure this policy setting, the Switch User interface is accessible to the user in the three locations.”

  • From there, you can choose to enable or disable the Fast User Switching depending on your preferences. After you’ve selected, click OK and exit the Group Policy Editor.
  • Now restart your PC to apply the changes made successfully.

Do You Need Help with Your Device?

Our Team of Experts May Help
Troubleshoot.Tech Experts are There for You!
Replace damaged files
Restore performance
Free disk space
Remove Malware
Protects WEB browser
Remove Viruses
Stop PC freezing
GET HELP
Troubleshoot.Tech experts work with all versions of Microsoft Windows including Windows 11, with Android, Mac, and more.

Share this article:

You might also like

A Quick Guide to Fixing Error C00D1199

What is Error C00D1199?

This is a typical Windows Media Player error code. Developed by Microsoft, Window Media Player is a media player and media library application that is used for playing audios and videos on the computer. Error C00D1199 appears when Windows Media Player is unable to play the file requested by you. The error code is displayed in the following format:
C00D1199: Cannot play the file

Solution

Restoro box imageError Causes

You might encounter an error C00D1199 message on your PC for one of the following reasons:
  • The file type you requested is not supported by the Windows Media Player
  • The file type was not compressed by using a codec that is not supported by the Player
  • Your sound card or controller is not configured properly or outdated
  • Registry corruption
The good news is that error C00D1199 is not fatal. But if this error code is generated due to registry problems, then it can lead to serious issues. Therefore it is advisable to fix it immediately.

Further Information and Manual Repair

Here are some of the best and easy do-it-yourself methods to resolve the error C00D1199 right away.

Method 1 - Ensure File Type is Supported by Windows Media Player.

If it is supported then make sure the codec used to compress the file is installed on your system. There are hundreds of audio and video Codecs in use today but the most popular Codecs used on Windows Media Player are Windows Media Audio, Windows Media Video, and MP3. If these Codecs are not installed on your PC, then it is advisable to download them from the web. But make sure you download these codecs from a reliable and a trusted website.

Method 2 - Check Sound Card Settings

Another method to resolve error C00D1199 is to check Sound card settings. Make sure it is configured properly. Improper configuration can also trigger the error. Nonetheless, if it is configured the right way but the error still persists then it is advisable to change update the driver. To do this, go to the Device Manager. Here use the Driver update wizard to make updates.

Method 3 - Check the Windows Registry

The registry is an important part of the PC. It stores all the activities performed on the PC and all files including both junk and important files. If unnecessary files like junk files, cookies, and bad registry entries are not removed frequently from the registry, it can corrupt and damage it and generate error codes like C00D1199. To clean the registry and resolve the error it is advisable to download Restoro. This is a user-friendly PC Fixer embedded with a registry cleaner. The registry cleaner wipes away all the clutter from the registry and cleans it instantly. It also repairs the damaged files and restores the registry. Click here to download Restoro and resolve error C00D1199 on your PC.
Read More
How To Fix Error 504

Error 504 - What is it?

Error 504 is a type of runtime error that occurs on Windows PC. A runtime error is a bug that causes software or hardware problems thereby preventing programs from working on your PC correctly. This error may occur during the execution of the program.  It also slows down your PC performance.

Solution

Restoro box imageError Causes

Error 504 can be triggered by many causes such as:
  • Incompatibility between 2 software programs
  • Malicious software
  • Missing DLL files
  • Registry issues

Further Information and Manual Repair

Whenever you experience the error 504 on your system, it is advisable to resolve it immediately, typically because runtime errors like error 504 can lead to system failure and valuable data loss which is more than often hard to recover. To resolve this error code, you don’t necessarily have to hire a professional for the job. In fact, here are some solutions that you can try to fix by yourself, even if you are not a computer programmer.

1. Get the latest updates for Windows and for the program showing the error

This is a quick way to resolve runtime error 504 on Windows PC. To update the latest updates for Windows and for the program causing the error, open Windows Update by going to the start menu. In the search box type ‘update’ and then in the list of results click Windows Update.  In the left pane click on check for updates, wait while Windows looks for the latest updates. It will show you a list of updates available select the important updates that you want to install. Then click ok and then click install updates. After the updates are successfully complete, restart your PC and try running the application. If the error still persists, then try the solution given below.

2. Scan For Malicious Software

Sometimes the runtime error 504 may occur due to viral infection and malware. So, to resolve it download an antivirus. However, the antivirus can also slow down your PC performance.

3. Scan for Registry Issues

Another way to resolve it is to scan for registry issues. The registry and DLL files get damaged when it overloads with too much data. This particularly includes irrelevant and obsolete files. Registry issues trigger runtime errors like 504. The best way to resolve it is to download Restoro. This is an advanced and multi-functional PC Fixer embedded with multiple utilities like a registry cleaner, an antivirus, and a system optimizer. The registry cleaning utility resolves registry issues by removing the unnecessary files completely and repairing the damaged dll files. The antivirus module scans and removes all kinds of malicious software on your PC like viruses and Trojans, thereby resolving the runtime error 504 in seconds. As for speed, Restoro also functions as a system optimizer which boosts the performance of your system significantly. Restoro is safe and bug-free software. It has simple navigation and a user-friendly interface which makes it very easy to operate and workaround. It is compatible with all Windows versions. Click here to download Restoro and resolve error 504 today!
Read More
Reset Windows computer without Settings app
As you know, the Settings app is a vital part of Windows 10 as it helps in fixing issues in the system and offers users access to various Troubleshooters, as well as the Reset function and many more. So if you want to Reset this PC or a Windows Store app, you need to use the Settings app to do so. However, one of the most annoying errors you can encounter when using the Settings app is that it crashes or sometimes does not open at all. Thus, if you are having issues with this app, worry not for there are alternative ways you can try to reset your Windows 10 PC. For you to reset your Windows 10 PC without using the Settings app, the main option you have is to use the Advanced Startup options and there are different methods by which it can be accessed. It can be accessed via Lockscreen, Command Prompt window, or via Start Menu.

Option 1 – Reset Windows 10 via Lockscreen

  • You need to first boot into the Advanced Startup options from the lock screen. If you’re already logged in to your account, you have to hit the Win + L keys to get on the lock screen.
  • Next, click on the Power button located at the bottom right corner of the screen.
  • After that, hold the Shift key and click on Restart to restart your computer into the Advanced Setup option mode. And from there, you can reset your Windows 10 computer.

Option 2 – Reset Windows 10 via Command Prompt

  • Search for “cmd” in the Cortana search box or hit the Win + R keys to open the Run box and type “cmd” in the field and hit Enter to open Command Prompt.
  • If a User Account Control or UAC prompt appears, click Yes to proceed in opening Command Prompt.
  • After that, type the following command and hit Enter to execute it:
shutdown /r /o /f /t 00
  • After you execute the command, it will restart your computer into the Advanced Startup options where you can reset your Windows 10 computer.

Option 3 – Reset Windows 10 via Start Menu

  • Tap the Win key or click on the Start button located in the Taskbar.
  • Then click on the Power button at the bottom right portion of the screen.
  • Next, press and hold the Shift key on your keyboard and then click on Restart. This will restart your Pc into the Advanced Startup options.
Note: Once you have access to the Advanced Startup options, you have to go to the setting which allows you to Reset your Windows 10 PC. All you have to do is select Troubleshoot > Reset this PC to reach the following screen Afterward, select either the “Keep my files” option or the “Remove everything” option depending on your preference, and then proceed to the next on-screen instructions that follow to reset your Windows 10 computer.
Read More
Fix Windows 11 not using the whole RAM
It has been reported that there are systems out there with Windows 11 operating systems that do not use the whole RAM memory installed in the system. If by any chance you are one of the unfortunate users that has encountered this issue, fear not, we have a solution for you.

RAM memoryRun the Windows Memory Diagnostic tool

  1. Press ⊞ WINDOWS + S to open the search menu
  2. Type in Windows Memory Diagnostic tool
  3. Click on the found app
  4. Select Restart now and check for problems
  5. Wait for the tool to finish
Memory Diagnostic tool is a built-in tool in Windows, it was designed to automatically find and repair memory issues and should be your first step toward resolving this issue.

Check page file

  1. Press ⊞ WINDOWS + S to open the search menu
  2. Type in View advanced system settings
  3. Click on the search result
  4. Click on settings under performance
  5. Click on the Advanced tab
  6. Click on Change under Virtual memory
  7. Uncheck the box for Automatically manage paging file size for all drives
  8. Then select the drive and check the No paging file option
  9. Click on Set
  10. Repeat for all drives on the system
  11. Reboot the system for changes to take effect
If after reboot system still does not see and use whole available RAM, repeat this process and turn back ON paging. After you are done move to the next solution.

Modify usable RAM

  1. Press ⊞ WINDOWS + S to open the search menu
  2. Type in System configuration
  3. Click on the search result
  4. Go to the Boot tab and click on Advanced options
  5. Check the box for Maximum memory
  6. Enter the installed RAM on your system in the field box and click on OK
  7. Confirm once again on the OK and close the System configuration window
  8. Restart the system
If the provided solution has not worked, uncheck the Maximum memory checkbox and save the changes. Move to the next solution.

Change and modify the registry

  1. Press ⊞ WINDOWS + R to open the run menu
  2. Type in Regedit and press the OK button or hit ENTER
  3. Click on YES if prompted by UAC
  4. Locate the HKEY_LOCAL_MACHINE\SYSTEM\CurrentControlSet\Control\Session Manager\Memory
  5. On the right side find and double click on the ClearPageFileAtShutdown DWORD
  6. Enter 1 under Value data and click on OK to save the changes
  7. Close the registry and reboot the system

Enable memory remapping inside BIOS

In order to do this fix, you will need to enter BIOS on your system. How entering BIOS is different from system to system depending on your manufacturer, especially if it is a laptop this step you will have to do alone. Go to your motherboard manufacturer or laptop manufacturer and see how to enter BIOS.
  1. Enter BIOS (80% of the time this can be done by pressing DEL or F12 while the system is turned ON)
  2. Locate System Agent Configuration option
  3. Select Memory Remap Feature and Enable it
Your BIOS might be different from ours and you might not have the System Agent Configuration option, in this case, go through the setting and try to locate Memory Remap Feature. If this feature is missing as well move to the next step.

Rearrange RAM modules on the motherboard

Sometimes RAM memory cannot be slotted properly or just purely switching them in slots can solve the issue. Take RAM out, clean memory slots, clean motherboard connectors for them, and place them back in a different order. If by any chance none of the methods worked, then the issue might be in the hardware itself, either memory banks themselves, motherboard, power supply, etc. If this is sadly the case, you will have to locate the issue and replace the faulty part. If you are not technical enough for this adventure, the best solution is to take a PC to a computer repair shop.
Read More
Chrome won’t open or launch on Windows
If you’re suddenly unable to launch or open Google Chrome or unable to load web pages, then it’s most likely that the files in Chrome have been corrupted or some plugin is taking up a lot of resources which is why you encounter an error message saying, “Google Chrome has stopped working”. And when you try to check the Task Manager, you’ll see that Chrome is really taking up lots of resources, however, when you check the Taskbar, strangely, you will see nothing. If you are currently facing this issue in Chrome on your Windows 10 PC, follow the given options below.

Option 1 – Kill Google Chrome’s process in the Task Manager

If you aren’t able to open Chrome, then maybe its process is running in the background and you don’t see the browser windows. If that’s the case, you may have to force quit the browser and then try to open it again.
  • First, right-click on the Taskbar then select the Task Manager. And if the Task Manager is not responding, you can just use the Alt + Ctrl + Del keys and then select the Task Manager.
  • After opening the Task Manager, under Processes, look for Google Chrome’s process which would most likely be named “chrome.exe”.
  • Right-click on Google Chrome’s process and then select the End task option.
  • Now try to open Google Chrome again.

Option 2 – Try checking if your antivirus program is blocking Google Chrome

There are instances when due to false-positive, a security or antivirus program might block Chrome which is why it failed to open properly. Thus, you can just disable the security program temporarily and then check if you can now open Chrome or not.

Option 3 – Delete the User Profile in Chrome

You can also try deleting the User Profile folder in Chrome. To do so, follow these steps:
  • Tap the Win + R keys to open the Run dialog box.
  • Then copy and paste “%USERPROFILE%AppDataLocalGoogleChromeUser Data” and hit Enter.
  • From there, look for a folder named “Default folder” and then copy the folder to another drive as a backup.
  • After creating a copy of the folder, delete the Default folder.
  • Next, open Google Chrome again and go to Settings > Advanced > Reset.

Option 4 – Disable the Extensions in Chrome

There are instances when issues on a browser are triggered or caused by some problematic extension. To find out which one of your extensions is causing the problem, disable them all first and then enable them back one by one.
  • Click on the three-dotted icon for the menu located at the top-right corner of your screen.
  • Then click on the More tools option and go to Extensions.
  • From there, you will see a list of all the installed extensions in Chrome.
  • Disable all these extensions and restart the browser.
  • Now enable them back one by one to figure out which one of them is the culprit. You could also remove extensions that you no longer use.

Option 5 – Run the Chrome Cleanup tool

You might also want to try running the Malware Scanner & Cleanup tool in Chrome. This is a built-in tool that can help you get rid of any unwanted pop-ups, banners, ads, unusual startup pages, toolbars, and malware. Thus, it can help you to resolve the issue in Chrome.

Option 6 – Try to reinstall Chrome

If running the Malware Scanner & Cleanup tool in Chrome didn’t work out for you, you can try reinstalling it. To do so, follow these steps:
  • Open the Settings app and go to System > Apps & features.
  • From there, look for Chrome and uninstall it from your PC.
  • Then go to the official website of Google Chrome and download its latest version and install it.
Read More
Diablo 2 is trending after launch looking good
Finally, some good news for Blizzard entertainment after tons of bad stuff happening around it regarding lawsuits and people layoffs. Diablo 2 has become the most-watched game on Twitch after its official release and sold copies are on a satisfactory level. Diablo 2 resurrectedFor people not familiar with recent events, the state of California has sued Blizzard for various things including discrimination and offensive behavior. Later Blizzard executives were caught shredding some evidence and things just started to go to worse from there. After much drama, many people believed that this is the end for Blizzard entertainment and that they would not be able to recover from this since the community has sided with California and Blizzard has received a large punch as many subscribed WOW players have left the game. Things are not so grim as they were looking as their Diablo 2 remake has made moderate success despite being released in these troubling times and there are rumors of Overwatch 2 planned release date as of the first quarter of 2022. overwatch 2
Read More
Fix Error 0x80070057 in Windows
Hello and welcome to another problem-solving tutorial on errortools.com. Today we will be solving error 0x80070057, we could not format the selected partition which occurs during setup and installation when performing a clean install of Windows from a USB drive. So, you have backed up your files and decided to format and do clean WIndows installation, you have your USB ready, you reboot the system, plug in USB, start Windows setup, choose the hard drive on which you want to do a clean install and then this happens. error 0x80070057This error is very frustrating and it annoys pretty much anyone who encountered it but do not worry we have a solution for you. First thing is to confirm the error prompt, Click on the OK button and then on X to exit Windows 10 installation wizard. Click on yes to confirm that you want to exit the setup. You will find yourself in original installation windows. On that screen choose and click on Repair your computer. Choose an option screen that will pop up, click on Troubleshoot. In the advanced options, click on the command prompt. Once you are in command prompts type DISKPART and hit ENTER In the diskpart prompt type LIST DISK and hit ENTER again. type SELECT DISK #, where # is listed disk number where you would like to install Windows. type LIST VOLUME in order to list volumes in the selected disk and hit ENTER You need to select the volume on which you would like to place your WINDOWS, to do this type in SELECT VOLUME #, where # is the listed number of the volume Finally, type FORMAT FS=NTFS and hit ENTER You have successfully formated a given volume, you can now exit DISKPART and return to setup, to exit DISKPART simply type exit and hit ENTER. Leave command prompt as well by again typing exit and hitting ENTER You will be returned to Choose an option screen, click on Turn off your PC. Your drive has been successfully formatted and it is ready for clean Windows installation, you can now restart your Windows 10 installation and the process will complete without errors.
Read More
MS Store and Electron Bot

So, what is Electron bot, and why it even matters if it is in the MS store. Electron bot is malware that somehow found its way inside MS Store via game clones of popular games temple run and subway surfer. This infiltration led to the infection of around 5000 systems over the globe in a very short period of time.

electron bot malware

This malware is a backdoor that gives complete system control to the attacker. Any type of execution can be performed remotely in real-time. Usually, this kind of attack was aimed at a spread of click fraud over popular social media like Facebook, google, youtube, etc.

Primary goal

Electron Bot's primary goals in the ongoing campaign analyzed by researchers are:

  • SEO poisoning – Create malware-dropping sites that rank high on Google Search results.
  • Ad clicking – Connect to remote sites in the background and click on non-viewable advertisements.
  • Social media account promotion – Direct traffic to specific content on social media platforms.
  • Online product promotion – Increase store rating by clicking on its advertisements.

These functions are offered as services to those who want to increase their online profits illegitimately, so the gains for the malware operators are indirect.

Publishers that contain malware

For now, users may take note of the publishers who released confirmed malicious game apps using the following names:

  • Lupy games
  • Crazy 4 games
  • Jeuxjeuxkeux games
  • Akshi games
  • Goo Games
  • Bizzon Case
Read More
0x800701e3, The request failed due ...
A lot of things can go wrong even when you’re only doing some simple operations or tasks on your computer and this is due to the fact that there are various small operations make up in order to perform the larger operations on your computer. So if any of these smaller operations are not properly working, it crashes the operation as a whole and it throws an error code instead. And one of these error codes is Error 0x800701e3. This particular error pops up when an error has occurred in the File Explorer when a transfer is initiated from one disk to another in your Windows 10 computer. When you encounter this error, you will get the following error message:
“Error 0x800701e3: The request failed due to a fatal hardware error.”
There are several methods you can check out to fix this error – you can try to run System Restore or Check Disk or format the destination drive or check the SMART attribute of the drive. For more details, refer to each one of the following options.

Option 1 – Try to run System Restore

Error 0x800701e3 might be due to some adjustments you’ve made in your computer’s settings. Thus, to fix this error, you can try undoing those changes using System Restore. How? Refer to these steps:
  • Tap the Win + R keys to open the Run dialog box.
  • After that, type in “sysdm.cpl” in the field and tap Enter.
  • Next, go to the System Protection tab then click the System Restore button. This will open a new window where you have to select your preferred System Restore point.
  • After that, follow the on-screen instructions to finish the process and then restart your computer and then check if your mouse is now back to its normal state.

Option 2 – Try running the Check Disk utility

You can also run the Check Disk utility in fixing Error 0x800701e3.
  • In the Windows Search box, type “command prompt” and from the search results, right-click on Command Prompt and select “Run as administrator”.
  • After opening Command Prompt, type this command and tap Enter: chkdsk <Partition Letter>: /f /r /x /b
  • The command you entered will start to check for errors and fix them automatically. Else, it will throw an error message saying, “Chkdsk cannot run because the volume is in use by another process. Would you like the schedule this volume to be checked the next time the system restarts? (Y/N)”.
  • Tap the Y key to schedule Disk Check the next time your computer restarts.

Option 3 – Try to format the destination drive

Formatting the destination drive could also help you resolve error 0x800701e3. To format your drive, follow these steps:
  • First, open File Explorer and then right-click on the drive where you encountered the error.
  • Next, select Format from the context menu. This will open a new mini window.
  • Then select the NTFS option from the drop-down menu for the File System menu.
  • After that, check the box labeled as Quick Format.
  • Now click on Start. Keep in mind that doing so will remove all the contents of your storage device.

Option 4 – Verify the hard drive using SMART attributes

In case you don’t know, Windows has a built-in feature of SMART analysis which analyzes the hard drive/SSD and checks all the parameters by performing some minor operations. To use it, follow these steps:
  • Tap the Win + S keys and type “command prompt” in the field then right-click on the related search result and select the “Run as administrator” option.
  • After opening Command Prompt as admin, type the “wmic diskdrive get status” command and hit Enter.
  • You should get a result after that, and if you see that it’s “normal”, proceed to the next option below
Read More
Reddit released the application in MS store
Reddit app
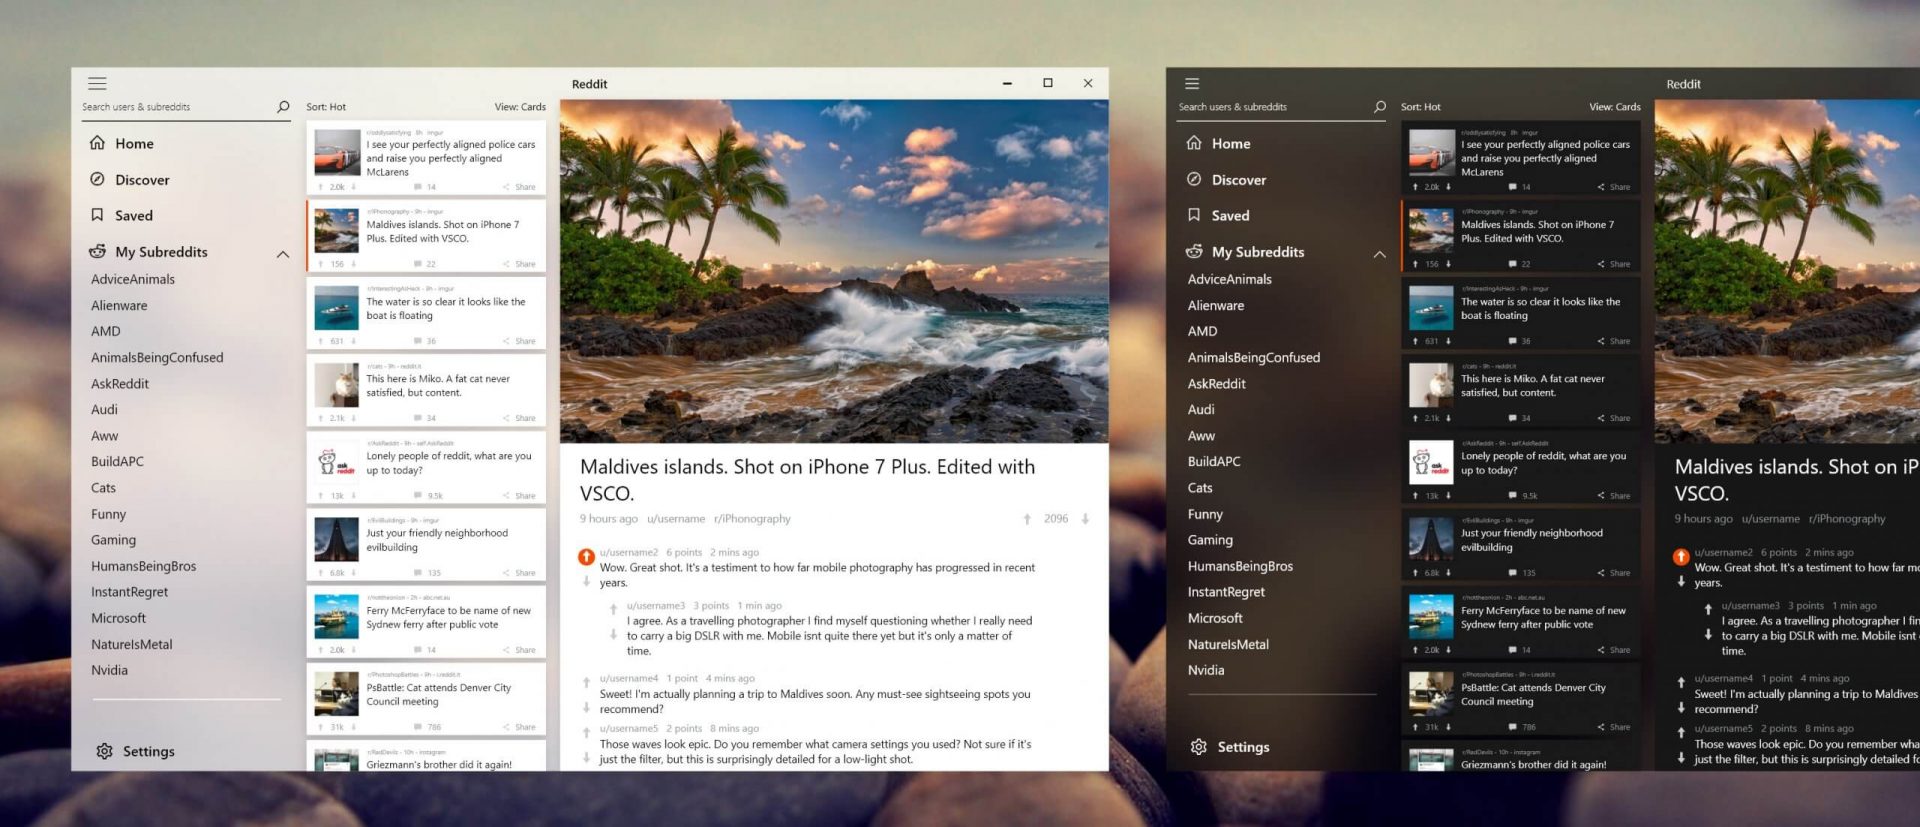
Reddit is one of the most popular websites in the world and how Microsoft is opening doors to everyone in its new store Reddit took a logical step and made a Progressive web application and placed it in it. Being a Progressive web app makes it more familiar and feels like a home experience using it for a lot of Reddit users. Reddit itself has a large community and active topics discussions all the time about anything. Bringing it to Windows as an application is, in my opinion, a great move since as an application it is independent, more light-weighted, and offering some other advantages specifically tied to being a standalone windows application. Everyone familiar with and using the Reddit website will feel right at home in this app and you can start using it right away.
Read More
1 2 3 171
Logo
Copyright © 2023, ErrorTools. All Rights Reserved
Trademark: Microsoft Windows logos are registered trademarks of Microsoft. Disclaimer: ErrorTools.com is not affiliated with Microsoft, nor claims direct affiliation.
The information on this page is provided for information purposes only.
DMCA.com Protection Status