If you are using a dual monitor setup on your computer and you wish to change the Primary and Secondary monitor in Windows 10, then you’ve come to the right place as this post will guide you on how exactly you can do that.
A lot of users use more than one monitor to be more productive so having dual monitors helps a lot. So if you have more than one monitor, know that you can actually select any monitor as the primary monitor after installing Windows. Changing the primary and secondary monitor in Windows 10 does not really require you to install any third-party application since you can get the job done by simply making some alterations in the Windows 10 Settings panel. You won’t have any problem in making such alterations since it is quite simple – from modifying the wallpaper to scaling and so on.
To get started, follow the instructions given below carefully.
Step 1: First, tap the Win + I key combination to open the Windows 10 Settings app and go to System and click the Display tab.
Step 2: Next, look for the Identify button located on your right-hand side and then click on it. This button will help you check which one is the primary and the secondary monitor.
Step 3: After that, select the desired monitor that you want to set as the primary one from the drop-down menu.
Step 4: After that, mark the checkbox for the “Make this my main display” option.
Step 5: After choosing the primary monitor, this will automatically set the other monitor as the secondary monitor. Restart your computer.
So that’s how you change the primary and secondary monitor on your Windows 10 computer. Note that you can always go back to the previous setting of your monitor by following the same instructions provided above.
If you are trying to run Windows Update but encountered an Error 0x80070003, read on as this post will guide you on how you can fix it. This kind of error in Windows Update can occur when you activate Windows Firewall or download from the Windows Store. This kind of error indicates that the Windows Update service or WUAUSERV is not started or that the Background Intelligent Transfer Service or BITS can’t be started. Aside from that, you can also encounter this error with the other Windows Update components.
To fix the Windows Update error 0x80070003, you can try to run the built-in Windows Update troubleshooter or replace the old Configuration file named “Spupdsvc.exe”. You can also try to reset the Windows Update components or check the status of all the Windows Update-related services, as well as run a System File Checker scan.
Option 1 – Run the Windows Update Troubleshooter
Running the built-in Windows Update troubleshooter is one of the things you can first check out as it is known to automatically resolve any Windows Update errors like error code 0x80070003. To run this troubleshooter, Refer to these steps:
Tap the Win + I keys to open Settings.
From there, click Update and Security and go to the Troubleshoot section.
Next, select Windows Update and click the “Run the troubleshooter” button and wait until it’s finished, and then try to run Windows Update again.
Option 2 – Try replacing the old Configuration file named “Spupdsvc.exe”
The next thing you can do to fix the Windows Update error is to replace the Spupdsvc.exe file. This is a process file that comes under the Microsoft Update RunOnce service. So when an update becomes available for your computer, the process responsible for performing the upgrade is notified. In addition, the RunOnce entry is also added to the registry for the spupdsvc.exe and this process is executed when your computer restarts and when you log on.
In the Start Search, type “command prompt” and from the search results, right-click on Command Prompt and select the “Run as administrator” option.
Next, execute this command to replace the old configuration of the Spupdsvc.exe file with a new one: c m d (remove spaces on CMD) /c ren %systemroot%System32Spupdsvc.exe Spupdsvc.old
After that, try to run Windows Updates again and check if the error is now gone.
Option 3 – Try deleting the files from the SoftwareDistribution folder and resetting the Catroot2 folder
The downloaded Windows Updates are placed in a folder called “SoftwareDistribution”. The files downloaded in this folder are automatically deleted once the installation is completed. However, if the files are not clean up or if the installation is still pending, you can delete all the files in this folder after you pause the Windows Update service. For complete instructions, refer to the steps below.
Open the WinX Menu.
From there, open Command Prompt as admin.
Then type in the following command – don’t forget to hit Enter right after typing each one of them.
net stop wuauservnet start cryptSvcnet start bitsnet start msiserver
After entering these commands, it will stop the Windows Update Service, Background Intelligent Transfer Service (BITS), Cryptographic, and the MSI Installer
Next, go to the C:/Windows/SoftwareDistribution folder and get rid of all the folders and files thereby tapping the Ctrl + A keys to select them all and then click on Delete. Note that if the files are in use, you won’t be able to delete them.
After resetting the SoftwareDistribution folder, you need to reset the Catroot2 folder to restart the services you just stopped. To do that, follow these steps:
Type each one of the following commands.
net start wuauservnet start cryptSvcnet start bitsnet start msiserver
After that, exit Command Prompt and restart your computer.
Option 4 – Check the status of some Windows Update Services
Tap the Win + R keys to open the Run dialog box.
Next, type “services.msc” in the field and hit Enter or click OK to open Services.
From the list of Services, look for the following services and make sure that their Startup type is as follows:
Windows Update – Manual (Triggered)
Background Intelligent Transfer Service – Manual
Cryptographic Services – Automatic
Workstation Service – Automatic
After that, check if the Service status of the listed services above are set to Running. If they’re not, click on the Start button to start these services and then check if the Windows Update error 0x80070003 is now fixed or not.
Option 5 – Run the System File Checker Scan
If manually resetting the Windows Update components didn’t work, you can run a System File Checker scan instead. It is a built-in command-line utility that replaces bad and corrupted system files with good system files that might be the cause why you’re getting the error when you try updating your computer. To run the SFC command, follow the steps given below.
Tap Win + R to launch Run.
Type in cmd in the field and tap Enter.
After opening Command Prompt, type in sfc /scannow
The command will start a system scan which will take a few whiles before it finishes. Once it’s done, you could get the following results:
Windows Resource Protection did not find any integrity violations.
Windows Resource Protection found corrupt files and successfully repaired them.
Windows Resource Protection found corrupt files but was unable to fix some of them.
Wondering if upgrading to Windows 11 will boost your gaming experience? We can’t give you a straightforward answer, sadly. But we can take you through the tweaks you can expect if you have all the right requirements and help you make a final decision.
Is Windows 11 good for gaming?
Essentially, the answer to this question is yes. Microsoft has definitely added a bunch of enhancements and features to its latest OS to give gamers the best possible experience. However, you have to keep in mind that this may not work out smoothly for every single user.
Whether you’ll be able to fully take advantage of the Windows 11 gaming features really depends on your setup. As expected, Windows 11 has more demanding system requirements than its predecessor.
Credit: Florian Olivo on Unsplash
So, unless your hardware can run the new OS comfortably, you might not be able to make the most of all these gaming perks. In that case, we recommend you first upgrade your hardware and then make the switch. Be prepared to be a little surprised by a few other interesting changes in comparison to Windows 10, though!
For some of the new gaming features to work, it’ll also be necessary for you to have an NVMe SSD and an HDR-compatible monitor. So let’s take a look at 4 big improvements you can expect if your setup is compatible.
Gaming enhancements on Windows 11
1. Enjoy faster loading speed with DirectStorage
For this powerful feature to work, you need a compatible graphics card and, as stated before, an NVMe SSD. It’s also important for your GPU to support the DirectX 12 graphics API at least. And since we’re on that subject, you’ll be happy to know that Windows 11 has also introduced a new version of the API called DirectX 12 Ultimate.
Now, what does DirectStorage do? It’s a new feature designed to make full use of the speedy storage of NVMe SSDs. It also transfers game data directly onto the graphics card, lightening the load on your CPU. Normally the CPU would have to decompress the data first, but DirectStorage helps bypass this. That’s how loading times are reduced and games run more smoothly.
2. Fully immerse yourself through Game Mode
Windows 11’s Game Mode is certainly a welcomed addition. When you turn on Game Mode, usage of background apps that aren’t essential to your game is reduced. This results in the game you’re running becoming a priority process. This way, it uses your hardware and system resources to the max. Ultimately, the Game Mode means less lag and higher frame rates so you can play undisturbed and fully enjoy your gaming session.
3. Vibrant visual experience thanks to AutoHDR
For this one you’ll absolutely need an HDR-compatible monitor. Basically, HDR (High Dynamic Range) means a wider range of contrasts and colors that can be displayed on a monitor.
Windows 10 has an HDR feature, but you have to turn it on and off manually (“Use HDR”). Plus, users have reported that, if left on, it results in an unappealing appearance of content other than movies and games.
Windows 11 fixes that problem with its AutoHDR feature. Toggling it results in the system automatically adjusting the color contrast, balance and brightness based on what you’re currently looking at. For gamers, this means vivid imagery in every single game, resulting in a supreme visual experience. You can check out Microsoft’s own video showcasing the power of AutoHDR.
Aside from AutoHDR, another way Windows 11 improves the visual aspect is through its support for refresh rates of up to 360Hz.
4. Xbox Game Pass & Game Bar
It’s no secret that Microsoft wants to integrate Windows and Xbox. We’ve seen some attempts with Windows 10, but they’re pretty wonky compared to the new OS.
Windows 11’s built-in Xbox Game Bar enables quite a few options all gamers desire. You can take screenshots and videos of your game and send them, for starters. Furthermore, you can use it to see audio settings and monitor your PC’s performance without having to leave the game or open the Task Manager.
Widgets are also a really cool part of the Game Bar. You can choose from a wide variety of widgets, such as Xbox Achievements, Spotify, Gallery, Xbox Social and more.
Moreover, the Xbox Game Pass has been streamlined on Windows 11. Game Pass is a subscription service that unlocks hundreds of awesome games and supports cloud streaming. Do keep in mind that the games are only unlocked for a certain period of time, as the selection rotates once in a while.
What can you do for a better gaming experience?
Windows 11 does offer tweaks that require zero input from you. However, there are a few things you can do manually to get even more out of your new OS while gaming.
Turn off enhanced pointer precision. Most games enhance precision by default, so having this feature on might interfere with that.
Make sure to select your high performance graphics card for each game. Go to Settings > Gaming > Game Mode and tap ‘Graphics’ from the ‘Related settings’ menu. Find the game you want to adjust, click on ‘Options’ and choose your high performance graphics card to be the default setting. While there, you can also turn on ‘Hardware-accelerated GPU scheduling’ at the top.
Disable unnecessary apps and programs. As long as they aren’t essential to running your game, they might take up valuable system resources, so disable them to make space for your gaming requirements.
Check for pending updates and install them. It’s well-known that out-of-date software causes bugs, latency and crashes. The same goes for your GPU drivers.
Use the High-performance power plan (Control Panel > Power Options > Additional plans) to maximize the use of resources for the best possible performance.
Summary
Windows 11 has done quite a bit for avid gamers. We hope your setup is compatible with all these new features and you can experience these enhancements ASAP!
The Google Chrome browser checks the SSL Security Certificate of the website that you are trying to open. However, if Chrome is not able to check the certificate then you might encounter an error related to the SSL Certificates which you might face when browsing the web. This particular error is the ERR BAD SSL CLIENT AUTH CERT error which is caused by many factors such as the computer’s Time, Cached Data is corrupt, Date is out of sync, as well as third party software installed in your computer is the one that’s blocking the site and many more.
The ERR_BAD_SSL_CLIENT_AUTH_CERT error might also be coming from the website’s end. It could be that the server is rejecting the certificate the client website is sending. The certificate might have already expired or the server may not trust its issuer – whichever the case may be, here are some options you can check out to fix the error.
Option 1 – Sync Date and Time
The first thing you can try is to sync the Date and Time of your computer as the wrong Date and Time settings are one of the most common causes of connection problems like the ERR_BAD_SSL_CLIENT_AUTH_CERT error. This is because of the incompatibility between the SSL Certificate validation date and the System Clock. Thus, you have to sync your System Clock. Refer to the steps below to do so.
Right-click on the Taskbar and click on the Adjust Date and Time option.
Next, click on the Sync Now button to synchronize the Date and Time with the Microsoft Servers.
Now make sure that the Time Zone that’s set on the same page is correct.
Option 2 – Try clearing the browser data
There are times when some data in the browser is conflicting with the loading of the website and triggers errors like ERR_BAD_SSL_CLIENT_AUTH_CERT. And so you can try to clear your browser’s data. This might be a very basic solution but oftentimes it works in fixing this kind of error in Google Chrome. Follow the steps below to clear the data in your browser.
Open your Google Chrome browser.
After that, tap the Ctrl + H keys. Doing so will open a new panel that allows you to delete the browsing history and other data in your browser.
Now select every checkbox that you see and click on the Clear browsing data button.
Then restart your Chrome browser and check if you can now open any website or not.
Option 3 – Try to check and fix any possible conflicts with third-party programs
Third-party programs like internet protection software could be interrupting the connection and causing the error. For some unknown reason, your antivirus program or firewall might be detecting the webpage you are trying to open as malicious or with less credibility which is why it is blocking the browser from opening the website. To fix that, if you have third-party programs installed like VPN, security software, or any add-on, or firewall, you can disable them temporarily and see if it fixes the problem and you’re able to pull up the website. After a while, you have to enable them back and configure their settings so that the website won’t get blocked again.
If you were using Google Chrome when you got the ERR_BAD_SSL_CLIENT_AUTH_CERT error, then you need to follow the protocol fixes for SSL3/TLS and QUIC which are usually some of the reasons that cause the SSL version / Cipher Mismatch. It also has a few fixes for Windows 10 computer where you can clear the certificates and make sure that your computer date and time is in sync with your time zone and so on.
If you were using Edge or Internet Explorer when you got the error, then you have to follow the steps below.
Type “Internet” in the search box of your browser. After that, you should see the Internet Options from the search results.
Next, open the Internet Properties window and switch to the Advanced tab and then scroll down to the Security section.
From there, check the “Use TLS 1.1” checkbox as well as the “Use TLS 1.2” checkbox and then click OK to save the changes made.
Restart the browser.
On the other hand, if you were using Firefox when you go the error, here’s what you have to do.
Open Firefox and in the address bar, type “about:config” and hit Enter.
If a warning appears, just click on the “I accept the risk!” button to proceed.
Next, type in “TLS” in the search field and hit Enter.
Then look for “security.tls.version.min” and double click on it and set its integer value to 3 to force the protocol of TLS 1.3.
Now click OK and restart Firefox and do the same thing with SSL.
Option 5 – Try to update Google Chrome
You might also want to try updating your browser to its latest version and have it installed in your computer. After you install the update, check if you can now open the website you were trying to open earlier.
Option 6 – Get rid of any conflicting browser extensions
Open Chrome and press Alt + F keys.
Go to More tools and click Extensions to look for any suspicious browser extensions or toolbars.
Click the Recycle bin and select Remove.
Restart Chrome and press Alt + F keys again.
Proceed to On Startup and mark Open a specific page or set of pages.
To check if the browser hijacker is still active, click Set pages, if it is active, overwrite the URL.
Note: If removing the browser extensions or toolbars didn’t work, you can also try to reset your Google Chrome browser.
Open Google Chrome, then tap the Alt + F keys.
After that, click on Settings.
Next, scroll down until you see the Advanced option, once you see it, click on it.
After clicking the Advanced option, go to the “Restore and clean up option and click on the “Restore settings to their original defaults” option to reset Google Chrome.
In trying to upgrade your Windows 10 computer, you might have come across the error 0x800F0923. This kind of Windows upgrade/update error is caused by an incompatible driver or software that’s installed on your computer. Thus, to fix the problem, you need a working fix which you can choose from below.
As mentioned, you can try updating the concerned application or software to its latest version to resolve the compatibility issue and in turn, fix error 0x800F0923. Note that depending on where you had installed the application, your steps will change. So if you have it installed directly from the website, refer to these steps:
Look for the built-in option to check the updates since the most application has this option.
You also have the option to go to the website of the application and check if there is a new version available. If there is, download and update the app.
On the other hand, if you have downloaded the app from the Microsoft Store, here’s what you have to do:
Open the Store and click on the three dots located at the top-right of the window.
Next, click the Download and Updates option.
From there, check if there is an update available for the store. If there is, update it.
Option 2 – Try to uninstall the application or software
If updating the app or software to its latest version didn’t help and you’re still getting the error 0x800F0923 every time you attempt to install the Windows Updates, you may have to uninstall it. You will need to use the usual Program and Features to uninstall it if you have downloaded it from the website.
In the search box, type in “control” and then click on Control Panel (desktop app) among the search results.
After that, select Programs and Features from the list which will give you a list of all the programs installed on your computer.
From there, look for the concerned program and select it and then uninstall it.
Note: If you have downloaded the app from the Windows Store, you can simply right-click on it from the application list and then uninstall it.
Option 3 – Try to disable your antivirus program
Disabling the antivirus program or any security software installed in your computer is always a good idea you can try when the Windows Update process does not go smoothly. So before you try updating your computer again, make sure to disable the antivirus or security program and once the Windows Update is done, don’t forget to enable the antivirus program back again.
Option 4 – Try to run the Windows Update Troubleshooter
Running the built-in Windows Update troubleshooter could also help you resolve the Windows Update error 0x80073712. To run it, go to Settings and then select Troubleshoot from the options. From there, click on Windows Update and then click the “Run the troubleshooter” button.
Option 5 – Try to do the Update in a Clean Boot state
Putting your PC in a Clean Boot state can also help you install Windows Updates or Upgrades without any trouble because, during this state, you can start the system with a minimum number of drivers and startup programs that will surely help you in isolating the root cause of the issue.
Log onto your PC as an administrator.
Type in MSConfig in the Start Search to open the System Configuration utility.
From there, go to the General tab and click “Selective startup”.
Clear the “Load Startup items” checkbox and make sure that the “Load System Services” and “Use Original boot configuration” options are checked.
Next, click the Services tab and select the “Hide All Microsoft Services” checkbox.
Click Disable all.
Click on Apply/OK and restart your PC. (This will put your PC into a Clean Boot State. And configure Windows to use the usual startup, just simply undo the changes.)
After that, try to install the Windows Updates or upgrade again.
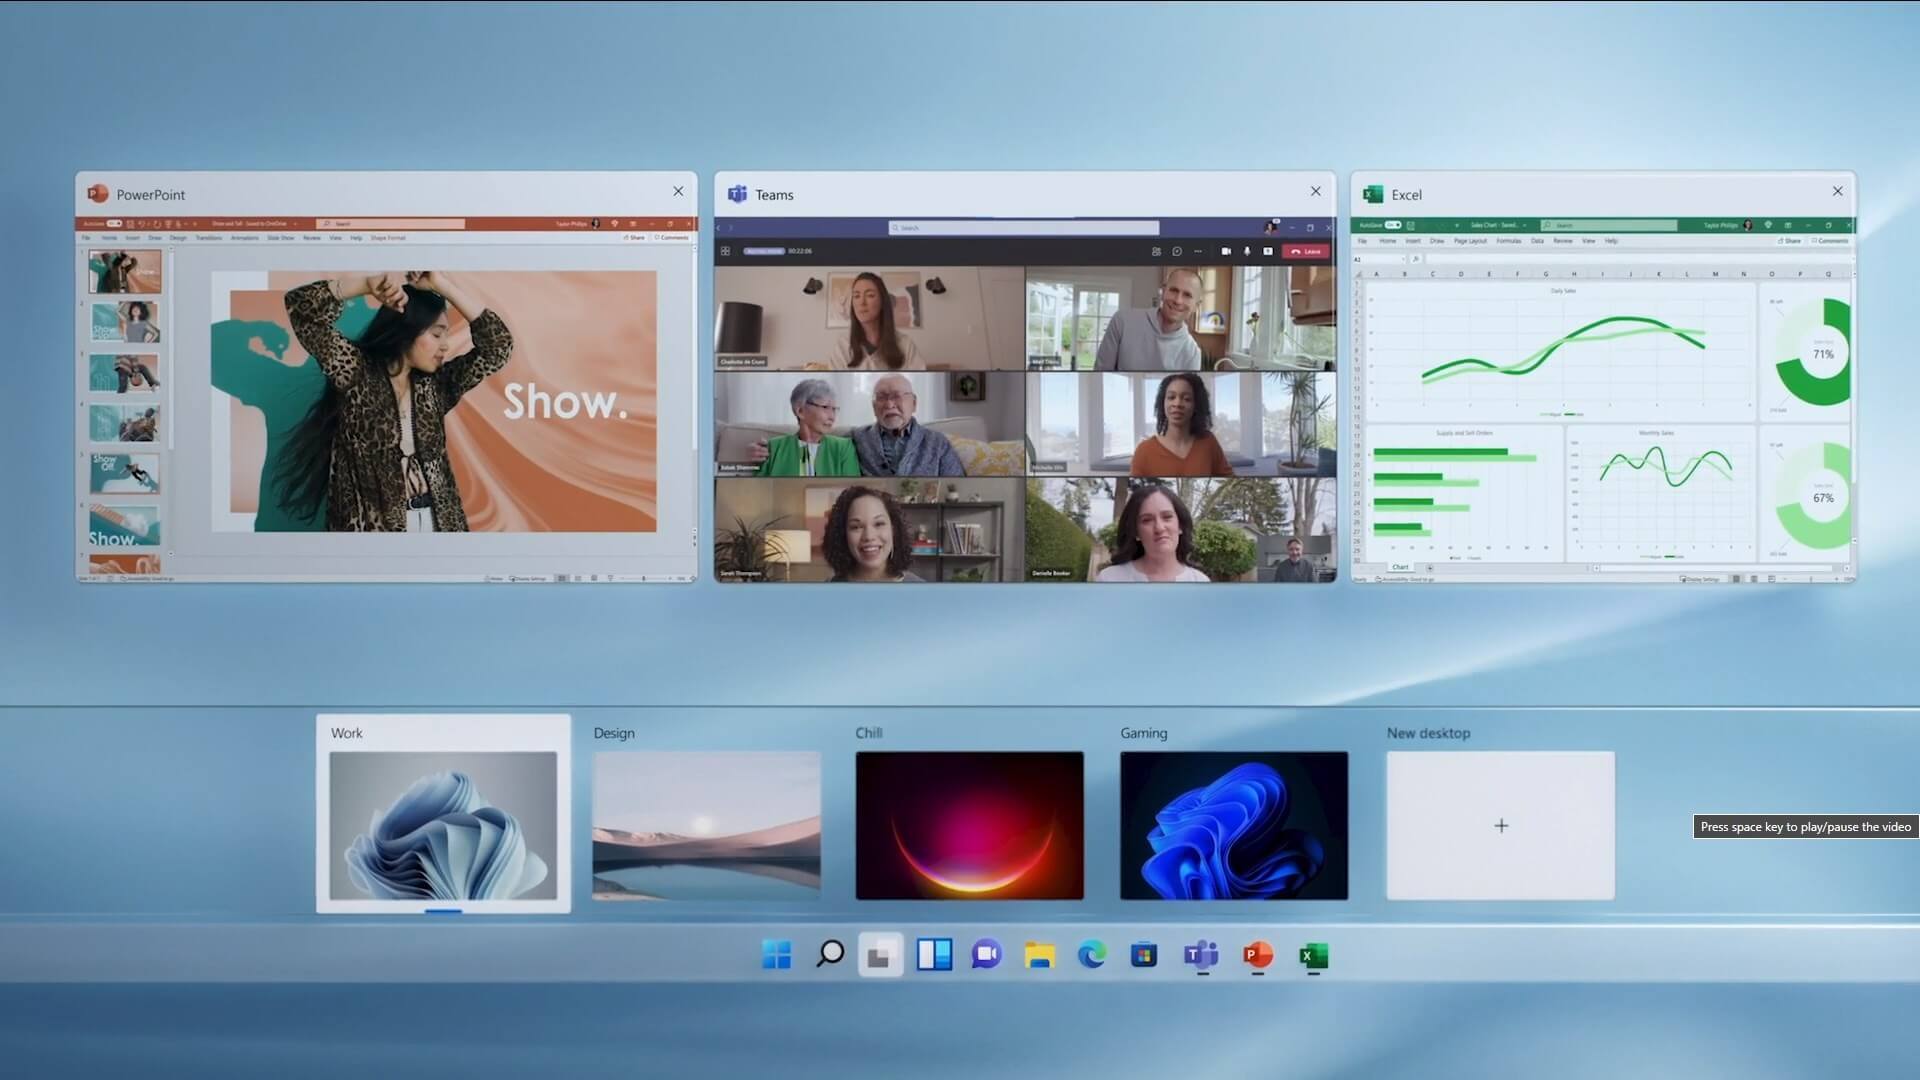
The feature that was originally planned for now scrapped Windows 10X is included in Windows 11. You will be able to customize your Virtual desktop with different wallpapers for each screen.
In order to fully customize your virtual desktops with different wallpapers follow this easy step-by-step guide.
Click on the Task View button in the taskbar
When the Task View opens, select the desktop on which you want to set wallpaper
The view will switch to the selected desktop. Right-click anywhere on the desktop and select personalize
In personalization settings, click on the background
Select wallpaper which you would like to have on the desktop by clicking on browse and navigating to the desired one
Close the settings
Repeat for each virtual desktop you would like to customize
0x80004005 Outlook is an error that users commonly encounter while attempting to send or receive emails on Outlook.
The message that appears usually states “This message could not be sent. Try sending the message again or contact your network administrator."
The client operation failed. Error is [OX80004005- 0X0004B9-OXOO501].
Error Causes
This error is usually caused by a problem in the Local Area Network or LAN. What actually happens is that signals with the wireless LAN are lost or a connection problem occurs within the network cable.
As a result, the 0x80004005 Outlook error is triggered while sending or receiving an email. Sometimes the problem goes away on its own. However, if it recurs after a few hours, it shows that some problem exists within the network.
Also, it is important to understand that different factors can affect the quality of wireless connections in a network.
For instance, garage door openers, microwave ovens, and Bluetooth devices can easily become obstacles, disrupting the connection and causing the quality to degrade. Other causes are listed below as follows.
Missing, corrupt, or damaged registry keys
Existence of viruses
Outdated drivers
It is a must to fix this error otherwise potential risks associate with this error such as permanent damage and blue screens.
Further Information and Manual Repair
There are two ways to fix this error and both are listed below as follows.
One solution is to disable script blocking in Norton Antivirus. Most users encountering this problem have Norton Antivirus installed on their PCs. To correct this problem, simply turn off the ‘Enable Script Blocking’ feature. However, there is a downside associated with this solution. Enabling script blocking will make your network or computer vulnerable to viruses and malware. That’s why it is not advised to implement this solution.
The alternative solution is to simply disable the new-mail notification feature offered in Outlook. To disable notifications of any new emails, the steps go as follows. Open Outlook and go to the Tools menu. Here you will come across ‘Options’.Click on it and then select the ‘Preferences’ tab. Here you will find the ‘Email Options’. Click on it and then uncheck the checkbox against the option, ‘Display a notification message when new mail arrives’. Click Ok two times.
Both these workarounds will work. Therefore, it is advised that you employ any one of them as per your needs.
Interrupts are designed so that the resource requests don’t get into a headlock when it comes to the hardware level. To simply put it, it is used to break a loop that never ends. Aside from that, developers also designed levels in order to prioritize interrupts. It is also known as “Interrupt Request Level” or IRQL. And if you suddenly encounter a “Bugcode 0xA –IRQL_NOT_LESS_OR_EQUAL” error, this means that a driver has accessed a memory location illegally while NT is operating at a specific IRQL.
The Bugcode 0xA –IRQL_NOT_LESS_OR_EQUAL is a fatal driver coding error and as an end-user, there isn’t much that you can do to resolve it but if you’re a developer, then this means that your code is trying to access an invalid memory location. You could check on different parameters such as memory location that was referenced and code addressed which referenced memory. The technical parameters are:
a memory location that was referenced
IRQL at time of reference
0 = read, 1 = write
code addressed which referenced memory
As mentioned earlier, if you are an end-user, there is nothing much that you can do to resolve this problem, but worry not for there are still possible solutions that could help you in fixing it. Refer to the suggestions laid out below to fix Bugcode 0xA –IRQL_NOT_LESS_OR_EQUAL error.
Option 1 – Try running the Hardware and Devices Troubleshooter
The first thing you can do to fix the problem is by running the Hardware Troubleshooter. Although it won’t make much of a difference, there’s still a possibility that it could automatically fix the problem. To use it, refer to these steps:
The first thing you need to do is click on Start and then on the gear-like icon to pull up the window for Settings.
After opening Settings, look for the Update and Security option and select it.
From there, go to the Troubleshoot option located on the left-hand side of the list.
Next, select Hardware and Devices from the list and open the Troubleshooter and run it. Once it is doing its job, wait for it to complete the process and then restart the system.
After the system restarts, check if the problem’s now fixed. If not, refer to the next option given below.
Option 2 – Try to update or rollback your device drivers
If the first option didn’t work for you, then it’s time to either update or roll back the device drivers. It is most likely that after you updated your Windows computer that your driver also needs a refresh. On the other hand, if you have just updated your device drivers then you need to roll back the drivers to their previous versions. Whichever applies to you, refer to the steps below.
Open the Devices Manager from the Win X Menu.
Then locate the device drivers and right-click on them to open the Properties.
After that, switch to the Driver tab and click on the Uninstall Device button.
Follow the screen option to completely uninstall it.
Finally, restart your computer. It will just reinstall the device drivers automatically.
Note: You can install a dedicated driver on your computer in case you have it or you could also look for it directly from the website of the manufacturer.
Option 3 – Run the Memory Diagnostic Tool to check for Memory leaks
Tap the Win + R keys to open Run and type exe and hit Enter to open the Windows Memory Diagnostic Tool.
After that, it will give two options such as:
Restart now and check for problems (Recommended)
Check for problems the next time I start my computer
Once your computer has restarted, perform a basic scan or you could also go for the “Advanced” options such as “Test mix” or “Pass count”. Simply tap the F10 key to start the test.
Note: After you select the option, your PC will restart and check for memory-based issues. If it finds any issues, it will automatically fix them and if there’s no issue found, then it’s most likely not a memory-based issue so you should try the other options given below.
First time when your computer is turned ON and when Windows is booting it will wait 10 seconds before starting your startup applications. This 10 second is used to load all of Windows services so everything is running smoothly. If by any chance you do not want to wait for this startup delay and wish to start applications right away then keep on reading and follow this guide precisely.
This guide will require you to play ad tweak with the registry of Windows, it is always recommended to make a registry backup before attempting any tweaks. Also, it is imperative to follow the guide as it is presented step by step.
be aware that this guide will eliminate a 10-second delay for all of your starting applications, there is no way currently to remove delay for only one or a few.
If the key does not exist, make a new one, Go to HKEY_CURRENT_USER\SOFTWARE\Microsoft\Windows\CurrentVersion\Explorer\, right-click on the explorer and choose new > key. Name it Serialize
Right-click on Serialize and choose New > DWORD (32-bit) Value
Name the value StartupDelayInMSec
Double click on StartupDelayInMSec and locate Value data
Set the value to 0
Save changes and Exit Registry editor
Reboot
If you want to reverse changes and enable delay again, go back to the Registry Editor and delete the StartupDelayInMSec value.
Error Code 44 is a device driver error that users encounter when using Windows 2000 operating system and later versions.
It is when the peripheral device that is connected to the computer, such as a printer or a fax machine, cannot be accessed as the programs required for operation interfere with other software on the computer. The error code will pop up with the following message:
“An application or service has shut down this hardware device. (Code 44)”
Solution
Error Causes
Error Code 44 is caused when the program that you are using shuts down the peripheral device installed on your system. It is triggered by the following:
Corrupted system registry entries
Device driver files are outdated
Device driver files are missing
It is critical to fix the Error Code 44 as it can pose serious risks to the wellbeing of your PC.
Further Information and Manual Repair
While bothersome, like other error codes, error code 44 to is relatively easy to fix. Here are ways to help resolve the error.
Method 1 – Restart your PC
The easiest method you can use to solve your PC error code is to simply run a restart of your Windows system. It may be that the error prompted upon connecting the device you have connected is merely a temporary problem, and upon restart, will resume functioning smoothly.
Method 2 – Run the Troubleshooting Wizard
If restarting your PC does not help, you will have to find the exact nature of the problem by running the troubleshooting wizard for the device and address the problem accordingly. To do this, proceed with the following steps:
Run Device Manager on your PC
Click on the program under the installed programs that are creating problems for you
Click on the ‘General’ Tab
Click ‘Troubleshoot’
Upon opening, the Troubleshooting Wizard will ask a series of questions regarding the error. Answer the questions and follow its directions for solving the error code.
After following the directions of the Troubleshooting wizard, make sure to restart your PC for the changes to take effect. Then check if your device is still causing problems.
Method 3 – Manually uninstall and reinstall the device driver
If troubleshooting does not work, you may have to resort to manually uninstalling and then reinstalling the device driver causing the problem.
This would be necessary since the remaining incomplete files due to a partial removal or installation of programs is what contributes to the error code. A fresh install, after uninstallation of the previous drivers, would lead to the completion of the files.
You can do this by firstly logging in as Administrator and opening Device Manager. Select the device that is causing the problem and double click it and make sure that the peripheral is connected properly to the PC.
Upon opening, click on the ‘Driver’ tab and then select ‘Update Driver’. Make sure to refer to the system documentation that you received with your PC or computer to check for the motherboard details and driver specifics.
Method 4 – Use software to automatically download the driver
Manually uninstalling and reinstalling the driver will do the trick, however, it may be time-consuming especially when you would have to resort to your hardware user manual.
Therefore, using a program such as DriverFIX can save you a lot of time and frustration in having your device work properly on your computer.
Driver Assist, with its user-friendly approach to help you fix your PC issues, comes with an integrated database that detects which drivers you need to reconfigure within just a few seconds and downloads it automatically.
It further ensures that your drivers are installed in their entirety leaving no room for any incomplete files to remain that create Error Code 38.
It also has the added advantage of being able to backup and restores your files should there be the slightest possibility of system file damage. DriverFIX is the answer to fixing your PC error codes accurately and quickly.
Click here to download DriverFIX to fix Error Code 44 quickly and effectively!
While browsing the internet, if you suddenly encounter a warning with an error message saying, “Server certificate has been revoked ERR CERT REVOKED” then it indicates that the SSL certificate used by the website has been revoked by its issuer. This kind of problem can only be fixed by the website owner but that does not mean that you can’t do anything about it. In fact, you have the option to bypass this error as well as contact the certificate issuer – all this and more.
Just a reminder, if a website that accepts payment, its passwords don’t have SSL or has some certification issue, you should never trust it. For instance, if you are trying to purchase something online and you’re on the payment stage but you encounter the “Server certificate has been revoked ERR CERT REVOKED” error, you must not proceed.
To resolve the “Server certificate has been revoked ERR CERT REVOKED” error, here are some things you can do.
Option 1 – Try contacting the Certificate Issuer
If you are the website owner, of course, the best thing you can is to get in touch with the Certificate Issuer in order to resolve the problem.
Option 2 – Try fixing the Date and Time
You have to check your computer’s Date and Time. There are cases when this simple setting causes a connection problem. So if your computer Date and Time is set to date or time that this after the certificate expiration date, then you have to make sure that you set it to automatically configure time. To do so, just open Settings > Time and Language. From there, turn on the toggle for “Set time automatically” and “Set time zone automatically” options. After that, check if it fixes the error, if not, you need to check if the manual selection is correctly set or not.
Option 3 – Bypass the Certificate Revocation Check
As pointed out earlier, you have the option to bypass the Certificate Revocation check. All you have to do is follow the steps below.
In the search box of your browser, type “internet options” and open it once it appears.
After that, go to the Advanced tab and navigate to the Security subheading.
Next, uncheck the “Check for publisher’s certificate revocation” option as well as the “Check for server certificate revocation” option.
Now restart your computer. Upon the next startup, try opening the website again. This time, your browser will stop checking it for certificate issues. However, it’s not safe to leave those options unchecked so make sure that once the website’s SSL certificate is fixed or once you no longer have to visit that website, you recheck those options.


 The feature that was originally planned for now scrapped Windows 10X is included in Windows 11. You will be able to customize your Virtual desktop with different wallpapers for each screen.
In order to fully customize your virtual desktops with different wallpapers follow this easy step-by-step guide.
The feature that was originally planned for now scrapped Windows 10X is included in Windows 11. You will be able to customize your Virtual desktop with different wallpapers for each screen.
In order to fully customize your virtual desktops with different wallpapers follow this easy step-by-step guide.
