- Press ⊞ WINDOWS to open the start menu and click on the settings
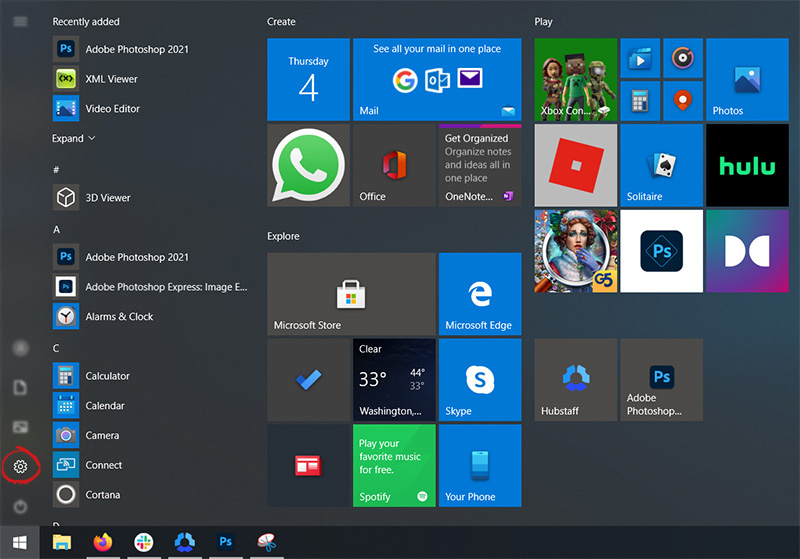
- On settings, screen click on system

- When the system dialog opens go to Power & Sleep and on the right side change all values to never.

0x8007005 is a Windows Error Code. You may come across this error if you don’t have the appropriate permission to install a particular Windows update. It is prompted as ‘Access Denied’ error message.
Solution
 Error Causes
The error code 0x80070005 usually triggered because of 2 reasons:
If you face this error while installing Windows updates on your PC, it is advisable to fix it immediately.
By taking timely actions, you can update your PC easily and in case if the cause of the error code 0x80070005 is malware or some virus, you can stop it from causing more and serious damage to your system. Sometimes malware and viruses can lead to data loss.
To avoid such damages here’s what you need to do:
Quick Fix: If the 0x8007005 error occurs on your system due to administrative permission issues, then the best way to fix this error right away is to log on as an administrator.
If there are many user accounts on your PC, then to resolve this error, make sure you log on using the user account that has administrator permissions on the computer.
Once you log on as an administrator, now try to install the updates again.
Quick Fix: If the error 0x80070005 occurs because of malware infection, the best way to resolve this error would then be to open your antivirus software and run a scan to detect the malware.
However, if you don’t have antivirus software installed on your system, then it is advisable to download the software immediately.
Download antivirus software. To be on the safe side download Microsoft Safety Scanner.
Click on the run when prompted. Once the scanner is installed on your PC create a shortcut to Safety Scanner on your computer desktop so that it is easily accessible.
Now double click on the icon and click on the full scan tab to start scanning for malware and viruses on your system. After the scan is complete, you will see a list of viruses on your PC.
Now remove them all by hitting the delete tab and then repair. Now try installing the updates again.
By following these quick-fix techniques, you can easily resolve the error 0x80070005 on your system by yourself, without calling an IT professional.

Mousepads are a common thing among computer users, everyone is using them and know what are they good for. Recently in the past few years, there are a lot of gaming mousepads on the rise, do you really need them, and do they back up their price? Short answer: YES, long answer: keep reading below.

One of the first things that one can see is the great difference in sizes between a regular mouse pad and a gaming one. Gaming pads have much more variety in size spawning all the way to really judge ones that you can use on your whole desk and place both keyboard and mouse on them. This will, of course, let you move your mouse more freely and have a much larger surface to use without the need to always lift the mouse up and center it on the regular pad.
Material on what are gaming pads built upon is extremely high in quality and usually even water phobic or water-resistant and it will allow great mouse movements on it. The backside is usually made of high-quality fabric that will stop slipping on the desk so the pad will stay at its pace during long sessions of work or gaming. Usually, standard mousepads are made with plastic or some other cheap material whereas gaming pads are made from fiber, high-quality fiber.
Among other great stuff that gaming pads have are wrist gel for hand resting and RBG light that looks cool, although RGB light is just a vanity that looks good gel for the wrist is a really good feature that will place less stress on your hands during long sessions of time spent in front of the computer.
“Windows Firewall and <Third party firewall name> Firewall are both turned off; tap or click to see available options”.This particular error could be caused by a lot of factors but when you manually check the firewall, you’ll find that there really is nothing wrong with both the Windows Firewall and the third party firewall. So if both the Windows Firewall and third-party firewalls like McAfee, Comodo, and many others are both turned off in Windows 10, then you need to do several things to resolve the problem – you need to check the supporting services that are required and uninstall and then reinstall the third party firewall on your computer. For more instructions, refer to the options provided below.
New Apple's upscaling technology called MetalFX will place iOS and macOS devices back into the gaming world. Apple had great games back in the old days and some all-time hits like the prince of Persia have been made first for apple but along the way, it just lost it.
Same as NVIDIA's DLSS and Intel's XeSS systems, Apple MetalFX also uses AI algorithms to upscale the resolution of output game frames. So, for example, the GPU inside your MAC might render the game at 1080p, but through MetalFX and AI upscaling it will look like a 4K image but have a good frame rate since it is rendered in base resolution.
The ability to make AI strike a good balance between performance and image quality is a key to technology in today's modern gaming and having this technology will help developers a ton to be able to achieve great results on Apple hardware.
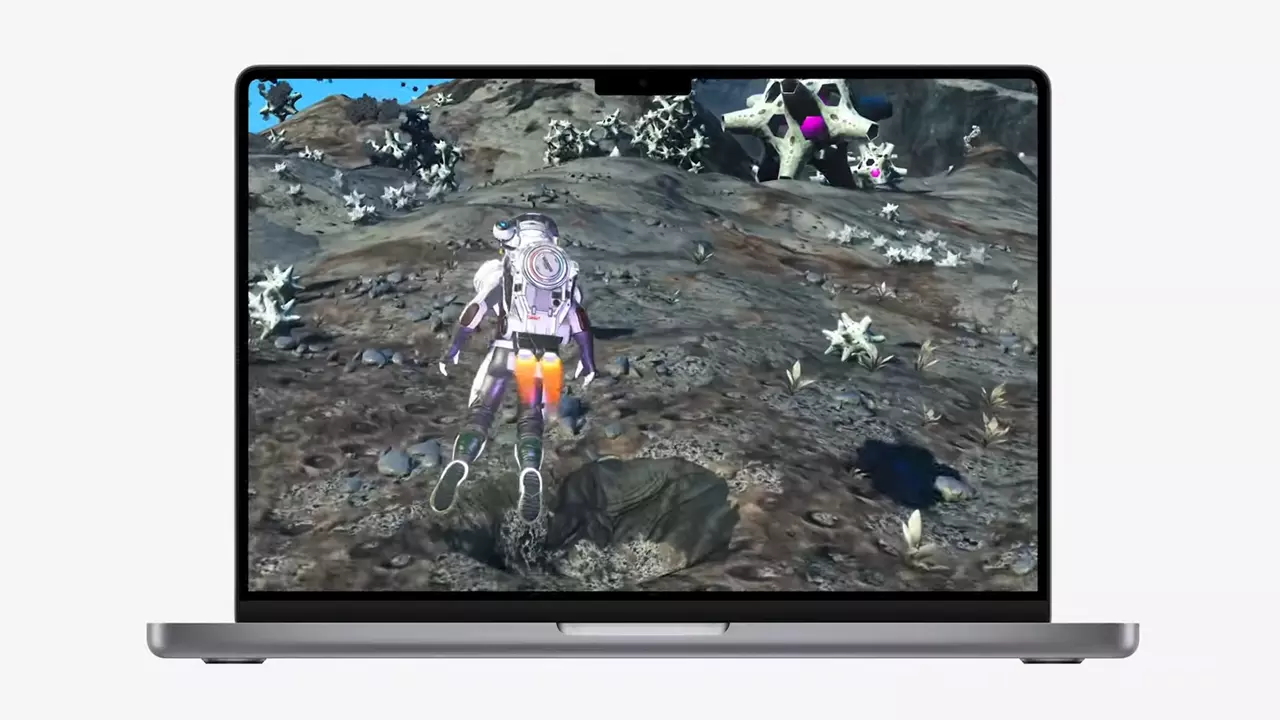
So far three official games that will use this technology and be released natively for Appl hardware are Resident Evil 8 Village, GRID legends, and No Man's Sky. All three games have been confirmed and Resident Evil 8 Village is already sent for review people are impressed since the game can run smoothly on all Apple devices, even ones with an M1 CPU.
When you say Apple gaming is probably the last thing that comes to your mind but truth be told Apple makes more money from games than Microsoft, Nintendo and Sony combined. Also, Apple itself was a big player once regarding computer games as well, Myst and Prince of Persia are games that were made and have been released for Apple first. Bungie was also founded by Apple developers and Halo was originally announced as a Mac game.
Apple has been trying and pushing gaming on its platform since it kind of died down. Today all Sony, Nintendo, and Microsoft controllers work without any issues with all Apple products. Apple also has its own gaming subscription service, Apple Arcade, and its Apple TV is packed with GPU that can rival Xbox ones.
MetalFX API ties and brings it all together, it is designed to get the most performance from the hardware by minimizing overhead.
Now, computers and laptops do not hold any large numbers if we look at the user base, and that could deter developers but if we look at iPad and iPhone things are different there, much different. How same CPU power these devices and how MetalFX is available across all products it is clear that there is a market for games there. No Man's Sky is coming to iPad using these technologies and bringing full computer experience to tablets.
Error code 10 is a type of Window Device Manager error code. This error code is generated when the Device Manager can’t start the hardware device or is experiencing device driver issues. It is displayed in the following format:
"This device cannot start. (Code 10)"
You can access complete details about error codes related to Device Manager such as code 10 through the Device Status area in the Device Properties.
By accessing Device Status, you can easily view the status of each device and learn about the specific device that could be causing the problem.
 Error Causes
Error code 10 can be triggered due to several reasons. These include:
Device driver corruption can cause you great inconvenience and PC performance issues. The computer’s operating system relies heavily on device drivers to communicate with the hardware.
For example, the printer driver facilitates functioning of the printer. Similarly, the graphic card driver ensures proper video output on the monitor screen.
However, your PC hardware, such as printer or keyboard, may stop functioning properly if their device drivers become outdated or corrupt. Therefore to avoid inconvenience and to ensure your PC works properly, it is important to resolve the problem immediately without any delay.
To repair error code 10, you don’t have to be a technical whiz or hire a professional computer programmer. Here are some of the best and easy to perform DIY methods that can help you fix this device error in no time.
Sometimes temporary problems in Device Manager can also generate code 10 error. Therefore it is advisable to restart your PC. Rebooting your system might fix the error. Try it! If it does, great, however, if the error still persists, then try other methods listed below.
Go through the Device Status in the Device Properties to view the driver causing the problem. If any driver is tagged with a yellow exclamation point, it means that driver is the one causing problems. Once identified, uninstall that driver and then reinstall it. This will hopefully resolve the problem.
Whether the error code 10 is generated due to incompatible, corrupted, or outdated device drivers, simply update the device driver to resolve. To update the driver, go to the Device Manager, then click the driver tab in the device properties dialog box.
After that, click update driver. This will start the hardware update wizard. Then follow the instructions to update the driver on your PC. During this process, you may be prompted to provide the driver path.
If you don’t have it, then you will have to download the latest driver from the hardware vendor’s official website. This can be time-consuming and stressful.
Another alternative is to install DriverFIX. It is a user-friendly device driver management software with an intuitive interface.
Its intelligent algorithm is designed to detect all the problematic drivers in seconds. It automatically updates and accurately installs appropriate drivers and ensures your PC runs at its optimum level in no time.
Click here to download DriverFIX on your system to resolve error code 10.
What is Mastodon? Mastodon is an open-source microblogging network very similar to Twitter. You can make 500 characters post messages called toot (tweet), share videos or images, and follow other people. But unlike Twitter, Mastodon is decentralized, meaning the entire Mastodon is not run by a single company pulling all strings.

Mastodon can be used directly in your web browser or through a mobile client on a smartphone or tablet. It includes features that seem copied from Twitter-like replies, boosts (retweets), favorites (loves), a timeline view, blocking, and voluntary content warnings that hide sensitive content.
Mastodon also has some great features that Twitter does not have like automated post deletion for the older post of a certain age, requiring approval for follows without restricting your account, and opting out of search engine indexing.
Currently, there are also no ads on Mastodon meaning no ad tracking or ad network surveillance.
Mastodon is a social media network made of nodes called servers or instances each running special software meaning anyone can run their own Mastodon instance (if they have a proper dedicated server). When you have your own instance it can be linked in the federation or remain private, so individuals or companies can have control over individual Mastodon servers.
The software itself is open source based on the social networking protocol ActivityPub which was developed by WWW Consortium.
While using Mastodon, people sign up for accounts with specific instances. Once logged in, you can view a local timeline (of posts from that instance only) or, if the instance is federated with others, see a federated timeline comprised of toots from people in other instances. Mastodon users can send messages to each other using their Mastodon account names that are similar to email addresses in that they feature the server address as well as the user name.
Get-ExecutionPolicy –ListStep 3: After you execute the command, it will give you a list of the User Groups as well as their Execution Policy status, and under the Scope column, look for “LocalMachine”. Once you find its Execution Policy you will notice that it’s either set to Undefined or Restricted. Step 4: Now that you’ve determined the Execution Policy, you need to set it to Unrestricted if it is set to Restricted. To do that, you have to enter the following command in the very same PowerShell window.
Set-ExecutionPolicy UnrestrictedStep 5: After you execute the command, you will see a message that asks for various permissions for which you either have to tap Y to say Yes to each one of the messages individually or tap the A key to say Yes to all the messages to once. However, if the command throws another error, you can just force the Execution Policy to change by executing the following command.
Set-ExecutionPolicy Unrestricted -ForceStep 6: Once you’re done, it will finally set the Execution Policy for the Windows PowerShell scripts as well as cmdlets to be Unrestricted and fix the “File cannot be loaded because running scripts is disabled on this system” error.
Computer voice control has moved a long way from its beginning routes and in today's age controlling your PC with voice is truly a reality and fully possible. Voice control is taking up the steam in everyday life, from simple commands in cars, Alexa, smartphones, TVs, etc. to modern computers.

Windows 10 has introduced voice control into PC with Cortana even during the installation process but a lot has changed from having a virtual assistant in begging days and in today's modern Windows 11 OS. You can now freely open apps, move, copy delete files, and even dictate in order to create a word document.
However, in order to take this advantage, you will need to turn it off first since it is disabled by default. Of course, you will need a microphone and some spare time to train Windows in understanding you properly.
Just like in Windows 10, in Windows 11 voice control is also in accessibility options and the first step is to turn ON Windows Speech Recognition.
Click on the Start button and type Settings into the search bar, click on Open, or press ENTER. On the left side of the settings, window locate and click on Accessibility. On the right part once Accessibility is selected scroll down and find a section titled Interaction and click on Speech. Turn on the switch next to Windows Speech Recognition.
A pop-up will appear that will lead you through the rest of the setup and that's it.
In order to make your voice control better, if you are not satisfied with the results, you can sample more of your voice into the algorithm to tune it more to your liking. Sadly this option is still deep in Control Panel.
Click the Start button and type in Speech recognition into the search bar, look for the search result with Control Panel displayed under it, and click on Open. Click on Train Your Computer to Better Understand You and follow the instructions.
The process will probably take a few minutes. The more data you provide to the speech recognition model, the more accurate it will be when interpreting your instructions. You can train the model multiple times, and each time you do, it should improve the accuracy.
 Intel says that the remedy to the issue for these games is the scroll lock fix which can be done so by enabling Legacy Game Compatibility mode from the BIOS of your motherboard. When running the said games, you can press scroll lock to park the E-cores on Intel's Alder Lake Desktop CPUs to get rid of DRM issues.
Certain motherboard manufacturers such as MSI and Gigabyte have made this even easier through software tools with which you don't have to access the BIOS. All you need to do is select a button in the tool which works on both Windows 11 and Windows 10 operating systems and you will enable compatibility mode.
Intel says that the remedy to the issue for these games is the scroll lock fix which can be done so by enabling Legacy Game Compatibility mode from the BIOS of your motherboard. When running the said games, you can press scroll lock to park the E-cores on Intel's Alder Lake Desktop CPUs to get rid of DRM issues.
Certain motherboard manufacturers such as MSI and Gigabyte have made this even easier through software tools with which you don't have to access the BIOS. All you need to do is select a button in the tool which works on both Windows 11 and Windows 10 operating systems and you will enable compatibility mode.