Automatically backup files & folders

If you are a person which spends a lot of time in front of the computer doing work, then you are aware of the importance of having a proper backup of your archive so if anything bad happens you will lose almost none of the work.

We can never tell when we might experience HDD failures or when we might be a victim of cyber attacks, natural disasters,s and other unpredictable circumstances where we could lose all of our data in a matter of minutes. Having a backup of our data is very important but sometimes we are too busy or not around and we miss that data backup we wanted to do, and if in this case disaster strikes we are out of luck and data is lost. To avoid such circumstances, you can set up automatic Windows Backups at a scheduled time. This way it will help to have the loss of important files and documents from unexpected hazards.

in order to create automatic backups of your files, you have several options, and below we will explore each one in hopes that you will find one that best suits your needs.

  1. Create automatic file backup with OneDrive

    This is probably the best way to do it because each time when you sign in OneDrive files get backed up right away, files are stored in the cloud and can be accessed on any device via a Microsoft account.
    To get started, open the Settings app first.
    Click on the Update & Security category
    Select the Backup tab from the left pane.
    Move to the right page and click on the Back up files button that is available under Back up files to OneDrive.
    Select the folders you want to backup in the cloud, and remove those ones you don’t want to backup.
    On the next page, click the Start backup button to start the procedure.

  2. Create a backup using File History

    File History is an inbuilt feature that allows users to create automatic file backup on Windows 10. File History allows the users to back up their files in an external or cloud drive at different intervals of time. To create automatic file backup using File History:
    Press the ⊞ WINDOWS + I to open the Settings app.
    Click on the Update & Security category and then select the Backup tab from the left pane.
    Under the Back up using File History section, click on Add a drive button.
    Now choose the drive to store the backup files. Windows will use this drive for File History.
    Then turn on the toggle button under Automatically back up my files. This will back up your data to the drive automatically whenever you connect it to the system.
    Below the toggle button, click on the “More options” link to set how frequently File History will back up.
    Use the Keep my backups drop-down menu to get the option to configure the time for how long you want to keep your backups. By default, it will keep your backups forever.
    Under the section Back up these folders, tap on the Add a folder button in order to add one more folder to the backup. Then click on the Add a folder button, under Exclude these folders. This will exclude the files that you don’t want to back up.
    You can stop the drive from storing backup files to change the backup storage location. To do this, click the Stop using drive option under the Back up to a different drive category.

  3. Backup using Windows backup & restore tool

    Open Control Panel
    Click on the System and Security option
    Scroll down and select the Backup and Restore (Windows 7) button
    Next click on the Set up backup button, available under the Back up or restore your files section
    Under the Save backup on section, select the Backup Destination where you want your backup files to get stored
    On the “Set up backup” page, Windows will ask you to choose the way to backup, check Let me choose checkbox, and then hit the Next button
    Under the section Computer, select the files and folders you want to backup. Then uncheck the box next to the Include a system image of drives option, and then hit the Next button
    Now click on the Change schedule link. Set the time and check the box beside Run backup on a schedule button
    Click OK then select the Save settings and run backup option

Do You Need Help with Your Device?

Our Team of Experts May Help
Troubleshoot.Tech Experts are There for You!
Replace damaged files
Restore performance
Free disk space
Remove Malware
Protects WEB browser
Remove Viruses
Stop PC freezing
GET HELP
Troubleshoot.Tech experts work with all versions of Microsoft Windows including Windows 11, with Android, Mac, and more.

Share this article:

You might also like

Fix the MEMORY 0x000000FC Stop Error
The Blue Screen of Death error or BSOD is definitely not an issue to face on your computer. Many users, if not all, have already experienced this headache at least once. One of these BSOD errors is the ATTEMPTED EXECUTE OF NOEXECUTE MEMORY error. The bug check error code for this is 0x000000FC and is usually caused by outdated or faulty drivers. In some cases, it could also be caused by an error in the Random Access Memory or RAM. This kind of error in the RAM might be physical, based on drivers, or even some kind of unwanted malware. So basically there are lots of possibilities why this particular BSOD error pops up. If you are currently facing this BSOD error, read on and carefully follow the suggestions given below but before you do that, make sure to create a System Restore point just in case something goes wrong. This way, you can always undo those changes using the System Restore point. Once you have that covered, proceed to the options given below to fix the ATTEMPTED EXECUTE OF NOEXECUTE MEMORY error.

Option 1 – Try updating Windows 10 with all the security patches and updates

You might be able to fix the ATTEMPTED EXECUTE OF NOEXECUTE MEMORY error by simply updating your Windows 10 computer with all the security patches and updates. To do so, go to Settings then proceed to the Windows Update section > Update & Security > Windows Update, and then click on the Check for Updates option. After you do that, it will automatically find and install all the latest security patches and feature updates from Microsoft.

Option 2 – Try updating all your drivers

From time to time, drivers get corrupted or outdated so it’s no surprise that they conflict with the operating system and cause errors like the ATTEMPTED EXECUTE OF NOEXECUTE MEMORY BSOD error. To fix the problem, you need to update all your drivers. Follow the steps below to update your drivers.
  • Tap the Win + R keys to launch Run.
  • Type in devmgmt.msc into the box and tap Enter or click OK to open the Device Manager.
  • After that, a list of device drivers will be displayed. If you see a red or yellow sign that shows up against the driver, right-click on the driver’s name and select “Update Driver Software” or “Uninstall”. And if you find any “Unknown device”, you need to update it as well.
  • Select the “Search automatically for updated driver software” option and then follow the instructions to complete the process.
  • Restart your PC.
Note: You also have the option to go directly to the website of your graphics card manufacturer and check if there’s a new update – if there is, download it.

Option 3 – Try running a Memory Check using Windows Memory Diagnostic

As mentioned, this error might be caused by some issues in the memory. To resolve it, you need to run the Memory Check on your Windows 10 PC. Refer to these steps to do so.
  • Tap the Win + R keys to open the Run dialog box.
  • Then type “mdsched.exe” in the field and hit Enter to open the Windows Memory Diagnostic.
  • After that, the Windows Memory Diagnostic will give out two options such as:
  1. Restart now and check for problems (recommended)
  2. Check for problems the next time I start my computer
  • Select any of the given options. After that, your computer will restart and check for memory-based issues upon the restart. If there are any issues, it will automatically them.

Option 4 – Try using the System File Checker via Command Prompt

System File Checker or SFC is a built-in command utility that helps in restoring corrupted files as well as missing files. It replaces bad and corrupted system files with good system files that might be causing the ATTEMPTED EXECUTE OF NOEXECUTE MEMORY BSOD error. To run the SFC command, follow the steps given below.
  • Tap Win + R to launch Run.
  • Type in cmd in the field and tap Enter.
  • After opening Command Prompt, type in sfc /scannow
The command will start a system scan which will take a few whiles before it finishes. Once it’s done, you could get the following results:
  1. Windows Resource Protection did not find any integrity violations.
  2. Windows Resource Protection found corrupt files and successfully repaired them.
  3. Windows Resource Protection found corrupt files but was unable to fix some of them.
Read More
Automatically Turn Off Hotspot when idle
One of the useful features that came with Windows 10 is the Mobile Hotspot although there’s a downside to it – it drains your battery faster especially if your Windows 10 device is running on battery. Another one of its flaws in the implementation of this feature is that it stays activated even when the connection is idle. In other words, it is still activated even if no devices are connected to it. As a result, it consumes battery life and affects it. There are also instances when it affects the performance of the network connection. At the time of writing, Microsoft hasn’t done anything about this dilemma yet so in the meantime, you can continue reading this post to resolve this issue on your Windows 10 device. You can remedy this Mobile Hotspot issue by running a command in Windows PowerShell. To get started, follow the given instructions below.

Turn off Mobile Hotspot Automatically:

Step 1: The first thing you have to do is to copy the following command:
powershell -windowstyle hidden -command "Start-Process cmd -ArgumentList '/s,/c,net stop "icssvc" & REG ADD "HKLMSYSTEMCurrentControlSetServicesicssvcSettings" /V PeerlessTimeoutEnabled /T REG_DWORD /D 1 /F & net start "icssvc"' -Verb runAs"
Step 2: After copying the command given above, open the Notepad app and paste the command you copied there and save it. And when saving it, select the “Save as” option and its File type as “All files”. Step 3: After that, put “TurnOnTimer.bat” as the file’s name and save it on your Desktop. Step 4: Once done, run the file you just created, and when a User Account Control or UAC prompt appears, just click on Yes. Step 5: After you run the file, it will run a series of scripts in a command line which will turn off the Mobile Hotspot automatically when idle. And that’s how you automatically turn off the Mobile Hotspot when your Windows 10 device is idle. On the other hand, if you want to undo the changes made, you can always do so using the steps provided below.

Turn on Mobile Hotspot:

Step 1: Copy and paste the following command in the Notepad app:
powershell -windowstyle hidden -command "Start-Process cmd -ArgumentList '/s,/c,net stop "icssvc" & REG ADD "HKLMSYSTEMCurrentControlSetServicesicssvcSettings" /V PeerlessTimeoutEnabled /T REG_DWORD /D 0 /F & net start "icssvc"' -Verb runAs"
Step 2: After copying and pasting the command, save it as “TurnOffTimer.bat” on the Desktop. Step 3: Once done, run the file like what you did earlier and select Yes when a UAC prompt pops up. This will run a series of scripts on a command line which will revert the changes back to their default state.
Read More
Remove Task View button from Windows 11
Task View
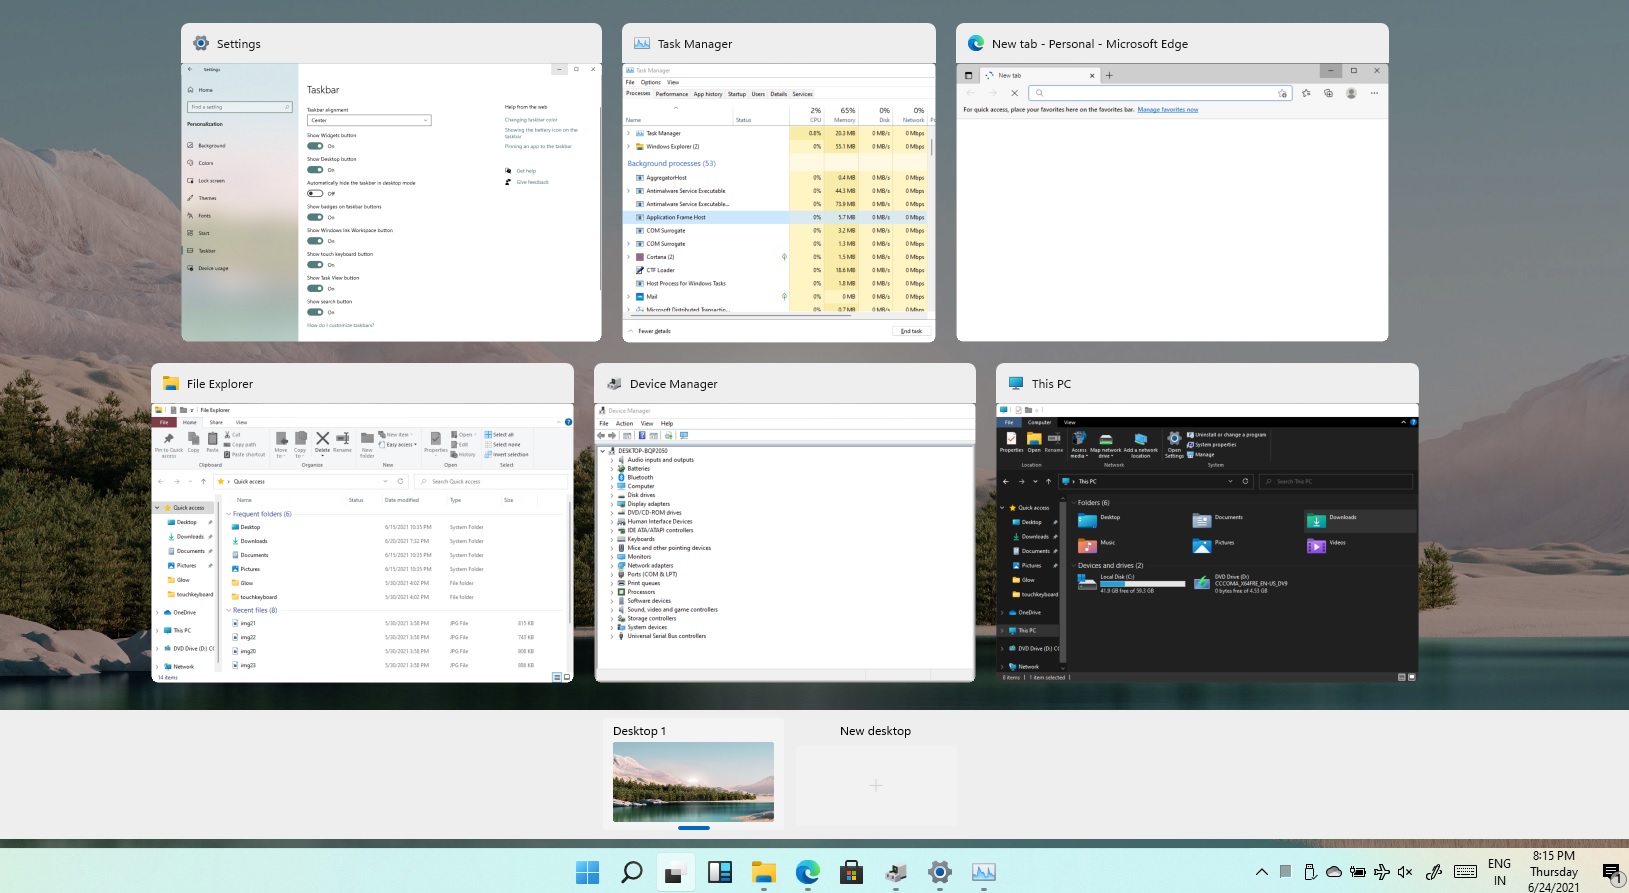
Task View feature inside Windows 11 is actually a great feature, letting you quickly view open windows and virtual desktops. How Task view itself could be reached with keyboard shortcut combination of ⊞ WINDOWS + TAB some users will prefer this way of using it and thus button on the taskbar is something you do not want or need. There is a very easy way to remove mentioned button and I will show you how to do it. Right-click the taskbar button itself and click on Hide From Taskbar. That’s it, you have done it. Now in order for you to bring it back if you change your mind, you will have to do some extra steps but it is nothing difficult. Right-click on the taskbar and click on Taskbar settings, you will be lead to Personalization > Taskbar. Inside locate Taskbar Items and switch Task View to ON, you will see the Task View button right away showing itself again.
Read More
Fix The update isn’t applicable in Windows
There are times when you install a Windows update to your Windows 10 computer but you only got an error message saying, “The update isn’t applicable to your computer”. This is unusual as Windows was the one that downloaded them in the first place. To understand the reason behind this error, read on as this post will also give you a couple of suggestions you can try to fix the problem. One of the main reasons why this error occurs is that your computer might not have the required installed updates and many more. Other reasons include:
  1. The update might be replaced. There are instances when a newer Windows version is already available on the computer and that the version you are trying to manually install is an older version which is why the Windows update failed.
  2. The update might already be installed. There are times when the update process is still in progress and the earlier payload might have already been installed.
  3. It could also be that it’s a wrong update for architecture. As you know, updates are designed accordingly based on the architecture of the computer so if the update you are trying to install does not match the architecture of your CPU then it’s no wonder you’re getting an error message.
  4. Your computer might be missing a prerequisite update. There are Windows updates that depend on other updates so if you missed one and you’re installing another one, it could be the reason why you’re getting the error.
To fix the problem, here are some suggestions that might help.

Option 1 – Try verifying the package and the Processor Architecture

As pointed out earlier, updates are made according to the Windows versions. Thus, if one of the updates failed to install, you need to check if it’s applicable or not. The best way to do that is by searching the Windows update name on the official website of Windows. It could be that the Processor Architecture is not compatible with the Windows Update you are trying to install. If you have an X86-based processor, you can’t install x64-based installations of Windows and vice-versa. This usually happens when you’ve downloaded the update manually and then tried installing it.

Option 2 – Try checking if the update is old

The issue might be because you are trying to install an old Windows update which is why it didn’t work. To check, go to Settings > Update and Security > View Update history. From there, you can look for the update.

Option 3 – Try checking if the update is already installed

To verify the update, just go to the Windows Update history once more as you did in option 2, and then see if the update is already installed or not.

Option 4 – Try checking the prerequisites

AS mentioned earlier, there are some updates that depend on other updates before they get installed on your computer. The best way to verify is by checking the Microsoft Knowledge Base (KB). And to verify if the prerequisite updates are installed or not, just run the command below in PowerShell:
get-hotfix KB1111111, KB2222222, KB3333333
Note: In the command given above, you need to replace “KB1111111, KB2222222, KB3333333” with the actual update KB numbers.

Option 5 – Try running the Windows Update Troubleshooter

As you know, Windows 10 has various auto-repair built-in tools to help users fix small issues which used to get fixed manually. And in this case, you will need the Windows Update Troubleshooter to fix the issue.
  • Go to Settings and click on Update and Security.
  • From there, click Troubleshoot and click on Windows Update and then click the “Run the troubleshooter” option.
  • After that, it will try to detect and automatically fix common issues in the Windows Updates which can be resolved by Windows itself. Note that the process may take several minutes before it completes so you need to wait until it’s done. Once it’s done, in case you have some pending update that wasn’t realized by the system early on, it will apply the fix right away and restart the Windows Update service.
Read More
Easily repair Server is not accessible
There are a lot of users who use their Windows 10 PCs to create and access data on their servers using their network. However, some of them reported getting an error saying that the server is not accessible. Here’s the full content of the error message:
“\server is not accessible. You might not have permission to use this network resource. Contact the administrator of this server to find out if you have access permissions. Logon Failure: The target account name is incorrect.”
If you are among the users who experience the same issue, read on as this post will help you resolve this error when accessing your server. But before you start troubleshooting the problem, you might want to perform System Restore, especially if tend to create one. To use System Restore, here’s what you have to do:
  • Tap the Win + R keys to open the Run dialog box.
  • After that, type in “sysdm.cpl” in the field and tap Enter.
  • Next, go to the System Protection tab then click the System Restore button. This will open a new window where you have to select your preferred System Restore point.
  • After that, follow the on-screen instructions to finish the process and then restart your computer and check if the problem is fixed or not.
If System Restore didn’t help in fixing the ACPI.sys Blue Screen error now’s the time for you to make use of the potential fixes laid out below.

Option 1 – Try rebooting your router

The first thing you can try to do to fix the error is to simply restart your router. All you need to do is reboot the router from its Admin panel or you can also turn it off manually and turn it back on after a couple of seconds so that it can completely reboot. Once you’re done, try accessing your server again and see if the error is now fixed.

Option 2 – Try checking the status of the Workstation Service

You might want to check the status of the Workstation Service as the error might have something to do with it.
  • Tap the Win + R keys on your keyboard to launch the Run utility.
  • Then type “services.msc” in the field and click OK or hit Enter to open the Windows Services Manager.
  • After opening the Services Manager, you will see a list of all the services on your computer and from there, locate the Workstation Service.
  • Double click on the Workstation Service to open its Properties.
  • Next, Stop the Service and Start it again or you can also right-click on it and select Restart and then make sure that its Startup type is set to Automatic.
  • Now restart your computer and check if the error is fixed.

Option 3 – Try to change the File Sharing Connections setting

You can also try to change the File Sharing connections setting. All you have to do is go to Control Panel > Network and sharing center > Advanced sharing settings > File sharing connections. From there, you need to select “Enable file sharing for devices that use 40 or 56-bit encryption and check if it helps in fixing the problem. If not, undo the changes you’ve made and proceed to the next given option.

Option 4 – Try checking the Network Configuration

Checking the Network Configuration can also help you fix the error. Refer to the steps below to do so:
  • Right-click on the Wi-Fi connection or on the Ethernet connection icon located in the system tray.
  • Then select open Network and Internet Settings and then click on the “Change Adapter Options”.
  • After that, a new window will appear and from there, select the network connection that connects your computer to your network – this can either be a Wi-Fi connection or Ethernet connection.
  • Right-click on that connection and select Properties where you will see a list of items.
  • Select the Internet Protocol Version 4 or Internet Protocol Version 6 from those items according to your system requirement.
  • Then click on the Properties button.
  • Check if everything is now configured as to how it is supposed to be and then check if the error is resolved.

Option 5 – Try to reset Winsock, TCP/IP & Flush DNS

You might also want to try resetting Winsock, TCP/IP, and flushing DNS might help you resolve errors. To do so, follow these steps:
  • Right-click on the Start button and click on Command Prompt (administrator) so you can pull up an elevated Command Prompt.
  • After that, execute each one of the commands listed below. And after you typed in one after the other, you have to hit Enter.
  1. netsh winsock reset – type in this command to reset Winsock
  2. netsh int ip reset resettcpip.txt – type in this command to reset TCP/IP
  3. ipconfig /flushdns – type in this command to flush the DNS cache
  • Next, restart your PC and check if the problem’s fixed.

Option 6 – Run the Network Adapter Troubleshooter

  • Open the Search bar on your computer and type in “troubleshoot” to open the Troubleshoot settings.
  • Next, scroll down and select the “Network Adapter” option from the right pane.
  • Then click on the Run Troubleshooter” button.
  • After that, your computer will check for any possible errors and will pinpoint the root cause of the problem if possible.
Read More
Computer is stuck on the Hi there screen
As you know, installing Windows 10 is quite a complicated process in the background even though it may look like an easy task in the foreground. There are times when the setup is stuck on the “Hi there” screen where you won’t be able to input any information in the fields given and you wouldn’t be able to do anything else since the screen does not move ahead. There are a lot of possible reasons why this issue occurs. It could be due to a damaged setup image, invalid boot configuration, and many more. To resolve this problem, there are several options you can check out. You can try to get a new setup image or run the Automatic Repair or you could also try to recreate the Boot Configuration files or BCD. To get started in checking out these solutions, make sure to follow the instructions provided below.

Option 1 – Try to run the Automatic Repair Utility

You might also want to use Automatic Repair in fixing the error. To do so, follow the steps below.
  • You can start by creating and booting from a bootable Windows 10 USB Stick.
  • After that, click on Repair your computer located on the bottom left corner when you are on the initial Windows Startup screen.
  • Next, click on Troubleshoot, and then on the other screen, click the Startup Repair option.
  • Now select the operating system you want to repair. Once you do that, it will start to repair your operating system. Wait until the process is completed and then check if the problem’s now fixed.

Option 2 – Try to rebuild the BCD files

You can also try rebuilding the BCD files to resolve stuck screen issue in your Windows 10 computer.
  • You can start by booting into the installation environment for Windows 10 from an installation media.
  • After that, click on Repair your computer and on the blue screen, select Troubleshoot and then select the Advanced options menu.
  • From there, select Command Prompt and once you open it, enter each one of the commands given below by sequence.
    • bootrec /FixMbr
    • bootrec /FixBoot
    • bootrec /ScanOS
    • bootrec /RebuildBcd
  • Once you’re done executing the commands given above, type “exit” to close the Command Prompt window and then restart your computer and see if it fixed error code 0xc000014c.

Option 3 – Try recreating the Windows 10 installation USB

Recreating the Windows 10 installation USB might help in fixing the problem. You can use a USB drive to do so but make sure that it has a great read-write speed. Follow the steps below to recreate Windows 10 installation USB”
  • Click this link and then click the Download Tool Now button.
  • Next, click the “Use the tool to create installation media (USB flash drive, DVD, or ISO file)…” option and follow the next given instructions on the screen.
  • Now select the ISO file option in step 5.
  • After that, you should now have an ISO file.
  • Next, go to the location where you’ve downloaded the ISO file.
  • Then right-click on the Windows 10 ISO file and select the Open with option and then select File Explorer.
  • Now click on “setup.exe” and follow the next instructions that appear on the screen. When asked, you have to select either Nothing (clean install) or Keep personal files only option. Take note that you must not select the “Keep personal files, apps, and Windows settings since it doesn’t really work.

Option 4 – Try getting a new Windows image file

If none of the four given options above worked, you might want to get a newer installation image using the Windows Media Creation tool. After that, create the bootable USB drive and once completed and then try to run the Windows 10 setup again.
Read More
Setting up an FTP Server in Windows
File Transfer Protocol Server, also known as FTP Server, is a private or public service that can host files that can be accessed both locally and globally. It is a quick, flexible and seamless service that allows you to store any kind of files depending on the total size of the server. If you’ve always found an FTP server useful, then the good thing is you can now create your FTP server since Windows 10 now allows it. You can host this server locally and later on make it globally available via the internet. So if you are planning to set up an FTP server on your Windows 10 computer, read on as this post will guide you on how to do so.

To set up the FTP server, you need to configure it first and then configure the Windows Firewall for the connections to go through. For more details, refer to the following steps:

Step 1: You need to configure the FTP server on Windows 10.
  • In the Search box, type in “Turn Windows Features On or Off” to search for it.
  • Then click on the appropriate result which will open a mini window.
  • From this mini window, scroll down to the list and expand “Internet Information Services where you have to expand the FTP Server section.
  • Next, select all the checkboxes to enable all the entries under FTP Server and then click the OK button to apply the changes made.
  • And now, since your computer is now allowed to host an FTP server, you need to configure it. To do so, type “Internet Information Services (IIS) Manager” in the Search box and click on the appropriate entry.
  • Next, right-click on Sites under the navigation bar of Connections and select Add FTP Site. This will open a new window where you have to input some information about your FTP hosting.
  • Now enter the details and click on Next.
  • Upon clicking Next, you will be prompted to give some authentication details. Enter the following details in the screenshot below.
  • Now click on Finish. After that, you will get an FTP Server being hosted on your Windows 10 PC.
And now that you’ve successfully configured the FTP Server, the next thing you have to do is to allow connections from and to the FTP server. Refer to the next step below. Step 2: Configure the Windows Firewall for FTP connections to pass-through
  • In the Start Search, type “Allow an app or feature through Windows Firewall” and click on the related search result which will open a window with all the settings.
  • From there, click on the Change Settings button. This will display a list where you have to mark all the checkboxes for the FTP server to enable them in both the Private and Public configurations.
  • After that, click OK. This will allow you access to the FTP server on your local network.
Read More
Fix Error 1061 The service cannot accept control messages at this time Error in Windows 10
If you are trying to run or starting a program on your Windows 10 computer and you suddenly get an error message saying, “Error 1061 The service cannot accept control messages at this time”, read on as this post will show you what you can do to fix the problem. This kind of error pops up since the Application Information Service does not respond to the requests to raise applications to Administrator in Windows 10 like the Task Manager, Service updates, and so on. Thus, you won’t be able to run or open apps and will only get stuck with this error. The “Error 1061 The service cannot accept control messages at this time” message is a type of network error that typically occurs when there is a temporary mismatch between the requested control and the state of the service to be controlled. It’s most likely that the service is in a state of start-pending, stop-pending, stopped or it may already be used by another user which explains why this error message suddenly appears. You can encounter this error message on any Windows operation. Here are some of the most common occurrences:
  • Debugging a Windows service
  • Starting Task Manager
  • Starting Registry Editor
  • Starting Firewall
  • Starting services.msc
  • Starting dsm.exe
  • Updating services
  • Asking for file permissions, etc.

According to Microsoft MSDN, the error occurs because:

“There is a temporary mismatch between the requested control and the state of the service to be controlled. The service may be in a state of start-pending, stop-pending, or stopped. Wait a few minutes, then retry your operation.” If after a few minutes, the error still appears, then you may have to follow the options prepared below.

Option 1 – Try to restart the Credential Manager Service

  • Go to the Start menu.
  • Then type in “services” in the search box.
  • From the search results, right-click on “Services” and select the “Run as Administrator” option.
  • Next, look for the Credential Manager Service in the Services window.
  • Once you found it, double-click on it to open its Properties. From there, you need to click on the Stop button.
  • After that, set the Credential Manager Service to “Automatic” and click on the Start button to restart it.

Option 2 – Try to start the Application Information Service

You can also try starting the Application Information Service to fix the “Error 1061 The service cannot accept control messages at this time”. Just open the Windows Services Manager and make sure that Application Information Service is Started. And if you find that it’s already started, you need to restart it.

Option 3 – Try killing the IIS Worker Process via Task Manager

  • Tap the Ctrl + Alt + Del keys and select the Task Manager.
  • Next, click on More details to expand the Task Manager and then look for the IIS Worker Process entry which should be displayed in the list under the Processes tab. From there, you can see it in the Background processes. Once you find it, kill its process.
  • You can also try to look for the “w3wp.exe” entries and end its process. if you find many entries, right-click on some of them and select the End task option from the context menu.
  • Now restart your PC. That should fix the problem.
Read More
What to do if you can’t delete Partition
There are times when it is really inevitable to delete your hard drive partitions especially if you are already running low on disk space in your Windows 10 computer. Users typically delete the volume which is not being used in such cases in order to free up some space for the volume that’s running low on disk space. To resolve the problem, users tend to use the Disk Management utility to delete hard drive partitions. However, some users reported that the “Delete volume” option is not available as it is grayed out. Thus, users aren’t able to delete hard drive partitions and aren’t able to free up disk space. This kind of problem usually occurs when there is a Page file on the volume that you are trying to delete and so on. Oftentimes, this issue is mistaken for the problem where you are unable to delete an EFI-protected partition. However, in this case, not only you are unable to delete EFI-protected partition but also NTFS file systems. This is really hard to deal with but worries not for there are some potential fixes you can check out to resolve this problem.

Option 1 – Try to manage the Page file in the Partition

As mentioned earlier, if a Page file exists in a partition, you won’t be able to delete it. The page file is what stores your data when the system’s random access memory fills up. To resolve this, follow these steps:
  • Go to the Start menu and type “View advanced system settings” in the field and open it from the search results.
  • Next, click on Settings in the Advanced tab.
  • On the new window that pops up, go to the Advanced tab and select Change.
  • Next, uncheck the checkbox of “Automatically manage paging file size for all drives” and highlight the drive you want to delete.
  • Then select “No paging file” and click on Set.
  • Now click on the Apply and OK buttons on all the windows and restart your computer.

Option 2 – Delete storage partition via Command Prompt

  • Tap the Win + X keys or right-click on the Start button and select Command Prompt (Admin) or you could also type in “cmd” in the Cortana search box and right-click on the Command Prompt icon and then select the “Run as Administrator” option from the context menu.
  • Once you have Command Prompt pulled up as admin, type in and enter this command – diskpart
  • After entering this command, the Diskpart Utility will start. Diskpart Utility is a command-line-based utility just like Command Prompt but it will get a UAC Prompt after you invoke it so you have to click Yes for the UAC Prompt.
  • After that, type in list volume and tap Enter to see the list of all the partitions created on your PC. This includes both types of partitions that are visible to the normal users in the File Explorer as well as the ones that are created by Windows 10 by default which helps it in storing the boot files and other essential system files.
  • You should see a list of all the partitions made on your computer. Select the partition you want to delete by its Unique Identification number as Volume X where X denotes the Unique Identification Number.
  • Next, type in the select volume number command and hit Enter to select the desired volume.
  • Then delete the volume you’ve selected and type in the delete volume command and hit Enter to delete the volume you just selected and convert it into unallocated space.

Option 3 – Delete storage partition via Windows PowerShell

  • Start by tapping the Win + X keys or simply right click on the Start button and select Windows PowerShell (Admin) or you could also type in “Windows PowerShell” in the Cortana search box and right-click on the Windows PowerShell icon and select the “Run as administrator” option.
  • Once you’ve opened the Windows PowerShell, type in the Get-Volume command and hit Enter to get a list of all the partitions on your PC.
  • Next, select the drive letter you want to delete and then type in the Remove-Partition –DriveLetter command and hit Enter to delete the selected partition. Note that you need to replace the drive letter with the letter of the partition you want to get rid of.
  • After that, it will ask you for confirmation. Just hit the Y key for Yes or hit the A key to say Yes to All. This will delete all the partition you’ve selected and will move them in as unallocated space.
Read More
Fixing Upside Down Screen in Windows 10
As you know, Windows 10 comes with a pre-packed feature that allows you to rotate the screen at different angles, and to facilitate this feature, there are keyboard shortcuts you can use as well. However, from time to time, no matter how useful this feature is, users still experience a handful of issues. One of which is that they suddenly find their screen rotated or Upside Down even when they didn’t do a thing or adjust the setting. You may have pressed the shortcut on the keyboard by accident or some other program changed the setting on your computer without your permission – whichever the case is, this post will show you what you can do to fix the upside-down screen on your Windows 10 PC using the options laid out below.

Option 1 – Try using hotkeys

As mentioned earlier, Windows have hotkeys in the UI that changes the orientation of the display. So the first thing you need to do is to make sure that these hotkeys are enabled and if they are, you can use the keyboard shortcut to adjust the orientation of your screen.
  • Right-click on an empty part of your Desktop and then select the Graphic options.
  • Next, select “Hot Keys” > “Enable”. After verifying that the hotkeys are enabled, you can tap the Ctrl + Alt + Up arrow keys to change your computer screen’s orientation.
  • Alternatively, you can also tap the Ctrl + Alt + Right or Left or Down arrow keys to change the direction the other way.

Option 2 – Try using the Graphics Properties

You will probably see the “Graphics Properties” option if you use the Intel HD Graphics every time you click on your Desktop. Note that this option has all the graphics driver properties and helps you in changing the configurations as well as control several options like refresh rate, resolution, color-depth and many more. You have to navigate to these options to see if the orientation is changed in these properties. To do so, follow the steps below.
  • Right-click on any empty space on your Desktop and then select Graphics Properties or Intel Graphics Settings.
  • After that, select Display from the list of sub-options that appears.
  • From there, you will see the rotation of the screen under the “Display settings” option where you have to make sure that the slider is set to “0”.
  • Click the Apply button to save the changes made and then click on Exit. The orientation of your screen should automatically change.

Option 3 – Try using the Windows Display Settings

Since the Windows Settings have a section where you can manage the display settings of your computer, you can use them to help control the resolution of your PC’s display without any trouble. There is a possibility that the settings are changed there so that’s probably why your screen is turned upside down all of a sudden.
  • Tap the Win + S keys to open search and then type in “settings” in the field and then hit Enter to open Settings.
  • After opening Settings, click on System and then on Display using the left navigation bar and then scroll to the end and select the Advanced display settings.
  • Next, click on the Display adapter properties and click on Intel HD Graphics control panel.
  • Now change the rotation to 0 Degrees. Afterward, the display should revert back to its original form automatically.

Option 4 – Check your monitor’s physical controls

There are monitors that have buttons in them that allows users to shift the rotation of the screen to 90 degrees. It could be that your monitor has these buttons without you knowing and you suddenly pressed them by mistake which caused your screen to rotate. Thus, you have to check your monitor for any physical buttons on the side and if you see a menu, navigate to its options and check if there are screen rotation options. To make it easier for you, you can simply search your monitor’s model online and see if these buttons exist. You could also go over your monitor’s manual if you still have it as it contains details with regards to screen rotation.

Option 5 – Update your Graphics drivers

  • Tap the Win + R keys to open the Run dialog box and then type in devmgmt.msc and tap Enter or click OK to open the Device Manager.
  • Expand the section for the outdated device drivers.
  • And then select the outdated driver(s) and right-click on it/them.
  • From the drop-down menu, select the Update Driver option if you wish to update the driver or select the Uninstall device if you want to uninstall the driver and then follow the on-screen instructions to install the latest version of the driver.
  • Restart your PC after the installation to allow the system to reinstall the driver.
Read More
1 2 3 171
Logo
Copyright © 2023, ErrorTools. All Rights Reserved
Trademark: Microsoft Windows logos are registered trademarks of Microsoft. Disclaimer: ErrorTools.com is not affiliated with Microsoft, nor claims direct affiliation.
The information on this page is provided for information purposes only.
DMCA.com Protection Status