In case you didn’t know, the new Windows 10 v1903 has brought tons of new features around Windows 10 Updates. One of these features is the ability to automatically adjust the Active Hours based on your computer activity. This feature is really useful as it tells the operating system when to install the Windows Updates.
A lot of users use the Active Hours feature to ensure that the Windows Update won’t force them to restart their PCs to install the update. So if your computer is turned on, it won’t apply the update during the active hours you’ve specified. In addition, the active hours change for many users and they are not that strict. For instance, if you set the active hours between 10 am to 5 pm, Windows Update won’t be forcing you to restart your computer to install the updates at those times.
Note that Windows Update allows enabling an option using where it can monitor the active hours in your computer and change it. To configure this setting, here’s what you have to do:
As you can see on the image given above, the earlier active hours were between 8:00 to 17:00 and were changed to 11:00 to 19:00. If you have been using this feature for a while you’ll find how useful and handy it is especially when you’re using your computer and don’t want any notifications like the prompts for Windows Updates to bother you while working.

Each time when you press WINDOWS + PrtScn key on your keyboard a screenshot is taken and saved on your Hard drive, to be more precise, it is saved in a specific folder which is in c:\Users\Your user name\Pictures\Screenshots. Now, this specific location is not anything that's bad but it is a little deep and not so user-friendly for quick access.
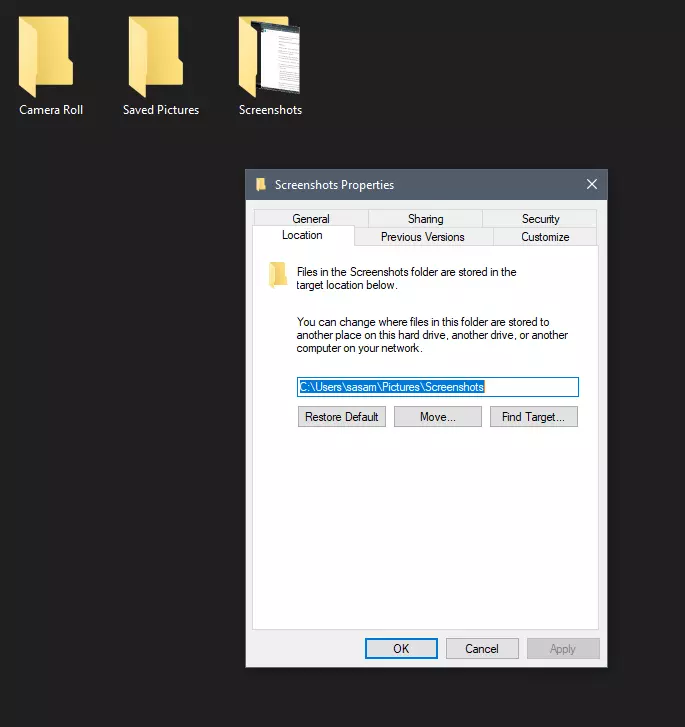
Luckily this default location can be changed into any folder that you like.
First thing is to open File Explorer and then navigate to your PC. Once you go to your PC, go to Pictures, and inside right-click on the Screenshots folder. If there is no screenshots folder inside, this means that since Windows was installed no screenshots were taken with WINDOWS + PrtScn key combination. Please note that just by pressing PrtScn you will create a screenshot but you will place it inside the clipboard ready to be pasted somewhere, with WINDOWS + PrtScn you are saving the screenshot directly in a file on your hard drive.
So once you clicked on the Screenshots folder, go to the bottom and click on properties. Inside properties go to the Location tab. In the location, tab clicks on MOVE and browse to your new location where you would like screenshots to be saved. Once you select the folder for screenshots, click on the Select Folder button and confirm with OK. After this, Windows will ask you would you like to move existing screenshots into the chosen folder. Click YES or NO, depending on your preference.
After this easy setup, all of your new screenshots will be placed now inside the chosen folder.
Thank you for reading and I hope to see you tomorrow. Take care.
 Error Causes
WeatherBlink is an extension for google chrome, Mozilla, and internet explorer. It allows users to check out the weather anywhere in the world at any time. This might seem like a convenient feature, however, this toolbar also displays unwanted ads, hijacks your browser home page, collects personal data about your web surfing habits, visits, and clicks. From the author: Access local weather forecasts, weather radar, allergy, and pollen reports, and worldwide weather news – all in one convenient spot! This extension configures your New Tab page to WeatherBlink™ to provide these features.
Be prepared with instant weather forecasts. Access FREE and accurate weather forecasts with one click!“Error 1005 Access Denied – The owner of this website has banned the autonomous system number (ASN) your IP address from accessing this website.”Usually, this error occurs when the website administrator decides to block an IP address or IP range. To fix this error, here are some suggestions you can try:
“Something went wrong, We weren’t able to set up your PIN. Sometimes it helps to try again or you can skip for now and do this later.”On the other hand, here’s the error message you get for the Microsoft Store-related error:
“Try that again, Something happened on our end and we couldn’t sign you in.”Here are some potential fixes you can try to fix the Error Code 0x80090016 in the Microsoft Store:
powershell -ExecutionPolicy Unrestricted Add-AppxPackage -DisableDevelopmentMode -Register $Env:SystemRootWinStoreAppxManifest.xml
“This policy setting allows you to control whether a domain user can sign in using a convenience PIN. If you enable this policy setting, a domain user can set up and sign in with a convenience PIN. If you disable or don’t configure this policy setting, a domain user can’t set up and use a convenience PIN. Note: The user’s domain password will be cached in the system vault when using this feature. To configure Windows Hello for Business, use the Administrative Template policies under Windows Hello for Business.”
nbtstat -R
nbtstat -RR
netsh int reset all
netsh int ip reset
netsh winsock reset
Error CausesIn the command prompt type sfc/scannow.This will scan the system files and fix any errors. Reboot the computer and try to install updates.