As you know, Windows 10 is created with the goal of developing an operating system that caters to users’ needs and enhances productivity. That’s why modern computers that are running the Windows 10 OS have the capabilities to project their screen to an external display wirelessly. That said, Microsoft has a dedicated and pre-installed app called Connect which helps another device to project their screen on the computer. However, this feature is kind of delicate and won’t work unless it’s properly configured.
So if some configuration does not work out well, it will throw an error message that says
“Something went wrong with the projection”.
This kind of error is caused by some issues with the Display driver, hardware, corrupted or damaged system files, and so on. And to fix it, there are several methods you can check out. You can try to update, roll back or reinstall the Display drivers. You could also run the Network Adapter troubleshooter or the Video Playback troubleshooter as well as run System Restore to undo any recent changes that might have triggered the error or reset your Windows 10 computer without deleting any files. For more details, refer to each one of the options provided below.
Option 1 – Try to update or rollback the Graphics driver
You can try to update your Graphics card driver using the Device Manager in your computer to resolve the blank dialog boxes problem or you can also go directly to the website of your graphics card manufacturers like NVIDIA, Intel, or AMD and go to the section called Drivers then check if there’s a new available update – if there is, download and install it.
To update your Graphics driver via Device Manager, refer to these steps:
First, boot your computer into Safe Mode.
After that, tap the Win + R keys to launch Run.
Type in MSC into the box and tap Enter or click OK to open the Device Manager.
After that, a list of device drivers will be displayed. From there, look for the Display Adapters and click on them.
After that, right-click on each entry under the Display Adapters and select the “Uninstall Device” option from the menu.
Now restart your computer.
After restarting your computer, go to the Settings app and Check for Updates in the Windows Update section.
Note: If updating the Graphics driver didn’t fix the problem, you can also try to roll back to its previous version and see if that helps or you could also try to roll back, update or reinstall the Network Adapter drivers.
Option 2 – Try to run the Network Adapter troubleshooter
To run the Network Troubleshooter, refer to these steps:
Open the Search bar on your computer and type in “troubleshoot” to open the Troubleshoot settings.
Next, scroll down and select the “Network Adapter” option from the right pane.
Then click on the Run Troubleshooter” button.
After that, your computer will check for any possible errors and will pinpoint the root cause of the problem if possible.
Restart your computer.
Option 3 – Try to run the Video Playback troubleshooter
If the Network Adapter troubleshooter didn’t work in fixing the problem, you can try to run the Video Playback troubleshooter instead. To run it, simply go to Settings > Update & security > Troubleshoot. From there, scroll down until you see the Video Playback option and then click on the “Run the troubleshooter” button to get started. This troubleshooter will detect and automatically fix any problems related to video playback so it should help fix the error.
Option 4 – Try performing a System Restore
You might also want to perform a System Restore that might help you in fixing the error. You can do this option either by booting into Safe Mode or in System Restore. If you are already in the Advanced Startup Options, just directly select System Restore and proceed with the next steps. And if you have just booted your PC into Safe Mode, refer to the steps below.
Tap the Win + R keys to open the Run dialog box.
After that, type in “sysdm.cpl” in the field and tap Enter.
Next, go to the System Protection tab then click the System Restore button. This will open a new window where you have to select your preferred System Restore point.
After that, follow the on-screen instructions to finish the process and then restart your computer and check if the problem is fixed or not.
Option 5 – Reset your computer
Tap the Win key or click on the Start button located in the Taskbar.
Then click on the Power button at the bottom right portion of the screen.
Next, press and hold the Shift key on your keyboard and then click on Restart. This will restart your Pc into the Advanced Startup options.
Note: Once you have access to the Advanced Startup options, you have to go to the setting which allows you to Reset your Windows 10 PC. All you have to do is select Troubleshoot > Reset this PC to reach the following screen
Afterward, select either the “Keep my files” option and then proceed to the next on-screen instructions that follow to reset your Windows 10 computer without losing your files.
There are times when an IT admin has to set up multiple IP addresses to the same network adapter. Setting up multiple IP addresses in scenarios like hosting various SSL sites, speed up traffic exchanges can help in avoiding being blacklisted in the SPAM filters, and so on. So in this post, you will be guided on how exactly you can assign multiple IP addresses to the network adapter in your Windows 10 computer.
There are several ways to assign multiple IP addresses in a network adapter. You can do it using the Network Adapter settings or using the Netsh utility, as well as the Windows PowerShell utility. To get started, refer to each one of the options provided below.
Option 1 – Assign multiple IP addresses via Network Adapter settings
Go to Settings first and from there, select Network & Internet, and then click on the Change adapter options. This will show you a list of both the physical and virtual network adapters in your computer.
Next, double click on the Ethernet adapter where you want to assign the multiple IP addresses and then click on the Properties button.
After that, you should see the Ethernet properties where you have to select the “TCP/IPv4” or “TCP/IPv6”.
Once done, click on the Properties button and then select the “Use the following IP address” option under the General tab.
Now you have to add an IP address, subnet, and default gateway to the network adapter and then click on the Advanced button.
This will open the Advanced TCP/IP settings where you have to click on the Add button so you can add an IP address. From here, you can keep adding multiple IP addresses to the network adapter. You also have the option to add multiple gateways or DNS IP addresses.
Once done, if you execute the “ipconfig” command, you should see all the secondary IP addresses listed.
Option 2 – Assign multiple IP addresses using the Netsh command
Another way to assign multiple IP addresses to your network adapter is via the Netsh command.
In the Start Search, type “command prompt” and from the search results that appear, right-click on Command Prompt and then select the “Run as administrator” to open it with admin privileges.
If a User Account Control or UAC prompt pops up, just click on Yes.
After that, run this command: Netsh int ipv4 add address name="Local Area Connection" 192.168.100.100 255.255.255.0 SkipAsSource=True
Note: You have the option to set “SkepAsSource” since it depends on your needs using the Netsh command. When it is configured as true, the IP address won’t be used by the OS for outbound connections.
Option 3 – Assign multiple IP addresses via Windows PowerShell
Tap the Win + X key combination and click on the “Windows PowerShell (Admin)” option.
After opening Windows PowerShell as admin, use the NetIPAddress command so you can add more IP addresses. Execute this command: Get-NetIPAddress | ft IPAddress, InterfaceAlias, SkipAsSource
Next, assign an IP address to a network adapter by executing this command: New-NetIPAddress –IPAddress 192.168.100.100 –PrefixLength 24 –InterfaceAlias “vEthernet” –SkipAsSource $True
Now to modify the “SkipAsSource” parameter, use this command: Get-NetIPAddress 192.168.100.100 | Set-NetIPAddress -SkipAsSource $False
A recent update in Windows 10 has caused a couple of glitches. One of these glitches is having trouble signing into Windows 10. Some users reported that they were not able to sign in to their computers using a PIN and they weren’t also able to reset it either. If you are one of these users, then you’ve come to the right place as this post will help you resolve issues that you are having in signing in to your computer using your PIN or fingerprint with Windows Hello.
When you encounter this issue, you will get an error message on your screen stating:
“Your PIN is no longer available due to a change in the security setting on this device on this device.”
To resolve this problem, you need to follow the steps laid out below carefully.
Step 1: The first thing you need to do is to make sure that you are using an administrator account. After signing in as admin, tap the Win + E keys to open the File Explorer.
Step 2: After that, under the View menu, enable Hidden items.
Note: From there, you should see a folder named “Ngc”. This folder might be the one that’s causing the problem so you are going to fix it by making some changes. This folder contains all the files responsible for any PIN-related settings. So if you are not able to access the Ngc folder, or it has gotten corrupted for some reason during an update here’s how to fix it.
Step 4: Try opening the Ngc folder. If you are able to open it, just skip to step 11 but if you can’t open it and you got the “Permission Denied” error message, proceed to the next few steps.
Step 5: Right-click on the Ngc folder and select Properties.
Step 6: Under Properties, go to the Security tab and click on the Advanced button.
Step 7: Next, click on the Change link which corresponds to the Owner field.
Step 8: Then click on Object Types and ensure that everything is selected.
Step 9: After that, enter your username in the field. You can just use the email that corresponds to your Microsoft account or you can also use the Check Names button to verify it. Now click OK.
Step 10: You should now see a change in the owner's name. Just make sure that you enable the checkbox below it which is labeled, “Replace owner on subcontainers and objects” and then click Apply and close everything.
Step 11: Next, try opening the Ngc folder again. You should now be able to access it. After opening the folder, delete all of its contents and make sure that it’s empty.
Step 12: Restart your PC. After your computer has booted, go to the Account Settings and try setting up a new PIN. You should now be able to set up a new PIN and use it to sign in to your PC.
Did you know you can use emoji in file names inside Windows 10?
It is no secret that emojis are basically everywhere and Microsoft has seen this and integrated them into Windows itself, so you can name files using emojis or combine them with text.
Placing emojis in file names or in the text is extremely easy, all you have to do is press ⊞ WINDOWS + . and the emoji dialog will open from where you can find which emoji you would like to use.
And that's it, you just used emoji for the file naming.
!!!NOTE!!!
In theory, some applications may not like these emojis if they don’t support Unicode characters. However, modern applications are designed to work with a broad set of languages that should properly support emojis.
For example, the classic Windows Command Prompt can’t see emoji characters in file names properly, but both PowerShell and Microsoft’s new Windows Terminal can display them properly.
If you do run into a problem, you can always open File Explorer and rename the affected files and folders to remove the emoji characters. You can then use those files in applications that don’t properly support emoji file names.
As you know, Windows 10 has a complicated mechanism for Activation which helps in the verification of a genuine copy of Windows 10. However, there are times when you might encounter some errors during the activation process. One of these errors is the error code 0xc000f074. This kind of error could be due to the Key Management Service or KMS which is unreachable by the client computer or if the key used in the SLSetAuthenticationData function call is incorrect.
This kind of error mostly affects surfaces on computers that are upgraded from either Windows 7 or Windows 8.1 to Windows 10. In such cases, you may encounter any of the following error messages:
“Windows is unable to reach your company’s activation service. Please connect to your corporate network. If you are connected and continue to see the error, contact your system administrator. You can also click on the error detail to find the exact error. Error code: 0xC004F074.”“Activating Windows(R),(Key hash)…Error: 0xC004F074 The Software Licensing Service reported that the computer could not be activated. No Key Management Service (KMS) could be contacted.Please see the Application Event Log for additional information.”“Error 0xC004F074, SL_E_AUTHN_MISMATCHED_KEY, The Software Licensing Service reported that the key is mismatched.”
To fix the Windows 10 Activation error 0xC004F078, you have to use the correct key for your type of Windows copy or use Command Prompt to reinstall the key or you could also try running the Activation troubleshooter.
Option 1 – Try running the Windows 10 Activation Troubleshooter
The first thing you can do to resolve the Activation error code 0xc000f074 is to run the Windows 10 Activation Troubleshooter. To do so, follow these steps:
Go to Settings and then select Activation.
After that, click on the Windows Activation and then troubleshoot. This will help you address most of the commonly found activation issues in Windows devices.
The Windows 10 Activation Troubleshooter will determine if your license key is a valid Windows 10 digital license for an edition that is not currently installed. If it turns out that it’s not, then the troubleshooter will show you how to install the correct edition.
Option 2 – Try to use the correct key for the type of Windows version you have
If the Windows Activation troubleshooter wasn’t able to resolve the error, then you can try using the correct key for your type of Windows version. All you have to do so is check the type of your Windows copy if it’s OEM, retail, or volume. And make sure that you have the correct, valid product key for your operating system.
Option 3 – Try to use Command Prompt to reinstall the key
In the Start Search, type “command prompt” and right-click on Command Prompt from the search results, and then select “Run as administrator”.
After that, execute this command to uninstall the existing key: vbs /upk
Next, you need to install the KMS product key by executing this command: vbs /ipk <The KMS Product Key>
Once you’re done, you will see a prompt that’ll tell you whether the operation was either successful or not.
To active, the KMS product key online, use this command: vbs /ato
Use this command to activate the key using the telephone: exe 4
After you’ve activated the KMS product key, restart the Software Protection Service. You can also verify the Activation Status to check if your fix was successful or not.
Option 4 – Contact Microsoft Support for assistance
If you’re at your wits’ end in trying to upgrade your computer, you should consider contacting Microsoft Support for help as they can offer you various options that would make fixing Windows Activation error code 0xc000f074 a lot easier and faster.
AnytimeAstrology is a browser extension for Google Chrome developed by Mindspark Inc. When installed, this extension will change your default new tab page to a custom search provider called MyWay (search.myway.com).
While browsing the internet with this extension installed, you will see additional ads through your browsing sessions, including but not limited to Sponsored Content, Injected Ads and Pop-up Ads.
While AnytimeAstrology is active it will monitor your browsing habits, recording website visits, clicked links, viewed products, etc. This information is later sent back to Mindspark Ad network servers where it is used to better target additional injected ads into your web pages.
Several anti-virus applications have marked this extension as a Browser Hijacker and it is recommended to remove it from your computer.
About Browser Hijackers
Browser hijackers (also known as hijackware) are a kind of malicious software that modifies web browser configuration settings without the computer owner’s knowledge or approval. These hijacks are raising at an alarming rate globally, and it can be actually nefarious and often harmful too. Browser hijackers could do more than just changing homepages. In most cases, hijackers are created for the benefit of online hackers usually through income generation that comes from forced ad clicks and site visits. While it might seem harmless, these tools are made by malicious people who always try to take advantage of you, so that they can earn money from your naive and distraction. Browser hijackers can also permit other vicious programs without your knowledge to further damage your computer.
Key symptoms that your browser has been hijacked
The following are some symptoms that indicate you’ve been hijacked:
1. your homepage has been reset to some unfamiliar site2. your browser is constantly being redirected to porn sites3. default internet search engine is modified4. you find unwanted new toolbars added5. you observe a lot of pop-up ads on your screen6. your browser has become unstable or starts running slowly7. you can’t visit certain websites such as homepages of antivirus software.
How browser hijacker finds its way to your computer
Browser hijackers could use drive-by downloads or file-sharing websites or perhaps an e-mail attachment in order to reach a targeted computer. They could also come from add-on software, also referred to as browser helper objects (BHO), web browser extensions or toolbars. Browser hijackers sneak into your computer along with free software downloads that you unwittingly install along with the original. An example of some well known browser hijacker includes Conduit, Anyprotect, Babylon, SweetPage, DefaultTab, RocketTab, and Delta Search, but the names are constantly changing.
The existence of any browser hijacker on your computer might considerably diminish the web browsing experience, monitor your internet activities that result in serious privacy issues, produce system stability issues and ultimately cause your PC to slowdown or to an almost unusable condition.
The best ways to remove a browser hijacker
Some hijackers can be simply removed by deleting the free software they came with or by eliminating any extension you have recently added to your system. The sad thing is, the majority of the software applications used to hijack a internet browser are deliberately built to be hard to eliminate or detect. Novice computer users should never attempt for the manual form of removal methods, since it calls for thorough computer knowledge to carry out repairs on the computer registry and HOSTS file.
Installing and running anti-malware application on the affected system will automatically erase browser hijackers and other unwanted applications. SafeBytes Anti-Malware could counter persistent hijackers and give you proactive computer protection against all kinds of malware. Together with the anti-virus tool, a system optimizer, such as SafeBytes’s Total System Care, could help you in removing all linked files and modifications in the registry automatically.
How to Get rid of Malware that is Blocking Websites or Preventing Downloads
Malware could potentially cause a great deal of damage to your PC. Some malware sits in between the computer and the internet connection and blocks some or all websites that you really want to visit. It might also prevent you from adding anything to your PC, especially anti-malware software. If you’re reading this article, you may have got affected by a virus that prevents you from installing a security software like Safebytes Anti-Malware. Follow the instructions below to get rid of malware through alternate methods.
Eliminate malware in Safe Mode
If the malware is set to run immediately when Windows starts, entering safe mode could very well block the attempt. Just the minimum required programs and services are loaded when you start your PC in Safe Mode. To launch your Windows XP, Vista or 7 computer in Safe Mode with Networking, do as instructed below.
1) At power-on/startup, press the F8 key in 1-second intervals. This will invoke the Advanced Boot Options menu.2) Select Safe Mode with Networking using arrow keys and press ENTER.3) Once this mode loads, you will have an internet connection. Now, use your internet browser normally and navigate to https://safebytes.com/products/anti-malware/ to download Safebytes Anti-Malware.4) As soon as the software program is installed, allow the scan run to eliminate trojans and other threats automatically.
Use an alternate web browser to download an antivirus application
Some malware mainly targets particular internet browsers. If this is your case, make use of another browser as it might circumvent the computer virus. If you suspect that your Internet Explorer happens to be hijacked by a virus or otherwise compromised by online hackers, the best plan of action is to switch to a different browser such as Mozilla Firefox, Google Chrome, or Apple Safari to download your favorite security application – Safebytes Anti-Malware.
Make a bootable USB anti-virus drive
To successfully eliminate the malware, you will need to approach the problem of running antivirus program on the affected PC from a different angle. Follow these steps to employ a USB flash drive to fix your infected PC.
1) Download the anti-malware program on a virus-free PC.2) Insert the pen drive on the same system.3) Run the setup program by double-clicking the executable file of the downloaded application, which has an .exe file extension.4) When asked, select the location of the USB drive as the place where you want to put the software files. Follow the onscreen instructions to finish the installation.5) Remove the pen drive. You can now use this portable antivirus on the affected computer.6) Double-click the antivirus program EXE file on the thumb drive.7) Run Full System Scan to detect and clean-up up all types of malware.
Protect Your Computer Against Viruses and Malware With SafeBytes Anti-Malware
Would you like to download the best anti-malware software program for your desktop? There are numerous applications in the market that comes in free and paid versions for Microsoft Windows computers. Some are good ones, some are ok types, while some are simply just bogus anti-malware software which will damage your personal computer themselves! You must pick one that is dependable, practical and has a strong reputation for its malware protection. On the list of recommended software programs is SafeBytes AntiMalware. SafeBytes has a really good history of excellent service, and customers appear to be very happy with it.
SafeBytes antimalware is a highly effective and easy-to-use protection tool which is created for users of all levels of IT literacy. Through its cutting-edge technology, this software will help you protect your PC against infections brought on by different kinds of malware and similar threats, including adware, spyware, computer viruses, worms, trojan horses, keyloggers, potentially unwanted program (PUPs), and ransomware.
There are plenty of amazing features you will get with this security product. Listed below are some of the great features included in the application.
World-class AntiMalware Protection: This deep-cleaning antimalware program goes much deeper than most antivirus tools to clean out your computer system. Its critically acclaimed virus engine detects and disables hard to remove malware that conceals deep within your personal computer.
Active Protection:SafeBytes delivers complete and real-time security for your computer system. They are highly effective in screening and removing numerous threats since they’re continuously improved with new updates and alerts.
Safe Web Browsing: Through its unique safety ranking, SafeBytes tells you whether a site is safe or not to visit it. This will ensure that you’re always certain of your online safety when browsing the web.
Faster Scanning: SafeBytes’s virus scan engine is among the fastest and most efficient within the industry. It's targeted scanning considerably increases the catch rate for malware that is embedded in various PC files.
Lightweight Application: SafeBytes is a lightweight application. It consume a really small amount of processing power as it works in the background so you’re free to use your Windows-based PC the way you really want.
24/7 Premium Support: You can get absolutely free 24/7 technical support from their IT experts on any product queries or PC security concerns.
SafeBytes has created a fantastic anti-malware solution to help you conquer the latest malware threats and virus attacks. You can be sure that your computer system will be protected in real-time as soon as you put this software to use. So if you are searching for the best anti-malware subscription for your Windows-based PC, we suggest the SafeBytes Anti-Malware application.
Technical Details and Manual Removal (Advanced Users)
If you wish to manually get rid of AnytimeAstrology without the use of an automated tool, it may be possible to do so by removing the program from the Windows Add/Remove Programs menu, or in cases of web browser plug-ins, going to the browser’s AddOn/Extension manager and removing it. You will most probably also want to totally reset your browser to its default configuration settings.
Finally, examine your hard disk for all of the following and clean your computer registry manually to get rid of leftover application entries after uninstallation. Please remember that this is for professional users only and may be difficult, with wrong file removal leading to additional system errors. Additionally, some malicious programs have the capability to defend against its removal. You are urged to do this procedure in Windows Safe Mode.
As you know, Microsoft’s consumer cloud storage platform is none other than OneDrive. It is where users can save any of their files albeit it’s mostly used to store common files like documents and photos. However, there are times when you might encounter some problems when saving these files. Recently, some users reported that they had problems saving Word documents to OneDrive and if you experience the same issue, then you’ve come to the right place as this post will guide you on how to resolve it.
According to users who encountered the problem, when they try to save Word documents on OneDrive, an error message appears instead stating, “This is not a valid file name”. This kind of error only occurs when the file is opened from within OneDrive for saving in a different folder. In other words, if the file is saved in the same folder, the error won’t pop up but if it is saved in a separate folder, that’s when the error appears. Worry not though for fixing this error is not complicated and won’t take too long.
It seems that this error is due to the 259-character limitation when creating and saving files as far as the Office products are concerned. To resolve it, there are several workarounds you can check out. Before you proceed with these workarounds, make sure that you have a stable internet connection.
Option 1 – Try renaming the file with a shorter name
The first thing you can do to fix the problem is to rename the file with a shorter name. Just right-click on the file and select the Rename option from the menu and then type in the new name and click OK or tap Enter to rename the file.
Option 2 – Try renaming the folders where the file is located
Like what you did in the first given option, all it takes is a right-click but this time on a folder. Rename the folder with a different name and save the changes made and then check if you can now save the Word document on OneDrive.
Option 3 – Try moving the file to a folder with a shorter path
If the first two options didn’t work, you can try moving the file to a folder with a shorter path. Note that it is not the same as doing it locally on a Windows 10 computer so you have to right-click on the file and select the “Move to” option. After that, locate the folder where you want to move the file and select it and then click on the Move button to complete the task.
Option 4 – Try making some changes in the document
You could also try to make some modifications to the document. Once you’ve done that, click the File tab and select the Save As option and then go to the folder where you want to save the file and tap enter.
Why Can’t drag and drop files or folders happens? In case you don’t know, there is a feature in Windows 10 called drag and drop that can help you move or copy files or even folders from one location to another. This feature is useful and can help you move or copy folders and files easier and quicker. However, if you encounter some problem while using this feature, worry not for this post will guide you on what you can do to resolve the problem.
There are several suggestions you can check out to fix the problem. You can try to simply tap the Esc key or you could also troubleshoot the problem in a Clean Boot State. Aside from that, changing the drag height and width or disabling the User Account Control via Registry Editor might also help. For more details, refer to the instructions laid out below.
Option 1 – Try to tap the Esc key
According to some users who experienced the same dilemma, by simply tapping the Esc key, they were able to resolve the problem. All they did was tap the Esc key before they drag and drop the folder or files. Thus, you can try doing the same thing as it might also work for you. After you tap the Esc key, you have to check all the background applications and if you see some that could be related to the hotkeys or keyboard, you might have to disable or remove them. Once done, check if the problem is fixed or not.
Option 2 – Try troubleshooting the problem in a Clean Boot State
There are some instances that some conflicting programs installed in your computer might be the reason why you’re having trouble using the drag and drop feature in Windows 10. To identify which program is causing the problem, you need to put your computer in a Clean Boot State. To do so, follow the steps below.
Log onto your PC as an administrator.
Type in MSConfig in the Start Search to open the System Configuration utility.
From there, go to the General tab and click “Selective startup”.
Clear the “Load Startup items” checkbox and make sure that the “Load System Services” and “Use Original boot configuration” options are checked.
Next, click the Services tab and select the “Hide All Microsoft Services” check box.
Click Disable all.
Click on Apply/OK and restart your PC. (This will put your PC into a Clean Boot State. And to configure Windows to use the usual startup, just simply undo the changes.)
From there, start to isolate the problem by checking which one of the programs you installed recently is the root cause of the problem.
Option 3 – Try changing the drag height and width
The next thing you can do to resolve the issue is to try changing drag height and width by following these steps:
Tap the Win + R keys to launch the Run utility and type “Regedit” in the field and then tap Enter to open the Registry Editor.
Next, navigate to this registry key: HKEY_CURRENT_USERControl PanelDesktop
From there, choose to modify both the “DragHeight” and “DragWidth” located on the right pane.
After that, change the value to a very high number. Note that these values are nothing but pixel size to drag and drop folders or files.
Option 4 – Try disabling the User Account Control or UAC via Registry Editor
Tap the Win + R keys to launch the Run utility and type “Regedit” in the field and then tap Enter to open the Registry Editor.
After that, navigate to this registry key: HKEY_LOCAL_MACHINESOFTWAREMicrosoftWindowsCurrentVersionPoliciesSystem
From this path, modify the value of “EnableLUA” from 1 to 0. This should disable the UAC in your Windows 10 computer.
Anxiety from all these digital threats lurking everywhere? An antivirus program can help put your mind at ease.
What can a virus do to your device?
A virus is malicious software that can affect pretty much any device and does so in a variety of ways. Be it your computer, your phone or your smart lightbulb - as long as there’s access to the internet, malware can get to it.
How exactly does this kind of attack manifest itself? Well, there’s a wide variety of effects ranging from mild to severe. Among other things, they depend on which type of malware attacks your device - a virus, spyware, ransomware, adware or something else.
These are some of the things you can expect to happen:
Slow performance
System crashes
Theft of data and sensitive information
Connectivity issues
Constant browser redirects
Strange messages sent to your contacts
Interference with files
It really can be the stuff of nightmares. So, if you want to sleep peacefully knowing that your devices are completely safe, you should definitely consider getting an antivirus.
P.S. don’t let its name fool you - an antivirus does indeed protect your devices against more than just viruses.
What is antivirus software exactly?
Antivirus software is designed to help you battle and ward off malware. Basically, it scans your device to detect any suspicious activity and offers tools to get rid of the culprit.
At first, antiviruses were developed to fight against viruses only, but nowadays they cover a lot more ground. Here are some of the biggest benefits of getting yourself a powerful defender.
Advantages of antivirus software
1. It fights those pesky ads
Look, constant ads that pop up everywhere aren’t the absolute worst thing that can happen on your computer. If anything, they are annoying, like when you’re trying to sleep but that one fly in your room just won’t stop buzzing.
Now, there’s a free, well-established solution for that - installing an ad blocker. And we’re about a hundred and ten percent sure you’ve already done that on each and every browser you use.
However, “if I can’t see it, it doesn’t exist” isn’t the most ideal approach for your online safety. Ad blockers can’t block everything and they won’t protect you from potential adware. An antivirus on the other hand offers that layer of protection against malware snuck into pop-ups and spammy websites.
2. It protects you from hackers
Hackers don’t target government institutions only. They’ll target regular people too if they have something to gain.
Credit: Clint Patteron (Unsplash)
There are different types of hacking, such as phishing e-mails, transmission of malicious programs, credential reuse, denial of service and more. In any case, they take control of your device and hijack your data.
The good thing is that, as threats evolve, antiviruses evolve too and there are tons of quality programs on the market that can keep you secure for an affordable price.
3. It keeps your files and data safe
When malware enters your device, it can target pretty much any file and get access to any and all data.
Installing an antivirus program will make sure that every single file, new or old, is monitored at all times, warning you against threats immediately. That way, you can make sure to react before your other files become infected and data is lost or stolen.
Another great thing for data protection is that the best antivirus software normally comes with a password manager, so no one can use malware to steal your passwords.
4. It blocks all kinds of malware
As we already stated, malicious attacks can be performed in many ways and malware comes in in different shapes an sizes, such as:
Trojan horse
Spyware
Ransomware
Adware
Rootkit
RAT (remote access Trojan)
Keyloggers
Worms
Botnets
Credit: Growtika (Unsplash)
Nowadays, antivirus software is designed to fight against all of these types. That’s why more often than not we hear the term 'antivirus' used interchangeably with 'anti-malware,' like in this article.
5. It keeps your children protected
You can’t keep your eyes on your kid every second of the day and you can’t protect them from everything. But at least you can limit their exposure to the threats they can encounter at every corner of the digital world.
An antivirus program will block harmful or suspicious websites and ads, which is great both for you and your children. To take it a step further, though, many such programs come with special parental controls and offer monitoring as well. It’s a great solution for keeping your kids safe online without sounding like the irritating, overbearing, controlling parent who “just doesn’t get it!”
How to pick one
There are definitely lots of different antivirus programs out there, both free and paid. We recommend you look for a paid option, since free ones are unfortunately a lot more susceptible to being compromised through malicious attacks.
Now, there are a few factors to consider when choosing the right software. If you use your PC for basic things then a basic antivirus will suffice. However, the more complex your use and the more sensitive the data you deal with, the stronger it needs to be.
It’s also crucial that you take into account the features it includes. As we already mentioned, some programs have additional security options. For example, depending on the package you select, Bitdefender provides:
Some are included in plans and some are separate products, so make sure to check out all the offers.
And don’t worry if you have multiple PCs or you’re looking for protection for your smartphone or tablet as well; Bitdefender has suitable solutions for your needs. Of course, you can also just pick their classic antivirus software if you’re not in need of advanced protection.
Another important point is how regularly the software is updated and enhanced. The more frequent the updates the better, as bugs can make the program more vulnerable. Other things we advise you consider are user-friendliness, impact on performance, reputation (user reviews especially) and, of course, price.
The bottom line
Fact is: anyone can be a malware victim. Don’t let it be you.
You can’t put a price on peace and security, so don’t be reluctant to pay for yours - especially since a lot of options out there are extremely affordable. Is $159.00 a year really too much to pay for cross-platform protection for up to 10 devices? We don’t think so.
Explore your options and protect your files and data before it’s too late.
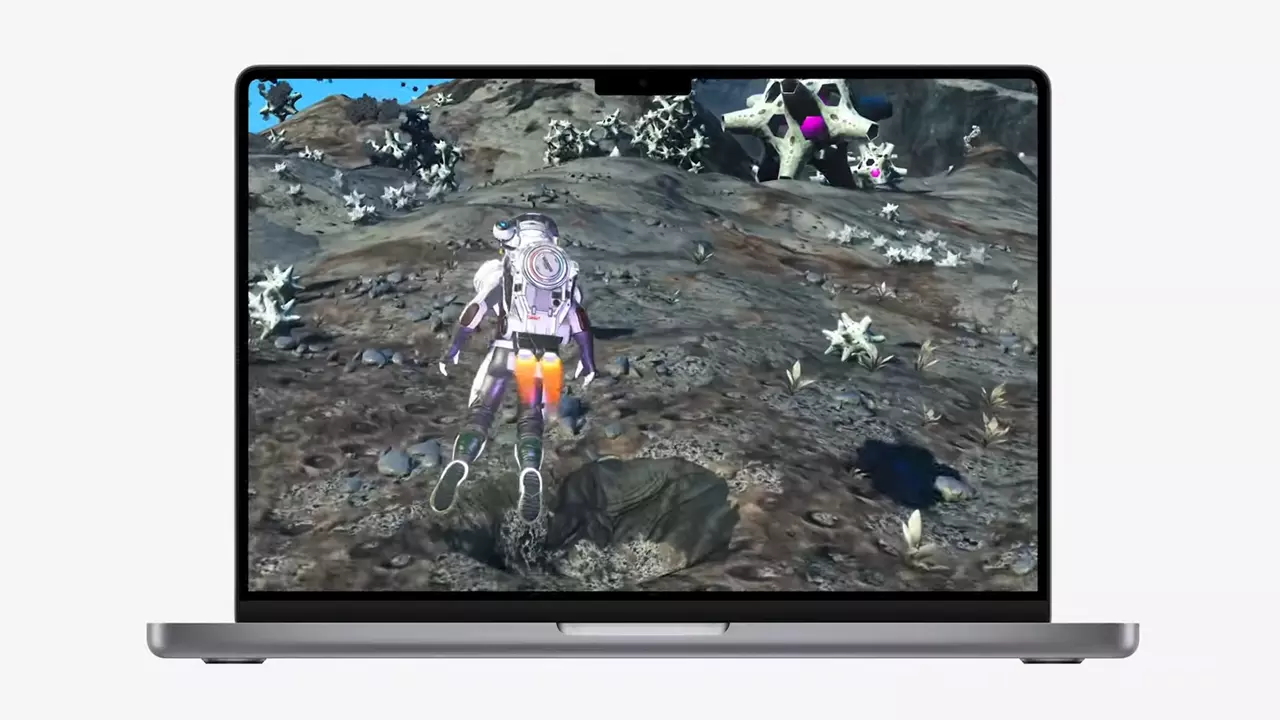
New Apple's upscaling technology called MetalFX will place iOS and macOS devices back into the gaming world. Apple had great games back in the old days and some all-time hits like the prince of Persia have been made first for apple but along the way, it just lost it.
Same as NVIDIA's DLSS and Intel's XeSS systems, Apple MetalFX also uses AI algorithms to upscale the resolution of output game frames. So, for example, the GPU inside your MAC might render the game at 1080p, but through MetalFX and AI upscaling it will look like a 4K image but have a good frame rate since it is rendered in base resolution.
The ability to make AI strike a good balance between performance and image quality is a key to technology in today's modern gaming and having this technology will help developers a ton to be able to achieve great results on Apple hardware.
The First MetalFX Games
So far three official games that will use this technology and be released natively for Appl hardware are Resident Evil 8 Village, GRID legends, and No Man's Sky. All three games have been confirmed and Resident Evil 8 Village is already sent for review people are impressed since the game can run smoothly on all Apple devices, even ones with an M1 CPU.
Apple is back into gaming
When you say Apple gaming is probably the last thing that comes to your mind but truth be told Apple makes more money from games than Microsoft, Nintendo and Sony combined. Also, Apple itself was a big player once regarding computer games as well, Myst and Prince of Persia are games that were made and have been released for Apple first. Bungie was also founded by Apple developers and Halo was originally announced as a Mac game.
Apple has been trying and pushing gaming on its platform since it kind of died down. Today all Sony, Nintendo, and Microsoft controllers work without any issues with all Apple products. Apple also has its own gaming subscription service, Apple Arcade, and its Apple TV is packed with GPU that can rival Xbox ones.
MetalFX API ties and brings it all together, it is designed to get the most performance from the hardware by minimizing overhead.
Now, computers and laptops do not hold any large numbers if we look at the user base, and that could deter developers but if we look at iPad and iPhone things are different there, much different. How same CPU power these devices and how MetalFX is available across all products it is clear that there is a market for games there. No Man's Sky is coming to iPad using these technologies and bringing full computer experience to tablets.
Portable small Bluetooth speakers are nothing new on the market, most of the time they have given the opportunity for music listening during picnics and walks in nature and also replaced some car speaker systems. The latest star in small portable speakers in JBL Clip 4, small in size, waterproof, and with an incredible high-quality sound.
Performance and quality
Out of the box and after first look speaker looks great, it has excellent design and is very intuitive to work with. Everything is laid out logically and you can start using it right away without reading instructions.
The sound quality is surprisingly very good and clear. I must say I have not expected this clarity and power from a speaker of this size. The volume range is also incredibly good and will fill most needs even on small picnics outdoors where you can hear it loud enough. One thing to mention is that even on their loudness levels sound is still clear without distortion which, to be honest, is to be expected from someone like JBL.
Where you can take JBL Clip 4
You can take it where ever you want, Its size and clip make it perfect for beach and pool trips. Speaker is waterproof and gas IP67 rating, meaning that sand and dirt will not affect it either. Do not take this speaker to your diving adventures since that will break it but a depth around 1 meter underwater should be safe. After your trip do not forget to wash Clip 4 with clean water so all dirt, salt, and other stuff are properly cleaned for longer life of the device.
How long it will play?
JBL claims that the battery will last 10 hours of continuous play. Note that this is meant probably on the largest volume setting so when you use it on lower settings battery is lasting longer. Playing of course on low volumes will extend playback time even longer but here we come at one feature that I do not like, there is no indication of any kind how much battery is left in the speaker, the only indication is a red light when the battery is almost empty which means you could be outside at that point and did not know that low battery was there in the first place when you were packing. Some battery indication would be a great addon.
More stability for JBL Clip 4
The clip itself has been improved from the previous Clip 3 model, it is wider, it goes all the way around the casing, and feels overall better and more stable. Since the clip is now all around casing this means a wider opening can be made making it fit around stuff Clip 3 was not able to.
Conclusion
All in all, Clip 4 is an incredible speaker and one that would highly recommend, the price goes around 79 USD but it can be found even as low as 50 USD on discounts and promotions and if you manage to get one at that price it is a great buy. Sound is good, portability is great, dirt and waterproof are excellent and battery life is really good.