Why You Need Antivirus Software & How to Select the Right One
Anxiety from all these digital threats lurking everywhere? An antivirus program can help put your mind at ease.
What can a virus do to your device?
A virus is malicious software that can affect pretty much any device and does so in a variety of ways. Be it your computer, your phone or your smart lightbulb - as long as there’s access to the internet, malware can get to it.
How exactly does this kind of attack manifest itself? Well, there’s a wide variety of effects ranging from mild to severe. Among other things, they depend on which type of malware attacks your device - a virus, spyware, ransomware, adware or something else.
These are some of the things you can expect to happen:
Slow performance
System crashes
Theft of data and sensitive information
Connectivity issues
Constant browser redirects
Strange messages sent to your contacts
Interference with files
It really can be the stuff of nightmares. So, if you want to sleep peacefully knowing that your devices are completely safe, you should definitely consider getting an antivirus.
P.S. don’t let its name fool you - an antivirus does indeed protect your devices against more than just viruses.
What is antivirus software exactly?
Antivirus software is designed to help you battle and ward off malware. Basically, it scans your device to detect any suspicious activity and offers tools to get rid of the culprit.
At first, antiviruses were developed to fight against viruses only, but nowadays they cover a lot more ground. Here are some of the biggest benefits of getting yourself a powerful defender.
Advantages of antivirus software
1. It fights those pesky ads
Look, constant ads that pop up everywhere aren’t the absolute worst thing that can happen on your computer. If anything, they are annoying, like when you’re trying to sleep but that one fly in your room just won’t stop buzzing.
Now, there’s a free, well-established solution for that - installing an ad blocker. And we’re about a hundred and ten percent sure you’ve already done that on each and every browser you use.
However, “if I can’t see it, it doesn’t exist” isn’t the most ideal approach for your online safety. Ad blockers can’t block everything and they won’t protect you from potential adware. An antivirus on the other hand offers that layer of protection against malware snuck into pop-ups and spammy websites.
2. It protects you from hackers
Hackers don’t target government institutions only. They’ll target regular people too if they have something to gain.
Credit Clint Patteron Unsplash
There are different types of hacking, such as phishing e-mails, transmission of malicious programs, credential reuse, denial of service and more. In any case, they take control of your device and hijack your data.
The good thing is that, as threats evolve, antiviruses evolve too and there are tons of quality programs on the market that can keep you secure for an affordable price.
3. It keeps your files and data safe
When malware enters your device, it can target pretty much any file and get access to any and all data.
Installing an antivirus program will make sure that every single file, new or old, is monitored at all times, warning you against threats immediately. That way, you can make sure to react before your other files become infected and data is lost or stolen.
Another great thing for data protection is that the best antivirus software normally comes with a password manager, so no one can use malware to steal your passwords.
4. It blocks all kinds of malware
As we already stated, malicious attacks can be performed in many ways and malware comes in in different shapes an sizes, such as:
Trojan horse
Spyware
Ransomware
Adware
Rootkit
RAT (remote access Trojan)
Keyloggers
Worms
Botnets
Credit Growtika Unsplash
Nowadays, antivirus software is designed to fight against all of these types. That’s why more often than not we hear the term 'antivirus' used interchangeably with 'anti-malware,' like in this article.
5. It keeps your children protected
You can’t keep your eyes on your kid every second of the day and you can’t protect them from everything. But at least you can limit their exposure to the threats they can encounter at every corner of the digital world.
An antivirus program will block harmful or suspicious websites and ads, which is great both for you and your children. To take it a step further, though, many such programs come with special parental controls and offer monitoring as well. It’s a great solution for keeping your kids safe online without sounding like the irritating, overbearing, controlling parent who “just doesn’t get it!”
How to pick one
There are definitely lots of different antivirus programs out there, both free and paid. We recommend you look for a paid option, since free ones are unfortunately a lot more susceptible to being compromised through malicious attacks.
Now, there are a few factors to consider when choosing the right software. If you use your PC for basic things then a basic antivirus will suffice. However, the more complex your use and the more sensitive the data you deal with, the stronger it needs to be.
It’s also crucial that you take into account the features it includes. As we already mentioned, some programs have additional security options. For example, depending on the package you select, Bitdefender provides:
Some are included in plans and some are separate products, so make sure to check out all the offers.
And don’t worry if you have multiple PCs or you’re looking for protection for your smartphone or tablet as well; Bitdefender has suitable solutions for your needs. Of course, you can also just pick their classic antivirus software if you’re not in need of advanced protection.
Another important point is how regularly the software is updated and enhanced. The more frequent the updates the better, as bugs can make the program more vulnerable. Other things we advise you consider are user-friendliness, impact on performance, reputation (user reviews especially) and, of course, price.
The bottom line
Fact is: anyone can be a malware victim. Don’t let it be you.
You can’t put a price on peace and security, so don’t be reluctant to pay for yours - especially since a lot of options out there are extremely affordable. Is $159.00 a year really too much to pay for cross-platform protection for up to 10 devices? We don’t think so.
Explore your options and protect your files and data before it’s too late.
The quickest and easiest way to log into your computer is when you use the PIN feature in Windows 10. Even though it is a bit slower compared to biometric logins such as Fingerprint and Iris scanning that comes under Windows Hello, the PIN feature is definitely less complicated. However, just like any other module of the software, it is also prone to some errors. In this post, you will be guided in fixing several PIN errors such as 0xd00000e5, 0x8007139f, and 0x8009003. These errors could be caused at different points in time like when you change or create a PIN or when you log into your computer.
To fix the 0xd00000e5, 0x8007139f and 0x8009003 PIN errors, there are various solutions you can try. You may empty the contents of the NGC folder or remove and change the PIN or the password. You could also use the Group Policy Editor or reset the ACLs in the NGC folder as well as run built-in tools like System File Checker and the DISM tool.
Option 1 – Take ownership of the NGC folder and delete its contents
Boot your computer first into Safe Mode.
Next, you need to take ownership of the Ngc folder first and you can do that using Command Prompt.
Type “command prompt” in the Windows Search bar and then right-click on the relevant search result and select “Run as administrator”.
After that, if a User Account Control or UAC prompt appears, just click on Yes to proceed.
Next, type and enter this command: TAKEOWN /F C:WindowsServiceProfilesLocalServiceAppDataLocalMicrosoftNgc
Note that the <path> is the location of the folder or file in File Explorer.
Now type and enter this second command: ICACLS C:WindowsServiceProfilesLocalServiceAppDataLocalMicrosoftNgc /grant administrators:F
Finally, once the command has been executed, restart your computer.
Once your computer has restarted, delete all the contents in the Ngc folder and check if the error is now fixed.
Option 2 – Try to remove and change the PIN or password
The 0xd00000e5, 0x8007139f, and 0x8009003 PIN errors could be caused by some conflicting issues with the PIN or password you have set for the User Account of your computer. Thus, you have to remove or change the PIN or password to fix these PIN errors.
Remove the PIN by going to Settings > Accounts > Sign-in options.
From there, go to the PIN section and click on the Remove button.
You will be asked to verify your account to proceed in removing the PIN, enter your credentials.
Restart your computer and then set up a new PIN.
Once you’re done, restart your computer and check if the error is gone now.
Option 3 – Try to use the Group Policy Editor
Tap the Win + R keys to open the Run utility and type “gpedit.msc” in the field and tap Enter to open the Group Policy Editor.
Next, navigate to this policy setting: Computer Configuration > Administrative Templates > System > Logon
After that, double click on the “Turn on convenience PIN Sign-in” option located on the right-side panel.
Then set its radio button to Enabled. You will see the following description when you do so:
“This policy setting allows you to control whether a domain user can sign in using a convenience PIN. If you enable this policy setting, a domain user can set up and sign in with a convenience PIN. If you disable or don’t configure this policy setting, a domain user can’t set up and use a convenience PIN. Note: The user’s domain password will be cached in the system vault when using this feature. To configure Windows Hello for Business, use the Administrative Template policies under Windows Hello for Business.”
After setting the radio button to Enabled, it will turn on the Logins in your computer using the PIN.
Close the Group Policy Editor and restart your computer for the changes to take effect.
Option 4 – Try to reset the ACLs in the Ngc folder
Type “command prompt” in the Windows Search bar and then right-click on the relevant search result and select “Run as administrator”.
After opening Command Prompt with admin privileges, execute this command: C:/Windows/Service/Profiles/Local/Service/AppData/Local/MicrosoftNgc /T /Q /C /RESET
The command you entered will start checking for errors and fix them automatically.
Option 5 – Run the System File Checker scan and the DISM tool
System File Checker:
Tap Win + R to launch Run.
Type in cmd in the field and tap Enter.
After opening Command Prompt, type in sfc /scannow
The command will start a system scan which will take a few whiles before it finishes. Once it’s done, you could get the following results:
Windows Resource Protection did not find any integrity violations.
Windows Resource Protection found corrupt files and successfully repaired them.
Windows Resource Protection found corrupt files but was unable to fix some of them.
Now restart your computer.
DISM tool:
Open Command Prompt.
Then type in the following commands and make sure to hit Enter right after you type each one of them:
Dism /Online /Cleanup-Image /CheckHealth
Dism /Online /Cleanup-Image /ScanHealth
Dism /Online /Cleanup-image /Restorehealth
After that, wait until the process is finished and do not close the window as the process will probably take a couple of minutes.
If you got an error code of 0x80072EE2 while trying to download a Windows 10 update then it could be that something is blocking the Windows Update service on your Windows 10 PC and is preventing it from connecting to the Microsoft server. In addition, the error code 0x80072EE2 also indicates “ERROR_INTERNET_TIMEOUT” and together with this message, you might also see a message as Windows Update encountered an unknown error or you might also find it hard to search for new updates. So in this post, you will be guided on how you can fix the Windows Update error code 0x80072EE2. Make sure to follow the steps below carefully.
Option 1 – Restart your computer and try installing the Updates again
You can restart your computer and then try installing the updates once again. There are instances when a simple restart resolves Windows Update errors. Aside from that, it would also be better if you make sure that your internet connection is working and that it’s stable. And so after you restart your computer, check for updates once again and see if you’re still getting the error or not.
Option 2 – Run the Windows Update Troubleshooter
Running the built-in Windows Update troubleshooter is one of the things you can first check out as it is known to automatically resolve any Windows Update errors like error code 0x80072EE2. To run it, go to Settings and then select Troubleshoot from the options. From there, click on Windows Update and then click the “Run the troubleshooter” button. After that, follow the next on-screen instructions and you should be good to go.
Option 3 – Try to disable your antivirus program
Disabling the antivirus program or any security software installed in your computer is always a good idea you can try when the Windows Update process does not go smoothly. So before you try updating your computer again, make sure to disable the antivirus or security program and once the Windows Update is done, don’t forget to enable the antivirus program back again.
Option 4 – Try to restart the Background Intelligent Transfer Service
The Background Intelligent Transfer Service or BITS is a part of the Windows Update service and is the one that manages the background download of Windows Update, as well as scans for new updates and so on. And if Windows Update is experiencing some problems, you can try restarting BITS but make sure that you have admin privileges to do so.
Tap the Win + R keys to open the Run dialog box.
Next, type “services.msc” in the field and hit Enter to open Windows Services.
From the list of Services, look for the Background Intelligent Transfer Service and double-click on it to open Properties.
After that, you need to set the Startup type to “Automatic (Delayed Start) and click on Apply.
Now click the Stop button to stop BITS and then click the Start button to restart the service.
Click OK to save the changes made and then restart your PC.
Option 5 – Try installing the updates in a Clean Boot State
It could be that some third-party application is the one that’s causing the problem so it’s best if you put your computer in a Clean Boot state. During this state, you can start the system with a minimum number of drivers and startup programs that will surely help you in isolating the root cause of the issue.
Log onto your PC as an administrator.
Type in MSConfig in the Start Search to open the System Configuration utility.
From there, go to the General tab and click “Selective startup”.
Clear the “Load Startup items” check box and make sure that the “Load System Services” and “Use Original boot configuration” options are checked.
Next, click the Services tab and select the “Hide All Microsoft Services” check box.
Click Disable all.
Click on Apply/OK and restart your PC. (This will put your PC into a Clean Boot State. And configure Windows to use the usual startup, just simply undo the changes.)
After that, try to install the Windows app again.
Note: If you are able to install the app without any trouble at all then it means that the error is caused by some third-party application on your computer. You need to look for the culprit and uninstall it once you found it.
Option 6 – Run Microsoft’s online troubleshooter
Running Microsoft’s online troubleshooter might also help you fix the Windows update error code 0x80072EE2. This online troubleshooter is known to help in fixing Windows Update errors, it scans your computer for issues that might be causing the problem and then fixes them automatically.
Error code 0x80070652 occurs when Windows users attempt to upgrade their operating system while another program is in the process of being downloaded. It may also occur due to problems related to previously failed update attempts within Window Update. When this Windows 10 upgrade occurs, Windows users fail to access the version of Windows they are attempting to download. Instead, a message box occurs stating that error code 0x80070652 has occurred on the device. If this error message is not rectified, it could give birth to other Windows 10 errors such as error code 0x80072EE2.
Solution
Error Causes
Error code 0x80070652 may result from Windows 10 users attempting to download another program while upgrading their operating system. It may also be caused by an issue related to previous installations of updates. For instance, in some cases, your previous installation of the Windows process may have been interrupted or it was simply not completed properly. This causes any other upgrade process that follows to result in error code 0x80070652.
Further Information and Manual Repair
But what can be done in such a situation to resolve the error code? Windows users have several options available. For instance, they can wait on any additional program that may be in the process of downloading to complete the process before attempting to upgrade Windows. They may also troubleshoot problems related to any failed updates or select a system restore point in which the error code was not present.
The manual repair methods Windows 10 users choose may involve any of the solutions mentioned previously. The choice is largely dependent on the user and his determination to fix the error code. However, note that automated tools or Windows repair technicians may also provide solutions to PC issues like error code 0x80070652.
Method One: Verify and Troubleshoot Failed Upgrades
Since previously failed updates within Windows Update can lead to the occurrence of error code 0x80070652, Windows 10 users will need to verify which of these failed updates occurred by checking the history section of the Windows Update tool. Once you’ve been able to verify that failed updates have occurred in the recent past, you’ll need to troubleshoot these problems to rectify the error code. Follow the instructions below to check for updates that have failed to install properly via Windows Update.
Step one: Type Windows Update in the Search box near Start Menu
Step two: Select Windows Update settings
Step three: Select Update history
Step four: Review updates from the most recent to least recent to see which updates have failed
Step five: Click failed updates for more details and troubleshoot accordingly.
Once you’ve completed the troubleshooting of any updates which failed, proceed by rebooting your device. You may then reattempt to upgrade to the latest version of Windows 10 once no other program is in the process of being downloaded.
If the problem causing error code 0x80070652 was related to failed updates of the past, these issues will likely be resolved once you successfully troubleshoot them. However, if the error code reoccurs, apply the next manual repair solution mentioned in this article.
Method Two: Download Updates Manually via Microsoft Download Center
Another option available to users is simply downloading updates manually by visiting the official Microsoft website, specifically the Windows section which provides downloads. To successfully complete this process, ensure you look for stand-alone packages of these downloads available on the website. You will need to know the Microsoft Knowledge Base (KB) article number related to the specific update(s) which failed.
Once a Windows user has verified the KB article number of the specific update, download it from the Microsoft website, then select Run to install the update. Reboot your PC, then check Windows Update to see if you are able to successfully complete the Windows 10 upgrade.
If the upgrade fails, you may need to implement the next manual repair method as is mentioned below.
Method Three: Use Windows System Restore
One of the best options for Windows 10 users facing certain PC problems is to apply System Restore. This allows them to reset their machine for a period of time in which the problem was not present. This is known as the restore point. To apply this manual repair method, follow the steps below.
Step one: In the search box beside the Start Menu, type System Restore
Step two: Select Create a restore point
Step three: Select the System Protection tab then Configure or Create
Step four: Provide details regarding a system restore point of your choice
Step five: Select Create, then OK.
Method Four: Download an Automated Tool
If you wish to always have at your disposal a utility tool to fix these Windows 10 and other related issues when they do arise, download and install a powerful automated tool.
Windows has a lot of built-in tools that help you fix tons of system-related issues. One of them is the System File Check which is the tool you can use to conveniently replace potentially corrupted or missing system files with good ones. But what happens when it does not work? Well, you’ve come to the right place as in this post, you will be guided on how you can replace a corrupted single Windows system file manually with a known good copy of the file if the System File Checker scan is not working.
When you encounter this issue with the System File Checker, it will be unable to replace the corrupted system files and returns an error message instead. And so to fix and replace corrupted system files in your Windows 10 computer without the help of System File Checker, you can refer to the instructions provided below.
Step 1: First, you need to open the log files listed below and identify which particular file has been corrupted:
%userprofile%Desktopsfcdetails.txt
Log %WinDir%LogsCBSCBS.log
Step 2: You will see all the details on the given log files. Once you find out the name and the path of the file, you have to take ownership of this corrupted system file.
Step 3: To take ownership of the corrupted file, you need to pull up Command Prompt by tapping Win + R keys on your keyboard and then type “cmd” and tap Enter.
Step 4: After opening Command Prompt, type and enter the command below to execute it:
takeown /f FileNameAndPath
Note: In the given command, “FileNameAndPath” represents the name and the path of the corrupted file. For instance, the corrupted file is named “wuapi.dll”, then you need to type “takeown /f C:/Windows/System32/wuapi.dll”
Step 5: Next, you need to grant administrators full access & control to the corrupted file and you can do that via Command Prompt again.
Step 6: In the elevated Command Prompt, type and enter the following command to execute it:
icacls FileNameAndPath /GRANT ADMINISTRATORS:F
Note: We’re going to use the wuapi.dll again as an example. So the command should be like this: icacls “C:/Windows/System32/wuapi.dll /grant administrators: F”.
Step 7: Now all that’s left to do is replace the corrupted system file with a good copy from a trusted source. Once you have a copy, open an elevated Command Prompt again and execute the following command:
copy NewFileLocation FileNameAndPath
Note: In the command given above, the “NewFileLocation” is the location where you have saved the copy of the file. For instance, if you’ve saved it on your desktop, this is how it should look: “copy C:/Users/<username>/Desktop/wuapi.dll C:/windows/system32/wuapi.dll”
Error code 3 is a type of PC windows error that can occur on any Windows version including Windows XP, Vista, Windows 7, or 8. This error code means that the system cannot find the path specified.
The error 3 messages are displayed in the following format: “Error_ Path_Not_Found” or it may sometimes be displayed with the value 3 in this format: (0x80070003: Error_Path_Not_Found)
Solution
Error Causes
The error code 3 indicates poor PC maintenance. It is a critical sign of an unstable system. The causes of this error code are:
Missing or broken system files
Registry issues
This error code poses serious system threats and should be resolved immediately before the damage is done. If you don’t address this error timely, your PC may be exposed to risks like system failure and crash. And this may lead to valuable data loss.
Further Information and Manual Repair
To resolve this error on your system, you don’t have to hire a technician or be technically sound yourself. What you simply need to do is clean the registry. Here are 2 ways to clean the registry:
1. Manually by Launching Registry Editor
First, launch the Windows registry editor by clicking the start button and selecting run.
In the text box type, 'Regedit' and press enter and click OK. Before you make changes to the registry, make sure you create a backup of your existing registry. This is advisable because if you accidentally lose important data during the cleaning process you can also recover the lost data.
Once you create a backup, now get started with the cleaning process. Expand HKEY_CURRENT_USER" key, then click on the software key and look for applications that you think could have corrupted the registry. Now delete them.
After that, remove the unwanted start-up items, by accessing this link: My Computer HKEY_LOCAL_MACHINE SOFTWARE Microsoft Windows Current Version.
Now click on the run tab and delete invalid entries/ values. This process may be time-consuming and for some, it may be slightly technical to identify unwanted start-up items.
2. Download Restoro Registry Cleaner
Another way to clean and repair the registry is to download Restoro. This is an innovative and a highly-functional registry cleaner.
It is embedded with an intuitive algorithm that detects all the registry issues instantly and removes them right away in just a few simple clicks. It removes all the unnecessary and obsolete files, repairs the registry, and fixes the damaged dll and system files.
It has a user-friendly interface and simple navigation which makes it easy for all levels of users to work around it. This software is compatible with all Windows versions.
Besides functioning as a registry cleaner, Restoro also functions as an antivirus and a system optimizer. It scans and removes all kinds of malicious software and simultaneously boosts the speed of your PC.
Click here to download Restoro and resolve error 3 “Entry_Path_Not_Found” on your PC now!
Each time we turn ON our computer or wake it from hibernation we are greeted with a Windows login screen where we need to provide login credentials in order to get into Windows itself and start working. This method of preserving data and privacy is perfectly fine and as a matter of fact, it is recommended for mobile computers but if you have a home computer in a safe environment where no one will try to look at your data or rummage through your personal stuff then removing login screen is safe enough action and can cause you a lot piece, from time-saving to less frustration on every restart or sleep action.
In previous Windows versions, it was much easier to turn off this feature but it seems Microsoft has determined that our privacy and security are important and somewhat removed the ability to turn OFF the lock screen. In this guide, we will show you how you can still remove the lock screen and automatically log in with your account like in the good old days.
The first thing you need to do is to press ⊞ WINDOWS + R to bring up the Run dialog
In the dialog, type in netplwiz and press ENTER.
You will find yourself in the User Accounts window, inside deselect Users must enter a user name and password to use this computer. Press OKSign in the window will pop up where you will have to type in your password and confirm it in order to start the feature.
After typing in your password and confirming it, press OK. That's it, next time you wake your computer from hibernation or turn it ON, you will automatically be greeted with a desktop instead of a Windows login screen.
Error code C1900107 is associated with an issue with upgrading to Windows 10. If you are trying to upgrade your Windows 7, Windows 8, or Windows 8.1 to Windows 10, you might have trouble doing it and you might come across this error C1900107. The error prevents you from upgrading to Windows 10 no matter what you do.
Common symptoms of this error:
The update process continues for a long time and never ends.
The update process ends suddenly and a message says “Failed: 1 update. Errors found: Code C1900107. Windows Update encountered an unknown error.”
The update process fails after trying multiple times.
Solution
Error Causes
Following reasons may be responsible for this error:
There is not enough space for Windows 10 files in the primary drive
There is not enough space in System Reserved Partition
Windows 10 files are faulty or corrupt
More Information and Manual Repair
Method 1:
Clean boot Windows 8 and Windows 8.1:
Whenever you get some unexpected behavior on your Windows 8, the first thing you should do is try to resolve the issue by taking a diagnostic approach. Plenty of factors can be the cause for issues like slowdowns, BSODs, computer freezes, sudden reboots, etc. The best way to detect the problem is to perform a clean boot. Using a clean boot, you can find out if the Operating System is damaged by some third-party app or bad driver. You can exclude the influence of these factors and prevent them from loading.
You should do 2 things before you proceed with the clean boot.
First, check if any third-party application is causing the problem. If you disable all third-party apps from startup, it will help eliminate software conflicts.
Press the Windows + R on the keyboard. The Run dialog box will pop up.
Type MSConfig in the dialog box and click "OK".
The System Configuration utility will appear on the screen.
On the services tab of the System Configuration dialog box, tap or click to select the Hide all Microsoft services check box, and then tap or click Disable all.
On the startup tab of the System Configuration dialog box, tap or click Open Task Manager.
On the startup tab in Task Manager, for each startup item, select the item and then click Disable.
On the startup tab of the System Configuration dialog box, tap or click OK, and then restart the computer.
Now, close MSConfig.
Method 2:
The second step is a Safe boot. Follow the steps below for a safe boot:
Press Win + R shortcut keys on your keyboard. The Run dialog will appear on the screen. Type MSConfig and press Enter.
The 'System Configuration' application will appear on the screen.
Switch to the 'Boot' tab, select your Windows 8.1 entry and tick the 'Safe mode' checkbox.
Reboot your PC to enter the Safe mode of Windows 8.1.
After you finish troubleshooting in Safe Mode, run MSConfig again from Safe Mode and uncheck the checkbox from step 2.
Method 3:
For this method, you will need to find the $Windows.~BT Folder in your primary drive which is C:. This folder might contain corrupt files which are preventing you from installing Windows 10. The folder is hidden and we need to unhide it. Follow the steps below:
Open File Explorer or alternatively double click on This PC or My Computer.
Now from the top option click on View, The Check the Box that says Hidden items.
Now you will be able to see hidden files and folders. Navigate to C:$Windows.~BT and Rename the folder to something like $Windows.~BT1.
Now, try downloading Windows 10 again. The installation process should go through this time without any errors like code C1900107.
Method 4:
If the above methods fail, try this method:
Go to C:\Windows\Software Distribution\Download. Now delete all the files from this download folder. Remember, do not delete the folder itself, and just delete the files.
Now, delete the $Windows.~BT Folder. This might ask you for administrator permission. Simply click yes.
Now try to install or upgrade to Windows 10. This method should work fine and there should be no error code C1900107.
If you do not possess the technical expertise required to accomplish this yourself or do not feel comfortable doing so, download and install a powerful automated tool to get the job done.
Microsoft has officially announced details about the newest upgrades to its office 365 suite moving forward along with its new OS release.
It seems that Microsoft has listened to its user base and feedback since Word, Excel, and PowerPoint are getting much-needed redesign taking into account many suggestions from the community.
The new office should feel more like an application suite guiding focus on the interconnection of applications themselves providing users with a much more natural experience of using them.
The new office features so far
From Microsoft themselves:
“This Office visual refresh is based on feedback from customers who asked for a more natural and consistent experience within and between your applications, specifically on Windows. With this update, we deliver an intuitive, coherent, and familiar user interface, using the Fluent Design principles, across all your applications: Word, Excel, PowerPoint, OneNote, Outlook, Access, Project, Publisher, and Visio. We aligned this visual refresh with the design of Windows 11 to provide seamless experiences on your PC.”
It is always refreshing to hear when a company listens to its user base and actually does what is needed instead of trying to invent the wheel.
How to switch
Since beta is already rolling and if you have an active 365 subscription to office suite visual refresh will be automatically available to all Office insiders running beta channel builds. It can be turned on and off using the coming soon feature in the top right corner of the menu in any application.
Just click on the megaphone icon to open the coming soon pane and apply settings to all office apps.
Note that The Coming Soon feature is not available in Access, Project, Publisher, or Visio. If you turn on the visual refresh in any of the 4 apps mentioned above (Work Excel, PowerPoint, or OneNote), it will also be available in these 4 apps.
Difference themselves
The Home tab menu still has a familiar look with a few tweaks. For example, accessing frequently used Word commands will be a lot easier. By navigating to Designer > Show Quick Access Toolbar, users can add a customizable shortcut ribbon to Word that houses conveniently placed options.
Also, the office will not match your Windows operating system color theme so if you have a dark theme enabled, the office will also have a dark color theme.
Color palettes are more neutral, corners are a bit softer but customizable ribbons are a win here for me.
Conclusion
There was not much said other than visual upgrades and small tweaks that were supposed to make your life easier but then again Windows 11 itself is in the same boat.
I am not sure if this is a great update offering just some visual tweaks and focus on workflow mechanics or just being plain lazy and trying to cash in visuals as a completely new product.
If you encounter an error while trying to burn files to a CD or disk on your Windows 10 computer, stating, “Windows Media Player cannot burn some of the files”, read on as this post will guide you in fixing the error.
Here’s the complete error message:
“Windows Media Player cannot burn some of the files. To investigate the problem, click the icon next to the files in the burn list.”
As you know, the Windows Media Player helps you burn songs or audio files to CD or disk but it does not always end up successfully as you could encounter some setbacks such as this particular error. Usually, this kind of issue occurs if an audio file does not comply with some restrictions so the Windows Media Player pops up this error instead. You can encounter this error message if:
You include a file that’s not an audio file.
If the total time limit exceeds 80 minutes (even though a CD has 700 MB storage capacity, you can’t burn audio of more than 80 minutes long)
To resolve the error, you have to remove the unsupported files from the burning list, change the burning speed or execute some tweaks in the Privacy settings. For more details, refer to the instructions provided below.
Option 1 – Get rid of the unsupported files from the burning list
You must get rid of the unsupported files from the list of files to burn. This list can be found on the right-hand side of the Windows Media Player. One of the indications that a file is causing problems is when there is a white cross in a red circle next to the file. You can simply click on that icon to remove the file from the burning list. Once you’ve gotten rid of all the unsupported files, try to burn your files to the CD or disk once more.
Option 2 – Try to modify the Privacy settings
In case you don’t know, the Windows Media Player comes with privacy settings that help you in various situations. However, on rare occasions, those settings could also trigger errors and this might be the one that’s causing the “Windows Media Player cannot burn some of the files” to pop up. Thus, you can try disabling these options to resolve the error. How? Refer to these steps:
Open the Windows Media Player.
Then go to Tools > Options. If you aren’t able to find the Tools menu, just tap the Ctrl + M keys. On the other hand, you can also tap the Alt key to display the menu options.
Once you’ve opened the Options window, go to the Privacy tab where you can the “Enhanced Playback and Device Experience” section.
In this section, you can find the following options. Make sure to disable them all.
Display media information from the Internet
Update music files by retrieving media info from the Internet
Download usage rights automatically when I play or sync a file
Automatically check if protected files need to be refreshed
Set clock on devices automatically
After you disable the options listed above, click on the Apply and OK buttons to save the changes made and then try to burn the files again.
Option 3 – Try to change the burning speed
Since the burning speed is set to fastest by default, you can try to change the burning speed to resolve the problem. All you have to do is open the Options window and then go to the Burn tab. From there, select either Medium or Slow burning speed and save the changes made. Now try to burn your files to the CD or disk once again.
This Unresponsive Script problem information is most frequent on Firefox, which is among the top browsers worldwide.
Firefox might show you these errors with the information, "Warning: Unresponsive Script". It is going to subsequently inform you that software to the web page you're trying to open is unresponsive, or has quit reacting.
This means that the script has ceased functioning and may freeze or hang Firefox if not immediately resolved. You can easily solve this problem.
Solution
Error Causes
Before you can fix this error, you need to understand its primary cause.
The biggest risk is that if left unchecked, Unresponsive Scripts will hang your browser and to an extension of your computer thus limiting your productivity. You may have to uninstall and re-install Firefox if the problem persists.
Listed here are several of the very most typical reasons for unresponsive script:
Programming Errors
Interference by other Softwares
Using an older outdated version of the program.
Further Information and Manual Repair
Most times, you have to do very little to fix this problem. Furthermore, a lot of the remedies supplied here do not require the assistance of a qualified professional technician. You can easily perform them and completely solve the error.
If you wish to stop the error, keep your browser and add-ons up to date.
It's easy to update your browser and any add-ons therein. In most cases it's free. By upgrading your browser and add-ons frequently, you are effectively eliminating the risk of Unresponsive Script occurring and interfering with your work.
Check for a poorly functioning background process
The sorts of background procedures that might result in the Unresponsive Software error include Javascript code, media plugin, and browser extension.
You can stop the script from running while using Firefox thus eliminating the Unresponsive script error.
Shutting the dialog box is just another easy way of eliminating the unresponsive script error information. Firefox offers you two choices in case of this malfunction. Either "Continue" or "Stop Script". Whatever alternative you pick, you can be certain the dialog box shuts, thus allowing you to continue browsing.
The final solution. Contact Firefox about these errors on your browser. Oftentimes, these errors occur when you attempt to visit particular websites. Mark the offending websites' URLs and include them in your communications with Firefox.
Sometimes you can also contact the website owner yourself and request them to check their website's code.
Following are additional measures you can take to resolve the Unresponsive Script error.
Waiting longer for the error to resolve itself automatically
Blocking the offending script
Yanking the guilty add-ons
Disabling the hardware acceleration tool.
With one of these few steps, you won't have to worry about the Unresponsive Script error, can continue enjoying your browsing activities on Firefox.


 In the dialog, type in netplwiz and press ENTER.
 You will find yourself in the User Accounts window, inside deselect Users must enter a user name and password to use this computer. Press OK
 Sign in the window will pop up where you will have to type in your password and confirm it in order to start the feature.
 After typing in your password and confirming it, press OK. That's it, next time you wake your computer from hibernation or turn it ON, you will automatically be greeted with a desktop instead of a Windows login screen.
  How to switch
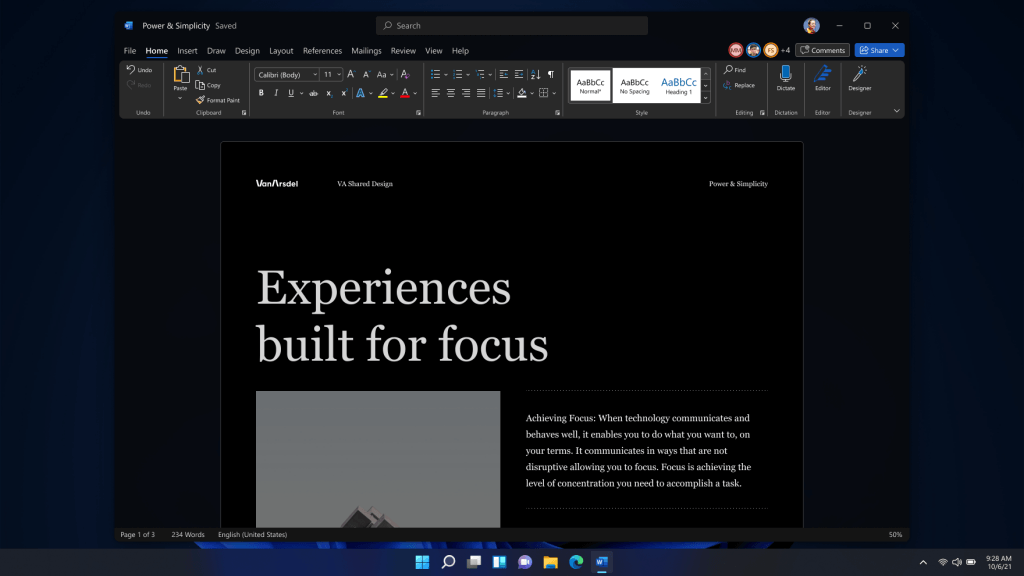 Conclusion
 Check for a poorly functioning background process
 The final solution. Contact Firefox about these errors on your browser. Oftentimes, these errors occur when you attempt to visit particular websites. Mark the offending websites' URLs and include them in your communications with Firefox.
Sometimes you can also contact the website owner yourself and request them to check their website's code.
Following are additional measures you can take to resolve the Unresponsive Script error.
The final solution. Contact Firefox about these errors on your browser. Oftentimes, these errors occur when you attempt to visit particular websites. Mark the offending websites' URLs and include them in your communications with Firefox.
Sometimes you can also contact the website owner yourself and request them to check their website's code.
Following are additional measures you can take to resolve the Unresponsive Script error.