rtf64x64.sys Blue Screen error happens in random intervals but it is a regular occurrence, it can happen when playing games, when watching movies, or even when the computer is idle. in this article we will guide you on how to resolve this error from the most simple steps you could take and do not worry, altho the error seems dreadfully and scary, it is nothing to worry about.
If you can boot Windows normally after error great, proceed with instructions, else reboot into safe mode or use installation media to boot.
Use official Microsoft online troubleshooter
Microsoft has an online blue screen troubleshooter that was made specifically for this kind of situation. Go to Troubleshoot screen error and answer questions needed. Most of the time this will be enough to solve any blue screen issue.
Update network and sound drivers
How is this error traced back to Realtek devices, go to the Realtek website and download drivers. Install them and reboot the system.
Use a dedicated software solution
DRIVERFIX is an application made for these and other kinds of driver issues and problems, it is one click automated solution for driver fixing. Visit the Driverfix site and download the application
Perform system Restore
If you have not managed to fix the issue with previous steps roll back to a previous restore point when everything was working.
Replace network or sound card
If everything failed including system restore then it is likely that it is a hardware malfunction. Replace faulty components and you should not receive errors anymore.
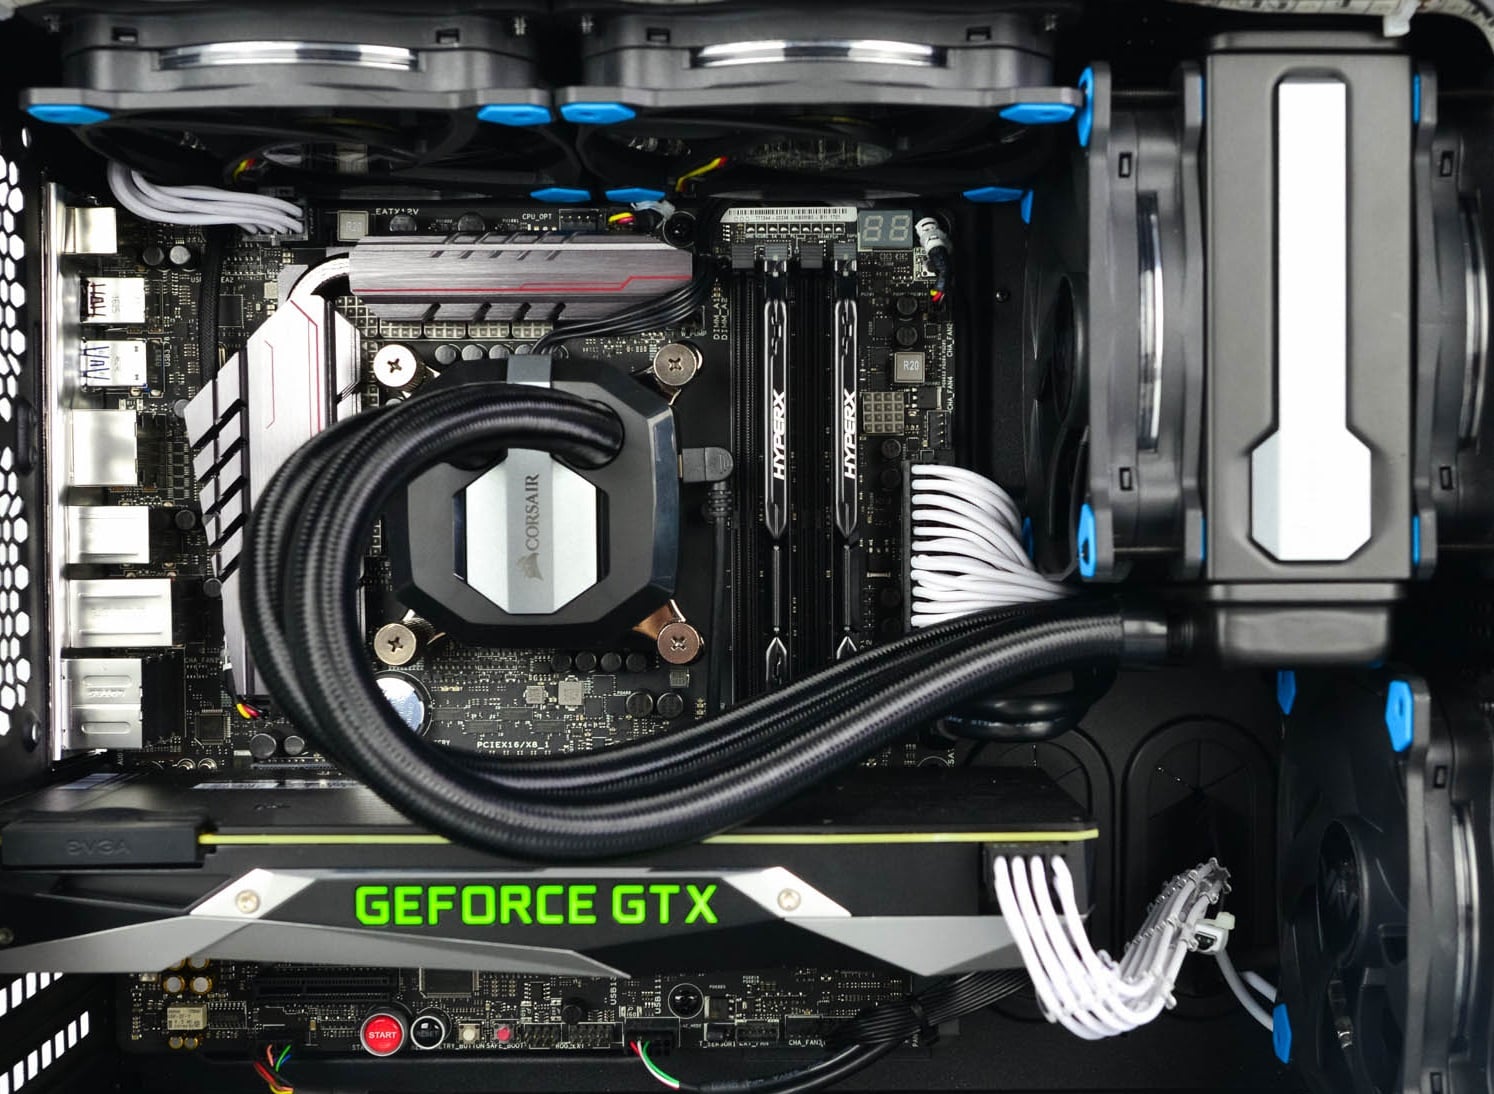
Building a custom PC is a great feeling but it can sometimes not be ideal and we are not talking about breaking or losing parts. What we mean is that choosing the right components can be sometimes a difficult task. Of course, picking a PC case can have its issues, choosing the right power supply can be tricky but pairing all components together, especially CPU and GPU can be tricky.
Builders with no depth knowledge and experience can sometimes choose improper CPU or GPU, picking one of them to be much more powerful than another thus not using it to its full potential because another component cannot handle stuff at the same speed. In order to not be trumped by this kind of stuff, there is a website that is completely free and you do not even need to be registered in order to use it.
Bottlenet calculator link here
What is even better, once you input your components you will get advice on what to change in order to tweak the system a little more to avoid bottlenecks even more. It is a very useful tool and we are advising you to use it in order to save money but not throwing it on some component that will be half used.
Windows and Devices chief Panos Panay has revealed new focus sessions feature that will be in Windows 11 on his Twitter account today. He himself is referring to it as a game-changer especially with Spotify integration.
So what is a focus session?
From the video clip provided on Twitter, we can see that focus session users will be able to choose a specific task from the previously made task list, choose songs that will play in the background while the task is active, and set a timer for the chosen task with breaks.
Maybe the best comparison and explanation would be a desktop google calendar task with music, basically, that’s it. A neat and good organizer inside your Windows 11 operating system. I think that this is generally a good idea and for sure it will find its audience.
Adobe.DLL is one of the numerous Dll files you are going to encounter on your Personal Computer.
This isn't a system-established service and is usually the consequence of the sort of applications you install on your own Personal Computer.
Because adobe.dll is a low-program process, in the event that you find it present on your pc, you can easily end it. It isn't required for the normal working of your OS but might trigger permanent harm if left unchecked.
Don't forget that the Computer uses the AdobePDF.dll file for assorted tasks, and you need to make sure it's installed correctly.
Solution
Error Causes
When the adobe.dll is left un-fixed, you may shortly have to deal with sluggishness on your Computer. Simply put, this impedes the standard and amount of work you do while using your PC and impacts your productivity.
Sometimes, adobe.dll happens because your computer experiences an overload. As a result, while resolving the malfunction, you've got to look for methods of decreasing the system overload. It's possible that lots of processes are functioning on your PC concurrently. Quit these processes.
Lousy setup of the adobe.dll file causes this error too. Check and fix the files and settings that Adobe.Dll requires to run and you may not have to content with these error anymore.
Further Information and Manual Repair
Even though the adobe.dll may severely influence the functioning of your Computer, it is really a trouble or malfunction that one can fix manually.
Permanently Un-Installing the Adobe.dll Component is one of the better methods for repairing the malfunction.
Yes, you are able to completely eliminate the adobe.dll issue. The thing you really need to do is un-install it from your own computer fully, and for good.
Quit the many processes operating on your Computer and you may get rid of the adobe.dll malfunction.
Adobe.dll regularly happens due to system overload. Thus, the first thing you need to assess is if several processes are operating on the device. If they're, search for methods to stop them, and you'll not have to worry about the adobe.dll error anymore.
Utilize Microsoft System Configuration Utility
The MS System-Configuration Utility will settle the system overload problem, thus freeing up space for your programs to run smoothly and possibly avoid malfunctions, including adobe.dll. The Microsoft System-Configuration Utility manually locates and eliminates all running processes.
Perform Scans On Your Computer
Running scans on your own Computer may enhance or increase its operation. This technique may also aid in examining your Computer for adobe.dll, or such associated malfunctions, and resolve them forever.
Repair Adobe.Dll Files and Settings' Errors.
Considering that the adobe.dll malfunctions can be a result of the existence of malfunctions on your own PC's files and options, fix these properly. Begin by fixing the settings on the files and options utilized by your Computer to perform the adobe.dll, and you may have removed this issue completely.
Finally, establish the source of the error message to effectively solve it. Once you do that and fix it, your PC will resume normal operations and even boost your work and productivity.
Encountering errors is never a pleasant experience and fixing errors can sometimes take a large amount of time. Also depending on your expertise and knowledge about computers and the operating systems themselves could be determining factor would you try to wrestle with error.
We will explore and analyze the advantages of both methods so you can choose and know when to apply one and when to reach for the other.
Advantages of manual method
Full control is the main advantage of manually solving errors, when you go deep dive into manually fixing problematic issues you are one that has control. Complete freedom is also another, sometimes fixing things can be done in several different ways and when you are the man behind the wheel, you are the one that can choose how to approach and what solution to apply in order to solve the issue.
Disadvantages of using manual method
The main disadvantage that some users might encounter is that they will need to know ins and outs of computer and operating systems' workings. Of course, the more complicated errors, the more knowledge it will require in order to apply the proper fix. There is also a risk to break something else if the person that is doing the fixing is not fully competent so this is also something to think about.
Another thing that goes against manual fixing is the time it will require in order to actually fix it, some more complex stuff will probably depend on searching for some external resources like searching for compatible drivers for example, or navigating complex registry keys inside Windows.
Advantages of automatic solutions
If you are a user that has no knowledge about how the operating system works, if you do not know what is a registry or how to properly navigate through the Windows folder then the automated solution is for you. The main advantage of automated systems is that you can easily fix errors without any kind of technical knowledge and usually with just one click of a button.
Saving time is also one of the advantages of fully automated solutions because they will work much faster than manually locating the problem and then fixing it. Also, most of these systems will have in place active monitoring that will check always if your system is in top form and alert you when something is not right.
Disadvantages of one-click solutions
Automated solutions are great, they can solve various issues and errors without any knowledge from the user, but they are not perfect. Like security suites sometimes an automated system can misinterpret something as an error when in fact it is not and fixing it could mean some apps not working anymore, luckily you can choose would you like to apply the suggested solution. So if you are using one do not just click fix without looking at what it is trying to fix and maintain.
Another problem with this is the price it is carrying, manually solving your computer error will cost you your time and knowledge but good automated software will come with a price tag. Some people might not be too happy to pay for this kind of application but at the end of the day, it will still be cheaper than a professional technician. The last thing that you should be aware of is that in order for the app to do its work properly it will need to be active all the time, now for modern computers, this is not the issue but for some older ones with a small amount of memory might lead to some slowing them down. This is a price to be paid in order to have your system always errors free.
Should you use an automated solution at all?
This depends on your knowledge and time available, professional IT technicians will not need this type of solution nor will power users but for most common people this will offer computers free of errors for an affordable price.
In the latest news, Microsoft has reached a deal to purchase Activision Blizzard for 67.8 billion. Now franchises like Warcraft, Starcraft, Overwatch, Call of duty, Diablo are now the property of Microsoft and I am sure that some of these games we can expect to be included in the Xbox game pass.
This is the second large game company acquisition by Microsoft, Acquiring Bethesda first and a big hit to Sony since Xbox will now have more games in its catalog and as exclusives.
Of course, the sale has to go through the standard closing conditions and completion of regulatory review and Activision Blizzard’s shareholder approval before it’s finalized. Assuming that all goes well, the deal is slated to be completed during the fiscal year 2023, which is July 1, 2022, through June 30, 2023.
If you suddenly encounter the DRIVER_PAGE_FAULT_IN_FREED_SPECIAL_POOL Blue Screen error on your Windows 10 computer along with the error codes, 0x000000D5, 0xb10BBD9E, 0x0D82DA24, 0Xfecd479D, 0x779827CB then read on as this post will provide you some troubleshooting tips that could help you resolve the BSOD error. Getting this kind of BSOD error means that a driver has referenced memory that was freed earlier and it could also mean that the Driver Verifier Special Pool option has caught the driver accessing memory which was freed earlier.
Follow the given options below to fix the DRIVER_PAGE_FAULT_IN_FREED_SPECIAL_POOL BSOD error.
Option 1 – Use the Driver Verifier Manager
The Driver Verifier Manager is another tool in Windows that could help you fix driver-related issues.
Type in the keyword “Verifier” in the Cortana search box to search for Verifier in Windows 10.
After that, select the option “Create custom settings”.
Make sure that you have checked everything except the options “DDI compliance checking” and “Randomized low resources simulation”.
Next, select the option “Select driver names from a list” option.
Afterward, you have to select all the drivers from any unofficial or third-party provider. To simply put it, you have to select all the drivers that are not supplied by Microsoft.
Then click on the Finish button.
Open Command Prompt as administrator and execute this command – verifier /querysettings
The command you just executed will display the Driver Verifier settings so if you see any of the flags enabled boot your Windows 10 PC into Safe Mode.
Open the Command Prompt as admin again and run this command – verifier /reset
The command will reset the Driver Verifier. Once the process is done, restart your PC and check.
Option 2 – Try updating SSD firmware
If you have installed SSD on your computer recently and you have started getting the DRIVER_PAGE_FAULT_IN_FREED_SPECIAL_POOL Blue Screen error since then you may have to update the SSD firmware. To fix this, you can download the Intel Solid-State Drive Toolbox from the official website. This toolbox is compatible with Windows 10 and Windows 7 and later versions.
Option 3 – Try running the Blue Screen Troubleshooter
The Blue Screen troubleshooter is a built-in tool in Windows 10 that helps users in fixing BSOD errors like DRIVER_PAGE_FAULT_IN_FREED_SPECIAL_POOL. It can be found in the Settings Troubleshooters page. To use it, refer to these steps:
Tap the Win + I keys to open the Settings panel.
Then go to Update & Security > Troubleshoot.
From there, look for the option called “Blue Screen” on your right-hand side and then click the “Run the troubleshooter” button to run the Blue Screen Troubleshooter and then follow the next on-screen options. Note that you might have to boot your PC into Safe Mode.
Option 4 – Try running Microsoft’s online Blue Screen Troubleshooter
If running the built-in Blue Screen Troubleshooter didn’t work, you can also try running Microsoft’s online Blue Screen Troubleshooter. All you have to do is go to Microsoft’s website and from there, you will see a simple wizard that will walk you through the troubleshooting process.
Option 5 – Try to reinstall or update device drivers of recently installed hardware
If the first few options didn’t work for you, then it’s time to either update or roll back the device drivers. It is most likely that after you updated your Windows computer that your driver also needs a refresh. On the other hand, if you have just updated your device drivers then you need to roll back the drivers to their previous versions. Whichever applies to you, refer to the steps below.
Open the Devices Manager from the Win X Menu.
Then locate the device drivers and right-click on them to open the Properties.
After that, switch to the Driver tab and click on the Uninstall Device button.
Follow the screen option to completely uninstall it.
Finally, restart your computer. It will just reinstall the device drivers automatically.
Note: You can install a dedicated driver on your computer in case you have it or you could also look for it directly from the website of the manufacturer.
Option 6 – Try disabling Hardware Acceleration
You might want to disable Hardware Acceleration system-wide or for a particular program like Google Chrome and see if it resolves the DRIVER_PAGE_FAULT_IN_FREED_SPECIAL_POOL BSOD error
BSOD or Blue Screen of Death errors are one of the most common errors you can encounter on your Windows PC. One of these BSOD errors is the “ACPI_BIOS_ERROR”. If you suddenly get this error, it means that there is some problem in booting the operating system from your hard drive or Windows was not properly installed on your PC. In addition, this error could also mean that there is something wrong with the CMOS battery located in the motherboard.
Unlike other BSOD errors, the workaround for this error is a bit different as these workarounds require a bit more expertise in updating the BIOS as well as setting the correct boot configuration. If you know are capable enough in troubleshooting the problem, refer to the instructions laid out below to fix the BSOD “ACPI_BIOS_ERROR”.
Option 1 – Try to remove the SSD and update the BIOS
The first thing you have to do is to check the primary storage devices on your PC. If you have just installed a new hard drive or SSD recently on your computer, then it’s most likely the cause of the BSOD error. Moreover, you should also ensure that your BIOS is up-to-date to the latest available build.
Remove the SSD/HDD and inject a different HDD that was already preinstalled in your Windows PC.
After that, update the BIOS to the latest available build. After updating it, insert the old SSD/HDD and then try to boot your PC again. The problem should be fixed now. If not, refer to the next given option.
Option 2 – Try to check the CMOS battery and reset the CMOS module
As mentioned earlier, the CMOS battery might also be the one that’s causing the problem. It is a physical component of the motherboard and is a memory chip that contains all the settings configuration on your computer and is also powered by a battery. So if your battery loses power, the CMOS will be reset and as a result, all the configurations will be gone as well. It is also possible that the CMOS module is not properly working and every time things are saved, they are properly written due to the battery. That’s why you have to consider changing the CMOS battery and see if it fixes the problem. In addition, you also have to make sure that you completely reset the CMOS module and then try booting your PC again.
Option 3 – Try to check the BIOS settings
If the BIOS settings are incorrect, chances are that’s the reason why you’re getting the “ACPI_BIOS_ERROR” BSOD error. Every BIOS has different settings which you can make use of to enhance your computer experience. So make sure that your BIOS is up-to-date and that the settings are in accordance with your requirement.
Another thing you can try is to disable the Legacy USB and the Legacy BIOS in the BIOS settings if you are trying to install a 64 bit Windows version. Make sure that you also enable AHCI before plugging in the installation drive on your PC. Moreover, ensure that your PC is using IDE or Integrated Drive Electronics mode instead of SATA or Serial Advanced Technology Attachment. Aside from that, try to check the extracted setup if it is in NTFS format, if it is, you should extract the ISO in FAT32 and use it to install Windows.
Option 4 – Try to reset the ACPI Compliant Control Method
ACPI or Advanced Configuration and Power Interface provide an open standard that operating systems can use to detect hardware, perform power management, as well as monitor the status of your device and provide information for other processes. Chances are, there are some misconfigurations with this module on your PC that lead to believing that there is no battery present. That’s why you need to reset it and see if it fixes the BSOD error or not.
Boot your PC into Safe Mode.
Tap the Win + R keys to open the Run dialog box.
Type in “devmgmt.msc” in the field and tap Enter to open the Device Manager.
After opening the Device Manager, go to the “Batteries” section and click it to expand it and then right-click on the “Microsoft ACPI-Complaint Control Method Battery” option and click on Uninstall.
After you disable the module, click on any empty space and then click the “Scan for hardware changes” option.
Then check if you can now boot your PC normally and without the BSOD error.
When you get the error information, "The Software Can Not Begin Because MSVCR100.Dll Is Missing", what this implies is that the Computer will be lacking the MS Visual C++ 2010 libraries.
The malfunction is rather frequent throughout installations. It doesn't matter the number of times you try to reinstall the program.
The malfunction can happen whether you've been utilizing your pc for many years, or it's really a recent one.
Solution
Error Causes
a) Missing MSVCR100.DLL: As the problem message indicates, you get this information mainly because MSVCR100.DLL is completely missing.
b) Broken MSVCR100.DLL: When the msvcr100.dll is broken, you will also get the same error, suggesting the software won't start.
The thing you need to understand is the fact that MSVCR100.DLL is playing an important role in the application referred to as MS Visual C++ 2010 Redistributable Package.
Without the MS Visual C++ 2010 Redistributable Package, any software that you simply make an effort to install won't start. You could possibly complete installing it by pursuing proper installation procedures, and then end up getting the "The Software Can Not Begin Because MSVCR100.Dll Is Missing" error.
Further Information and Manual Repair
If you get the "The Software Can Not Begin Because MSVCR100.Dll Is Missing" error information on an effective setup of any software, you shouldn't worry. You can really repair the issue and commence your recently installed software without any more hassle.
Start by checking whether you presently use 64-bit or 32-bit Windows. Visit the start button, in case you use Winxp. Type winver. On the window that appears, click Run, subsequently push enter. Head to Start, in case you use both Win7 or Vista.
Subsequently, click on the search box and type “Computer”. Right-click windows and subsequently click on Properties. Under Windows Edition, you'll find whether your Windows is 64-bit or 32-bit.
Search for the correct variation of MS Visual C++ 2010 Redistributable Package, as soon as you discover whether your Windows is 64-bit or 32-bit. Down load the x86 variant of MS Visual C++ Redistributable Package if your version is 32-bit and you must obtain the x64 variant of MS Visual C++, for those who own a-64-bit version of Windows Operating System.
You must never obtain MS Visual C++ 2010 Redistributable Package from third-party websites.
This is because Microsoft doesn't charge a cent for the files. The files are openly and easily available on Microsoft. These files come in many different variants. Consequently, select what's suitable for your own Computer with regards to the version of Windows which you operate.
Never pick the edition of MS Visual C++ 2010 Redistributable Package that's not compatible or appropriate to your Windows Operating System.
Make use of the release date, when installing MS Visual C++ 2010 Redistributable Package. You might also look out for Service Pack 1 and obtain it for your Windows. Service Pack 1 only ensures that you simply obtain the latest edition.
As soon as you end installing the most up-to-date version of MS Visual C++ 2010 Redistributable Package as demonstrated above, reboot your computer and you'll not have to worry about getting the annoying"The Software Can Not Begin Because MSVCR100.Dll Is Missing" error message anymore.
In case you don’t know, Windows 10 comes with a native ability to project to another screen, be it wireless or wired. All it takes to do that is by tapping the Win + P key combination to display options to manage the extended display. However, there are times when you might encounter errors when you do that like the “Your PC can’t project to another screen” error. This kind of error stops you from projecting your computer to the other screen. Here’s the full content of the error message:
“Your PC can’t project to another screen, Try reinstalling the driver or using a different video card.”
This error could be due to loosely connected hardware or the display adapter. It is also possible that a recent Windows Update has messed up its settings. To resolve this issue, you can try several suggestions that will be given in this post. You can try to check the hardware cable connections or run the Hardware and Devices troubleshooter. You could also update or reinstall the display adapters or replace the graphics card.
Option 1 – Try checking the hardware connections
The first thing you have to do before you further troubleshoot the problem is to check the hardware connections of your computer and see if there are damaged ones, just like with the ports as it would also affect the overall connectivity of the device with the computer. You also have to make sure that no pin is missing from the ports. So if you notice some irregularities in the connecting cable physically, you might have to buy another one and replace it and then see if it fixes the problem or not.
Option 2 – Run the Hardware and Devices Troubleshooters
The first thing you need to do is click on Start and then on the gear-like icon to pull up the window for Settings.
After opening Settings, look for the Update and Security option and select it.
From there, go to the Troubleshoot option located on the left-hand side of the list.
Next, select Hardware and Devices from the list and open the Troubleshooter and run it. Once it is doing its job, wait for it to complete the process and then restart the system.
After the system restarts, check if the problem’s now fixed. If not, refer to the next option given below.
Option 3 – Try to update or reinstall the display adapters
You might also want to update the drivers for Display adapters and Monitors or you might also have to update or reinstall your NVIDIA driver if you’re using one. To update or reinstall the display adapters, follow these steps:
Tap the Win + R keys to open the Run dialog box and then type in MSC and tap Enter or click OK to open the Device Manager.
Expand the section for Display Adapters.
And then select the Display Driver and right-click on it.
From the drop-down menu, select the Update Driver option and follow the on-screen instructions to install the latest version of the Display Driver.
Restart your PC after the installation.
If you find that updating the drivers does not help, you can try to reinstall them. How? Simply follow the steps below.
Tap the Win + X keys and select the Device Manager.
After that, look for the affected driver in the Device Manager window. And if you see a yellow exclamation mark beside it, right-click on it and select the option “Rollback” to roll back the driver.
And if the Rollback option is not available, just select Uninstall and then restart your PC.
Finally, open the Devices Manager once again and select the option “Scan for hardware changes” to install the driver.
Option 4 – Consider replacing the graphics card
You might also want to consider replacing the graphics card of your computer to resolve the problem if the options provided above didn’t work.
As you know, the NVIDIA Control Panel is the central control panel for all devices that run the graphics drivers manufactured by NVIDIA. This control panel comes bundled with the drive package itself which is why there is no need for users to download it or update it separately. However, recently, some users reported that when they tried to make changes to the configuration in the NVIDIA Control Panel, they were unable to do so and encountered an error message instead saying, “Access denied. Failed to apply selected settings to your system”. If you also got the same error message, then you’ve come to the right place as this post will walk you through fixing this error in the NVIDIA Control Panel.
There are several suggestions given in this article to fix the error. You can try to run the file named “nvcplui.exe” as an administrator or restore the most recent version of the folder where the aforementioned file is located. You could also try to restart NVIDIA’s process or restart the NVIDIA Display driver service or update the NVIDIA drivers in your computer. For more details, refer to each one of the options given below.
Option 1 – Try running the nvcplui.exe file as an administrator
Tap the Win + E keys to open File Explorer and navigate to this path: C:/Program Files/NVIDIA Corporation/Control Panel/Client
After that, look for the exe file and right-click on it, and then select the Run as administrator option.
Next, select Yes if a User Account Control or UAC prompt appears.
Option 2 – Try to restore the most recent version of the folder
The next thing you can do to fix the error is to restore the most recent version of the folder where the nvcplui.exe file is located. Keep in mind that this option is tricky so you have to be careful.
Tap the Win + E keys to open File Explorer.
Next, navigate to this path: C:/ProgramData/NVIDIA DRS
From there, right-click on the DRS folder and select Properties.
After that, go to the Previous Versions, System Protection, or System Restore tab in the Properties window.
Now restore the most recent version of the contents inside that folder. This will revert the old working configuration of DRS.
Option 3: Restart the process of the NVIDIA Control Panel
Tap the Ctrl + Shift + Esc keys to open the Task Manager.
After opening the Task Manager, look for the process named NVIDIA Control Panel Application.
Once you found it, expand it and right-click on the NVIDIA Control Panel sub-process, and click on End Task.
Now try opening the NVIDIA Control Panel from the Start Menu and see if it now works fine or not.
Option 4: Restart the NVIDIA Display Driver Service
Tap the Win + R keys to open the Run dialog box.
Then type “services.msc” in the field and hit Enter to open the Windows Services Manager.
After opening the Services window, you will see a list of services. From there, look for services named “NVIDIA Display Container LS” and double click on it to open its Properties.
Now make sure that the service is Started. If it isn’t, you need to start it, otherwise, you need to Stop it and Start It again. You also have to make sure that the Startup Type is set to Automatic.
Do the same for the NVIDIA LocalSystem Container service.
Restart your computer and check if the problem’s fixed.
Option 5– Try updating the drivers from the official site of NVIDIA
If both the first and second given options didn’t work, you can also try updating the drivers from the official NVIDIA website. And in case you don’t know the type of Nvidia graphics card that your computer is on, follow the steps below:
Tap the Win + R keys to open the Run dialog box.
Next type in “dxdiag” in the field and click OK or hit Enter to open the DirectX Diagnostic Tool.
From there, you can see what type of Nvidia graphics card that your system is on.
Take note of your graphics card information and then look for the best drivers for your operating system. Once you’ve downloaded and installed the file, restart your PC.

 Builders with no depth knowledge and experience can sometimes choose improper CPU or GPU, picking one of them to be much more powerful than another thus not using it to its full potential because another component cannot handle stuff at the same speed. In order to not be trumped by this kind of stuff, there is a website that is completely free and you do not even need to be registered in order to use it.
Bottlenet calculator link here
What is even better, once you input your components you will get advice on what to change in order to tweak the system a little more to avoid bottlenecks even more. It is a very useful tool and we are advising you to use it in order to save money but not throwing it on some component that will be half used.
Builders with no depth knowledge and experience can sometimes choose improper CPU or GPU, picking one of them to be much more powerful than another thus not using it to its full potential because another component cannot handle stuff at the same speed. In order to not be trumped by this kind of stuff, there is a website that is completely free and you do not even need to be registered in order to use it.
Bottlenet calculator link here
What is even better, once you input your components you will get advice on what to change in order to tweak the system a little more to avoid bottlenecks even more. It is a very useful tool and we are advising you to use it in order to save money but not throwing it on some component that will be half used.  Windows and Devices chief Panos Panay has revealed new focus sessions feature that will be in Windows 11 on his Twitter account today. He himself is referring to it as a game-changer especially with Spotify integration.


 This is the second large game company acquisition by Microsoft, Acquiring Bethesda first and a big hit to Sony since Xbox will now have more games in its catalog and as exclusives.
Of course, the sale has to go through the standard closing conditions and completion of regulatory review and Activision Blizzard’s shareholder approval before it’s finalized. Assuming that all goes well, the deal is slated to be completed during the fiscal year 2023, which is July 1, 2022, through June 30, 2023.
This is the second large game company acquisition by Microsoft, Acquiring Bethesda first and a big hit to Sony since Xbox will now have more games in its catalog and as exclusives.
Of course, the sale has to go through the standard closing conditions and completion of regulatory review and Activision Blizzard’s shareholder approval before it’s finalized. Assuming that all goes well, the deal is slated to be completed during the fiscal year 2023, which is July 1, 2022, through June 30, 2023.