What is Stop Error 7B?
Stop error 7B is a blue screen of death error code that occurs during Windows XP setup or after installation. The error message is displayed in either of the following formats:
- STOP: 0x0000007B (parameter1, parameter2, parameter3, parameter4)
- INACCESSIBLE_BOOT_DEVICE
- ‘A problem has been detected and Windows has been shut down to prevent damages’
- Setup has encountered a fatal error that prevents it from continuing.
- Setup cannot continue. Power down or reboot your computer now.
Solution
 Error Causes
There is no one particular cause for this error. The Stop error 7B may be triggered due to multiple reasons. These include:
- Boot Sector Viruses
- Device Driver Issues
- Poor Windows XP installation
- Registry Corruption
If you come across this error code on your PC, it is advisable to fix it right away particularly because it is a blue screen of death error that can cause severe damages to your system. It can lead to system failure, crash, and valuable data loss.
Further Information and Manual Repair
Here we’ve listed for you the best PC repair solutions to resolve and fix stop error 7B.
Cause: Boot Sector Viruses
Solution: Stop error 7B can occur when infected with a boot sector virus. If this is the cause, then first download a powerful antivirus on your system. After downloading it, run it to scan your PC for viral infection. Immediately delete the viruses if found.
However, if the virus is too powerful, the antivirus may fail to remove it. In such an event, you will have to repartition and format your hard disk and then later reinstall Windows XP.
Cause: Device Driver Issues
Solution: If the boot controller is not properly configured or the driver is not updated, Stop error 7B can occur. When this happens, simply restart your system and press F8 to go to the advanced boot options.
Here choose the Last Known Good Configuration option. After that boot into Windows and then perform a system restore. Now go to the start menu and type Device Manager in the search box.
To access the Device Manager window it may prompt you to enter an administrator password, insert it to proceed. Now go to Device Manager and perform a driver rollback to reinstall the drivers generating this stop error.
By following these simple steps you can easily resolve device driver and configuration issues.
Cause: Poor Windows XP Installation
Solution: In this case, you will have to perform a
Windows start-up repair. This can be done by booting Windows XP from CD. Simply press enter at setup Windows Screen when prompted. Then press R to repair Windows XP installation.
This procedure copies the original Windows files over the bad ones.
Cause: Registry Corruption
Solution: Sometimes the stop error 7B is also triggered by the registry corruption. When this happens, it is advisable to download and run Restoro software for PC scan and repair.
Restoro is a powerful, advanced, and highly functional registry cleaner. It is deployed with intuitive algorithms that detect registry issues and errors like Stop error 7B on your system in seconds. It wipes out clutter from your hard disk, repairs damaged files and the corrupted registry.
It is safe, efficient, and bug-free. It is also compatible with all Windows versions. In addition to this, it is also embedded with other utilities like an antivirus, a system optimizer, and Active X controls, and a class ID scanner.
Click here to download Restoro and resolve to stop error 7B on your PC immediately!

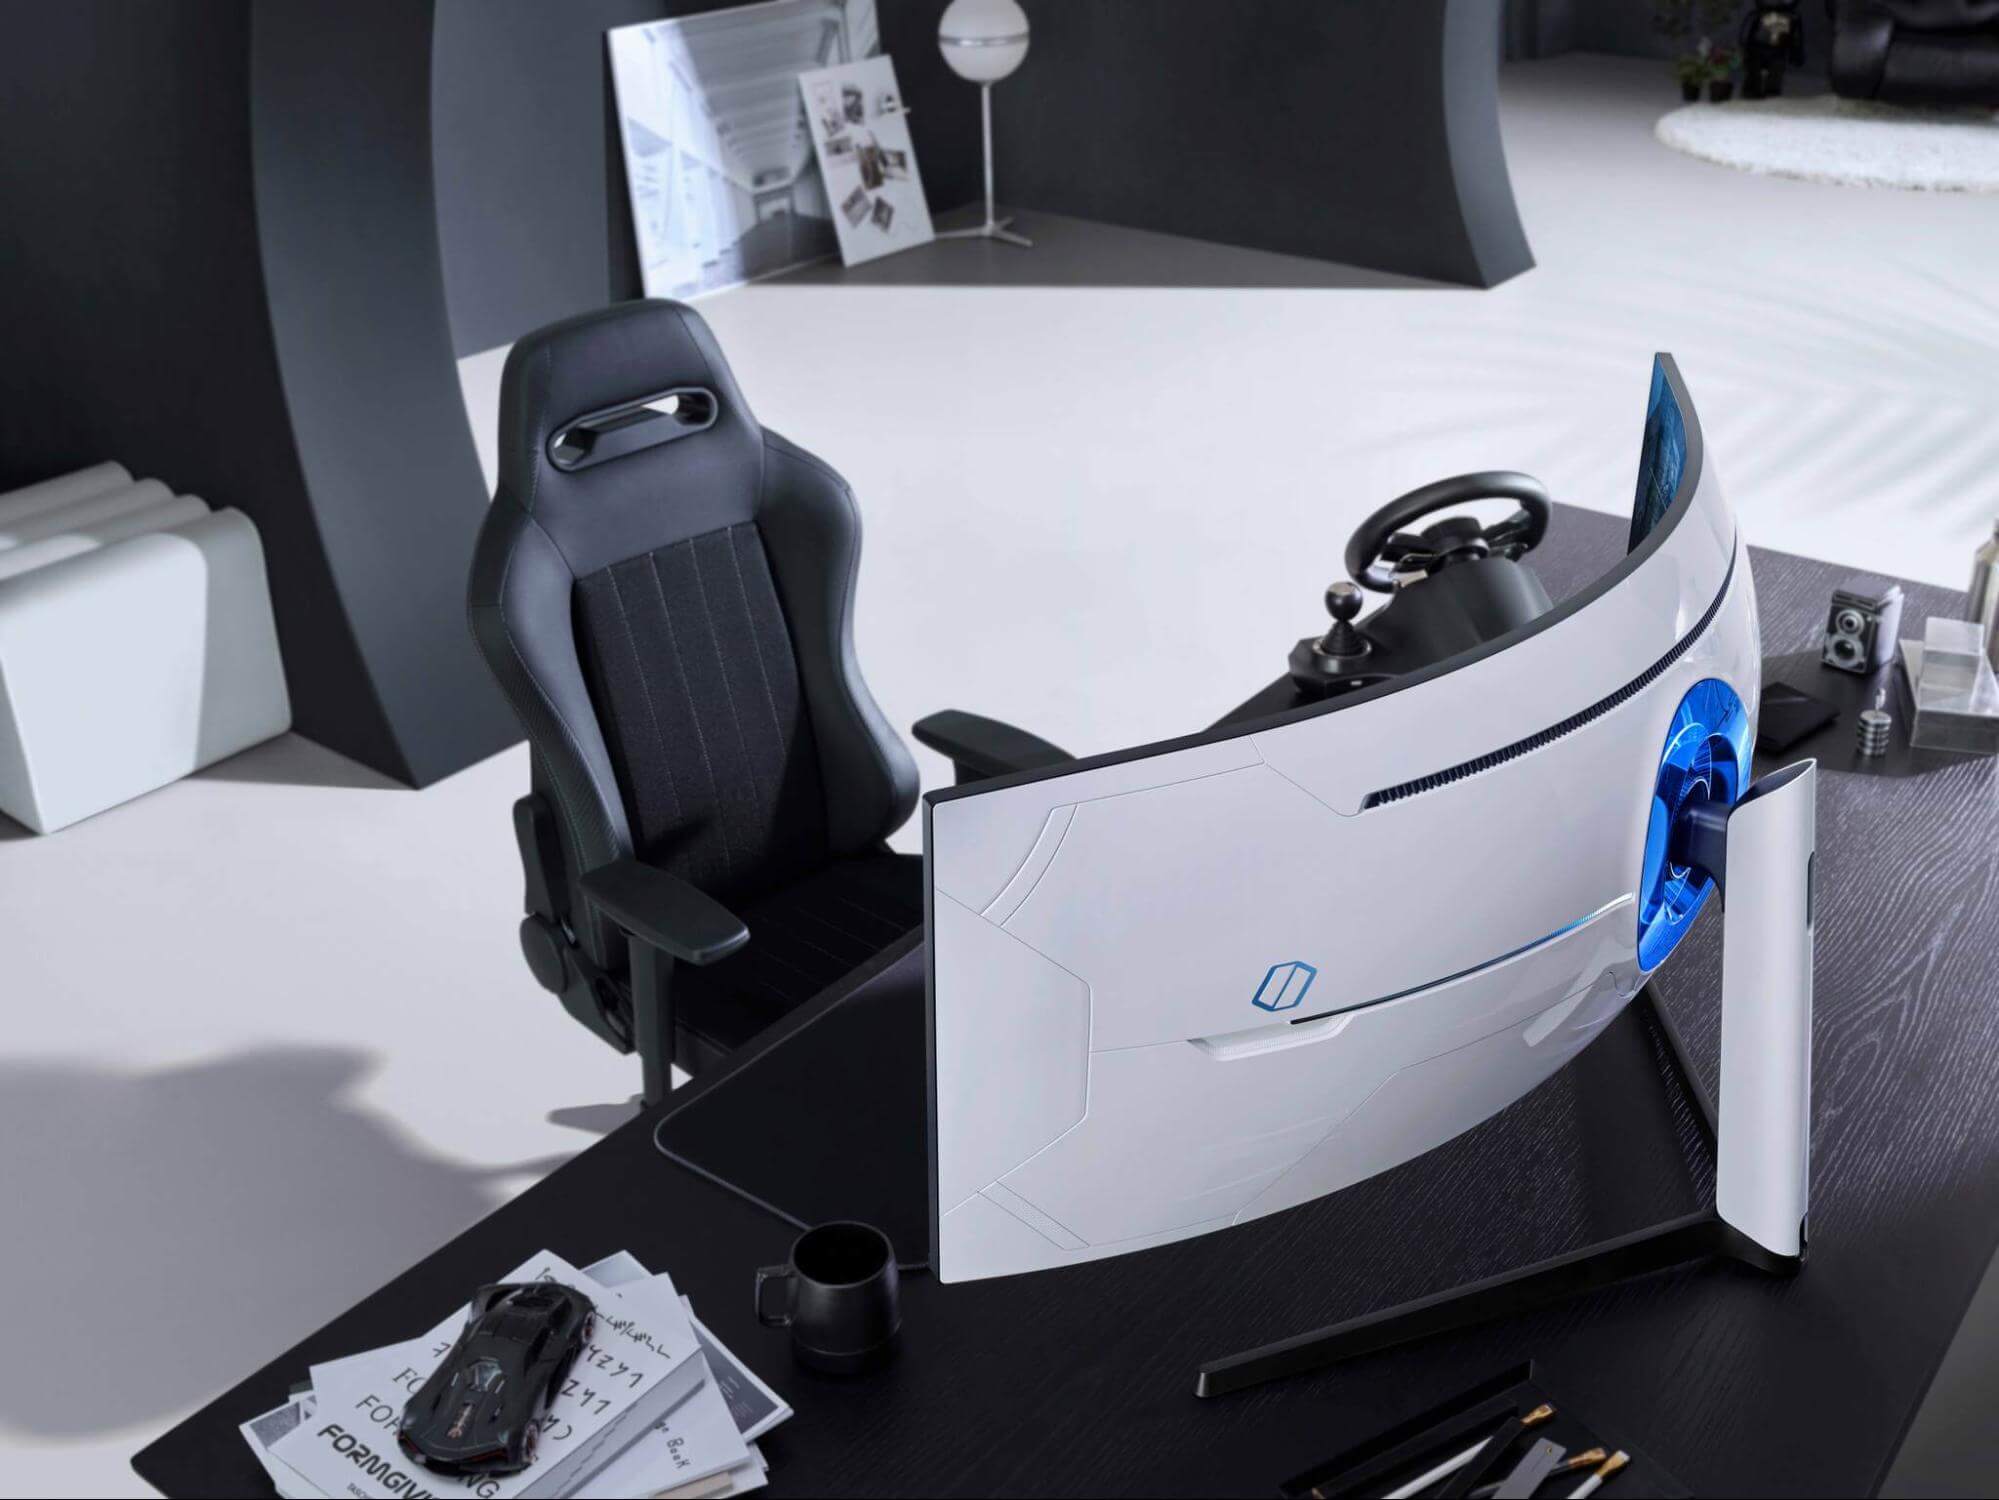 Odyssey Neo G9 is a successor to Odyssey G9 curved gaming monitor and it is aimed again at the gaming community with its specifications but of course, it can be used for work as well.
Gapping at a stunning $2500 USD price it is not really a cheap piece of hardware so it is normal to see what do you get for this kind of price and do features justify it, so let’s dive in.
Odyssey Neo G9 is a successor to Odyssey G9 curved gaming monitor and it is aimed again at the gaming community with its specifications but of course, it can be used for work as well.
Gapping at a stunning $2500 USD price it is not really a cheap piece of hardware so it is normal to see what do you get for this kind of price and do features justify it, so let’s dive in.
 In today's world any professional, whatever be design, print, web design or similar is using one or more Adobe programs. Adobe has cemented itself as a must-have software for any kind of serious and even amateur work. Sadly in the latest Windows 11 adobe software in some instances can slow down your computer and put some hard load on the CPU. If you are one of these unfortunate users, keep reading because we have a few things you can do to solve this.
 So far we probably all know what are good new and exciting features that W11 is bringing to the table, let’s talk now about features that will be removed and are not there but we had them in W10
 Well if anyone told me just a few years ago that I will see the day when Microsoft releases a new OS based on Linux I would be very amused, but that day has come. Mariner is the newest OS out of nowhere.
Microsoft’s new Linux Distro, dubbed Common Base Linux (CBL)-Mariner, isn’t the type of distro you’d want to install directly on any old machine. It’s primarily meant for cloud infrastructure and edge products. Specifically Microsoft’s Cloud and Edge products.
But if you are curious, it’s possible to run. Juan Manuel Rey, a Microsoft Senior Program Manager for Azure VMware, recently published a guide to ISO CBL-Mariner image. With that, you can easily get it up and running. And you can build CBL-Mariner on an Ubuntu 18.04 desktop. So you can try it out since it is free.
You can get it from here:
Well if anyone told me just a few years ago that I will see the day when Microsoft releases a new OS based on Linux I would be very amused, but that day has come. Mariner is the newest OS out of nowhere.
Microsoft’s new Linux Distro, dubbed Common Base Linux (CBL)-Mariner, isn’t the type of distro you’d want to install directly on any old machine. It’s primarily meant for cloud infrastructure and edge products. Specifically Microsoft’s Cloud and Edge products.
But if you are curious, it’s possible to run. Juan Manuel Rey, a Microsoft Senior Program Manager for Azure VMware, recently published a guide to ISO CBL-Mariner image. With that, you can easily get it up and running. And you can build CBL-Mariner on an Ubuntu 18.04 desktop. So you can try it out since it is free.
You can get it from here:  As of the time of writing this article you no longer need or are required to have a password if you plan to log in to your Microsoft account. Microsoft explored various options for account security and came to the conclusion that passwords are obsolete.
Microsoft is letting you access your account through the Microsoft Authenticator app, Windows Hello, a security key, SMS verification, or email verification code. All of these methods are way better in terms of security than passwords.
As of the time of writing this article you no longer need or are required to have a password if you plan to log in to your Microsoft account. Microsoft explored various options for account security and came to the conclusion that passwords are obsolete.
Microsoft is letting you access your account through the Microsoft Authenticator app, Windows Hello, a security key, SMS verification, or email verification code. All of these methods are way better in terms of security than passwords.