Logo

Intel's open-source Clear Linux* Project

clear linux projectThe Clear Linux Project creates an operating system and software stack that offers highly optimized performance, security, versatility, and manageability.

Clearly optimized for Intel CPUs and based on GNOME it will offer you incredible speeds if you are on Intel CPU.

The big news, though, is that Clear Linux sports the shiny new Gnome 40. This is a fresher Gnome than you'll find even on Ubuntu's more experimental 21.04 release. The only big names that let you test drive Gnome 40 are Fedora and Arch Linux.

Packages only when you need them

Installation of packages is used by Swupd, a Clear Linux* package management tool. It is easy to use and pretty straightforward.

  • "bundle-list" for showing what's installed
  • "bundle-info" for details on installed bundles (such as owned files via the "‑‑files" flag)
  • "search" for repository searching
  • "bundle-add" for installation
  • "bundle-remove" for uninstallation

The only problem here is the packages themselves. Clean Linux* has been imagined as a developer distro focusing mostly on well-development tolls. In intel’s words: “A Linux OS built for Linux developers”, so some things will be left out. Strangely enough some things as FFmpeg which if you want to have and blast some youtube videos while you work will have to complete manually by yourself.

Clear Linux* modular philosophy

Everything in Clear Linux* is based on a modular philosophy approach. There is no /etc/fstab file, the /boot directory is totally empty. Every partition to be mounted is enabled as a systemd "mount unit."

Intel reaping the benefits of systemd's modular philosophy, where everything is a unit. If you know your way around systemd, intermediate-level configuration tasks should be straightforward. Any advanced configuration likely demands deep systemd knowledge.

Clear Linux* performance

As stated earlier this is Intel’s distro, optimized for Intel hardware meaning that Intel as the developer has every possible tool at its disposal to make use of hardware to its maximum potential and it shows.

Distro almost leaves other ones two times in speed performance. So if you are looking for a distribution that will deliver you speed and it is aimed for developer Clear Linux* is for you.

Conclusion

Clear Linux* is a really interesting distro and seeing how Intel is adding new software packages on its official website it might have a bright future.

But as always, be the judge for yourself and see if it can fit your needs. Go get it at: https://clearlinux.org/

Do You Need Help with Your Device?

Our Team of Experts May Help
Troubleshoot.Tech Experts are There for You!
Replace damaged files
Restore performance
Free disk space
Remove Malware
Protects WEB browser
Remove Viruses
Stop PC freezing
GET HELP
Troubleshoot.Tech experts work with all versions of Microsoft Windows including Windows 11, with Android, Mac, and more.

Share this article:

You might also like

Choosing default browser in Windows 11
Default applications in previous Windows versions were a pretty straightforward process. The user went to the settings application and picked for each category which application he would like to choose from the list of installed ones. In Windows 11 things are little changed. In this article, we will show you how to choose the default internet browser inside Windows 11, and sadly it is a more tedious task than in previous versions.

windows 11 default browser
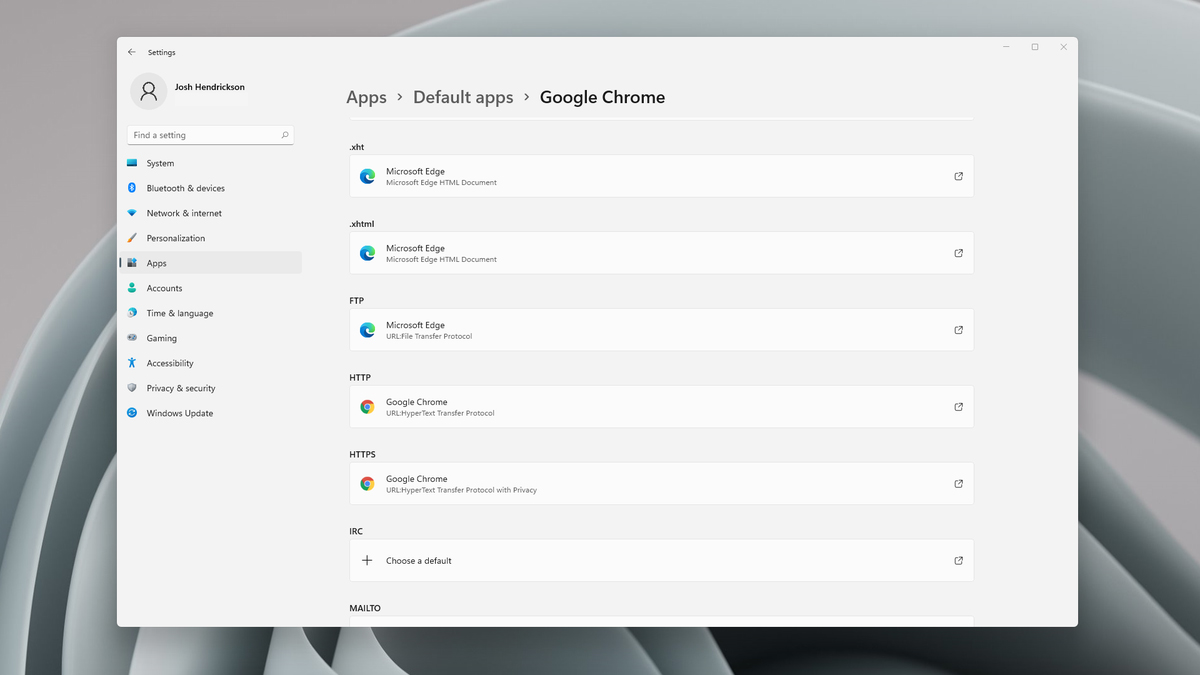
Choosing default browser in settings

As in previous versions of the Windows operating system you will need to use the settings application in order to change your default Internet browser. Previously, in Windows 10, a variety of general categories like email, web browser, and photo viewer were all listed under the Default Apps section of the Settings panel. It was easy to click on one of those categories and click on the option you like best from the small pop-up suggestion window. In the Windows 11 Insider Build, you’ll see a gauche list of an individual file or link types that you’ll need to specify your preferred browser for. The types include: HTM, HTML, PDF, SHTML, SVG, WEBP, SHT, FTP, HTTP, and HTTPS. There are additional optional types you can specify your preferred browser for as well. The issue here is in order to use a single browser which most users do you will have to go through each file type and set your preferred one. I am really not sure why this was introduced or why it has to be this way, all I can do is hope that in the final release of Windows 11 this feature will be rolled back as it used to be and that you could set your default browser in just one simple click.
Read More
Increase or decrease notification display time
As you know, the Windows 10 Action Center has a stack of all the notifications that come from different applications on your computer. So each time an app displays notifications, it will be displayed for about 5 seconds and then it disappears right away. Although the allotted time for the notifications to be displayed is quite enough to catch your attention and help you get a glance at the message, there are times when you might miss it and you hoped it could’ve been displayed a lot longer. So in this post, you will be guided on how you can increase or decrease the display time of the notification in Windows 10. The best way you can view the missed notification is to click on the Action Center. From there, you will see all the notifications that are grouped by the applications. This means that if you have a lot of notifications, it would be hard for you to find what you are looking for. Thus, in such cases, the best way you can do is to increase the display time for which notification to stay on the screen.

To get started, refer to the instructions given below.

Step 1: Tap the Win + I keys to open Settings. Step 2: Next, navigate to Home > Ease of Access > Display. Step 3: After that, scroll down to the end until you see the dropdown to change the notifications where you should see the “Show notifications for”. Step 4: Then you can change the time from the default 5 seconds to 7, 15, 30, and so on. Step 5: Once done, the display time of the notifications should stay longer but keep in mind that you must choose the length wisely so if you have notifications from a lot of apps, then the screen will also be filled with multiple notification cards.
Read More
What to do if Remote Desktop is not working or won’t connect in Windows 10
One of the biggest annoyances in Windows 10 is that it’s upgrading from one version to another. Although these upgrades are necessary to fix some bugs or improve user experience, some of them actually bring bugs into the computers instead. And in one of the recent Windows 10 updates, a lot of issues were found especially for users who use Remote Desktop on a daily basis. The error stacks up as Windows 10 Remote Desktop Protocol client is not working or won’t connect and can’t find the computer HOSTNAME generally. Based on the reports by users who experienced this issue, there are two cases around it:
  1. Users who try to reach a specific website or folder on the network
Some users encounter this error when they try to run the Network Troubleshooter. Even when they add the server name inside it, it still won’t identify the problem, and unpredictably, the driver seems to appear and disappear every now and then. And even after connecting, the network commands don’t work at all. This is really troublesome for users who have lots of PCs and all the other systems do not appear on the network.
  1. Remote Desktop isn’t able to find the computer HOSTNAME
Some other users reported that the error appeared when they use the classic remote desktop software. It keeps on failing and throwing the error message, “Remote Desktop can’t find the computer “HOSTNAME”. If this is the same scenario you are having, it means that “HOSTNAME” does not belong to the specified network. So you need to verify the computer name and domain where you are trying to connect to. There are times when it used to work after some users tried connecting to the domain a couple of times. However, when users try to use the UWP version of Remote Desktop, it seems to connect most of the time. This kind of problem is definitely a DNS issue. It could be that there are two different records on the DNS server which is why it connects and other times it doesn’t. When it is able to resolve the correct address, the drives connect to the PC however, after a couple of minutes, they will suddenly go missing. Using “nslookup” for the hostname, multiple times, you can check this and see if you’ll get identical results all the time.
nslookup [–SubCommand …] [{ComputerToFind| [–Server]}]
If you’ve determined that the drives disappear each time, you may have to change the DNS server or ask your admin to resolve the problem for you. Alternatively, you can also check out another option that has worked for a lot of users. This second option is disabling the IPv6 on the network adapter. In case you don’t know, Windows 10 prefers IPv6 over IPv4 so if you now have issues using IPv6 to connect to the servers, you can change your computer’s settings so that it’ll only use IPv4 instead of IPv6. To do so, follow these instructions:
  • Open Settings > Network and Internet > Ethernet > Change Adapter options.
  • From there, right-click on the adapter for where you want to disable it and then select Properties.
  • Next, look for the checkbox labeled, “Internet Protocol Version 6 (TCP/IPv6)” then uncheck it.
  • Now click on OK and restart your PC to save the changes made.
Read More
Malware Guide: How to Remove DownloadAdmin

What is DownloadAdmin/ Updateadmin?

As a digital creation of Blueis, the DownloadAdmin application peruses your computer system for programs/applications that are outdated. This program then makes the necessary updates/installation on your computer, as if it were the Administrator. While most people might consider this application harmful, scrutinizing the Digital Publisher/Creator of the application should be reason enough to remove DownloadAdmin (and any other associated program) from your computer. Why? Blueis is infamous for producing/distributing “adware type software”, according to herdProtect Anti-Malware. Is that not a plausible reason for you to remove applications associated with that publisher? Additionally, DownloadAdmin not only updates your outdated applications, but it installs additional programs - usually utility tools and search toolbars. This is a sly way to promote third-party software and to get ads loaded onto your computer system. Technical details about DownloadAdmin include:
Digital Publisher: Blueis Product Version: 4.0.0.1 Original File Name: DownloadAdmin Entry Point:  0x0000234A

Assessment of DownloadAdmin

For this assessment, the DownloadAdmin file was obtained and installed on a test computer. After the DownloadAdmin/Updateadmin application was installed, it made several modifications to the computer system. These modifications may class the newly installed file as a PUP (potentially unwanted program). Outlined below is what took place after the file was installed.
  • Updated an outdated application installed on the computer

Subsequent to the update made by Updateadmin, I thought the PUP had run its course. However, it was not quite finished. It was after scanning the contents/programs of my Local Drive, I stumbled on an additional program, one that I did not download or install, at least not intentionally. As predicted, the DownloadAdmin application scanned through the computer system (in the blink of an eye), during installation and made adjustments to an application already installed. This program was the Mozilla Firefox. Since Mozilla Firefox was rarely used on the PC in question, the DownloadAdmin application thought it quite appropriate to revive the Mozilla Firefox browser, by replacing it with the latest or more contemporary version.
  • Installed a search toolbar

While DownloadAdmin did request permission to install an updated version of my Browser, it provided no warning about installing a search toolbar. This is quite shady and deceptive. In addition to updating the Internet Browser, DownloadAmin also installed the SearchProtect toolbar (Conduit). This toolbar is no stranger to the market as I’ve encountered it on several occasions during my assessment of malware.

Should you remove DownloadAmin?

That decision is totally yours to make. However, here are some reasons why most people would consider that program unwanted
  • It updates your outdated programs

In most cases, at least those I’ve seen, if a user has a program installed, they don’t necessarily want a new version of that program. In fact, this PUP could spell trouble since some programs, especially paid, require a license to use the software. When that program is updated/ upgraded, you might have to acquire a new license to get it to work.
  • Unnecessary program

If you’re totally lackadaisical and loathe the idea of doing work yourself, this program might come in handy. Many users will update their computers manually by using Microsoft’s preinstalled/pre-programmed updater in their computer’s Control Panel. This option searches for and installs all the necessary programs to keep your computer safe and secure. The DownloadAdmin program only occupies needed space and resources on your computer. However, what’s good about this program is that it doesn’t operate at the start time so it doesn’t necessarily cause unnecessary lags on your computer.
  • Modifies your search experience

By installing a search toolbar called SearchProtect, Updateadmin modifies or changes the browsing experience you’re accustomed to. SearchProtect hijacks your browser and changes your homepage to their choice while removing yours. This is often hard to reverse since the publisher created this software to remain once installed. To completely remove DownloadAdmin from your computer, click here to download and install Spyhunter
Read More
Setup Voice control in Windows11

Computer voice control has moved a long way from its beginning routes and in today's age controlling your PC with voice is truly a reality and fully possible. Voice control is taking up the steam in everyday life, from simple commands in cars, Alexa, smartphones, TVs, etc. to modern computers.

voice control

Windows 10 has introduced voice control into PC with Cortana even during the installation process but a lot has changed from having a virtual assistant in begging days and in today's modern Windows 11 OS. You can now freely open apps, move, copy delete files, and even dictate in order to create a word document.

However, in order to take this advantage, you will need to turn it off first since it is disabled by default. Of course, you will need a microphone and some spare time to train Windows in understanding you properly.

Setting up Voice Control

Just like in Windows 10, in Windows 11 voice control is also in accessibility options and the first step is to turn ON Windows Speech Recognition.

Click on the Start button and type Settings into the search bar, click on Open, or press ENTER. On the left side of the settings, window locate and click on Accessibility. On the right part once Accessibility is selected scroll down and find a section titled Interaction and click on Speech. Turn on the switch next to Windows Speech Recognition.

A pop-up will appear that will lead you through the rest of the setup and that's it.

Improving Voice Control

In order to make your voice control better, if you are not satisfied with the results, you can sample more of your voice into the algorithm to tune it more to your liking. Sadly this option is still deep in Control Panel.

Click the Start button and type in Speech recognition into the search bar, look for the search result with Control Panel displayed under it, and click on Open. Click on Train Your Computer to Better Understand You and follow the instructions.

The process will probably take a few minutes. The more data you provide to the speech recognition model, the more accurate it will be when interpreting your instructions. You can train the model multiple times, and each time you do, it should improve the accuracy.

Read More
Cannot save media from Microsoft Photos
The Microsoft Photos app is a useful tool that allows users to view, edit, as well as create videos on their Windows 10 computers. Although it works just fine most of the time, there are some instances when you might encounter some issues when using it. One of these issues is when you cannot save media from the Photos app after you’ve edited an image. This is most likely related to a permission issue. However, according to some users, they got the error where the edited media file can’t be saved. When you encounter this kind of error, you will see the following error in your Photos app:
“It looks like you don’t have permission to save changes to this file. Try saving a copy instead.”
There are several options you can explore to resolve this error. You can try updating the Microsoft Photos app or verify the ownership of the destination folder. You can also re-register and reinstall the app. For more detailed instructions, make use of the options provided below.

Option 1 – Try to update the Microsoft Photos app

The first thing you can do to fix the problem is to update the Microsoft Photos app.
  • Open the Microsoft Store and click on the three horizontal dots for the menu located on the top right portion of the window to see the options.
  • Next, select Downloads and updates and then click the Get updates button in the top right. This will install any pending updates for all the apps including the Microsoft Photos app using the Microsoft Store.

Option 2 – Try to verify the ownership of the destination folder

The next thing you can do to fix the error is to verify the ownership of the folder because chances are, the location where you’re trying to save the file might not have enough permissions to read and write the file to the disk. Thus, you need to take ownership of the folder by following these steps:
  • Type “command prompt” in the Windows Search bar and then right-click on the relevant search result and select “Run as administrator”.
  • After that, if a User Account Control or UAC prompt appears, just click on Yes to proceed.
  • Next, type and enter this command: TAKEOWN /F <path>
  • Note that the <path> is the location of the folder or file in File Explorer.
  • Now type and enter this second command: ICACLS <path> /grant administrators:F
  • Finally, once the command has been executed, restart your computer and then see if you can now access the folder or file.

Option 3 – Try resetting the Photos app

If the first option of restarting the background process of the Photos app didn’t work for you, you can try to reset the Photos app so that it will use the default factory settings. Note that this option works when you are experiencing this issue after making a couple of changes in the Photos app.
  • To get started in resetting the Photos app, open the Windows 10 Settings.
  • Then go to Apps > Apps & features.
  • After that, scroll down until you see the Photos app option – click on it and open its Advanced options.
  • From there, you will see the Reset button, click on it and click and then click on it once more to confirm.
Note: The process may take a couple of minutes to complete. Once it’s done, open the pictures again using the Photos app.

Option 4 – Try reinstalling the Photos app

If none of the first two options given above worked, then you might want to consider reinstalling the Photos app. Unlike what most users think, it isn’t really that hard reinstalling preinstalled apps as you have the Windows PowerShell for that. To use this program in reinstalling the Photos app, follow these steps:
  • Open the Windows PowerShell program with admin privileges and key in the following command:
Set-ExecutionPolicy Unrestricted
  • After that, execute this second command to re-register and reinstall the Microsoft Photos app.
Get-AppXPackage -AllUsers | Foreach {Add-AppxPackage -DisableDevelopmentMode -Register "$($_.InstallLocation)AppXManifest.xml"}
Note: In the command given, do not forget to replace the “PackageFullName” with the actual package name for the Photos app. After executing the command, it will uninstall the Photos app from your computer so you need to install it again from the Windows Store by simply looking for it. Once you found it, just click on install to start the installation process.
Read More
A Quick Guide to Fixing Error Code 17

Error Code 17 - What is it?

Code 17 is a typical Spotify error code. Spotify is a music streaming service. Through this software, PC users can browse songs and search by artist, album, and playlist. Simply put, it is an audio player available for BlackBerry, iOS, and Microsoft Windows desktop. You may experience error code 17 if the process fails when downloading Spotify from the internet. The error message is displayed in any one of the following formats:
Error 17: Spotify has encountered a problem and needs to close. We are sorry for the inconvenience. Spotify could not be started (Error code 17)
Some of the symptoms of this error code are program crash, slow Windows performance, and periodic system freeze.

Solution

Restoro box imageError Causes

Error 17 may be triggered by several reasons such as:
  • Viral infection
  • Incomplete installation of Spotify software
  • Corrupt download
  • Registry corruption
  • Windows Installer service terminated
To use the audio player Spotify successfully on your PC, it is advisable to fix error 17 right away on your system. Delay may cause inconvenience and limit your access to your desired program.

Further Information and Manual Repair

To repair this error code on your PC, you don’t have to hire a professional or be a technical whiz yourself. The good news is that this error is quite easy to fix. You don’t need to be technically sound to resolve it. Here are some proven methods for you to fix error code 17 on your system. So let’s get started:

Method 1 - Make sure that the Windows Installer is running

Sometimes Spotify error 17 may occur if the Windows Installer service is terminated. Therefore before you download, make sure the Windows Installer is running. This is a good way to ensure the error code 17 messages don’t pop up on your PC again. For this here’s what you need to do, first quit all programs. Now go to the start menu and in the search box type RUN, and press enter. In the Open Box, type msiexec /unregister and then press OK to confirm. After that, perform the same steps again, and now in the Open Box type msiexec /regserver and press OK to save. Reboot your PC and try downloading Spotify again. If the program successfully downloads on your system, then this means error 17 is resolved. However, if the error code still persists, then try other methods given below.

Method 2 - Use System Restore to Undo Recent Changes

Another reason for the cause of error 17 is the improper or incomplete installation of Spotify. Improper installations can configure settings and also leave bad entries in the registries. To resolve, use System Restore utility built-in Windows. By using this system tool, you can undo recent changes and resume your computer to its previous condition as it was before the proper installation was attempted. To do this, go to the start menu, then in the search box type System Restore and press enter. Go to System Restore and choose a restore point. Once you’ve selected the point, reboot your PC to activate changes.

Method 3 - Remove Viruses

Viruses can enter and damage your PC if you download software programs from unknown websites. These not only damage your PC but also hinder your ability to install desired programs successfully in this case audio player Spotify. In such an event, simply use an antivirus to remove all viruses infecting your system. After they are removed, make sure you download and install Spotify software from a trusted website.

Method 4 - Repair the Registry

Another cause of error 17 is registry corruption. This occurs due to bad entries, invalid and junk files saved in the registry. To fix the corrupt registry simply download Restoro. This is a user-friendly PC Fixer embedded with a powerful registry cleaner. This software is compatible with all Windows versions. The registry cleaner detects all registry issues, removes all file corrupting the registry, and cleans it immediately in just a few clicks. Click here to download Restoro on your PC and resolve Error 17.
Read More
Fake Windows 11 installers come with malware
Being in the Microsoft Windows insider program will let you get a hands-on new Windows 11, but some people just want Windows 11 without being in the insider program. Well, people beware! It was detected that some groups have been releasing fake Windows 11 installers with malware into them. There’s one malicious file called 86307_windows 11 builds 21996.1 x64 + activator.exe. Based on the filename, one might guess that it includes Windows 11 build 21996.1, and on top of that, there’s something in it that will automatically activate Windows for you. It comes in at 1.75GB, so for some people, that might seem reasonable. It starts out looking like a normal installer, and then there’s a second installer that calls itself a download manager. If you accept the nonsense agreement that’s included, you get a bunch of malware. This is just one example of malicious installers running amok internet, but there are more of them with different software placed inside. Malware can be anything from adware to a Trojan virus. The adware usually isn’t super dangerous. It’s just malware that’s meant to inject your PC with advertisements. Viruses can be more of an issue, and they can be harder to get rid of if your machine is infected. Windows Defender does a good job of getting rid of this stuff. The only problem is that if you’re downloading Windows 11 from shady sources, you’re probably already set to click through the dozen or so warnings that pop up telling you not to install it. The solution will be to get Windows from a trusted source of roll inside the insider program and get it from Microsoft directly.
Read More
How to fix Windows 10 Error 0x803f7000

Error code 0x803f7000 -What is it?

Error code 0x803f7000 refers to an issue in Windows 10 with downloading apps through Windows Store. When you choose the app or game to download, it heads to Downloads in the Store app. Then it says it is acquiring a license but then fails. When you click the “See details” link, you see the error code 0x803F7000. It could mean that the date and time or region settings in your Windows 10 are incorrect or there are some problems with the Windows Store Cache.

Symptoms

  • This error appears when you are running Windows 10 and trying to download an app through the Microsoft store. The error code may appear with this message: Something went wrong. The error code is 0x803f7000, in case you need it
  • You might also see this message along with the error code: "It looks like you've reached your device limit for installing apps and games from the Store on your Windows 10 device. If you want to install apps and games from the Store on another Windows 10 device, remove a device from the device list."

Solution

Restoro box imageError Causes

There may be several reasons for this error:
  1. This problem may arise if the date and time in Windows 10 are incorrect.
  2. If the region has been set incorrectly.
  3. Problems with Windows store cache.
  4. Windows store server overloaded.
  5. The Windows version you are using is pirated.

Further Information and Manual Repair

Method 1:

Correcting date and time:
  • Open up Control Panel > Clock, Language, and Region.
  • Then click on Date & Time.
  • Now click on Change date & time to correct your time.

Method 2:

Correcting region:
  • Navigate to Control Panel > Clock, Language, and Region.
  • Then click on Region.
  • Then click on the Location tab.
  • Now set your actual region from Home location section.
  • Click Apply & OK.

Method 3:

Resetting Windows Store:
  • Press Windows Flag Key + X from your keyboard. Then select Command Prompt (Admin). It will launch Command prompt as administrator.
  • Then type wsreset and hit Enter.
  • Wait for a few seconds. It will automatically open Windows Store.
  • Then try to download any apps.

Method 4:

  1. Open Command prompt in local machine and type in the Windows Store reset tool exe
  2. Activate Windows by going to Settings>Updates and Security
  3. Run the Modern UI/metro app troubleshooter from Microsoft
  4. Keep trying it several times.
  5. Try changing locale and time zone to the United States as shown below
  6. Go to control panel, Language settings
  7. Select location to the United States
  8. This will reset the language to US English. After this try downloading the apps again.
  9. Try restarting the Windows Updater service or restart the machine once.
You must make sure that you have a good internet connection. You need that for the updates and downloads complete without disruption.

Method 5:

Make sure the app isn’t blocked by the Windows firewall: To make your PC more secure, some apps are blocked by Windows Firewall by default. For proper functioning, you might need to enable an app to receive info through the firewall. For more info, see the "Allow an app to receive info through the firewall," and follow the procedure from start to finish.

Method 6:

Check with your system admin: If your PC is part of a network in an organization, like a business, school, or government agency, your system administrator might have turned off the use of certain apps using the Group Policy. Contact your system admin if you believe that Group Policy is preventing you from using an app.

Method 7:

Make sure your apps are up-to-date: To make the apps working properly, you must keep your apps up-to-date. This could be done by turning on automatic updates in the Windows Store.

Method 8:

Contact the app publisher To view the publisher’s app support info, follow these steps:
  1. On the Start screen, tap or click Store to open the Windows Store.
  2. Search or browse for the app, and then tap or click it.
  3. Scroll to the Details section of the app's description page, and then tap or click the support link for the app under Learn more. The link will open an email message for you to contact support or will take you to a support website.
If you do not possess the technical expertise required to accomplish this yourself or do not feel comfortable doing so, download and install a powerful automated tool to get the job done.
Read More
How to map a network drive in Windows 11
windows 11 network drive
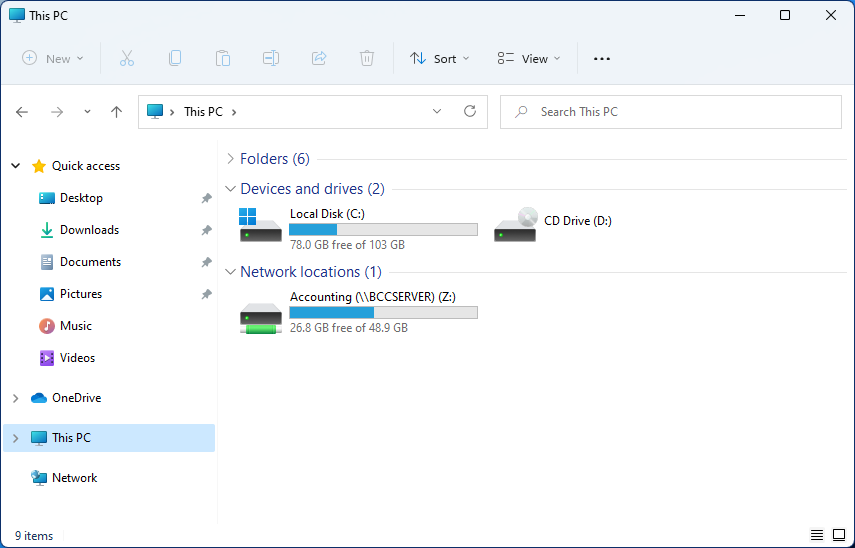
Mapping network drive has many benefits in terms of speed and ease of access of files via network. It lets you access the hard drive over the whole network like it was the hard drive inside your PC case. In order to easily and quickly map a folder as a network drive follow the guide below.
  1. Open File Explorer
  2. Click on the three dots icon in the Toolbar
  3. Select Map Network Drive
  4. Click the Drive drop-down menu
  5. Select a driver letter that you wish to assign as a network drive
  6. In the folder field enter network device and share name (click on browse to see all devices on local network)
  7. Check the box beside Reconnect at sign-in if you wish to automatically connect to a network drive on Windows startup
  8. Check Connect Using Different Credentials if you wish to connect to a network drive using different credentials that one used to login into Windows.
  9. Click Finish
After finishing setting Windows 11 will try to connect to the network drive and if successful drive icon will appear inside File Explorer and the drive will open up to see its content. If for any reason it cannot connect try checking user credentials, cables, network adapters, etc.
Read More
1 2 3 171
Logo
Copyright © 2023, ErrorTools. All Rights Reserved
Trademark: Microsoft Windows logos are registered trademarks of Microsoft. Disclaimer: ErrorTools.com is not affiliated with Microsoft, nor claims direct affiliation.
The information on this page is provided for information purposes only.
DMCA.com Protection Status