A newfound bug in Google docs is causing it to crush and upon reopening it will crush again making it very difficult to re-access your document. The bug is manifested when a series of the same word is typed into a document and Show grammar suggestion is turned on.
How was it found
A Google Docs user, Pat Needham brought up the issue on Google Docs Editors Help forum.
"I've only tried in Google Chrome, with documents from three separate Google accounts (personal, G Suite Basic, and work one which might be enterprise). All three experience this same issue".
"It's case-sensitive. So trying with 'and. and. And. and. And.' doesn't cause it to crash."
While Needham publicly reported the bug, it appears that the issue was discovered by Eliza Callahan who was writing a poem novel for her novel using Google Docs.
Needham's findings have also been confirmed by other users running Firefox 99.0.1
Another user, Sergii Dymchenko, said strings like "But. But. But. But. But." triggered the same response. Some also noticed putting any of the terms like "Also, Therefore, And, Anyway, But, Who, Why, Besides, However," in the same format achieved the outcome.
A YCombinator HackerNews reader suspected the cause to be the "Show grammar suggestion" option in Google Docs.
A Google spokesperson confirmed the presence of the issue adding, "we're aware of this issue and the team is working on a fix."
How to recover your document
First thing first, turn off Show grammar suggestions so you do not run into issue by accident. In order to turn it off go to Tools and then into Spelling and grammar and untick Show grammar suggestions.
Now, if you already have a document that has been crushed, fear not because there is a workaround to access it. For some strange reason this bug does not manifest on Google Docs mobile app, so you can open the crushed document in the mobile app, delete words that have caused the bug and reopen the document on your desktop.
Until Google comes up with the solution this is currently the only way to address the issue.
Rundll Error, DLL is also known as Dynamic Link Library is a Window library that basically consists of instructions and codes used and shared by multiple programs installed on your system. It helps programs load and run smoothly.
Rundll error is generated when the system fails to access DLL files thereby hampering your ability to successfully run your desired program.
Solution
Error Causes
The rundll error code is triggered due to multiple reasons such as:
DLL file affected by virus and malware
Poor program installation
Invalid Windows registry entries
It is advisable to fix the run.dll error immediately without any delay because this error exposes your PC to serious threats such as system crash, freeze, failure, data loss, and even privacy threats like cybercrime, data breaches, and identity thefts.
Further Information and Manual Repair
To resolve the rundll error on your system, here are some solutions that you can try:
Solution 1: Reboot your System
Sometimes rebooting your system can also resolve the issue. However, if it doesn’t then you need to try some other solution to fix it.
Solution 2: Identify the Program Triggering the Error
To fix rundll error, the first thing that you need to do is to identify the program generating this error and check it for validity. For this, simply analyze the rundll error dialog box. Let’s say you get the following run.dll error on your system Error loading
C:\WINDOWS\system32\usvdgpo.dll.
This error message indicates that the program ‘usvdgpo’ is causing the run.dll error on the system.
Once the program is identified, the next step is to stop it manually. For this, you go to the start menu and click run, now type ‘services.msc’ in the dialog box, and press ‘Enter’.
After that right-click the related process to your rundll error and then click the ‘Stop’ button to stop the program. Now close the window.
Though this action will stop the process it will not remove the reference to the bogus items. To remove that you will have to remove the program from the Windows Registry. This can be done by typing ‘Regedit’ in the Run dialog box.
This will open the registry editor. From the keys listed in the left panel, navigate to the following key: HKEY_LOCAL_MACHINE/Software/Microsoft/Windows/CurrentVersion/Run.
Now right-click on this key and click delete and then simply close the windows registry and reboot your system.
After this, you will then have to uninstall the program to completely eradicate the rundll error. To do this, go to the control panel, Add/remove programs, and right-click to uninstall the program causing the run.dll error on your system. Click yes to confirm your decision.
Once the program is uninstalled, reinstall the program using the program CD to get yourself an error-free program.
This procedure is tricky, time-consuming, and maybe slightly challenging for you especially if you are not a computer programmer.
Solution 3: Run an Antivirus
If the cause of the run.dll error is a malware attack then you need to download an antivirus and run it on your system. However, this may impact the speed of your PC.
Antivirus is notorious for slowing down PC speed.
Solution 4: Download Restoro.
If you are not a computer programmer, then running Restoro is possibly the easiest way for you to resolve rundll errors on your system in seconds. Restoro is an innovative, cutting edge, and multi-functional feature-filled PC repair tool that can be used to repair all kinds of system-related errors including rundll errors.
The registry cleaner utility cleans up the RAM by removing unnecessary and obsolete files like junk files, invalid registry entries, and files from the uninstalled programs. It resolves disk fragmentation issues, repairs dll files, and the registry.
In just a few clicks you can easily repair the registry and remove malware thereby resolving rundll errors on your system. Operating Total System Care is quite simple. It has a user-friendly interface and easy navigation.
It is safe, efficient, bug-free, and compatible with all Windows versions
Click here to download Restoro and resolve ‘rundll errors’ and access/run programs on your system smoothly.
If you are trying to copy a file but suddenly encountered an error message saying, “An unexpected error is keeping you from copying the file”, then you’ve come to the right place as this post will help you resolve the problem.
This error comes along with another message that states, “Error 0x80070037: The specified network resource or device is no longer available”. This kind of error occurs when the power supply to the external device is weak and causes the device to be disconnecting and reconnecting consistently. To fix this problem, you need to check out the potential fixes provided below.
Option 1 – Try to physically check the USB ports
You need to check the USB ports as there could be some ports that are loose or damaged physically which affects the overall performance of the port. You could also try to change the USB port since modern computers have a variety of USB ports. So if your USB drive supports USB 3.0 or 3.1, make sure that you plug it inside a USB 3.0 or 3.1 ports. If you’re not sure which port, just keep in mind that the USB 3 port is usually blue or you can also use your computer’s documentation or manual as a reference to locate it.
Option 2 – Check the connected cables physically
Aside from the USB ports, you also have to check the physical status of the connected cables because if there are damaged ones, just like with USB ports, it would also affect the overall connectivity of the device with the computer. So if you notice some irregularities in the connecting cable physically, you might have to buy another one and replace it and then see if it fixes the problem or not.
Option 3 – Update or reinstall the Universal Serial Bus Controller driver
Since it could be a driver issue, you can try to update or reinstall the Universal Serial Bus Controller drivers using the Device Manager. Refer to the following steps:
First, click the Start button and type “device manager”.
Then click on the “Device Manager” from the search results to open it.
From there, look for the “Universal Serial Bus controllers” option and then right-click on each one of the USB drivers and select the Update Driver from the menu.
Note: If it is a regular USB drive, then it will be listed as a USB Mass Storage Device but if you have a USB 3.0 device, then look for a USB 3.0 Extensible Host Controller.
Restart your PC and then click the “Search automatically for updated driver software” option.
Note: If updating the USB Controller drivers didn’t work, you can try to reinstall them instead.
Option 4 – Try connecting to a slower USB port
If connecting your device to USB 3.0 or 3.1 ports didn’t work, you might want to try connecting it to a slower USB port this time. There are times when the device is not capable of supporting the higher power supply from a USB 3.0 or 3.1 port which is why the weak circuits do not work properly. Thus, try connecting your device to a USB 2.0 port and check if your device is now working.
Option 5 – Try to turn off the Power Saving option
You could also try to turn off the Power Saving option to resolve the problem. All you have to do is switch to Power Management after you select the Properties of the USB device and from there, uncheck the “Allow the computer to turn off the device to save power” option. On the other hand, if you are using a laptop and did not use the USB device for a long time, then it could be powered off. This will ensure that the system does not turn off the USB device.
Option 6 – Try to connect your device to another computer
It is also possible that your computer does not support your device. To check that possibility, you can try connecting your device to a different computer and see if it is working without any issues. If it is, then you need to get another device that’s compatible with your computer.
Option 7 – Try to use a different device
You could also try using a different device and connect it to your computer. This will help you figure out if your device is damaged or not. So if the other device you connected is working just fine, then you might have to replace your device with a new one or consult an expert and have it repaired if possible.
Option 8 – Run the Hardware and Devices Troubleshooters
The first thing you need to do is click on Start and then on the gear-like icon to pull up the window for Settings.
After opening Settings, look for the Update and Security option and select it.
From there, go to the Troubleshoot option located on the left-hand side of the list.
Next, select Hardware and Devices from the list and open the Troubleshooter and run it. Once it is doing its job, wait for it to complete the process and then restart the system.
After the system restarts, check if the problem’s now fixed. If not, refer to the next option given below.
Windows 10 is undeniably one of the great operating systems and the same thing can be said about a lot of computers that are running it. However, there are instances when things don’t go as you expect them to be. One of the many issues you might face when using Windows 10 is the inability to upload any pictures over the web. If you are facing this issue right now, you are not alone for a lot of users have suffered from the same problem at least once. Even though it might seem like a minor problem, some users find it inconvenient especially the ones who often upload pictures online. Worry not though for this post will guide you on what you can do if you aren’t able to upload any images to websites on your Windows 10 computer.
To get started in troubleshooting the problem, here are some suggestions that might help:
Option 1 – Try to clear browser cache and try downloading again
There are times when some data in the browser is conflicting with the loading of the website and triggers some problems like not being able to upload pictures to websites. And so you can try to clear your browser’s data. This might be a very basic solution but oftentimes it works in fixing this kind of odd problem in your browser.
Option 2 – Open your browser in Incognito Mode
The next thing you can do to fix the problem is to try opening the web page in Incognito Mode. When your browser is in this mode, it will work without extensions. This would help in fixing the problem especially if it was caused by some extension or toolbar in your browser. All you have to do is open any web page in Chrome and tap the Ctrl + Shift + N key combination to open a window in Incognito Mode.
Option 3 – Try to disable and get rid of the problematic extension
The next thing you can do after trying the Incognito mode in your browser is to see if a browser extension is the one that’s causing the problem. And if you have installed a lot of browser extensions, then identifying which one is the culprit may take a while but not too long. Once you’ve identified the culprit, you can get rid of that browser extension and see if you can now upload pictures on websites.
Option 4 – Try to reset your browser
You might also want to reset your browser as it could also help in resolving the issue. To reset your browser, here’s what you have to do:
Google Chrome
Open Google Chrome, then tap the Alt + F keys.
After that, click on Settings.
Next, scroll down until you see the Advanced option, once you see it, click on it.
After clicking the Advanced option, go to the “Restore and clean up option and click on the “Restore settings to their original defaults” option to reset Google Chrome.
Now restart Google Chrome.
Mozilla Firefox
Open Mozilla Firefox and tap Ctrl + Shift + A to access the Add-ons Manager.
In the Extensions, menu Remove the unwanted extension.
Restart the browser and tap keys Alt + T.
Select Options and then move to the General menu.
Overwrite the URL in the Home Page section and then restart the browser.
Internet Explorer
Launch Internet Explorer.
Next, click the wrench icon for Settings.
Then click Internet Options.
After that, go to the Advanced tab.
From there, click the Reset button. This will reset Internet Explorer’s settings to their default condition.
Now click OK to save the changes made.
Restart your computer.
Option 5 – Update your browser or switch to another one
The last option you can try is to update your browser. You can do it by checking for any available updates from its official site and then install it. However, if updating the browser did not help, you might want to consider switching to another browser.
If you receive an error message saying, “File System Error 2147219196” when trying to open a picture, access a file or when moving a folder on your Windows 10 computer then read on as this post will help you resolve this error. According to experts, this error started to appear right after the Windows Update v1803 was released. Users who installed the new Windows version faced the same dilemma.
This error might be caused by a corrupted disk or it could be due to some broken Windows components or due to file system encryptions. Before you troubleshoot the problem, make sure that you are logged in as an administrator.
Option 1 – Update Windows
The first thing you can do to Resolve File System Error -2147219196 is to update Windows. Since Microsoft is already aware of this issue, they might have already released a fix for this in one of their new updates so make sure to check for any available updates on your computer and have it installed right away.
Tap Win + S to open Search then type “update” in the field and from the search results that appear, click on Windows Update.
After that, it will open Windows Update under Settings and from there click the Check for Updates button and let Windows check for any available updates.
And if there are any updates available, download and install them on your Windows 10 computer.
Restart your PC and check if the error is now fixed or not.
Option 2 – Run CHKDSK to check your disk for errors
When it comes to some issues concerning the hard drive or removable devices, there is a utility in Windows that might help which is called “chkdsk”. This error check utility can help with several issues in the system including File System Error -2147219196.
Tap the Win + S keys to open the Search box.
Then type “command prompt” in the field and from the search results that appear, right-click on Command Prompt and select “Run as administrator”.
After opening an elevated command prompt, copy and paste the following command and hit Enter:
chkdsk /r /f
Now if you are prompted to run CHKDSK after your reboot your PC, just tap Y and reboot your PC.
If CHKDSK is not able to find any errors, tap the Win + E keys and navigate the access window. From there, right-click on the concerned drive and click on Properties.
After opening Properties, click on the tab Tools and then click on the “Check” button under the Error-checking section.
Wait until the process is completed and then restart your computer.
Once your computer has restarted, try accessing the file and check if the error persists.
Option 3 – Disable the File System Encryption
File System Encryption allows you to encrypt drives to protect them from being accessed from another computer. This is the standard practice in various organizations in order to protect their data. However, there are times when the file encryption system caused issues for users in accessing files and throws the File System Error -2147219196 instead which is why you need to temporarily disable it to access your file. To do so, follow the steps below.
Tap the Win + R keys to open the Run dialog box.
Then type “control” in the field to open Control Panel.
From there, navigate to Security and select the BitLocker Drive Encryption option from the list.
After that, make sure that all your drives are not encrypted and if any of them are encrypted, turn off encryption by selecting Turn off BitLocker.
Reboot your computer for the changes to take effect.
Option 4 – Run SFC scan
Tap Win + R to launch Run.
Type in cmd in the field and tap Enter.
After opening Command Prompt, type in sfc /scannow
If you spend a large amount of time gaming or working on a computer gaming chair is a very important asset. One other thing that is mostly looked past but could help greatly is a good desk. A great chair accompanied by a great desk can make your long sitting sessions more pleasant and more healthy which is very important in the long run.
Hey, but it is only a desk, what is so special about having an expensive desk? Well truth to be told desk is just a desk and any kind of desk can serve the purpose of hosting a keyboard, mice, and screen. But a good desk will offer some other advantages that may not seem so important but they could mean a lot like adjusting desk height so it fits perfectly on your size and sitting position making long hours more pleasant and lower stress on hands sitting on it.
Advanced desk features
Bytezone might not be a company that will sound familiar to you, mostly because they manufacture gaming chairs and desks, now in the gaming chairs world there are a lot of competitors and Bytezone has managed to make a name for itself despite this fact. But they are more popular in their gaming and office modern-looking desk category.
The advanced desk is made from carbon steel and plastic combination, it is very durable and it weighs 27kg. Now that is not really light but it is not very heavy if we compare it to wood desks. The top layer of the table is made from easy-to-clean material and the desk comes with a large mouse and keyboard pad.
The table itself includes a cup holder, headphones bracket under the table and it has a cable management drawer in the back. The desk is sized 66x120x76 cm. Also for anyone interested desk itself comes also with RGB lights for that true gaming feel.
Anxiety from all these digital threats lurking everywhere? An antivirus program can help put your mind at ease.
What can a virus do to your device?
A virus is malicious software that can affect pretty much any device and does so in a variety of ways. Be it your computer, your phone or your smart lightbulb - as long as there’s access to the internet, malware can get to it.
How exactly does this kind of attack manifest itself? Well, there’s a wide variety of effects ranging from mild to severe. Among other things, they depend on which type of malware attacks your device - a virus, spyware, ransomware, adware or something else.
These are some of the things you can expect to happen:
Slow performance
System crashes
Theft of data and sensitive information
Connectivity issues
Constant browser redirects
Strange messages sent to your contacts
Interference with files
It really can be the stuff of nightmares. So, if you want to sleep peacefully knowing that your devices are completely safe, you should definitely consider getting an antivirus.
P.S. don’t let its name fool you - an antivirus does indeed protect your devices against more than just viruses.
What is antivirus software exactly?
Antivirus software is designed to help you battle and ward off malware. Basically, it scans your device to detect any suspicious activity and offers tools to get rid of the culprit.
At first, antiviruses were developed to fight against viruses only, but nowadays they cover a lot more ground. Here are some of the biggest benefits of getting yourself a powerful defender.
Advantages of antivirus software
1. It fights those pesky ads
Look, constant ads that pop up everywhere aren’t the absolute worst thing that can happen on your computer. If anything, they are annoying, like when you’re trying to sleep but that one fly in your room just won’t stop buzzing.
Now, there’s a free, well-established solution for that - installing an ad blocker. And we’re about a hundred and ten percent sure you’ve already done that on each and every browser you use.
However, “if I can’t see it, it doesn’t exist” isn’t the most ideal approach for your online safety. Ad blockers can’t block everything and they won’t protect you from potential adware. An antivirus on the other hand offers that layer of protection against malware snuck into pop-ups and spammy websites.
2. It protects you from hackers
Hackers don’t target government institutions only. They’ll target regular people too if they have something to gain.
Credit: Clint Patteron (Unsplash)
There are different types of hacking, such as phishing e-mails, transmission of malicious programs, credential reuse, denial of service and more. In any case, they take control of your device and hijack your data.
The good thing is that, as threats evolve, antiviruses evolve too and there are tons of quality programs on the market that can keep you secure for an affordable price.
3. It keeps your files and data safe
When malware enters your device, it can target pretty much any file and get access to any and all data.
Installing an antivirus program will make sure that every single file, new or old, is monitored at all times, warning you against threats immediately. That way, you can make sure to react before your other files become infected and data is lost or stolen.
Another great thing for data protection is that the best antivirus software normally comes with a password manager, so no one can use malware to steal your passwords.
4. It blocks all kinds of malware
As we already stated, malicious attacks can be performed in many ways and malware comes in in different shapes an sizes, such as:
Trojan horse
Spyware
Ransomware
Adware
Rootkit
RAT (remote access Trojan)
Keyloggers
Worms
Botnets
Credit: Growtika (Unsplash)
Nowadays, antivirus software is designed to fight against all of these types. That’s why more often than not we hear the term 'antivirus' used interchangeably with 'anti-malware,' like in this article.
5. It keeps your children protected
You can’t keep your eyes on your kid every second of the day and you can’t protect them from everything. But at least you can limit their exposure to the threats they can encounter at every corner of the digital world.
An antivirus program will block harmful or suspicious websites and ads, which is great both for you and your children. To take it a step further, though, many such programs come with special parental controls and offer monitoring as well. It’s a great solution for keeping your kids safe online without sounding like the irritating, overbearing, controlling parent who “just doesn’t get it!”
How to pick one
There are definitely lots of different antivirus programs out there, both free and paid. We recommend you look for a paid option, since free ones are unfortunately a lot more susceptible to being compromised through malicious attacks.
Now, there are a few factors to consider when choosing the right software. If you use your PC for basic things then a basic antivirus will suffice. However, the more complex your use and the more sensitive the data you deal with, the stronger it needs to be.
It’s also crucial that you take into account the features it includes. As we already mentioned, some programs have additional security options. For example, depending on the package you select, Bitdefender provides:
Some are included in plans and some are separate products, so make sure to check out all the offers.
And don’t worry if you have multiple PCs or you’re looking for protection for your smartphone or tablet as well; Bitdefender has suitable solutions for your needs. Of course, you can also just pick their classic antivirus software if you’re not in need of advanced protection.
Another important point is how regularly the software is updated and enhanced. The more frequent the updates the better, as bugs can make the program more vulnerable. Other things we advise you consider are user-friendliness, impact on performance, reputation (user reviews especially) and, of course, price.
The bottom line
Fact is: anyone can be a malware victim. Don’t let it be you.
You can’t put a price on peace and security, so don’t be reluctant to pay for yours - especially since a lot of options out there are extremely affordable. Is $159.00 a year really too much to pay for cross-platform protection for up to 10 devices? We don’t think so.
Explore your options and protect your files and data before it’s too late.
While running your Windows 7/Windows Server 2008 R2, your system suddenly stops responding out of complete randomness and you see an error message popping up which says something like this:
The stop error 0x00000050 signifies that there’s a PAGE_FAULT_IN_NONPAGED_AREA problem. If you’ve seen this error on different occasions then you will find the parameters in the message to be varying. That is because they are dependent on your PC’s configuration. Not all Stop errors "0x00000050” occur due to a single issue.
However, the most common problem which is encountered which results in the stop error popping up is due to a pool corruption occurring in the Srvnet.sys file.
This issue might be caused because of software incompatibility or a defective physical memory which resulted in requests for data for a hardware driver or service which was not found in the memory.
If you find the error occurring after you’ve installed a new application or a device driver then you should access Safe Mode and uninstall, disable or remove that application or driver.
Further Information and Manual Repair
In order to fix this issue, you should try booting your computer to the “Last Known-Good Configuration” as listed during startup.
For this you have to follow the below-mentioned steps:
Start your system.
When you see the message which says “For Troubleshooting And Advanced Startup Options For Windows, Press F8” hit F8 and proceed.
Use the up and down arrow keys to highlight “Last Known-Good Configuration” and hit enter (This method will only work if your system boot was not successfully carried out ever since you made any specific changes).
When you are starting the computer, press F12 and proceed with the PSA/32 Bit Diagnostics.
Do the following so that a clean boot can be performed:
Go to the Start menu when the Windows 7 desktop shows up.
On the search bar, type “msconfig” and hit search.
Disable all the applications which are listed on the “Startup” tab.
Now head over to the “Services” tab and mark the option which reads "Hide all Microsoft Service".
Select the “Disable All Services” option.
Apply the changes by clicking on “Apply” then restart your PC. You should now check the performance of your computer. If you don’t see a BSOD then you start re-enabling all the Services and Startup applications one by one until you finally figure out which one is causing the BSOD to appear.
Dnssd.dll is a type of dynamic link library. It is developed for Windows Operating System by Apple Computer Inc.
The latest version of fnssd.dll is 3.0.0.10 used in Windows Vista. This file also functions like a typical dynamic link library. DDL files are small programs similar to executable files which are used by multiple programs to load and run properly.
Dnssd.dll error occurs when the dnssd.dll file fails to function properly and load to run the desired application/program. The error may occur most often during computer startup and program startup.
The dnssd.dll error message may be displayed on your PC on either one of the following formats:
"Dnssd.dll not found."
"Dnssd.dll Access Violation."
"Cannot register dnssd.dll."
"The file dnssd.dll is missing."
"Cannot find C:WindowsSystem32\dnssd.dll."
"This application failed to start because dnssd.dll was not found. Re-installing the application may fix this problem."
"Cannot start Bonjour. A required component is missing: dnssd.dll. Please install Bonjour again."
Solution
Error Causes
To narrow down the cause of the dnssd.dll error is difficult virtually because there are multiple reasons why this error occurs on your system. However, here are the most common causes for this error:
Missing Dnssd.dll file
Corrupt and damaged Dnssd.dll file
Invalid dnssd.dll registry entry
Viral Infection
Improperly shutting down your PC
Poor PC maintenance
Broken registry keys
Hardware failure
Dnssd.dll file deleted when uninstalling another program
It is advisable to fix this error right away, as it can create many troublesome problems on your PC such as slow system performance, computer freeze up, blue screen of death errors, system failure, and crash.
Further Information and Manual Repair
Here are some of the best and easiest DIY solutions that you can try to resolve this issue on your PC without hiring a professional.
1. Use System Restore Function
Since this error largely indicates poor PC maintenance, it is advisable to use the System Restore function built-in Windows to resolve the Dnssd.dll file error.
It will help you restore the system back to its previous healthy status. It can also help you get a fresh copy of damaged and corrupted files. Here’s what you need to do:
Go to the start menu of Windows, type restore in the search box.
Choose the option that says ‘choose a different restore point’ this presents customizable options for users.
Here you will be presented with a list of restore points, choose the one that you believe has most likely caused the dnssd.dll error.
Confirm your selection.
This will help resolve the error. Now restart to see changes made. If the error still persists then try other solutions given below.
2. Reinstall the Program Causing the Dnssd.dll Error to Pop Up
As dll files are shared files, there is a possibility that the file got deleted when you tried to uninstall a certain program. Therefore, if this is the reason, then try to reinstall the program that is causing the error message.
By doing so, you can set up the dnssd.dll file again on your PC.
3. Scan for Viruses and Registry Issues
Other reasons for the error are associated with viral infection and registry issues. Therefore it is advisable to download software to scan for these issues and remove them from your PC. Viruses can also corrupt dll files.
On the other hand, dll errors like Dnssd.dll can also occur if the registry is not cleaned frequently.
The registry becomes corrupt due to the accumulation of invalid/wasted and irrelevant files. This also causes disk defragmentation and hard disk problems which can also lead to hardware failure and dll file damage and corruption.
Now to repair it you can either download 2 different programs, an antivirus, and a registry cleaner, or you can install multi-functional and advanced software, Restoro.
Downloading 2 separate programs can reduce your PC performance even furthermore. Therefore we recommend you opt for Restoro.
This is a one-stop solution for all your PC problems. It includes multiple utilities like an antivirus that detects all malicious software including spyware, malware, adware, Trojans, and viruses.
A powerful registry cleaner that resolves all registry issues, wipes out bad registry entries and repairs broken registry keys, damaged dll files like Dnssd.dll, and restores the registry back to its optimum health.
This software also functions as a system optimizer that boosts the speed of your PC dramatically.
It is safe, bug-free, and efficient. All PC issues are resolved in seconds in just a few clicks. It is user-friendly and compatible with all Windows versions.
Click here to download Restoro and resolve the dnssd.dll file error right away!
If you like to travel but you do not have a navigation device and a place where you are traveling does not have internet coverage do not worry, Windows offline maps are here to help.
Traveling in today's world often requires that we have some sort of navigation system, wherever that be a dedicated navigation device, maps on your mobile phone, or something similar.
Maps on mobile-phone are nice but they drain the battery of the phone fast and being on a road might require that we have access to our phone, just in case of an emergency call, and dedicated navigation devices often cost a lot of money. Lucky for us Windows comes with a maps feature where you can check local maps and orientate with their help and even if you are in an area where you do not have internet coverage you can still use maps via offline mas mode in Windows.
This feature will require that you sacrifice little HDD space because you will need to download maps that you will need and some time preparing in order to find and download maps that you will need but in the end, it is worth it, you have a full map system completely offline and independent of the internet.
So in order to prepare all maps that you will need, follow this guide step by step and enjoy your trip.
Select Settings from the Start menu.
Click System.
Select Offline maps.
Click the + button next to "Download maps".
Select the continent where your desired country is located.
Select the region you want to download. Depending on the area, you can download a whole country or you'll have to drill down to a smaller region (for example, with Canada and the USA).
Repeat for any additional regions you want to have as offline maps. You can download more maps while other maps are currently downloading.
The Local Security Authority Subsystem Service or LSASS.exe is a process in the Windows operating system that is valuable as it enforces the security policy on the computer. Every time you log in to the Windows Server, the LSASS.exe is the one that handles the password changes and creates the access tokens while updating the security log. However, it is also frequently targeted by malware and is often imitated. The original location of this file is at “C:/Windows/System32” so if you open the Task Manager and notice that a process with a similar name has a different location then it is definitely a threat and is exploiting the security of your computer.
To resolve issues related to LSASS.exe, here are some fixes that could help.
Option 1 – Use the Performance Monitor’s Active Directory Data Collector
Note that this option will only work on the recent Windows server versions. Refer to the steps below to use the Performance Monitor’s Active Directory Data Collector set on your computer.
Tap the WINKEY + R button to open the Run dialog box.
Then type “Perfmon.msc” in the field and hit Enter to open the Performance Monitor and from there open the Server Manager.
Next, navigate to Diagnostics > Reliability and Performance > Data Collector Sets > System from the left side of the navigation bar.
Then right-click on “Active Directory Diagnostics” and select Start from the context menu. This will take about 5 minutes or 300 seconds depending on the performance capabilities of your hardware to gather the data required and then take some more time to compile a report from the gathered data. Note that these timings are dependent on one another.
After the report is compiled, you can find it under Diagnostics > Reliability and Performance > Reports > System > Active Directory Diagnostics. The report will contain all the information as well as conclusions. However, it does not mean that it will also contain the exact cause of the problem with LSASS.exe. Nevertheless, it should help you in fixing the problem.
Option 2 – Try to run the System File Checker
System File Checker or SFC is a built-in command utility that helps in restoring corrupted files as well as missing files. It replaces bad and corrupted system files to good system files that might be the cause why the LSASS.exe file is having some issues. To run the SFC command, follow the steps given below.
Type “cmd” in the Start search and then right-click on the appropriate search result.
Next, select “Run as administrator” to open Command Prompt with admin privileges.
After opening Command Prompt, type in sfc /scannow
The command will start a system scan which will take a few whiles before it finishes. Once it’s done, you could get the following results:
Windows Resource Protection did not find any integrity violations.
Windows Resource Protection found corrupt files and successfully repaired them.
Windows Resource Protection found corrupt files but was unable to fix some of them.
Now restart your computer and see if the problem is fixed or not.
Option 3 – Put your computer in a Clean Boot State
If none of the options given above helped, you can try putting your computer in a Clean Boot State as this can help you in finding any incompatible programs that’s causing the problem.
Log onto your PC as an administrator.
Type in MSConfig in the Start Search to open the System Configuration utility.
From there, go to the General tab and click “Selective startup”.
Clear the “Load Startup items” check box and make sure that the “Load System Services” and “Use Original boot configuration” options are checked.
Next, click the Services tab and select the “Hide All Microsoft Services” check box.
Click Disable all.
Click on Apply/OK and restart your PC. (This will put your PC into a Clean Boot State. And configure Windows to use the usual startup, just simply undo the changes.)
From there, start to isolate the problem by checking which one of the programs you installed recently is the root cause of the problem.
Once you’ve found any incompatible programs, you need to uninstall them. Refer to the steps below to do so.
In the search box, type in “control” and then click on Control Panel (desktop app) among the search results.
After that, select Programs and Features from the list which will give you a list of all the programs installed on your computer.
From there, look for the concerned program and select it and then uninstall it.
Note: If you have downloaded the app from the Windows Store, you can simply right-click on it from the application list and then uninstall it.


 Error Causes
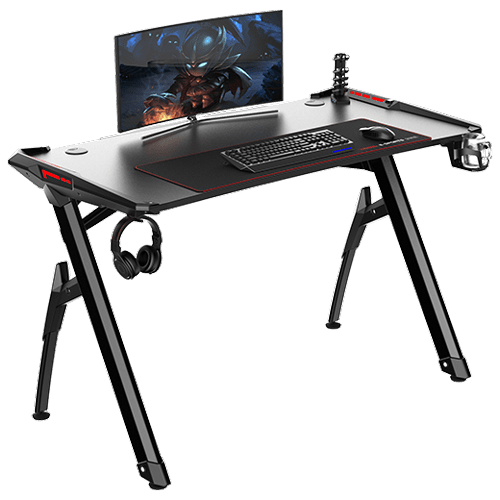 Advanced desk features
