Netflix was one that made streaming service standard and even after some stumbles even today it is still a respected service.
So in that spirit, we are bringing you the list of all new and old movies and TV series releasing to NETFLIX this September.
September 1
Turning Point: 9/11 and the War on Terror — NETFLIX DOCUMENTARY
How to Be a Cowboy — NETFLIX ORIGINAL
Agatha Christie’s Crooked House (2017)
Anjaam (1994)
Barbie: Big City Big Dreams (2021)
Brave Animated Series (Season 1)
Crocodile Dundee in Los Angeles (2001)
Green Lantern (2011)
House Party (1990)
El Patron, radiografia de un crimen / The Boss: Anatomy of a Crime (2014)
HQ Barbers (Season 1)
Letters to Juliet (2010)
Level 16 (2018)
Los Carcamales / Oldsters (Season 1)
Kid-E-Cats (Season 2)
Kuroko’s Basketball (Season 3)
Marshall (2017)
Welcome Home: Roscoe Jenkins (2008)
September 2
Afterlife of the Party — NETFLIX FILM
Q-Force — NETFLIX ORIGINAL
The Guardian
September 3
Dive Club (Season 1) — NETFLIX ORIGINAL
Money Heist (Season 5) — NETFLIX ORIGINAL
Sharkdog (Season 1) — NETFLIX FAMILY
Worth (2021) — NETFLIX ORIGINAL
September 5
Bunk’d (Season 5)
September 6
Countdown: Inspiration 4 Mission to Space (Season 1 – Episodes 1 & 2) — NETFLIX DOCUMENTARY
Shadow Parties (2021)
September 7
Kid Cosmic (Season 2) — NETFLIX ORIGINAL
Octonauts: Above & Beyond (Season 1) — NETFLIX ORIGINAL
On The Verge (Season 1) — NETFLIX ORIGINAL
UNTOLD: Breaking Point — NETFLIX DOCUMENTARY
If I Leave Here Tomorrow: A Film About Lynyrd Skynyrd (2018)
September 8
Into the Night (Season 2) — NETFLIX ORIGINAL
JJ + E — NETFLIX FILM
The Circle (Season 3) — NETFLIX ORIGINAL
Show Dogs (2018)
September 9
Blood Brothers: Malcolm X & Muhammad Ali — NETFLIX DOCUMENTARY
The Women and the Murderer (2021) — NETFLIX DOCUMENTARY
September 10
Firedrake the Silver Dragon (2021) — NETFLIX ORIGINAL
Metal Shop Masters — NETFLIX ORIGINAL
Kate — NETFLIX FILM
Pokemon Master Journey: The Series (Part 1) — NETFLIX ANIME
Prey — NETFLIX FILM
Lucifer (Season 6) — NETFLIX ORIGINAL
Lucifer season 6 poster cast
September 13
Crime Stories: India Detectives (Season 1) — NETFLIX DOCUMENTARY
September 14
You vs. Wild: Out Cold — NETFLIX FILM
The World’s Most Amazing Vacation Rentals — NETFLIX ORIGINAL
September 15
Countdown: Inspiration4 Mission to Space (Season 1 – Episodes 3 & 4) — NETFLIX DOCUMENTARY
Too Hot to Handle Latino — NETFLIX ORIGINAL
Nailed It! — NETFLIX ORIGINAL
Schumacher — NETFLIX DOCUMENTARY
September 16
Safe House (2012)
Birth of the Dragon (2017)
He-Man and the Masters of the Universe (Season 1) — NETFLIX ORIGINAL
My Heroes Were Cowboys (2021) — NETFLIX DOCUMENTARY
September 17
Chicago Party Aunt — NETFLIX ORIGINAL
Sex Education (Season 3) — NETFLIX ORIGINAL
Tayo and Little Wizards (Season 1) — NETFLIX FAMILY
The Stronghold (2020) — NETFLIX FILM
September 22
Dear White People (Season 4) — NETFLIX ORIGINAL
Confessions of an Invisible Girl — NETFLIX FILM
September 23
A StoryBots Space Adventure (2021) — NETFLIX ORIGINAL
September 24
Ganglands (Season 1) — NETFLIX ORIGINAL
Midnight Mass — NETFLIX ORIGINAL
My Little Pony: New Generation — NETFLIX FAMILY
September 28
Aba Twist, Scientist — NETFLIX FAMILY
September 29
Sounds Like Love — NETFLIX FILM

 Error Causes
 California's Department of Fair Employment & Housing has widened its anti-discrimination lawsuit against Activision Blizzard and claims the publisher has been shredding vital documents relevant to the ongoing investigation.
A recent report from Kotaku described the department as offering poorly paid, highly insecure positions, with a culture of hostility towards LGBTQ+ testers. The DFEH's rewording of "employees" to "workers" now hopes to take these contractors' experiences into account.
"As a contract employee, I feel there's a lot of pressure to excel, impress, and move through the ranks as fast as you can before your contract ends and you're forced to go 3 months without income or find another job," Axios reports one worker saying. "I take pride in what I do, but it feels like it's never enough."
Activision's contentious hiring of union-busting third-party law firm WilmerHale "directly interferes" with its own investigation, it says. By going to WilmerHale, Activision appears to be claiming that all work related to the investigation is privileged and can't be shared with DFEH.
The suit also claims that Activision HR shredded documents related to "investigations and complaints", against its legal obligation to retain them during the investigation. The relevant parts of the updated lawsuit were shared by Axios reporters Stephen Totilo and Megan Farokhmanesh, the former also noting that the DFEH "fixed their misspelling of Bill Cosby's name".
"DFEH is also informed and aware that documents and records have not been maintained as required by law or by the DFEH's Document Retention Notice," the complaint reads, "including but not limited to documents related to investigations and complaints were shredded by human resource personnel and emails are deleted thirty days after an employees separation."
California's Department of Fair Employment & Housing has widened its anti-discrimination lawsuit against Activision Blizzard and claims the publisher has been shredding vital documents relevant to the ongoing investigation.
A recent report from Kotaku described the department as offering poorly paid, highly insecure positions, with a culture of hostility towards LGBTQ+ testers. The DFEH's rewording of "employees" to "workers" now hopes to take these contractors' experiences into account.
"As a contract employee, I feel there's a lot of pressure to excel, impress, and move through the ranks as fast as you can before your contract ends and you're forced to go 3 months without income or find another job," Axios reports one worker saying. "I take pride in what I do, but it feels like it's never enough."
Activision's contentious hiring of union-busting third-party law firm WilmerHale "directly interferes" with its own investigation, it says. By going to WilmerHale, Activision appears to be claiming that all work related to the investigation is privileged and can't be shared with DFEH.
The suit also claims that Activision HR shredded documents related to "investigations and complaints", against its legal obligation to retain them during the investigation. The relevant parts of the updated lawsuit were shared by Axios reporters Stephen Totilo and Megan Farokhmanesh, the former also noting that the DFEH "fixed their misspelling of Bill Cosby's name".
"DFEH is also informed and aware that documents and records have not been maintained as required by law or by the DFEH's Document Retention Notice," the complaint reads, "including but not limited to documents related to investigations and complaints were shredded by human resource personnel and emails are deleted thirty days after an employees separation."

 Once run dialog is shown type in it control panel as shown in the picture and press OK
 If you have followed the steps precisely, you should be now in the control panel of Windows 10. Click on the top-right view and choose large icons. The Control panel will switch to a grid-like view, in the current view go to the far-right and almost bottom icon where it says User Accounts and click on it.
 User account settings
 Once you click on the link you will be presented with a User account control slider on the left and a brief explanation on the right
 Here in the picture, we see Windows default setting and an explanation of when and how he will notify you. If you wish to turn all notifications linked to programs changing computer or you making windows changes, click on the left slider and bring it all the way to the bottom where it says never notify me. If you prefer some notifications try to find which of the remaining 3 settings best suit your needs. Once you are done and satisfied with your choice click on OK.
 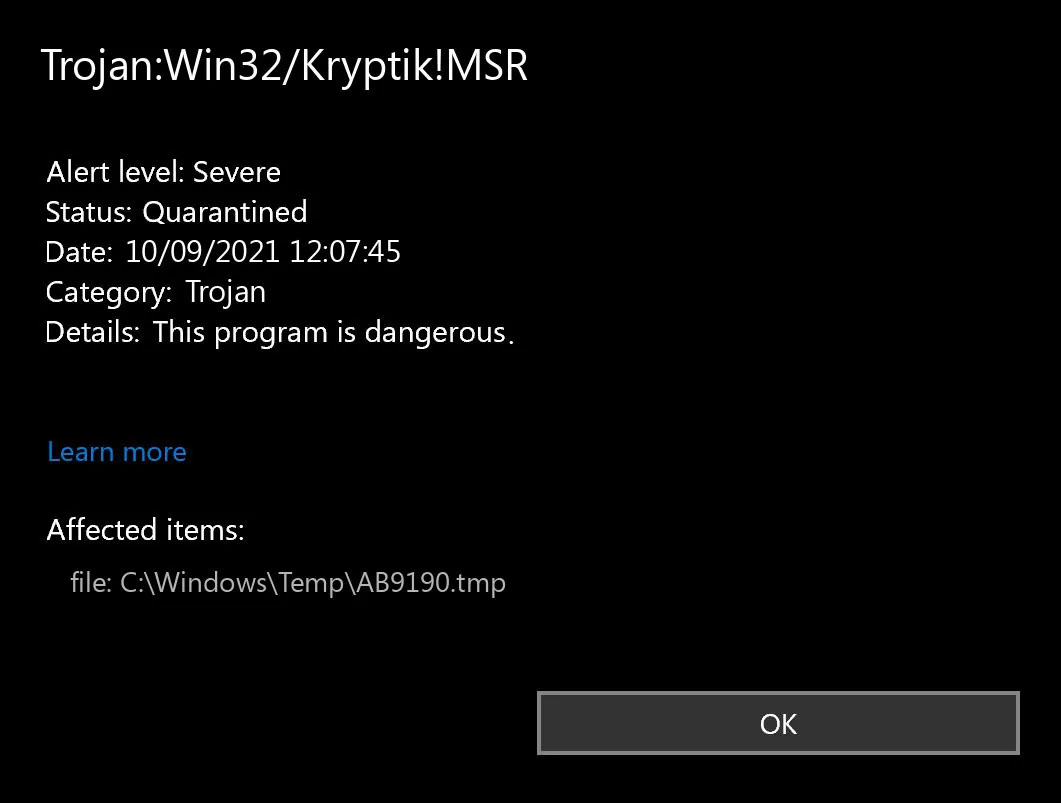 Trojan.Kryptik creates the following registry entry or registry entries: