In 27 European countries for some time it has been considered for introducing a law that would force phones, tablets, laptops, and other mobile devices to use a single USB Type-C connector.
The European Parlament announced that a provisional agreement has been reached and that it was voted that a single charging solution is USB Type-C. The current agreement applies and covers the next devices: phones, tablets, Readers, earbuds, digital cameras, headphones, headsets, handheld consoles, and portable speakers. All currently existing devices can still be sold without issues but starting in the fall of 2024 all-new products must support USB Type-C charging.
The agreement will also hit Laptops but not on the same date, How is USB Type-C currently not enough for charging laptops, all new laptops that will have to use it are scheduled for fall of 2025.
Although the agreement is reached the EU Parliament and Council still have to formally approve everything.
Apple targeted the most
Apple has been targeted as the main target for rules since their iPhones are still using Apple's proprietary Lightning charging port. Apple sells a lot of iPhones in Europe and even though iPad Pro and iPad Air along with all MacBooks have moved to USB Type-C, iPhones are still struggling with the Lightning port.
Apple criticized the EU’s charger rules when they were first proposed in 2021, telling the BBC, “We remain concerned that strict regulation mandating just one type of connector stifles innovation rather than encouraging it, which in turn will harm consumers in Europe and around the world.” The European Union has said in response that it will update its rules as new technology arrives.
Why was this proposed?
The main problem in Europe that led to this proposition was electronic waste which reached 11 000 metric tons in 2018. European union is afraid that this will keep rising as chargers become larger and heavier in order to accommodate faster-charging speeds. More electronic waste means more hardware slowly decomposing in landfills that will contribute to climate change affecting everyone on the planet, not just the people living in Europe.
If you are trying to start the Microsoft Outlook application on your Windows 10 computer but you suddenly receive a message box with an error message that says, “We are unable to connect right now, Please check your network and try again later”, read on as this post will guide you on how you can fix this error.
This kind of error in Microsoft Outlook could be due to some issues with your internet connection or it could also be due to the VPN software if you’re using one. Whatever the cause is, there are several potential fixes you can check out to fix the error. You have to check your internet connection or try changing it. You could also try to disable your VPN software or restart your computer or Microsoft Outlook and try starting the app again. In addition, you can also try entering your password again or check some settings in the Windows Registry or open Microsoft Outlook in Safe Mode. Refer to the guidelines provided below to further troubleshoot the problem.
Option 1 – Try to check your internet connection
The first thing you can do to resolve the problem is to check your internet connection. You have to make sure that you are connected to the internet and that it has a stable connection.
Option 2 – Try to restart your computer or Microsoft Outlook and try again
The next thing you can do to fix the error is to restart your computer or Microsoft Outlook. This simple process can actually help you fix the problem as it could only be a glitch that can be fixed with a simple restart.
Option 3 – Try to enter your password again
You could also try entering your password again to resolve the error. Just click on the Cancel button to open a dialog box and then enter your password again and see if it helps. Note that you might have to do it for all your email IDs in Microsoft Outlook.
Option 4 – Try opening Microsoft Outlook in Safe Mode and disabling its add-ins
Putting Microsoft Outlook into Safe Mode can help you identify the problems in it. Safe Mode also helps you fix a certain issue caused by some corrupted add-in. To start your Microsoft Outlook in Safe Mode, refer to these steps:
Tap Win + R on your keyboard to open the Run dialog box.
Next, type in “Outlook /safe” and press Enter to run the command.
After that, it will ask you to select a profile that you want to use. Just simply select a profile from the drop-down menu and click on the OK button.
Now you have successfully opened Microsoft Outlook in Safe Mode. As a result, it will start with disabling the add-ins. Meaning to say, there is some corrupted add-in that’s causing the problem, and that you need to look for that add-in and either disable it or have it permanently removed.
Once you’ve identified the corrupted add-in, you can disable or remove it by going to File > Options > Add-ins. From there, select the option “COM Add-ins” from the drop-down menu and then click the Go button.
Finally, close Microsoft Outlook once you’ve covered the given steps above and then try to open it normally.
Option 5 – Try disabling the VPN
As pointed out earlier, if you are using VPN, this could be the reason why you’re getting the “We are unable to connect right now, Please check your network and try again later” error so the most obvious thing to do is for you to turn off the VPN and try to run the Windows Update once more. And if you use a VPN software that works using their software, you can just completely exit or log-off from its account. On the other hand, if you are using a built-in Windows 10 VPN, you can simply turn it off or delete all the settings you have created there.
Option 6 – Try to check the settings in the Registry
Tap the Win + R keys to open the Run utility and type “Regedit” in the field and tap Enter to open the Registry Editor.
Next, navigate to this registry path: HKEY_LOCAL_MACHINESYSTEMCurrentControlSetservicesNlaSvcParametersInternet
From there, look for the DWORD named “EnableActiveProbing” and make sure that its value is set to “1”. When the value is set to 1, it means that it is Enabled. This is the default setting and is used to identify the status of the network connectivity of your computer.
When we initiate the copy or move files command we get a dialog that shows us the progress of the current operation, under that bar we can click on the little arrow to expand the bar into so-called more details view where we get more information like which file is being copied, more detailed graph, etc.
Windows will remember the last option we had and next time when we start the same process it will open the last view.
But what if we want to only have one view always open as default, even if we change it? Let's say that we always want to have a detailed view opened always as our default even if we switch to a minimal one? Well with some tweaks in the registry of Windows we can.
Note that this guide will require changing things in the registry of Windows itself, it is always smart and recommended to make a safe backup of your registry, just in case.
FOR ALWAYS SHOW MORE DETAILS FOLLOW THIS GUIDE:
open notepad and paste the following code inside:
Windows Registry Editor Version 5.00[HKEY_CURRENT_USER\Software\Microsoft\Windows\CurrentVersion\Explorer\OperationStatusManager]"EnthusiastMode"=dword:00000001
Go to File > Save as... and once the file save dialog opens choose at the bottom all files under file type. Save the file with extension .REG naming it whatever you want.
Right-click on file and choose Merge, confirm with YES and you are done, now each time when you start copy or move operation details view will be open.
FOR ALWAYS SHOW FEWER DETAILS FOLLOW THIS GUIDE:
open notepad and paste the following code inside:
Windows Registry Editor Version 5.00[HKEY_CURRENT_USER\Software\Microsoft\Windows\CurrentVersion\Explorer\OperationStatusManager]"EnthusiastMode"=dword:00000000
Go to File > Save as... and once the file save dialog opens choose at the bottom all files under file type. Save the file with extension .REG naming it whatever you want.
Right-click on file and choose Merge, confirm with YES and you are done, now each time when you start copy or move operation minimal details view will be open.
Started as an internal network and has slowly expanded since 1960 internet has taken over the world. In the beginning, it was a means of information change but in the modern age you can run applications and virtual machines over the internet, you can stream video and audio, and you can communicate in real-time with someone on the other side of Earth.
With the internet growing so fast in such a small amount of time it is only logical and wise to take a step back and take a good look at what it offers now, what are great things about it and what are some of the worst.
Good sides of the internet
Information
There are a lot of advantages of the internet, first and foremost is information. Internet was made as an information exchange service and even today you can find a lot of various information about various topics that interest you. A site like Wikipedia is a completely free online encyclopedia and a lot of news companies have their own internet sites where you can find free information and news.
On the other hand, there are also websites like udemy, edx, Coursera, and many others that will offer you the education, some for free, some for money but you can get a glimpse and part of university quality education for just a fraction of price.
Online shopping
Sites like Amazon have used the internet and launched themselves as today's multi-billion companies. In today's world, there is not a single thing you can not buy online. Many sites today are going from the large online marketplace where you can find everything to small niche specialized ones. Also every major brand in the world today has its own online store.
Other shops will offer you music, movies, games, etc. Services like steam, xbox pass, sony pass etc, will let you buy games online, other music, movies, and many more.
Streaming services
Days, when you had to buy movies in order to watch them at home, are gone, thanks to the internet we have plenty of streaming services for movies and tv shows as well as ones for music. If you do not want to spend money on actually purchasing things then a good idea is to have a streaming plan set up when you want it.
Email and messaging
Communication is a great thing and since the dawn of mankind people have been talking and sharing with each other, the internet has made it possible to send mail electronically and instantly and modern chat communication is everywhere. We can not just talk with our friends and family that can be on the other side of the world, we can also talk in real-time with the sales representative, with technical service, or attend online classes with a group of people.
Cloud storage services
Saving your pictures in this digital media age on the hard drive can be risky but thanks to modern technologies you can save most of your precious files on cloud servers for safekeeping. From pictures to documents and even other files that you need and want to save. There are some of them that will offer you a free amount and some basic free plans as well.
Bad sides of the internet
Malware, viruses, and phishing
We could not talk about the bad side of the internet if we do not mention its greatest threat. Bad sites, infected software, phishing emails, and many more malicious threats. Problem is that these kinds of tricks and attacks have become more and more sophisticated and harder to detect and avoid.
Pornography
Pornography is bad, having it freely available to children is even worse. Sadly the only way to regulate this is on a computer-by-computer basis by turning on parent control on each one. There are many studies that go into detail about why this is bad, sadly currently there are no effective ways to isolate this content.
No privacy
When we say there is no privacy we do not mean by using social media and not setting your privacy settings altho that also fits in this point, what we are talking about is data mining of your habits and things you do. It is well known that today lot of websites are using some form of AI recommender system in order to tailor your internet experience to suit your needs better. Most of these AI systems are trained by mining your data and analyzing your habits.
If you have 2 google accounts there is a high probability chance that for the same query you will get different results, depending on your so far browsing habits. The same goes for other services as well.
Dark webshops
There are some great things in dark and deep WEB-like sites with true news and information. Even some legit libraries where you can find and download rare books. Sadly as goes with the internet dark and deep WEB also has its well, dark sides, from disturbing content to shops that sell stolen items to straight stealing your money by parading as legit shops but only to steal your money.
Dating sites
We all try to find someone that is perfectly matched with us but using the online dating site has many proven bad effects on psychology. It also devaluates interaction between people and can lower self-esteem.
Bad habits
Since the internet has become wildly available and popular on various devices like tablets and mobile phones more and more people are spending an unhealthy amount of time on it. Harvesting the benefits of the internet is great but find some time for other people as well.
Mail and Calendar not working with Cortana? As you know, Cortana was first launched way back in 2014 with an emphasis on its tight integration with both the Windows Mail and Calendar apps. This integration has been one of the highlighting features of this Personal Digital Assistant. However, there are some users who reported that the Calendar and Mail integration with Cortana is not working on their Windows 10 computers. This kind of problem could be due to several factors like the loose integration between the services, incompatible versions of the components, and many more.
According to the users who experienced the issue, the features affected are the syncing of calendar appointments, sending emails via Cortana, and so on. To fix this problem, there are several options you can try. You can try to restart Cortana’s processor run the Windows Store Apps troubleshooter. You could also try to relink your Microsoft account or reinstall the Mail and Calendar apps, as well as reinstall Cortana. For more details, follow the suggestions given below.
Option 1 – Restart Cortana’s process in the Task Manager
Restarting Cortana’s process in the Task Manager could also help you resolve the problem. Refer to the steps given below to do so.
Tap the Ctrl + Alt + Del keys to open the Security options window.
From there, look for the Task Manager in the given list and open it.
Next, look for the process of Cortana and right-click on it, and then select the End Task option to end its process.
After that, the Cortana process will restart by itself and re-initialize.
Option 2 – Run the Windows Store App troubleshooter
The Windows 10 Store Apps Troubleshooter will help you in fixing the Web Preview problem in Cortana. This is a great built-in tool from Microsoft that helps users fix any app issues. To use the Windows Store Apps Troubleshooter, follow the steps below.
Tap Win + I keys again to open the Windows Settings panel.
Go to Update & Security and then go to Troubleshoot.
Under the Troubleshoot section, on your left-hand side, scroll down to find Window Store Apps.
Then click on the Run the troubleshooter option and follow the on-screen instructions and then see if it fixes the problem.
Option 3 – Try to relink your Microsoft Account
You might also want to relink your account in Microsoft using the Windows 10 Settings app.
Open the Windows 10 Settings app.
Next, navigate to Accounts > Email & Accounts and from there, go to the section of Accounts used by Email, Calendar, and Contacts.
After that, select your email account and select Manage.
Once done, a new panel will come up where you have to click on the “Delete account from this device” link.
Once you get a confirmation, select Delete and then relink the same account. This should resolve the problem.
Option 4 – Try to reinstall or update the Mail and Calendar apps
Open Windows PowerShell as admin.
Next, execute this command: Get-AppxPackage *windowscommunicationsapps* | Remove-AppxPackage
Once done, restart your computer and go to the Microsoft Store page to get the latest updates for both Windows Mail and Calendar apps.
Option 5 – Try to reset Cortana via Settings
Launch the Windows 10 Settings app and go to Apps > Apps & Features.
Next, look for the entry of Cortana on the right-side panel and select it.
After that, select the Advanced options and then select the Terminate button under the Terminate section.
Once done, click on the Reset button under the Reset section.
Restart your PC.
After your computer boots, launch Cortana again and check.
Option 6 – Try to reinstall Cortana
If none of the options given above works, you must consider reinstalling Cortana.
First, right-click on the Taskbar and select the Task Manager.
Next, select File menu > Run new task and type “Powershell” in the field and then select the “Create this task with administrative privileges” option.
Click on OK to open the PowerShell console.
After that, type the following command and hit Enter to execute it:
Open Source Software is developed, tested, or improved through public collaboration and distributed with the idea that the must be shared with others, ensuring an open future collaboration. In other words, it is free software developed and maintained by public contribution. Many open-source projects have reached performance and usability like their paid alternatives, some have even surpassed them. Here we will explore open source alternatives to paid applications, you will find alternatives to paid ones that aim to do the same task.
LINUX - alternative to Windows or macOS
When it comes to the operating system, Windows and macOS mostly dominate the home market, but if you go a little deeper into the OS world you will hear this talk about LINUX and its distributions. LINUX is an open-source operating system, it has many various distributions aimed at different types of users and they are also open source as well. Its security and account privileges, as well as complete control over it, make it one of the best-operating systems in the world, many servers that run websites today use LINUX as their choice of operating system mostly due to its superior security features. If LINUX is good enough for big web companies, I am sure it will be at least satisfactory to you as well. Get your LINUX distribution here.
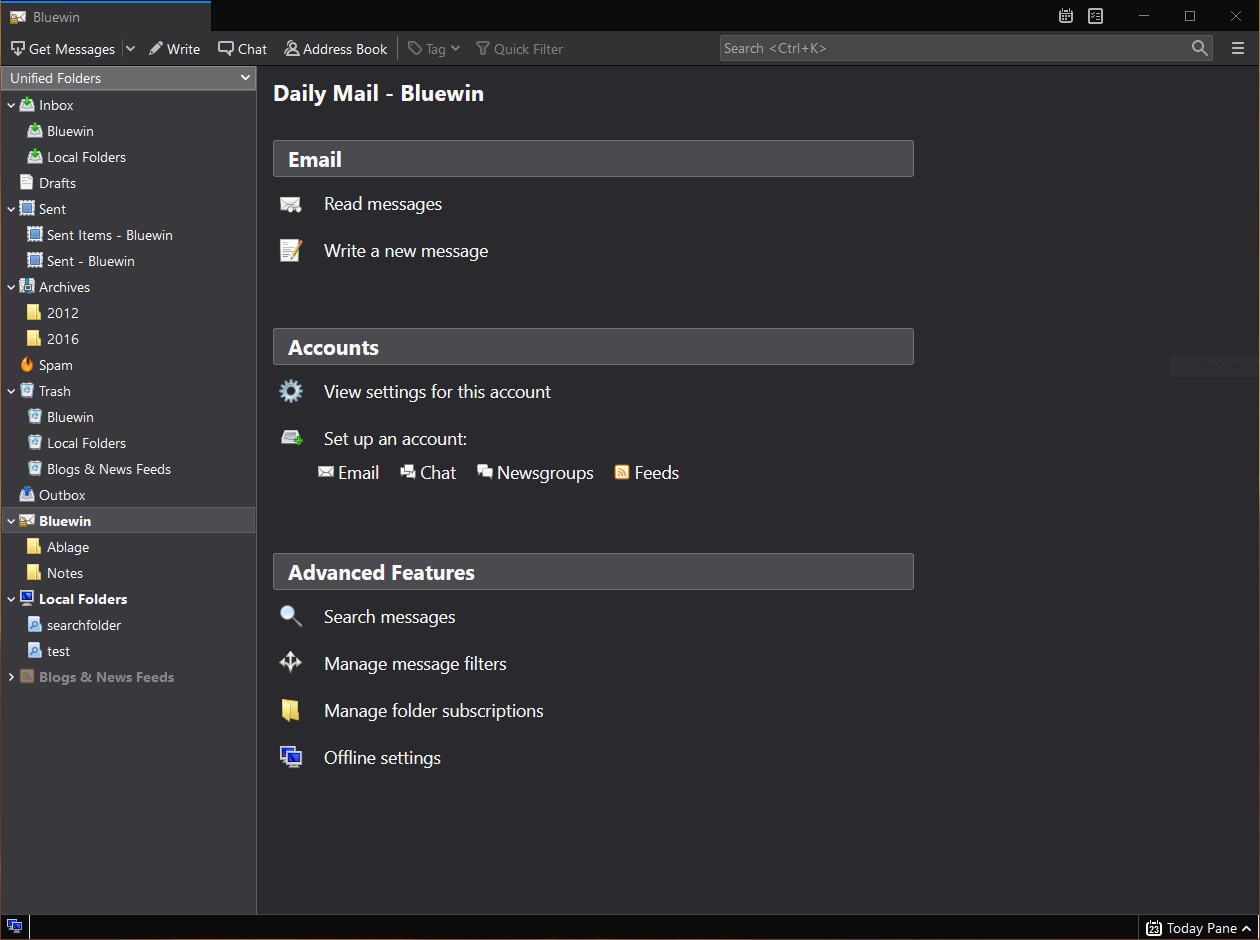
Thunderbird - alternative to outlook
A great alternative to any mail client actually, connect all of your emails into thunderbird and use it as the centralized email client for all of your email needs. Thunderbird does not lack any features that its paid counterparts have and overall it is a great application worth installing. Grab it from here.
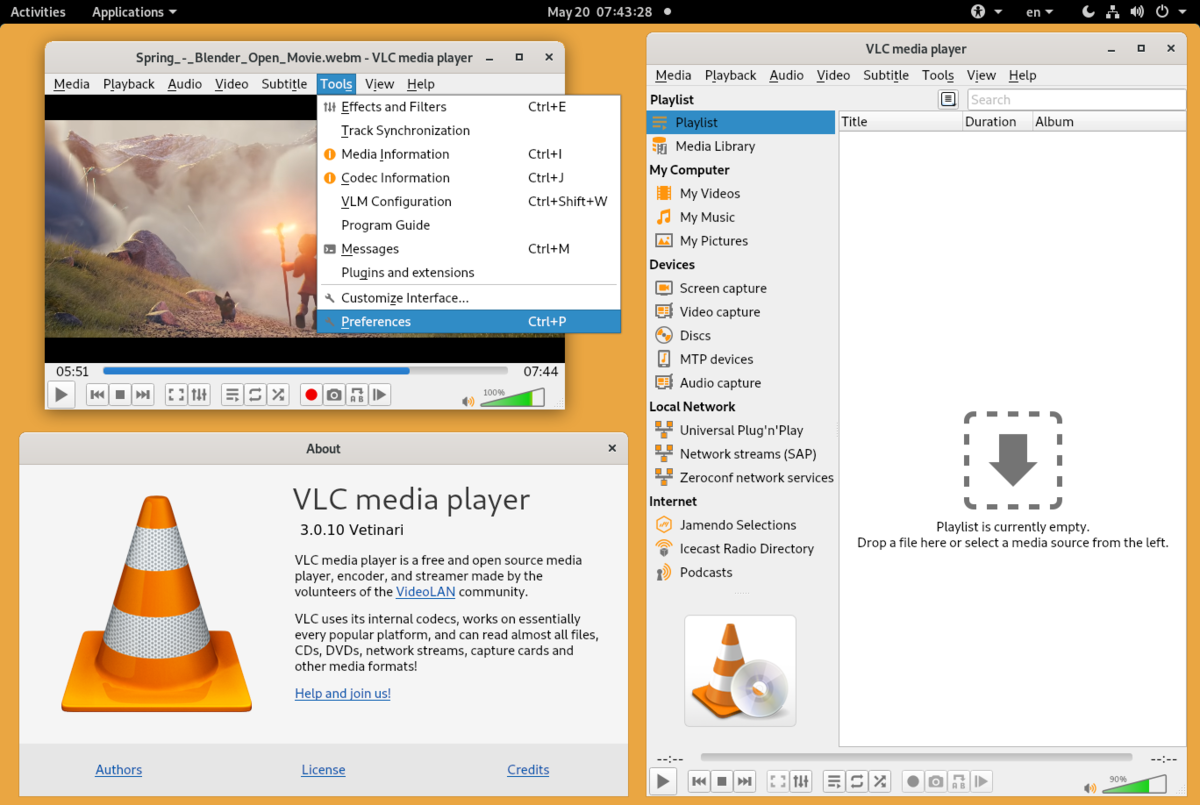
VLC media player - media player able to play almost anything
Are you looking for a great media player alternative to Windows media player or iTunes? Look no further, VLC is a lightweight media player that can play almost any file type, it is customizable and packed with features even its paid counterparts would envy. Its playback features are unmatched by other applications and once you try it, I am sure you will hardly go back from it. Give it a go and grab it from here.
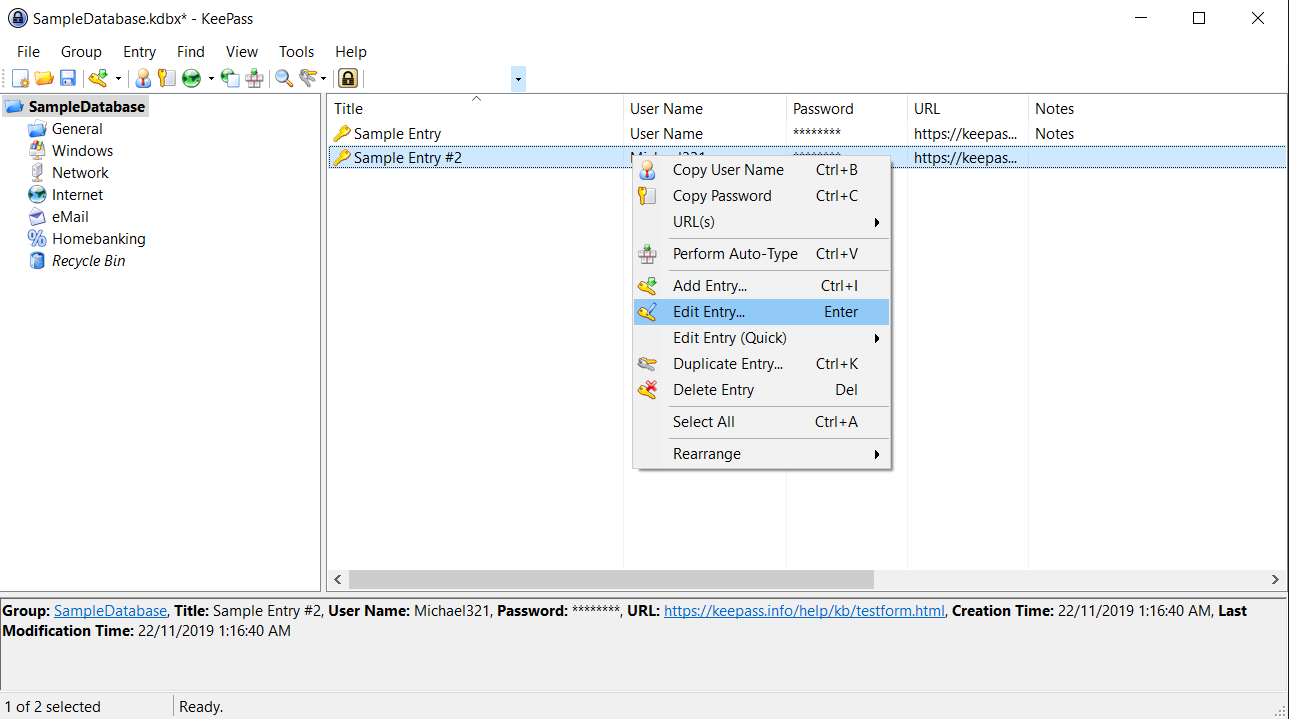
KeePass - password manager
Keepass is a simple, user-friendly lightweight password generator and manager, it uses industry-standard AES encryption and two-factor authentication to keep the details of your accounts safe and secure. you can store him and the database on a USB stick for safekeeping making it a great one to use on a go, wherever you need it. Get it from this link.
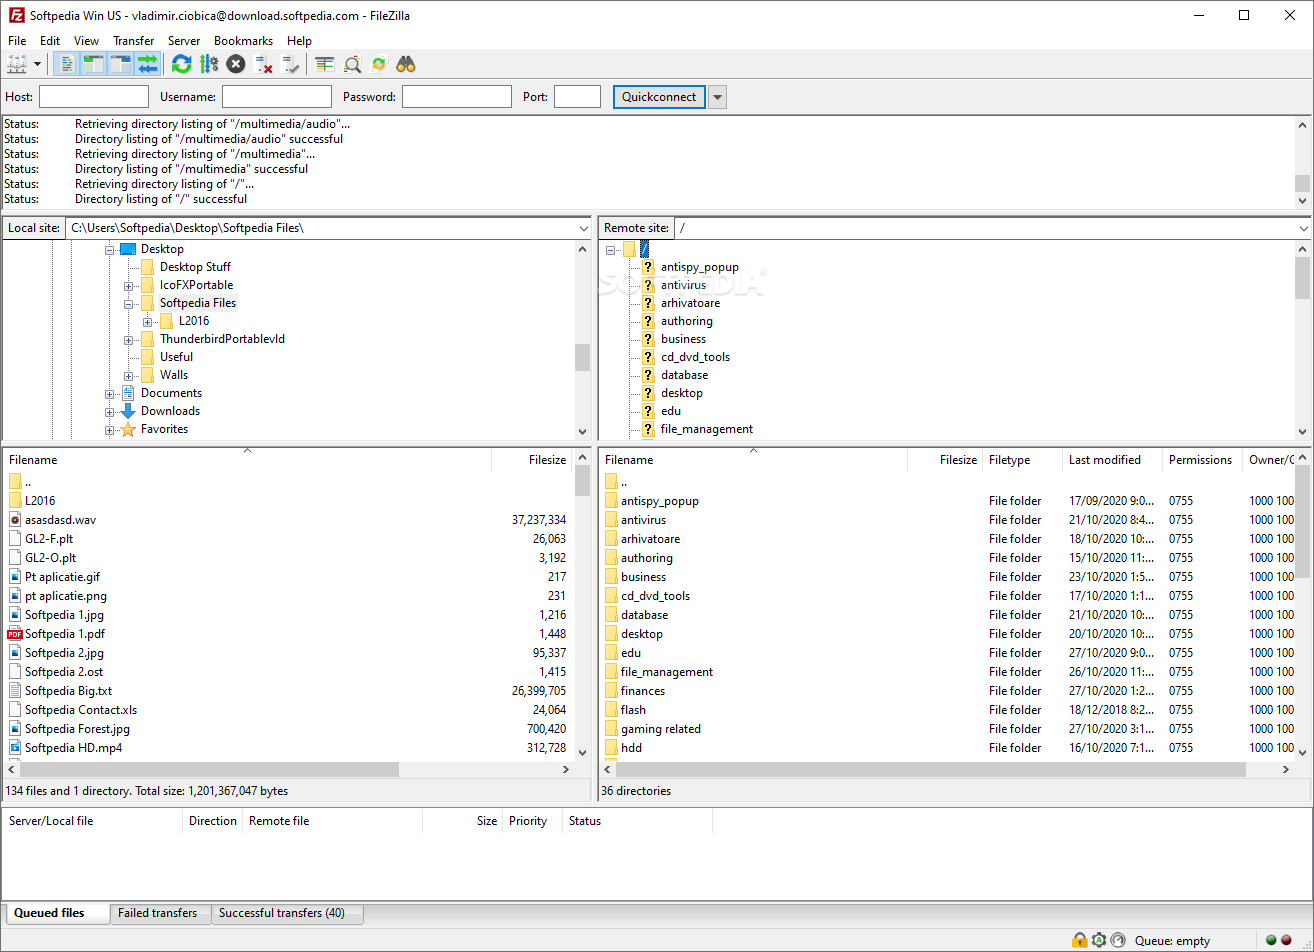
FileZilla - FTP client
A lightweight and future-rich FTP solution. It supports remote file editing and resuming of lost transfers, overall great application which anyone who needs this type of software should not overlook. Download it from its official website.
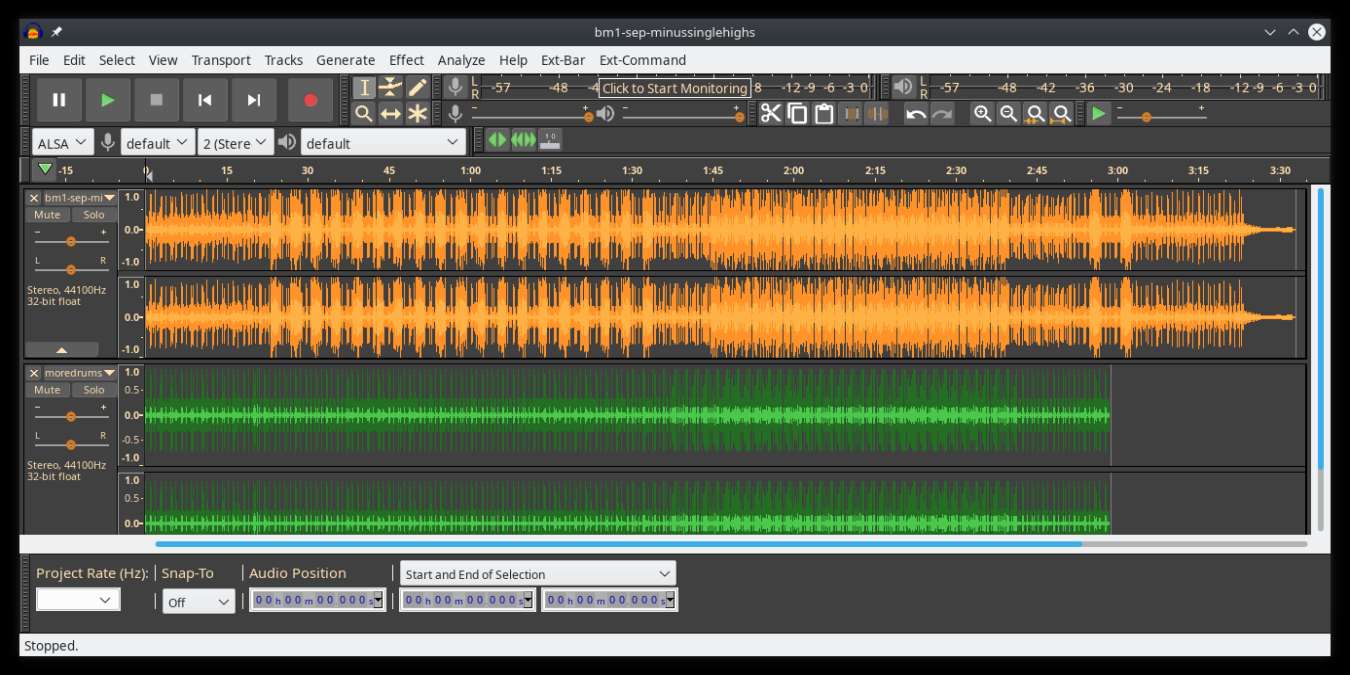
Audacity - alternative to Audition, Fl, apple logic pro,...
Digital audio editor and recording computer software with some great features like recording audio from multiple sources, post-processing of all types of audio, including podcasts by adding effects such as normalization, trimming, and fading in and out. Audacity has a great following and it is well documented, easy to learn and use. Grab it from here.
Shortcut - alternative to adobe premiere, avid media composer, DaVinci resolve
The shortcut is a video editor application that demonstrates how long an open-source project can go if enough dedication and work are put into it, started as not so great and not so feature-packed in beginning, today it can easily contend with its paid counterparts with its non-destructive editing, color gradation, keyframing, etc. It is running and using FFmpeg, an open-source video framework that lets it open and works with virtually any video or audio format. Download it from here.
Gimp - alternative to adobe photoshop
This one has been around since 1996 and it is one of the best maintained open source applications. With its features like built-in support for layers, filters, and automatic photo enhancement. It also makes it easy to create new graphic design elements and you can really take things to the next level by downloading plug-ins created by the broader GIMP open source community. Gimp is the best pixel manipulation-free tool on the market and with the right skills, it can go side by side with adobe's flagship product. Check it out here.
Inkscape - alternative to adobe illustrator, Corel draw
What is Gimp for photoshop that is Inkscape for illustrator. This free open-source vector graphic tool does not fall behind with its tools in comparison to its paid counterparts and I would highly recommend it for anyone. Features like alpha blending, cloning on-point path manipulations can assure that you can create anything you want inside it. get your copy from here.
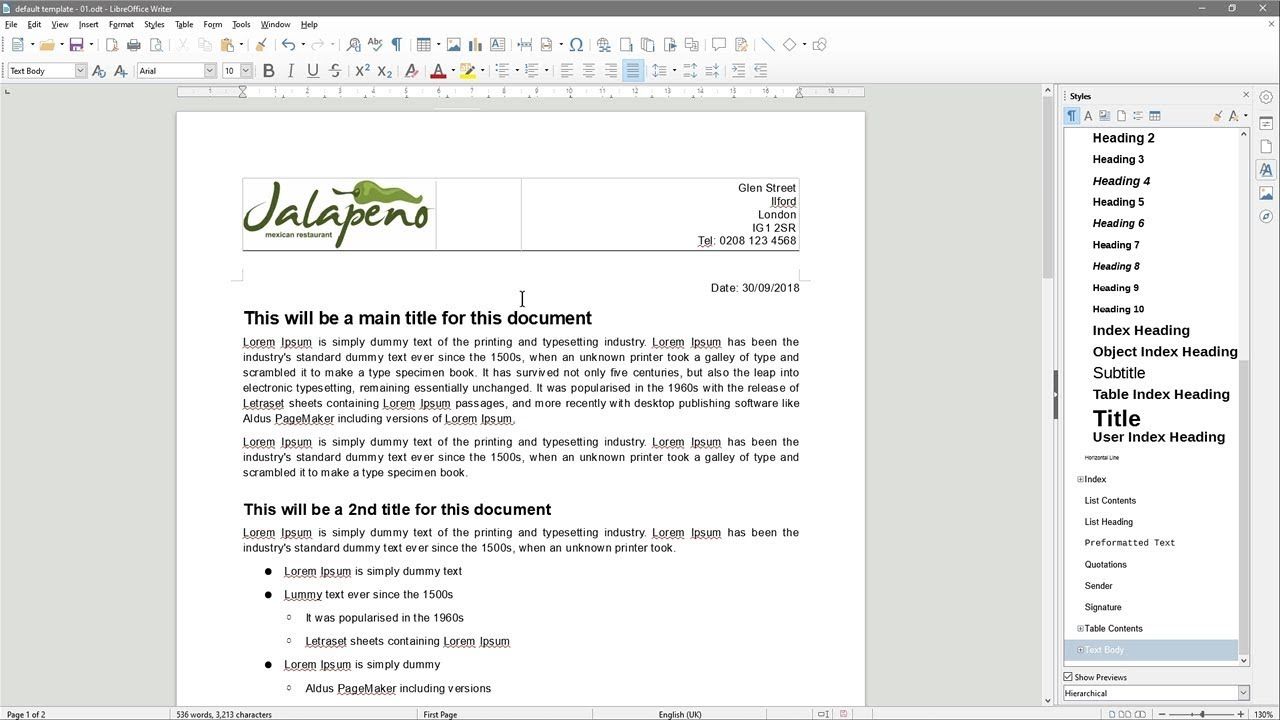
Libre office - alternative to MS office
Libre office is one of the most quality office suite there, it has spreadsheets, word processor, presentation app, calculation applications, database application, and diagrams. All these applications create and make one great suite that can open Microsoft Office files and even work with them naturally. Completely free and active in development there is no reason, not t use it in your daily routine. Go to its official website and download it for a test run.
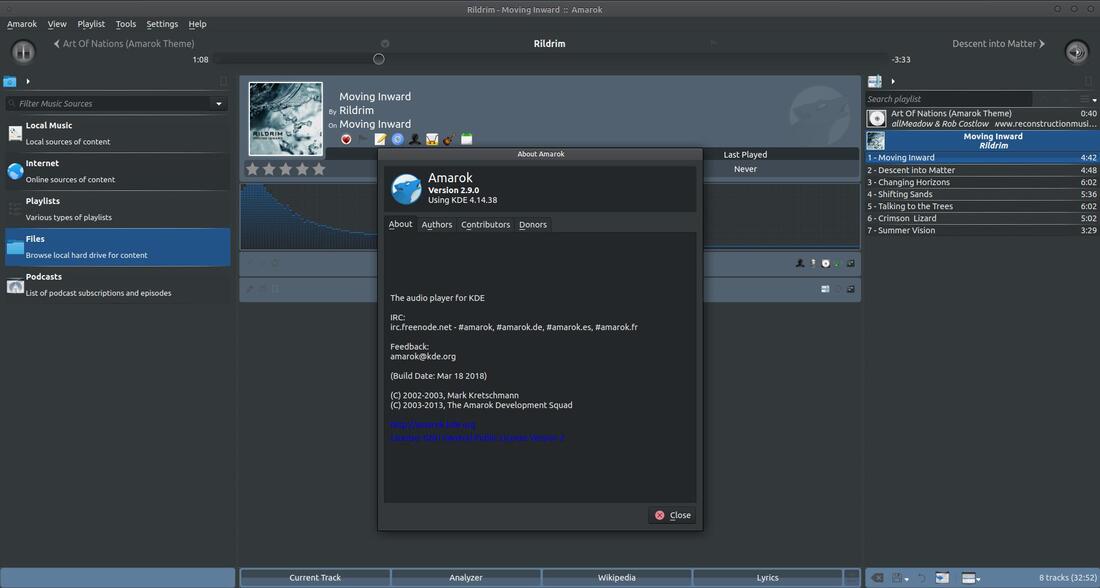
Amarok - alternative to iTunes
Amarok is an audio player with a broad range of features like integration with multiple Web audio services, dynamic playlists, bookmarks, scripting, context view, and more. get it from here.
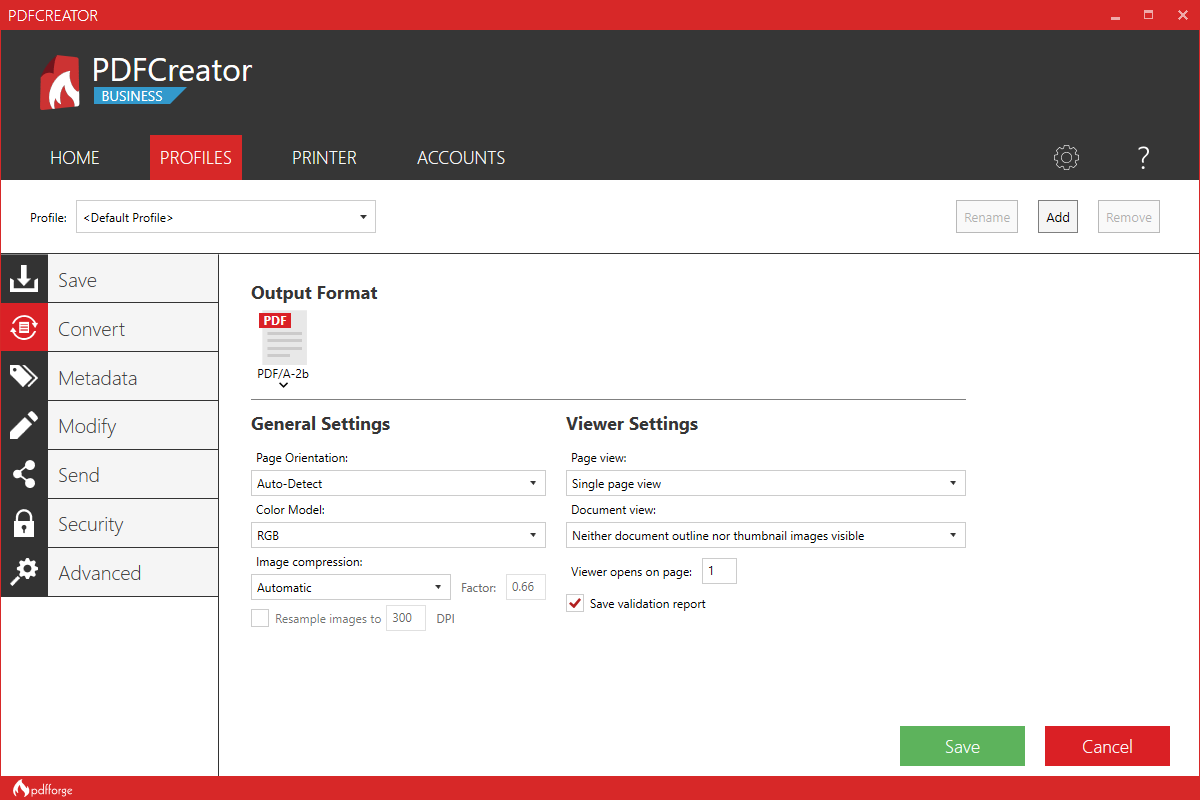
PDF Creator - alternative to adobe acrobat
As its paid counterpart PDF Creator lets you make PDF files from any application that could print. It works the same way as adobe acrobat and supports encryption and digital signature, it lacks in PDF forms a little but if that is not something that you need, it is a great alternative to acrobat and completely free. Download it from here.
Blender - Alternative to Autodesk Maya, Autodesk 3dmax, foundry Modo, cinema4d,...
3D modeling and animation software is very expensive. From the point of home user long it has been lost dream to have industry quality 3D modeling, animation, and rendering application for an affordable price. Blender has made that dream a possibility, completely free and open-source this package offers everything that its paid counterparts offer, some could even argue that since its open-source nature and availability of full code it offers even more. Why you are still here? Go get it here.
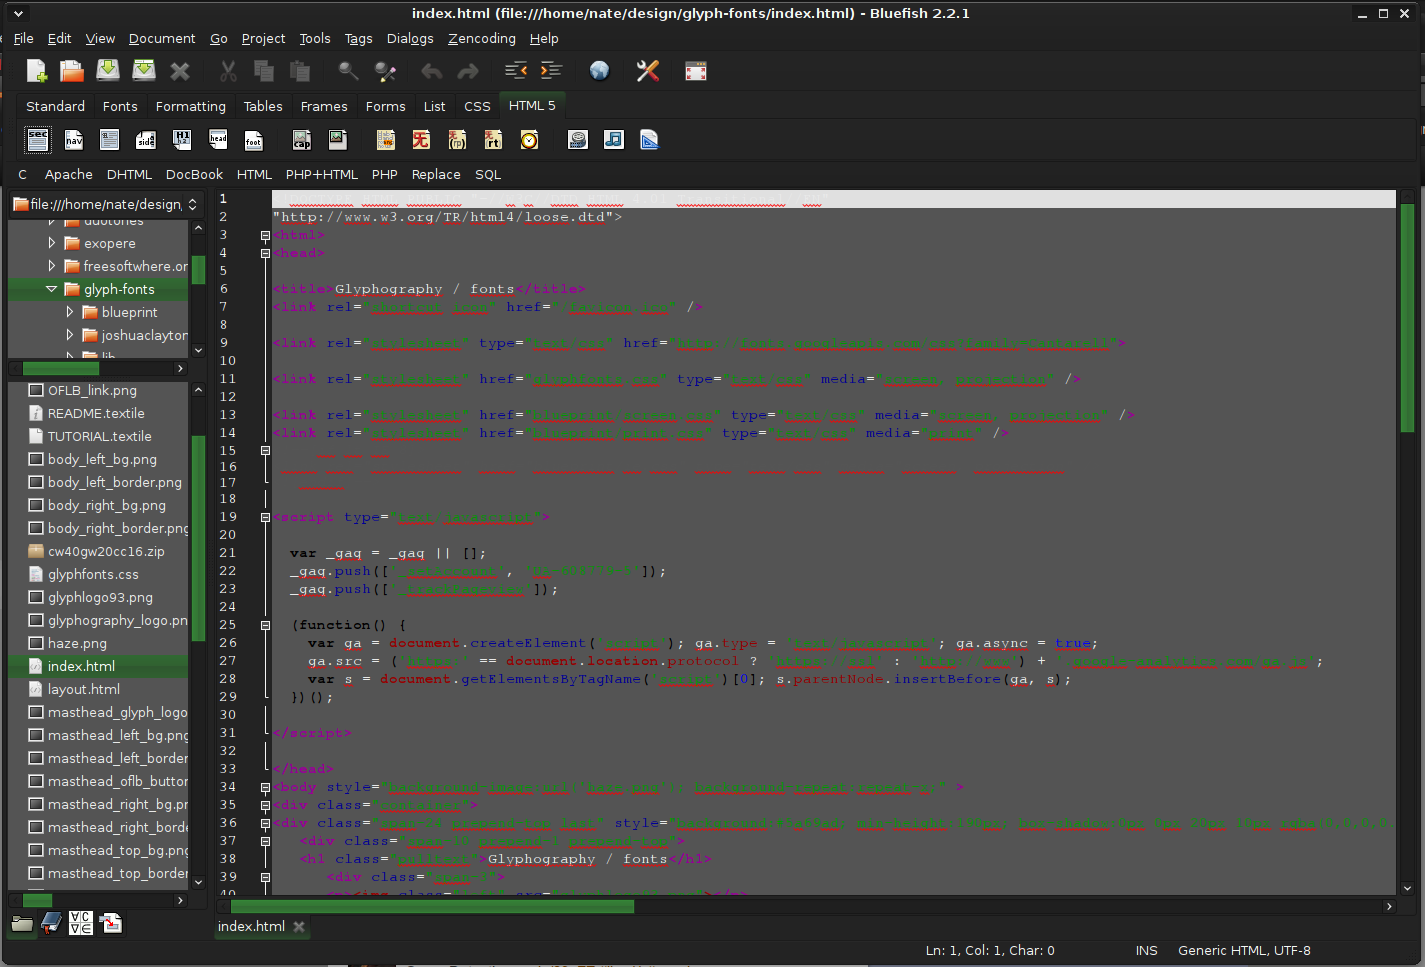
Bluefish - alternative to Adobe Dreamweaver
When it comes to web editing and code editing applications, notepad ++ seems like a person go-to application, but if you prefer a more professional suited IDE for web development check out Bluefish, auto-filling, code syntax, and constant development make sure that this application will not go away soon and it is worth investing your time in it. Get it from here.
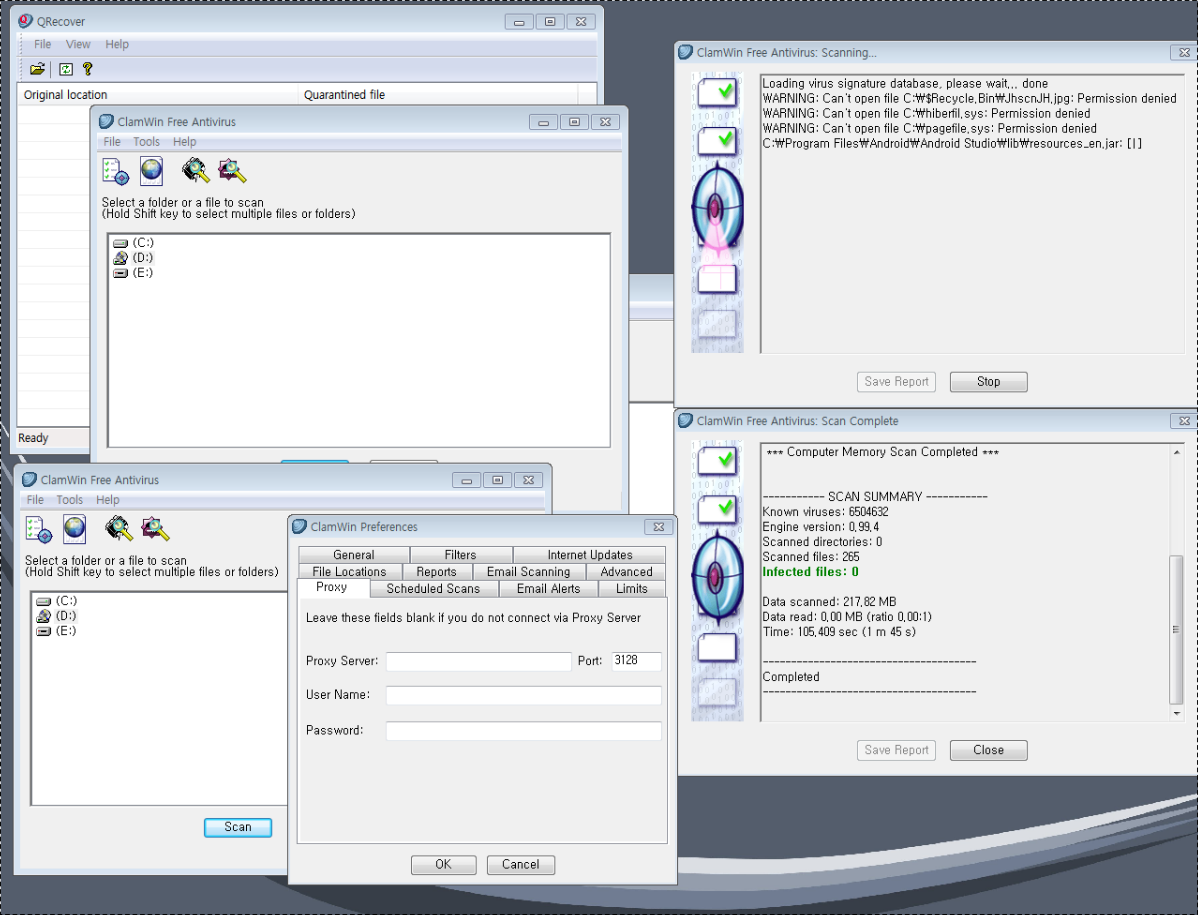
ClamWin - alternative to Kaspersky, BItdefender, Norton
This antivirus has over 600000 users and active database updates also feature a full email scanner, scanning scheduler, and File Explorer integration. It is far better than other freeware alternatives and if you are looking for a free antivirus option look no further, ClamWin is here to stay. Grab it from here.
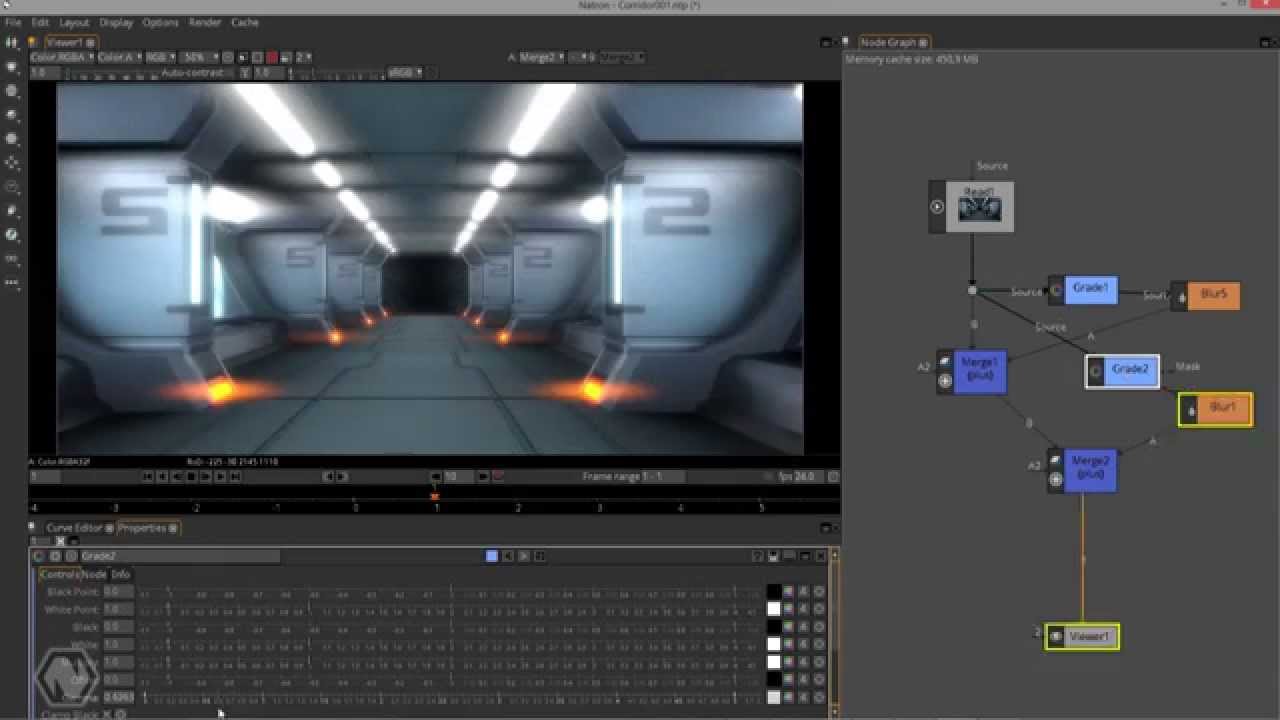
Natron - alternative to adobe aftereffects, foundry nuke
Full-featured node-based composition and effects suite. Natron is a powerful Digital Compositor that can handle all of your 2D/2.5D needs. Its robust OIIO file formats and OpenFX architecture is what makes Natron the most flexible open-source compositor for the visual effects community. Its interface and functionally are the same across all platforms such as macOS, Linux, and Windows. Natron has a powerful keying, roto/roto paint, 2D tracking tools that are staple for all current film production project that requires visual effects. Get natron from here.
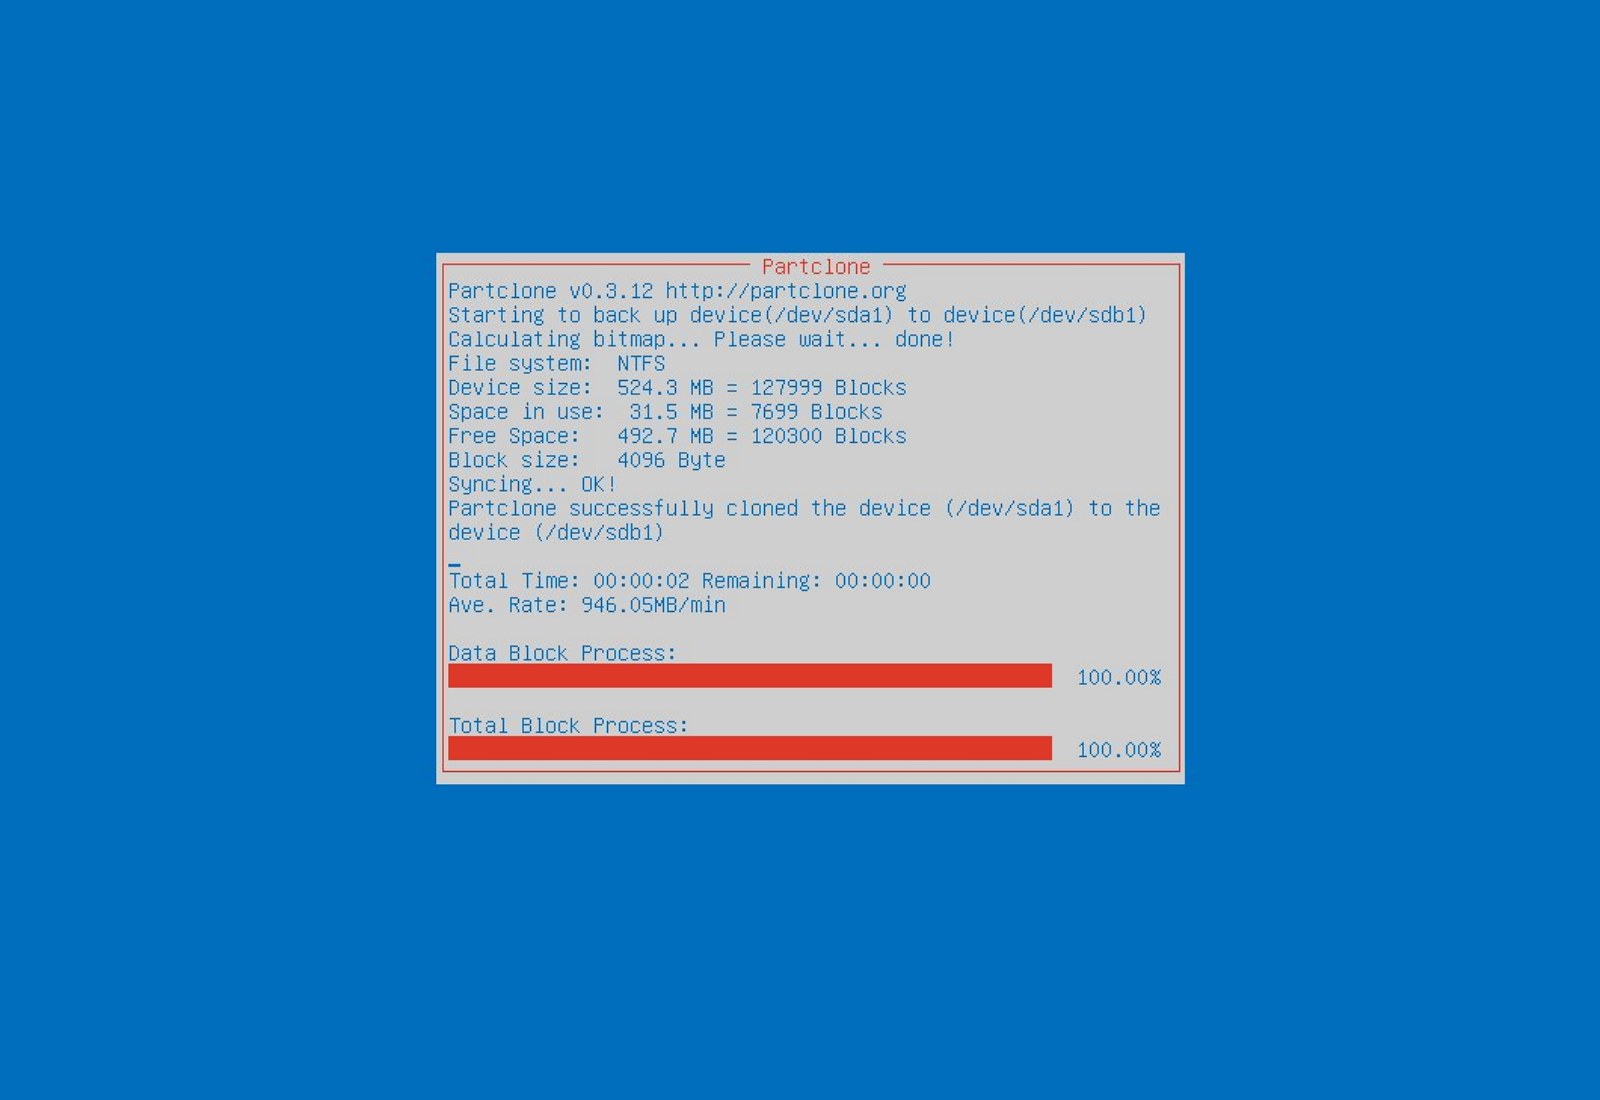
Clonezilla - alternative to Norton Ghost
When it comes to cloning hard drives usually there is only one application, Norton ghost. Clonezilla tends to change that by offering the same usability as the ghost. Grab your copy from here.
FreeCAD - alternative to Autodesk AutoCAD
Autodesk AutoCAD has years of development and dedication of its team behind it to keep it as the best CAD application on the market and it shows. However, if you are not really a hardcore professional who needs all of AutoCAD features and can live without some automation inside it FreeCAD is one of the best free open source options, it will certainly get the job done and with its dynamic simulation and analysis, it is guaranteed that you can achieve same results as in AutoCAD with little more time investment. Get if here.
Octave - alternative to MATLAB
Octave is the best open-source educational tool used for numerical computation with an interactive environment. The tool features powerful mathematics-oriented syntax with built-in plotting and visualization tools and also Octave syntax is largely compatible with Matlab. Get your copy from here.
Godot - alternative to Unity3D, Unreal
Godot is a lightweight feature-packed node-based game development engine, completely open-source and free to use for commercial projects. The engine has reached 3.2 version and it is more and more adopted by various independent game makers across the globe, recently there are to of video tutorials and documentation to get you up and running and its open-source nature lets you modify the engine itself in any way that suits and benefits you. Also, any project made with Godot is completely yours, there are no hidden fees or anything similar. Download it from here.
Conclusion
That's it, my pick for 20 open source alternatives which I believe you should at least try and if you end up with at least one, you have saved some hard-earned money.
And always remember:
Open-source programs give you complete freedom without any shady terms and conditions.
Open-source software code is readily available for anyone who wants it, so anyone can use it, share it, modify it for their own needs, and study it.
No spying eyes, no tracking, and no telemetry
In some cases, open-source tools offer features or performance benefits that surpass their commercial counterparts.
No hidden charges, completely free.
If you would like to read more helpful articles and tips about various software and hardware visit errortools.com daily.
If you suddenly encountered an error when you try to run the Windows Sandbox that says, “Windows Sandbox failed to start, Error 0xc030106, The virtual machine or container exited unexpectedly”, read on as this post will guide you on what you can do to resolve the problem.
According to security experts, this kind of error in Windows Sandbox is due to some issues with the supporting virtualization component. It could also be caused by other factors and to fix it, there are several potential fixes you need to check out. You can try running the Windows Sandbox as an administrator. You should also make sure that all the supporting processes are running properly, as well as try to install any pending Windows Updates.
Option 1– Try to run Windows Sandbox as an admin
In the Start Menu, scroll down until you see the entry for the Windows Sandbox.
Then right-click on it and select More and then select the “Run as administrator” option to open it with admin privileges.
Next, if a User Account Control or UAC prompt pops up, just click on Yes to proceed.
You should now be able to open the Windows Sandbox without the error. However, if the error persists, proceed to the next given options below.
Option 2 – Ensure that all the supporting processes and services are running properly
If running Windows Sandbox as an administrator didn’t fix the error, you have to ensure that all related processes for Windows Sandbox are running properly. To do that, follow these steps:
Tap the Win + R keys to launch the Run utility and type “services.msc” in the field and hit Enter to open the Windows Services Manager.
Next, from the list of services, look for the following services in the given order:
Network Virtualization Service
Virtual Disk
Hyper – V Virtual Machine
Hyper – V Host Compute Service
Container Manager Services
After you find the aforementioned services, restart each one of them.
Once done, try to open the Windows Sandbox again and see if the error is fixed or not.
Option 3 – Try to install any pending Windows Updates
If the second option still didn’t work, then you might want to check Windows Updates on your computer and see if there are any pending Windows Updates you have to install. All you have to do is go to the Windows 10 Settings app and then go to the Windows Updates section and click on the “Check for updates” button to check if there are any pending updates that are needed to be installed. This could fix the Windows Sandbox error.
Error Code 0xC004F00F can appear during the Windows 10 installation and activation process. It is a fairly straightforward error code that occurs when a product key is entered in that is unable to be used to complete the final activation of the new operating system. This error code is most commonly related to the installation of new pieces of hardware on a machine that was already running Windows 10 at a previous time.
Error Code 0xC004F00F can also appear on other versions of the Windows software, so if you are not specifically trying to install and activate Windows 10 when this message appears, you may want to contact a qualified Windows technician to help resolve your system error, as the error code has different causes and resolution methods on other versions of the Windows operating system.
Solution
Error Causes
In some cases, Error Code 0xC004F00F will show up if you are attempting to install Windows 10 on a computer in which the hard drive has been replaced or significantly altered. It can also appear when other major pieces of hardware, like the motherboard, have been changed out. These pieces may be changed as part of an upgrade to new or better hardware or be changed due to the malfunction of the original pieces of equipment. Because it may appear to the Windows activation servers that you are attempting to use the same product code that you have used before to activate what appears to be a new machine (even if the machine is the same one, just with some new parts), you may see Error Code 0xC004F00F arise.
Error Code 0xC004F00F can also come up if you have installed Windows 10 on your machine in the past and have already used the product key that you are attempting to use again.
Further Information and Manual Repair
Error Code 0xC004F00F most commonly appears for users who have made major hardware or software changes done on their machine. Because this error specifically arises from the Windows activation servers believing that your computer is a new one, you’ll need to get in touch with the Windows support team in order to resolve the error. From their database, they will be able to confirm that you are not using a new computer and will be able to bypass the error, allowing you to complete the Windows 10 Activation process.
If you haven’t installed or replaced any of the hardware on the computer, but are still seeing Error Code 0xC004F00F arise during your Windows 10 installation, you will still need to get in touch with the Windows support team to bypass the error code.
Calling the Windows' Support Team
When you call into the Windows support team, you’ll want to specifically have a list of the following information readily available: Which pieces of hardware have been changed out on your computer prior to the installation and activation, what method you were using to install Windows 10, which version of Windows 10 that you were attempting to install, whether it was a single-use or multiple-use license, and basic details about your PC like its make, model, and age. You may also want to have the product key that you were attempting to use when Error Code 0xC004F00F first appeared.
By having all of this information ready and on hand ahead of time, you’ll have a greater likelihood that your error will be able to be resolved quickly and efficiently, avoiding long periods spent on the phone with customer service. Make sure that you specifically mention that you are experiencing Error Code 0xC004F00F during the Windows 10 activation process when you call into the Windows support team so that you can be connected to a representative who is equipped to help you resolve this specific problem.
Getting a Qualified Technician
If you are not comfortable in working with the Windows support team or have not been able to successfully resolve Error Code 0xC004F00F even after getting in touch with customer support, contact a qualified technician who is familiar with the Windows 10 activation process and can walk you through the things that you will need to communicate to the Windows support team in order to have them bypass or resolve the error code.
If you wish to always have at your disposal a utility tool to fix these Windows 10 and other related issues when they do arise, download and install a powerful automated tool.
If you encounter error 0x8024500C after a Windows Update or when you were trying to update Windows Store apps, read on as this post will guide you in fixing the problem. This kind of Windows Update error indicates that the Windows Update service has been blocked.
Here are some suggestions you could check out to resolve the Windows Update error 0x8024500C on your Windows 10 computer.
Option 1 – Try checking the status of all the Windows Update Services
You need to check if all the Windows Update Services are up and running or not. To do so, follow the steps below.
Tap the Win + R keys to open the Run dialog box.
Next, type “services.msc” in the field and hit Enter to open Windows Services.
From the list of Services, look for the following services that support Windows Update:
Background Intelligent Transfer Service (BITS)
Delivery Optimization
Windows Update
Windows Update Medic Service
Once you’ve found them, check if they are running just fine or not. if not, you can right-click on each entry and click on Start.
Option 2 – Run the Windows Update Troubleshooter
You might also want to run the Windows Update Troubleshooter as it could also help in fixing Windows Update Error 0x8024500C. To run it, go to Settings and then select Troubleshoot from the options. From there, click on Windows Update and then click the “Run the troubleshooter” button. After that, follow the next on-screen instructions and you should be good to go.
Option 3 – Try downloading and installing the Windows Updates manually
Error 0x8024500C might be due to a Windows Update that has failed. So if it is not a feature update and only a cumulative update, you can download the Windows Update and install it manually. But first, you need to find out which update has failed, and to do so, refer to the following steps:
Go to Settings and from there go to Update and Security > View Update History.
Next, check which particular update has failed. Note that Updates that have failed to install will be displayed under the Status column which has a label of “Failed”.
After that, go to the Microsoft Download Center and look for that update using its KB number and once you find it, download and then install it manually.
Note: You can also use the Microsoft Update Catalog, a service from Microsoft that provides a list of software updates that can be distributed over a corporate network. With the help of this service, it can be easier for you to find Microsoft software updates, drivers as well as fixes.
Option 4 – Try checking the Registry settings
Tap the Win + R keys to open the Run dialog box.
Then type “Regedit” in the field and hit Enter to open the Registry Editor.
After that, navigate to this registry path: HKEY_LOCAL_MACHINESoftwarePoliciesMicrosoftWindowsWindowsUpdate
Then double click on “DisableWindowsUpdateAccess” located at the right side of the panel and make sure that its value is set to “0”. If not, you have to change it to “0”.
Now restart your computer and check if error 0x8024500C is now fixed or not
Option 5 – Disable the Proxy server
Tap the Win + R keys to open the Run dialog box.
Then type “inetcpl.cpl” in the field and hit Enter to pull up the Internet Properties.
After that, go to the Connections tab and select the LAN settings.
From there. Uncheck the “Use a Proxy Server” option for your LAN and then make sure that the “Automatically detect settings” option is checked.
Now click the OK and the Apply buttons.
Restart your PC.
Note: If you are using a third-party proxy service, you have to disable it.
Option 6 – Try to reset the Microsoft Store cache
Just like browsers, Microsoft Store also caches as you view apps and games so it is most likely that the cache is no longer valid and must be removed. To do so, follow the steps below.
Right-click on the start button and click on Command Prompt (administrator).
Next, type in the command, “exe” and tap Enter. Once you do, the command will clear the cache for the Windows Store app.
Now restart your PC and afterward, try opening Microsoft Store again.
Option 7 – Perform a System Restore
Performing System Restore might help you in fixing the Windows Update error 0x8024500C. You can do this option either by booting into Safe Mode or in System Restore. If you are already in the Advanced Startup Options, just directly select System Restore and proceed with the next steps. And if you have just booted your PC into Safe Mode, refer to the steps below.
Tap the Win + R keys to open the Run dialog box.
After that, type in “sysdm.cpl” in the field and tap Enter.
Next, go to the System Protection tab then click the System Restore button. This will open a new window where you have to select your preferred System Restore point.
After that, follow the on-screen instructions to finish the process and then restart your computer and check if the problem is fixed or not.
Error code 0x80240020 is a Windows 10 upgrade error code that affects users who attempt to upgrade their Windows operating system. This may occur due to a particular program that blocks the upgrade from completing. It can also result when other PC issues interfere with the upgrade process by disrupting the ability of Windows Update to download updates on one’s machine. Common symptoms of error code 0x80240020 include the following:
Message box detailing the presence of error code 0x80240020
Inability to complete Windows 10 upgrade process
Solution
Error Causes
Upgrade error codes occur when Windows users experience upgrade failure while using Windows Update, the Microsoft Windows Update website, the Microsoft Update website, or the Windows Server Update Services (WSUS) server. Disruption may cause this process to fail, for instance, due to system file corruptions or problems related to the Windows Update services.
Further Information and Manual Repair
To correct issues related to error codes, it is often best to apply manual repair methods. These help Windows users determine the root causes of the error code and provide solutions that permanently fix these issues. For instance, if error code 0x80240020 on your machine is due to an issue within the Windows Update tool, you will need to first verify that this is the problem by using a troubleshooter option found within your machine’s settings. The troubleshooter will detect and fix the issue.
Most of these manual repair methods can be implemented by any Windows user, regardless of their background, technical abilities, or lack thereof. However, in certain cases, technical skills are required. If you have trouble implementing the procedures highlighted below or in any other error code article found on this site, consider getting help from a Windows repair technician or use a powerful automated tool.
Below are details regarding the manual repair methods for fixing error code 0x80240020. Ensure you follow the instructions correctly. After all, any error you make will likely cause further problems on your machine and prevent you from resolving error code 0x80240020 in Windows 10.
Method One: Run Windows Update Troubleshooter
One way to fix error code 0x80240020 is to troubleshoot Windows Update. To do this you will need to access Settings within your machine then simply select the relevant troubleshooting options available. Follow the instructions below:
Step one: Type Settings within search box near Start button then press Enter
Step two: In the search box within Settings, type Troubleshooting
Step three: Select the troubleshooting option
Step four: Under System and Security, select Fix problems with Windows Update
Step five: Under Windows Update, select Resolve problems that prevent you from updating Windows.
Step six: Click Next and wait for the troubleshooter to detect and fix problems
If there are problems with Windows Update, the troubleshooter will be able to fix them. Once this process is complete, restart your PC and then reopen Windows Update. Attempt to upgrade your Windows operating system. If Windows Update completes the process and your machine downloads and runs the upgrade, you have successfully resolved error code 0x80240020.
If, however, there is another upgrade failure and the message box detailing the presence of error code 0x80240020 in Windows 10 appears, you will need to apply another manual repair procedure. Please see below for further details regarding manual repair method two.
Method Two: Use SFC to Scan and Fix Corrupted System Files
Corrupted or missing system files may interfere with your machine’s ability to successfully download an upgrade. For this reason, scan and fix any problems related to system files on your machine using Command Prompt. This manual repair method is often called a System File Check/ Checker (SFC).
Step one: Right-click Start Menu
Step two: Select Command Prompt (Admin)
Step three: Type sfc /scannow
To ensure you follow this procedure correctly, enter the command as it is written above, with a space between “sfc” and “/scannow”. Once missing, corrupted or damaged files are present on your machine, the SFC command will enable Command Prompt to scan and fix these issues. Wait until the process is complete then reboot your PC.
With your system successfully rebooted, reattempt the Windows 10 upgrade process in Windows Update or on the Windows Update website. If the issue causing error code 0x80240020 was related to problems with system files, you should be able to complete the upgrade after using the SFC tool.
Method Three: Download an Automated Tool
If you wish to always have at your disposal a utility tool to fix these Windows 10 and other related issues when they do arise, download and install a powerful automated tool.
JavaScript is a computer programming language used to make a website work smoothly with the internet. It helps to display visual effects, animations, and other web page functions.
You may come across the JavaScript Void (0) error message when there is a problem in loading JavaScript from a web page or the internet browser.
Error Causes
JavaScript Void (0) error is triggered by multiple reasons such as:
It can be due to a simple random Windows application glitch.
You are visiting an unsafe website that contains malware
JavaScript’s web browser implementation is broken due to poor program installation
Active X controls, Java applets, and active scripting, the key components of JavaScript are disabled
Registry issues like invalid or misconfigured registry keys
Further Information and Manual Repair
For JavaScript Void (0) error-free web surfing, it is advisable to repair the issue without any delays. Let’s take a look at different methods to resolve this error on your system.
Cause: Simple Random Glitch
Solution: If the cause for the JavaScript Void 0 error is a simple glitch, then it is advisable to restart your system and then run the program again.
Cause: JavaScript’s web browser implementation is broken
Solution: If you experience the JavaScript Void 0 error message after the installation of the new browser on your system, then poor installation of the program or program conflict is most likely to be the deep-rooted cause of this error code. To resolve it, uninstall the program and undo the recent changes.
Cause: Active X controls, Java applets, and active scripting, the key components of JavaScript are disabled
Solution: You should know that components including Active X controls, Java applets, and active scripting are all essential to JavaScript in order to make your browsers run properly. If these are disabled, you may come across the JavaScript Void (0).
To fix it open your browser and select the Tools tab. Then click the options button and select content. Here check the ‘enable JavaScript’ check box and click Ok to enable these components.
Cause: Registry Issues
Solution: If after performing all the solutions discussed above, you still come across JavaScript Void (0) error code, then you should know that the problem is bigger than what you expected. It triggers registry issues.
Either the cause of the error is misconfigured or invalid registry keys. To reconfigure the registry keys setting may be a challenging task and complex if you are not a computer programmer.