Website breaches and stealing user data is nothing new in the world of the internet. Although a very unpleasant experience it still happens even on some high-quality websites. In this article, we will not focus on how can you not be the target of this kind of attack, because you really cannot. Weel you can kind of if you decide not to have your data on websites at all, but let's just say that is not something you are willing to do.
So, in this case, you have some social, forum, or gaming accounts but you heard that service has been breached and that your email or password might be stolen. Well in this case all you need to do is of course to login into the service and change your password. But, what happens if you are not aware at all that service has been compromised?
Mozilla foundation has asked themselves this same question it seems and they have decided to help us out. They have placed a free online service where you can just by typing in your email address find out if your email or data has been compromised in any way.
Go to https://monitor.firefox.com/ and check it out, if you find out that there is some website that you did not know was breached, change your password right away, and if you have used the same password for anything else (I hope not), change them as well.
Windows 10 users a set of rules or standards called Network Protocols in communicating over the internet. These protocols are the ones that made sure that the data is correctly sent between computers. However, if any of the Network Protocol is missing in your Windows 10 computer, then you will most likely encounter a problem like not being able to browse the internet, or share files. For this, you can try to run the Incoming Connections troubleshooter:
As you were not able to connect to your internet connection using your PC, you can try to run the Incoming Connections troubleshooter as it might resolve the problem. Refer to the following steps to run this troubleshooter:
Tap the Win + I keys to open Settings.
After opening Settings, go to Update and Security.
Next, navigate to the Troubleshoot pane and select the Incoming Connections section and click the Run Troubleshooter button to get started.
Wait until the troubleshooter is finished doing its job and then try connecting to your network again.
If after running the Incoming Connections troubleshooter you receive an error message instead that says, “Network Protocol is missing”, then here are some suggestions you need to check out to fix it. Take note that you must have admin privileges before you start troubleshooting the problem.
Option 1 – Try to update or rollback or uninstall the Network drivers
You might also want to update, roll back, or disable your Network drivers to fix the “This operation failed as no adapter is in the state permissible for this operation” error.
Tap the Win + R keys to launch the Run window and then type in the “devmgmt.msc” command and hit Enter to open the Device Manager window.
Under the Device Manager, you will see a list of drivers. From there, look for the Network Adapters and expand it.
Then right-click on each one of the Network drivers and depending on your preference, you can either select “Update driver”, “Disable device” or “Uninstall device”.
After that, restart your PC and see if it helped in fixing the netio.sys Blue Screen error.
Option 2 – Try to reset Winsock, TCP/IP & Flush DNS
You might also want to try resetting Winsock, TCP/IP, and flushing DNS might help you resolve errors. To do so, follow these steps:
Right-click on the Start button and click on Command Prompt (administrator) so you can pull up an elevated Command Prompt.
After that, execute each one of the commands listed below. And after you typed in one after the other, you have to hit Enter.
netsh winsock reset – type in this command to reset Winsock
netsh int ip reset resettcpip.txt – type in this command to reset TCP/IP
ipconfig /flushdns – type in this command to flush the DNS cache
Next, restart your PC and check if the problem’s fixed.
Option 3 – Diagnose the Network Adapter
To diagnose the Network Adapter, go to Control Panel > All Control Panel Items > Network Connections, and from there, look for the network adapter that could be causing the error. Note that if you are using a Wi-Fi connection, then it’s probably your Wi-Fi adapter, otherwise it has something to do with your Ethernet adapter. Just right-click on the problematic network adapter and select diagnose to troubleshoot.
Option 4 – Try to perform Network Reset
You can also try to perform a Network Reset to resolve the problem. This will reset the entire network configuration including your IP address. To perform Network Reset, follow these steps:
Tap the Win + I keys to open Settings.
From there, go to the Network and Internet section.
Next, scroll down and look for “Network Reset” under the status pane.
After that, click on Network Reset and then on Reset now to start resetting the network configuration. Once done, check if it is able to fix the error or not.
Option 5 – Try importing Winsock settings from another computer
If resetting Winsock or the Network didn’t fix the problem, then you can try to import settings from a computer that’s in good condition. You need to have access to the registry to get this done and then export and import a couple of settings. Refer to these steps to get started:
Tap the Win + R keys to open the Run dialog box and type “Regedit” in the field and hit Enter to open the Registry Editor.
After that, go to this registry path: HKEY_LOCAL_MACHINESYSTEMCurrentControlSetServices
Next, look for two registry keys named “Winsock” and “Winsock2” and then right-click on each one of them and select the Export option.
Now copy the registry keys to a USB drive and then copy the keys on the PC in excellent condition.
Then double click on each one of them and it will install the WINSOCK keys.
The 0x80040600 error is a common error that becomes particularly distressing for Outlook users.
This error prevents users from sending or receiving emails through Microsoft Outlook. Users may also encounter this problem while altering an entry on the calendar or adding a new contact. There is no obvious message that is displayed to the user when this error occurs.
However, Outlook displays a vague message that includes the code 0x80040600.
Solution
Download available to recover all lost Outlook data
Error Causes
The primary cause of this error is a problem with the PST file. When the PST file is corrupt, missing, or damaged, this error occurs at once. The PST file is essentially an important file that stores crucial and personal information of an individual’s accounts.
Sometimes this error is because the file is corrupt while at other times, the reason that it occurs is that the file is too full to accommodate any further information.
Irrespective of the causes of this problem, it is important that this error is promptly fixed to ensure the proper and uninterrupted functioning of Outlook in the future.
Further Information and Manual Repair
The error occurs because the Outlook application encounters problems while attempting to receive, send or read emails. Some solutions that can work wonders and help you get rid of the problem are outlined below.
As soon as the error appears, the first solution is to restart the system. This is the first thing that must be done because a lot of times, these errors can be removed by simply restarting the system. This will, hence, save the user the inconvenience of manually fixing this problem.
If restarting the system doesn’t resolve the problem and the error message displays again, it is advised the user makes use of the ‘Inbox Repair Tool’.
This is the most commonly used and effective approach to fixing a corrupt PST file. The procedure to remedy this Personal Storage Table file or PST file is listed below.
Go to the start menu. Type Run and launch the Inbox Repair Tool by typing the following path: drive name: Program FilesCommon FilesSystemMapiLocale IDscanpst.exe. Now click Ok. A pop-up message will appear. Enter the file name and path of the damaged PST file. Now click on the Start button. Here it is important to mention that the inbox repair tool may take a long time depending upon the file size and the amount of data that has to be recovered. However, it is the most effective way of fixing this problem.
The Windows Subsystem for Linus, also known as WSL, is a useful and excellent tool for developers. However, it isn’t without flaws as users can still encounter some errors when using it. One of these errors is the error code WslRegisterDistribution, 0x8007019e,0x8000000d. Although it seems like the error is have something to do with the installation of WSL, it could be a false positive since some users who’ve installed WSL still encountered the same problem. Here’s the context of the error:
“Installing, this may take a few minutes…WslRegisterDistribution failed with error: 0x8007019e/0x8000000dError: 0x8007019e/0x8000000d The parameter is incorrect.Press any key to continue.”
Error code 0x8007019e or 0x8000000d could be due to the absence of supporting Windows 10 features since the error does not even let one use the WSL-based command line. If you are one of the users facing this problem, then you’ve come to the right place as this post will provide you with a couple of suggestions to fix it.
There are two options you can check out to fix the problem, but before you do that, you need to make sure that the Windows Subsystem for Linux feature is enabled. The two options include enabling WSL using the “Turn Windows features on or off” option and using the Windows PowerShell.
Option 1 – Try to enable the WSL using the “Turn Windows features on or off” option
To get started, search for “Turn Windows Features on or off” in the Start Search and click on the appropriate result to open a dialog box.
After that, you will see a populated list in the dialog box and from there, look for the “Windows Subsystem for Linux” option.
Once you find it, select OK. This will search and install the system files needed and ask you to restart your computer.
Restart your computer. The Linux distro should now work without any trouble.
Option 2 – Try to use Windows PowerShell
The next thing you can do to fix the error code 0x8007019e or 0x8000000d is to use Windows PowerShell.
Tap the Win + X keys and click on the “Windows PowerShell (Admin)” option to open Windows PowerShell as admin.
After that, execute this command to enable the Windows Subsystem for Linux feature: Enable-WindowsOptionalFeature -Online -FeatureName Microsoft-Windows-Subsystem-Linux
The command you entered will start to search for the required system files and install them.
If prompted, type “Y” to restart your computer. This should fix the problem.
This post will guide you in fixing the (1058) ERROR_SERVICE_DISABLED error you can encounter when trying to launch various games. Usually, this error pops up during startup and prevents you from running the game. In fact, this error has become quite a headache for many users. Some of the games it affects are Smite, Paladins, Far Cry, and many more.
In most cases, this error is caused by missing or corrupted game files. It could also be caused by the anti-cheat utility you might have installed along with your games. Whichever the cause is, you can try to check out the possible fixes given below to resolve the (1058) ERROR_SERVICE_DISABLED error.
Option 1 – Verify the Integrity of the Game files
This is the first option you can try no matter what kind of issues you are having with Steam games.
Double click on the game’s icon located on your Desktop and then go to the Library tab in the Steam window.
From there, look for GTA V from the list of games installed in your library.
Next, right-click on its entry and select Properties.
After that, navigate to the Local Files tab and click the “Verify Integrity of Game Files” button.
Now, wait for the tool to complete checking the game’s integrity. You should see that some of the files may have been downloaded.
Reopen the game and see if it now runs properly without crashing.
Option 2 – Apply some tweaks in the Service’s startup settings
As pointed out earlier, the error can also occur due to the anti-cheat tools that were installed alongside the game. These tools are usually used by games to check if you are running something which might give you an unfair advantage over other players. These anti-cheat tools include but are not limited to BattlEye, EasyAntiCheat, and PunkBuster. The error might occur if the service’s startup settings are not correctly configured which is why you can apply some tweaks in order to resolve the problem.
Tap the Win + R keys to open the Run dialog box.
Next, type “services.msc” in the field and hit Enter or click OK to open Services.
From the list of Services, look for any of the services mentioned above such as BattlEye, EasyAntiCheat Service, or PunkBuster Service. Then right-click on the service and select Properties from the context menu.
After that, check if the service is started by checking the Service status. If it is started, click on the Stop button to stop the service and if it is already stopped, leave it as it is, at least for now.
Next, make sure that the Startup type menu in the Service’s properties is set to Automatic before you go on.
Now confirm any dialog boxes that may appear as you set the Startup type and then click on the Start button located in the middle before you exit Properties.
Note: You might get the following error message when you click on the Start button:
“Windows could not start the service on Local Computer. Error 1079: The account specified for this service differs from the account specified for other services running in the same process.”
If you got the error message above, then here’s how you can fix it:
Tap the Win + R keys to open the Run dialog box.
Next, type “services.msc” in the field and hit Enter or click OK to open Services.
From the list of Services, look for any of the services mentioned above such as BattlEye, EasyAntiCheat Service, or PunkBuster Service. Then right-click on the service and select Properties from the context menu.
Now go to the Log On tab and click on the “Browse…” button.
After that, type in your account’s name under the “Enter the object name to select” box and click on Check Names then wait for the name to be recognized.
Then click OK once you’re done and type in the password in the Password field when you are prompted to do so. This should resolve the issue.
Option 3 – Try reinstalling the Anti-cheat program
If the first two options did not work out, you can try reinstalling the anti-cheat program.
Open Steam from your Desktop or by searching for it in the Start menu.
After opening the Steam client, go to the Library tab in the Steam window and then look for the Rust entry from the list.
Next, right-click on the game’s icon in the library and select Properties.
Now go to the Local Files tab under Properties and click the Browse Local Files button.
From there, look for BattlEye, EasyAntiCheat, or PunkBuster folder depending on the game, and then double click on it to open the folder.
Then right-click on EasyAntiCheat_setup.exe or the BattlEye installed file in the folder or PunkBuster and select the Run as administrator option.
Exit the Steam client by clicking Steam > Exit from the menu located at the top.
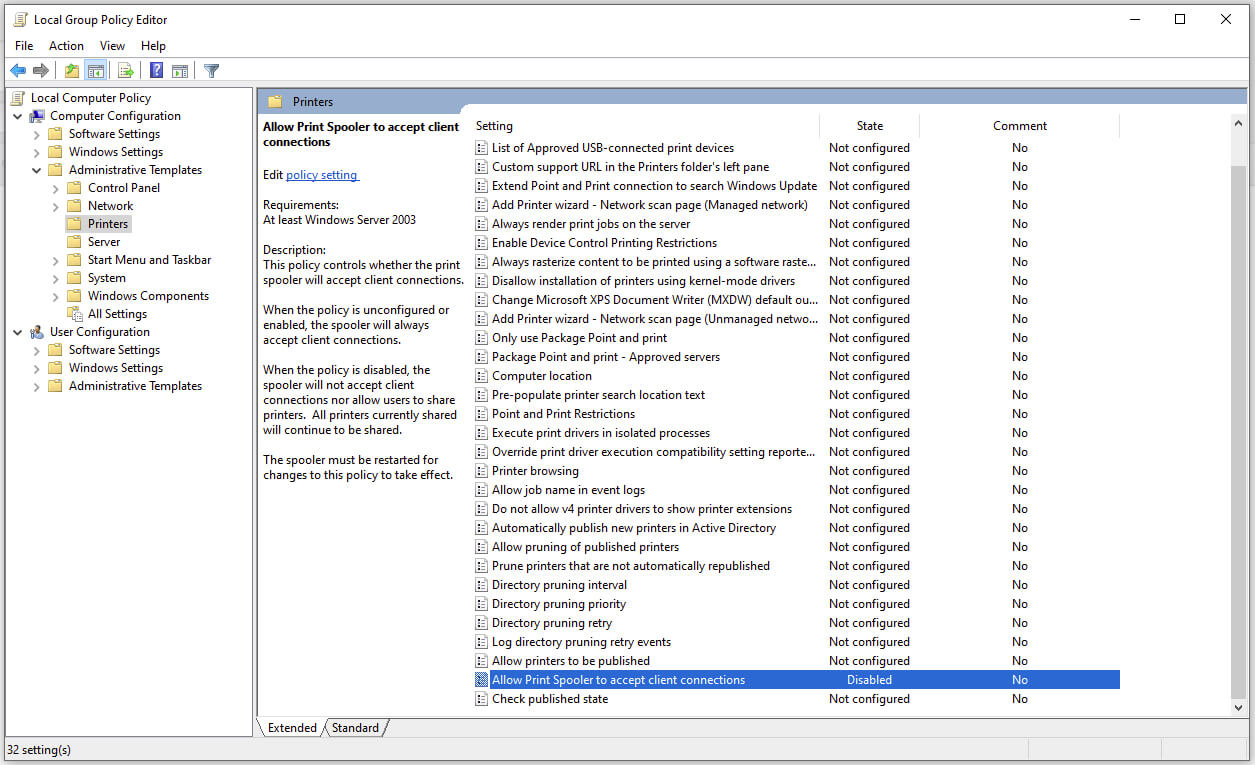
The third time is charm saying goes but not when we are talking about Microsoft. Print spooler is again in focus, in a bad way.
This is the third print spooler vulnerability to emerge in just five weeks. While a critical flaw was originally identified and patched in June, a similar flaw came to light shortly after and was subsequently patched (with mixed success).
Microsoft is once again advising its customers to disable Windows print spooler after a new vulnerability that allows hackers to execute malicious code on machines has emerged. While a patch fixing the flaw will be released in due course, the most effective workaround currently on the table is to stop and disable the print spooler service entirely.
"An elevation of privilege vulnerability exists when the Windows Print Spooler service improperly performs privileged file operations. An attacker who successfully exploited this vulnerability could run arbitrary code with SYSTEM privileges. An attacker could then install programs; view, change, or delete data; or create new accounts with full user rights."
Stop this service right away or you are risking a potential attack.
Press ⊞ WINDOWS + X to open the hidden menu
Click on Power Shell (admin)
In Power Shell type in the following command to check if spool service is running: Get-Service -Name Spooler followed by ENTER
If spooler service is running type in the next command to stop it: Stop-Service -Name Spooler –Force and press ENTER
Then follow with this command to disable it at startup: Set-Service -Name Spooler -StartupType Disabled followed with ENTER
That’s it, we hope a patch will come soon for all the people that are using network printing and indeed need this service running in order to do work.
The Control Panel is one of the most important tools in Windows which allows users to control and change various settings. However, there are cases when it experiences some problems like when users aren’t able to open it. Recently, a lot of users complained about not being able to open the Control Panel. To be more specific, users were able to open it but only lasted for a second, and then it’s gone. This is not just some issue you can ignore as this will prevent you from accessing some major settings in your computer and you won’t be able to perform some important task without it.
According to security experts, this issue is most likely caused by a bug in the Windows Update. If you have installed an update recently, then it’s most likely the culprit. Aside from the Windows Update, there are also other things that can cause this issue. Some of them are the IDT audio panel and a control panel file that causes conflicting issues with the control panel that leads to this problem. Aside from these aforementioned cases, the Windows Error reporting services could also be one of the causes of this issue. As you can see, since there are a lot of possible causes for this problem, this post prepared a lot of options as well which you have to check out. Follow each one of them and see which one worked best for you.
Option 1 – Try updating your Windows 10 PC
If you haven’t updated your PC to the latest version of Windows 10, then you should. A lot of users found that the issue with the Control Panel was fixed right after they updated their Windows 10 PCs. This is probably because Microsoft has probably released a fix on one of the latest updates.
Option 2 – Try uninstalling the IDT Audio Panel
For some users, uninstalling the IDT Audio Panel from their PCs did the trick. You can also try doing the same thing to fix the vanishing Control Panel. According to these users. The IDT audio panel was the one that’s causing the issue. To uninstall the IDT audio panel, here’s what you have to do:
Tap the Win + R keys at the same time to open the Run dialog box.
Then type in “appwiz.cpl” in the field and tap Enter to open the “Uninstall or change a program” screen of the Control Panel.
From there, look for the IDT audio panel, select it and then select the Uninstall option and follow the next on-screen instructions that appear.
Note: If you are unable to locate the IDT audio panel or you simply can’t access the Uninstall or change program screen or you can’t keep Control Panel open for a long time, here’s what you can do:
Tap the Win + R keys at the same time once again to open the Run dialog box.
And in the field, type in “devmgmt.msc” and hit Enter to open the Device Manager.
After opening the Device Manager, look for the “Sound, video and game controllers” option and double-click on it.
From there, locate the IDT audio panel or “IDT High Definition CODEC” and select Uninstall and follow the next instructions that appear.
Option 3 – Try deleting or renaming IDTNC64.cpl
IDTNC64.cpl is a control file in the control panel. However, it might be the one that’s causing the problem as it could be conflicting with the control panel. As a result, the control panel crashes after a second or more. Many users have fixed the problem by either renaming or deleting this file – the safer option would be is renaming it.
Tap the Win + E keys to open File Explorer.
In the address bar located at the top, type in “C:\Windows\System32” and tap Enter to open this folder.
From there, look for the IDTNC64.cpl file, right-click on it and select the Rename option.
You can name the file anything you want but it’s better if you rename it to “oldcpl”.
After you rename the file, try opening the Control Panel again. It should work fine now.
Option 4 – Try to disable the Windows Error Reporting Service
As mentioned earlier, the Windows Error Reporting Service is also known to cause the issue so some users disable it and got the issue fixed.
Tap the Win + R keys.
In the field, type in “MSConfig” and hit Enter to open System Configuration.
After opening System Configuration, go to the Services tab and look for the Windows Error Reporting Service and uncheck its checkbox.
Click the Apply button and click OK. You should now see a date in the Disable Date column. Then check if the Control Panel is now working properly if not, restart your computer and check once more. That should fix the problem.
Option 5 – Try opening Control Panel via Run
This option is more of a workaround than a solution as it does not really fix the issue with the Control Panel but rather helps you in accessing the controls at the very least.
Tap the Win + R keys to open Run.
Type in “appwiz.cpl” in the field and tap Enter to open the Uninstall or change program screen of the Control Panel.
Next, copy and paste “Control panel all control panel items” on the address bar located at the top-mid part of your screen. You must not type the given address and simply copy and paste it. After that, you will see a list of control panel controls you can use.
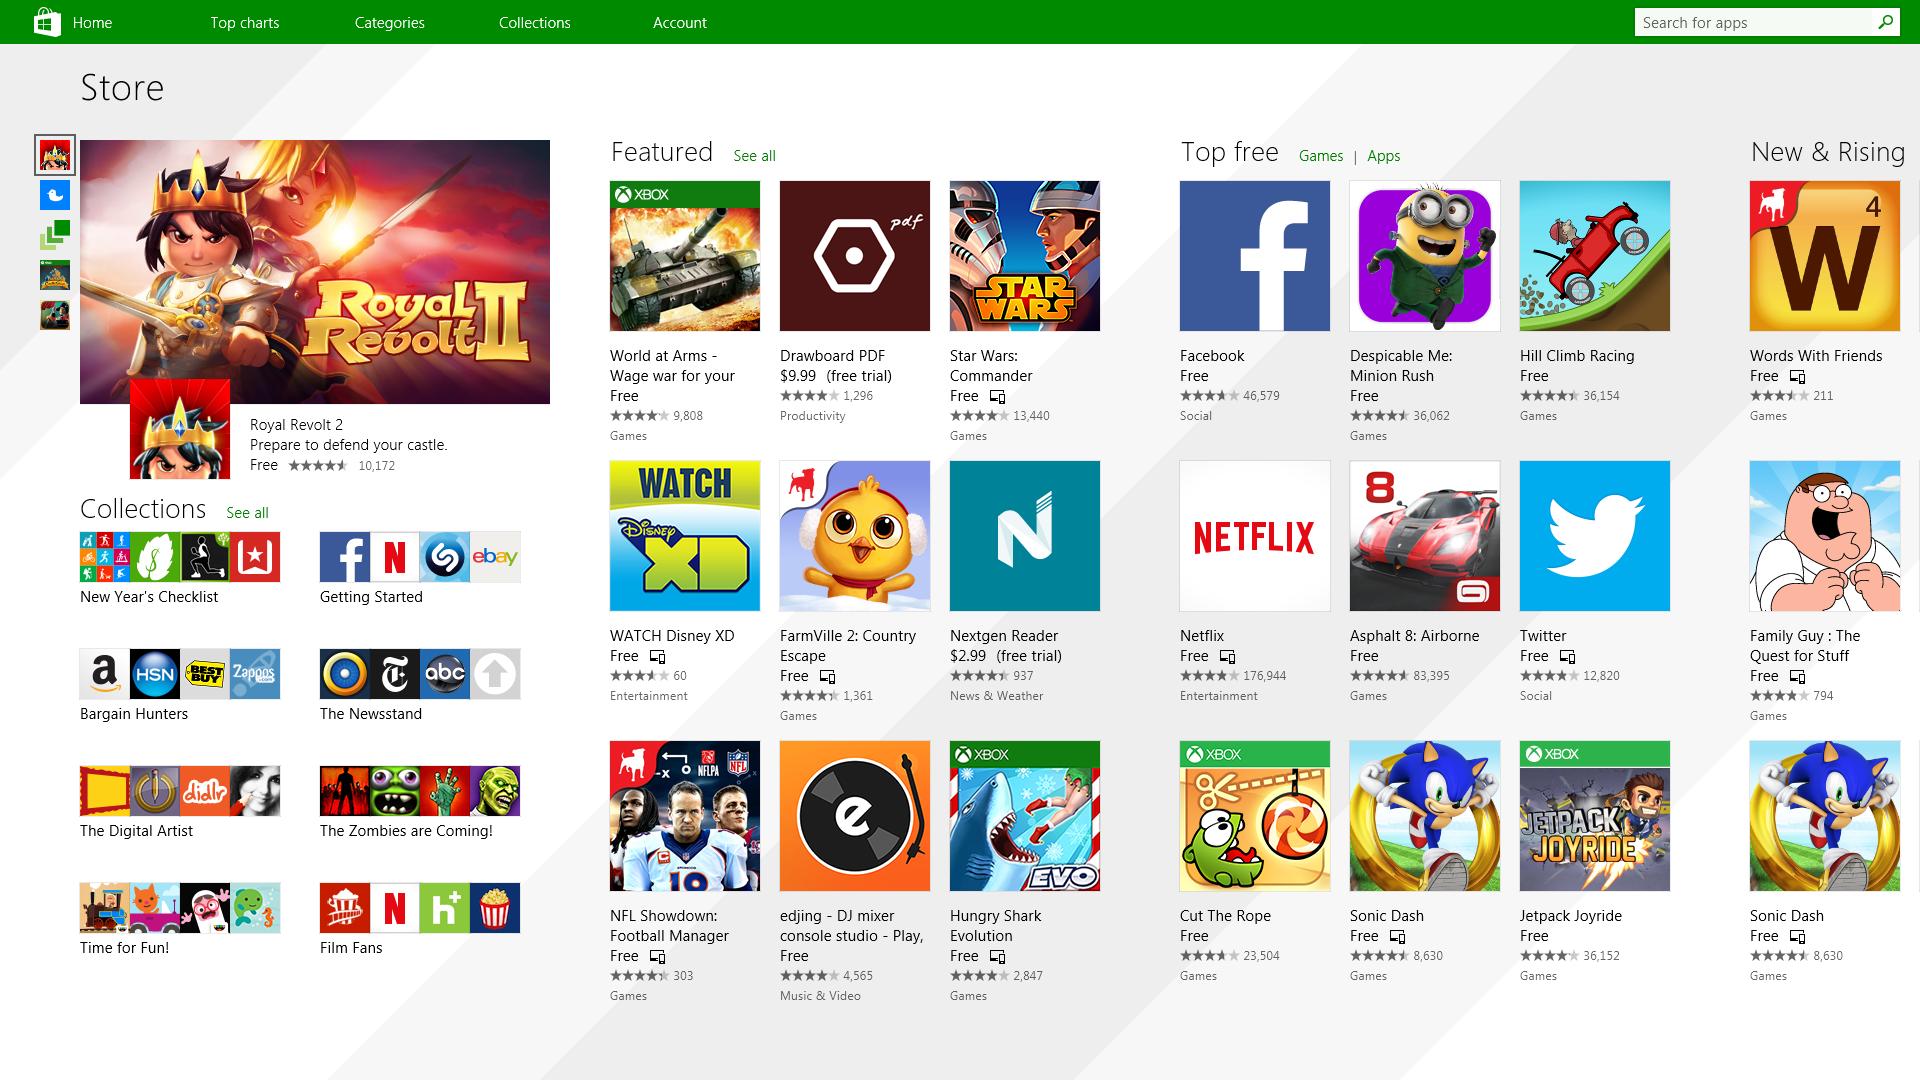
Microsoft store is ready and prepared for Windows 11 official release on October 5th and it is coming with some surprises.
It has officially confirmed that many open source and free applications will be in it like Opera, VLC, discord, Libre office, etc. It seems that Microsoft wants to place its store as one place to go for all of your software needs.
Another great surprise is the coming of Epic games store implementation. It was officially confirmed but not explained in detail, will we have Epic store opened in Windows store or we will only get installer as a package we will see but this is some great news.
As for how it states now, it seems that the Windows store aims to eliminate searching the web for applications and bring them all into one environment with reviews and ratings so you know which one to install and use. It also features a great search engine to find proper applications for your needs.
The new store will come to Windows 10 as well but after all Windows 11 has been mostly released and adopted. So expect it via update in two or three months' time.
It would be great if some larger companies decide to join MS stores like Autodesk, Adobe, the Foundry, etc so you can install everything you need from it but one can only hope.
Upgrading your Windows 10 computer does not always go smoothly and you often encounter not just one but various errors so, in this post, we are going to cover several Windows 10 upgrade errors such as 80240020, 8007002C, 80246007, 80070004. All these upgrade errors are related to the Windows Update folder. Thus, you need to clear the Software Distribution folder, repair the System Image and fix System Health in order to resolve all these Windows 10 Upgrade errors.
Before you get started on the steps to resolve these tons of errors, you have to disable your security program for the meantime, disconnect your peripherals, remove USBs connected to your PC and then make sure that your PC is connected to the main power supply. Once you have everything covered, carefully follow the options given below.
Option 1 – Delete Windows 10 Update Files in the SoftwareDistribution folder
The Software Distribution folder in the Windows operating system is a folder that can be found in the Windows directory and is used to store files temporarily which might be required to install the Windows Update on your PC. Thus, it is required by the Windows Update and maintained by WUAgent. A lot of users tried deleting the files in this folder to fix the problem and so far it has worked. Like them, you can try clearing the Windows Update cache by simply deleting the contents of the folder named “SoftwareDistribution” since Windows apparently can’t clear and re-download the update contents once they are corrupted. Thus, deleting the contents of this folder will make Windows download the contents again which will fix the problem. To do that, follow the steps below.
Open the WinX Menu.
From there, open Command Prompt as admin.
Then type in the following command – don’t forget to hit Enter right after typing each one of them.
net stop wuauservnet stop bits
After entering these commands, it will stop the Windows Update Service and the Background Intelligent Transfer Service.
Next, go to the C:\Windows\SoftwareDistribution folder and get rid of all the folders and files thereby tapping the Ctrl + A keys to select them all and then click on Delete. Note that if the files are in use, you won’t be able to delete them.
Once all the contents in the Software Distribution folder are deleted, restart your PC and then go back to Command Prompt and input the following commands again.
net start wuauservnet start bits
Since the folder has already been flushed, it will be populated afresh the instant your restart your computer and open Windows Update.
Now Open Settings and check for Windows Updates. Windows 10 should begin the download right away.
Option 2 – Try using the DISM tool
Running the DISM Tool helps in repairing the Windows System Image as well as the Windows Component Store in Windows 10. Using this built-in tool, you have various options such as the “/ScanHealth”, “/CheckHealth”, and “/RestoreHealth”.
Open the Command Prompt with admin privileges.
Then type in the following commands and make sure to hit Enter right after you type each one of them:
Dism /Online /Cleanup-Image /CheckHealth
Dism /Online /Cleanup-Image /ScanHealth
exe /Online /Cleanup-image /Restorehealth
Do not close the window if the process takes a while as it will probably take a few minutes to finish.
Note: If it happens that the Windows Update client is broken, you need to run the following command to repair it then restart your PC and click on Update once again.
Note: The Windows Upgrade error, with error code 80240020 is an expected error message that happens when the upgrade requires customer user action. Thus, you need to do the following steps to resolve this particular Windows Upgrade error.
Tap the Win + R keys to open the Run dialog box.
Then type “regedit” in the field and hit Enter to open the Registry Editor.
After that, navigate to this registry key: HKEY_LOCAL_MACHINESOFTWAREMicrosoftWindowsCurrentVersionWindowsUpdate
Now right click on WindowsUpdate located in the left pane and then create a new key and name it as “OSUpgrade”
Next, right-click in an empty space in the left pane and create a new DWORD and name it “AllowOSUpgrade” and enter “1” as its value.
Option 3 – Try running the Windows Update in a Clean Boot State.
Putting your PC in a Clean Boot state can also help you install Windows Updates or Upgrades without any trouble because, during this state, you can start the system with a minimum number of drivers and startup programs that will surely help you in isolating the root cause of the issue.
Log onto your PC as an administrator.
Type in MSConfig in the Start Search to open the System Configuration utility.
From there, go to the General tab and click “Selective startup”.
Clear the “Load Startup items” checkbox and make sure that the “Load System Services” and “Use Original boot configuration” options are checked.
Next, click the Services tab and select the “Hide All Microsoft Services” checkbox.
Click Disable all.
Click on Apply/OK and restart your PC. (This will put your PC into a Clean Boot State. And configure Windows to use the usual startup, just simply undo the changes.)
After that, try to install the Windows Updates or upgrade again.
Error 0xe06d7363 is displayed when a process or an operation is not launched, or completed by an application.
This error can prevent the user from performing some operations. It might close the application unconditionally. Sometimes a ‘GetLastError()’, a ‘GetExceptionCode()’, or a ‘GetExceptionInformation()’ is displayed with this error.
Error Causes
Error 0xe06d7363 can occur for a number of reasons. Damaged, corrupted, or missing files in the registry database are the main reasons why the error might occur. Another reason is when the system files are not configured correctly, thus they corrupt system files in applications. They can also affect the hardware devices.
All code-generated exceptions in the Microsoft Visual C + + compiler will contain this error. As this error is compiler-generated, the code will not be listed in Win32 API header files. This code is a cryptic device, with ‘e’ for exception while the final 3 bytes represent ‘msc’ ASCII values.
Further Information and Manual Repair
To resolve this error, you will have to debug an application. While using Microsoft Visual Studio, you can stop the program when the error 0xe06d7363 occurs. To start debugging, follow these steps:
Start debugging application
From Debug menu, click on Exceptions
In the Exceptions window, select error 0xe06d7363
In Action, Change to Stop always from Stop if not handled
Another fix for this issue is reverting back to an earlier copy or the last update of the same Windows. Error 0xe06d7363 can occur is when you try running a client application using Microsoft.SqlServer.Types.dll component on your computer that has Microsoft SQL Server 2008 Server Pack 2 installed. With the error, the following text can be seen:
“unable to load DLL ‘SqlServerSpatial.dll’ Exception from HRESULT 0xe06d7363".
A Cumulative Update 7 was initially released for SQL Server 2008 Service Pack 2 in order to fix this issue. Since the builds are cumulative, every new fix released contains hotfixes and all security fixes which were also included in the previous SQL Server 2008 fix release. This error can be found in all Microsoft products that are listed in the Applies to Category.
Microsoft SQL Server 2008 hotfixes are created to resolve errors like 0xe06d7363 on specific SQL Server service packs. This error is by design and has commonly occurred in the previous versions of Windows before Windows 7.
Congratulations, you have just fixed Error 0xe06d7363 in Windows 10 all by yourself. If you would like to read more helpful articles and tips about various software and hardware visit errortools.com daily.
Now that’s how you fix Error 0xe06d7363 in Windows 10 on a computer. On the other hand, if your computer is going through some system-related issues that have to get fixed, there is a one-click solution known as Restoro you could check out to resolve them. This program is a useful tool that could repair corrupted registries and optimize your PC’s overall performance. Aside from that, it also cleans out your computer for any junk or corrupted files that help you eliminate any unwanted files from your system. This is basically a solution that’s within your grasp with just a click. It’s easy to use as it is user-friendly. For a complete set of instructions in downloading and using it, refer to the steps below
Perform a full system scan using Restoro. To do so, follow the instructions below.
Download and install Restoro from the official site.
Once the installation process is completed, run Restoro to perform a full system scan.
After the scan is completed click the “Start Repair” button.
We have all experienced Windows errors over time and that can range from simple ones that will do very little to no harm and can be even system breaking making us lose our work or completely making the PC unusable. No one likes them but they happen, and usually, they happen once we least expect them.
No matter how frequent and unpleasant they might be there are ways to keep them at the minimum and even avoid them.
We will discuss steps that you can take in order to do this, simple tips and guides on how to keep your computer in top form and eliminate not just Windows, but any kind of errors altogether.
Keep your hardware clean
Believe it or not, some serious Windows errors like the dreaded blue screen of death can come from hardware issues not from the software at all. It is very important to keep your computer clean and with enough air flow so it can function properly.
Keeping applications on the drive might seem harmless but sadly that is not the case. Some applications have a certain impact on the system itself after all most of them are tweaking registry entries in Windows and sometimes having too many applications means an increased possibility of conflict over certain resources even when they are not running.
Some applications like adobe creative suite, for example, will have certain services always running in the background, and more of these kinds of applications you have, more services, more places for unexpected errors when they collide. Some of them will also install certain dependencies that could be problematic.
The general idea is: if you are not using it, uninstall it and you will be safer and more resilient to errors inside OS.
Do not use pirated or cracked software
Besides moral and law implications that using pirated or cracked software might bring you there are also certain other things that might be problematic. Certain "free" software might come packet with some problematic malware, for example, it is not uncommon for attackers to use some popular software to pack their malicious application with it.
Other things might be wrong and incomplete tweaking with application in order to bypass security and thus bringing some instability due to scripts needed to run in order to achieve this goal.
Keep your drivers updated
Errors can also come from old drivers or bad drivers, device manufacturers are not all-knowing and perfect, and sometimes drivers can wreak havoc on the system. Having updated drivers can minimize any kind of unexpected behaviors inside the operating system making it more stable and reliable.
You can check your driver version in the control panel inside the Windows OS and then compare it to the ones found on the manufacturer's site, if there are newer available it is recommended to download and install them,
Keep software updated
Applications can have bugs, and bugs can lead to certain errors both in the system and when using the app as well. It is in your best interest to get the latest patch or newer version of the software in order to avoid these unpleasant experiences.
Also, certain codecs and extensions that are installed directly in Windows can also have some unpredictable behavior, updating is the best solution to keep them in line.
Keep Windows updated
Same as with drivers and applications, Windows itself is not immune from bugs and some unpredictable issues. Luckily Microsoft is always working on fixes and features of Windows but in order to actually have benefited from that work, you will need to keep Windows updated. Sometimes a bad update can introduce some errors but you can always roll back to the previous and wait for them to fix everything and then download them all.
Check the health of your hardware regularly
Hardware components have their life cycle, more quality ones tend to last longer but eventually, they will reach the end of their lifecycle. There are a lot of testers for various components in your computer that can check different things and provide you with information about the state of your components.
If you are on Windows 11, Microsoft has included a basic health app inside OS, just type PC health check in search and start the app. For some more detailed information and advanced checks, you will have to use a custom application. There are plenty of them specialized for single components like RAM, SSD, etc. A simple google search with providing you with top results and most of them are free for personal use.
Remember, a faulty component or component that is reaching its life cycle can produce many errors inside the operating system.
 So, in this case, you have some social, forum, or gaming accounts but you heard that service has been breached and that your email or password might be stolen. Well in this case all you need to do is of course to login into the service and change your password. But, what happens if you are not aware at all that service has been compromised?

 Microsoft is once again advising its customers to disable Windows print spooler after a new vulnerability that allows hackers to execute malicious code on machines has emerged. While a patch fixing the flaw will be released in due course, the most effective workaround currently on the table is to stop and disable the print spooler service entirely.
 It has officially confirmed that many open source and free applications will be in it like Opera, VLC, discord, Libre office, etc. It seems that Microsoft wants to place its store as one place to go for all of your software needs.
Another great surprise is the coming of Epic games store implementation. It was officially confirmed but not explained in detail, will we have Epic store opened in Windows store or we will only get installer as a package we will see but this is some great news.
As for how it states now, it seems that the Windows store aims to eliminate searching the web for applications and bring them all into one environment with reviews and ratings so you know which one to install and use. It also features a great search engine to find proper applications for your needs.
The new store will come to Windows 10 as well but after all Windows 11 has been mostly released and adopted. So expect it via update in two or three months' time.
It would be great if some larger companies decide to join MS stores like Autodesk, Adobe, the Foundry, etc so you can install everything you need from it but one can only hope.
It has officially confirmed that many open source and free applications will be in it like Opera, VLC, discord, Libre office, etc. It seems that Microsoft wants to place its store as one place to go for all of your software needs.
Another great surprise is the coming of Epic games store implementation. It was officially confirmed but not explained in detail, will we have Epic store opened in Windows store or we will only get installer as a package we will see but this is some great news.
As for how it states now, it seems that the Windows store aims to eliminate searching the web for applications and bring them all into one environment with reviews and ratings so you know which one to install and use. It also features a great search engine to find proper applications for your needs.
The new store will come to Windows 10 as well but after all Windows 11 has been mostly released and adopted. So expect it via update in two or three months' time.
It would be great if some larger companies decide to join MS stores like Autodesk, Adobe, the Foundry, etc so you can install everything you need from it but one can only hope. 

