What is this particular error?
One common issue when trying to upgrade to Windows 10 from Windows 7 or 8 is incompatible software. Any installed software or app that isn’t compatible with Windows 10 will prevent you from continuing with the set-up. Normally, you’ll get an error message “What needs your attention” and it will ask you to uninstall a list of apps manually. Unfortunately, some users reported that they couldn’t find the app it asks to uninstall. In some cases, users said they’ve already uninstalled the app but it still won’t start the Windows 10 Setup.
Solution
 Error Causes
This type of issue normally occurs because of the following:
- Incompatible software/apps
- Corrupted software/apps
- Incomplete uninstallation
Further Information and Manual Repair
Here are some steps you can take whenever you encounter this error.
Note: Before taking any steps, make sure that you’re highly equipped to do so. Some steps might affect the system and even do more damage to your computer. You might also want to consider using an automated tool instead.
Method 1 – Perform a clean boot, then retry upgrading
A clean boot is normally done to start Windows using the least set of drivers and startup programs available. By doing this, it eliminates possible software issues that happen when installing or uninstalling a program in Windows 10.
Before performing a clean boot, make sure to take note of the following:
- You need administrative privileges in order to perform this action.
- When doing this, your computer might lose temporarily functionality. However, it will return after start-up.
- It is highly advisable to not use the System Configuration to change advanced boot options.
Here are the steps to perform a clean boot.
- Step 1 – Go to Start and search for msconfig
- Step 2 – Go to System Configuration
- Step 3 – Under Services tab, click on the “Hide all Microsoft services” checkbox. Then, choose to Disable all
- Step 4 – Go to the System Configuration’s Startup tab. Then, click on “Open Task Manager”
- Step 5 – In the Task Manager dialog box, you will see a Startup tab. Choose items that you want to disable and then click the Disable button
- Step 6 – Close the Task Manager dialog box.
- Step 7 – Go back to the Startup tab of the System Configuration box. Click “Ok” then proceed with restarting.
Method 2 – Manually uninstall programs from the Program Files folders
Instead of using the “add or remove programs” feature in Windows, you might need to manually install the program directly from the C drive. To do this, follow the steps below:
- Step 1 – Go to the C drive, and look for the Program Files folders. For 32-bit users, you can find it at C:\Program Files. If you’re using the 64-bit version of Windows, go to C:\Program Files (x86) folder.
- Step 2 – Find the “uninstall” application file
- Step 3 – Right-click, and run the file as administrator. Wait for the uninstallation to finish. In some software, you need to restart your system before the uninstallation will take effect.
Note: In some cases, you may also need to search for files related to the program. You can use the search bar under Drive C to do this. Delete those files as well.
Method 3 – Create a new user account
Before upgrading to Windows 10, create a new user account. Make sure it has administrative privileges. From there, run the upgrade.
Method 4 – Use third-party uninstaller services
If you still can’t run Windows 10 Setup after the above methods, you might need to rely on a third-party service. Microsoft recommends Revouninstaller that can help you.
Before using this software, reinstall the application or utility that Windows 10 wants you to install. Then, use Revouninstaller to delete the program completely.
Method 5 – Disable third-party antivirus software
Some users who experienced this issue reported that it was solved after disabling or completely uninstalling the anti-virus software installed in their system.
Method 6 – Use a trusted automated tool
If after trying the above methods, the problem still persists, it might be best to use a trusted automated tool to fix the issue.

 Sadly receiving this blue screen does not really explain which of the three cases is the correct one and causing the unwanted issue.
That being said, this article will not offer you a direct solution this time, it will be more like a guide on what to check and to do in order to remove this error, reason for this is the nature of the error itself.
If your computer is booting properly and you can enter Windows without issues the first thing you can try is going into power options and set it to high performance, if you are on a laptop set high performance both ways, when plugged and when on battery. Power performance settings can reflect on some hardware and can cause mayhem. After setting reboot the computer and see if the error repeats itself.
If the error persists go to the device manager and see if there is hardware that has any kind of warning beside it. If there is, update the driver or remove the driver of the device to see if this fixes the issue.
If all of the previous two things fail there is another thing you could try. Turn off your computer and disconnect all hardware except the most basic one. Now, this may take a long period of time but boot your computer and then repeat this process but each time add a new piece of hardware to eliminate and find which one is causing the issue. When found try to see if it is repairable through driver updates or get a new device.
Sadly receiving this blue screen does not really explain which of the three cases is the correct one and causing the unwanted issue.
That being said, this article will not offer you a direct solution this time, it will be more like a guide on what to check and to do in order to remove this error, reason for this is the nature of the error itself.
If your computer is booting properly and you can enter Windows without issues the first thing you can try is going into power options and set it to high performance, if you are on a laptop set high performance both ways, when plugged and when on battery. Power performance settings can reflect on some hardware and can cause mayhem. After setting reboot the computer and see if the error repeats itself.
If the error persists go to the device manager and see if there is hardware that has any kind of warning beside it. If there is, update the driver or remove the driver of the device to see if this fixes the issue.
If all of the previous two things fail there is another thing you could try. Turn off your computer and disconnect all hardware except the most basic one. Now, this may take a long period of time but boot your computer and then repeat this process but each time add a new piece of hardware to eliminate and find which one is causing the issue. When found try to see if it is repairable through driver updates or get a new device. 
 The first step is to right-click anywhere on the taskbar (in empty space) and choose Taskbar settings
Once the taskbar settings are opened, find Widgets and click on the switch on the far right to turn it off, immediately no more information will be shown on the taskbar and it will be free again. And that is all there is to it.
The first step is to right-click anywhere on the taskbar (in empty space) and choose Taskbar settings
Once the taskbar settings are opened, find Widgets and click on the switch on the far right to turn it off, immediately no more information will be shown on the taskbar and it will be free again. And that is all there is to it.  Advanced desk features
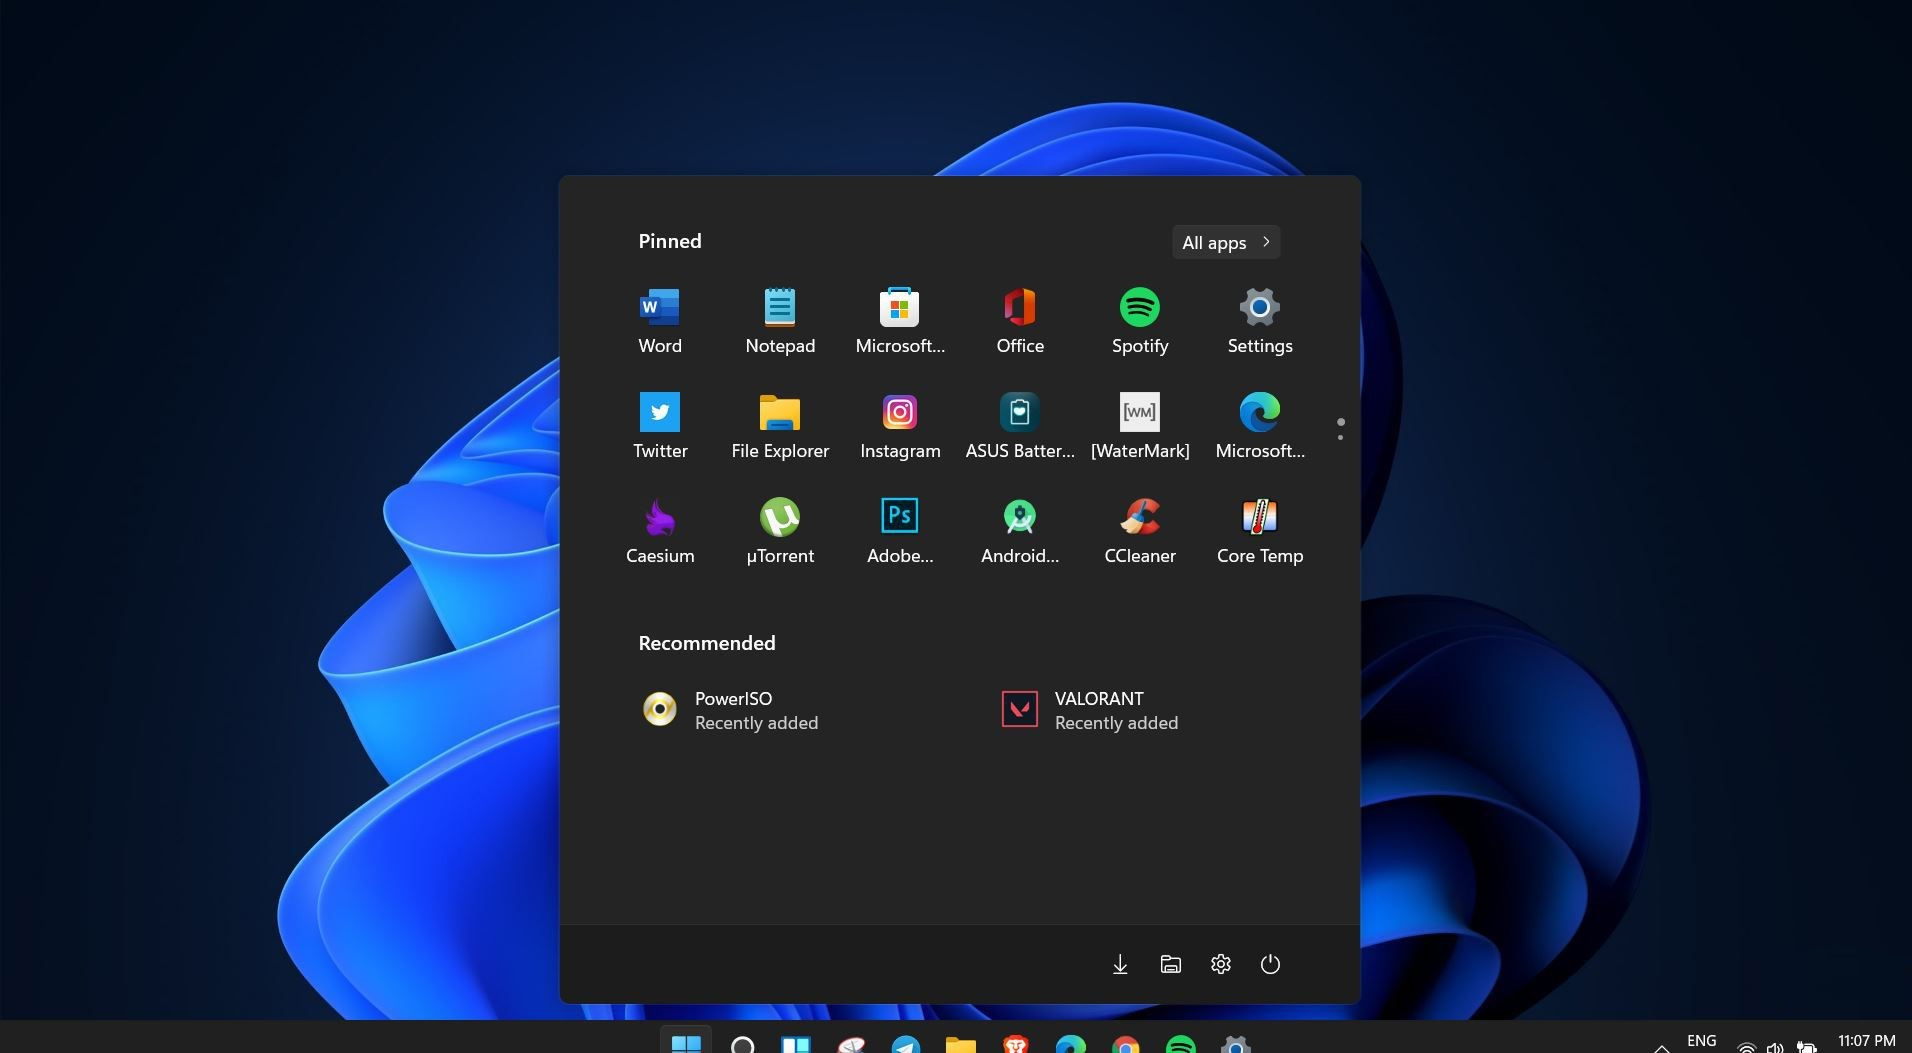 Windows 11 is coming soon, from its typical view and color scheme, Windows 11 will natively support dark mode.
The dark mode is very popular in many applications today, some large companies like Adobe, Autodesk, and many more have already adopted a dark color scheme for their software so it is logical for others to follow and Microsoft is aboard for it.
The dark mode itself has its benefits, for people who work on computer for longer period of time dark mode inside applications will throw less white and blue light on their eyes making workhours easier and pleasant on them.
As a person who does indeed spend a lot of time in front of the screen, I would advise you to switch to dark mode regardless of the time that you spend with a computer, your eyes will be grateful.
Windows 11 is coming soon, from its typical view and color scheme, Windows 11 will natively support dark mode.
The dark mode is very popular in many applications today, some large companies like Adobe, Autodesk, and many more have already adopted a dark color scheme for their software so it is logical for others to follow and Microsoft is aboard for it.
The dark mode itself has its benefits, for people who work on computer for longer period of time dark mode inside applications will throw less white and blue light on their eyes making workhours easier and pleasant on them.
As a person who does indeed spend a lot of time in front of the screen, I would advise you to switch to dark mode regardless of the time that you spend with a computer, your eyes will be grateful.
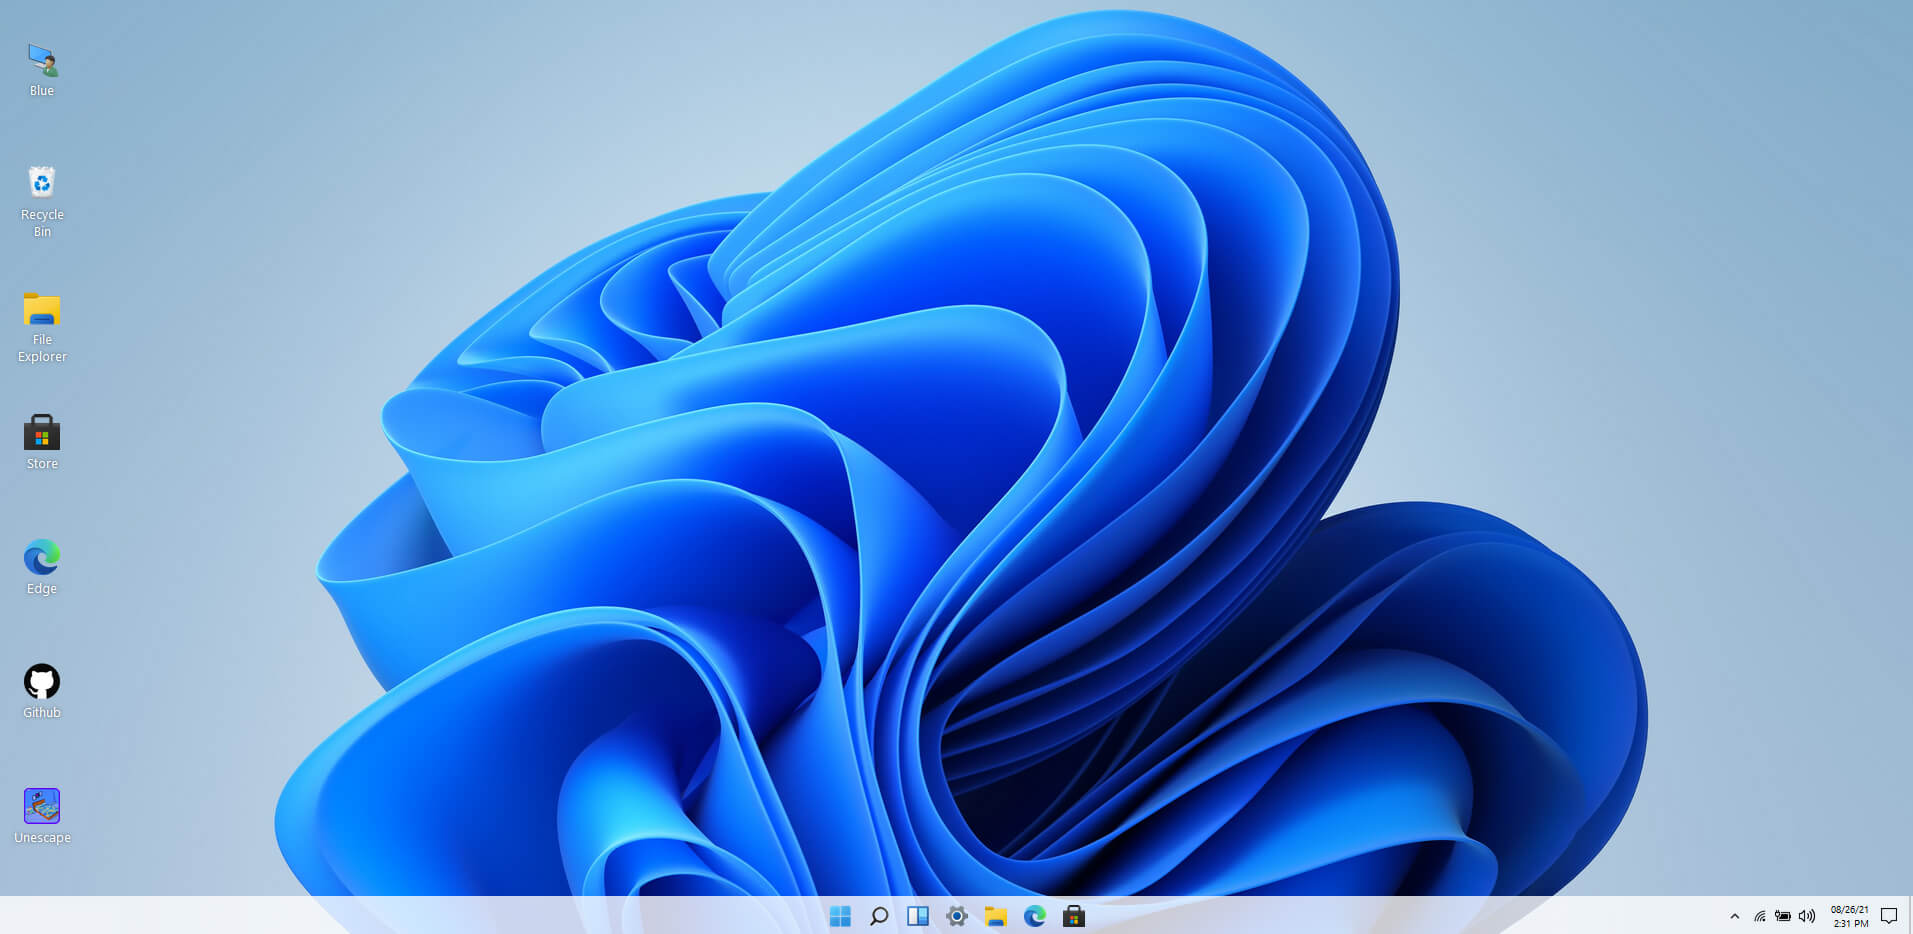 Windows 11 release date is closing in, some people have tried it via insider build, some have decided not to. It has come to our attention that there is a little website made by BlueEdge that offers a virtual Windows 11 desktop.
Opening the Website will put you right inside Windows 11 desktop, now take note that this is not Windows 11, it is a simulation of Microsoft’s newest OS and therefore many things will not work like File Explorer, etc.
One thing you can make sure it is working is UI itself, you can see how you do like the new Taskbar, start menu, widgets, and some other things. You can just pop up on the site and check how you do like the overall new look and feel of Windows 11 UI before installing it or trying it.
We are sure that many more options will come in time but even now you can get a feel of the newest OS.
Windows 11 BlueEdge site:
Windows 11 release date is closing in, some people have tried it via insider build, some have decided not to. It has come to our attention that there is a little website made by BlueEdge that offers a virtual Windows 11 desktop.
Opening the Website will put you right inside Windows 11 desktop, now take note that this is not Windows 11, it is a simulation of Microsoft’s newest OS and therefore many things will not work like File Explorer, etc.
One thing you can make sure it is working is UI itself, you can see how you do like the new Taskbar, start menu, widgets, and some other things. You can just pop up on the site and check how you do like the overall new look and feel of Windows 11 UI before installing it or trying it.
We are sure that many more options will come in time but even now you can get a feel of the newest OS.
Windows 11 BlueEdge site: