 Researchers have discovered 16 vulnerabilities in Bluetooth connections that could be exploited and make from minor to some serious damage to your device. The flaw can be used on chips manufactured by Intel, Qualcomm, and Texas Instruments while connecting to external devices like speakers, headphones, keyboards, mice, etc.
Mentioned chips are used by many in a vast range of devices including big players with their products like Microsoft Surface laptops, Dell desktops, Samsung Phones, Google Pixel, and OnePlus handsets.
The Bluetooth bug affects a wide range of devices, including smartphones, laptops as well as smart home gadgets. In total, more than one billion devices that rely on Bluetooth are believed to be impacted.
The amount of damage possible with this flaw depends on the type of device with the chipset. Some devices can only be crashed after a specially crafted packet is sent to the flawed chip. If that's the case with your gadget, it can be easily resolved with a simple restart.
With other devices, hackers can take advantage of the Bluetooth Classic flaw to remotely run malicious code. That could allow malware to be installed remotely. Researchers say vendors were informed about these issues months ago before the findings were published.
The good news is this should have given plenty of time for the relevant patches to be pushed out that remedy the flaws. However, you'll need to make sure that you're running the latest version of the operating system to be protected by the patch crafted by the manufacturers.
The researchers emphasize the lack of basic tests in Bluetooth certification to validate the security of Bluetooth Low Energy (BLE) devices. The BrakTooth family of vulnerabilities revisits and reasserts this issue in the case of the older, but yet heavily used Bluetooth classic (BR/EDR) protocol implementations.
We would also advise users to disable Bluetooth on devices that do not need it. This way you can prevent attackers from sending you malformed LMP packets. Since BrakTooth is based on the Bluetooth Classic protocol, an adversary would have to be in the radio range of the target to execute the attacks. So, in a safe environment Bluetooth can be enabled.

In 2014 Proton mail started as an end-to-end encrypted email service offering secure and private email services. Proton mail is still live and going with the same dedication to privacy and security but the company has expanded its offering into cloud storage drive services.
Starting as a public beta at the end of 2020, Proton Drive is keeping its privacy and security policy philosophy with the new service. Proton Drive is the newest service besides Proton Calendar, Proton VPN, and Proton Mail.
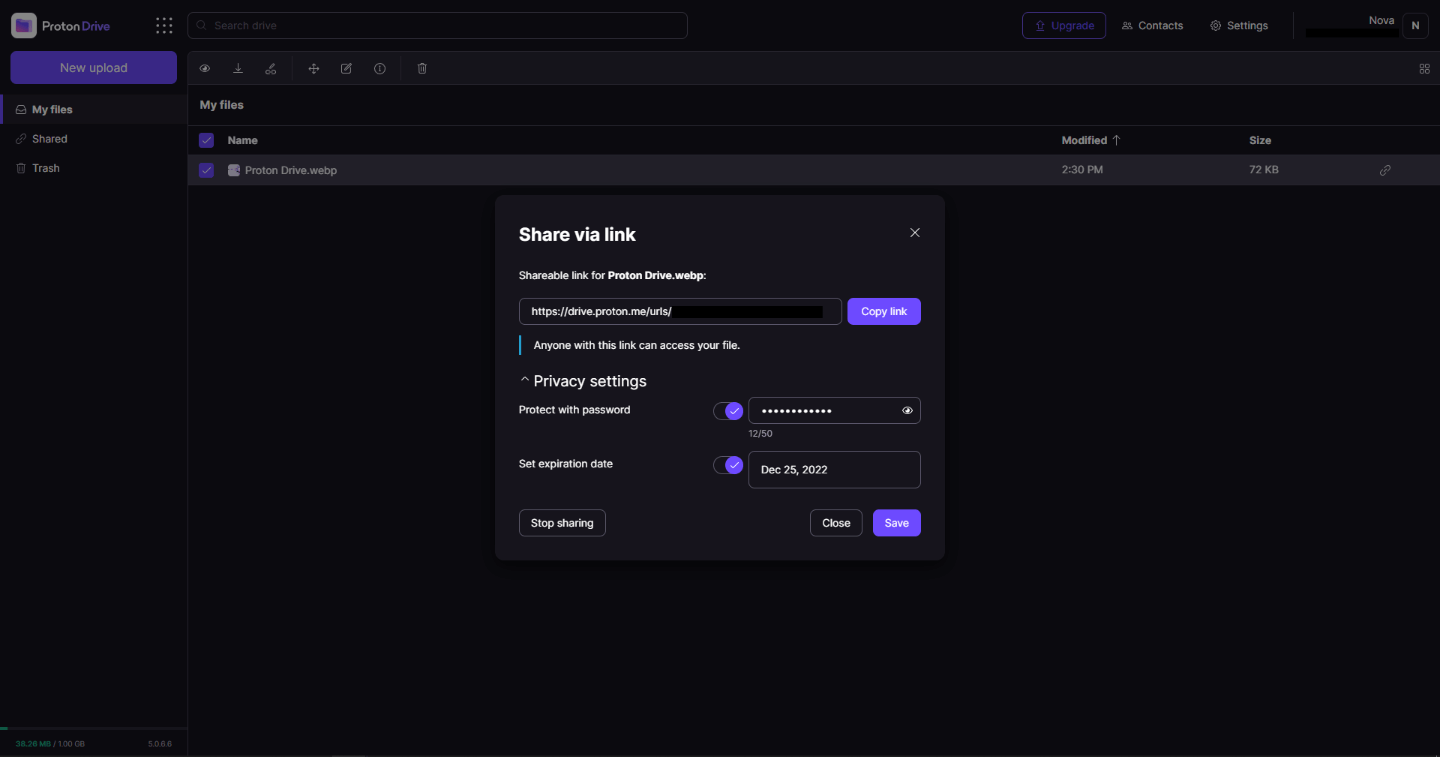
Drive has end-to-end encryption for everything on it including files themselves, filenames, folder structure, folder names, extensions, and file sizes. This means that you and only you can access your files. Servers are located in Geneva, Switzerland and they are under Swiss privacy laws making sure that your files are protected. Proton services in general are all open source so anyone can take a look at them to be sure that nothing is lurking under the hood. For now, sync is done either via the android app or web interface but the desktop client will come soon since currently, it is under development.
Sadly free plan of Proton Drive will give you only 1GB of storage which is much less than other services and sadly payments plans are also not so jaw-dropping going for $4 USD per month for a 200GB plan or with Proton ultimate subscription that will set you $10 behind but you will get 500GB of drive storage. Of course, if you value privacy for your files these options are good but if you do not mind that part other services have much better options.
All in all Proton Drive is a great cloud storage solution if you need privacy and well worth the investment. With the ultimate subscription, you will get enough space for most people and company needs with other services and guaranteed privacy and security, on the other hand, if you just need a large amount of cloud storage not caring too much about privacy other options are better.
The Motitags toolbar browser add-on was created by Mindspark Inc. and is compatible with Internet Explorer and Mozilla Firefox. It claims to enhance users’ Internet browsing experience by enabling smileys within popular email clients such as Gmail, Yahoo!, AOL, and Outlook Live. While such added functionality may seem useful, Internet users should be aware that this browser plugin is categorized as a Browser Hijacker due to its behavior.
When installed this extension changes your default search engine, the home page, and new tab to MyWay.com, and while installed it gathers user browsing data and sends it back to Mindspark servers. This data is later used to inject additional unwanted ads into the user’s browser search results.
 Error Causes
Error codes on Windows devices can result from many reasons, including lack of proper PC maintenance, the presence of malware, and issues related to servers. In the case of error code 0xc00007b, it manifests itself on various versions of the Windows operating system when users attempting to run applications incompatible with their system or use the incorrect bit location. To correct these issues that may be causing error code 0xc00007b, users will need to use manual repair methods listed in this article. Failure to rectify this error code could result in others such as error code 0xc0000142.
The manual repair procedures listed in this article do not require extensive technical knowledge. Thus, even average Windows users will be able to apply these solutions in order to fix error code 0xc00007b in Windows 8. However, in case of difficulty applying the solutions listed below, contact a Windows repair technician.
One of the first manual repair methods you can attempt is to use Windows Update. This will enable users to access the latest updates for the version of Windows they have on their system. To update your system, follow the instructions below.
After you’ve completed the installation of the latest updates, reboot your machine then attempt to run the gaming application you were unable to open due to error code 0xc00007b. You should be able to run the application if Windows Update fixed the issue. However, if the error code reoccurs, proceed to the next manual repair method by installing Microsoft DirectX.
Another important manual repair method relates to the use of DirectX, a free tool available to Windows users regardless of the version of the Windows operating system present on their PC. Visit Microsoft’s official website and search for DirectX End-User Runtime Web Installer. Ensure you access the latest version of the program, then click download.
The app enables Windows users to access high-speed gaming by providing a powerful platform for games and multimedia applications. Access to the latest version of DirectX can help users fix the issues causing error code 0xc00007b in Windows 8.
When the installation process is complete, reboot your PC, then proceed by checking if you are able to run your gaming applications. If you are still unable to run the applications the issue will need to be resolved via another manual repair method.Access the latest version of Microsoft’s .NET Framework to complete the final manual repair method. Be sure to follow the steps listed below to download the latest version of the .NET framework. This is crucial as only the latest version of the framework is equipped with the necessary capabilities required to successfully address the issues causing error code 0xc00007b on your device.
Restart your computer after you’ve downloaded the latest version of the .NET framework. Open the gaming application you were previously unable to run due to error code 0xc00007b.
You’ll be able to access all your gaming or multimedia programs if the issue was resolved via this manual repair method. Otherwise, you may need to reinstall the programs you are unable to run as there may be an issue with the program itself resulting in software conflict or the inability to run other gaming programs.
If you wish to always have at your disposal a utility tool to fix these Windows 8 and other related issues when they do arise, download and install a powerful automated tool.
 As of the time of writing this article you no longer need or are required to have a password if you plan to log in to your Microsoft account. Microsoft explored various options for account security and came to the conclusion that passwords are obsolete.
Microsoft is letting you access your account through the Microsoft Authenticator app, Windows Hello, a security key, SMS verification, or email verification code. All of these methods are way better in terms of security than passwords.
As of the time of writing this article you no longer need or are required to have a password if you plan to log in to your Microsoft account. Microsoft explored various options for account security and came to the conclusion that passwords are obsolete.
Microsoft is letting you access your account through the Microsoft Authenticator app, Windows Hello, a security key, SMS verification, or email verification code. All of these methods are way better in terms of security than passwords.
“Your PC ran into a problem and needs to restart. We’re just collecting some error info, and then we’ll restart for you. (0% complete) If you’d like to know more, you can search online later for this error: 0xc000021a”This error pops up when a user-mode subsystem like the WinLogon or the Client Server Run-Time Subsystem or CSRSS has been compromised fatally and security can no longer be guaranteed in the system. Thus, the operating system switches to kernel mode, and Windows won’t be able to run without the WinLogon or the Client Server Run-Time Subsystem. This is why it’s one of the few cases where the failure of a user-mode service can shut down the system. To resolve the issue, here are some fixes that might help.