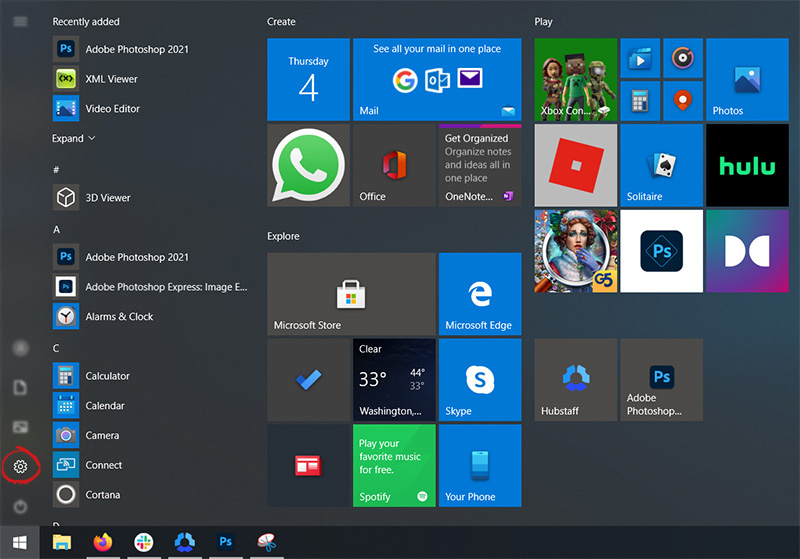
Logo

MMC.exe has been blocked for your protection

When trying to run Computer Management, or when running mmc.exe or compmgmt.msc from a command prompt you get the error that the application has been blocked for your protection then keep reading in order to solve the issue. This is a permission issue where if a regular user tries to run such system tools will result in saying that it has been blocked. Along with this, you may have a Group Policy issue. This can be fixed, but you will need admin permission to achieve it. It’s because when they are run from the command prompt with elevated privileges, it works.

  1. Change Group Policy Settings

    If your account is an admin account, and you are still facing the issue, then change the group policy settings:
    Open Group Policy Settings by typing gpedit.msc in the run prompt followed by pressing ENTER
    Navigate to User Configuration > Administrative Templates > Windows Components > Microsoft Management Console > Restricted/Permitted snap-ins
    Locate Computer Management policy, and double click to open it
    Enable it, exit Group Policy.
    When Enabled: The snap-in is permitted and can be added into the Microsoft Management Console or run from the command line as a standalone console.
    When Disabled: The snap-in is prohibited and cannot be added into the Microsoft Management Console or run from the command line as a standalone console. An error message is displayed stating that the policy is prohibiting the use of this snap-in.

  2. Temporarily disable UAC

    UAC is the user access control panel, and if you need to run the command right away, you can choose to disable it for some time. Click on the Start button, and then type UAC to find the User Account Control Settings.
    Click to open, and then slide down the notification setting at the bottom. It will temporarily allow launching the application as there is no check. However, make sure to switch to default once you are done.

Do You Need Help with Your Device?

Our Team of Experts May Help
Troubleshoot.Tech Experts are There for You!
Replace damaged files
Restore performance
Free disk space
Remove Malware
Protects WEB browser
Remove Viruses
Stop PC freezing
GET HELP
Troubleshoot.Tech experts work with all versions of Microsoft Windows including Windows 11, with Android, Mac, and more.

Share this article:

You might also like

Premiere Download Manager removal guide for Windows PC

Premiere Download Manager is a Browser Extension that comes bundled with Premiere Download Manager Potentially unwanted program, and other unwanted applications and extensions. This program was developed by Mindspark Interactive and offers users the ability to download files off the internet through the Download Manager provided. It also changes the home page and defaults the search engine to Myway.com.

This bundle monitors the user’s activity, and while the extension has access to your browsing activity, clicked links, visited pages, etc. the application itself has access to all the files that you downloaded, and have on your computer. This gathered data is later sent back to Mindspark’s servers where it is used to better target ads for users.

While installed, you will run into additional, sponsored links, and even pop-up ads while browsing the internet. Though it is not considered malware, it contains many behaviors disliked by users and is labeled as potentially unwanted. This bundle has been marked as a Browser Hijacker by several anti-virus applications and is therefore recommended to remove from your PC.

About Browser Hijackers

Browser hijacking is actually a form of unwanted software program, commonly a browser add-on or extension, which causes modifications in web browser’s settings. Browser hijacker malware is designed for many different reasons. Often, hijackers will force hits to sites of their preference either to increase web traffic producing higher ad revenue, or to obtain a commission for each and every user visiting there. Although it may seem naive, these tools are made by malicious people who always attempt to take full advantage of you, so that they can earn money from your naivety and distraction. Some browser hijackers are designed to make particular modifications beyond the web browsers, like changing entries in the computer registry and permitting other types of malware to further damage your computer.

Key symptoms that your internet browser has been hijacked

There are numerous symptoms that indicate your web browser is highjacked: the home page of the browser is changed all of a sudden; your browser is constantly being redirected to pornography sites; the default web engine has been changed and the browser security settings have been lowered without your knowledge; you’re getting browser toolbars you have never noticed before; you find lots of pop-up ads on your screen; your browser gets slow, buggy, crashes very often; You can’t access certain sites, in particular anti-virus websites.

Exactly how they get into your computer or laptop

There are several ways your computer or laptop can become infected by a browser hijacker. They generally arrive through spam email, via file-sharing networks, or by a drive-by download. They may also originate from any BHO, extension, toolbar, add-on, or plug-in with malicious purpose. Sometimes you may have mistakenly accepted a browser hijacker as part of an application bundle (usually freeware or shareware). Browser hijackers could affect the user’s web browsing experience significantly, monitor the websites frequented by users and steal financial information, cause difficulty in connecting to the net, and then finally create stability issues, making applications and computers freeze.

Removing browser hijackers

Certain browser hijacking can be quite easily reversed by finding and removing the corresponding malware application through your control panel. However, many hijackers are extremely tenacious and require specialized applications to eradicate them. Also, browser hijackers might modify the Computer registry therefore it could be very hard to restore all of the values manually, especially when you are not a very tech-savvy person. Installing and running antivirus applications on the affected system could automatically delete browser hijackers and also other unwanted applications. SafeBytes Anti-Malware discovers all types of hijackers – including Premier Download Manager – and removes every trace efficiently and quickly.

What To Do When You Cannot Install Safebytes Anti-Malware?

All malware is bad and the degree of the damage will differ greatly with regards to the type of malware. Certain malware variants modify internet browser settings by including a proxy server or modify the computer’s DNS configurations. When this happens, you’ll be unable to visit certain or all of the internet sites, and thus unable to download or install the required security software to get rid of the infection. If you are reading this article now, you have probably realized that virus infection is the cause of your blocked internet connectivity. So what to do when you want to download and install an anti-virus program such as Safebytes? There are some options you could try to get around with this particular issue.

Make use of Safe Mode to resolve the issue

In Safe Mode, you may change Windows settings, uninstall or install some applications, and get rid of hard-to-delete viruses and malware. In case the malware is set to load automatically when the computer starts, shifting into this mode could prevent it from doing so. To boot into Safe Mode, hit the “F8” key on the keyboard right before the Windows boot screen comes up; Or right after normal Windows boot up, run MSConfig, check the Safe Boot under the Boot tab, and click Apply. Once you are in Safe Mode, you can try to install your antivirus program without the hindrance of the malware. At this point, you can actually run the anti-malware scan to get rid of viruses and malware without interference from another application.

Switch to some other web browser

Some malware only targets certain internet browsers. If this sounds like your situation, employ another web browser as it can circumvent the computer virus. If you’re not able to download the anti-malware program using Internet Explorer, it means malware is targeting IE’s vulnerabilities. Here, you should switch over to a different internet browser like Chrome or Firefox to download Safebytes software.

Make a bootable USB anti-virus drive

Another option is to create a portable antivirus program onto your USB stick. To run anti-malware using a pen drive, follow these simple steps: 1) Download the anti-malware on a virus-free computer. 2) Plug the pen drive into the uninfected computer. 3) Double click on the downloaded file to run the installation wizard. 4) When asked, choose the location of the pen drive as the place where you want to store the software files. Do as instructed on the computer screen to finish up the installation process. 5) Transfer the USB drive from the clean computer to the infected PC. 6) Double-click the antivirus software EXE file on the USB flash drive. 7) Hit the “Scan Now” button to start the malware scan.

SafeBytes Anti-Malware: Lightweight Malware Protection for Windows PC

In order to protect your PC from many different internet-based threats, it is important to install anti-malware software on your computer system. But with countless numbers of anti-malware companies out there, nowadays it is hard to decide which one you should buy for your personal computer. Some of them are good and some are scamware applications that pretend as legit anti-malware software waiting around to wreak havoc on your computer. You have to be careful not to pick the wrong application, particularly if you buy a premium application. While considering the highly regarded applications, Safebytes AntiMalware is certainly the highly recommended one. SafeBytes anti-malware is a very effective and user-friendly protection tool that is suitable for end-users of all levels of computer literacy. Through its cutting-edge technology, this software will help you protect your personal computer against infections caused by different types of malware and similar threats, including adware, spyware, trojans, worms, computer viruses, keyloggers, ransomware, and potentially unwanted program (PUPs).

SafeBytes has great features when compared to other anti-malware programs. The following are a few of the great ones:

Active Protection: SafeBytes gives you round-the-clock protection for your personal computer limiting malware intrusions in real-time. It will regularly monitor your pc for hacker activity and also gives users sophisticated firewall protection. Antimalware Protection: With its advanced and sophisticated algorithm, this malware elimination tool can detect and get rid of the malware threats hiding in your computer system effectively. High-Speed Malware Scanning Engine: Safebytes AntiMalware, with its enhanced scanning engine, offers extremely fast scanning which can immediately target any active internet threat. Website Filtering: SafeBytes checks and gives a unique safety ranking to every website you visit and block access to webpages known to be phishing sites, thus protecting you from identity theft, or known to contain malicious software. Low CPU Usage: SafeBytes gives you complete protection from online threats at a fraction of the CPU load due to its advanced detection engine and algorithms. 24/7 Support: You could get high levels of support around the clock if you’re using their paid version. SafeBytes will keep your computer safe from the latest malware threats automatically, thus keeping your online experience safe and secure. Once you’ve downloaded and installed SafeBytes Anti-Malware, you will no longer have to bother about malware or other security concerns. So if you’re looking for the best anti-malware subscription for your Windows-based PC, we highly recommend SafeBytes Anti-Malware software.

Technical Details and Manual Removal (Advanced Users)

If you wish to carry out the removal of Premier Download Manager manually instead of employing an automated tool, you may follow these simple steps: Go to the Windows Control Panel, click the “Add or Remove Programs” and there, select the offending program to remove. In cases of suspicious versions of web browser plug-ins, you can easily get rid of it through your web browser’s extension manager. It is also suggested to reset your web browser to its default state to fix corrupt settings. Lastly, examine your hard drive for all of the following and clean your computer registry manually to remove leftover application entries following an uninstallation. Having said that, editing the registry is usually a difficult task that only experienced computer users and professionals should attempt to fix it. Also, certain malware is capable of replicating itself or preventing its deletion. It is advised that you do the removal process in Safe Mode.
Files: C:\Program Files\PremierDownloadManager_agEI\Installr.bin\NPagEISb.dl_ C:\Program Files\PremierDownloadManager_agEI\Installr.bin\NPagEISb.dll C:\Program Files\PremierDownloadManager_agEI\Installr.bin\agEIPlug.dl_ C:\Program Files\PremierDownloadManager_agEI\Installr.bin\agEIPlug.dll C:\Program Files\PremierDownloadManager_agEI\Installr.bin\agEZSETP.dl_ C:\Program Files\PremierDownloadManager_agEI\Installr.bin\agEZSETP.dll %PROGRAM FILES%\PREMIERDOWNLOADMANAGER\PDMANAGER_IE.DLL: %PROGRAM FILES%\PREMIERDOWNLOADMANAGER\PDMANAGER_IE.DLL Malware %PROGRAM FILES%\PREMIERDOWNLOADMANAGER\PDMANAGER_IE.DLL Dangerous %PROGRAM FILES%\PREMIERDOWNLOADMANAGER\PDMANAGER_IE.DLL High Risk %program files%\premierdownloadmanager\pdmanager_ie.dll %PROGRAM FILES%\PREMIERDOWNLOADMANAGER\PDMANAGER_IE.DLL %PROGRAM FILES%\PREMIERDOWNLOADMANAGER\PDM.ICO %PROGRAM FILES%\PREMIERDOWNLOADMANAGER\PDMANAGER.EXE %PROGRAM FILES%\PREMIERDOWNLOADMANAGER\PDMANAGER_IE.DLL %PROGRAM FILES%\PREMIERDOWNLOADMANAGER\PDMANAGER_IE.TLB %PROGRAM FILES%\PREMIERDOWNLOADMANAGER\REGASM.EXE Registry: key HKLM\Software\Classes\CLSID\819D045F-E9A2-39E0-B495-D615AD1A9471\InprocServer32.0.0.1\CodeBase: file:///C:/Program Files/PremierDownloadManager/PDManager_ie.DLL key HKLM\Software\Classes\CLSID\819D045F-E9A2-39E0-B495-D615AD1A9471\InprocServer32\CodeBase: file:///C:/Program Files/PremierDownloadManager/PDManager_ie.DLL key HKLM\Software\Classes\CLSID\87D1BD5F-0174-4AB2-FFC4-9E3A451F17EB\InprocServer32.0.0.1\CodeBase: file:///C:/Program Files/PremierDownloadManager/PDManager_ie.DLL key HKLM\Software\Classes\CLSID\87D1BD5F-0174-4AB2-FFC4-9E3A451F17EB\InprocServer32\CodeBase: file:///C:/Program Files/PremierDownloadManager/pdmanager_ie.dll key HKLM\Software\Classes\Record\EDF1D497-05B5-37F6-AAAC-3EB5E67D4DC2.0.0.1\CodeBase: file:///C:/Program Files/PremierDownloadManager/PDManager_ie.DLL key HKCU\SOFTWARE\PREMIERDOWNLOADMANAGER\INTERNET EXPLORER: %PROGRAM FILES%\PREMIERDOWNLOADMANAGER\PDMANAGER_IE.DLL
Read More
Apple gaming is coming!!!

New Apple's upscaling technology called MetalFX will place iOS and macOS devices back into the gaming world. Apple had great games back in the old days and some all-time hits like the prince of Persia have been made first for apple but along the way, it just lost it.

Same as NVIDIA's DLSS and Intel's XeSS systems, Apple MetalFX also uses AI algorithms to upscale the resolution of output game frames. So, for example, the GPU inside your MAC might render the game at 1080p, but through MetalFX and AI upscaling it will look like a 4K image but have a good frame rate since it is rendered in base resolution.

apple metalfx

The ability to make AI strike a good balance between performance and image quality is a key to technology in today's modern gaming and having this technology will help developers a ton to be able to achieve great results on Apple hardware.

The First MetalFX Games

So far three official games that will use this technology and be released natively for Appl hardware are Resident Evil 8 Village, GRID legends, and No Man's Sky. All three games have been confirmed and Resident Evil 8 Village is already sent for review people are impressed since the game can run smoothly on all Apple devices, even ones with an M1 CPU.

Apple is back into gaming

When you say Apple gaming is probably the last thing that comes to your mind but truth be told Apple makes more money from games than Microsoft, Nintendo and Sony combined. Also, Apple itself was a big player once regarding computer games as well, Myst and Prince of Persia are games that were made and have been released for Apple first. Bungie was also founded by Apple developers and Halo was originally announced as a Mac game.

Apple has been trying and pushing gaming on its platform since it kind of died down. Today all Sony, Nintendo, and Microsoft controllers work without any issues with all Apple products. Apple also has its own gaming subscription service, Apple Arcade, and its Apple TV is packed with GPU that can rival Xbox ones.

MetalFX API ties and brings it all together, it is designed to get the most performance from the hardware by minimizing overhead.

Now, computers and laptops do not hold any large numbers if we look at the user base, and that could deter developers but if we look at iPad and iPhone things are different there, much different. How same CPU power these devices and how MetalFX is available across all products it is clear that there is a market for games there. No Man's Sky is coming to iPad using these technologies and bringing full computer experience to tablets.

Read More
Fix Windows 11 not using the whole RAM
It has been reported that there are systems out there with Windows 11 operating systems that do not use the whole RAM memory installed in the system. If by any chance you are one of the unfortunate users that has encountered this issue, fear not, we have a solution for you.

RAM memoryRun the Windows Memory Diagnostic tool

  1. Press ⊞ WINDOWS + S to open the search menu
  2. Type in Windows Memory Diagnostic tool
  3. Click on the found app
  4. Select Restart now and check for problems
  5. Wait for the tool to finish
Memory Diagnostic tool is a built-in tool in Windows, it was designed to automatically find and repair memory issues and should be your first step toward resolving this issue.

Check page file

  1. Press ⊞ WINDOWS + S to open the search menu
  2. Type in View advanced system settings
  3. Click on the search result
  4. Click on settings under performance
  5. Click on the Advanced tab
  6. Click on Change under Virtual memory
  7. Uncheck the box for Automatically manage paging file size for all drives
  8. Then select the drive and check the No paging file option
  9. Click on Set
  10. Repeat for all drives on the system
  11. Reboot the system for changes to take effect
If after reboot system still does not see and use whole available RAM, repeat this process and turn back ON paging. After you are done move to the next solution.

Modify usable RAM

  1. Press ⊞ WINDOWS + S to open the search menu
  2. Type in System configuration
  3. Click on the search result
  4. Go to the Boot tab and click on Advanced options
  5. Check the box for Maximum memory
  6. Enter the installed RAM on your system in the field box and click on OK
  7. Confirm once again on the OK and close the System configuration window
  8. Restart the system
If the provided solution has not worked, uncheck the Maximum memory checkbox and save the changes. Move to the next solution.

Change and modify the registry

  1. Press ⊞ WINDOWS + R to open the run menu
  2. Type in Regedit and press the OK button or hit ENTER
  3. Click on YES if prompted by UAC
  4. Locate the HKEY_LOCAL_MACHINE\SYSTEM\CurrentControlSet\Control\Session Manager\Memory
  5. On the right side find and double click on the ClearPageFileAtShutdown DWORD
  6. Enter 1 under Value data and click on OK to save the changes
  7. Close the registry and reboot the system

Enable memory remapping inside BIOS

In order to do this fix, you will need to enter BIOS on your system. How entering BIOS is different from system to system depending on your manufacturer, especially if it is a laptop this step you will have to do alone. Go to your motherboard manufacturer or laptop manufacturer and see how to enter BIOS.
  1. Enter BIOS (80% of the time this can be done by pressing DEL or F12 while the system is turned ON)
  2. Locate System Agent Configuration option
  3. Select Memory Remap Feature and Enable it
Your BIOS might be different from ours and you might not have the System Agent Configuration option, in this case, go through the setting and try to locate Memory Remap Feature. If this feature is missing as well move to the next step.

Rearrange RAM modules on the motherboard

Sometimes RAM memory cannot be slotted properly or just purely switching them in slots can solve the issue. Take RAM out, clean memory slots, clean motherboard connectors for them, and place them back in a different order. If by any chance none of the methods worked, then the issue might be in the hardware itself, either memory banks themselves, motherboard, power supply, etc. If this is sadly the case, you will have to locate the issue and replace the faulty part. If you are not technical enough for this adventure, the best solution is to take a PC to a computer repair shop.
Read More
Customize Lock Screen in Windows 11
Same as in Windows 10, Windows 11 also features a lock screen. IN this lock screen by default, you will see a clock and date above the standard Windows 11 background. Not all users will be happy with this choice but do not worry, you can choose and customize your lock screen to better suit your idea of it.

Lock Screen in Windows 11To personalize the lock screen do:

  1. Right-click on Desktop and select Personalize
  2. Click on the lock screen
  3. Choose one of three options and customize it
    • Personalize Your Lock Screen

      this option will let you set a custom image or slideshow for your lock screen. Choose either one that best suits you. Under selecting picture or pictures for the slide show you can uncheck the option to see tips, tricks, and facts on your lock screen.
    • Lock screen status

      when clicking on this option you can select the application widget that you wish to be shown on the lock screen like weather, mail, calendar, etc. Choose if you would like one by clicking on it.
    • Show the lock screen background picture on the sign-in screen

      as self-explanatory this switch will enable or disable chosen lock screen wallpaper on your login credentials screen.
  4. Close settings
All settings will be automatically saved and applied and when you wish to lock the screen easiest way is to press ⊞ WINDOWS + L shortcut on your keyboard.
Read More
All wallpapers of Windows 11
We have gathered and want to share with you all of the Windows 11 wallpapers if you would like to place them on your desktop now and now wait for the official W11 release. Hope that you will like some of them and I hope to see you again on errortools.com Download Windows 11 Wallpapers here!

And here is the preview of them

W11_32W11_31W11_30W11_29W11_28W11_27W11_26W11_25W11_24W11_23W11_22W11_21W11_20W11_19W11_18W11_17W11_16W11_15W11_14W11_13W11_12W11_11W11_10W11_09W11_08W11_07W11_06W11_05W11_04W11_03W11_02W11_01
Read More
Enable or disable Console Mode Sign-in
Microsoft has been bringing new lock-screen features with every iterative feature release of Windows 10 in order to improve user experience. However, Windows 10 users have different opinions regarding it. Some users are pleased with it while some users simply do not like it. So if you are one of the users who seem to not approve of this feature, read on as this post will be about enabling or disabling the Console Mode sign-in feature in Windows 10. Before you proceed, take note that you will not be able to use your mouse pointer in this Consol Mode login screen and you can only use your keyboard to navigate around various options. You might also want to create a System Restore point just in case. To enable or disable the Console Mode sign-in in your Windows 10 computer, refer to the given steps below. Step 1: Tap the Win + R keys to open the Run dialog box. Step 2: Then type in “Regedit” in the field and tap Enter to open the Registry Editor. Step 3: Next, navigate to the following registry path:
ComputerHKEY_LOCAL_MACHINESOFTWAREMicrosoftWindowsCurrentVersionAuthenticationLogonUITestHooks
Step 4: From there, look for a DWORD named “ConsoleMode”. If you don’t see this DWORD, you can just create a new DWORD and name it as “ConsoleMode” and make sure that its base is set to Hexadecimal. Step 5: After that, double click on ConsoleMode and change its value to “0” to disable it and “1” to enable it. Step 6: Now restart your computer to apply the changes made. Like pointed out, you can only use your keyboard when you’re in the Console Mode login window or screen. You can just use the ESC button to go back to the menu while you can utilize the arrow keys so you can go through the options that are mostly vertically arranged and the Enter key to select an option. In the Console Mode, sign-in using the Passwords and PINs worked efficiently.
Read More
How to Fix Windows 10 Activation Error 0Xc004F074

Error code 0Xc004F074 - What is it?

Did you previously use Windows 7 or 8 but decided to run with the latest Windows 0S, Windows 10? An early error message encountered was activation error code 0Xc004F074. Error code 0Xc004F074 is manifested when the user fails to activate Windows directly after the installation of Windows 10. This occurs if the previous operating system on your computer was Key Management Service (KMS) activated.

The KMT provides a more seamless operation when users are activating volume license editions of Microsoft Windows and Office. This process tends to be clear to end-users of the system.

Symptoms of error code 0Xc004F074 include:

  • Windows is unable to reach your company’s activation service.
  • The Key Management Service is unavailable.

Solution

Restoro box imageError Causes

Various factors might incite error code 0Xc004F074. A primary cause is a discrepancy or difference between the KMS client and the KMS host machine. The host computer could possibly be operating a Windows Server 2003 or Windows Server 2008, while the client runs on OS Windows 7 or Windows Server 2008 R2. To supplement, the computer’s time might be a contributing factor. The time on the host machine and client might show a difference (Usually the host time exceeds 4 hours).

Further Information and Manual Repair

To rectify error code 0Xc004F074, users are advised to try various methods. These methods include:
  1. Method 1: Update Your KMS Host 9 (Windows Server 2003)

Are you running later versions of Windows Server? Use an update that fixes or installs KMS on your computer. The update is available on Microsoft’s website. Keep clearly in mind that the update is only for Windows Server 2013 Service Pack 1 and later versions of Windows Server 2003.

  1. Method 2: Update Your KMS Host 9 (Windows Server 2008)

This step is similar to the aforementioned. However, it applies to Windows Vista and Windows Server 2008. This ensures the service is extended to Windows 7 and Windows Server 2008 R2.

  1. Method 3: Update the Time

It was previously mentioned that the time reflected on the KMS host and client might cause error code 0Xc004F074 to manifest. A simple fix to adhere to is to always ensure that the time between both is updated. To Resync the time on the client, execute the following command.

w32tm /resync

  1. Method 4: Uninstall the Existing KMS

For this method to be successfully deployed, you’ll need to have in your possession an activation key or KMSpico Key. As you cannot apply the new key with the existing one, remove or uninstall the initial key. To perform this step, open the command prompt. This should be done while the computer is in admin mode. Then, run the command

(slmgr.vbs /dlv)

It should be executed without the brackets and before you have removed the existing key.

After executing the command, you’ll encounter the description:

Windows(R) Operating System, VOLUME_KMS_WS12_R2 channel

Move along with the process by applying the slmgr.vbs /upk to uninstall the existing KMS key.

After the old key is uninstalled, you’re ready to apply the following:

slmgr.vbs /ipk <NewKMSProductKey>

To check if things are in place and complete the process, follow the steps below: PC Settings >Update and Security > Activation

  1. Method 5: Download an Automated Tool

If you wish to always have at your disposal a utility tool to fix these Windows 8 and other related issues when they do arise, download and install a powerful automated tool.
Read More
Fix fatal error C0000034 applying update
Fatal error C0000034 happens during the installation of the Windows update and if you are one of the unlucky users who sadly run into this, keep reading as we will provide solutions to this error and how to get around it. Start from point 1 to the bottom and hopefully you will have your PC back into working order in no time.
  1. Run Windows Update troubleshooter

    Usually, a built-in Windows troubleshooter can solve issues painlessly and fast, my advice is to try this as the first option, it is a simple and clean solution worth trying and in 90% it solves the issue all by itself.
  2. Do a clean boot

    Using task manager, remove all nonessential applications and services from starting up, reboot your computer, and once it is cleanly booted try re-running the update process again, if the issue was running the application this time everything will work since the problematic application is not running.
  3. Reset Windows update components to the default

    This solution requires you to use the Reset Windows Update Agent Tool to reset Windows Update components to default or use this PowerShell script to reset Windows Update Client. You can also manually reset each Windows Update component to default and then re-run the update.
  4. Disable firewall and antivirus

    Altho not likely it is still a possibility that some firewalls and antivirus can detect windows updates as malicious software and cut them off. If everything else failed, disable the firewall and your PC protection and when it is fully disabled try updating.
  5. Do automatic startup repair

    This should be the last thing to do but if everything else failed, do it. Perform Windows 10 Startup Repair. Once the startup repair completes successfully, you can re-run the update. The update should install without errors.
Read More
What to do if you cannot switch between Programs on Taskbar in Windows 10
It is common to run multiple programs and applications at the same time and it’s important to be able to switch between them using their Taskbar icons or using the usual Alt + Tab shortcut. However, there are times when you might suddenly find that neither of the aforementioned methods worked and you will no longer be able to switch between programs in the Windows Taskbar. To fix this issue, refer to the options given in this post. For instance, when you have multiple instances of Microsoft Edge running and every time you press the Alt + Tab combo nothing happens so you are left with no choice but to minimize everything and then hover your mouse on the icon and switch between the instances of Edge. You will also notice that the right-click on the taskbar won’t respond back and will only keep on showing the loading circle icon. Here are a few tips you can follow to fix the issue with the Windows 10 Taskbar.

Option 1 – Try to restart the Windows Explorer

This is one of the basic things you can try as restarting Windows Explorer helps in refreshing the user interface and makes most of the things work in relation to the user interface.
  • To get started, tap the Alt + Ctrl + Del keys to pull up the Windows Task Manager.
  • After opening Task Manager, look for “explorer.exe” under the list of programs.
  • Once you find the explorer.exe, right-click on it and click Restart.

Option 2 – Try changing the Foreground Lock Time

Aside from restarting Windows Explorer, you could also try changing the Foreground Lock Time to fix the issue with the Taskbar.
  • Tap the Win + R keys to open the Run dialog box.
  • Then type in regedit in the field and tap Enter to open the Registry Editor.
  • Next, go to this registry key – HKEY_CURRENT_USERControl PanelDesktop
  • Next, change the ForegroundLockTimeout value from200000 to 0. After that, it will make sure that no other application will take away the focus from your current program or application. It could be that some other application has taken away the focus and even when you try to actually switch, the focus gets back to the old one. Anyhow, since you already changed the value of ForegroundLockTimeout, it will ensure that the focus is not switched.
Note: If you are running some Full-Screen applications there are some devices especially the gaming ones, disable the Windows key to make sure that you won’t be able to switch. If this is the case, you need to make some modifications to the Full-Screen games.
Read More
Turn On or Off the Recommended Troubleshooting
For a while now, Microsoft has been working hard to add various built-in troubleshooters in Windows 10. In fact, there is a troubleshooter for almost every standard or common error in Windows 10. And now with the newly released Windows 10 v1903, Microsoft has added the Recommended Troubleshooting which allows Windows 10 to automatically fix a lot of critical issues on your computer, and in this post, you will be guided on how you can turn on or off the Recommended Troubleshooting in Windows 10. The Microsoft Diagnostic & Feedback data only provides two settings – Basic and Full. So if you want to turn off the Recommended Troubleshooting for some reason, the only way to do so is to stop it from collecting complete data from your PC. And to turn it on or off, you can choose to switch between them. To do that, navigate to Settings > Privacy > Diagnostics & feedback and from there, select Basic under the Diagnostic Data section. After that, go back to Settings and go to Update & security > Troubleshoot. Once you’re there, you should see a warning message saying, “Share Full Diagnostic data to get additional troubleshooting recommendations”. Based on the message, Microsoft will only offer the recommended troubleshooting based on the Full Diagnostic data which it collects from your computer. On the other hand, if you know how to navigate and use the Windows Registry, then you can enable or disable the Recommended Troubleshooting via Registry Editor but before you proceed, make sure that you create a System Restore point. Once that’s covered, follow these steps:
  • Tap the Win + R keys to open the Run dialog box and type “regedit” in the field and tap Enter to open the Registry Editor.
  • Next, navigate to this registry path: HKEY_LOCAL_MACHINESOFTWAREMicrosoft
  • From there, look for the key named “WindowsMigration”. If you can’t find it, just right-click on the left pane and create a new key and then name it “WindowsMigration”.
  • After that, create a DWORD “UserPreference” and double click on it to set its value to “0” if you want to turn it off or “1” if you want to turn it on.
  • Exit the Registry Editor and restart your computer to apply the changes made.
Note: The Recommended Troubleshooting functionality can look into the error logs sent back to the Microsoft team and use an algorithm to set up a solution for you and they’re nothing but Diagnostics and Feedback data that Windows collects and sends back to Microsoft. Moreover, the recommendations are only visible if you are connected to the internet, else it will show the same message.
Read More
1 2 3 171
Logo
Copyright © 2023, ErrorTools. All Rights Reserved
Trademark: Microsoft Windows logos are registered trademarks of Microsoft. Disclaimer: ErrorTools.com is not affiliated with Microsoft, nor claims direct affiliation.
The information on this page is provided for information purposes only.
DMCA.com Protection Status