When we purchase a computer, usually it is meant to be used by one person. Sometimes we would like to share our computer with other people, with friends and family members but we would also like to keep some privacy for ourselves in the process. Lucky for us Windows 10 will let us create multiple user accounts which then can be used by other persons with their own settings, documents, etc. The only requirement is to already have one user account which is automatically created when Windows is installed.
This guide will lead you step by step in the creation of a new user account within Windows 10, so grab your favorite drink, and let's begin.
Creating new account
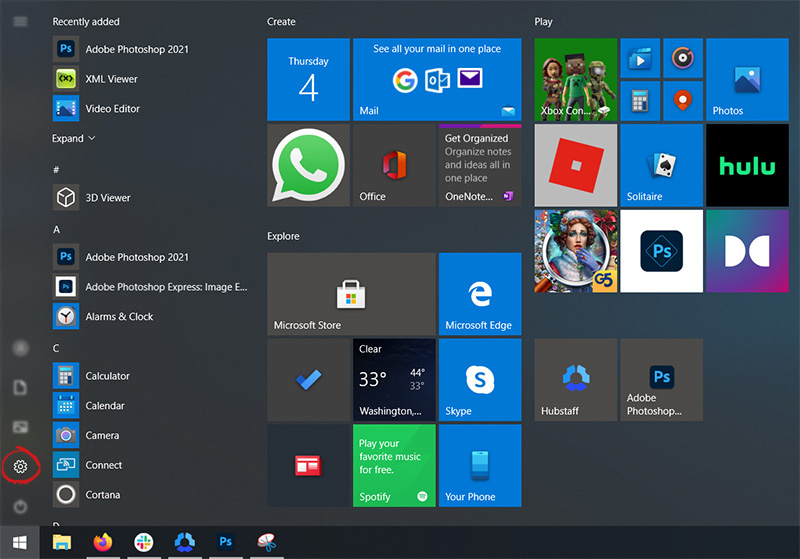
First thing is to
click on the
windows icon on the bottom left and open
start menu, from start menu
click once on
settings.
When the
settings window opens, choose
ACCOUNTS on it.

Windows will then go to the
accounts settings page. Within that page,
click on the Family & other users to open the setting for the chosen section on right. On the right settings, screen
navigate to the lower section and
click once with the left button on add someone else to this PC

When
add someone else to this PC is clicked, pop up window will appear which will ask you to provide the persons email address and later on the password of his/her Microsoft account, after the required information is provided you are done, a
new user has been added and he can use his Microsoft credentials on the login screen to use this computer.
Setting up a user without Microsoft ID
However, if you do not wish to add a new user via his Microsoft login credentials or the person does not have them, on the pop-up window click on
I don't have this person's sign-in information.

This will open yet another pop-up giving you the option to create a Microsoft account for this person, to use a phone number instead of a Microsoft account, or to create a new email address for the user. Any of these options will create a new user for this computer with provided credentials but there is the last option at bottom of the pop-up which will allow you to create a
local user only without a Microsoft account. This user will be able to use this computer, will not be able to transfer his document through various devices like he/she would if using a valid Microsoft account but it could use the computer and personalize it fully to his/her liking.

Once the
link is clicked, you will be presented with a floating window requiring you to input needed information in order for the account to be created. You will need to provide
username, password, and answers to 3 security questions.

Once all information has been provided,
click on
next and your new non-Microsoft
local user has been created. Now when you click on
Family & other users you will see that Windows has added a
new user with the provided name to this computer. If you wish, you can
add another user in the same manner, following the previous steps. Microsoft Windows does not have a limit for how many users can be on one computer so feel free to create as many as you like.
User account options
Now,
clicking on the
existing created user will
open user options. From there you will have options to
remove the user, therefore removing him/her from this computer, note that removing the local user will remove
permanently his/her settings and they would not be able to be restored, or you can change the
user account type.

Click on
Change account type.

Under
account type, you will have the option to promote this user to an
administrator if you wish or you can leave it as a
standard user.


