Error 0x80070057 is a typical Windows 7 error code.
It may occur when you try to back up files by using Windows Backup on Windows 7 and the backup fails. The error message is often displayed as the following:
“An internal error has occurred: The parameter is incorrect: (0x80070057)”
Besides this, you may also experience this error message when you format a hard disk drive to install Windows 7.
Solution
Error Causes
The error 0x8007005 occurs due to multiple reasons. However, the most common causes for this error code include:
The partition that is reserved for the system is damaged
Misconfigured registry keys
Misconfigured decimal symbol settings
Further Information and Manual Repair
Here are some of the best and easy DIY methods to resolve the error 0x80070057 on your PC.
Solution 1: Change the Decimal Symbol Setting
As mentioned above the error 0x80070057 sometimes can be triggered by misconfigured decimal symbol settings. Therefore, try changing the settings to fix the problem. The error is likely to occur if the decimal symbol is not set to ‘.’ (dot).
This is common in languages and locales other than English such as German.
Here’s what you need to do to change the decimal symbol setting:
First, open the Control Panel, click the clock, then language, and then region.
Now click the formats tab and go to the additional settings menu.
Here you will find the decimal symbol field, now type "." (dot) and then click OK twice.
After that, you must restart your PC to activate the changes.
Solution 2: Create a New Partition and Reinstall Windows 7
If the error 0x80070057 is linked to partition damage, then this method is the best way to resolve it. Here’s what you need to do:
Insert the Windows 7 DVD and start the installation.
Select your language preference to install. Here you will see a screen of the Microsoft License Agreement. Click on the I accept option to proceed with the installation process.
Then click next.
Choose a custom advance option and select the Disk O partition 1 option.
Once selected, click delete. When you do this you will be prompted if you want to confirm the deletion, click OK to continue.
Now repeat the same however now select Disk O partition 2.
Delete this partition as well. Now click New to create a new partition. Here define the disk size and then click apply. Please note, the size of the default value is the maximum size of the disk.
After doing so, select disk 0 partition 2 and then click the formatting tab. Once the formatting is complete, click next to continue Now you will be able to complete the installation of Windows 7 on your PC without any problem.
Solution 3: Add a Registry Key Value
If the underlying cause of the error 0x80070057 is a registry issue, then it is serious as such issues can put your PC at serious risks like system failure, crash, and data loss.
To resolve this error and add a registry key value here’s what you need to do:
Go to the start menu and type Regedit.exe in the search bar and then press enter. Locate and click the following registry sub-key:
HKEY_LOCAL_MACHINESOFTWAREPoliciesMicrosoftSystem. Once you locate it, now go to the edit menu and point to new, and then click DWORD Value. After that, type CopyFileBufferedSynchronousIo and press enter again. Right-click now on the text you just typed and then click Modify.
In the Value data box, type 1 and then click ok and exit the registry editor.
This will fix the error on a temporary basis but not permanently. However, a long-term solution is to clean and repair the registry.
Solution 4: Restoro
The registry gets cluttered with unnecessary and redundant files like junk files, cookies, internet history, and bad registry keys. If these are not removed timely, they can damage the registry and corrupt DLL files. It often leads to disk fragmentation (disk partition) too.
To remove these files immediately, clean and restore the registry and repair the corrupt files, it is advisable to download Restoro.
Why Restoro
This is an advanced and highly functional Registry Cleaner. It is deployed with a cutting-edge and intuitive algorithm that scans your entire PC to detect all registry issues in seconds. It cleans the cluttered disk and restores the registry back to normal.
It is safe, bug-free, and efficient. This software is easy to use and compatible with all Windows versions.
In addition to this, it is also deployed with several other powerful utilities like an antivirus that detects all malicious software and removes them right away. It also functions as a system optimizer and boosts the speed of your PC significantly.
Click here to download Restoro and resolve error 0x80070057 now!
As you know, “JPEG” is one of the commonly used formats for image files which is a compression of digital images. It is one of the topmost used file formats by mobile phones and digital cameras and usually achieves a 10:1 compression with little visible loss in the quality of the image.
There are tons of cases as of late, most particularly after the latest Windows 10 update where users were not able to open JPEG files on their PCs. Every time they try to open any JPEG file, they either get an error or nothing happens at all. This issue could be due to the default handler application for JPEG applications not being set or there could be some third-party image viewer not working properly. To fix this issue with JPEG files, refer to the troubleshooting options below.
Option 1 – Try to change the file type association
You need to check if the file type association of the JPEG files are correctly set or not since there are tons of third party programs that change the file type association automatically to themselves without your permission the instant they are installed and so if any of these third-party programs are broken, then naturally, your JPEG files won’t really open. That’s why you can try changing the setting to the default photo viewer instead of the third-party one. To do so, follow the steps below.
Tap the Win + R keys to open the Run dialog box.
Then type in “control panel” in the field and hit Enter to open the Control Panel.
After opening Control Panel, click on the Programs category and select the “Default Programs” option from the menu.
Next, select the second option “Associate a file type or protocol with a program” and then select the “Choose default apps by file type” option.
After that, click on the .jpg file extension and choose the option from the pop-up.
Now restart your PC to refresh all your programs and then see if it has fixed the problem or not.
Option 2 – Try to update your computer
Microsoft frequently releases updates to target bugs and improve users’ experience. And this particular error where JPEG files won’t open is already acknowledged by Microsoft so you need to make sure that your Windows 10 PC is updated to the latest released update and that there are no pending updates.
Tap the Win + S keys to open Search and then type in “update” in the field and open the system setting from the search results.
After that, check for updates and then download and install them if needed.
Now restart your PC once the update is done and check if you can now open JPEG files.
Option 3 – Try to reset the Photos app via Settings
Resetting the Photos app could also help you in fixing the problem. Note that this option will reset all the configurations and your data associated with your Photos and makes the application go into a state when you first started using it and that this option will fix any discrepancies that your application might be experiencing right now.
Tap the Win + S keys to open the search bar.
Then type in “settings” in the field to open the Settings application.
After opening Settings, click the “Apps” category.
From there, a list of applications installed on your computer will appear.
Navigate through these applications until you find the Photos app and then click on the Advanced options.
Afterward, click the Reset button that appears on the next screen. Then a new pop-up comes up and will warn you that all the preferences, as well as sign-in information, will be lost. Click on “Reset” anyway to proceed in resetting the Photos app.
Restart your PC once the reset is done.
Option 4 – Try to reinstall the Photos app
Before you start using other third-party image viewers just yet, you can try to reinstall the Photos app first. Thus, if there is something wrong with it, it will instantly get fixed right after it reinstalls. Just take note that this option requires administrative privileges so you need to be logged in as an administrator.
The first thing you have to do is tap the Windows + S keys and type in “PowerShell”.
Next, right-click on the file and click on the “Run as administrator” option from the context menu.
Once PowerShell is opened, execute this command: get-appxpackage *Microsoft.Windows.Photos* | remove-appxpackage
The command you just entered will remove the Photos app. After the process is done, go to the Microsoft Store and look for Microsoft Photos then download and install it again.
Modem Error 633 error is a dial-up error that usually occurs when using a USB modem with a Windows computer. The Modem Error 633 error message is displayed as the following:
“Error 633: The Modem is already in use or not configured properly.”
Solution
Error Causes
This error can be triggered due to several reasons such as:
A software program conflicts with the USB modem
The modem is not configured properly
The Telephon.ini file is missing or damaged
There is some issue with the way Windows is managing the communication (COM) ports on your computer.
Further Information and Manual Repair
If you experience the Modem Error 633 on your PC, you don’t have to panic. Though this error does not pose any major threats like data loss, it may hamper your ability to use the internet therefore it is advisable to resolve the error.
Repairing the Modem Error 633 is quite easy. There are a number of ways to fix this error. So, let’s get started:
Solution 1: Delete Incompatible Software and Non-Present Modems
Click on the start menu and go to the ‘Control Panel’. Now choose the option ‘Phone and Modem’.
Here you will see three tabs, the dialing rules, modems, and advanced. Choose the tab ‘Modems’. As you click on it, you will see modems installed on your PC. To repair the Modem Error 633, select and remove all the incompatible software and modems that are not present and click ‘OK’.
Now to bring the changes into effect, restart your system with the modem plugged in and try connecting to the internet again.
Solution 2: Change the Communication Ports
If the error occurs because the modem is not properly configured, then this solution is possibly the best way to resolve this error. Here’s what you need to do:
Click on the Start menu and choose My Computer.
Now click on the option ‘Manage’ to open the Computer Management Window.
Once it opens, click the option ‘Device Manager and then expand the option modems. Click on Properties, then the Advanced tab, and the Advanced Port Settings button.
As you click on the Advanced Port Settings, then click on the COM Port Number drop-down box.
Choose a new Communication Port. However, make sure it is not already in use.
Once you make changes, click ‘OK’ and then restart your PC.
Now Open Device Manager again. Open the Modern Properties Window and then Click the Diagnostics tab.
After that view the command response window to verify if the error is fixed. If yes, then create a new dial-up connection and connect to the internet with ease.
Solution 3: Disable the Startup items
Another way to resolve Modem Error 633 on your PC is to go to the start menu and type ‘msconfig’ into the search box and then press ‘enter’.
Open the misconfig.exe program. As you open it, you will see 4 tabs, General, Boot, Service, Start-up, and Tools.
Now click on the ‘Start-up’, ‘Disable All’, and then press Apply.
After you press Apply, a window will pop up asking to restart the computer.
Confirm it and click restart.
Once the computer restarts now try connecting to the internet again. This will hopefully resolve the Modem Error 633.
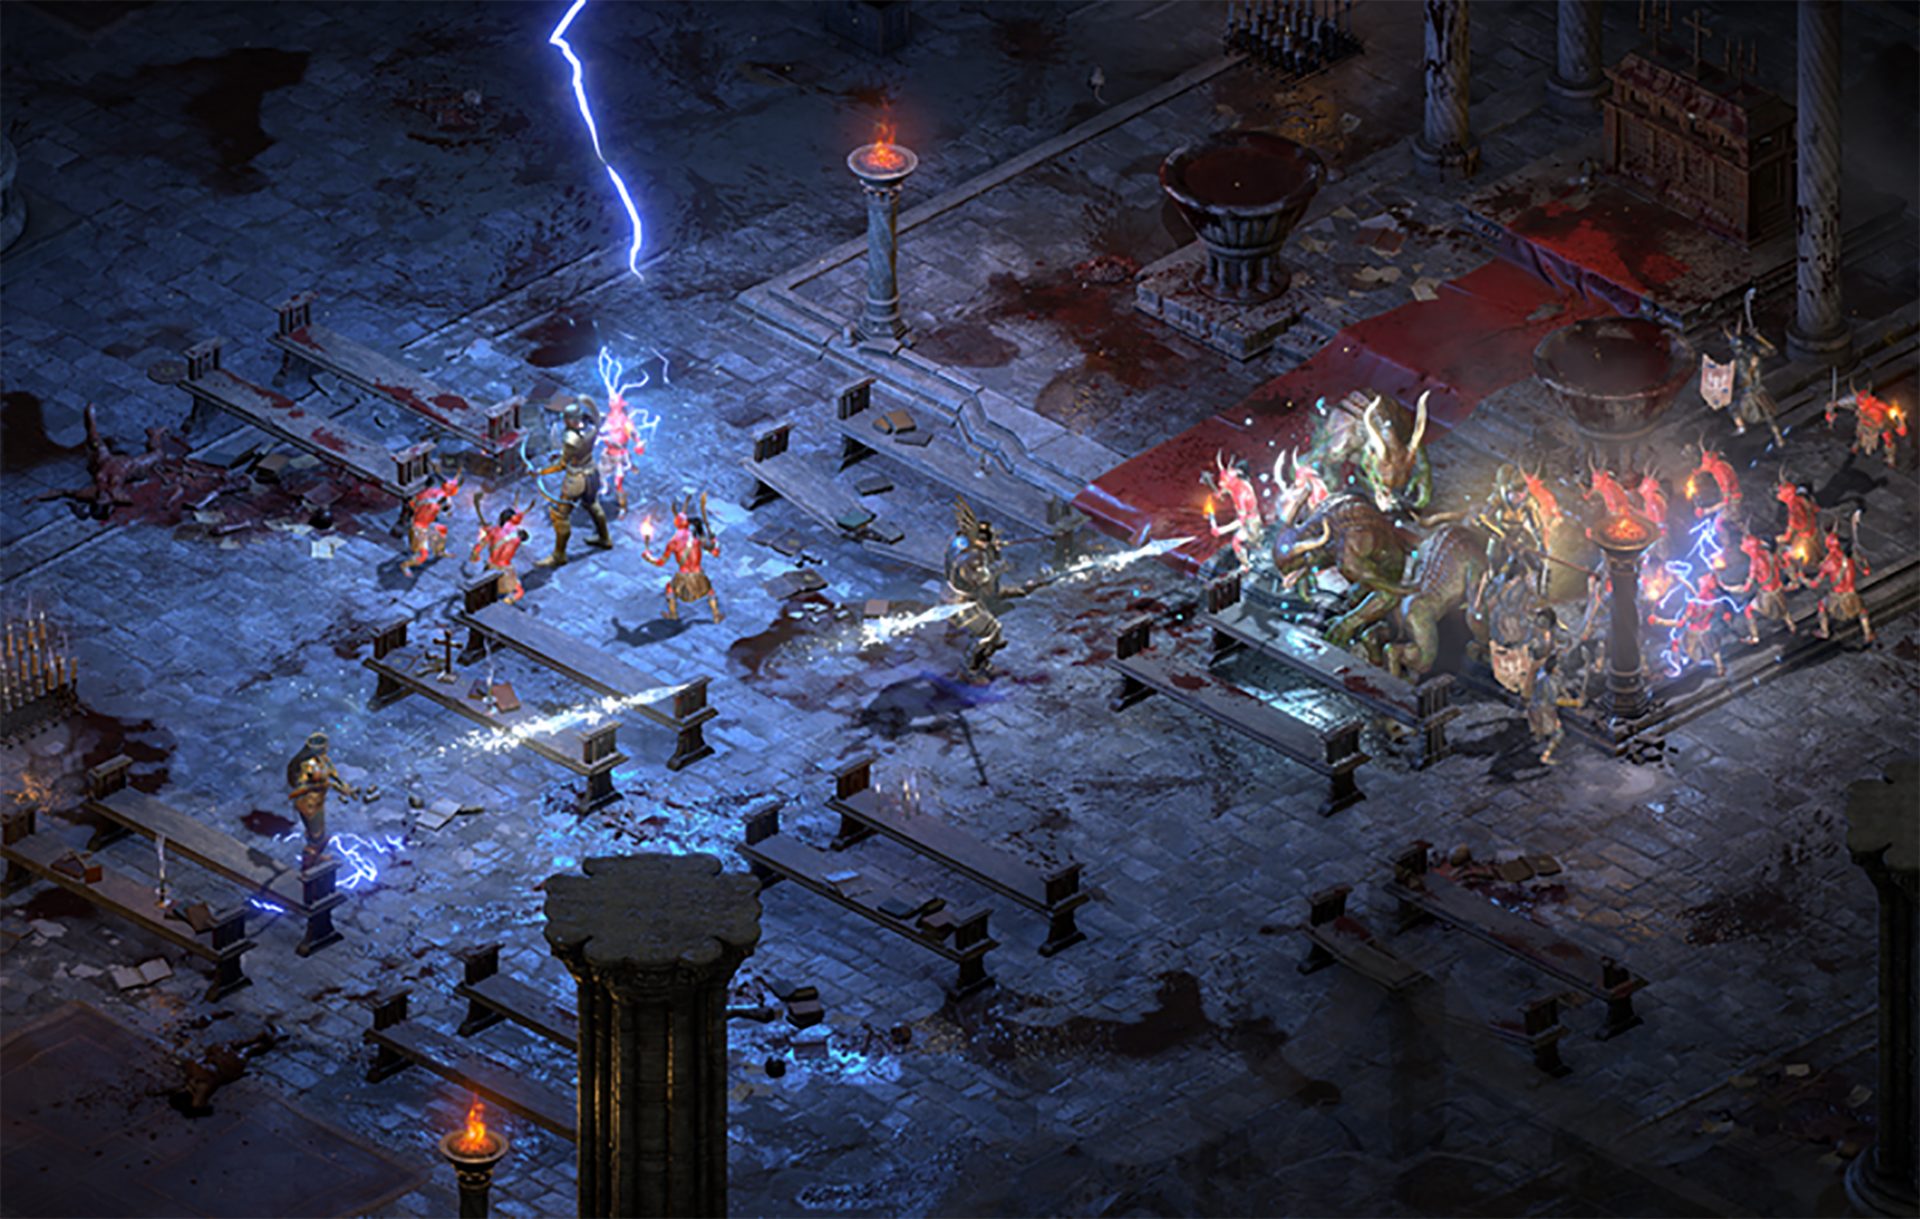
Diablo 2 resurrected has hit official release and servers seem to be finally taken care of and everything seems to be running smoothly now. The game also received great praise from gamers and attracted old players of the original Diablo 2 game.
Speaking of old players of old Diablo 2, they can transfer their old characters into remaster and continue playing them within this new great HD environment. There are some steps and requirements but we are here to help and transferred characters will bring full stash, inventory, and equipped items with them.
Requirements
There are not many requirements for this transfer to occur but they must be respected in order to be successful. The first thing is a minor requirement and somewhat annoying but it needs to be done, firstly fire up Diablo 2 resurrected and create a character, any kind of character with any kind of name, any kind of class. This strange requirement is to actually create a character folder and register it inside D2 resurrected so we can copy old ones there.
The second requirement will be that characters that you wish to be transferred must be offline characters. Old battle net online characters cannot be transferred at this moment and probably will not be in the future as well. So for all of you that wish to transfer online characters, bad luck, for the rest of us casuals playing offline single-player mode, we can enjoy our characters.
Process of diablo 2 character trasfer
The process itself of transferring characters when previously mentioned requirements are met is just a simple and copy operation. If you have somewhere backed your characters go into your backup folder and copy files in c:\users\*current user*\saved games\*diablo 2 resurrected folder*
If you do not have characters backed up and just have old Diablo 2 installed and playing it, you can go to c:\users\*current user*\saved games\*diablo 2 folder* and just copy all characters files into c:\users\*current user*\saved games\*diablo 2 resurrected folder*
Your old characters end with .d2s extension, grab all that you want to transfer, and copy them into D2R. Take note that copied characters cannot be brought back into Diablo 2, once they are copied into Diablo 2 resurrected all further progress on them will be tied to the new game.
Conclusion
That’s it about the transfer process and requirements for it. Fire up the new game version and enjoy.
Error Code 40 is a device driver error that users encounter on any Windows 2000 and later operating systems. It occurs when the peripheral device that you connect to your PC cannot be accessed due to a change in the system registry.
This is due to the presence of invalid sub-keys of the device driver in the system registry.
It is a common error that users come across and appears on your PC with either of the following messages:
“Information in the registry entry for this driver is invalid”
OR
"Windows cannot access this hardware because its service key information in the registry is missing or recorded incorrectly. (Code 40)"
Solution
Error Causes
As mentioned above, the error code is triggered when the device driver’s invalid sub-keys appear in the registry, effectively changing it. This happens when the windows system files get damaged due to the following factors:
An incomplete program uninstallation
An incomplete program installation
Hardware is not removed properly
System recovery from viruses
An improper system shut down
Factors such as incomplete installations or uninstallations or an improper system shut down can cause files to become damaged that threaten the health of your computer.
Removing viruses from the computer is also another factor as it removes the entries in the Windows system files which contain the viruses including spyware or malware
Further Information and Manual Repair
Fixing Error Code 40 is similar to fixing other device manager error codes. Here are a few methods you can try.
Method 1 – Use System Restore
You can use system restore to eliminate the problem. Here is how you can use it:
Log in using an Administrator account
Click ‘Start’ button and select All Programs > Accessories > System Tools > System Restore
Click ‘Restore my computer to an earlier time’ and click ‘Next’
Select the last Windows restore point from the ‘On this list, click a restore point’ list, and click ‘Next’
Click ‘Next’ on the confirmation window to proceed
Restart your PC after restoration is complete
By restoring the system via a last saved system checkpoint, you can obtain undamaged Windows system registry files that can help avert the error code.
Method 2 – Manually uninstall then reinstall the device driver
If using system restore also does not work in removing the error code, you may have to resort to manually uninstalling and then reinstalling the device driver causing the problem.
This would be necessary since the remaining incomplete files due to a partial removal or installation of programs is what contributes to the error code. By uninstall and reinstalling the device driver program, it would lead to the completion of the files.
You can do this by firstly logging in as Administrator and open Device Manager. Select the device that is causing the problem and double click it and make sure that the peripheral is connected properly to the PC. Upon opening, click on the ‘Driver’ tab and then select ‘Update Driver’.
Make sure to refer to the system documentation that you received with your PC or computer to check for the motherboard details and driver specifics.
Method 3 – Use software to automatically download the driver
Manually uninstalling and reinstalling the driver will do the trick, however, it may be time-consuming especially when you would have to resort to your hardware user manual.
Therefore, using a program such as DriverFIX can save you a lot of time and frustration in having your device work properly on your computer.
DriverFIX, with its user-friendly approach to help you fix your PC issues, comes with an integrated database that detects which drivers you need to reconfigure within just a few seconds and downloads it automatically.
It further ensures that your drivers are installed in their entirety leaving no room for any incomplete files to remain that create Error Code 40.
It also has the added advantage of being able to backup and restores your files should there be the slightest possibility of system file damage.
Thus, registry damage can be averted by letting the software roll back the system files to an earlier healthy checkpoint. Driver Assist is the answer to fixing your PC error codes accurately and quickly.
Click here to download DriverFIX to fix Error Code 40 quickly and effectively!
In case you don’t know, the Windows Registry contains a System Hive which is a core part of Windows. The Windows operating system store various settings, options, and configurations. And if you encounter a Device Manager Error 49 for a device then it means that the system hive has exceeded its size limit. Worry not for this post will provide you with possible solutions that can help you in fixing error code 49.
You will see the following error message when you encounter error code 49:
“Windows cannot start new hardware devices because the system hive is too large (exceeds the Registry Size Limit), (Code 49)”
There are instances when it may so happen that the device or devices are no longer attached to the computer but they are still listed in the system hive of the registry. For instance, if you were removing hardware and application for years but they weren’t removed from the registry then the size of the system hive keeps on growing until it hits the maximum limit.
As you know, making changes in the registry manually, no matter how knowledgeable you are on such things is not sage since the registry is not only important but also complex. In addition, the System Hive is also a permanent part of the Registry associated with a set of files that contain information related to the configuration of the computer on which the OS is installed. To resolve this error, you must remove or uninstall any hardware devices that are no longer in the system. In fact, the Device Manager hides them by default so you need to enable hidden or non-present devices.
Follow the instructions given below to set the Devices Manager to display devices that are no longer connected to the computer.
Step 1: Tap the Win + R keys to open the Run dialog box.
Step 2: After that type in “cmd” and hit Enter to open the Command Prompt.
Step 3: Type “set devmgr_show_nonpresent_devices=1” in the Command Prompt and hit Enter to enable the hidden devices option.
Step 4: After that, exit Command Prompt and tap Win + X + M to open the Devices Manager.
Step 5: After opening the Devices Manager, click on View and then select the “Show hidden devices” option. This will show you all the devices that are not connected to the computer but are still mentioned.
Step 6: Next, select a non-present device and click Uninstall from the Driver tab.
Step 7: After that, repeat what you’ve done on step 5 for any other device that you no longer use.
Step 8: Restart your computer.
You can check the device Properties dialog box in the Device Manager after you’re done removing all the useless devices, to check if the error is now fixed or not.
Moreover, you can also try running the Hardware and Devices Troubleshooter as it can also help resolve hardware-related problems. To use it, refer to the steps below.
The first thing you need to do is click on Start and then on the gear-like icon to pull up the window for Settings.
After opening Settings, look for the Update and Security option and select it.
From there, go to the Troubleshoot option located on the left-hand side of the list.
Next, select Hardware and Devices from the list and open the Troubleshooter and run it. Once it is doing its job, wait for it to complete the process and then restart the system.
After the system restarts, check if the problem’s now fixed. If not, refer to the next option given below.
The Sysfader iexplore.exe Application Error - What is it?
To understand Sysfader iexplore.exe application error, first, it is important to learn what is Sysfade.exe file.
Sysfader.exe is basically an IE (Internet Explorer) application file that provides cool animation effects. These animation effects include fading menus in and out, animated windows and etc. It is responsible for the graphical enhancements for animated pages.
The Sysfader iexplore.exe application error occurs when this file fails to execute properly and open animated websites on Internet Explorer.
The error code is displayed in the following format:
“SysFader: iexplore.exe – Application ErrorThe instruction at “0×00000000″ referenced memory at “0×00000000″. The memory could not be “read”.”
Solution
Error Causes
The Sysfader iexplorer.exe application error may be triggered due to many causes. These include:
Sysfader.exe file corrupted by malware and spyware
Recently upgraded Internet Explorer which resulted in the Sysfader iexplorer.exe application error due to incompatibility issues with the system program.
Issues with IE configuration
Damaged registry files
Damaged DLL files
Obsolete and bad registry entries
Due to Sysfader iexplorer.exe application error, your Internet Explorer browser may crash. Furthermore if the error is not fixed timely, it may result in even more severe PC problems like system slowdown, system crash and failure.
This happens especially when Sysfader iexplorer.exe application error is related to the registry.
The registry saves all the activities performed on the computer. This also includes junk files, invalid registry entries, bad registry keys, cookies, temporary internet files, and files of the programs uninstalled.
If the registry is not cleaned frequently, these obsolete files overload the RAM causing great deal of damage to the registry. When you try to upgrade your browser, the installation fails and results in browser incompatibility issues because of the previous files of the uninstalled program saved in the registry.
Furthermore, the error code may also pop up due to the Sysfader.exe file corrupted by malicious software like spyware and adware on your system if you don’t run an antivirus on your system regularly.
Further Information and Manual Repair
To prevent IE web browser and your PC from coming crashing, here are some solutions that you can try to resolve the Sysfader iexplorer.exe application error:
Repair and restore the registry by changing the configuration settings in the Registry Editor Window. This is accessible by typing ‘Regedit’ in the Run window. However, to edit the configuration settings manually and restore the registry, you should be technically sound. If not then making the changes would be slightly complex and time-consuming for you.
However, another alternative to this is to download Restoro. Restoro is a powerful, advanced, and highly functional PC repair tool that includes multiple utilities such as a registry cleaner and a system optimizer. The registry cleaning feature scans your entire PC for registry issues triggering error codes like Sysfader iexplorer.exe.It wipes out all the unnecessary and obsolete files and fixes the damaged dll files thus simultaneously restoring the registry. The antivirus utility scans for and removes viruses and spyware from your PC which as we explained earlier could be the reason for Sysfader error code.
With Restoro, it takes only a few seconds to resolve this error and repair the registry. If you have system slowdown issues, it takes care of that too.
It has simple navigations and a user-friendly interface which makes it very easy to operate even if you are not technically sound. It is safe, efficient, and compatible on all Windows versions including Vista, XP, Windows 7, 8, 8.1, and 10.
Click here to download Restoro and resolve Sysfader iexplorer.exe application error on your PC today!
To understand this error, first, it is important to understand what Flash.ocx actually is. Flash.ocx is basically a flash plug-in or ActiveX file that is responsible for the adobe flash player to work on the system.
The Flash.ocx error triggers due to issues in the Adobe flash player.
Solution
Error Causes
The error Flash.ocx may occur due to many reasons. These include:
Flash player corruption
Corrupted and broken Active X components
To this error code is not fatal but nonetheless it is still advisable to fix it right away to avoid inconvenience when using Flash player.
The inability to run the Flash Player smoothly will hinder you from watching videos on your PC and playing exciting web-based games.
Further Information and Manual Repair
To resolve this error on your system, you don’t have to hire a professional and spend hundreds of dollars. This error code is quite easy to fix. You don’t need to be technically sound to resolve this error code.
Simply follow the methods give below to fix the Flash.ocx error code in a few minutes.
Method 1: Reinstall the Flash Player
If the error occurs due to the corruption of the Flash Player, then it is advisable to reinstall the player on your PC. However, before you do that first remove the previous versions of Adobe Flash Player on your system.
If the previous corrupted version is not removed properly, then you will be unable to re-install it properly on your PC again.
Go to the Add/Remove Programs and find the Flash Player and uninstall it. Make sure the files are also removed from the registry.
Once you have successfully uninstalled the corrupted version, now go to the official website of Adobe Flash Player and download the utility from the website. Install it and run it on your system.
If it works, then this means the error is resolved. However, if the error still persists, then try method 2.
Method 2: Download Restoro to Fix Active X components
Another reason for Flash.ocx error code can be broken or corrupted Active X components.
If this is the issue, then the best way to resolve it is to download Restoro. This is a multi Reimagefunctional and advanced PC Fixer deployed with multiple high-performance scanners including Active X and Class scanner.
The Active X and Class scanner perform an entire PC scans for corrupt and broken Active X entries along with missing software paths and invalid combinations. After the scanning process is complete, it repairs and restores the components back to normal.
Thereby resolving the Flash.ocx error right away and ensuring smooth video browsing over the web.
Restoro is an efficient and a safe program. It has a user-friendly interface and easy navigations. It can be used by all level of users.
Besides the Active X scanner, it includes 5 more value-added utilities like a registry scanner and an antivirus to name a few. It is compatible with all Windows versions
Click here to download Restoro on your PC and resolve Flash.ocx error code now!
In 27 European countries for some time it has been considered for introducing a law that would force phones, tablets, laptops, and other mobile devices to use a single USB Type-C connector.
The European Parlament announced that a provisional agreement has been reached and that it was voted that a single charging solution is USB Type-C. The current agreement applies and covers the next devices: phones, tablets, Readers, earbuds, digital cameras, headphones, headsets, handheld consoles, and portable speakers. All currently existing devices can still be sold without issues but starting in the fall of 2024 all-new products must support USB Type-C charging.
The agreement will also hit Laptops but not on the same date, How is USB Type-C currently not enough for charging laptops, all new laptops that will have to use it are scheduled for fall of 2025.
Although the agreement is reached the EU Parliament and Council still have to formally approve everything.
Apple targeted the most
Apple has been targeted as the main target for rules since their iPhones are still using Apple's proprietary Lightning charging port. Apple sells a lot of iPhones in Europe and even though iPad Pro and iPad Air along with all MacBooks have moved to USB Type-C, iPhones are still struggling with the Lightning port.
Apple criticized the EU’s charger rules when they were first proposed in 2021, telling the BBC, “We remain concerned that strict regulation mandating just one type of connector stifles innovation rather than encouraging it, which in turn will harm consumers in Europe and around the world.” The European Union has said in response that it will update its rules as new technology arrives.
Why was this proposed?
The main problem in Europe that led to this proposition was electronic waste which reached 11 000 metric tons in 2018. European union is afraid that this will keep rising as chargers become larger and heavier in order to accommodate faster-charging speeds. More electronic waste means more hardware slowly decomposing in landfills that will contribute to climate change affecting everyone on the planet, not just the people living in Europe.
One of the most useful utilities on a Windows 10 computer is the Windows File Explorer. It is undeniably one of the File Managers out there full of features on all the platforms. However, it is not without its issues and one of the most common ones most users encounter is when you are trying to open a folder or a location on File Explorer and it displays a message saying, “Working on it…” as it tries to load the content of that location or folder. This kind of issue mainly occurs to computers that run on an HDD although that doesn’t mean that it can’t happen to other computers that run an SDD.
And so if the File Explorer on your Windows 10 computer keeps getting stuck on the “Working on it…” message along with a green animation bar moving very slowly while loading the contents of the folder, then it’s best if you follow the options given below to resolve this problem.
Option 1 – Try deleting the contents of the Automatic Destinations folder
Tap the Win + R keys on your keyboard to open the Run utility.
And then type “%AppData%MicrosoftWindowsRecentAutomaticDestinations” and hit Enter to open this location.
From there, select all the files and tap the Shift + Delete key combination.
After that, you will get a prompt that will ask you if you want to delete all the files permanently, just click on Yes. This will delete all the Quick Access cache.
Now check if you can now open a folder or a location without the “Working on it…” message.
Option 2 – Try to rebuild the Search Index
First, open the Indexing Options using the Search bar.
Next, click on the appropriate listing, e.g. Users folder.
After that, click on the Advanced button. This will open a mini-sized window and from there, go to the Index Settings tab.
Then click on the “Rebuild” option under the Troubleshooting section.
Now click on OK after the rebuilding is completed. This should rebuild the search index for all the files and thus, fix the File Explorer stuck on the “Working on it…” message.
Option 3 – Try to optimize the folder for General Items
You might also want to try optimizing the folder for General Items as it can help the File Explorer to load the contents faster.
Just right click on the folder that takes time to load the contents in it and is showing the “Working on it…” message.
After that, click on Properties to open the Properties mini window.
From there, go to the Customize tab and click on the drop-down menu to “Optimize this folder for” under the “What kind of folder do you want?” section and then select General Items.
Then check the checkbox with a label that says, “Also apply this template to all subfolders” and click on the OK button to save the changes.
Restart File Explorer and check if the problem is now fixed or not.
Option 4 – Try performing a System Restore
Running System Restore can also help you resolve whatever issue that’s causing the “Working on it…” message. You can do this option either by booting into Safe Mode or in System Restore. If you are already in the Advanced Startup Options, just directly select System Restore and proceed with the next steps. And if you have just booted your PC into Safe Mode, refer to the steps below.
Tap the Win + R keys to open the Run dialog box.
After that, type in “sysdm.cpl” in the field and tap Enter.
Next, go to the System Protection tab then click the System Restore button. This will open a new window where you have to select your preferred System Restore point.
After that, follow the on-screen instructions to finish the process and then restart your computer and check if the problem is fixed or not.
Afraid of the growing threats online? As you should be. But we’re here to show you what kinds of malware are out there and what you can do to keep them at bay.
Malware definition
Malware comes from the term malicious software. It’s software designed to attack and exploit devices and networks to the advantage of the hacker who made it.
Malware can be transmitted in different ways. Most commonly this happens via infected USB drives, downloadable files or malicious websites. Depending on the type and ultimate goal, the consequences of a malware attack can range from negligible to catastrophic.
Credit: Ed Hardie on Unsplash
What kinds of malware are there?
1. Virus
A virus is typically spread via infected files, websites or links. It’s one of the oldest malware types and one of the most difficult to get rid of. That’s because, once activated, it replicates itself - hence the name.
It can perform different kinds of attacks, depending on what the creator wants to achieve. The main characteristic of a virus is that it really doesn’t show itself until you activate the host. So that’s a scary thought for sure.
2. Adware
Sometimes an ad blocker isn’t enough to fight off unwanted ads. And some of them can, unfortunately, be malicious. They may redirect you to infected sites or prompt downloads of risky files. Even just opening a malicious site can lead to data theft.
So, definitely be careful when clicking around. Even if an ad seems completely legitimate, you can never be too sure.
3. Ransomware
Through ransomware, cybercriminals gain access to a user’s data and use it to extort them for money. Basically, the user is threatened with data deletion or even exposure if a ransom isn’t paid by a specific deadline.
This is a particularly nerve-wracking type of malware. If it targets an individual, it preys upon their sense of anxiety, fear, guilt and even shame. If it targets a business (which is a lot more common), it preys upon not only that business’s profit but also every single one of their customers and their data.
4. Trojans
This type of malware disguises itself very well as a legitimate-looking program. Once you download it, hackers can get full access and control of your device, data and network. They can even be hidden in games, apps and attachments. They cannot self-replicate, though, so we guess that’s… good news?
5. Worms
Worms can replicate, just like viruses, but you don’t need to actually activate the infected program for them to get going. They can be used for various purposes, ranging from data deletion to file encryption to support a ransomware attack.
Credit: Growtika on Unsplash
6. Spyware
Spyware refers to malicious software that stays hidden on your computer and monitors your activity. The best-known type is keyloggers. This can be used to steal sensitive data like passwords and banking information.
7. Rootkits
Rootkits are among the most dangerous types of malware. They allow administrative access and full control of a device, which lets hackers continue hijacking all your data and monitoring your activity without your knowledge.
8. Botnets
Botnets are networks made up of bots - computers that cybercriminals have infected with malicious software. Bots and botnets give hackers remote access to users’ devices and allow them to spy on your camera, take screenshots, memorize passwords and launch Distributed Denial of Service attacks. This one truly makes your hair stand on end.
What can you do about it?
You know the old adage - better safe than sorry. And trust us, malware attacks are such a pain in the you-know-what that you really don’t want to be sorry.
Luckily, there are simple solutions that can shield you from most digital threats these days. What you want to be looking at is a solid antivirus program. Well, technically, you need an antimalware program, but since the latter evolved from the former, we still mostly refer to them as antivirus software. The majority of antimalware programs these days don’t just shield you from potential risks online, but include additional features as well. For example, some Bitdefender antivirus packages also include parental control and a VPN. And Bitdefender is not just for PCs either - it offers protection for your beloved iPhone or Android as well. You can throw in a password manager in there too, for an additional layer of security.
Credit: Dan Nelson on Unsplash
If you aren’t too concerned about all these various threats or feel like you don’t need extra security, you can at least take a step to protect your information from being exposed to lurking cybercriminals as you’re browsing. This can be done through a good VPN like Surfshark, which hides your identity in the digital space and prevents your data from being tracked.
Choosing the right protective software is especially important if you have children with access to the Internet, since they’re unfortunately even more vulnerable to malicious attacks. If you aren’t sure what the right kind of antimalware program is right for you, you can reach out to us and we’ll be happy to help keep your entire household or office digitally secure.
The bottom line
The truth is that there’s no way to be 100% protected in the online world. Hackers are constantly coming up with new ways to infiltrate our devices. But malware-battling software evolves along with them and there’s still plenty you can do to keep risks away. Stay safe!


 Speaking of old players of old Diablo 2, they can transfer their old characters into remaster and continue playing them within this new great HD environment. There are some steps and requirements but we are here to help and transferred characters will bring full stash, inventory, and equipped items with them.


