As you know, Windows has a built-in Automatic Maintenance feature that takes care of important tasks such as security scanning and updating, Windows software updates, Disk Defragmentation, System Diagnostics, Disk Volume Errors, and many more. So if you receive an error message saying, “Windows is unable to run automatic maintenance, The maintenance schedule is unavailable”, then this post will guide you in what you can do to resolve this issue.
Here are some suggestions you can try if the Automatic Maintenance in your Windows 10 PC is not able to run.
Option 1 – Enable Automatic Maintenance
It is possible that Automatic Maintenance has been disabled so you can try enabling Automatic Maintenance on your Windows 10 PC. To do so, follow these steps:
Go to Control Panel.
From there, select System and Security > Security and Maintenance > Automatic Maintenance.
After that, set the time you want to run the Automatic Maintenance and then check the checkbox saying, “Allow scheduled maintenance to wake up my computer at the scheduled time”.
Click OK to save the changes.
On the other hand, you can also enable Automatic Maintenance via the Registry Editor. But before you proceed, you need to create a System Restore Point first.
Tap the Win + R keys to open the Run dialog box.
After that, type “Regedit” in the field and hit Enter to open the Registry Editor.
Next, look for the “MaintenanceDisabled” key and then double click on it to open it and then set its value to “0”.
Click OK and exit the Registry Editor.
Restart your computer.
Option 2 – Check the Task Scheduler Services status
Majority of the tasks in Windows 10 run via services. So it is most likely that either the Service has been stopped or is set to the manual which is why Windows is unable to run Automatic Maintenance. Thus, you need to change it to automatic mode.
Tap the Win + R keys to open Run.
Type “services.msc” in the field and hit Enter to open Services.
Next, look for the Task Scheduler service and tap the T key on your keyboard which should take you to the services that start with T.
Double click on the Task Scheduler service and select the Automatic option under the Startup Type.
If it is not started yet, click on the Start button.
Then click Apply and OK to save the changes.
Option 3 – Check the Status in Task Scheduler
You can also try checking the status in the Task Scheduler. Just open the Task Scheduler > Task Scheduler Library > Microsoft > Windows > TaskScheduler. From there, make sure that Idle Maintenance, Maintenance Configurator, and Regular Maintenance are enabled.
Option 4 – Run the System File Checker
The SFC or System File Checker scan could detect and automatically repair damaged system files that could be causing the Automatic Maintenance issue. SFC is a built-in command utility that helps in restoring corrupted files as well as missing files. It replaces bad and corrupted system files with good system files. To run the SFC command, follow the steps given below.
Tap Win + R to launch Run.
Type in cmd in the field and tap Enter.
After opening Command Prompt, type in sfc /scannow and hit Enter.
The command will start a system scan which will take a few whiles before it finishes. Once it’s done, you could get the following results:
Windows Resource Protection did not find any integrity violations.
Windows Resource Protection found corrupt files and successfully repaired them.
Windows Resource Protection found corrupt files but was unable to fix some of them.
Option 5 – Run the DISM tool
The DISM tool is another command-line tool in the Windows operating system that could help users fix various corrupted system files. To use it, follow these steps:
Open the Command Prompt as admin.
Then type in this command: DISM /Online /Cleanup-Image /RestoreHealth
The DISM command you entered will repair the corrupted system image. Do not close the window if the process takes a while as it will probably take a few minutes to finish.
If you receive an error code of “0x80073afc” in Windows Defender after you boot your Windows 10 computer or when you try to manually run Windows Defender, then it could be that the Windows Defender files are corrupted. In such cases, this error could also occur if there is third-party security software that interferes with the smooth functioning of this Microsoft Security Client.
If you are one of the users who are currently facing this issue, then here are some suggestions you can check out to resolve the Windows Defender error code 0x80073afc.
Option 1 – Try to check the status of all the Windows Defender-related services
In the Cortana search box, type “services” and click on the Services icon to open the Services Manager. Alternatively, you can also tap the Win + R keys to launch the Run prompt and then type “msc” in the field and hit Enter to open the Services Manager
After opening the Services Manager, look for the following services and make sure that their Startup type is set to their default values:
Windows Defender Advanced Threat Protection Service – Manual
Windows Defender Antivirus Network Inspection Service – Manual
Windows Defender Antivirus Service – Manual
Windows Defender Firewall Service – Automatic
You can right-click on each one of the listed services and then select Start to start them.
And if some of the services don’t have their default values, just double-click on the Services to change the Startup types and select the correct option from the drop-down menu of the Startup type under the Properties box.
Next, set up the Startup type of these services to Automatic and then click on the Start button if the services are not running yet.
Now click on the Apply and OK buttons to save the changes made and then see if it fixed the problem or not.
Option 2 – Try to re-register the concerned DLL files
You could also try to re-register some Dynamic Link Library or DLL files on your computer as this could also help in fixing the Windows Defender error.
In the Start search, type “cmd” and from the search results that appear, right-click on Command Prompt and select the “Run as administrator” option from the context menu.
After opening Command Prompt as admin, type the following commands one after the other:
regsvr32 dll
regsvr32 dll
regsvr32 dll
regsvr32 dll
Once you’ve entered the commands given above, it will re-register the concerned DLL files in your system.
Now restart your computer for the changes to take effect.
Option 3 – Try to use the Registry Editor
Tap the Win + R keys to open the Run dialog box,
Then type “Regedit” in the field and hit Enter to open the Registry Editor.
Afterward, navigate to this registry path: ComputerHKEY_LOCAL_MACHINESOFTWAREMicrosoftWindows NTCurrentVersionImage File Execution Options
Next, look for the DWORDs named “MSASCui.exe”, “MpCmdRun.exe”, “MpUXSrv.exe” and “msconfig.exe”.
If you can’t find these DWORDs, refer to the next given option below.
Restart your computer.
Option 4 – Check the Environmental Values
Type “View advanced system settings” in the Windows search box and select the appropriate result.
This will open a new mini window. From there, go to the Advanced tab and click on the “Environment Variables…” button located at the bottom part of the window.
Next, look for the “%ProgramData%” variable name and make sure that its value is set to C:/ProgramData.
Then click OK to save the changes made.
Option 5 – Run the System File Checker Scan
System File Checker or SFC is a built-in command utility that helps in restoring corrupted files as well as missing files. It replaces bad and corrupted system files to good system files. To run the SFC command, follow the steps given below.
Tap Win + R to launch Run.
Type in cmd in the field and tap Enter.
After opening Command Prompt, type in sfc /scannow
The command will start a system scan which will take a few whiles before it finishes. Once it’s done, you could get the following results:
Windows Resource Protection did not find any integrity violations.
Windows Resource Protection found corrupt files and successfully repaired them.
Windows Resource Protection found corrupt files but was unable to fix some of them.
Restart your computer.
Option 6 – Perform a System Restore
Performing a System Restore on your computer can also help you fix the Windows Defender error. You can do this option either by booting into Safe Mode or in System Restore. If you are already in the Advanced Startup Options, just directly select System Restore and proceed with the next steps. And if you have just booted your PC into Safe Mode, refer to the steps below.
Tap the Win + R keys to open the Run dialog box.
After that, type in “sysdm.cpl” in the field and tap Enter.
Next, go to the System Protection tab then click the System Restore button. This will open a new window where you have to select your preferred System Restore point.
After that, follow the on-screen instructions to finish the process and then restart your computer and check if the problem is fixed or not.
If you are trying to run or starting a program on your Windows 10 computer and you suddenly get an error message saying, “Error 1061 The service cannot accept control messages at this time”, read on as this post will show you what you can do to fix the problem.
This kind of error pops up since the Application Information Service does not respond to the requests to raise applications to Administrator in Windows 10 like the Task Manager, Service updates, and so on. Thus, you won’t be able to run or open apps and will only get stuck with this error.
The “Error 1061 The service cannot accept control messages at this time” message is a type of network error that typically occurs when there is a temporary mismatch between the requested control and the state of the service to be controlled. It’s most likely that the service is in a state of start-pending, stop-pending, stopped or it may already be used by another user which explains why this error message suddenly appears.
You can encounter this error message on any Windows operation. Here are some of the most common occurrences:
Debugging a Windows service
Starting Task Manager
Starting Registry Editor
Starting Firewall
Starting services.msc
Starting dsm.exe
Updating services
Asking for file permissions, etc.
According to Microsoft MSDN, the error occurs because:
“There is a temporary mismatch between the requested control and the state of the service to be controlled. The service may be in a state of start-pending, stop-pending, or stopped. Wait a few minutes, then retry your operation.”
If after a few minutes, the error still appears, then you may have to follow the options prepared below.
Option 1 – Try to restart the Credential Manager Service
Go to the Start menu.
Then type in “services” in the search box.
From the search results, right-click on “Services” and select the “Run as Administrator” option.
Next, look for the Credential Manager Service in the Services window.
Once you found it, double-click on it to open its Properties. From there, you need to click on the Stop button.
After that, set the Credential Manager Service to “Automatic” and click on the Start button to restart it.
Option 2 – Try to start the Application Information Service
You can also try starting the Application Information Service to fix the “Error 1061 The service cannot accept control messages at this time”. Just open the Windows Services Manager and make sure that Application Information Service is Started. And if you find that it’s already started, you need to restart it.
Option 3 – Try killing the IIS Worker Process via Task Manager
Tap the Ctrl + Alt + Del keys and select the Task Manager.
Next, click on More details to expand the Task Manager and then look for the IIS Worker Process entry which should be displayed in the list under the Processes tab. From there, you can see it in the Background processes. Once you find it, kill its process.
You can also try to look for the “w3wp.exe” entries and end its process. if you find many entries, right-click on some of them and select the End task option from the context menu.
If your USB keeps disconnecting and reconnecting after you connect your USB device on its own randomly, then the problem might have something to do with a hardware or driver issue. The first thing you have to do in such a case is to make sure that the device is working on another computer. This will help you isolate the problem and if it turns out that it works, then the problem lies in your computer and not your USB device.
To fix this connection problem between your USB device and Windows 10 computer, you can use the options given below as a reference.
Option 1 – Update or reinstall the Universal Serial Bus Controller driver
Since it could be a driver issue, you can try to update or reinstall the Universal Serial Bus Controller drivers using the Device Manager. Refer to the following steps:
First, click the Start button and type “device manager”.
Then click on the “Device Manager” from the search results to open it.
From there, look for the “Universal Serial Bus controllers” option and then right-click on each one of the USB drivers and select the Update Driver from the menu.
Note: If it is a regular USB drive, then it will be listed as a USB Mass Storage Device but if you have a USB 3.0 device, then look for a USB 3.0 Extensible Host Controller.
Restart your PC and then click the “Search automatically for updated driver software” option.
Note: If updating the USB Controller drivers didn’t work, you can try to reinstall them instead.
Option 2 – Try to change the USB port
You might want to change the USB port since modern computers have a variety of USB ports. So if your USB drive supports USB 3.0 or 3.1, make sure that you plug it inside a USB 3.0 or 3.1 ports. If you’re not sure which port, just keep in mind that the USB 3 port is usually blue or you can also use your computer’s documentation or manual as a reference to locate it.
Option 3 – Try to turn off the Power Saving option
You could also try to turn off the Power Saving option to resolve the problem. All you have to do is switch to Power Management after you select the Properties of the USB device and from there, uncheck the “Allow the computer to turn off the device to save power” option. On the other hand, if you are using a laptop and did not use the USB device for a long time, then it could be powered off. This will ensure that the system does not turn off the USB device.
Option 4 – Try to reinstall the latest Universal Serial Bus controller drivers in Compatibility Mode
If you were unable to install the Universal Serial Bus controller drivers you’ve downloaded, you can try installing them again but this time using Compatibility mode. Follow the steps below to do so:
You need to download the driver and place it on your desktop.
After that, right-click on it and select Properties.
Next, switch to the Compatibility tab where you should see two options:
Compatibility troubleshooter, and let Windows figure out what works best for you. If it fails, follow the next.
Manually choose the version of Windows it was correctly working.
Now right-click on the file and select the “Run as administrator” option to install. After that, you should now be able to change your screen aspect ratio to what you were using early on.
Note: If you have other programs that won’t work on the existing version of Windows, then make sure to run the program in a Compatibility mode.
Option 5 – Run the Hardware and Devices Troubleshooters
The first thing you need to do is click on Start and then on the gear-like icon to pull up the window for Settings.
After opening Settings, look for the Update and Security option and select it.
From there, go to the Troubleshoot option located on the left-hand side of the list.
Next, select Hardware and Devices from the list and open the Troubleshooter and run it. Once it is doing its job, wait for it to complete the process and then restart the system.
After the system restarts, check if the problem’s now fixed. If not, refer to the next option given below.
If you like to schedule different tasks on your Windows 10 computer and automate them, then you would find the Windows Task Scheduler very useful. It is commonly used by a lot of users to schedule various tasks like scheduling periodic execution of scripts and some programs to make sure that the intended tasks are automatically carried out. Apart from being a preinstalled application, the Task Scheduler is already available on your computer. However, there are times when you might encounter some errors while using it. One of these errors is error 0xFFFD0000. You can encounter this error while executing some PowerShell scripts. It can occur to any tasks as well especially to the ones that have a file executed using a particular program. And just like the PowerShell script, files also use PowerShell to be executed.
To fix Error 0xFFFD0000, you need to follow the instructions provided below carefully.
Step 1: In the Start Search, type “task scheduler” and click on Task Scheduler from the results to open it.
Step 2: After opening Task Scheduler, right-click on the task that’s giving you the error and then click on Properties.
Step 3: After that, navigate to the Actions tab in the new mini window that appears.
Step 4: From there, select the action for the task and click on the Edit button which will open another mini window.
Step 5: Next, make sure that the path to the executing program is properly typed inside the field of Program/script. Note that it should be set to the executable file for that particular program. For instance, you have to set it to “C:WindowsSystem32WindowsPowerShellv1.0powershell.exe” for the Windows PowerShell program.
Step 6: You can also utilize the Browse button and navigate through Windows Explorer to locate that particular executable file for the program.
Step 7: Now make sure to use the file argument in the Add arguments field followed by the path of the file to be executed. It should look like this:
Step 8: Once done, click on OK to save the changes made and see if the task is still giving you an error or not.
On the other hand, if you are still getting the same error, you can try to repair the Task Scheduler by deleting corrupted tasks. Note that a single corrupted file can cause big problems so this option is quite important. And for you to delete a corrupted task or any task from the Task Scheduler, you have to use the Registry Editor if you are not able to use the Task Scheduler interface. To do so, follow these steps:
Tap the Win + R keys to open the dialog box for Run.
Next, type in regedit and click on OK or tap Enter to open the Registry Editor.
Then navigate to this path: ComputerHKEY_LOCAL_MACHINESOFTWAREMicrosoftWindows NTCurrentVersionScheduleTaskCacheTree
Note: In this path, you can see all the tasks that are currently set in the Task Scheduler. And since it would be hard to tell which one of them is corrupted, you have to delete the latest one in Task Scheduler last. But before you do so, make sure that you take a note of the ID of the tasks. And for you to get the ID, you have to select the task you wish to delete and double click on the ID string located on your right-hand side, and then copy it in the Notepad.
Right-click on the task name and then delete it.
After that, delete the very same GUID which you have copied earlier from these folders:
If your Windows 10 computer is downloading or installing updates but suddenly an error pops up saying, “GWXUX has stopped working”, read on as this post will show you what you can do to resolve the problem. GWXUX is a process responsible for downloading and installing Windows updates and is installed on your computer via Windows Updates. That particular update is known as “KB3035583”. Through this process, the “Get Windows 10” pop-ups are installed and initiated by Microsoft. This process is also capable of checking the compatibility of your PC to run Windows 10 as well as preparing it for installation. However, this process might also result in excessive usage of Disk and sometimes, CPU. So in this post, you will be guided on how you can fix the issue with the GWXUX. Follow the instructions given below carefully.
Option 1 – Disable GWXUX in the Task Scheduler
You will have to disable the gwxux.exe process to run from the Task Scheduler. Thus, you need to follow the steps below to do so.
Open the Cortana Search box and then type “task scheduler” in the field.
Then click on Task Scheduler from the related search results that appear to open it.
After opening the Task Scheduler, navigate to Microsoft > Windows > Setup > gwx on the left panel from the Task Scheduler Library.
Once you select the GWX folder, you will see two tasks that are listed under that folder. Select both of these tasks and permanently disable them.
Restart your computer to apply the changes made and check if the issue is now fixed or not.
Option 2 – Uninstall the KB3035583 Windows Update
To uninstall the KB3035583 Windows Update, you need to go to Control Panel, and for you to do that, type “control panel” in the Cortana Search box.
After that, click on Control Panel from the related search results given.
Once Control Panel is pulled up, search for “View Installed Updates” in the search field from the top right part of the window.
Next, click on a link labeled, “View Installed Updates” under the Programs and Features menu.
After clicking the link, you will see the list of all the installed updates in your computer from the Windows Updates.
Now look for an update named “KB3035583” and select it.
You should notice the Uninstall button located at the top portion of the sub-menu ribbon as you can see on the snippet below. Click on that button to uninstall the KB3035583 Windows Update.
After uninstalling the update, make sure to restart your computer to apply the changes made.
Option 3 – Try using the System File Checker
System File Checker or SFC is a built-in command utility that helps in restoring corrupted files as well as missing files. It replaces bad and corrupted system files with good system files that might be causing the error 0x80200056. To run the SFC command, follow the steps given below.
Tap Win + R to launch Run.
Type in cmd in the field and tap Enter.
After opening Command Prompt, type in sfc /scannow
The command will start a system scan which will take a few whiles before it finishes. Once it’s done, you could get the following results:
Windows Resource Protection did not find any integrity violations.
Windows Resource Protection found corrupt files and successfully repaired them.
Windows Resource Protection found corrupt files but was unable to fix some of them.
After running the System File Checker, restart your computer and check if the error with the GWXUX.exe file is now fixed or not.
In today's IT world, if you want a computer for typical day-to-day actions and gaming, there are 3 primary ways you can go. An Apple computer with its proprietary hardware and operating system or a typical machine with Windows or Linux operating system.
Each system has both advantages and disadvantages and picking the right one might be difficult for some users. From hardware differences to specific software and operating system, each system is aimed at a different type of work, and in this article, we will explore each one and help you in choosing the right one for you.
Apple ecosystem
Apple has managed to create a unique ecosystem of its own devices, from its iMac desktop computers to more professional MAC studio and power MAC and all the way to tablet iPad and iPhone are powered by Apple's own operating system that connects all of these devices into one large system. So if you really need one singular ecosystem this is a huge advantage.
The ecosystem on the side, MAC computer systems are great, some would argue best for coding, design, video work, and sound editing. MAC M2 chip is optimized for all of these tasks and a specially tailored operating system is just the icing on the cake. Specific Apple-made software like a logic pro or final cut also helps a lot to position MAC systems on top of the line.
Reading all of this you might think hey this is the computer for me, it does everything! Sadly the truth is not like that. The first thing that is difficult on MAC systems and a maybe big reason that it is not so adopted outside professional working environment is lack of games. If you are a gamer or plan on using MAC for gaming, well I have some bad news. The second big turn-off is that MAC systems tend to be more expensive than PC systems, yes components are of higher quality but rest assured that you will pay for also for branding.
Get MAC as your workstation for serious work and for good tech support, if you need a plain home computer keep reading.
Windows PC machine
There is no better feeling than assembling your own computer, tweaking hardware to make a monster and despite haters hating, Windows is the best all-around operating system on the market. It is supporting the largest variety of hardware and the largest variety of software.
The best platform for serious gaming and streaming Windows machine has cemented itself as a multimedia powerhouse. But, this kind of computer is not alien to being also a professional machine, you can practically do everything that you can do on Apple or Linux machine inside Windows, yes some things might require extra steps or will be slightly slower but in the end, being able to do anything is the greatest strength of Windows machine.
Of course, every system has its flaws and Windows is not immune to that. One of the biggest is being the operating system for every hardware ever made and every software as well while keeping legacy support for old software and hardware, basically, its biggest strength is in the same time its biggest weakness leading to sometimes stability issues. Also being able to place any kind of hardware can also lead to the same stability issues. Executing something a little slower than other systems and having some extra steps can also be looked upon as weaknesses.
Linux system
First and perhaps for some people, the biggest advantage of the Linux operating system is its price, it is completely free! Other advantages include the great server and networking included in the OS itself, the large amount of customization, and unmatched stability. The ability to write scripts inside the OS terminal is also a great thing and coding is much more streamlined and friendlier than on other machines.
The power of Linux is the ability to change anything, even on the system layer, no other operating system will let you change the basic functionality of the OS itself while Linux will let you do this. It is also the only operating system you can fully use by booting it up from a USB stick and having the same experience as it was installed on a local hard drive. Among other OS mentioned earlier, Linux is by far the lightest one, taking the smallest amount of memory among the three.
The bad side of the Linux machine is the steep learning curve, among the three mentioned operating systems rest assured Linux is the most difficult to learn and be comfortable in it. The operating system will require you to know the hardware and how computers work in order to fully use its potential. Other things that place it behind are not so wide hardware support compared to Windows and the somewhat confusing distro model.
Linux versions come in form of different distro packages and first-time users will face many of them being left in awe of which one to choose. Also installing drivers and software via a package system can also be a tedious task as well, often being that some version of the driver will not work on the newer version of the Linux distro.
Get a Linux machine if you are well versed in computer technology, if you want great customization of the OS itself or if you do not want to spend money on OS and software since almost entire Linux software is open source.
Manually cleaning your PC registry may be the worst or best thing you ever decide to do. Registry keys that lie around on your computer, unused, can cause your computer to lag. This can end up in your computer not being able to load the easiest of programs and being slow at loading anything, let alone something that would take up a decent amount of memory.
If your computer has slowed to almost an absolute stop, it is most probably the registry’s fault and the only option then is to clean it. You can get programs to do this for you, but they can be riddled with inaccuracies and viruses that could harm your computer even more.
This is why some people choose to manually edit their computer. However, this is not without its flaws.
Registry Keys
Registry keys tend to have really long names.
These names will be full of numbers and hyphens and will most likely give you no indication of what they do. Even some computer experts find it hard to understand what every computer’s registry keys do.
This can make it very hard to see which ones are causing the problem; and if you don’t know what’s causing the problem, then there is no way you will be able to fix it.
Some registry keys will be completely menial in what they do but some could be vital to even allow Windows to work on your computer.
Manual Registry Repair
Registry keys can also cause huge problems if you manually delete the wrong one.
A lot of registry cleaners have the option to revive a key that they have deleted on you, which means that fixing an error that they made would be easy enough to do. However, when you manually delete registry keys, it will be an awful lot harder to get them back to work again afterward.
This can cause your computer many problems and if you delete even one wrong key it is possible your computer will not even start. With the horrid naming system they have as well, it makes it very hard to determine what is important and what is not, which means it is all too likely that you will delete something important.
However, those are the risks you have to take when you are cleaning out your registry. A registry cleaner has the same likelihood of messing with your computer and deleting something wrong that you have, so it is the same either way however a registry cleaner will do it with less hassle.
But, some people say that if you do it yourself, it’s more likely to be right; that is why they prefer to do it manually and that is alright.
Conclusion
So, if you are manually deleting your registry keys that are unused, you’ll have to use a program that comes with Windows known as ‘regedit.exe’ which is incredibly difficult to use but may just be worth the hassle in the end.
So, you don’t really need to put up with a slow computer, but be careful when messing with your registry manually!
To repair and resolve this and other PC-related issues Click Here to download Restoro.
A very serious data breach has happened to the unfortunate GoDaddy hosting service placing a little over 1.2 million accounts affected. Security breaches sadly are not a rare occurrence but this time it is a little different.
Each time when the company is breached data is stolen and that places the company in a bad light usually because its user database has been compromised and people are concerned about their data being misused. This is very rational fear and concern but this time things are a little bit different than usual, why is that, you might ask?
Well, as before mentioned GoDaddy is a hosting company and the vector of attack was aimed at the part where it is hosting WordPress. Attackers were able to get their hands on the sFTP credentials of customers on that server meaning that all of the websites are also been relieved of their user base as well.
This potentially means that there is a high chance that all of the hosted web site's content is also compromised, meaning that your data could also be compromised even if you were not a GoDaddy customer, all you needed to do is to be a member of any site hosted on their platform.
GoDaddy has reset WordPress passwords and private keys, so it’s already taken the steps required to stock the attacker from exploiting anything with the passwords obtained. The company is in the process of generating new SSL certificates for customers.
Bad thing is that the attack used a compromised password to get into systems all the way back around September 6th, 2021, the breach was discovered on November 17th, 2021, which is more than a 2-month active time where the attacker could harvest tons of data. The outcome of this attack will be seen in the upcoming time, until then be safe, and Just in case change your passwords.
DirectX function GetDeviceRemovedReason error is a DirectX error that comes up during playing games on Windows 11 operating system. Usually, the error occurs in gaming systems powered by AMD and very rarely if any times at all on Nvidia or intel platforms.
If you are one of the gamers affected by this error, fear not because we have a solution for you. Follow provided fix guide in order to correct this error and get back to gaming asap.
1. Update drivers
The first thing of course is to update your graphic card driver, you can do this with your graphic cards panel software or directly in Windows itself but the best practice and one that I would recommend is to go to your graphic card manufacturer’s website and download the latest driver there, and then install it inside Windows 11.
2. Change power mode
Changing power mode inside Windows 11 can solve this issue since sometimes Windows power manager if it is set to anything except best performance can interfere with the proper functioning of the graphic adapter, and because of this error. To change the power setting do the following:
Press ⊞ WINDOWS + I to open settings
Click on the System tab
Select power & battery on the right part
Click on the menu beside power mode
Select the best performance
3. Run SFC scan
Corrupted system files can also cause this error and if previous steps have not resolved it we will use Windows built-in tool SFC scan to find and repair all bad files in windows.
Press ⊞ WINDOWS + S to open the search menu
Type in Windows terminal and run it as administrator
If prompted click on YES on UAC
Press CTRL + SHIFT + 2 to run command prompt
Type in sfc /scannow and press ENTER
Wait for the whole process to finish and then reboot your system
4. Reinstall the problematic game
Sometimes game files can get corrupt and maybe even overwritten, try with game reinstallation if the problem still persists.
If you are trying to install or update Microsoft Edge on your Windows 10 computer but ended up getting HTTP Error 500 or Error 0x8004xxxx or 0x8007xxxx, then you’ve come to the right place as this post will help you sort this problem out.
The aforementioned errors when either installing or updating the Edge browser occur due to a Network issue. There is actually a range of error codes that are associated with the network connection issue. These error codes include Error 500 or 0x80010108, 0x80040801, 0x80042193, 0x80042194, 0x800421F4, 0x800421F6, 0x800421F7, 0x800421F8, 0x80072742, 0x80072EE2, 0x80072EE7, 0x80072EFD, and 0x80072EFE. To fix them, there are several options you can try. You can try to run the Network Adapter troubleshooter or update or reset the Network Adapter as well as check and the proxy configuration.
Option 1- Try updating the Network Adapter Driver
Follow the steps below to update your Network Adapter Driver:
Tap the Win + R keys to launch the Run window and then type in the “MSC” command and hit Enter to open the Device Manager window.
From there, expand the list of all the network drives and update each one of them.
Note: If updating the network drivers didn’t help in fixing the problem, you can also try to uninstall the very same drivers and restart your Windows 10 PC. After that, the system itself will reinstall the drivers you just uninstalled. Alternatively, you can also download and install the drivers from the manufacturer’s website directly.
Option 2 – Run the Network Adapter troubleshooter
To run the Network Troubleshooter, refer to these steps:
Open the Search bar on your computer and type in “troubleshoot” to open the Troubleshoot settings.
Next, scroll down and select the “Network Adapter” option from the right pane.
Then click on the Run Troubleshooter” button.
After that, your computer will check for any possible errors and will pinpoint the root cause of the problem if possible.
Restart your computer.
Option 3 – Try to reset the Network Adapter
You can also try to perform a Network Reset to resolve the problem. This will reset the entire network configuration including your IP address. To perform Network Reset, follow these steps:
Tap the Win + I keys to open Settings.
From there, go to the Network and Internet section.
Next, scroll down and look for “Network Reset” under the status pane.
After that, click on Network Reset and then on Reset now to start resetting the network configuration. Once done, check if it is able to fix the error or not.
Option 4 – Try to fix the Proxy Settings
In the Cortana search box, search for Internet Explorer and then click on the related search result.
After that, tap the Win + T keys on your keyboard and click on Internet Options.
Next, navigate to the Connections tab and click on LAN Settings.
Then click on the Advanced button and delete all the entries in the list generated in the Exceptions section. And if the Advanced button is disabled because the “Use a proxy server for your LAN (These settings will not apply to dial-up or VPN connections)” option is disabled then you are good to go. Now proceed to the next step.
Tap the Win + X keys or right-click on the Start button and select Command Prompt (Admin) or you could also search for “cmd” in the Cortana search box and right-click on Command Prompt from the search results and select the “Run as administrator” option.
If a User Account Control appears, click on Yes to proceed. After that, type each one of the commands listed below, and don’t forget to hit Enter after you type each one of them.
netsh winhttp reset proxy
net stop wuauserv
net start wuauserv
Now restart your computer and check if the problem is fixed or not by installing or updating Microsoft Edge again.


 Each time when the company is breached data is stolen and that places the company in a bad light usually because its user database has been compromised and people are concerned about their data being misused. This is very rational fear and concern but this time things are a little bit different than usual, why is that, you might ask?
Well, as before mentioned GoDaddy is a hosting company and the vector of attack was aimed at the part where it is hosting WordPress. Attackers were able to get their hands on the sFTP credentials of customers on that server meaning that all of the websites are also been relieved of their user base as well.
This potentially means that there is a high chance that all of the hosted web site's content is also compromised, meaning that your data could also be compromised even if you were not a GoDaddy customer, all you needed to do is to be a member of any site hosted on their platform.
GoDaddy has reset WordPress passwords and private keys, so it’s already taken the steps required to stock the attacker from exploiting anything with the passwords obtained. The company is in the process of generating new SSL certificates for customers.
Bad thing is that the attack used a compromised password to get into systems all the way back around September 6th, 2021, the breach was discovered on November 17th, 2021, which is more than a 2-month active time where the attacker could harvest tons of data. The outcome of this attack will be seen in the upcoming time, until then be safe, and Just in case change your passwords.
Each time when the company is breached data is stolen and that places the company in a bad light usually because its user database has been compromised and people are concerned about their data being misused. This is very rational fear and concern but this time things are a little bit different than usual, why is that, you might ask?
Well, as before mentioned GoDaddy is a hosting company and the vector of attack was aimed at the part where it is hosting WordPress. Attackers were able to get their hands on the sFTP credentials of customers on that server meaning that all of the websites are also been relieved of their user base as well.
This potentially means that there is a high chance that all of the hosted web site's content is also compromised, meaning that your data could also be compromised even if you were not a GoDaddy customer, all you needed to do is to be a member of any site hosted on their platform.
GoDaddy has reset WordPress passwords and private keys, so it’s already taken the steps required to stock the attacker from exploiting anything with the passwords obtained. The company is in the process of generating new SSL certificates for customers.
Bad thing is that the attack used a compromised password to get into systems all the way back around September 6th, 2021, the breach was discovered on November 17th, 2021, which is more than a 2-month active time where the attacker could harvest tons of data. The outcome of this attack will be seen in the upcoming time, until then be safe, and Just in case change your passwords. 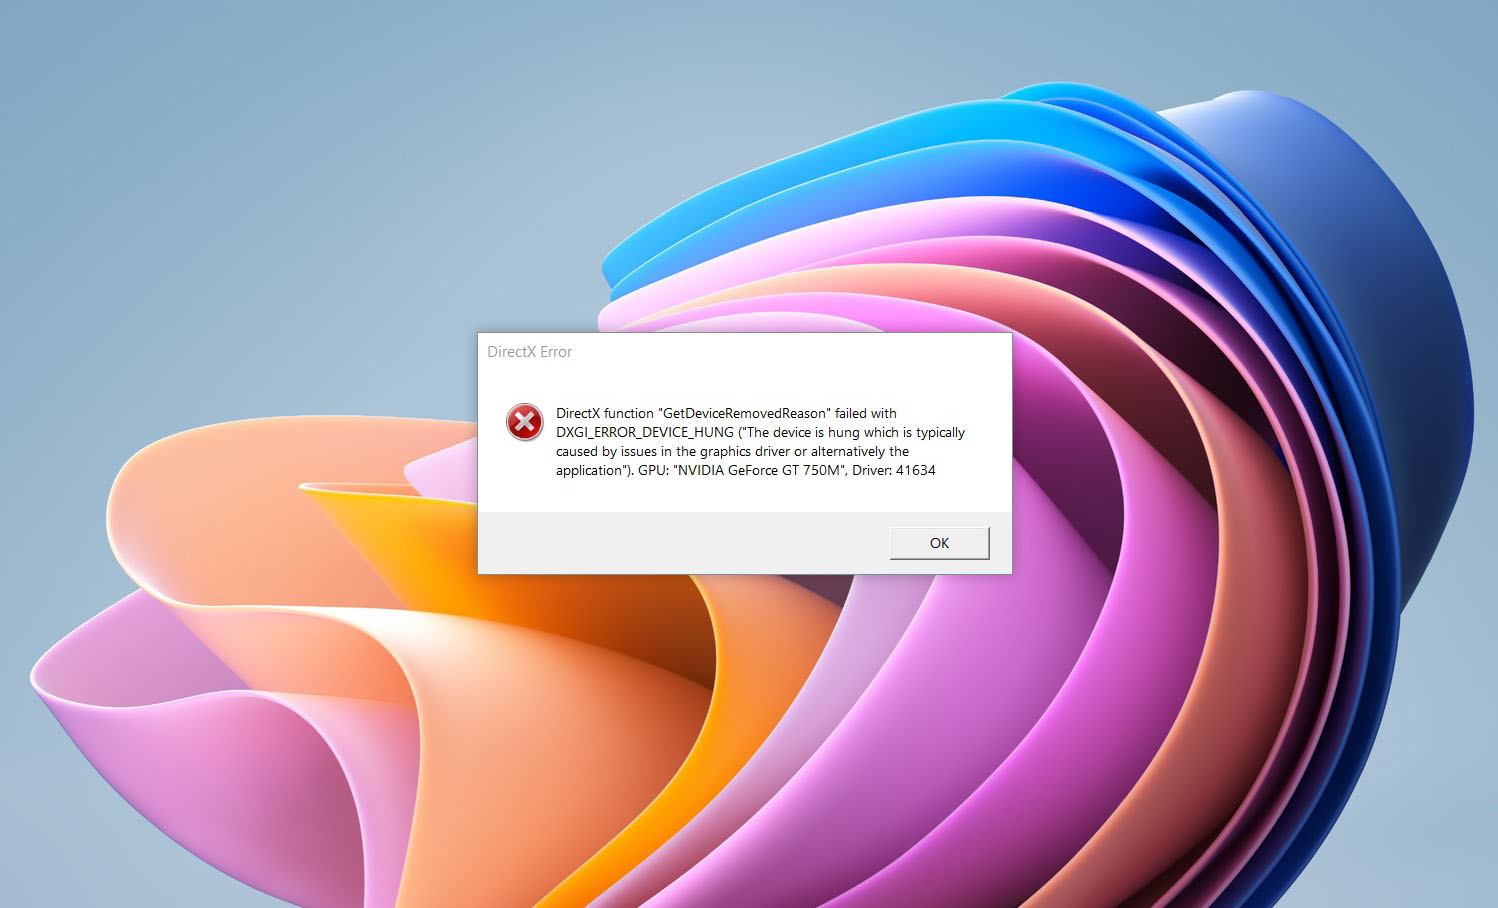 If you are one of the gamers affected by this error, fear not because we have a solution for you. Follow provided fix guide in order to correct this error and get back to gaming asap.