If the Task Manager is either blank or is not showing processes on your Windows 10 computer, then here are a few things you can do to resolve this issue. This kind of problem can occur due to some system file corruption or some malware infection in the system.
Here are some suggestions you can try to resolve the problem with the Task Manager on your Windows 10 PC.
Option 1 – Try restarting your computer
The most common and most of the time effective way to resolve this kind of issue is to simply restart your computer. Thus, you have to restart your computer and see if it helps in fixing the Task Manager issue or not. If not, you can try the next given options below.
Option 2 – Run the DISM tool
If the first option didn’t work, then running the Deployment Imaging and Servicing Management tool can help you resolve the issue with the Task Manager as it will repair the Windows System Image as well as the Windows Component Store in Windows 10.
After you access the Advanced Startup options, select Command Prompt by using the arrow keys on your keyboard.
Next, type in this command: DISM /Online /Cleanup-Image /RestoreHealth
Do not close the window if the process takes a while as it will probably take a few minutes to finish.
Option 3 – Make sure that the display columns are selected in the Task Manager
You have to make sure that you have checked or selected the display columns you want to be displayed. So if none of them are selected, you might not see any details at all. Thus, you need to right-click on the space near Name and select the columns.
Option 4 – Run the System File Checker Scan
System File Checker or SFC is a built-in command utility that helps in restoring corrupted files as well as missing files. It replaces bad and corrupted system files with good system files that might be the reason why the Task Manager is blank or is not showing processes. To run the SFC command, follow the steps given below.
Tap Win + R to launch Run.
Type in cmd in the field and tap Enter.
After opening Command Prompt, type in sfc /scannow
The command will start a system scan which will take a few whiles before it finishes. Once it’s done, you could get the following results:
Windows Resource Protection did not find any integrity violations.
Windows Resource Protection found corrupt files and successfully repaired them.
Windows Resource Protection found corrupt files but was unable to fix some of them.
Restart your computer.
Option 5 – Troubleshot the problem in a Clean Boot State
There are some instances that some conflicting programs installed in your computer might be the one that’s causing the Task Manager issue. To identify which program is causing the problem, you need to put your computer in a Clean Boot State. To do so, follow the steps below.
Log onto your PC as an administrator.
Type in MSConfig in the Start Search to open the System Configuration utility.
From there, go to the General tab and click “Selective startup”.
Clear the “Load Startup items” check box and make sure that the “Load System Services” and “Use Original boot configuration” options are checked.
Next, click the Services tab and select the “Hide All Microsoft Services” check box.
Click Disable all.
Click on Apply/OK and restart your PC. (This will put your PC into a Clean Boot State. And configure Windows to use the usual startup, just simply undo the changes.)
From there, start to isolate the problem by checking which one of the programs you installed recently is the root cause of the problem.
Option 6 – Try scanning your computer using Windows Defender
As mentioned, the Task Manager issue might be caused by some malware in the system and so to eliminate the malware, you have to scan your computer using security programs like Windows Defender.
Tap the Win + I keys to open Update & Security.
Then click on the Windows Security option and open Windows Defender Security Center.
Next, click on Virus & threat protection > Run a new advanced scan.
Now make sure that Full Scan is selected from the menu and then click the Scan Now button to get started.
Google Docs has cemented itself as a great free alternative to Microsoft Office Word. Most of the time people just share links to google Docs among themselves but sometimes you need to save and download files.
Luckily Google docs let you download easily files in various formats including PDF as well. In this short tutorial we will explain how can you download your Google document as a PDF file.
Saving Google Docs as a PDF
Open the Google document inside the browser and click on the File drop-down menu. In the file drop-down menu go to Download and choose PDF document. Next, choose the location where you would like your file to be saved and click on SAVE.
And that's all that needs to be done. Also, you can edit PDF files as well in google docs if you need to.
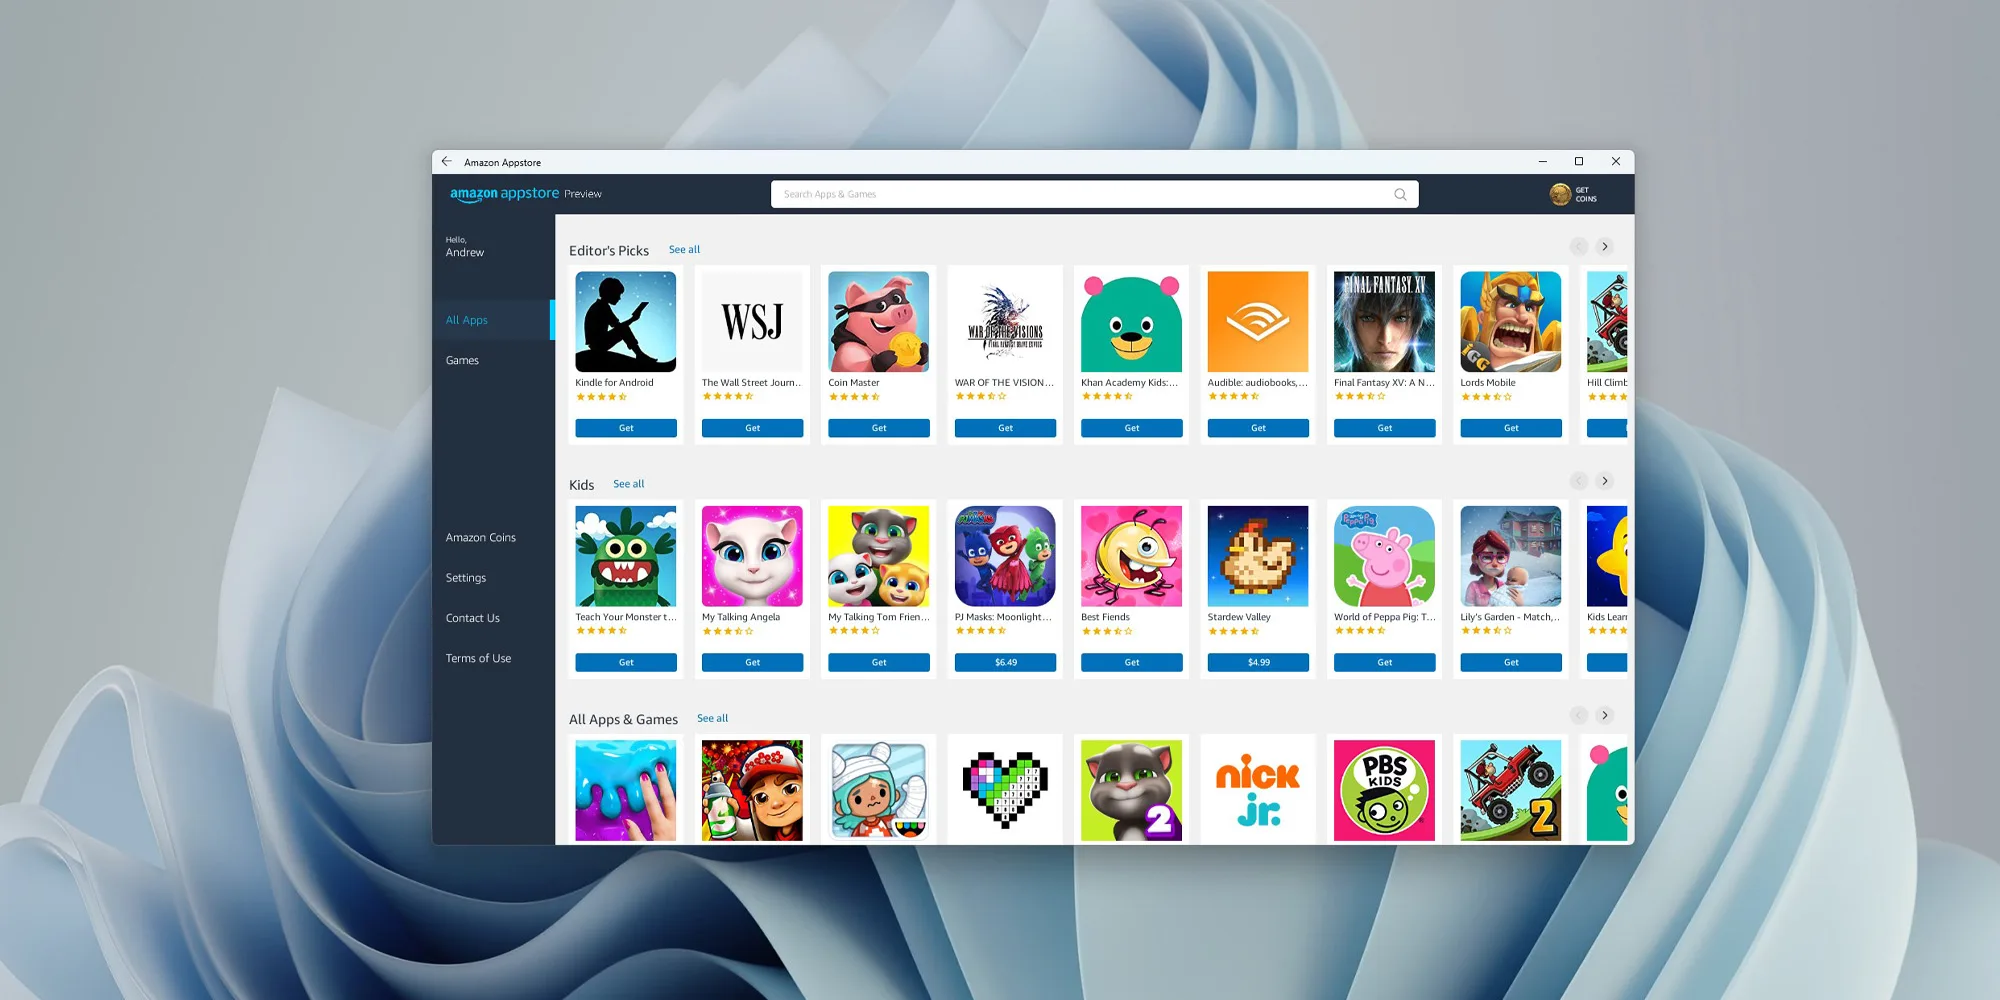
One of the selling points of Windows 11 was the ability to run Android apps natively in it without the need for any third-party software. It is not a big surprise that even after its release Microsoft is evolving and expanding Windows 11 and its features.
Microsoft is now rolling out an update for the Windows Subsystem for Android on the Dev Channel of the Windows Insiders program. The new version upgrades the core operating system from Android 11 to Android 12.1 (also known as Android 12L), which means the new system and app features in Android 12 and 12.1 are now available on Windows for the first time. However, not the new features in those updates apply to the modified version that runs on top of Windows. For example, one of the main improvements in 12.1 was a dual-pane notification panel for larger screens, but Android app notifications on Windows just show up in the Windows notification panel.
The upgrade also improves how Android apps integrate into Windows. The Windows taskbar will now show which Android apps are currently using the microphone, location, and other system services — similar to many native Windows applications. Toasts messages (the small popups that some apps use for temporary messages) are now displayed as Windows notifications, and the titlebar on Android apps will use the current activity name for the title.
Full changelog
Windows Subsystem for Android updated to Android 12.1
Advanced networking on by default for newer x64 Windows builds
Updated Windows Subsystem for Android Settings app: redesigned UX and diagnostics data viewer added
Simpleperf CPU profiler recording now works with Windows Subsystem for Android
Windows taskbar now shows which Android apps are using microphone and location
Improvements to Android app notifications appearing as Windows notifications
Reduced flicker when apps are restored from minimized state
Apps are not restarted when devices come out of connected standby on recent Windows builds
New video hardware decoding (VP8 and VP9)
Fixes for on-screen keyboard in apps
Fixes for full-screen Android apps and auto-hidden Windows taskbar
Windows Subsystem for Android updated with Chromium WebView 100
Added support for Android NetworkLocationProvider in addition to GpsLocationProvider
Improved general stability, performance, and reliability
The new update is limited to Windows Insiders for now, but once Microsoft fixes all the bugs, it should start rolling out to everyone on Windows 11 that has the Android Subsystem enabled.
Hello and welcome to our software series review. Weel this time we could say this is more of a service review since the application we are going through today is online and you can use it freely without ever needing to install it.
When we choose software that we are going to review and recommend we really try to recommend something that is worth your time and money, Cartoonize fits in both categories in my opinion.
First of all basic plan of this graphic software is completely free and as mentioned it is working online, also as one more feature basic plan does not even require you to have an account of any kind, all you need to do is go to the website of the application and you can start using it right away. There is also paid plan for extra features if you need them billed monthly or annually.
Features
First things first, this is not Photoshop or GIMP and it does not aim nor want to be. This is something else, directed and pointed at the different types of users. This application is aimed at people that want to make some quick graphics and post them on social media and it does that very well. Even without knowledge to use graphic software this one is so well designed and straightforward that even a complete newcomer can do something right away.
So as the application that wants to be used by people that want to place some cool pictures or ads on their social media what it offers. For starters simplicity and ease of use, every option that you can use is on the left side of the screen nicely packed into the vertical toolbox. Inside the toolbox, you have access to various tools, effects, and filters that you can apply to your image.
Tools explained
Image manager
The first section on the tool panel is the image manager, here you can upload your images, delete them, search stock images, and so forth. nothing more to say about this one as it is only a basic file manager.
Edit
In this tool panel, there are a lot of basic settings for your image manipulations divided into 3 sections: Basics, Enhance, and Creative. In the basic section, you can crop, resize and rotate your image. Enhance panel will let you set exposure, color, vibrance, tint, and details (sharpen). Finally, the Creative part will let you remove the background with AI in a single click, replace colors in the image, and add a vignette and round image.
Effects
In the effects panel, you will be given 4 options to choose from Cartoonizer, Digital art, Sketcher, and painting. Each option once clicked will open another set of options tied to chosen preset where you will be able to choose a different style from chosen template. Once you click on the desired template it will be applied to your image and in the upright corner, you will have edit options to tweak it to your liking. You can play around as much as you want because only once you click on the apply button, the effect will be applied to your image.
Filters
Same as in the effects tool panel here you will also get a series of different filters that you can apply to your image. As in the previous tool once clicked on the chosen filter, you will be given options for its variations and details edits. How there is really plenty of filters options and combined with its own presets I will not focus on explaining what each one is doing since picture thumbnails are pretty accurate and just one look at them will explain to you everything you need to know.
Overlays
In the overlays panel, you can as the name says overlay different kinds of effects on your image. You can add snow, fog, sun flares rain, and many more. Presets work identically to previous effects and filters.
Masks
If you want to place your image in a certain shape or in-text this is the section for you. You will be presented with sections as custom text, shapes, brushes, floral, animals, and patterns. Each section will once again lead to plenty of variations on the chosen subject where you can pick one that you like the most and tweak its options.
Text
As the name suggests, this section is to add text to your picture or design. If you are making some cool ad for Facebook, Instagram, or other social media I believe that you will spend most of your time in this section adding text and tweaking it so it looks best. You have all the tools that you will need to make a catchy title or smaller block of text and you can add multiple texts to your picture tweaking their own visual appearance, the font used, color, and some effects like a drop shadow.
Draw
In the draw section, you will be able to freely draw whatever you like with your mouse or pen if you have one. you have basic options for a brush and eraser so you can erase stuff. Pretty basic tool but it gives a nice touch to underline something, circle it, etc.
Graphics
This panel will let you place various already made graphic assets into a picture. You have hearts, hats, glasses, etc. There really are tons of premade graphics along with thematic ones like new year, st. Patric day and more.
Frames
As the name suggests this section will place a frame of your choice around your picture. You can choose the style of frame, position, color, and many more. There are various styles and each style has its own options.
Conclusion
Cartoonize is a great online application that will let you quickly and easily do cool and nice image edits. As mentioned you can also add various effects, text, and graphics and use this app to make some quick and nice ads for social media. You have the option to publish to your social media right from the app in the save dialog but you can also of course download your image or design to your local computer.
Please note that for this review we used the pro, paid version so all of the features were unlocked. We wanted to give you a full overview of the full potential of the app. In my opinion, the small monthly fee that they charge is well worth it when you see all things that you can do with it.
Go to the cartoonize website and check it out, basic option is completely free and it does not even require making an account. Have fun, be creative and take care, I hope to see you again tomorrow.
One of the cool and interesting features in Windows is the Screensaver which allows users to display animation or change the wallpaper automatically when the computer is not being used. This feature can also time out and lock your computer when it remains idle for quite some time. However, if you notice that the screensaver of your computer turns on a lot earlier, then you’ve come to the right place as this post will guide you on how you can change the timeout settings of the screensaver of your Windows 10 computer.
Usually, the screensaver in Windows 10 is turned off by default, however, if some other user has turned it on or if you have turned it on, you can actually change the timeout settings of the screensaver using several methods. You can do it through the Personalization settings, Registry Editor, as well as the Group Policy Editor.
Before you proceed with the instructions provided below, make sure that you create a System Restore point first. Once done, follow each one of the suggestions carefully to successfully change the Screensaver timeout settings in Windows 10.
Option 1 – Modify the timeout settings of Screensaver via Personalization settings
Open the Start menu and type “screen saver” in the field.
On the search results that appear, click on the “Change Screen Saver” option.
From there, you have the option to change the screen saver type, preview, open settings, change the wait time, as well as choose to display lock screen on your resume.
Now to change the timeout settings of your screensaver, you have to increase the wait time from 1 to 15 or anything that works for you.
Once done, click OK and exit to save the changes made.
Option 2 – Try to change the screensaver time via Registry Editor
The next option you can try to change the timeout settings in the screensaver is using the Registry Editor. To get started, follow these steps:
Tap the Win + R keys to launch the Run utility and type “regedit” in the field and hit Enter to open the Registry Editor.
Next, navigate to this registry path: ComputerHKEY_CURRENT_USERSoftwarePoliciesMicrosoftWindows
From there, right-click on Windows located in the right pane and select New > Key.
Name the key as “Control Panel” and right-click on it and select New > Key and then name it as “Desktop”.
Once done, click on the newly created Desktop key to highlight it.
After that, right-click on any empty space in the right pane and select New > String Value and then type “ScreenSaveTimeOut” and hit Enter to save it.
Now right-click on ScreenSaveTimeOut and select Modify and then set its value data in seconds.
Click on OK and exit the Registry Editor to save the changes made.
Option 3 – Change Screensaver timeout settings via Group Policy Editor
Tap the Win + R keys to open the Run dialog box and type “gpedit.msc” in the field and hit Enter to open the Group Policy Editor.
Next, navigate to User Configuration > Administrative Templates > Control Panel > Personalization.
Then look for a policy setting named “Screen saver timeout” and double click on it and then click on the Enabled option to enable it.
Add the screen timeout in seconds and click on the Apply and OK buttons to save the changes.
Restart your computer.
Note: If you want to disable the screensaver feature in your computer, you can always do so by disabling a policy setting named “Enable Screen Saver”.
In case you don’t know, Windows 10 actually allows users to set the Keyboard Repeat Rate and Repeat Delay. Both of these terms are interrelated and when you make active, any text field or an editor and then press and hold a single character key, it will quickly type the character for the first time and will show delay until the second and later characters appear. This is what you call the Keyboard Repeat Delay. On the other hand, the rate at which the later character appears is known as Keyboard Repeat Rate.
There are two ways you can set the Keyboard Repeat Rate and the Keyboard Repeat Delay on Windows 10. The first one is using the Keyboard Properties while the second one is using the Registry Editor.
Option 1 – Set up Keyboard Repeat Rate and Repeat Delay via Keyboard Properties
First, tap the Win + R keys to open the Run dialog box and type in “control keyboard” in the field, and hit Enter to open the Keyboard Properties.
From there, you can use the slider to make the respective options for both Keyboard Repeat Delay and Repeat Rate shorter or whatever you prefer them to be.
You should also see a text field in the mini window where you can test out your preferences. Once done, click on the Apply and OK buttons to save the changes made.
Option 2 – Keyboard Repeat Rate and Repeat Delay via Registry Editor
Tap the Win + R keys to open the Run utility and type “Regedit” in the field and then hit Enter to open the Registry Editor.
Next, navigate to this registry path: HKEY_CURRENT_USERControl PanelAccessibilityKeyboard Response
From there, you can set your own value for both the AutoRepeatDelay and AutoRepeatRate registry keys so that you can set the Keyboard Repeat Rate and Repeat Delay in Windows 10.
Once you’re done, exit the Registry Editor and restart your computer to save the changes made.
Call of Duty is a fun and good game, a great time killer with a squad of friends, however sometimes the game crashes, and fun is interrupted.
In this guide, we will address and solve this unpleasant issue.
Scan game files
inside launcher choose options and under them, choose scan and repair game files
This process can take 5-30 minutes, as the game is 60GB large. This will look through all your game files and make sure they’re all valid and that none are corrupted, which may cause crashes. When it’s complete, you’ll get a notification that the game is now playable. Try again and see if your crashes continue.
Update drivers
Keeping drivers updated is crucial for the game to run smoothly, GPU drivers are possibly important. Go to your GPU manufacturer's website and get the latest drivers.
Lower graphic settings
Intensive graphic requirements can overload GPU and cause crashes, try lowering details in-game and see if this will fix the issue.
Disable overlays
If you’re using a program like Discordthat has an overlay, you’ll want to disable it as it may be causing the graphic error
Error code 0x80240020 is a Windows 10 upgrade error code that affects users who attempt to upgrade their Windows operating system. This may occur due to a particular program that blocks the upgrade from completing. It can also result when other PC issues interfere with the upgrade process by disrupting the ability of Windows Update to download updates on one’s machine. Common symptoms of error code 0x80240020 include the following:
Message box detailing the presence of error code 0x80240020
Inability to complete Windows 10 upgrade process
Solution
Error Causes
Upgrade error codes occur when Windows users experience upgrade failure while using Windows Update, the Microsoft Windows Update website, the Microsoft Update website, or the Windows Server Update Services (WSUS) server. Disruption may cause this process to fail, for instance, due to system file corruptions or problems related to the Windows Update services.
Further Information and Manual Repair
To correct issues related to error codes, it is often best to apply manual repair methods. These help Windows users determine the root causes of the error code and provide solutions that permanently fix these issues. For instance, if error code 0x80240020 on your machine is due to an issue within the Windows Update tool, you will need to first verify that this is the problem by using a troubleshooter option found within your machine’s settings. The troubleshooter will detect and fix the issue.
Most of these manual repair methods can be implemented by any Windows user, regardless of their background, technical abilities, or lack thereof. However, in certain cases, technical skills are required. If you have trouble implementing the procedures highlighted below or in any other error code article found on this site, consider getting help from a Windows repair technician or use a powerful automated tool.
Below are details regarding the manual repair methods for fixing error code 0x80240020. Ensure you follow the instructions correctly. After all, any error you make will likely cause further problems on your machine and prevent you from resolving error code 0x80240020 in Windows 10.
Method One: Run Windows Update Troubleshooter
One way to fix error code 0x80240020 is to troubleshoot Windows Update. To do this you will need to access Settings within your machine then simply select the relevant troubleshooting options available. Follow the instructions below:
Step one: Type Settings within search box near Start button then press Enter
Step two: In the search box within Settings, type Troubleshooting
Step three: Select the troubleshooting option
Step four: Under System and Security, select Fix problems with Windows Update
Step five: Under Windows Update, select Resolve problems that prevent you from updating Windows.
Step six: Click Next and wait for the troubleshooter to detect and fix problems
If there are problems with Windows Update, the troubleshooter will be able to fix them. Once this process is complete, restart your PC and then reopen Windows Update. Attempt to upgrade your Windows operating system. If Windows Update completes the process and your machine downloads and runs the upgrade, you have successfully resolved error code 0x80240020.
If, however, there is another upgrade failure and the message box detailing the presence of error code 0x80240020 in Windows 10 appears, you will need to apply another manual repair procedure. Please see below for further details regarding manual repair method two.
Method Two: Use SFC to Scan and Fix Corrupted System Files
Corrupted or missing system files may interfere with your machine’s ability to successfully download an upgrade. For this reason, scan and fix any problems related to system files on your machine using Command Prompt. This manual repair method is often called a System File Check/ Checker (SFC).
Step one: Right-click Start Menu
Step two: Select Command Prompt (Admin)
Step three: Type sfc /scannow
To ensure you follow this procedure correctly, enter the command as it is written above, with a space between “sfc” and “/scannow”. Once missing, corrupted or damaged files are present on your machine, the SFC command will enable Command Prompt to scan and fix these issues. Wait until the process is complete then reboot your PC.
With your system successfully rebooted, reattempt the Windows 10 upgrade process in Windows Update or on the Windows Update website. If the issue causing error code 0x80240020 was related to problems with system files, you should be able to complete the upgrade after using the SFC tool.
Method Three: Download an Automated Tool
If you wish to always have at your disposal a utility tool to fix these Windows 10 and other related issues when they do arise, download and install a powerful automated tool.
Error Code 48 is a device driver error code that users can encounter on any Windows 2000 operating system and later versions.
It occurs when the connected peripheral device cannot be run as the Windows operating system’s driver required to install the programs for peripheral devices has either been corrupted or is incompatible with the system.
It prompts the user with the following message on the screen:
The software for this device has been blocked from starting because it is known to have problems with Windows. Contact the hardware vendor for a new driver. (Code 48)
Solution
Error Causes
Like most other Windows error codes, error code 48 is triggered by the following factors.
Corrupted system registry files
Presence of viruses in the device
The device driver is out-of-date
If this error code is not rectified, it could give birth to other driver device errors such as error code 52.
Further Information and Manual Repair
Method 1 – Run a complete scan for malware and spyware
Identifying and removing the viruses in the system registry and in the connected devices is the easiest method to fix the corrupted registry files.
Viruses such asspyware and malwareinfect the registry entries and eat up the files that lead to incomplete or missing data. This creates problems for installing external devices as the driver required to install them is not complete.
Method 2 – Use System Restore
You can also use system restore to eliminate the problem. Here is how you can use it:
Log in using an Administrator account
Click ‘Start’ button and select All Programs > Accessories > System Tools > System Restore
Click ‘Restore my computer to an earlier time’ and click ‘Next’
Select the last Windows to restore point from the ‘On this list, click a restore point’ list, and click ‘Next’
Click ‘Next’ on the confirmation window to proceed
Restart your PC after restoration is complete
By restoring the system via the last saved system checkpoint, you can obtain undamaged Windows system registry files that can help resolve the error code.
Method 3 – Manually uninstall and reinstall the device driver
Since Error Code 48 is due to a missing or an out-of-date device driver, uninstalling and then reinstalling the device driver can help solve the error.
You can do this by firstly logging in as Administrator and opening Device Manager. Select the device that is causing the problem and double click it; make sure that the peripheral is connected properly to the PC.
Upon opening, click on the ‘Driver’ tab and then select ‘Update Driver’. Make sure to refer to the system documentation that you received with your PC or computer to check for the motherboard details and driver specifics.
Method 4 – Use software to automatically download the driver
Manually uninstalling and reinstalling the driver will do the trick; however, it may be time-consuming especially when you would have to resort to your hardware user manual.
Therefore, using a program such as DriverFIX can save you a lot of time and frustration in having your device work properly on your computer.
DriverFIX, with its user-friendly approach to help you fix your PC issues, comes with an integrated database that detects which drivers you need to reconfigure within just a few seconds and downloads it automatically.
It further ensures that your drivers are installed in their entirety leaving no room for any incomplete files to remain that create Error Code 48.
It also has the added advantage of being able to backup and restores your files should there be the slightest possibility of system file damage. DriverFIX is the answer to fixing your PC error codes accurately and quickly.
Click hereto download DriverFIX to fix Error Code 48 quickly and effectively!
Each year Steam makes a couple of large sales, and each year there are speculations and leaks on the date when the sale is going to happen and when it is starting. It seemed that Steam has become aware that these leaks will not stop and that store really cannot hide that kind of important date from the public so in the latest news Steam Purley has just given the date of this year's big winter sale.
Probably tired of even trying to hide it, Steam has released that this year's big Steam Winter sale is officially starting on December 22nd, 2021, and closing on January 5th, 2022. So if you have someone to buy a gift or just want to drop a few great games in your library at a low price this is the time when you should do it.
No one knows everything about a program off hand. You need to use the program for a long time before you can even possibly know all that it is able to do and all you are able to achieve with it. However, this doesn’t mean that you don’t need help from time to time. This is also the case when Outlook errors pop up. Sometimes there are things you must or probably should do with your program that you do not understand and definitely don’t know how to do. Set up POP3 with your email account in Outlook is one of these things you will probably need help to achieve.
Steps to Set up POP3
First, you may need to know what POP3 is. POP3 is the way emails are sent from one email address to another. It may be more or less instant nowadays, but the process is still long and hard-winded. Similar to how your letters get from your mailbox to the recipients' mailbox, your emails get from you to the next person.
Letters are picked up in your mailbox and sent to your post office where they send it to the recipient’s post office who sends it to the recipient’s mailbox.
Similarly, your email is sent to your outbox, which sends it to your email service provider, that sends it to the recipient’s email service provider who sends it to their inbox.
This is one of the reasons that sending an email to someone who uses the same email service provider as you is about a millisecond faster. This process of sending emails is called POP3 and you need to set it up if you use Outlook on Microsoft.
This, on Outlook, also determines which email account you send your emails from. You see, on Outlook and many other email service providers, you can have many different email addresses, no even necessarily with the email service provider’s prefix on the end.
Now, if you want to see this for yourself, go on to your settings on Outlook and look for manage email accounts. If you have more than one email account, you will see them listed. Somewhere on the sidebar, you will see POP3 as well.
If you want to add more email accounts to this, such as a business email or a personal email, then just click ‘Add new account’ instead of 'Manage email accounts'.
When you click on an email account you have linked already, you will see on this side the details for your POP3 (incoming emails) and your SMTP (outgoing emails).
This can be changed, but since everyone’s number of accounts and type of accounts is different, there is no set way to change this.
However, you can give Microsoft a call and they will walk you through the necessary steps in order to change this.
Conclusion
So, POP3 can be incredibly easy to understand or incredibly hard; it depends on how good you are with electronics and the advice you are given.
But don’t try to change things by yourself; get a professional from Microsoft to help you with POP3 on your Microsoft Outlook account.


 Probably tired of even trying to hide it, Steam has released that this year's big Steam Winter sale is officially starting on December 22nd, 2021, and closing on January 5th, 2022. So if you have someone to buy a gift or just want to drop a few great games in your library at a low price this is the time when you should do it.